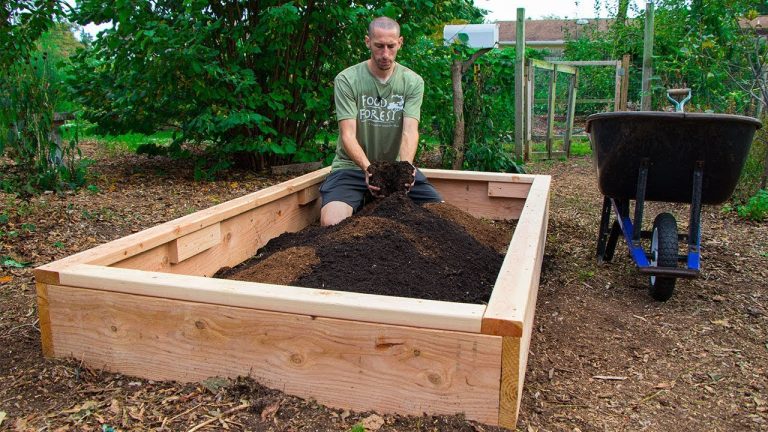
How To Build Raised Garden Beds On A Budget: Easy Guide
A raised garden bed can turn hard clay, poor sand, or a weedy patch into a productive garden. You do not need expensive cedar boards, a power saw, or a truckload of special soil. With careful planning, reclaimed lumber, free organic material, and a simple frame, many gardeners can build a useful bed for about $30 to $100.
I have built raised beds in wet coastal soil, heavy clay, and dry gardens in USDA Zones 5 through 9. The biggest savings came from using the right size, buying soil in bulk, and avoiding extras that do not improve plant growth. A good budget bed should drain well, last for several seasons, and be easy to reach from both sides.

Quick answer: build a simple raised bed for less
The best way to build raised garden beds on a budget is to use untreated lumber, reclaimed boards, or metal stock tanks; keep the bed 3 to 4 feet wide; and fill it with a mix of topsoil, compost, and aged organic matter. A basic 4-by-8-foot bed often costs $40 to $150, depending on materials and local soil prices.

A simple 4-by-8-foot bed is large enough for vegetables but small enough for a beginner to manage. Use 2-inch-thick boards when possible. Place the bed on level ground with at least six hours of sun. Fill it with about 1 cubic yard of soil mix.
Raised beds save your back, warm up faster in spring, and give you control over soil quality. They also dry out faster than in-ground beds, so you must plan for watering.
Plan the bed before buying materials
Good planning prevents most budget mistakes. Start by measuring the space, checking sunlight, and deciding what you want to grow. A bed for lettuce and herbs can sit in four to six hours of sun, while tomatoes, peppers, cucumbers, squash, and melons need closer to eight hours.
Choose the right size and shape
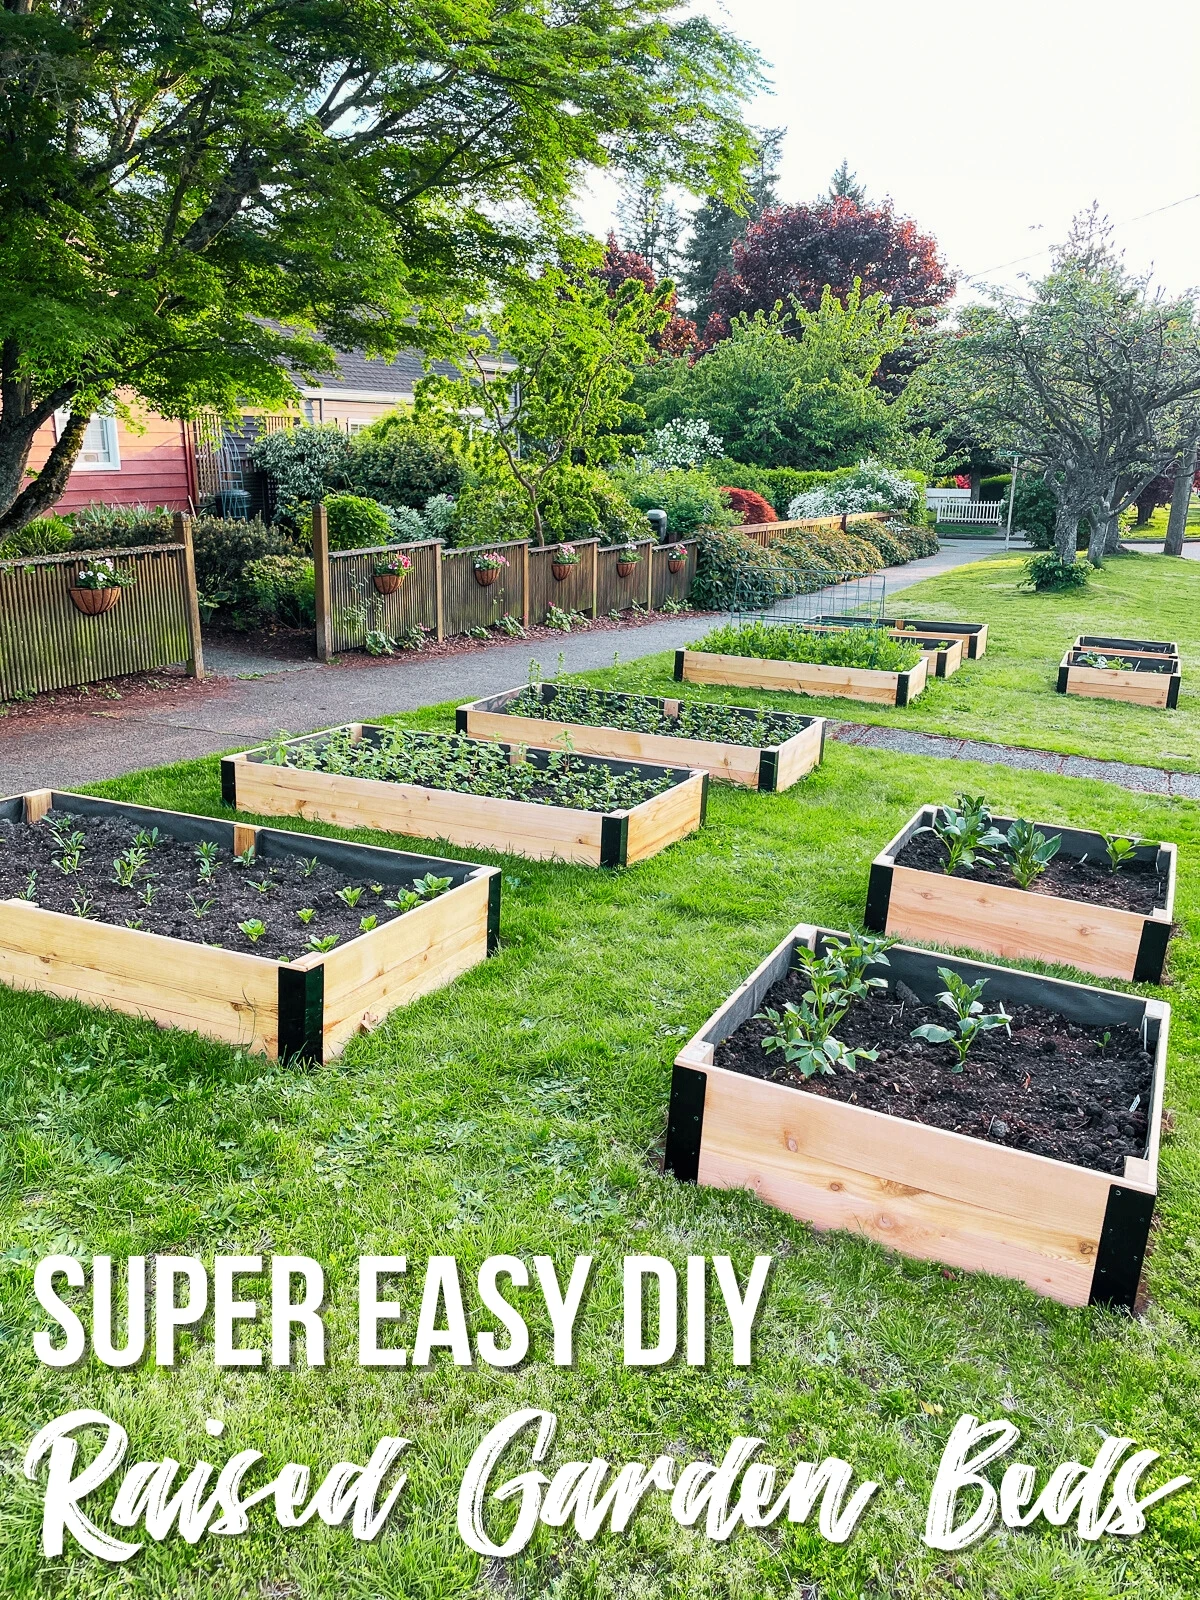
Keep a raised bed no wider than 4 feet if you can reach both sides. A 3-foot width works well for children, older gardeners, and anyone with limited mobility. If the bed touches a wall or fence, keep it 2 feet wide so you can reach the back without stepping into the soil.
A length of 6 or 8 feet makes cutting boards easy. A 4-by-8-foot bed gives you 32 square feet of growing space. It also uses standard lumber with little waste.
For a first bed, avoid odd shapes. Curves and corner cuts may look attractive, but they add labor and make future repairs harder.
Pick a useful height
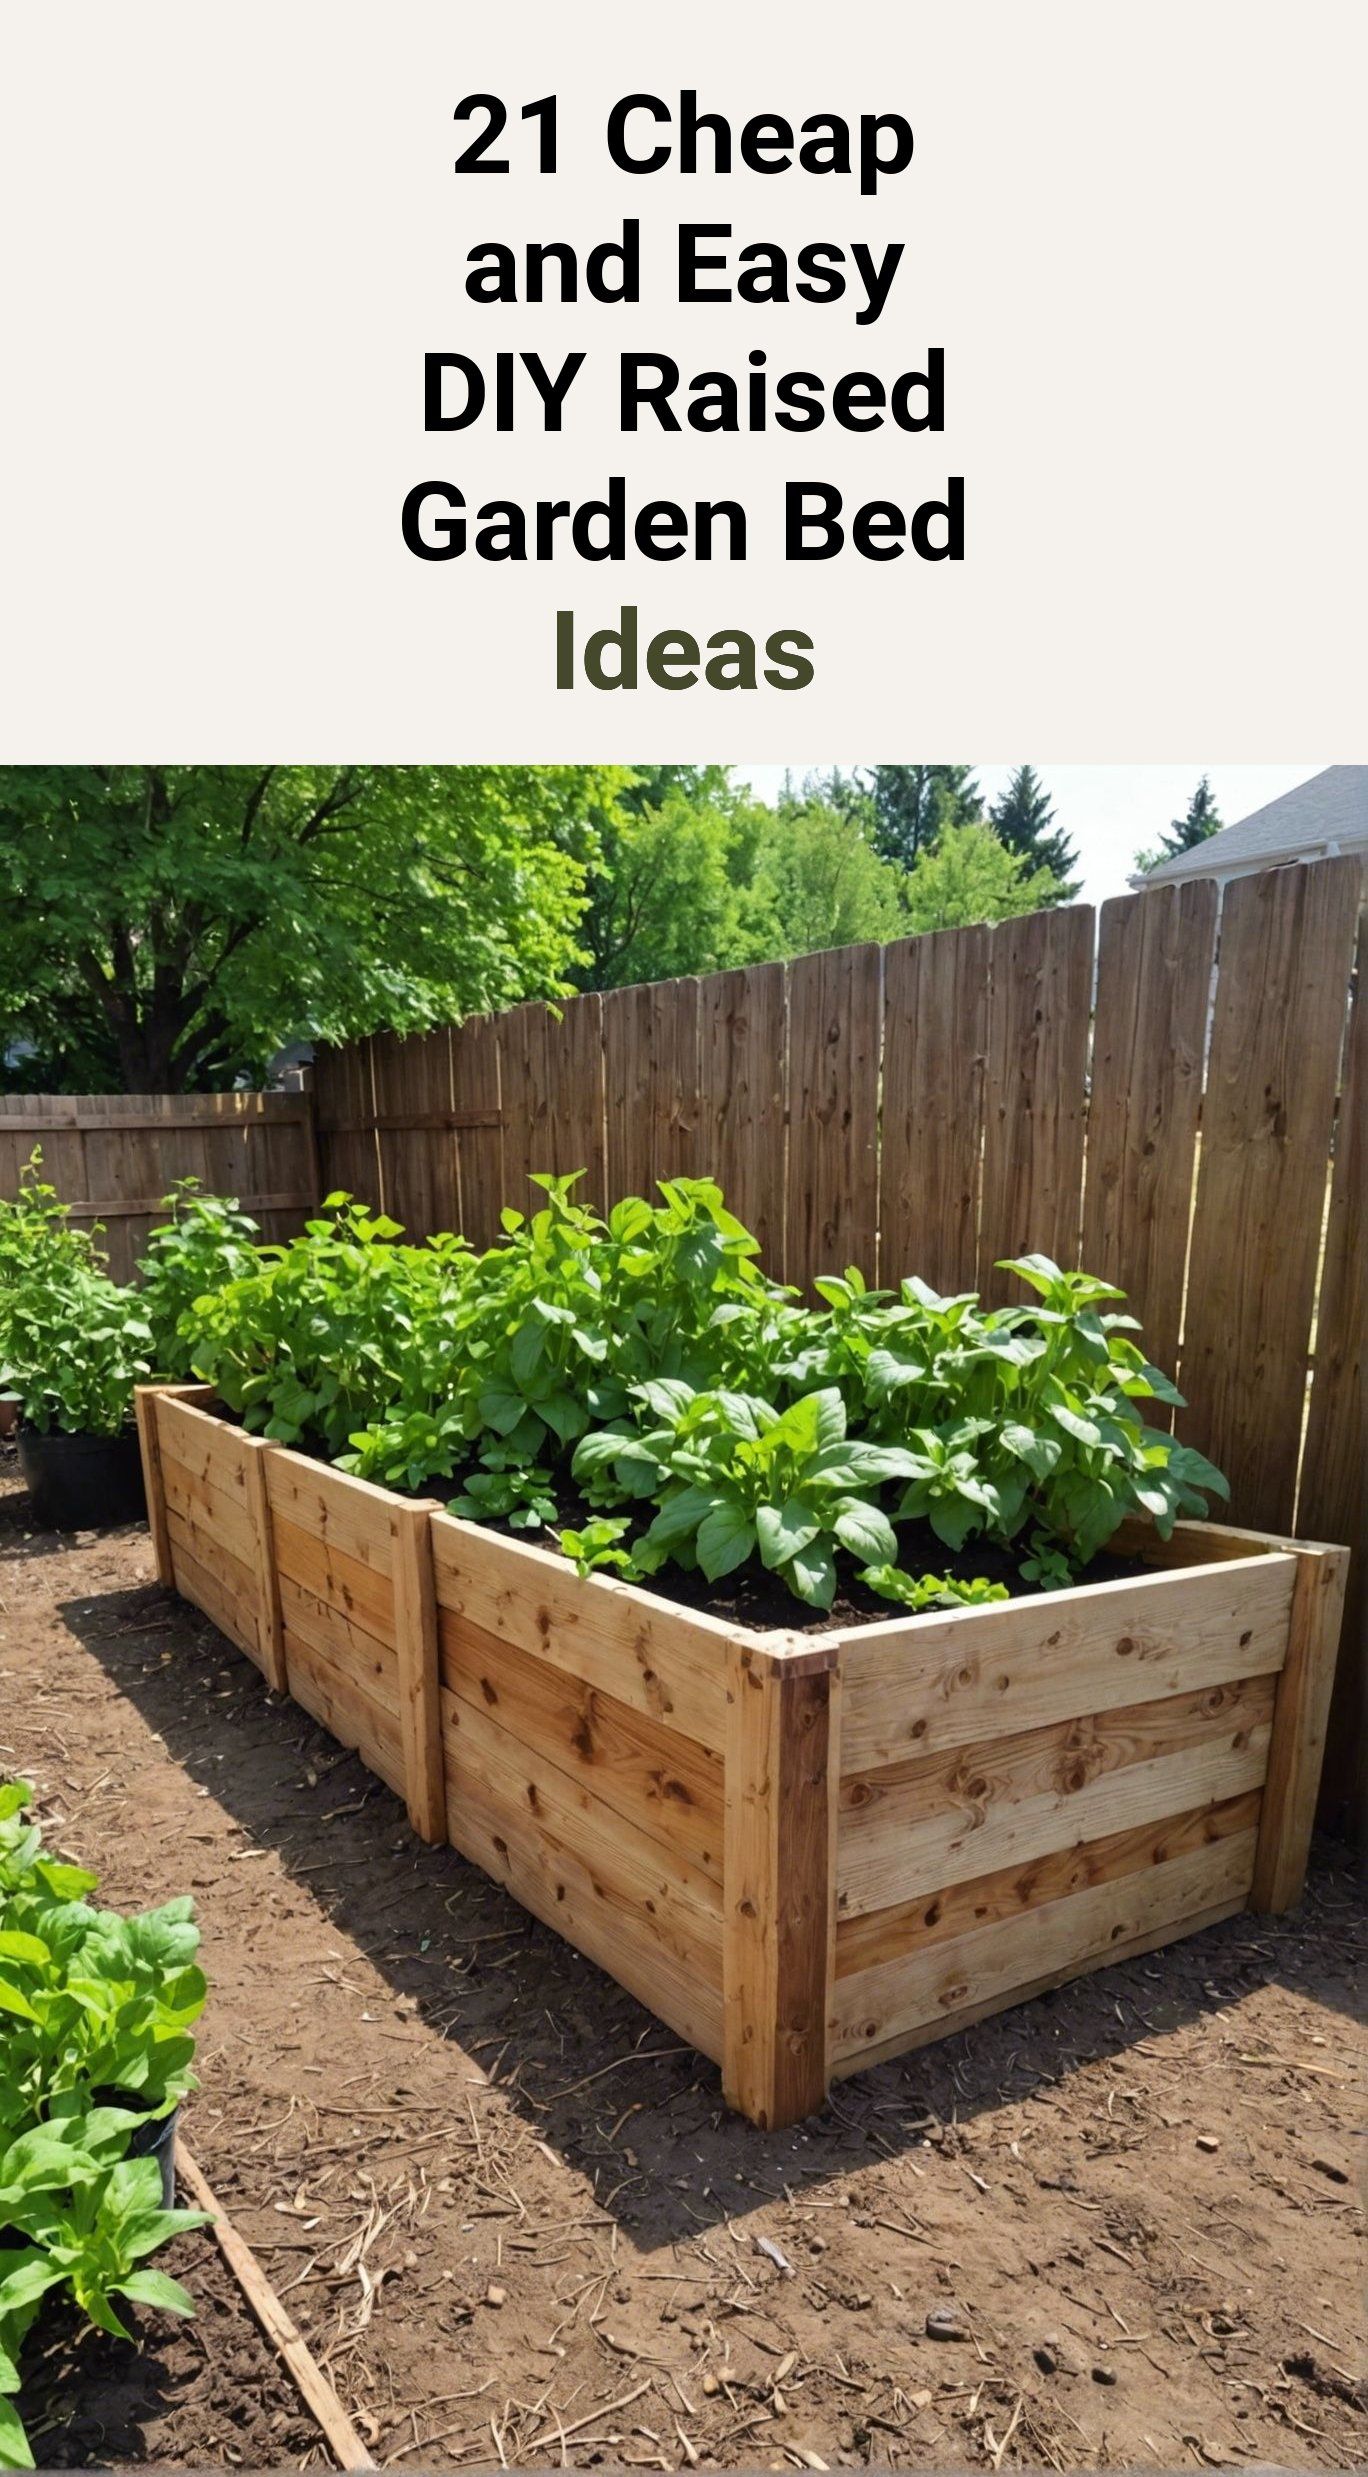
A 6-inch bed costs less and works well over healthy soil. An 8- to 12-inch bed gives roots more room and helps in compacted ground. A 12- to 18-inch bed feels easier on the knees, but it needs more soil and stronger side walls.
For carrots, parsnips, daikon radishes, and long beets, use at least 12 inches of loose soil. Shallow-rooted crops such as lettuce, spinach, radishes, onions, and many herbs can grow in 6 to 8 inches.
Check drainage and sunlight
Do not place a raised bed where water already pools. A raised frame cannot fix a site with constant standing water. If your yard floods, install a drainage path or choose a different site.
Watch the area during the day. Trees, fences, and homes can create more shade than you expect. In hot USDA Zones 8 and 9, some afternoon shade can protect lettuce and cilantro, but tomatoes and peppers still need strong light.
Budget materials that work
The cheapest material is not always the lowest-cost choice over five years. Thin untreated boards may cost less today but warp after one wet winter. I prefer a material that lasts long enough to justify the soil, compost, and labor inside it.
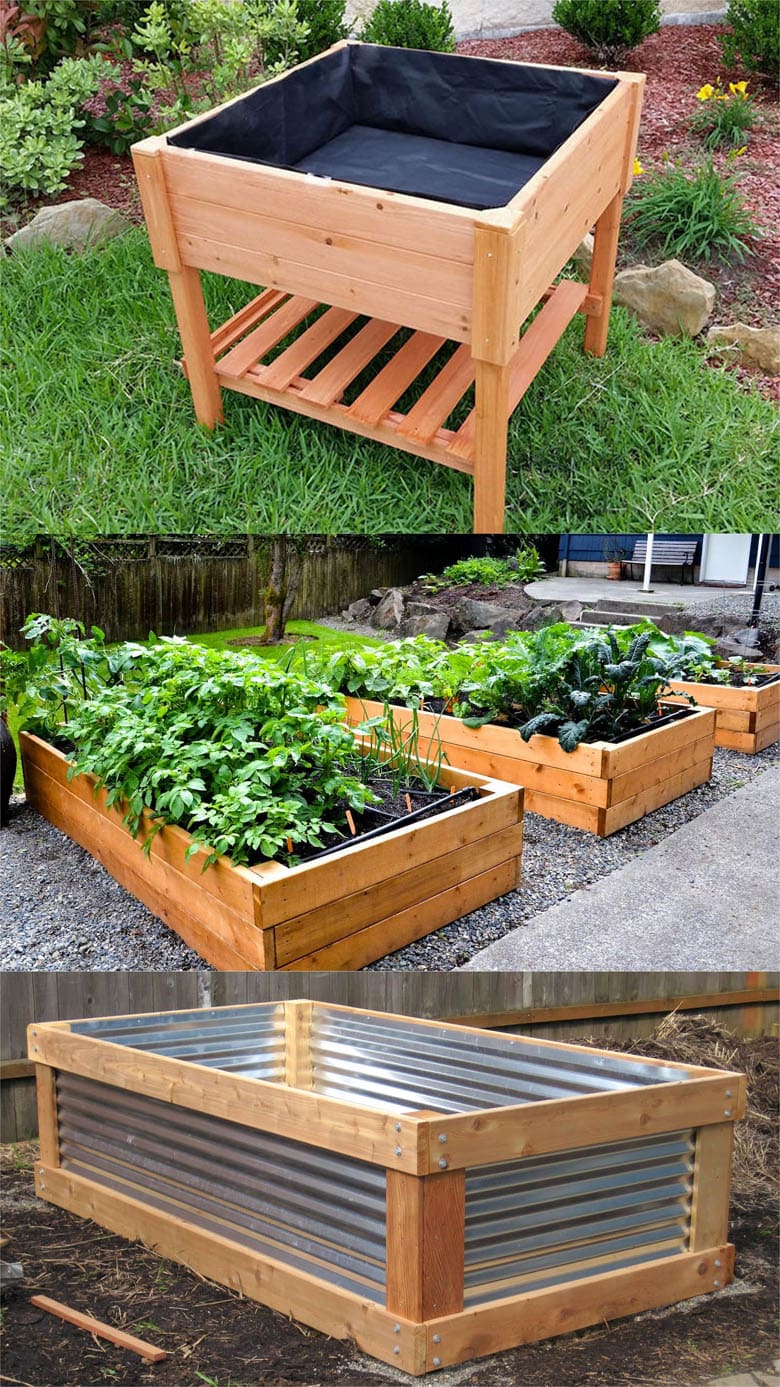
The table below shows common options for a 4-by-8-foot bed. Prices vary by region, board size, and whether you buy new or used materials.
| Material | Typical cost and life | Main concern |
|---|---|---|
| Untreated pine | $35–$70; about 3–7 years | Rots faster in wet climates |
| Cedar | $90–$180; about 8–15 years | Higher first cost |
| Reclaimed untreated boards | $0–$60; varies widely | Check for chemicals and nails |
| Corrugated metal panels | $70–$160; about 10–20 years | Needs a safe frame and smooth edges |
| Concrete blocks | $40–$120; often 15+ years | Takes more space and can heat soil |
| Food-safe stock tank | $100–$300; 10–20 years | Often too costly for a large garden |
For the lowest cost, reclaimed boards or untreated pine usually win. For a wet climate such as western Oregon or coastal Washington, cedar, metal, or concrete blocks may cost less over time because they resist rot.
Avoid railroad ties, old utility poles, painted boards, and wood with an unknown history. They may contain creosote, lead paint, or other chemicals. Older pressure-treated lumber can contain chromated copper arsenate, so I do not use unknown treated boards for edible crops.
How to inspect reclaimed wood
Look for boards that are clean, dry, and free of strong chemical odors. Reject wood with black oily stains, peeling paint, soft rot, or many deep cracks. Pull every nail and staple before cutting.
Old fence boards can work if they are untreated and sound. Pallet wood requires extra care. Use only pallets marked “HT,” which means heat treated, and avoid pallets marked “MB,” which means methyl bromide fumigation.
Hardware for a sturdy frame
You need exterior-rated screws, not indoor drywall screws. Galvanized or coated deck screws resist moisture. Use 3-inch screws for joining 2-inch-thick boards.
For a 4-by-8-foot bed, budget for:
- Eight to twelve 3-inch exterior screws
- Four corner stakes or wood blocks
- A drill and bit
- A level
- A tape measure
- A shovel or garden fork
- A wheelbarrow or tarp
- Work gloves and safety glasses
A circular saw helps, but a hand saw can cut a small bed. Many hardware stores cut lumber for a small fee. That fee may still be cheaper than buying a saw for one project.
Materials and cost at a glance
A budget raised bed has three major costs: the frame, the soil, and delivery. Soil often costs more than the wood, especially when you fill a deep bed.

| Project size | Soil volume | Budget range | Good use |
|---|---|---|---|
| 2-by-6 feet, 8 inches deep | About 0.25 cubic yard | $25–$75 | Herbs and greens |
| 4-by-8 feet, 8 inches deep | About 0.8 cubic yard | $50–$150 | Mixed vegetables |
| 4-by-8 feet, 12 inches deep | About 1.2 cubic yards | $75–$220 | Roots and large crops |
| 4-by-8 feet, 18 inches deep | About 1.8 cubic yards | $120–$350 | Deep beds or mobility needs |
These figures include common local prices for wood and bulk or bagged soil but exclude tools. Bulk soil usually costs less per cubic yard, though delivery fees can change the math.
A small bed is often the best starting point. You can add another bed later without spending all your money at once.
Build the frame step by step
A simple rectangular frame does not need advanced carpentry. Work on a level surface, measure twice, and pre-drill near board ends to reduce splitting.

1. Mark the site
Set the boards on the ground to outline the bed. Use a tape measure to check both diagonals. If the diagonals match, the rectangle is square.
Mark the outside edge with flour, a hose, or a line of twine. Remove grass and large weeds from the footprint. You can build over lawn, but removing the sod gives better control and reduces future grass problems.
2. Level the ground
Dig down high spots rather than raising low corners with loose soil. Check the ground with a level across the width and length. A bed that is slightly off level will still grow plants, but a severe slope can cause soil to wash out.
On a mild slope, step the bed into the hill. Do not force a long frame to sit at an angle. Use shorter sections and secure each level.
3. Cut and join the boards
For a 4-by-8-foot bed, cut two boards to 8 feet and use two boards at 4 feet. Board dimensions are often smaller than their listed size. A board sold as 2 by 8 inches may measure about 1.5 by 7.25 inches.
Stand the boards on edge. Place the short boards between the long boards for an exact outside size, or overlap the corners if you want a simpler build. Drill pilot holes, then drive two screws into each corner.
4. Add corner stakes
Drive a wood stake inside each corner. Screw the side boards to the stakes. Stakes stop the boards from shifting when wet soil pushes outward.
For beds longer than 6 feet, add a center brace or crossbar. A 4-by-8-foot bed made from thin boards can bow in the middle after heavy rain. A scrap 2-by-4 or threaded rod can prevent this.
5. Add a second course if needed
If you want a 12-inch bed, stack a second row of boards. Stagger the joints so the corners do not line up. Join the rows with screws or short stakes.
Do not make a very tall bed from thin boards without support. Soil is heavy. One cubic yard of moist soil can weigh well over 2,000 pounds.
💡 Pro Tip: Before filling the bed, place a straight board across the top and check the frame in several directions. A small correction is easy when the bed is empty and difficult after you add soil.
Prepare the ground beneath the bed
The best base depends on the site. Healthy soil needs no plastic liner. Instead, loosen the top 6 to 10 inches with a garden fork before adding the raised-bed mix.

Over grass or weeds
Remove the sod if possible. Turn the soil with a fork, shake out the roots, and rake the area smooth. A layer of plain cardboard can help smother grass, but use only clean brown cardboard without glossy ink or tape.
Overlap the cardboard by several inches. Wet it before adding soil so it stays in place. The cardboard breaks down and feeds soil life, but it may temporarily tie up a small amount of nitrogen.
Over compacted clay
Use a garden fork to loosen the soil without turning every layer upside down. Add compost to the bed above it. Raised beds improve drainage only when water can move through the soil below.
Do not add a thick layer of sand to clay. That can create a dense, concrete-like mix. Compost, leaf mold, and plant roots improve clay structure more safely.
Over concrete or contaminated soil
Use a bottom liner only when you need a barrier. A raised bed over concrete needs drainage holes and a deeper soil layer. A bed over suspected contaminated soil should use a tested barrier, such as heavy landscape fabric, plus clean imported soil.
Plastic sheeting can trap water if the bed has no drainage. If you use a liner, leave the bottom open where possible and line only the side facing contaminated soil.
⚠️ Warning: Do not place landscape fabric under a normal garden bed just to stop weeds. It can slow drainage, block earthworms, and make root growth harder. A thick cardboard layer works better for most lawn sites.
Mix affordable soil without harming plants
A raised bed works best with loose soil that drains well but still holds water. You do not need a perfect recipe. You need enough mineral soil, compost, and organic matter to support roots.
A practical soil recipe
For most vegetables, use:
- 60% screened topsoil
- 30% finished compost
- 10% aged bark fines, leaf mold, or other stable organic matter
You can also use equal parts topsoil, compost, and coconut coir for a small bed. Coir holds water but contains little nutrition, so it must be mixed with compost and mineral soil.
Avoid using pure compost. It can settle, dry unevenly, or contain too many soluble salts. Manure-based compost may burn seedlings if it is fresh or poorly finished.
Calculate how much soil you need
Use this formula:
Length in feet × width in feet × depth in feet = cubic feet
Divide the cubic feet by 27 to get cubic yards.
A 4-by-8-foot bed that is 1 foot deep needs:
4 × 8 × 1 = 32 cubic feet
32 ÷ 27 = 1.19 cubic yards
So, order about 1.25 cubic yards after allowing for mild settling. For a 6-inch bed, use 0.6 cubic yard. For a 12-inch bed, do not fill the bottom with gravel. Gravel does not improve drainage in a raised bed and simply reduces root space.
Test pH and nutrients
Most vegetables grow well in soil with a pH between 6.0 and 7.0. Blueberries need a more acidic mix, near pH 4.5 to 5.5, so they should not share a general vegetable bed.
A basic soil test can show pH, phosphorus, potassium, and organic matter. Do not add lime, sulfur, bone meal, or high-nitrogen fertilizer without a reason. Too much phosphorus can harm waterways and reduce the plant’s ability to take up zinc and iron.
Fill the bed in layers
The cheapest safe fill uses local materials, but each layer must be clean and suitable for roots. Do not fill the bottom with logs unless you understand how the wood will settle and change nitrogen levels.
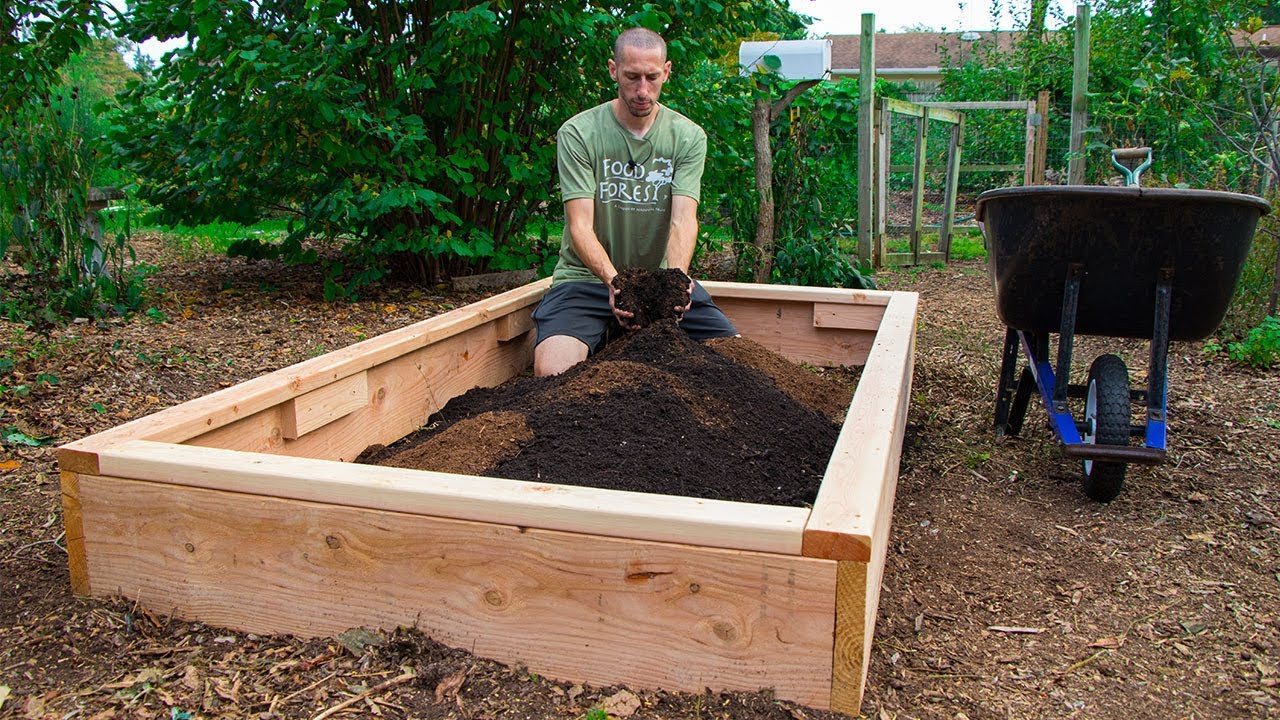
Use a simple soil blend
Add soil in 3- to 4-inch layers. Lightly water each layer to settle air pockets. Do not compact the soil by walking on it.
Top off the bed after one or two weeks. Compost and loose soil often settle by 10% to 20%, especially after rain.
Try hügelkultur with care
Hügelkultur uses woody material under soil. It can reduce the amount of purchased soil in a deep bed, but fresh wood takes nitrogen as it breaks down and may cause settling.
If you use this method, place small, well-rotted logs at the bottom of a bed at least 18 inches deep. Avoid cedar, black walnut, diseased wood, and treated lumber. Add compost-rich soil above the wood and expect to top it up each season.
For a normal 8- to 12-inch vegetable bed, I prefer a full soil mix. It settles less and gives shallow roots a more stable growing zone.
Choose plants that give a strong return
A budget garden should grow crops you will eat often. Leafy greens, herbs, beans, tomatoes, peppers, and salad crops produce more value in a small space than large pumpkins or sprawling melons.
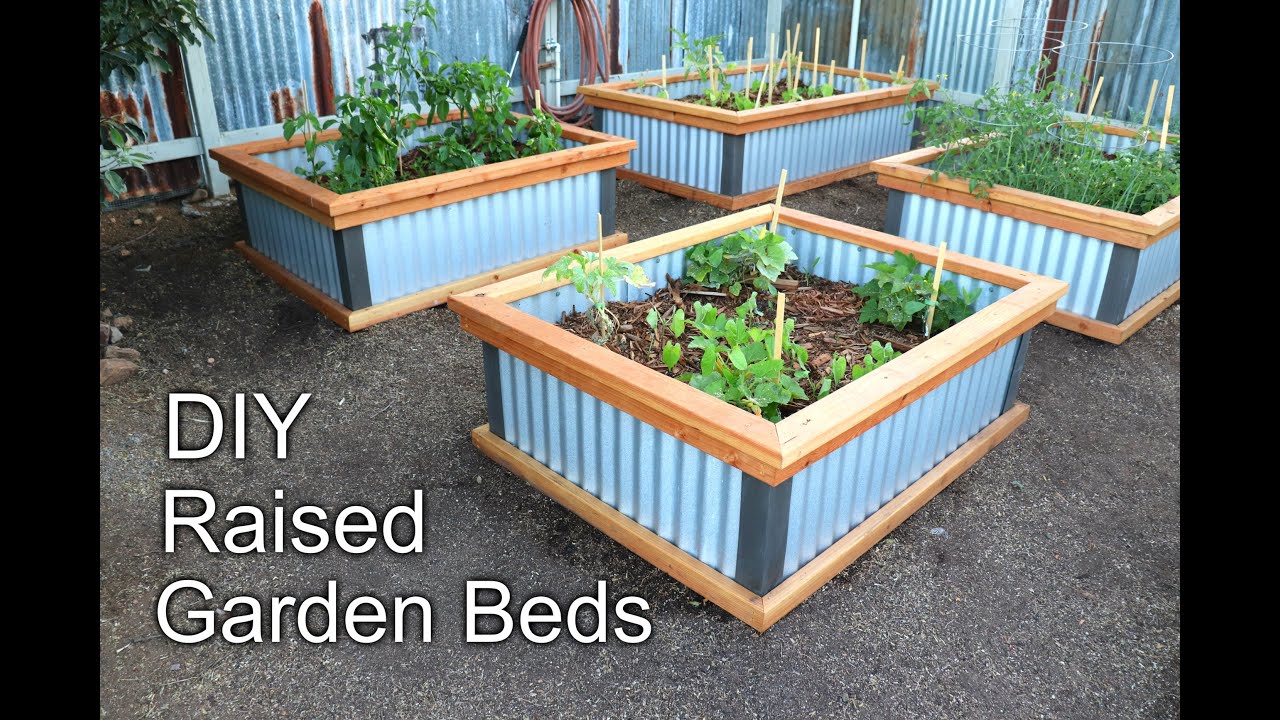
Good crops for a first raised bed
Plant these crops based on your climate and season:
- Leaf lettuce and romaine
- Spinach and Swiss chard
- Kale
- Bush beans
- Radishes
- Carrots
- Green onions
- Basil and parsley
- Cherry tomatoes
- Jalapeño or bell peppers
In USDA Zones 3 through 6, use cool-season crops in spring and fall, then warm-season crops after the last frost. In Zones 7 through 10, lettuce and spinach often perform best from fall through spring because summer heat causes bolting.
Space plants by mature size
Crowding creates weak plants and more disease. A tomato plant may need 18 to 24 inches, while baby lettuce can grow 6 inches apart. Use trellises for peas, cucumbers, and indeterminate tomatoes to save bed space.
Square-foot gardening can help beginners plan, but follow the mature size of each variety. A compact cherry tomato such as ‘Patio Choice Yellow’ needs less room than a vigorous heirloom such as ‘Cherokee Purple.’
Use companion planting sensibly
Companion planting can improve space use, attract pollinators, and keep soil covered. Basil near tomatoes, dill near beneficial insects, and marigolds around bed edges are easy choices.
Do not expect a marigold border to stop every pest. Crop rotation, row covers, healthy soil, and regular inspection work better than one “magic” companion plant.
Keep the bed productive with low-cost care
Raised beds need less digging but still need regular care. The main jobs are watering, mulching, feeding, weeding, and checking the frame.
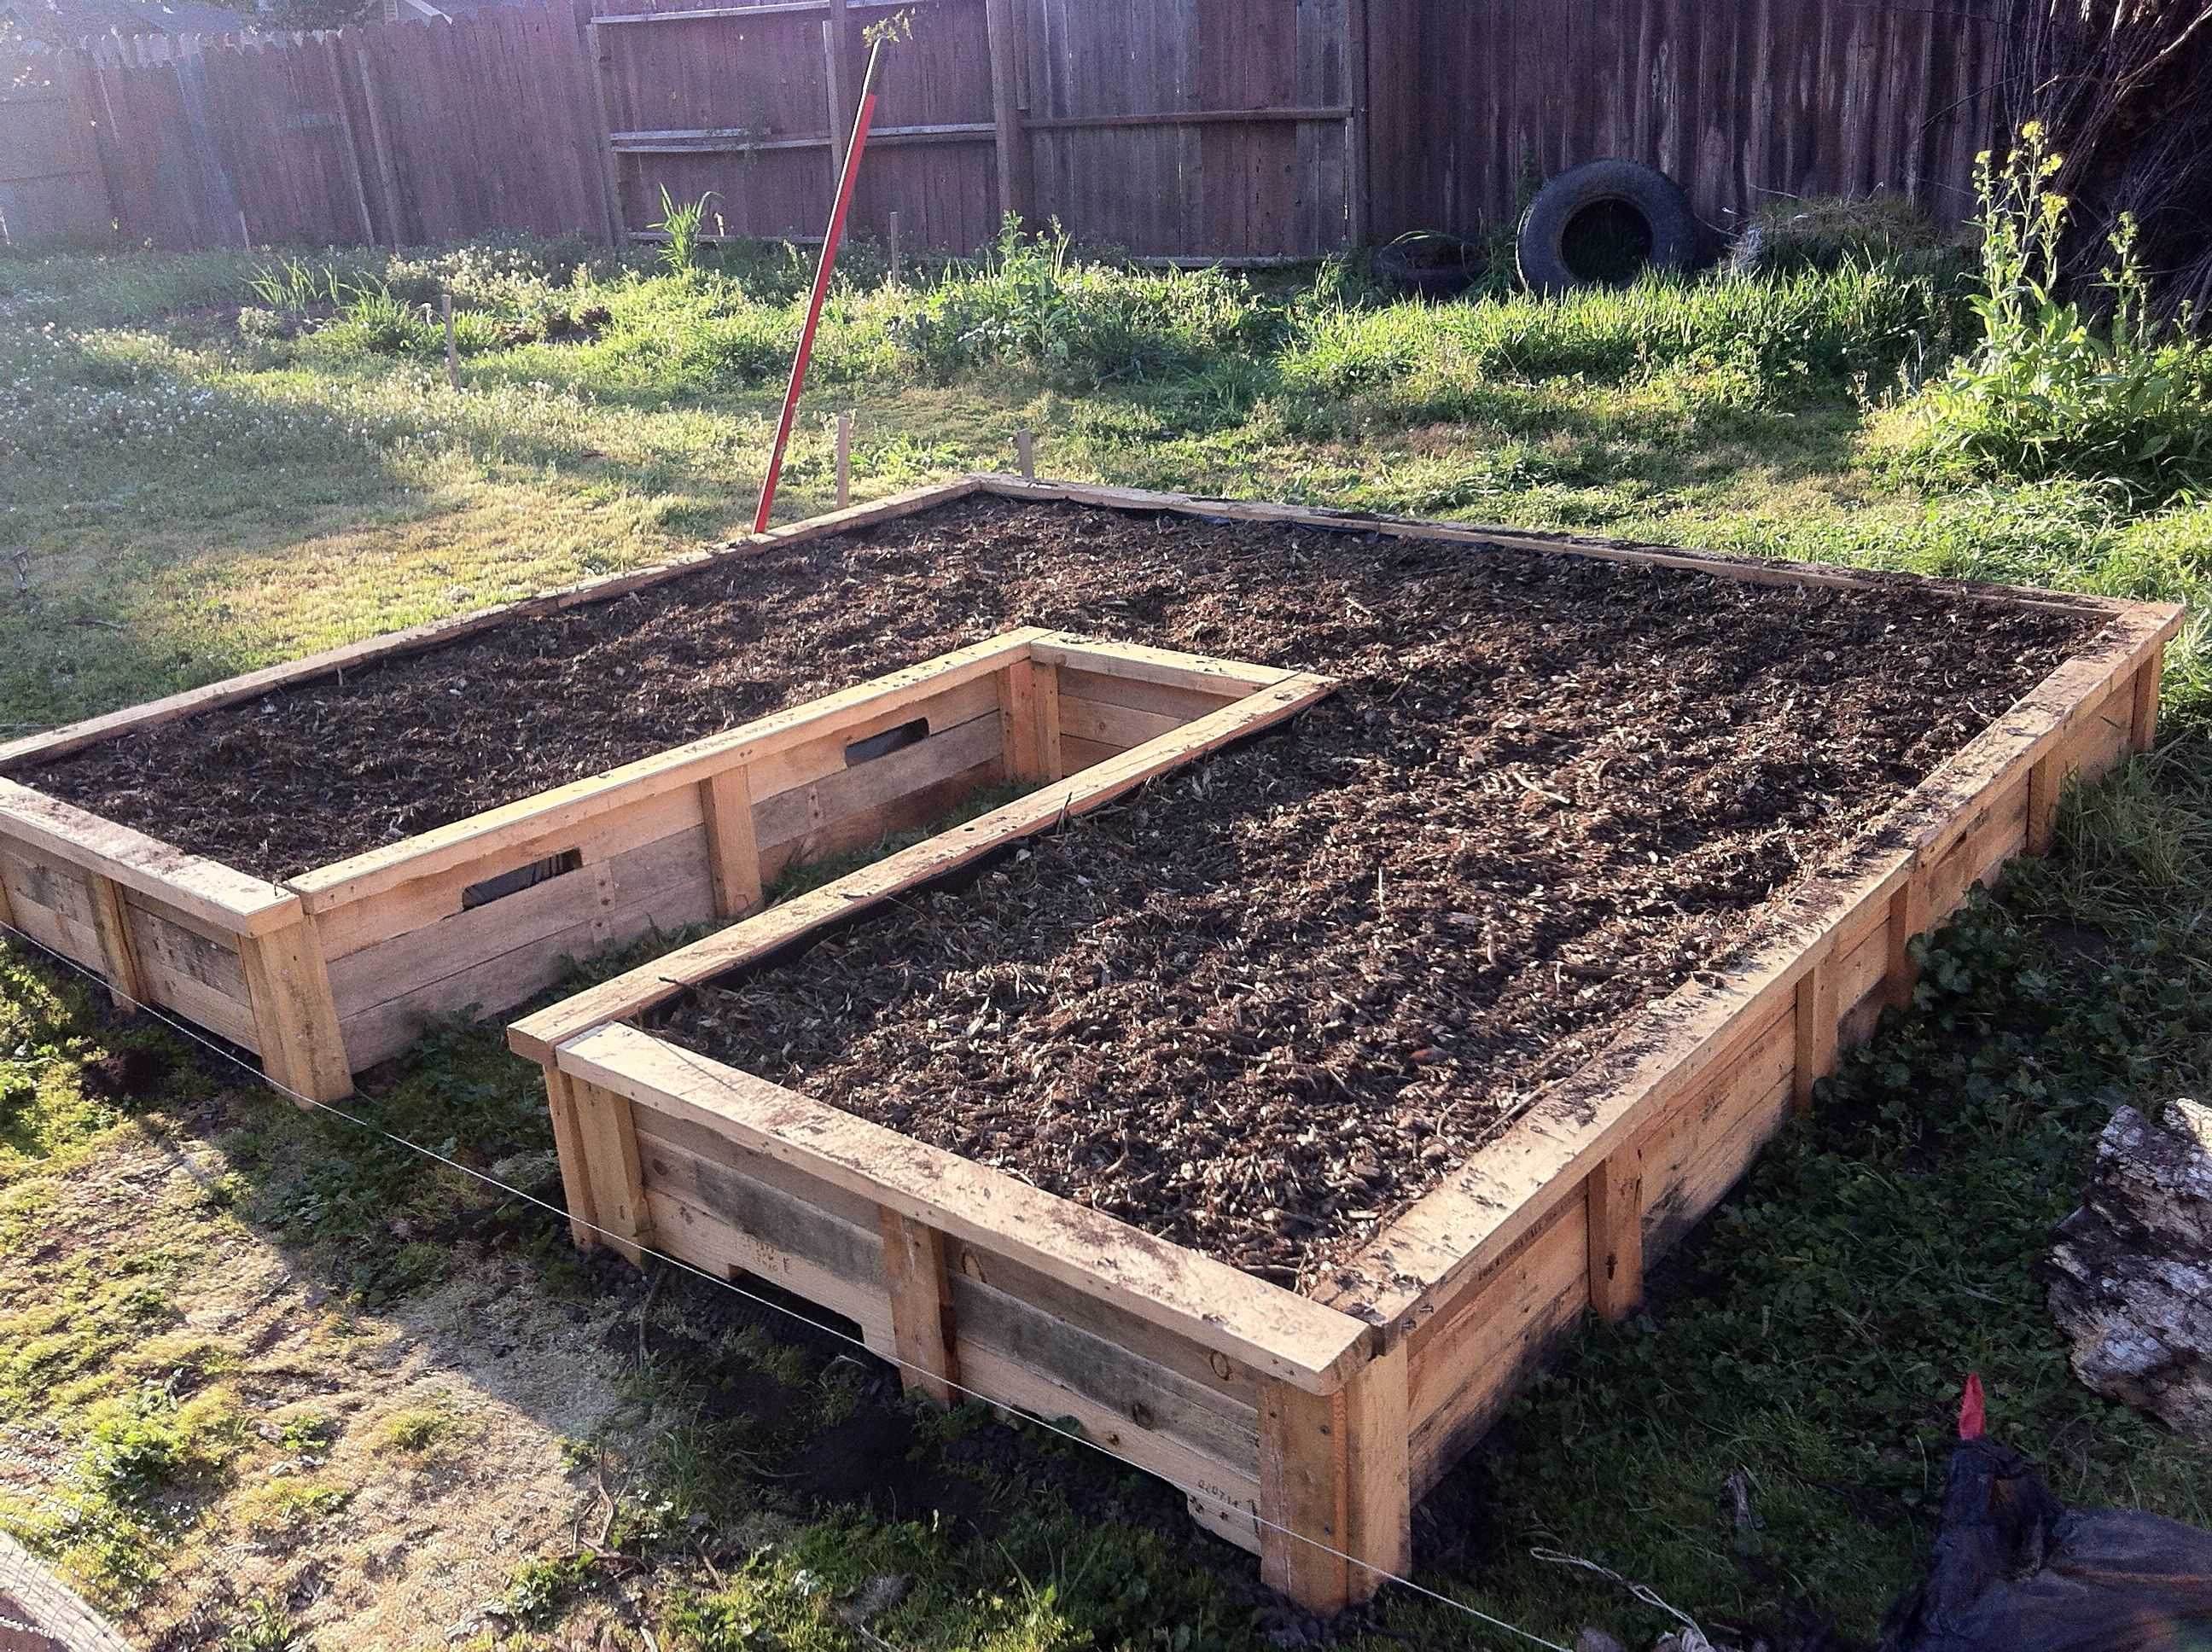
Water deeply and consistently
Water the root zone, not the leaves. A soaker hose or simple drip line uses less water than a sprinkler and helps reduce fungal disease on tomatoes, cucumbers, and squash.
New beds may need water every day during hot weather until roots spread. Established beds often need about 1 inch of water per week, though sandy soil, wind, heat, and plant size change that amount.
Press a finger 2 inches into the soil. If it feels dry at that depth, water slowly until the root zone is moist. Do not let a bed swing from bone dry to soaked.
Mulch at the right time
Add 1 to 3 inches of shredded leaves, straw, untreated grass clippings, or finished compost. Keep mulch 2 inches away from tomato stems and other plant crowns.
Mulch lowers evaporation, limits weeds, and buffers soil temperature. In cool, wet spring weather, delay heavy mulch until the soil warms.
Feed based on plant needs
Compost supplies slow nutrients, but heavy feeders such as tomatoes, corn, squash, and peppers may need more. A balanced fertilizer such as 5-5-5 can work when a soil test shows a need.
Leafy greens often need nitrogen, but too much nitrogen gives soft growth and fewer flowers. Follow the label rate. More fertilizer does not mean more vegetables.
Seasonal maintenance schedule
A raised bed can last many years if you check it twice a year. Spring is the time to repair boards and refresh soil. Fall is the time to remove diseased plants and protect the soil.

| Season | Main task | Budget method |
|---|---|---|
| Early spring | Check screws, boards, drainage, and soil level | Use saved lumber scraps for repairs |
| Late spring | Add compost and install mulch | Make leaf compost at home |
| Summer | Water, tie plants, and inspect pests | Use a timer and soaker hose |
| Fall | Remove diseased debris and cover soil | Plant cover crops or add leaves |
| Winter | Store hoses and protect tools | Clean tools instead of replacing them |
Remove tomato vines, cucumber vines, and squash leaves with powdery mildew or blight. Do not add badly diseased plants to a cool backyard compost pile.
A cover crop such as crimson clover, oats, or winter rye can protect soil in larger beds. In small beds, chopped leaves work well and are easy to turn into the soil in spring.
Common mistakes and simple fixes
Most raised-bed problems come from poor drainage, weak frames, low-quality soil, or planting too much at once. These issues are easier to prevent than repair.

| Problem | Likely cause | Fix |
|---|---|---|
| Boards bow outward | Thin boards or no center brace | Add stakes, braces, or a second board |
| Soil stays wet | Poor site or blocked bottom | Move the bed or improve drainage below it |
| Plants grow slowly | Low fertility or compact soil | Test soil and add finished compost |
| Soil dries too fast | Small bed, sandy mix, or heat | Add mulch and use drip irrigation |
| Weeds return quickly | Sod or perennial roots remain | Remove roots and add cardboard |
| Tomatoes get leaf spots | Wet foliage, crowding, or disease | Improve spacing and water at soil level |
| Soil level drops | Organic matter settled | Add compost and soil each spring |
Do not line every bed with plastic. Do not use fresh manure. Do not fill the bottom with gravel. These popular “fixes” often create new problems.
🔧 Quick Fix: If a bed dries out in one day, check the soil mix before watering more. Pure compost, peat-heavy mixes, and very sandy soil can all hold water poorly at the root level.
Pros and cons of budget raised beds
Raised beds solve real problems, but they also create new costs and chores. The right choice depends on your soil, climate, mobility, and available space.

| Pros | Cons |
|---|---|
| Better control over soil quality | Soil and delivery can cost more |
| Easier access and less bending | Beds dry out faster |
| Warms earlier in spring | Wood can rot or warp |
| Clear planting boundaries | Roots cannot spread as freely |
| Fewer weeds from lawn and paths | You must refill settled soil |
| Works over poor native soil | Tall beds need strong construction |
Raised beds are a strong choice for heavy clay, contaminated sites, poor drainage, and gardeners who want a neat layout. They are less useful where native soil already drains well and fertility is easy to improve.
Compare raised beds with cheaper alternatives
A raised bed is not the only low-cost garden method. In-ground rows, grow bags, and straw bales may fit your site better.

| Method | Cost and setup | Best fit |
|---|---|---|
| In-ground garden | Lowest cost; needs soil improvement | Large spaces with decent soil |
| Raised wood bed | Moderate cost; long-term structure | Clay, weeds, and easier access |
| Grow bags | Low to moderate; easy to move | Renters and patios |
| Fabric containers | Low; often last 3–7 seasons | Herbs, potatoes, and small crops |
| Concrete block bed | Moderate; sturdy and modular | Permanent gardens |
| Large pots | Moderate to high per square foot | Balconies and small spaces |
In-ground beds usually offer the lowest cost per square foot. Grow bags offer the lowest commitment. Raised beds offer the best balance for gardeners who need better soil and clear paths.
When a container makes more sense
Choose containers if you rent, have only a balcony, or need to move plants into winter shelter. A 10-gallon grow bag can hold one tomato, two peppers, or several herbs.
Containers need more frequent watering than raised beds. Dark plastic pots can overheat roots in USDA Zones 8 through 10, so light-colored fabric or ceramic containers may perform better.
When concrete blocks are useful
Concrete blocks can form a durable bed without wood rot. The holes can hold thyme, oregano, alyssum, or small flowers for pollinators. However, blocks take more width and can become hot in full sun.
Use solid blocks or cap the top if children or pets may contact rough edges. Check local rules before using salvaged construction materials.
My experience building low-cost beds
The first budget bed I built used inexpensive untreated pine over heavy clay. It cost less than a cedar bed, but the boards began to soften near the soil line after the fourth wet season. The bed still worked, yet I had to replace one side sooner than planned.
The better result came from lining the inside of the lower board with a narrow strip of heavy pond liner, not across the bottom. That kept wet soil away from the most vulnerable wood while allowing the bed to drain. I also added a center brace, which prevented the long sides from bowing.
My biggest filling mistake was using too much compost. The bed looked rich at first, but it settled sharply and dried near the top during a hot July. The following season, I mixed in more screened topsoil and added leaf mulch. Lettuce, beans, and peppers grew more evenly after that change.
In a Zone 6 garden, the raised soil warmed several days earlier than the surrounding clay in spring. In a Zone 9 garden, the same bed needed more mulch and morning watering because the soil heated and dried fast.
How long do budget raised beds last?
A raised bed made from untreated pine may last three to seven years, depending on rainfall, soil contact, and wood quality. Cedar can last eight to fifteen years. Metal and concrete often last longer, but their upfront cost is higher.
The first parts to fail are usually the lower boards, corner joints, and screws. Inspect the soil line each spring. Replace one board instead of tearing down the whole bed when possible.
Do not wait until a board collapses. Loose soil can spill into paths, expose plant roots, and make the frame harder to square again.
Extend the life of the frame
Keep the outside of the bed free from constant weeds and wet leaves. Do not pile mulch against the outer boards. Use exterior screws and keep the top edge clear so rain can dry the wood.
A removable inner liner on the side walls can slow rot. Avoid roof tar, creosote, and unknown wood preservatives around edible crops.
When to hire help
Most gardeners can build a small raised bed without professional help. Consider help when the site slopes sharply, contains buried utilities, floods, or needs a retaining wall.
A tall bed above 18 inches needs careful bracing. A long bed filled with wet soil creates strong outward pressure. If the bed borders a foundation, deck, or drainage system, confirm that water will not move toward the structure.
Call for help with contaminated soil testing, major grading, concrete cutting, or structural walls. The cost of advice is small compared with repairing a failed wall or exposing children to unsafe soil.
Frequently asked questions
Q: What is the cheapest way to build a raised garden bed?
A: Use clean reclaimed untreated boards, make a simple 3-by-6- or 4-by-8-foot rectangle, and buy soil or compost in bulk. If the native soil is safe and fertile, use a low 6-inch frame and spend more on compost than on wood.
Q: Can I build a raised bed directly on grass?
A: Yes, but remove the sod first or cover it with overlapping plain cardboard. Grass roots can grow into the bed and compete with vegetables. Wet the cardboard, then add soil immediately.
Q: Should I put rocks or gravel under a raised bed?
A: No. Gravel does not create a drainage layer under normal raised beds. It reduces root space and may create a perched water zone. Improve the soil below and choose a site that does not stay wet.
Q: Is pressure-treated wood safe for raised beds?
A: Modern residential pressure-treated wood uses different preservatives than older arsenic-treated lumber, but gardeners still vary in comfort. Use cedar, untreated pine, metal, or concrete if you want to avoid treated wood. Never use wood with an unknown history.
Q: How deep should a raised garden bed be?
A: Use 6 to 8 inches for lettuce, herbs, onions, and radishes. Use 12 inches or more for tomatoes, peppers, carrots, beets, and mixed vegetables. Deep beds need much more soil, so start shallow if your native ground is healthy.
Q: What soil is best for raised garden beds?
A: A mix of about 60% screened topsoil, 30% finished compost, and 10% stable organic matter works for most vegetables. Avoid pure compost and fresh manure. Test pH if plants struggle or if you plan to grow acid-loving crops.
Q: Can I use old pallets to build a garden bed?
A: Only use clean pallets marked “HT” for heat treated. Avoid “MB” pallets and any pallet with stains, chemical odors, paint, or unknown use. Pallet wood can split easily, so inspect it closely.
Q: How do I stop soil from washing out of a raised bed?
A: Level the bed, keep the topsoil below the rim, and water slowly. Add mulch to protect the surface. On a slope, build shorter stepped beds instead of one long tilted frame.
Q: Why is my raised bed drying out so fast?
A: Common causes include sandy soil, too much compost, shallow beds, strong wind, and dark metal sides in hot weather. Add organic mulch, use a soaker hose, and check soil moisture 2 inches below the surface.
Q: How often should I replace the soil in a raised bed?
A: You usually do not need to replace it. Add 1 to 2 inches of finished compost each year and replace soil that settles. Remove diseased plant debris and rotate plant families when space allows.
Q: Can I grow tomatoes and potatoes in the same raised bed?
A: It is better to separate them because both belong to the nightshade family and can share diseases. Rotate tomatoes, peppers, eggplants, and potatoes to a different bed every few years when possible.
Q: Do raised beds need fertilizer?
A: Sometimes. Compost may supply enough nutrients for light feeders, but tomatoes, corn, cucumbers, squash, and peppers often need extra feeding. Use a soil test and follow the fertilizer label instead of guessing.
Q: Are raised beds worth the money?
A: They are worth it when native soil is poor, wet, compacted, contaminated, or hard to reach. They may not be worth the cost on good, deep garden soil. In that case, in-ground rows with compost are cheaper.
Start small and improve each season
The most affordable raised garden bed is a simple one that you can maintain. Start with a 4-by-8-foot frame, fill it with a balanced soil mix, and grow crops you already eat. Add irrigation, trellises, and more beds only after you learn how the first bed behaves.
Choose strong joints, safe wood, good drainage, and enough sun. Watch how the soil settles over the first four weeks, then adjust with compost and mulch. A budget garden does not need to look fancy; it needs to grow healthy roots and give you a reason to keep planting.
Meta description: Learn how to build raised garden beds on a budget using low-cost materials, affordable soil mixes, simple tools, and practical tips for lasting vegetable gardens.