How To Build A Raised Garden Bed Greenhouse: Easy DIY Guide
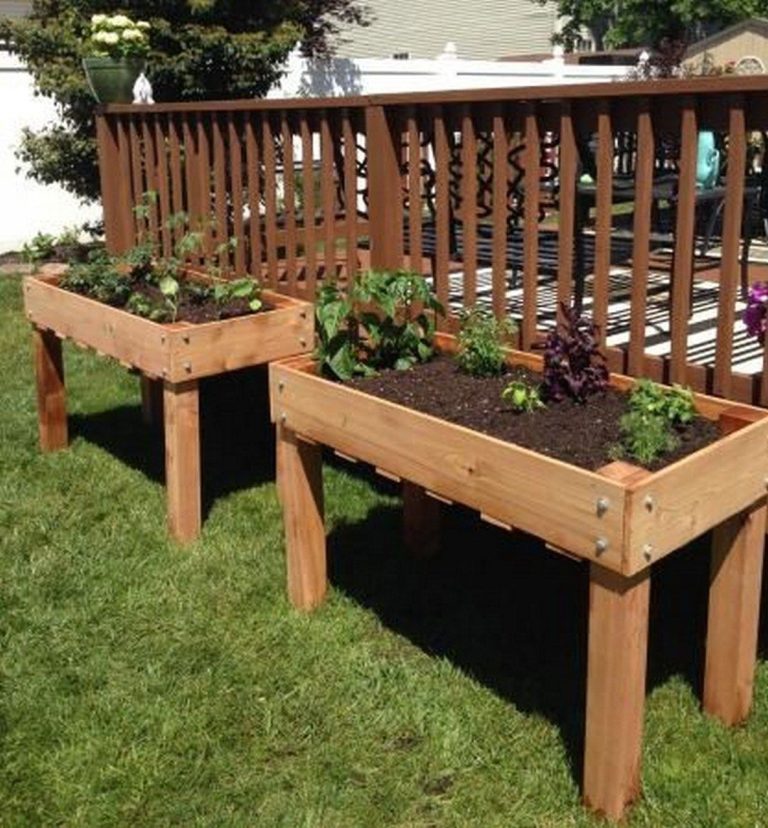
A raised garden bed greenhouse gives you the best parts of two garden systems in one small space. The bed warms early, drains well, and reduces bending. The greenhouse cover traps heat, blocks wind, and extends the growing season. Together, they can help you start lettuce in late winter, grow tomatoes longer in fall, and protect seedlings from sudden cold.
I have built and used small bed greenhouses in USDA Zones 5, 6, and 8. The simple versions worked well for greens, herbs, radishes, carrots, and young plants. They worked less well for full-size tomatoes when ventilation was poor. That lesson matters: a raised bed greenhouse is not just a box with plastic over it. It needs strong framing, good airflow, safe materials, and a way to manage heat.
This guide shows how to build one from common lumber, PVC pipe, greenhouse plastic, and basic hardware. You will also learn how much it costs, which plants fit inside, how to vent it, how long it can last, and what to do when condensation, frost, pests, or high heat cause trouble.

The simplest way to build a raised garden bed greenhouse
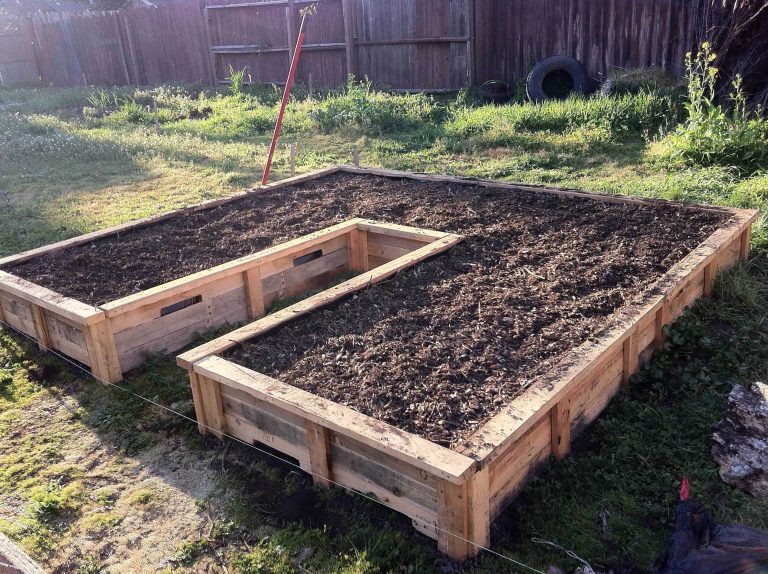
The best way to build a raised garden bed greenhouse is to make a sturdy raised bed first, then attach a removable hoop frame over it. Use untreated cedar or another rot-resistant wood, set the bed on level ground, fill it with healthy soil, and cover the hoops with greenhouse film or insect mesh. Add roll-up sides, end vents, and anchors before planting.

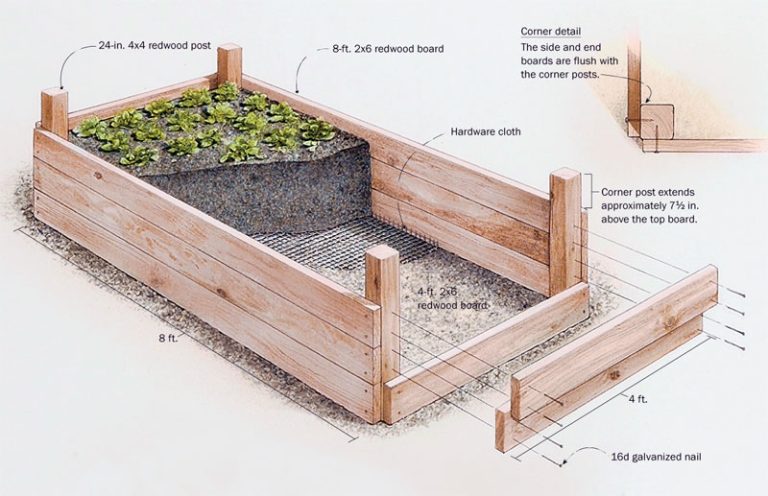
A practical beginner size is 4 feet wide by 8 feet long. This size is easy to reach from both sides, uses standard lumber, and gives enough space for salad crops and compact vegetables. A 2-by-12-inch board creates a bed about 11 1/4 inches tall after milling.
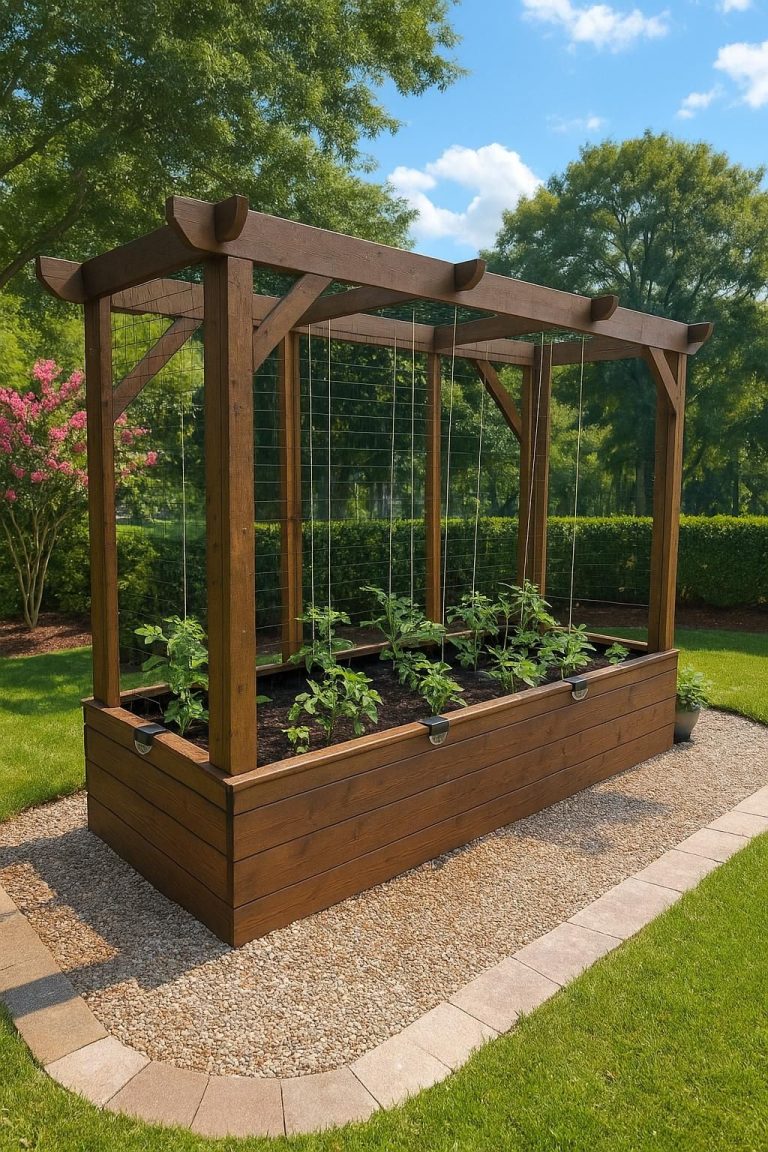
The greenhouse cover should sit high enough above the plants to allow air movement. For most beds, hoops that rise 24 to 36 inches above the soil work well. If you plan to grow indeterminate tomatoes, cucumbers, or peppers, use taller hoops or build a framed mini greenhouse instead.
Choose the right design before buying materials
Your site, climate, crop list, and budget should guide the design. A low hoop house is simple and cheap, but it can overheat fast. A hinged cold frame gives strong winter protection, but it has less headroom. A rigid polycarbonate cover lasts longer, but it costs more and takes more time to build.

Hoop cover, cold frame, or rigid panel greenhouse?
A hoop cover uses bent PVC or metal conduit. It is the fastest option and works well for lettuce, spinach, bok choy, kale, and seedlings. You can lift the sides for air flow or remove the cover in summer.
A cold frame uses a sloped lid made from glass, twin-wall polycarbonate, or clear corrugated roofing. It holds heat well and suits small plants. However, the lid can become heavy, and the bed may be harder to reach.
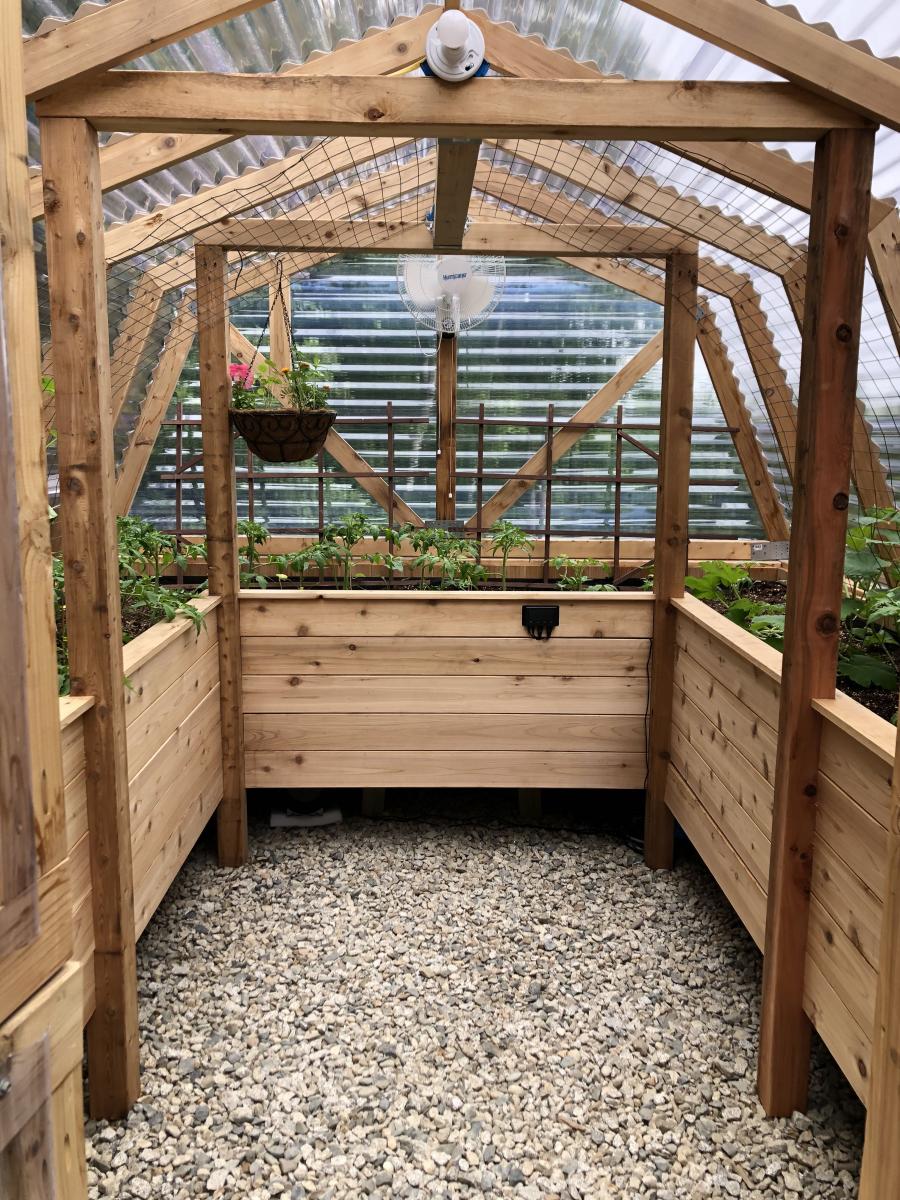
A rigid panel greenhouse uses wood or metal walls with polycarbonate panels. It is stronger and more attractive than plastic film. It also lasts longer in areas with snow, strong wind, or hail. The tradeoff is cost and more complex construction.

| Design | Best use | Main limit |
|---|---|---|
| PVC hoop cover | Low-cost season extension and seedling protection | Needs regular venting and may fail in strong wind |
| Hinged cold frame | Winter greens and early seedlings | Limited height and access |
| Rigid panel frame | Long service life and high wind areas | Higher cost and more building work |
The main difference is how much control and durability you need. A removable hoop cover suits most beginners. Choose a rigid frame if you live in a snowy area or want a structure that stays in place for many years.
Pick a safe and useful location
Choose a spot with at least six hours of direct sun. Eight hours is better for tomatoes, peppers, cucumbers, and eggplant. Morning sun helps dry leaves and reduces fungal disease.
Place the long side of the greenhouse from east to west when possible. This can give plants more even light in many climates. In hot regions such as USDA Zones 8 through 10, some afternoon shade can prevent leaf scorch and heat stress.
Avoid low ground where rain collects. Raised beds drain well, but a greenhouse cover can redirect rain outside the bed. If the soil below stays wet, water may still build up around the roots.
Keep the bed near a water source. A full 4-by-8-foot bed can hold more than 1,000 pounds of moist soil. Build it where you want it to stay.

Match the height to the crops
Low hoops are fine for salad greens and frost protection. They are not ideal for tall plants. A plant that touches plastic can suffer cold injury at night or leaf burn in bright sun.
Use these rough height targets:
- 18 to 24 inches above the soil for lettuce, spinach, and herbs.
- 24 to 36 inches for seedlings, carrots, kale, and compact peppers.
- 48 to 72 inches for cucumbers, bush tomatoes, and climbing beans.
- 72 inches or more for full-size tomatoes and trellised crops.
Remember that plants grow. Measure the mature height, not the size of the seedling you plant in March.
Tools and materials for a 4-by-8-foot bed
To build a basic raised bed greenhouse, you need lumber, soil, hoops, a cover, and several small parts that keep wind from tearing the structure apart. The cover is often the weakest part, so do not treat clips and anchors as optional.

Materials list
The table below covers a common 4-by-8-foot design with a bed about 11 inches tall. Adjust the list if you want a taller bed, a rigid roof, or a wider structure.
| Material | Suggested amount | Notes |
|---|---|---|
| Untreated cedar or redwood boards | Two 2-by-12-by-8-foot and two 2-by-12-by-4-foot boards | Cedar lasts well in damp soil; avoid treated wood with unknown chemicals |
| Exterior screws | 2 1/2 to 3 inches | Use coated or stainless screws |
| PVC pipe or metal conduit | Four to six pieces, 10 to 12 feet long | Use UV-rated conduit or greenhouse hoops when possible |
| Hoop clamps or pipe straps | Eight to twelve | Fasten each hoop on both sides |
| Greenhouse plastic | One piece, about 12 by 20 feet | Use 6-mil UV-stabilized film |
| Wiggle wire or battens | As needed | Gives a stronger plastic attachment |
| Landscape staples or ground anchors | Six to ten | Secure the cover and frame |
| Hinges and latch | Optional | Useful for a framed end door |
| Compost and garden soil | About 32 cubic feet | Use a blended soil, not pure compost |
These quantities leave extra plastic for side roll-ups and end flaps. Extra material costs less than rebuilding after the first strong wind.
Tools to gather
You can build the bed with a drill, driver bit, tape measure, level, pencil, shovel, rake, and hand saw. A circular saw makes cuts faster, but the lumberyard can often cut boards for you.
For PVC hoops, a rubber mallet helps set short sections of pipe into the soil. For metal conduit, use a conduit bender or buy pre-bent hoops. Wear gloves when cutting plastic and eye protection when drilling or cutting pipe.
A soil pH test, compost thermometer, and simple min-max thermometer are useful once the greenhouse is planted. A wireless sensor is helpful, but it is not required.

Prepare the bed site and build the frame
Start with a level, well-drained site. A greenhouse cover makes small design errors more noticeable, so take time to square the bed before you fill it.

1. Mark and level the footprint
Mark a 4-by-8-foot rectangle with stakes and string. Measure both diagonals. They should match, or the bed is not square.
Remove grass and weeds inside the footprint. You do not need to dig deep, but loosen the top 6 to 8 inches. If the site has aggressive perennial weeds such as bindweed, quackgrass, or Bermuda grass, remove the roots first.
Place cardboard under the bed if you want to smother grass. Overlap the cardboard by at least 6 inches. Do not use glossy printed cardboard, plastic carpet backing, or landscape fabric as a substitute for good soil preparation.

2. Assemble the raised bed
Set the boards in place and drive two or three screws into each corner. Check the level from side to side and end to end. Use soil or compacted gravel under low spots.
For a taller bed, stack a second course of boards. Stagger the joints and connect the courses with long screws or inside corner blocks. A 22-inch bed is comfortable for people with limited mobility, but it needs more soil and stronger bracing.
Do not line the inside with plastic. Plastic can trap water against the wood and speed rot. If you need a barrier, use cardboard under the bed or a breathable geotextile fabric on the bottom.
3. Fill with a stable soil blend
A reliable raised bed blend contains topsoil, finished compost, and an aeration material such as pine bark fines. A common starting mix is:
- 50% screened topsoil.
- 30% finished compost.
- 20% pine bark fines or aged leaf mold.
Avoid filling the bed with pure compost. It can shrink, hold too much water, release excess salts, and leave plants unstable as it breaks down.
Test the soil after mixing. Most vegetables prefer a pH between 6.0 and 7.0. Brassicas such as kale and broccoli tolerate a slightly higher pH, while blueberries need acid soil and do not belong in a mixed vegetable bed.
Add a slow, balanced fertilizer only if the soil test calls for it. A modest product such as 4-4-4 can work at planting time, but follow the label. Too much nitrogen creates soft leaves and more aphids.

4. Install the hoops
Mark hoop locations along the 8-foot sides. Space them 24 to 36 inches apart. Use at least four hoops for an 8-foot bed; six provide better support in snow or wind.
Push each hoop end 8 to 12 inches into the soil beside the bed, or attach the ends to exterior blocks. Do not rely on loose hoops pushed only 2 inches into soft soil. They will lift during wind.
For stronger construction, attach short lengths of PVC or metal conduit to the outside of the bed. Slide the hoops into these sockets. This keeps the hoop ends from splitting the wood and makes summer removal easier.
5. Add end supports and a door
A hoop house needs a way to open at both ends. You can fold and clip the plastic, but a simple framed end panel works better.
Build two small rectangles from 1-by-3 or 2-by-2 lumber. Cover them with plastic or insect mesh. Attach one panel with hinges and add a latch. The other end can have a fixed vent panel or a roll-up flap.
For a low-cost version, leave the ends open and use plastic flaps. Weigh the flaps with smooth boards. Avoid bricks with sharp corners, which can tear the film.

6. Attach the cover
Pull greenhouse plastic over the hoops on a calm, warm day. Warm plastic stretches more evenly and forms fewer wrinkles.
Center the plastic so both sides have equal excess. Leave at least 18 inches hanging on each long side. Attach the cover with wiggle wire, battens, greenhouse clips, or UV-resistant clamps.
Do not use ordinary office binder clips for long-term outdoor use. Sunlight makes them brittle, and wind can turn their edges into cutting tools.
Make one long side roll up for ventilation. A piece of PVC pipe at the bottom edge creates a simple roll-up bar. Secure it with straps when open.
🌱 Beginner Note: Do not seal the greenhouse tightly on the first warm day. A small bed can rise above 100°F within minutes, even when the outdoor air stays near 60°F.
Build the ventilation and watering system
Good ventilation matters more than extra plastic. Heat, humidity, and wet leaves cause more problems in a small greenhouse than cold does.
Create a manual vent system
At minimum, open both ends during sunny weather. Roll up one long side when the inside temperature reaches 75°F for cool-season crops or 80°F for warm-season crops.
Tomatoes, peppers, and cucumbers can handle warmer air, but they still need pollen movement and reduced humidity. Tomatoes may fail to set fruit when daytime temperatures stay above 90°F and nights remain above 70°F.
A simple rule is to open the cover before the bed feels hot to your hand. Better still, use a thermometer at plant height. The air near the soil can differ from the air at the roof.
Use automatic venting when possible
An automatic solar vent opener can lift a cold-frame lid when the temperature rises. These openers contain a cylinder that expands with heat. They need no electricity, but they work best on rigid lids, not loose plastic sides.
For a hoop house, an electric exhaust fan with a thermostat gives better control. A small 12-volt fan can work for a home system, but protect the wiring from water. Use a screened intake vent on the opposite end.
In my Zone 6 beds, manual venting worked well for spring greens. In July, I needed the side rolled up all day. The plants did better with more airflow than with a fully enclosed cover.
Water at the root zone
A soaker hose or drip line is more reliable than hand watering from above. Lay the line before planting and cover it with a thin layer of straw or leaf mulch.
Water early in the day. This gives leaves and soil time to dry and reduces conditions that favor gray mold, powdery mildew, and damping-off.
Check moisture with your finger 2 inches below the surface. If the soil feels cool and slightly damp, wait. A covered bed loses less water than an open bed, so your old outdoor watering schedule may overwater it.
| Crop group | Typical summer check | Watering sign |
|---|---|---|
| Lettuce, spinach, and herbs | Every 1 to 2 days in hot weather | Leaves wilt by late morning or soil feels dry 1 inch down |
| Tomatoes, peppers, and cucumbers | Every 2 to 3 days, depending on soil | Leaves droop, fruit cracks, or soil dries 2 to 3 inches down |
| Seedlings | Daily checks; small plants may need water each day | Surface crusts or seedling stems soften |
The figures are starting points, not fixed rules. Sandy soil needs more frequent water than loam, while compost-rich soil holds moisture longer.
Protect plants from frost, heat, and pests
A greenhouse cover changes the climate, but it does not remove risk. A clear plastic cover may raise daytime temperatures by 20°F or more, yet it offers limited protection on a still, freezing night.

Improve frost protection
A single plastic layer can protect cool-season crops from light frost. For a hard freeze, add a second layer of row cover over the plants, leaving the greenhouse cover above it.
Water the soil before a cold night if it is dry. Moist soil stores more heat than dry soil. Avoid watering the leaves at sunset.
Use a small outdoor-rated heat source only when you can manage fire and electrical risks. Never use a charcoal grill, propane heater made for outdoor patios, or open flame inside a plastic greenhouse.
Reduce heat stress
Shade cloth helps in hot climates. Use 30% shade cloth for many vegetables and 40% for lettuce and other cool-season crops in intense sun. Attach it above the plastic or use it after removing the cover.
Do not place shade cloth directly on wet leaves. It can hold moisture against the plants and reduce air flow.
Mulch the soil with straw, shredded leaves, or untreated grass clippings. Keep mulch 2 inches away from plant stems. Mulch keeps root temperatures steadier and reduces watering swings.
Keep pests from entering
A greenhouse does not stop aphids, whiteflies, fungus gnats, spider mites, or flea beetles. You may bring pests in on transplants or tools.
Inspect new plants before placing them inside. Look under leaves for eggs, sticky honeydew, webbing, or pale speckles. Wash small infestations with a firm stream of water.
Encourage beneficial insects near the greenhouse with alyssum, dill, yarrow, calendula, and native flowering plants. Do not spray broad-spectrum insecticides when bees or hoverflies are active.
Plant the bed for all-season use
A raised garden bed greenhouse works best when crops match the season. Cool crops fill the bed in spring and fall. Warm crops use it in summer after the cover comes off or stays open.

Spring planting
In USDA Zones 5 and 6, sow spinach, radishes, lettuce, peas, and mustard greens under protection four to six weeks before the average last frost. Kale and chard can handle cold nights once established.
Start tomato, pepper, and eggplant seeds indoors. Move transplants into the bed after the soil reaches about 60°F for tomatoes and peppers. Harden them off for seven to ten days first.
Do not crowd spring crops. Humid air inside the cover can spread downy mildew and Botrytis. Give lettuce 8 to 12 inches, kale 12 to 18 inches, and tomatoes at least 24 inches.
Summer planting
Remove or open the cover when nights stay above 50°F and frost risk has passed. Tomatoes and peppers need pollinators or hand pollination, so open sides help bees reach the flowers.
Compact varieties suit a low structure. Try ‘Patio Choice Yellow’ tomato, ‘Tiny Tim’ tomato, ‘Lunchbox’ pepper, bush cucumber, or dwarf basil.
Cucumbers and tomatoes need trellises. A trellis can carry weight, but it also catches wind. Fasten it to the bed frame, not just to loose soil.
Fall and winter planting
Sow fall greens six to eight weeks before your first expected frost. In Zones 7 through 9, you may grow lettuce, cilantro, parsley, arugula, and spinach through much of winter.
In colder Zones 4 through 6, use the greenhouse to keep crops alive rather than to force rapid growth. Plant spinach, mâche, kale, and scallions before the days become short.
Growth slows in low light. Do not add more fertilizer just because plants look small. Short days, cold soil, and low sun often limit growth more than nutrients do.
| Season | Good crops | Main task |
|---|---|---|
| Early spring | Spinach, radish, lettuce, peas, kale | Vent on sunny days and protect from late frost |
| Late spring to summer | Tomato, pepper, basil, cucumber, beans | Remove or roll up cover and provide trellis support |
| Fall | Arugula, chard, cilantro, lettuce, Asian greens | Sow before cold weather and reduce watering |
| Winter | Mâche, spinach, kale, scallions | Keep leaves dry, harvest lightly, and vent on mild days |
The strongest results come from succession planting. Replace finished radishes with basil or bush beans, then follow summer crops with fall greens.
Common building mistakes and how to fix them
Most raised bed greenhouse failures come from poor airflow, weak anchors, bad soil, or the wrong crop choice. These problems are easy to prevent when you know what to look for.

| Problem | Likely cause | Practical fix |
|---|---|---|
| Plastic tears at the corners | Sharp wood, tight plastic, or wind movement | Sand edges, add slack, and use battens or wiggle wire |
| Plants wilt on sunny days | Heat buildup or dry root zone | Open ends and sides early; check soil moisture |
| Mold covers leaves | High humidity and poor airflow | Water at soil level, space plants, and vent each morning |
| Hoops lift in wind | Ends are too shallow or weakly attached | Use deeper sockets, side straps, and ground anchors |
| Seedlings fall over | Low light, wet soil, or damping-off disease | Increase light, reduce water, and improve airflow |
| Tomatoes have flowers but no fruit | Heat, low airflow, or poor pollination | Vent, tap flower clusters, and grow during suitable temperatures |
A small greenhouse often needs more attention than an open bed. Check it each morning, even if you only have five minutes.
⚠️ Warning: Never leave a sealed plastic greenhouse unattended on a sunny day until you know how fast it heats. In my first low tunnel, the temperature rose from 68°F to 104°F in less than an hour.
Fix condensation
Condensation forms when warm, moist air touches cool plastic. Some moisture is normal, but constant dripping can spread leaf disease.
Vent in the morning. Water the soil, not the foliage. Avoid packing plants tightly against the cover.
A layer of coarse mulch can reduce soil evaporation. Do not use thick wet mulch in a cold, enclosed bed because it may keep the surface too damp.
Fix weak or leaning hoops
Check whether the hoop ends move in their sockets. If they do, add screws through the socket into the bed frame. You can also add a horizontal ridge pole along the top.
A ridge pole links the hoops and spreads wind force. Use PVC fittings or UV-resistant zip ties, then replace any tie that becomes brittle.
Fix poor plant growth
Start with light and temperature. A greenhouse cannot make up for deep shade or cold, compacted soil.
Next, inspect the roots. Brown, soft roots suggest excess water. White roots with dry soil suggest drought. Pale lower leaves may show nitrogen shortage, but do not add fertilizer until you rule out poor roots.
Test the pH if growth stays weak after four weeks. Nutrients can become unavailable when pH moves too far from the crop’s preferred range.
Maintain the greenhouse through the year
A raised garden bed greenhouse can last many seasons, but the plastic, fasteners, and wood need care. UV light often damages the cover before the frame fails.
Weekly checks during the growing season
Walk around the structure once a week. Look for loose clips, lifted anchors, torn plastic, blocked vents, and standing water.
Check the thermometer at midday. Check the soil near the center and edge of the bed because the edges often dry first.
Remove yellow leaves and fallen fruit. These can harbor fungal spores and pests. Wash pruners with rubbing alcohol between diseased plants.
Seasonal maintenance schedule
Use the following schedule as a simple reminder. Your timing will change with frost dates, storms, and local weather.
| Time | Maintenance task | Why it matters |
|---|---|---|
| Early spring | Wash plastic, inspect hoops, test the soil, repair anchors | Clean light improves growth and repairs prevent wind damage |
| Late spring | Add drip lines, install trellises, check vent routine | Summer crops need support and steady water |
| Summer | Open sides daily, inspect for mites and aphids, tighten cover | Heat and pests increase fast |
| Fall | Remove dead plants, disinfect tools, sow winter crops | Reduces disease and prepares the bed for low light |
| Winter | Brush off snow, check wind damage, store loose parts | Prevents frame collapse and plastic failure |
Do not let heavy snow remain on a low hoop structure. Brush it off with a soft broom from the side, or remove the cover before a major storm if the design cannot support snow.
How long the materials last
A cedar bed can last 8 to 15 years, sometimes longer in dry climates. Wet soil, poor drainage, and constant irrigation shorten its life.
UV-stabilized 6-mil greenhouse film often lasts three to five seasons. Cheap clear plastic may last only one season. Polycarbonate panels can last 10 years or more when installed correctly.
PVC hoops may last several years, but sunlight makes some PVC brittle. Metal conduit lasts longer and handles wind better. Stainless screws outlast basic coated screws in wet conditions.
The first parts to fail are usually the cover, clamps, and wood around the hoop sockets. Inspect these areas before each growing season.
What it costs and whether it saves money
A DIY raised bed greenhouse costs less than a full greenhouse, but the total price depends on the frame, soil, cover, and local material costs. Current pricing ranges from about $150 for a basic small setup to $700 or more for a tall, rigid-panel design.
| Build level | Typical cost range | What you get |
|---|---|---|
| Basic PVC hoop bed | $150–$300 | Cedar bed, PVC hoops, plastic film, soil, simple clips |
| Stronger hoop house | $300–$550 | Metal hoops, better anchors, roll-up sides, drip irrigation |
| Rigid mini greenhouse | $550–$1,000+ | Framed walls, polycarbonate panels, doors, stronger roof |
Soil can become the largest cost. A 4-by-8-foot bed filled 11 inches deep needs about 29.3 cubic feet before settling. A taller bed needs much more.
The structure can save money if you grow high-value crops, start plants from seed, and use it for several seasons. It may not save money if you buy small bags of soil, replace plastic each year, and grow inexpensive crops that are already cheap at the store.
For many gardeners, the real value is fresh food in months when the outdoor garden is empty. A bowl of spinach in January may matter more than a strict cost calculation.
Pros and cons of this garden system
A raised bed greenhouse solves several common garden problems, but it also creates new work. The table below gives a realistic view before you build.
| Pros | Cons |
|---|---|
| Warms soil earlier in spring | Can overheat in minutes |
| Extends harvest into fall and winter | Needs daily vent checks |
| Reduces bending and improves drainage | Requires extra soil |
| Protects plants from wind and light frost | Plastic film can tear |
| Makes small gardens more productive | Does not stop every pest |
| Works in yards, patios, and community plots | Tall crops may need a larger frame |
This setup suits gardeners who want season extension without building a walk-in greenhouse. It is less suitable for anyone who cannot check vents during hot weather or who lives in a location with severe wind and heavy snow unless the frame is reinforced.
My experience after two growing seasons
My first version used a 4-by-8-foot cedar bed with four PVC hoops and thin clear plastic. It was fine for spinach and lettuce in early spring. It was not strong enough for a windy April, and one corner pulled loose during a storm.
I replaced the pipe clamps with exterior blocks, added a ridge pole, and used 6-mil greenhouse film. The second version stayed stable through two seasons in Zone 6. The plastic still needed patching near one end where it rubbed against a sharp screw.
The biggest surprise was how quickly the bed dried near the open side. I expected the cover to reduce water use evenly, but wind entering the vent dried the outer row faster than the center. A drip line solved that problem.
I also learned to avoid growing full-size ‘Brandywine’ tomatoes under low hoops. The plants reached the plastic, trapped moisture, and became difficult to prune. Compact ‘Celebrity’ and ‘Patio Choice’ tomatoes performed much better.
Pro tips for better results
Small changes can improve the structure without adding much cost. Focus on airflow, access, anchors, and crop planning.
Use a removable cover
A removable cover gives you more options than a permanent one. Remove it for pollination, summer rain, and warm nights. Put it back on when a cold front arrives.
Label the folded plastic with a marker. Store it dry in a cool place. Do not fold it while wet, because trapped moisture can create mildew and a musty smell.
Add a central ridge pole
A ridge pole keeps hoops aligned and reduces side-to-side movement. It also gives you a place to hang plant clips or lightweight trellis netting.
Do not hang heavy tomato vines from a weak PVC ridge pole. Use metal conduit or a wood beam for heavy crops.
Keep a temperature log
Record the inside high and low for one week in spring and one week in summer. This shows how your structure behaves at your site.
A greenhouse near a south-facing wall may run hotter than one in an open yard. A bed under trees may stay cooler but receive too little light.
Use companion planting with restraint
A few flowers can attract pollinators and beneficial insects. Calendula, sweet alyssum, dill, and basil fit well near many vegetable crops.
Do not fill the bed with companion plants that compete for light or moisture. Good spacing matters more than a long plant pairing list.
Plan for access
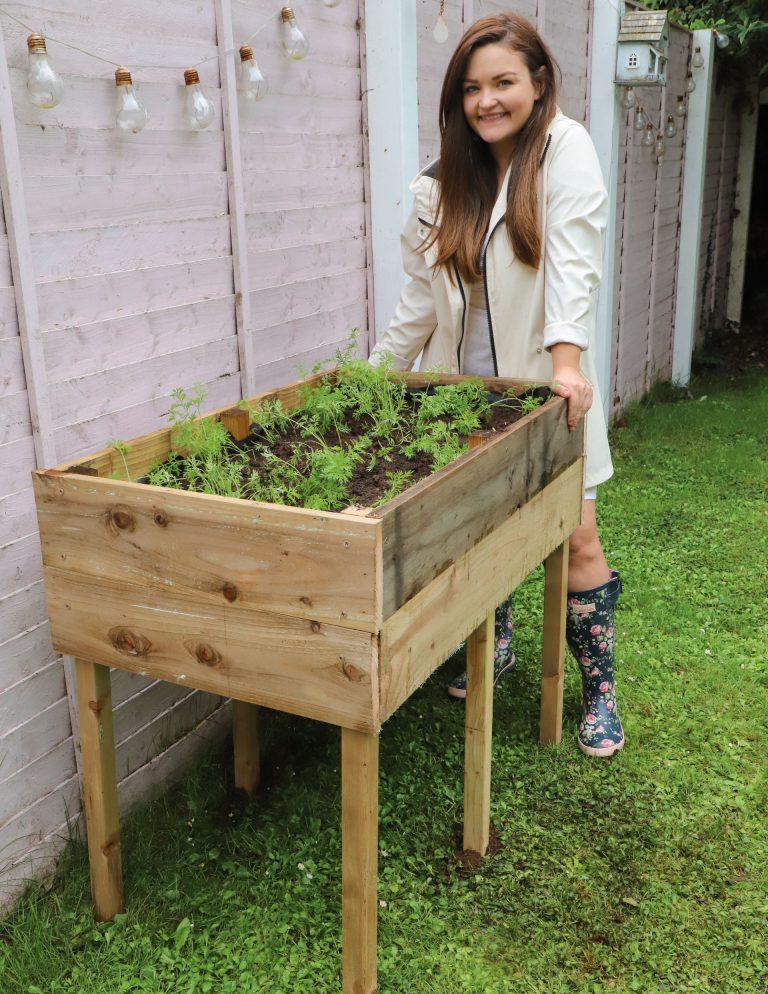
You should be able to reach the center of the bed without stepping into the soil. At 4 feet wide, most gardeners can reach 2 feet from each side.
If you make the bed wider than 4 feet, add a path or divide the bed. Compacted soil reduces drainage and damages roots.
When to choose an alternative
A raised bed greenhouse is not the only way to extend the season. A fabric row cover may be enough for frost protection. A cold frame may suit a balcony or small patio. A walk-in greenhouse makes more sense if you want to grow tall crops year-round.
Choose floating row cover when you need a light, low-cost barrier against frost and flea beetles. It does not raise temperatures as much as plastic, but it breathes better and needs less venting.
Choose a cold frame when you grow winter greens and want a compact structure. Choose a high tunnel when you need more room, stronger wind protection, and regular access inside.
When to hire a professional
Most gardeners can build a low hoop bed with hand tools. Hire help for a tall structure, electrical wiring, concrete footings, or a site with drainage problems.
Professional advice also makes sense in areas with heavy snow, hurricane-force wind, or strict local building codes. A greenhouse that lifts during a storm can damage fences, windows, vehicles, or nearby plants.
Never run a permanent electrical line without proper outdoor-rated parts and local code compliance. A licensed electrician can install a safe outlet, ground-fault protection, and weatherproof connections.
Raised garden bed greenhouse FAQs
Q: How deep should a raised garden bed greenhouse be?
A: Use at least 8 to 12 inches for lettuce, herbs, and most annual vegetables. A 12-inch bed gives roots more room and holds moisture better. Use 18 to 24 inches for deep-rooted crops, poor native soil, or easier access for gardeners with limited mobility.
Q: What is the best plastic for a raised bed greenhouse?
A: Use 6-mil UV-stabilized greenhouse film. It stretches better and lasts longer than hardware-store drop cloth plastic. Clear film gives the most light. Woven poly film is stronger but may reduce light slightly.
Q: Can I use regular clear plastic sheeting?
A: You can use it for a short test, but it often becomes brittle after one season. It may also tear at the frame. Greenhouse film costs more at first but usually gives better value over several seasons.
Q: How warm does a small greenhouse get?
A: A small covered bed can become 20°F to 40°F warmer than outdoor air in direct sun. The exact increase depends on wind, cloud cover, cover color, soil moisture, and ventilation. Use a thermometer rather than guessing.
Q: Should I leave my raised bed greenhouse open at night?
A: Close it when frost or cold wind threatens. Leave vents partly open on mild nights if humidity is high and temperatures stay above the crop’s safe range. Warm-season crops need more protection than kale or spinach.
Q: Can tomatoes grow in a raised bed greenhouse?
A: Yes, but use a tall structure with strong ventilation. Compact or determinate varieties are easier in a small bed. Full-size indeterminate tomatoes need at least 6 feet of vertical space and strong trellis support.
Q: How do I stop my greenhouse from blowing away?
A: Anchor each hoop, fasten the plastic with battens or wiggle wire, add a ridge pole, and secure the long sides. Use ground anchors outside the bed. Do not depend only on loose clips or stones placed on the plastic.
Q: Do raised bed greenhouses need a floor?
A: No. An open soil floor gives better drainage and lets roots access the native soil when the bed is shallow. A floor may help on a patio, but you then need containers, drainage holes, and a stronger structure.
Q: What soil is best for a raised greenhouse bed?
A: Use a well-drained blend of screened topsoil, finished compost, and pine bark fines or leaf mold. Aim for a loose loam with a pH near 6.0 to 7.0. Avoid pure compost and heavy clay.
Q: How often should I water plants under plastic?
A: Check the soil every day at first, then adjust to weather and crop size. Many beds need water every two to three days in summer, but sandy soil may need daily water. Drip irrigation reduces waste and keeps leaves dry.
Q: Can I grow plants in a raised bed greenhouse all winter?
A: You can grow cold-tolerant crops through winter in many areas, but growth slows in short days. Spinach, mâche, kale, scallions, parsley, and hardy lettuce handle cool conditions. In Zones 4 and colder, extra row cover may be needed inside the structure.
Q: How do I control humidity?
A: Vent early, space plants well, water at the soil line, and remove dead leaves. Open both ends when weather allows. A fan can help in a larger structure, but good passive airflow solves many problems in a small bed.
Q: How long does a raised garden bed greenhouse last?
A: A cedar bed may last 8 to 15 years, while greenhouse film often lasts three to five seasons. Metal hoops and polycarbonate panels can last much longer. Drainage, wind exposure, UV light, and maintenance control the real lifespan.
Q: Is a raised garden bed greenhouse worth the money?
A: It is worth the money for gardeners who want earlier planting, later harvests, and better control in a small space. It is less useful if you cannot vent it on hot days or if you only grow summer crops that already thrive outdoors.
Final recommendation
Build the simple version first: a 4-by-8-foot cedar bed, four to six strong hoops, 6-mil greenhouse film, roll-up sides, and a drip line. That design gives you enough control to learn how your local weather behaves without spending the cost of a full greenhouse.
Spend extra money on anchors, cover attachment, and good soil before buying decorative features. Open the structure early on sunny days, watch the temperature, and plant crops that match the height and season. With those habits, a raised garden bed greenhouse can turn one small patch into a productive garden from early spring through late fall, and in mild climates, through much of winter.
Meta description: Learn how to build a raised garden bed greenhouse with simple materials. Get step-by-step plans, costs, ventilation tips, crop ideas, maintenance advice, and common fixes.