How To Build A Raised Garden Bed Easy: Simple DIY
A raised garden bed is one of the easiest ways to grow vegetables, herbs, flowers, and berries in a small space. You do not need a large yard, perfect soil, or advanced building skills. With a few boards, basic tools, and a good soil mix, you can create a productive bed in one afternoon.
I have built raised beds on heavy clay in USDA Zone 6 and on sandy soil in Zone 9. The best results came from simple beds that were 4 feet wide, 8 to 12 inches tall, and placed in full sun. This guide explains how to build a raised garden bed easy, how much it costs, what materials last, and how to avoid the common mistakes that cause beds to rot, dry out, or settle.

Quick answer: Build a simple raised bed in one afternoon
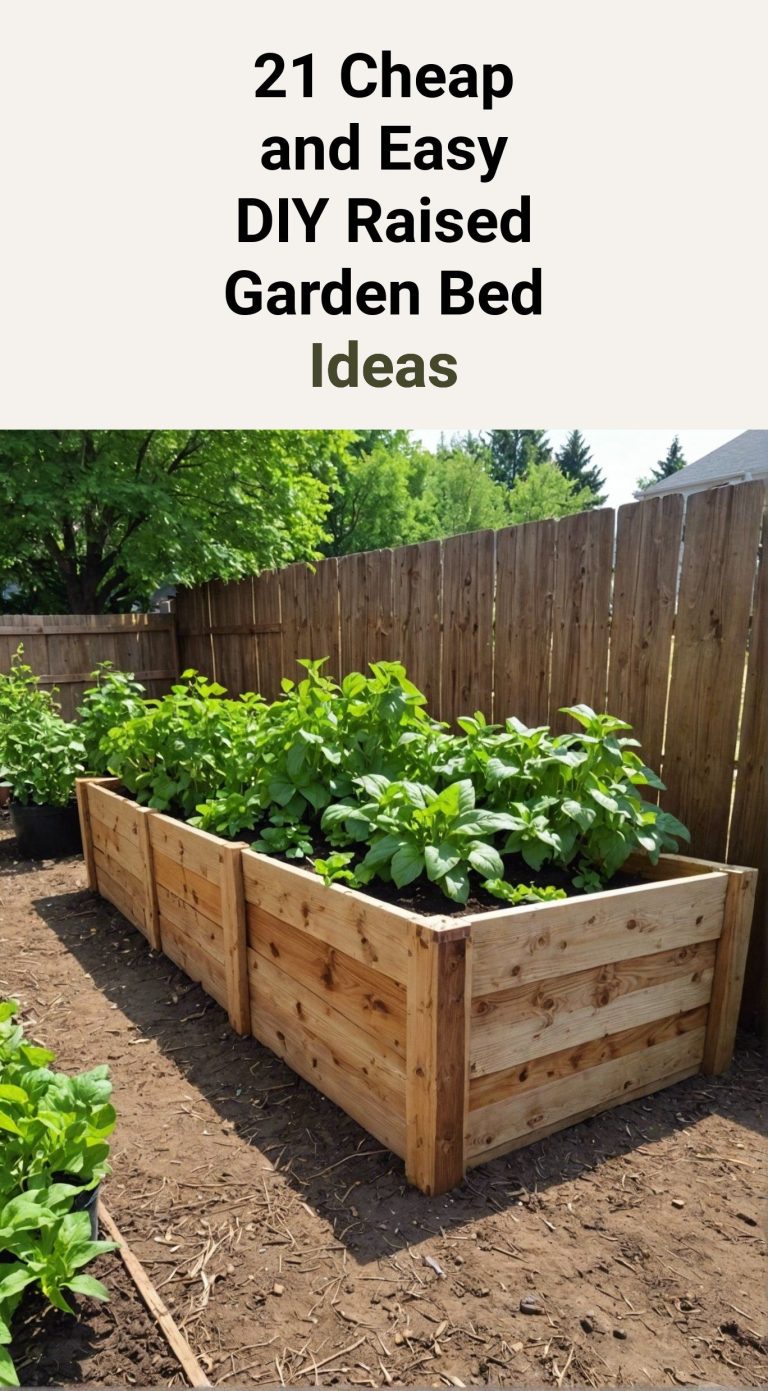
The easiest raised garden bed uses untreated cedar or pine boards, exterior screws, and a level area with at least six hours of sun. Cut four boards, join the corners with galvanized screws, place the frame on the soil, and fill it with a mix of compost, topsoil, and coarse material. A 4-by-8-foot bed that is 12 inches deep holds about 32 cubic feet of soil.
A beginner can build a basic bed in two to four hours. The frame may cost $60 to $180, depending on the wood and size. Soil often costs another $80 to $180. You can spend less by using shorter boards, local compost, or reclaimed lumber that has not been treated with toxic chemicals.
The key is to keep the bed narrow enough to reach the center. A 3-foot-wide bed works well from one side. A 4-foot-wide bed works well from both sides. Avoid beds wider than 4 feet unless you add a path or access from inside the bed.
Choose the right size, site, and layout
A raised bed works best when you plan the location before you buy wood. The site affects sunlight, drainage, watering, winter access, and how easy it is to harvest. Moving a full bed later is almost impossible.
Pick a sunny location
Most vegetables need six to eight hours of direct sun each day. Tomatoes, peppers, cucumbers, squash, beans, corn, and eggplant perform best in full sun. Leaf crops such as lettuce, spinach, kale, and arugula can manage with four to six hours, especially in hot climates.
Watch the site for a full day if possible. A place that looks sunny at 9 a.m. may sit in shade by 3 p.m. Avoid areas under large trees because tree roots steal water and nutrients. Falling leaves can also raise maintenance and attract slugs.
Keep the bed close to water
Place the bed near a hose, rain barrel, or irrigation line. Carrying watering cans across a yard becomes tiring after a few hot weeks. In my garden, the beds farthest from the spigot were the first ones to dry out and the last ones to receive care.
Do not place the bed where water pools after rain. Raised beds drain better than ground soil, but a flat, soggy site can still cause root rot. A gentle slope is fine if you level the frame with soil or small wood shims.
Use a practical width and height
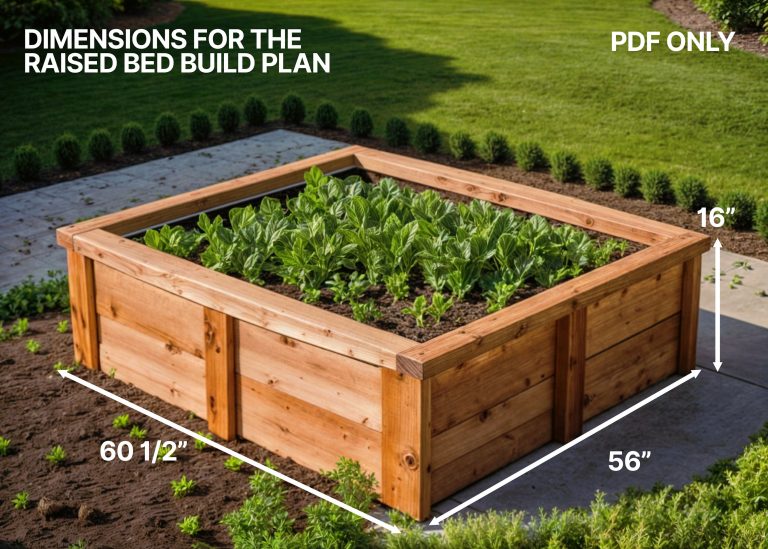
A 4-by-8-foot bed gives 32 square feet of growing space. It can hold a large crop of salad greens, herbs, carrots, onions, beets, and several tomato plants. A 4-by-4-foot bed is easier to build and costs less, so it suits first-time gardeners.
Use an 8-inch bed for shallow-rooted plants. Use 12 to 18 inches for tomatoes, carrots, parsnips, potatoes, and crops grown over compacted soil. A taller bed also helps gardeners who have back or knee pain.
| Bed size | Soil volume at 12 inches deep | Good use |
|---|---|---|
| 3 × 6 feet | 18 cubic feet | Herbs, greens, and compact crops |
| 4 × 4 feet | 16 cubic feet | Small yards and beginner gardens |
| 4 × 8 feet | 32 cubic feet | Mixed vegetable production |
| 4 × 12 feet | 48 cubic feet | Large family garden with clear paths |
These volumes assume the bed is filled to a full 12-inch depth. Soil settles after watering, so buy about 10 percent more than the exact calculation suggests.
Leave room for paths
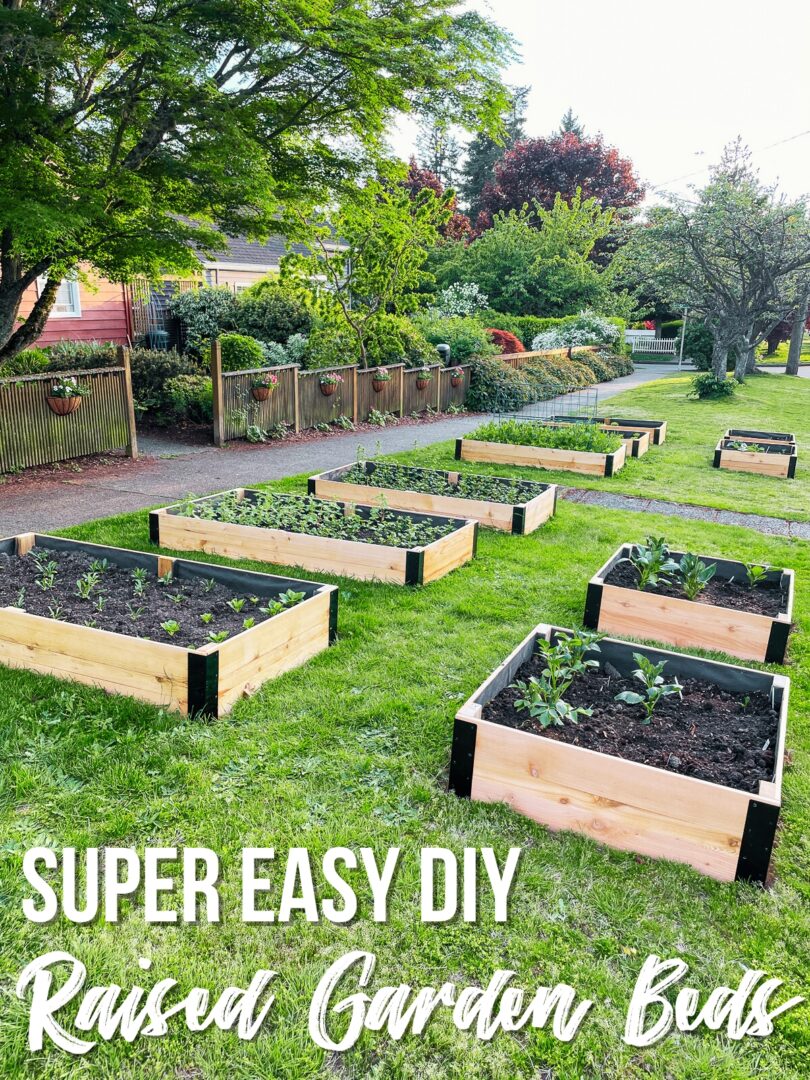
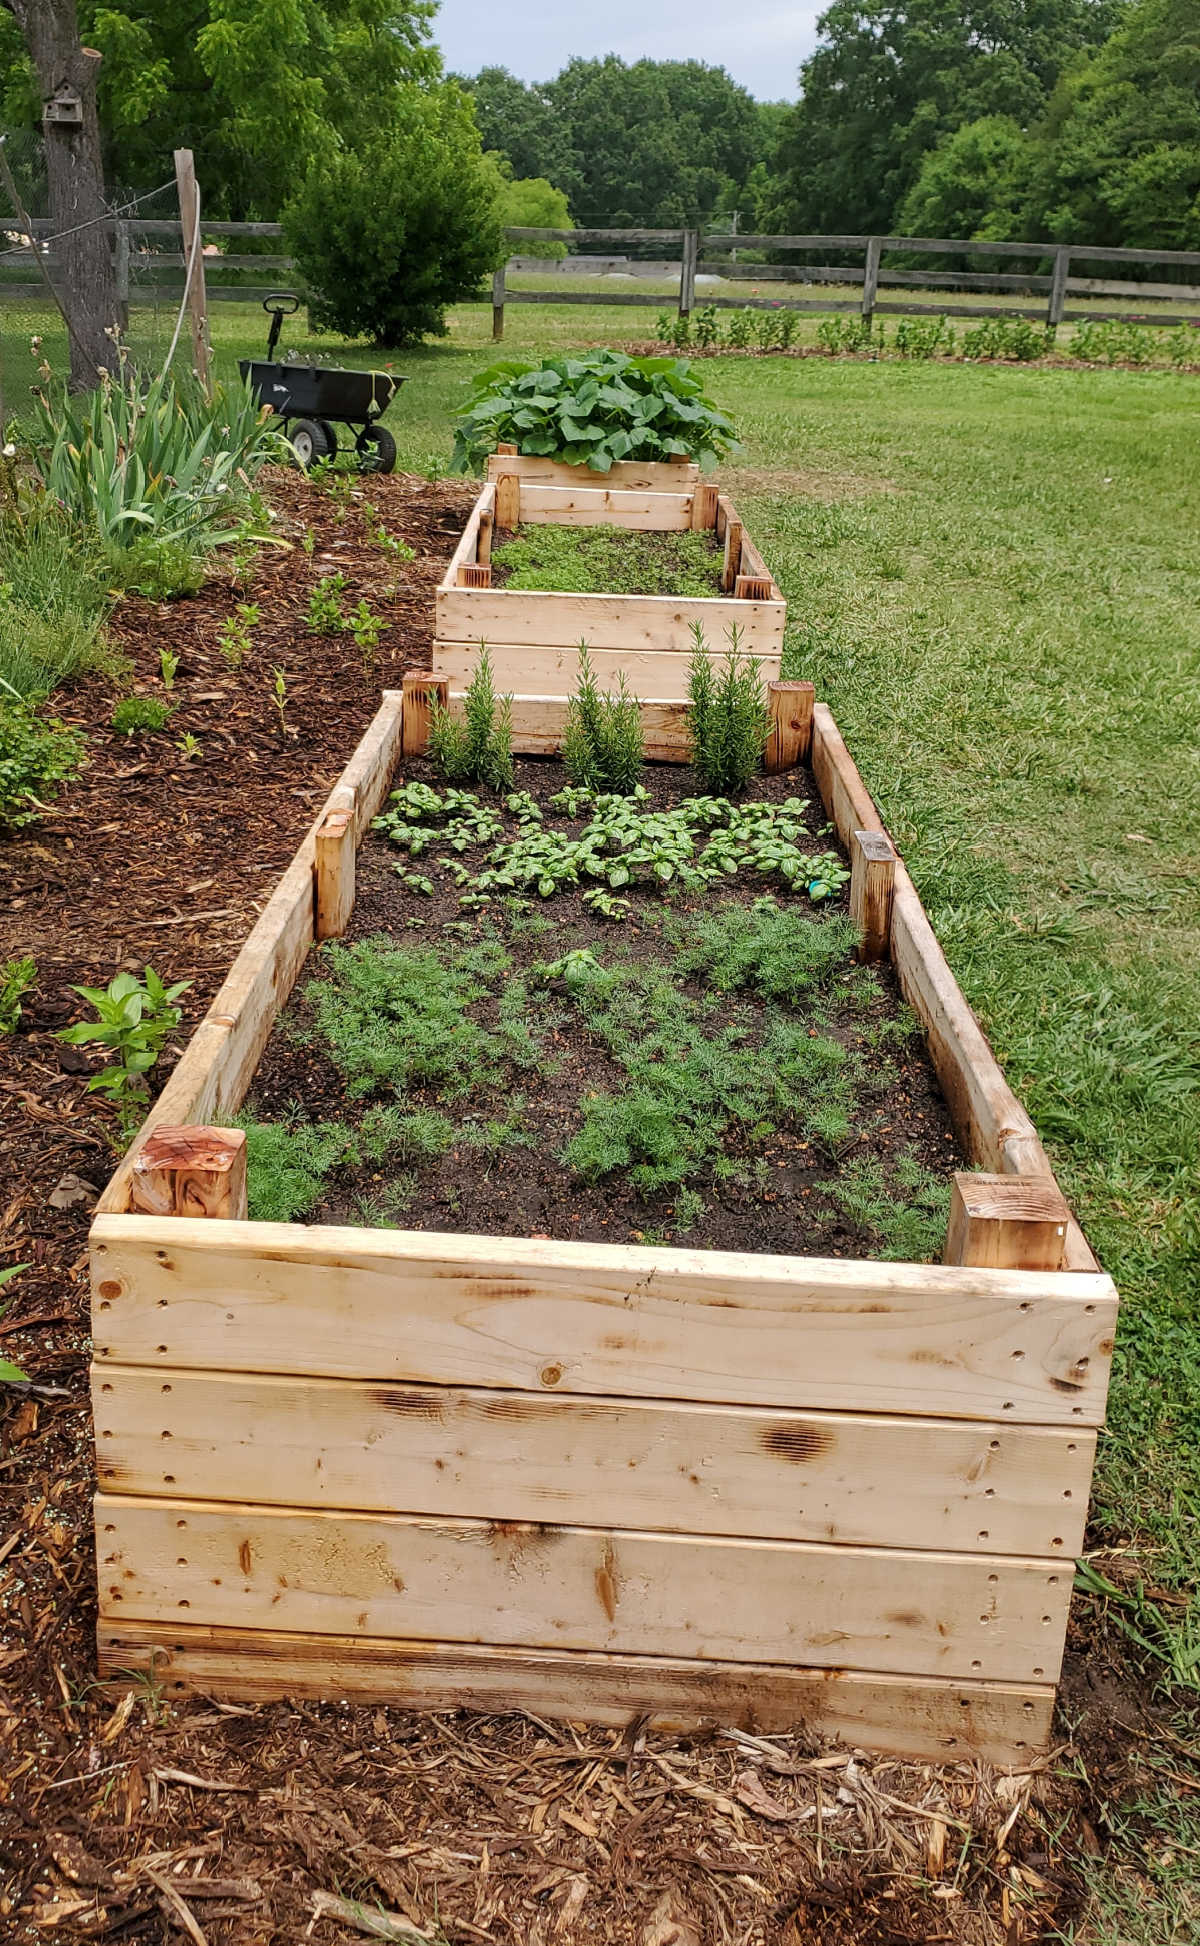
Leave at least 24 inches between beds. Thirty-six inches feels much better if you use a wheelbarrow. Grass paths need more care than mulch paths, but they look neat and stay firm.
Wood chips, straw, shredded leaves, gravel, and landscape fabric can all work as path materials. I prefer 3 to 4 inches of wood chips because they reduce mud and weeds without creating a hard surface.
Gather tools and materials before you build
The easiest raised garden bed project uses straight boards, a drill, and a level. You do not need a table saw or complicated joinery. Measure twice, cut once, and pre-drill near board ends to prevent splitting.

| Item | Amount for a 4 × 8-foot bed | Notes |
|---|---|---|
| 2 × 6-inch boards, 8 feet long | 4 | Makes a 12-inch-tall frame |
| Exterior screws, 3 inches | 16–24 | Use coated or galvanized screws |
| Drill and driver bit | 1 each | A cordless drill is convenient |
| Hand saw or circular saw | 1 | Needed only if cutting boards |
| Level and tape measure | 1 each | Helps keep the frame square |
| Compost and topsoil | About 32 cubic feet | Add extra for settling |
| Cardboard or newspaper | Optional | Smothers grass under the bed |
| Wheelbarrow and shovel | 1 each | Makes filling much faster |
A 2-by-6 board is not exactly 2 inches by 6 inches. Its real size is about 1 1/2 by 5 1/2 inches. Four boards stacked into a single frame create a wall close to 6 inches high, not 12 inches. For a 12-inch bed, use two boards on each side or buy 2-by-12 boards.
I often use two 2-by-6 boards because they are easier to carry and less likely to warp than a long 2-by-12. The tradeoff is more screws and a small seam between boards.
Select safe, durable lumber
Untreated cedar is a strong choice for raised beds. Western red cedar resists decay and remains light, but it can be expensive. Eastern red cedar lasts well in many climates but may be harder to find in wide boards.
Untreated pine costs less and can last three to seven years, depending on rainfall, soil contact, and drainage. Cedar may last eight to fifteen years. In wet USDA Zones 5 through 8, the lower ends of those ranges are more realistic if the boards sit directly on damp soil.
Avoid old railroad ties, unknown salvaged lumber, and wood with an oily smell. Older treated lumber may contain chemicals that you do not want near edible crops. Modern residential pressure-treated wood uses safer preservatives than older products, but many gardeners still choose untreated cedar for peace of mind.
Choose the right screws
Use 3-inch exterior-rated screws with a corrosion-resistant coating. Deck screws work well. Galvanized screws are useful in wet climates. Standard indoor drywall screws rust quickly and can snap under pressure.
Do not use nails if you want easy repairs. Nails can hold a frame, but screws make it easier to replace one rotted board later. Pre-drill holes about 1/8 inch smaller than the screw shaft near each board end.
Prepare the ground before assembling the frame
Ground preparation takes more time than most people expect. A frame placed on uneven grass can twist, leave gaps, and lose soil during heavy rain. You do not need to dig a deep trench, but you should remove thick turf and large roots.

Mark the bed footprint
Set stakes at the four corners and run string around them. Measure the diagonals from corner to corner. Both diagonal measurements should match. If they do, your rectangle is square.
For a 4-by-8-foot bed, mark the outside edge first. Keep in mind that the actual outside size may change slightly based on board thickness and how you join the corners.
Remove grass and weeds
Cut the grass as short as possible. Remove sod with a flat shovel if the area has tough perennial grass, Bermuda grass, quackgrass, or creeping weeds. These plants can grow through loose soil and become hard to remove later.
For a low-maintenance setup, cover the soil with overlapping cardboard before placing the frame. Use plain brown cardboard with no glossy coating, tape, or colored ink. Wet it well so it stays in place.
Cardboard works best over annual weeds and lawn grass. It may not stop bindweed, horsetail, or aggressive rhizomes. For those weeds, remove the roots first and check the bed edges through the season.
Level the site
Use a shovel and hand rake to create a reasonably flat base. Check the soil in several directions with a 2-foot level. A bed can tolerate a slight slope, but one corner should not sit several inches lower than the rest.
Do not bury the wood deep unless you use rot-resistant posts. Buried boards stay wet and decay faster. Set the frame on the ground, then use soil or gravel outside the lower edge to close small gaps.
💡 Pro Tip: Place a narrow strip of gravel under the outside edges of the frame in wet regions. It improves drainage and keeps soil from staying against the bottom board.
Assemble the raised garden bed step by step
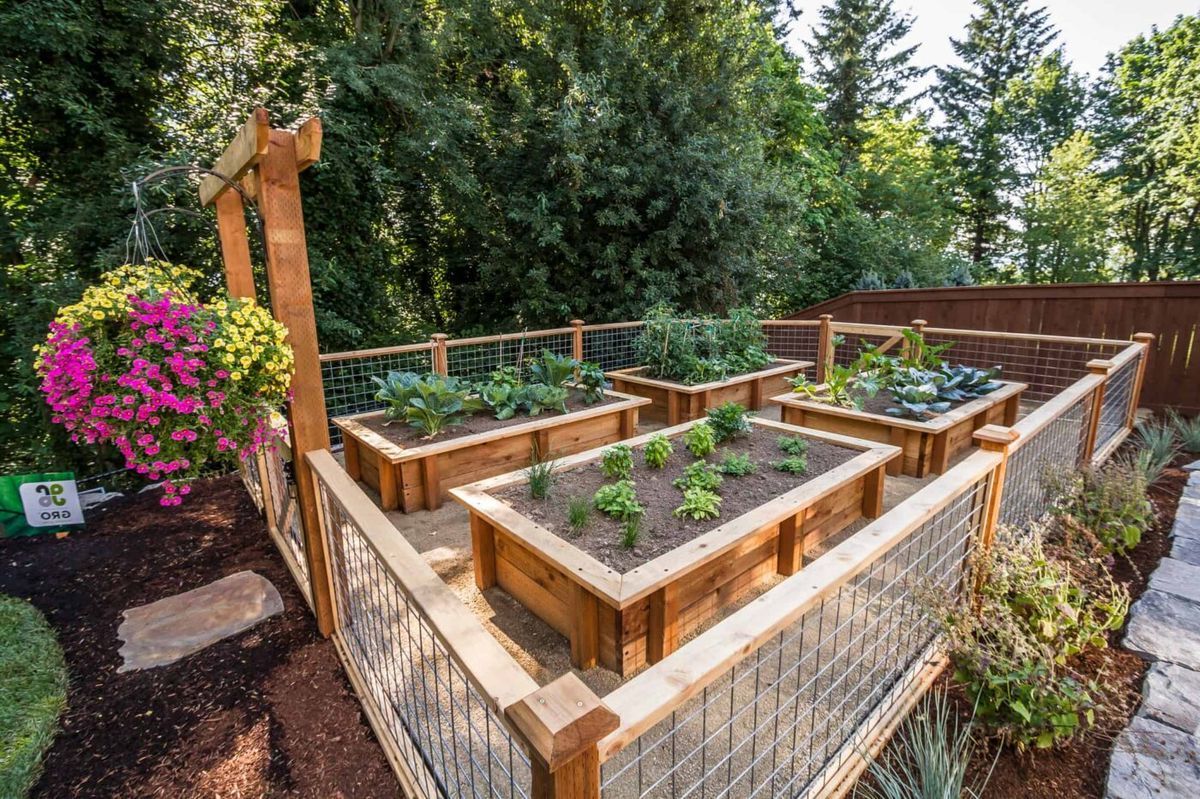
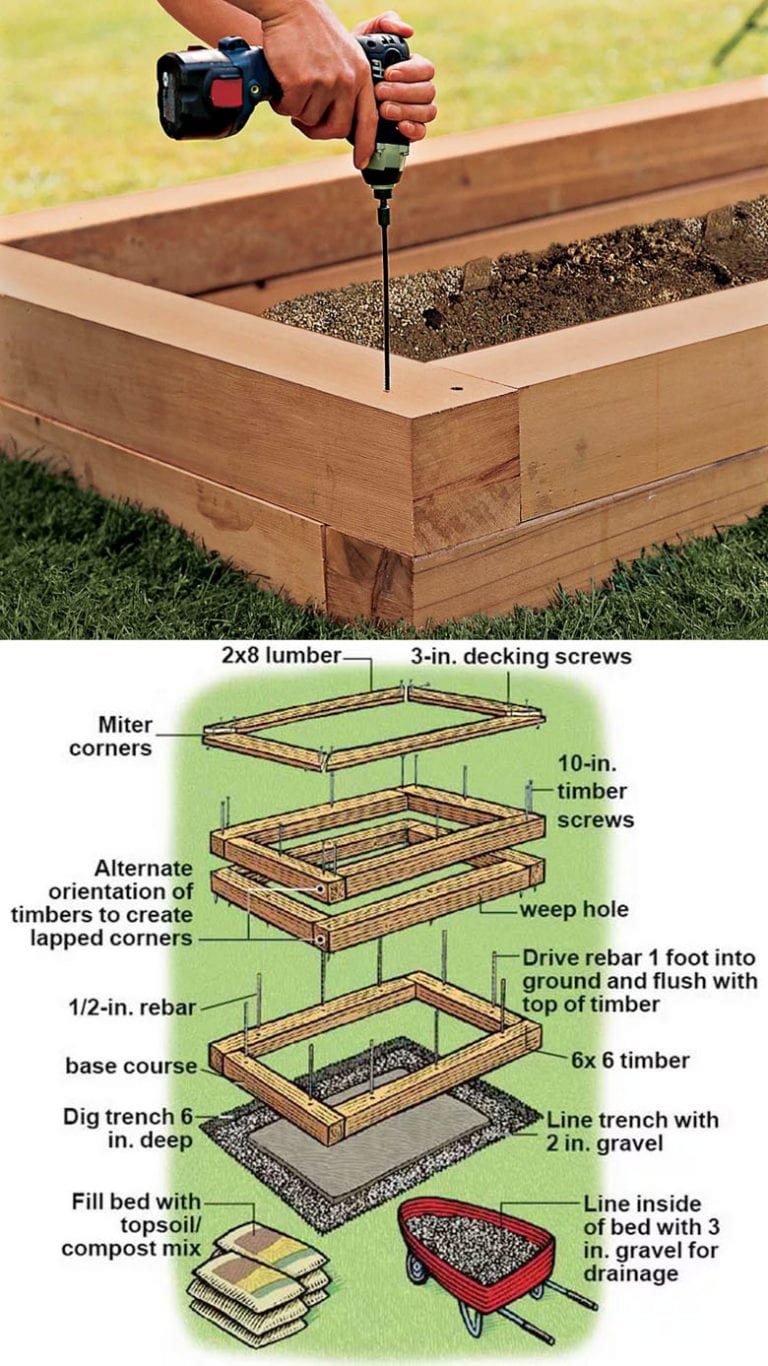
A basic frame has four sides and four square corners. Build it on flat ground, then move it into place if you can. A 4-by-8-foot cedar frame is light enough for two adults before you add soil.
1. Cut and label the boards
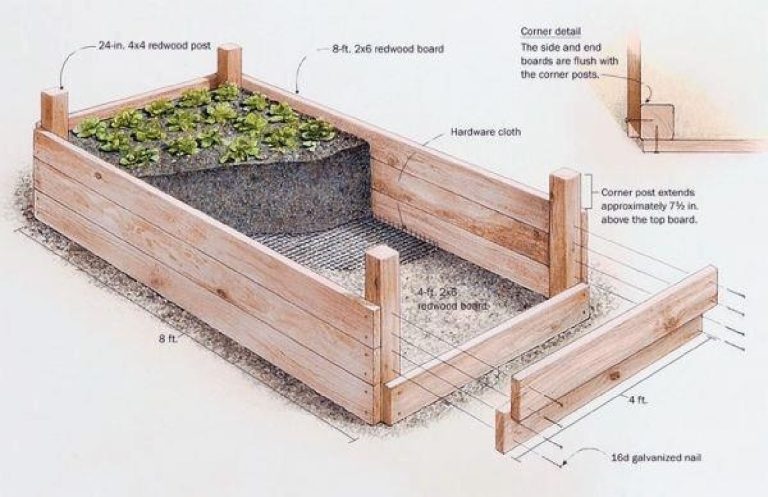
For a simple 4-by-8-foot frame, use two 8-foot boards for the long sides. Cut four 4-foot boards for the ends if you are building a single 6-inch-high frame.
For a 12-inch-high frame, build two matching layers. Label the boards “north,” “south,” “east,” and “west,” or mark them with pencil. Clear labels prevent you from turning the second layer the wrong way.
If your boards have a slight bow, face the crown outward. The screws will pull the boards toward the frame as you join them. Avoid boards with deep cracks, large knots near the ends, or severe twisting.
2. Pre-drill the corners
Stand one end board inside or outside the long board, then hold the joint square. Drill two pilot holes through the long board and into the end grain of the short board.
Place one screw about 1 inch from the top and another about 1 inch from the bottom. Keep the screws at least 1 inch from the board edge. This spacing reduces splitting.
3. Drive the exterior screws
Drive the screws until the heads sit flush with the wood. Do not bury them deeply. A deep hole collects water and can weaken the board.
Check the corner with a square after the first screw. The joint may shift when you drive the second screw. A helper can hold the boards, but a clamp also works.
4. Add the second course
If you want a 12-inch bed from 2-by-6 boards, place the second course directly on top of the first. Stagger the corner joints so the seams do not line up. This makes the frame stronger and limits soil leaks.
Use screws every 16 to 24 inches along long sides. Add at least two screws at each corner. For an 8-foot bed, a center brace can stop the long boards from bowing outward.
5. Install a center brace on wide beds
A 4-foot-wide bed usually does not need a brace. A bed that is 6 feet wide or longer should have one. Use a treated or cedar board across the center, or connect the opposite walls with a galvanized threaded rod.
The brace matters most when the bed is tall. Wet soil is heavy. One cubic foot can weigh 40 to 80 pounds, depending on moisture and soil texture. A full 4-by-8-by-1-foot bed can hold more than half a ton of material.
6. Set the frame in place
Move the frame onto the prepared area. Check the level from side to side and end to end. Add or remove soil under low corners until the frame sits firmly.
Do not worry if the frame is not perfect to the millimeter. A small variation will not harm plants. The goal is a stable frame that holds soil without large gaps.
7. Secure tall beds
Beds taller than 18 inches need extra support. Use vertical corner posts inside the frame, or drive 2-by-2 stakes outside the walls. Attach the boards to the posts with exterior screws.
A tall bed also needs strong side walls. Thin fence boards may bow or fail under the weight of wet soil. Use structural lumber, landscape timbers, or a manufactured metal bed rated for deep soil.
Fill the bed with healthy soil
The best raised bed soil drains well, holds water, and contains enough organic matter for strong roots. Do not fill a bed with pure compost. Pure compost can shrink, dry quickly, hold too much water, or release excess nutrients.

Use a simple soil blend
A practical blend contains about 60 percent screened topsoil, 30 percent finished compost, and 10 percent aeration material such as aged pine bark or coarse vermiculite. Many gardeners use an equal mix of topsoil, compost, and potting soil, but bagged potting soil becomes costly in large beds.
For a 32-cubic-foot bed, a 60-30-10 blend equals about 19 cubic feet of topsoil, 10 cubic feet of compost, and 3 cubic feet of bark or similar material. You can adjust the mix based on your native soil and climate.
| Soil ingredient | Main purpose | Amount in a 32-cubic-foot bed |
|---|---|---|
| Screened topsoil | Structure and mineral content | About 19 cubic feet |
| Finished compost | Organic matter and nutrients | About 10 cubic feet |
| Aged pine bark or coarse material | Air space and drainage | About 3 cubic feet |
In sandy areas, add more compost to improve water retention. In heavy clay, add compost and pine bark, but do not add large amounts of sand. Clay mixed with a little sand can form a dense, brick-like soil.
Test the soil before adding fertilizer
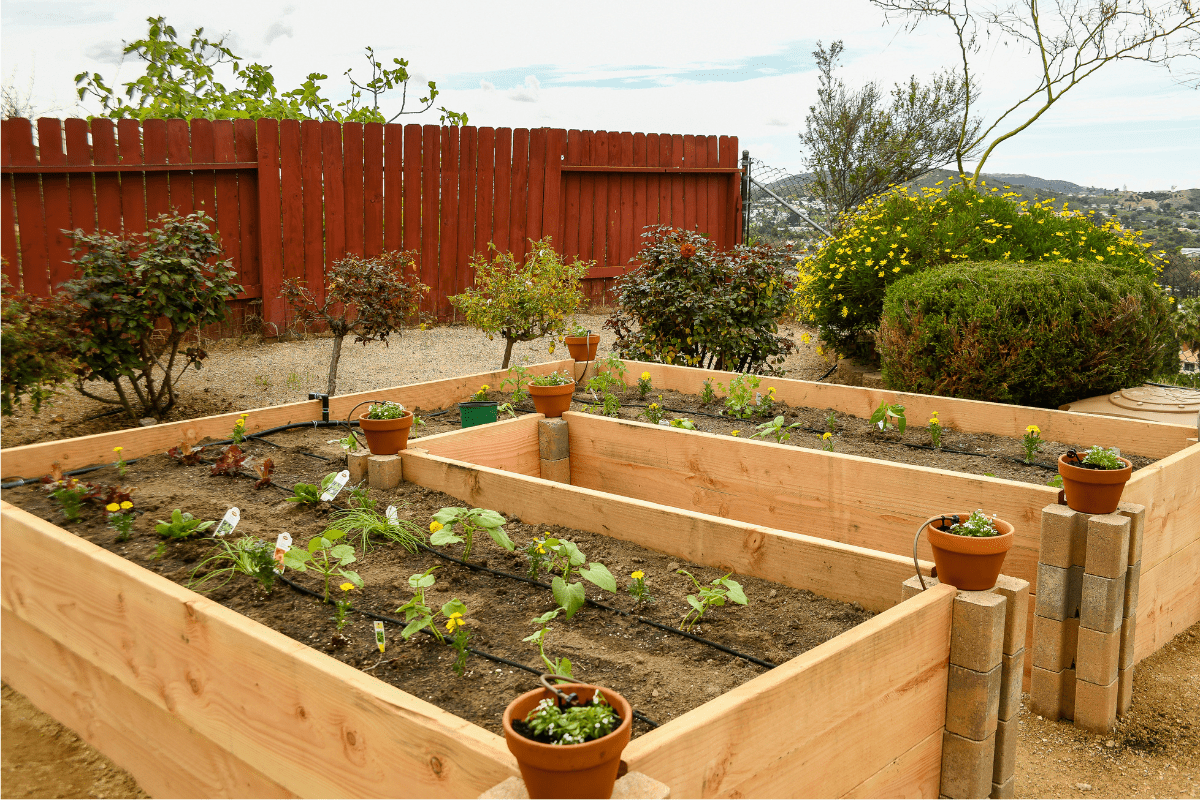
A soil test gives you pH and nutrient levels. Most vegetables grow well in soil with a pH between 6.0 and 7.0. Blueberries need a much lower pH, often 4.5 to 5.5, so they usually deserve their own container or bed.
Do not add lime, sulfur, bone meal, or strong fertilizer without a test. Compost often supplies enough phosphorus and potassium for the first season. If the test shows low nitrogen, use a gentle organic fertilizer such as 5-3-4 at the label rate.
Fill in layers and water as you go
Add soil in 4- to 6-inch layers. Lightly water each layer before adding the next one. This removes large air pockets and helps the mix settle evenly.
Fill the bed to within 1 or 2 inches of the top. Soil will settle after several rains and watering cycles. Top it up with compost and soil after four to six weeks.
Do not line the bottom with plastic
Plastic blocks drainage and can create a wet root zone. It also becomes brittle and hard to remove. A cardboard layer over grass is fine, but leave the rest of the bottom open to the soil below.
Hardware cloth can help exclude voles and moles. Place 1/4-inch galvanized hardware cloth under the frame before filling it. Overlap seams by at least 6 inches and bend the edges upward along the inside walls.
Plant the bed using the right spacing
Raised beds work well with intensive planting because you do not need walking rows inside them. Space plants based on mature size, not the size of the seedling.
Use square-foot spacing with caution
Square-foot gardening can help beginners plan crops. You might grow one tomato per 4 square feet, nine bush beans per square foot, or sixteen radishes per square foot. But airflow matters more than a strict chart.
In humid areas such as the Southeast, give tomatoes, cucumbers, and squash extra space. Crowded leaves stay wet and increase the risk of early blight, powdery mildew, and downy mildew.
Match plants to the season
Cool-season crops include lettuce, peas, spinach, kale, broccoli, carrots, radishes, and onions. Warm-season crops include tomatoes, peppers, eggplant, basil, cucumbers, beans, and summer squash.
In USDA Zones 3 through 5, wait until the danger of hard frost passes before planting tomatoes and peppers. In Zones 8 through 10, leafy greens may grow from fall through spring, while summer heat can stop lettuce from forming good heads.
Combine crops with care
Good bed companions include basil near tomatoes, dill near cabbage-family crops, and alyssum near vegetables to attract hoverflies and other pollinators. Marigolds add color and may attract beneficial insects, but they do not form a magic pest barrier.
Avoid planting mint directly in a raised bed. It spreads through underground stems and can take over within one season. Grow mint in a pot placed near the bed instead.
Water and maintain the bed through the season
Raised soil warms early and drains faster than ground soil. That helps roots in spring, but it also means the bed may need more water during hot weather.

Water deeply instead of lightly
Water when the top 1 to 2 inches of soil feels dry. Apply water slowly until the soil is moist 6 to 8 inches down. A soaker hose or drip line works better than a sprinkler because it keeps leaves dry.
New beds may need water every day for the first week if the weather is hot. After roots establish, two deep waterings per week may work in mild weather. During a heat wave, tomatoes and cucumbers may need water daily.
| Season or condition | Typical watering pattern | What to check |
|---|---|---|
| Cool spring | Once or twice weekly | Soil moisture 2 inches down |
| Warm summer | Two to four times weekly | Wilting at midday and dry soil |
| Heat wave | Daily or as needed | Root-zone moisture 6 to 8 inches down |
| Rainy period | Pause and inspect | Standing water and yellow leaves |
These are starting points, not fixed rules. Sandy mixes dry faster than compost-rich loam. Mulch can cut water loss and keep roots cooler.
Add mulch after the soil warms
Apply 1 to 3 inches of shredded leaves, straw, untreated grass clippings, or fine wood chips. Keep mulch 2 inches away from tomato stems and other plant crowns. Thick, wet mulch touching stems can encourage rot and shelter slugs.
Do not use fresh wood chips as a thick soil amendment. They can tie up nitrogen while they decompose. Aged chips work well on the soil surface and in garden paths.
Fertilize based on plant needs
Leafy crops often need more nitrogen. Fruiting crops need steady nitrogen but also adequate phosphorus and potassium. Too much nitrogen creates large leaves and few tomatoes, peppers, or flowers.
Side-dress heavy feeders with compost or a balanced organic fertilizer during the growing season. A product labeled 4-4-4 or 5-3-4 is less likely to burn roots than a concentrated synthetic product when used correctly.
Watch for common pests
Raised beds can still attract aphids, cabbage worms, flea beetles, slugs, cutworms, squash bugs, and tomato hornworms. Inspect the undersides of leaves twice each week. Early action is easier than trying to rescue a badly damaged crop.
Hand-pick large pests. Use row cover over young brassicas to block cabbage moths. Remove diseased leaves and dispose of them away from the compost pile if the disease spreads quickly.
Fix common raised bed problems
Most raised bed problems come from poor soil, weak construction, overwatering, or a bad site. The symptoms often point to the cause.

| Problem | Likely cause | Practical fix |
|---|---|---|
| Soil dries within one day | Sandy mix, low organic matter, strong sun | Add compost and 2 inches of mulch |
| Plants turn yellow | Poor drainage, low nitrogen, or root stress | Check moisture before fertilizing |
| Boards bow outward | Bed is too wide or too tall | Add a brace or outside stakes |
| Soil leaks from corners | Frame is not square or joints have gaps | Add corner blocks and reset screws |
| Roots hit hard soil | Compacted ground below the bed | Loosen the base before filling |
| Slugs hide under mulch | Wet shelter and dense cover | Thin mulch and hand-pick at dusk |
Yellow leaves do not always mean the plant needs fertilizer. Waterlogged roots can turn yellow because they cannot take in oxygen. Check the soil with your finger before adding nutrients.

Correct soil that settles too much
If the soil level drops more than 3 inches, the mix may contain unfinished compost, wood, or too much loose organic matter. Add screened topsoil and finished compost. Avoid refilling with pure compost.
A small amount of settling is normal. Organic matter breaks down, and the soil structure improves. Top-dress the bed each spring rather than replacing all the soil.
Stop water from washing out the bed
A bed on a slope may lose soil during heavy rain. Level the frame, add a border of wood chips, and install a shallow swale above the bed if runoff flows toward it.
You can also attach a thin strip of cedar or plastic along the lower outside edge. This acts as a splash guard. Do not seal the bed so tightly that water cannot drain.
⚠️ Warning: Never burn or bury painted, stained, or chemically treated lumber in a garden bed. Unknown wood may contain preservatives or heavy metals that can move into the soil.
Repair rotten boards
The bottom boards usually fail first because they stay close to wet soil. If only one board is damaged, remove the soil beside it, unscrew the board, and replace it with cedar or another rot-resistant board.
Do not wait until the wall collapses. A small repair can take an hour. Rebuilding a full frame with plants growing inside can take most of a day.
Learn how long a raised bed lasts
A raised bed can last from three years to more than fifteen years. Wood type, climate, drainage, soil contact, and construction quality matter more than the brand name.

Untreated pine may last only three to five years in a wet climate. Cedar often lasts eight to fifteen years. Galvanized steel beds can last twenty years or more, but the coating may eventually rust at cut edges or fasteners.
Plastic composite beds resist rot but may cost more. Stone, brick, and concrete last the longest, yet they require more labor and often need a firm foundation.
| Bed material | Common service life | Main limitation |
|---|---|---|
| Untreated pine | 3–7 years | Rots sooner in wet soil |
| Cedar or redwood | 8–15 years | Higher cost |
| Galvanized steel | 15–30 years | Can heat soil in hot, dry sites |
| Composite boards | 10–25 years | More expensive and may flex |
| Brick or stone | 25+ years | Heavy, costly, and harder to change |
These ranges vary by region. A cedar bed in rainy Oregon may age faster than one in dry Colorado. Keep boards dry where possible, use quality screws, and repair small damage early.
Inspect the bed each season
Check the frame in early spring and after major storms. Look for split boards, loose screws, bulging walls, ant nests, and soil erosion. Press each corner with your hand. Movement suggests a loose joint or weak post.
Check the soil level and add compost if needed. Inspect irrigation lines for leaks. Remove old plant debris because dead stems can shelter pests and disease.
Prepare for winter
In cold climates, leave healthy roots in place and cover bare soil with shredded leaves or compost. The cover protects soil from erosion and feeds soil life as it breaks down.
Remove diseased plants and fallen tomato or squash leaves. Do not compost plants with severe blight, powdery mildew, or bacterial disease unless your compost pile reaches a high, even heat.
In areas with heavy snow, tall beds may need extra corner support. Snow rarely breaks a sound frame, but freeze-thaw cycles can shift an unlevel bed.
Use a cheaper or different bed style when needed
A wood frame is easy, but it is not the only way to grow above ground. Your best option depends on budget, mobility, climate, and crop choice.
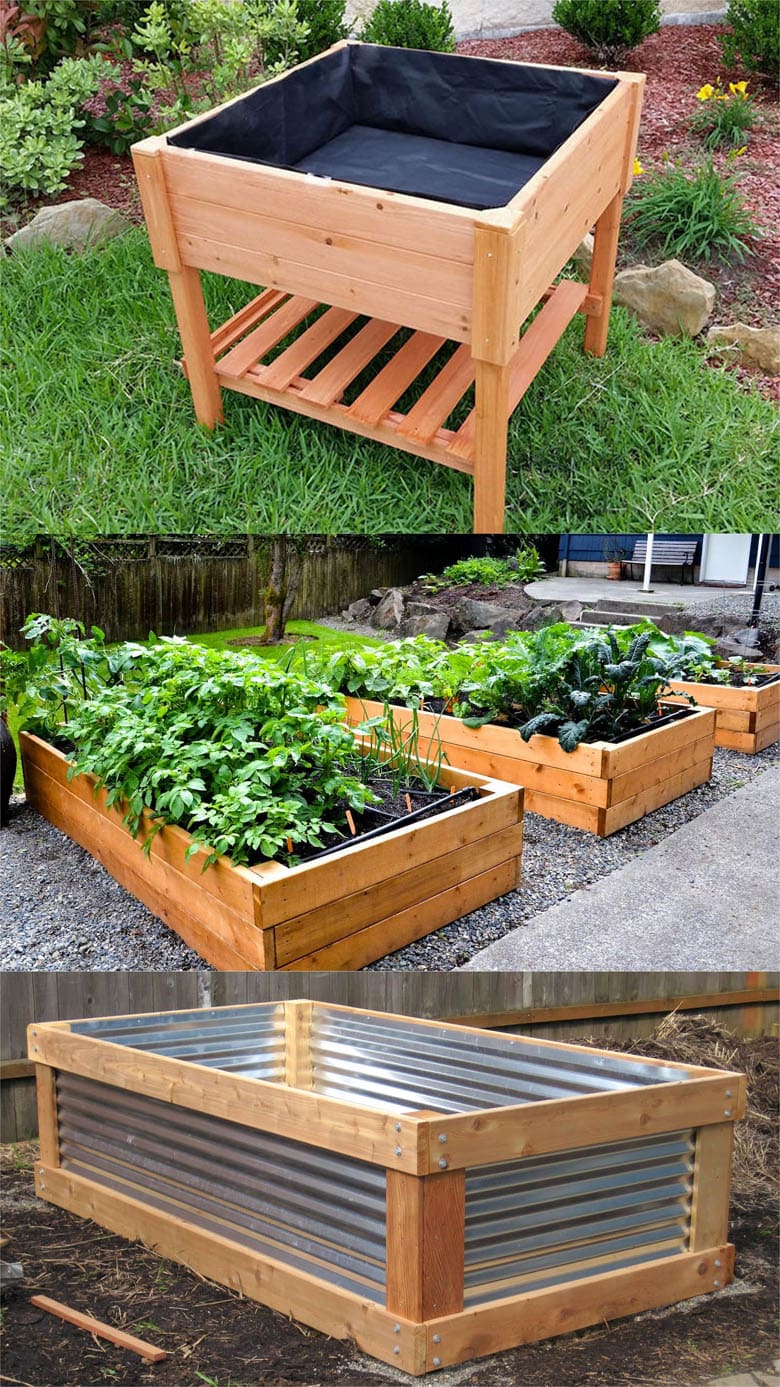
Choose a stock-tank bed
Galvanized stock tanks work well for small gardens and patios. They are durable and attractive, but they need drainage holes. Drill several 1/2-inch holes near the bottom and cover them with a small piece of mesh.
Metal heats faster than wood in full sun. In hot USDA Zones 8 through 10, place tanks where they receive morning sun and afternoon shade, or use a light-colored container.
Choose grow bags
Fabric grow bags cost little and need no construction. They work well for potatoes, tomatoes, peppers, herbs, and strawberries. They dry faster than raised beds, so they need regular watering.
Grow bags last one to five seasons, depending on fabric quality and sun exposure. They are a good choice for renters or people who may move soon.
Choose a ground-level no-dig bed
A no-dig bed uses layers of cardboard, compost, and mulch directly on the ground. It costs less and supports soil life, but it does not solve drainage or contaminated soil problems.
This method suits gardeners with healthy soil and enough space. A framed raised bed works better over compacted clay, poor fill, or a lawn with aggressive grass.
| Option | Best for | Main tradeoff |
|---|---|---|
| Wood raised bed | Long-term vegetable gardens | Wood eventually rots |
| Galvanized stock tank | Small spaces and neat design | Higher heat and cost |
| Fabric grow bag | Renters and movable crops | Dries out quickly |
| No-dig bed | Low-cost soil improvement | Less control over drainage |
| Brick or stone bed | Permanent landscape | High labor and cost |
The simplest choice for most first-time gardeners is an untreated cedar or pine frame. Pick a tank or grow bag when mobility, space, or long life matters more than low cost.
Know when to hire help
Most 4-by-8-foot beds are simple do-it-yourself projects. You may need help if the bed is very tall, built from stone, placed on a slope, or connected to permanent irrigation.
Hire a contractor or experienced carpenter when you need a retaining wall, drainage correction, electrical work, or a bed higher than 24 inches. A tall bed can create serious pressure on its walls. It may also need a foundation.
Ask for help moving long boards and heavy soil. A 32-cubic-foot bed can hold over 1,000 pounds of wet material. Safe lifting matters more than finishing the project in one day.
Personal lessons from building raised beds
My first raised bed was too wide. It was 5 feet across, and I could not reach the middle without stepping into the soil. That compacted the root zone and made weeding awkward. I rebuilt later beds at 4 feet wide, and the difference was immediate.
I also used too much compost in one early bed. The soil looked rich, but it shrank badly after winter and held water around the roots of my peppers. A mix with more screened topsoil and aged bark stayed more stable.
Another mistake was placing a bed beside a fence. The fence shaded the plants in the afternoon, and tomatoes leaned toward the open yard. Now I check sun patterns before assembling any frame.
After four weeks, a well-built bed should show stable walls, even soil moisture, and active plant growth. After two seasons, the main work is topping up the soil, replacing mulch, checking screws, and watching for board decay.
🌱 Beginner Note: Start with one 4-by-4-foot bed rather than building a full garden at once. A small bed teaches you how much water, compost, and time your site needs.
Common mistakes to avoid
Simple projects fail when small planning details get ignored. These mistakes cost more to fix after the bed is full.
- Building on compacted soil without loosening the base.
- Making the bed wider than 4 feet.
- Using indoor screws that rust.
- Filling the bed with pure compost.
- Planting aggressive mint or horseradish directly in the bed.
- Skipping drainage in a stock tank.
- Planting tomatoes too close together.
- Adding fertilizer without a soil test.
- Using contaminated or unknown reclaimed wood.
- Forgetting a path wide enough for a wheelbarrow.
- Placing the bed too far from a water source.
- Leaving diseased plant debris in the bed over winter.
🔧 Quick Fix: If your soil mix is too wet, stop watering for a few days, check that the bed drains freely, and add a thin layer of compost plus aged pine bark at the next refill. Do not mix large amounts of fresh sawdust into the root zone.
Frequently asked questions
Q: What is the easiest size for a first raised garden bed?
A: A 4-by-4-foot bed is the easiest starting size. It is simple to build, easy to reach from all sides, and holds about 16 cubic feet of soil at 12 inches deep. A 4-by-8-foot bed gives more space but needs more soil and may require a center brace.
Q: How deep should a raised bed be for vegetables?
A: Use at least 8 inches for lettuce, spinach, radishes, herbs, and many onions. Use 12 to 18 inches for tomatoes, carrots, parsnips, potatoes, cucumbers, and crops grown over hard ground. Deep soil also helps gardeners with limited mobility.
Q: Can I put a raised bed directly on grass?
A: Yes, but cut the grass short and cover it with overlapping plain cardboard first. The cardboard blocks light and breaks down over time. Remove aggressive perennial weeds before building because cardboard may not stop deep roots or creeping rhizomes.
Q: Should I put rocks in the bottom of a raised bed?
A: No. A layer of rocks does not improve drainage in most raised beds. It can create a perched water layer above the rock boundary. Keep the bottom open to the soil, or use galvanized hardware cloth if you need to block rodents.
Q: How much soil do I need for a 4-by-8-foot raised bed?
A: A 4-by-8-foot bed that is 12 inches deep holds 32 cubic feet of soil. Buy about 35 cubic feet to allow for settling and spillage. This equals roughly 1.3 cubic yards when purchasing bulk soil.
Q: Can I use garden soil in a raised bed?
A: You can use some garden soil, but do not fill the bed with heavy native clay or compacted soil alone. Mix it with compost and coarse organic material. A common starting blend is 60 percent topsoil, 30 percent finished compost, and 10 percent aged pine bark.
Q: Is pressure-treated wood safe for raised beds?
A: Modern pressure-treated wood uses preservatives that differ from older arsenic-treated lumber. Many gardeners use it for structural beds, while others choose untreated cedar for edible crops. Avoid old treated boards, railroad ties, painted wood, and unknown salvaged lumber.
Q: How often should I water a raised garden bed?
A: Check the top 1 to 2 inches of soil. Water deeply when that layer feels dry. New beds may need water daily during hot weather, while established beds often need two or three deep waterings per week. Soil type, mulch, wind, and plant size change the schedule.
Q: Why is my raised bed soil sinking?
A: Soil sinks as compost and other organic materials break down. Large air pockets can make the drop worse. Top up the bed with screened topsoil and finished compost, and avoid using pure compost as the main fill material.
Q: How do I stop a raised bed from bowing?
A: Add vertical corner posts, exterior stakes, or a center brace. Tall beds and beds wider than 4 feet create more outward pressure. Use strong boards and exterior screws, especially in a 12-inch or taller frame.
Q: Can I grow blueberries in a raised bed?
A: Yes, but blueberries need acidic soil with a pH near 4.5 to 5.5. A separate container or dedicated bed filled with acidic mix works better than changing the soil for an entire vegetable bed. Plant at least two compatible varieties for better fruit set.
Q: What should I plant first in a new raised bed?
A: Start with easy crops suited to your season. Radishes, lettuce, beans, kale, basil, bush cucumbers, and herbs give quick results. In warm weather, cherry tomatoes such as ‘Sungold’ are productive, but they need a cage and steady water.
Q: Do raised garden beds attract more pests?
A: Raised beds do not automatically attract more pests, but rich soil and dense crops can support them. Slugs, aphids, cabbage worms, flea beetles, and squash bugs may still appear. Use row covers, crop rotation, mulch control, and regular leaf checks.
Final advice for an easy raised bed
The easiest raised garden bed is not the most complex one. Build a 4-by-4 or 4-by-8-foot frame from untreated cedar or pine, keep it no wider than 4 feet, set it on a level site, and fill it with stable soil rather than pure compost.
Start small, grow plants suited to your USDA zone, and watch the bed for a full season before expanding. Good placement, safe lumber, reliable water, and healthy soil will matter far more than fancy corners or expensive accessories. Once the frame is built, the garden becomes a living project that improves with each season.