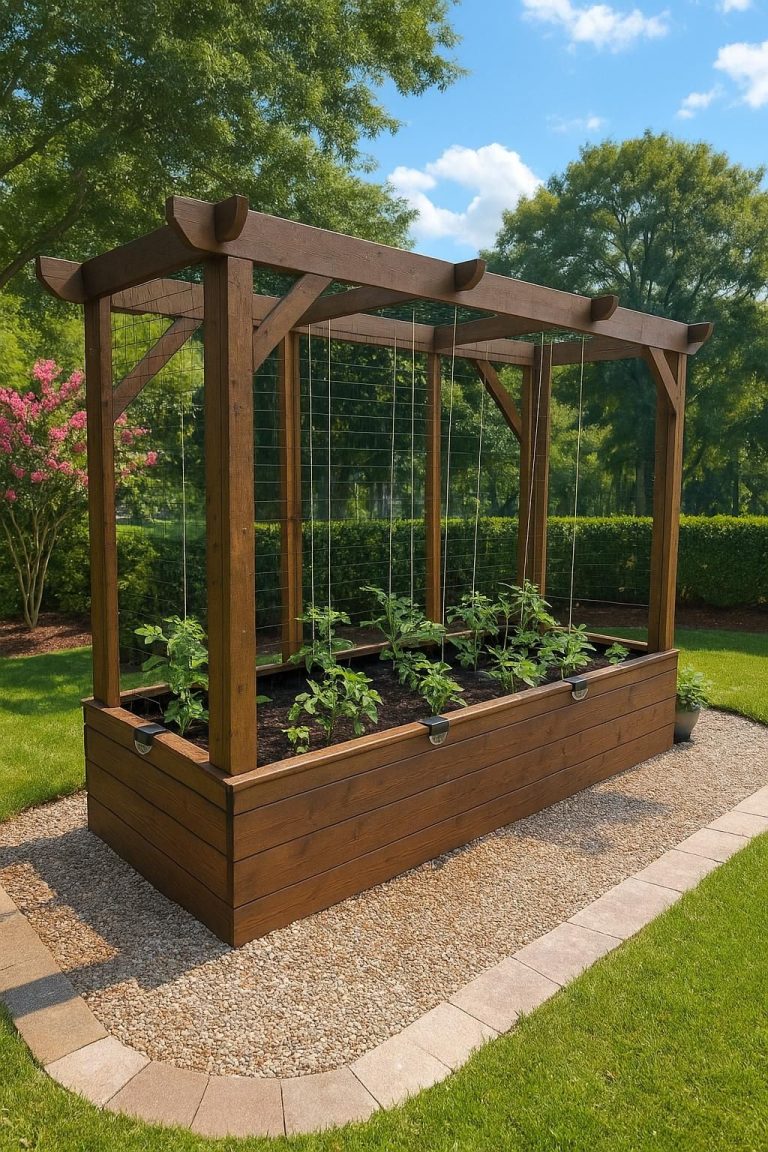
How To Build A Corner Flower Bed: Easy DIY Guide
A corner flower bed can turn an unused patch of yard into a bright, useful garden space. The corner may sit beside a fence, porch, driveway, deck, or house wall. With the right shape, soil, plants, and drainage, even a small area can support flowers from spring through fall.
The best corner flower beds look planned but not stiff. Start with sunlight, water flow, and mature plant size. Then choose a simple outline, improve the soil, and place tall plants in back with shorter plants toward the edge. This method works in small urban yards, large suburban gardens, and most USDA hardiness zones.
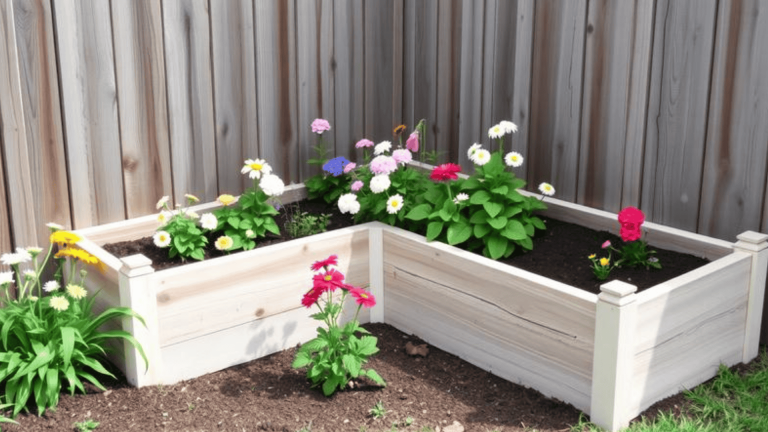
Quick answer: How do you build a corner flower bed?
To build a corner flower bed, mark a curved or triangular outline, remove grass and weeds, loosen the soil, add compost, and plant from tall in back to short in front. Choose plants that match the corner’s sunlight and drainage. Finish with 2 to 3 inches of mulch, then water deeply. A small bed often takes one weekend and costs about $50 to $250.

Plan the corner before you dig
The best way to build a corner flower bed is to study the space for one full day before choosing plants. Watch how sunlight moves across the ground. Check where rain collects, where roof water falls, and how close the bed will sit to paths, siding, fences, or tree roots.
A corner often has two different light zones. One side may receive six hours of sun while the other stays in afternoon shade. Soil can also change within a few feet, especially near a downspout or foundation.

Measure sunlight and moisture
Use these simple labels:
- Full sun: Six or more hours of direct sun
- Part sun: Four to six hours of direct sun
- Part shade: Two to four hours of sun
- Full shade: Less than two hours of direct sun
Check the soil after a normal rain. If water remains for more than a day, the site may need a drainage fix or plants that tolerate wet soil. If the soil turns hard and dry near a wall, mix in compost and use a deeper mulch layer.
Do not place a flower bed where water runs toward the house. Keep soil and mulch below siding, brick weep holes, and wood trim. A gap of 6 to 12 inches near the foundation helps reduce moisture and pest problems.

Decide how large the bed should be
A corner flower bed should be wide enough to hold mature plants but narrow enough to reach. A bed 4 feet deep works well for most homes. If you can reach only from one side, keep the depth near 3 feet.
For a corner between two fences, a triangle or quarter-circle shape may fit best. Along a house wall, a rounded wedge often looks softer than a straight rectangle. Use a garden hose to test the outline before you cut the edge.
| Bed shape | Good use | Common size |
|---|---|---|
| Triangle | Fence or wall corner | 5 by 5 by 7 feet |
| Quarter circle | Porch or deck corner | 4 to 8 feet wide |
| Curved wedge | House or driveway edge | 3 to 6 feet deep |
A simple shape makes mowing easier and gives plants room to spread. Avoid sharp points that become hard to weed or water.

Gather the right tools and materials
You do not need expensive equipment to build a corner flower bed. A sharp spade, hand trowel, rake, hose, measuring tape, and wheelbarrow will handle most small projects. For heavy clay or compacted soil, a digging fork works better than a small tiller.
I have built beds with basic hand tools and with a battery edger. The hand tools took longer but made it easier to protect tree roots and control the shape. A power edger such as the EGO Power+ 56V or Ryobi 40V can create a clean line, but it is not needed for a small bed.

| Tool or material | Use | Amount for a small bed |
|---|---|---|
| Spade or half-moon edger | Cut the bed outline | 1 |
| Digging fork | Loosen hard or clay soil | 1 |
| Compost | Improve soil structure | 1 to 2 cubic yards |
| Garden hose | Lay out the shape | 1 |
| Mulch | Protect soil and roots | 0.5 to 1 cubic yard |
| Gloves and safety glasses | Protect hands and eyes | 1 set |
Buy compost by the cubic yard when possible. Bags work for small beds, but the price rises quickly. One cubic yard covers about 108 square feet at 3 inches deep.

Choose edging based on your goal
Edging keeps grass from creeping into the bed. It also gives the corner a finished look. You can use a simple trench, metal edging, stone, brick, plastic edging, or treated wood.
A trench edge is inexpensive and looks natural. Dig a 4- to 6-inch-wide trench at a 45-degree angle. This method needs touch-up work once or twice each growing season because grass will slowly move back toward the bed.
Metal edging lasts longer and creates a crisp line. Steel and aluminum edging cost more, but they usually need less repair. Avoid thin plastic edging in areas where a string trimmer may hit it.

Mark and cut the flower bed outline
Marking the outline before removing grass prevents one of the most common mistakes: making the bed too large. Use a hose, rope, flour, or landscape marking paint. Step back from several angles and check how the shape looks from the street, porch, and main windows.
A curved line usually looks more natural than a rigid triangle. However, a triangular bed can work well in a tight fence corner. Match the shape to the lines already found in your yard.

Use a hose to test the shape
Lay the hose on the ground and adjust it until the curve looks balanced. Leave it in place for a day if you can. This lets you notice if the bed blocks a walkway, mower path, gate, or outdoor outlet.
Measure the widest part and the depth from the corner. Mark the final line with landscape paint. If you plan to install edging, mark the outside edge rather than the planting area.

Remove sod without wasting effort
Water the grass one day before digging if the soil is dry. Moist soil cuts more easily, while wet soil turns into sticky clumps and damages its structure.
Cut the sod into strips 12 to 18 inches wide. Slide the spade under each strip and roll it up. Shake off soil and place healthy sod in a bare patch, compost pile, or low area.
For a no-dig method, cover the grass with overlapping cardboard and add 6 to 8 inches of compost and soil. This method can work well, but the bed may settle several inches over the next few months. It also takes longer for roots to reach the native soil.

⚠️ Warning: Call 811 before digging in the United States. Utility lines may pass through a front, side, or backyard, even when no visible feature shows their location.
Improve the soil before planting
Most flower beds perform best in loose, well-drained soil with a pH between 6.0 and 7.0. Some plants need different conditions. Blueberries prefer acidic soil near pH 4.5 to 5.5, while lavender prefers sharp drainage and does poorly in heavy, wet ground.
Do not guess at serious soil problems. A basic soil test can show pH, phosphorus, potassium, and organic matter. Many county extension offices offer low-cost tests in the United States.

Test the soil texture
Squeeze a handful of moist soil. Sandy soil falls apart quickly. Clay soil forms a firm ribbon or ball. Loam holds its shape for a moment but breaks apart with light pressure.
Each soil type can grow flowers with the right changes. Sandy soil needs compost and regular mulch. Clay soil needs organic matter and care when wet. Do not work clay while it feels sticky, or you may create hard clods that last for years.

Add compost at the right rate
Spread 2 to 3 inches of finished compost over the bed. Mix it into the top 6 to 8 inches with a fork or spade. In an established bed, top-dress with 1 inch of compost each year instead of digging around roots.
Avoid adding large amounts of manure from an unknown source. Fresh manure can burn roots, add weed seeds, and contain high salt levels. Use aged compost from a trusted supplier.
| Soil problem | Useful amendment | What to avoid |
|---|---|---|
| Sandy soil | Compost and leaf mold | Heavy doses of clay |
| Heavy clay | Compost and shredded leaves | Working soil when wet |
| Low pH | Soil-test-based lime | Adding lime without a test |
| Poor drainage | Compost, raised soil, or drainage plan | Planting moisture-sensitive flowers |
Compost improves structure, but it cannot solve every drainage issue. If water sits against a foundation, fix the water path before planting.

🌱 Beginner Note: Do not fill the whole bed with bagged potting soil. Potting soil belongs in containers. In a flower bed, use native soil improved with compost.
Choose plants for the corner’s conditions
The right plants depend on sunlight, USDA hardiness zone, soil moisture, mature size, and the time you want to spend watering. A plant that thrives in coastal Oregon may struggle in a dry Texas summer, even if both gardens receive full sun.
Choose at least three plant heights. Use taller plants near the back or inside corner, medium plants in the middle, and low plants at the front edge. Repeating a few plant types creates a calmer design than buying one of everything.

Full-sun plant ideas
For six or more hours of sun, consider:
- Coneflower (Echinacea purpurea)
- Black-eyed Susan (Rudbeckia fulgida ‘Goldsturm’)
- Catmint (Nepeta spp.)
- Yarrow (Achillea millefolium)
- Salvia (Salvia nemorosa)
- Lavender (Lavandula angustifolia)
- Daylily (Hemerocallis spp.)
- Sedum, such as ‘Autumn Joy’
- Coreopsis (Coreopsis verticillata)
- Zinnia (Zinnia elegans)
These plants vary in hardiness. Lavender often struggles in humid zones 8 and 9 because wet roots and poor air movement lead to rot. Coneflower and black-eyed Susan handle a wider range of conditions once established.
Shade and part-shade plant ideas
For a north-facing corner or a site under trees, try:
- Hosta
- Coral bells (Heuchera spp.)
- Astilbe
- Foamflower (Tiarella cordifolia)
- Lungwort (Pulmonaria spp.)
- Japanese forest grass (Hakonechloa macra)
- Impatiens
- Begonia
- Ferns
- Hellebores
Tree roots create competition for water. In such places, add compost to the top layer and water slowly. Avoid digging deeply near established trees, since cutting large roots can harm the tree.
Build a plant layer plan
Place the plants in their nursery pots before digging. Use the mature width on the plant tag, not the current pot size. A 1-gallon perennial may look small now but fill a 24-inch space after two seasons.
| Plant layer | Approximate height | Examples |
|---|---|---|
| Back or corner | 3 to 6 feet | Little Bluestem, Joe-Pye weed, hydrangea |
| Middle | 1.5 to 3 feet | Coneflower, salvia, daylily |
| Front edge | 4 to 18 inches | Creeping thyme, alyssum, sedum |
Place shrubs only when the bed is deep enough for their roots and mature spread. A compact hydrangea can work in a large corner, but a full-size lilac will outgrow a narrow bed.
Plant the corner bed step by step
Planting works best on a cool, cloudy day or in the late afternoon. Avoid planting during extreme heat, frozen soil, or a stretch of strong wind. In most US regions, spring and fall offer easier conditions than midsummer.
The general rule is simple: plant at the same depth as the nursery container, water well, and mulch after the soil settles. Do not bury the crown of perennials or the trunk flare of shrubs.
1. Set plants in their pots
Arrange every plant before you dig. View the bed from the house and street. Turn pots so the fullest side faces outward.
Group plants in odd numbers, such as three, five, or seven. Repeat colors and textures rather than scattering every plant type across the bed.
2. Dig wide, not deep
Dig each hole two to three times wider than the root ball. Make the hole no deeper than the root ball. The plant should sit level with the surrounding soil.
If roots circle the outside of the container, loosen them with your fingers. For a badly root-bound plant, make three or four shallow cuts down the sides of the root ball.
3. Water each plant at the root zone
Fill the hole halfway with native soil, then water it. Let the water drain before filling the rest of the hole. Press the soil lightly around the roots to remove large air pockets.
Do not pack the soil hard with your boots. Compacted soil blocks air and water. A gentle hand press works better.
4. Add mulch after planting
Spread 2 to 3 inches of shredded bark, leaf mulch, or pine straw. Keep mulch 2 to 4 inches away from stems and trunks. A mulch volcano holds moisture against the plant and can invite rot, rodents, and insects.
Mulch reduces weeds, buffers soil temperature, and slows water loss. It will not replace watering during the first growing season.
5. Water on a simple schedule
Give new plants about 1 inch of water per week, including rain, unless the soil drains very quickly or the weather is unusually hot. Water slowly at the soil line. A soaker hose or drip line is more efficient than a sprinkler.
Check the soil with your finger. If the top 2 inches are dry, water deeply. If the soil is still wet, wait.
| Time after planting | Watering approach |
|---|---|
| First 1 to 2 weeks | Check daily; water when the surface begins to dry |
| Weeks 3 to 8 | Water deeply two or three times weekly as needed |
| After 8 weeks | Water during dry spells; adjust for plant type |
Plants in sandy soil may need more frequent water. Plants in clay may need less frequent but slower watering.
Maintain the bed through the seasons
A corner flower bed needs regular care, but the work is small when you keep up with it. The main tasks are watering, weeding, deadheading, pruning, checking mulch, and watching for pests or disease.
Do not cut every plant down in fall. Seed heads on coneflower, rudbeckia, and ornamental grasses feed birds and add winter interest. Cut diseased foliage and plants that collapse onto paths.
| Season | Main tasks | Watch for |
|---|---|---|
| Spring | Weed, add compost, divide crowded perennials | Slugs, cutworms, frost |
| Summer | Water, deadhead, inspect leaves | Aphids, powdery mildew, drought |
| Fall | Add mulch, remove diseased leaves, plant bulbs | Rodent damage, wet soil |
| Winter | Protect tender plants and shrubs | Salt spray, broken stems |
The best time to add mulch is late spring after the soil warms, or fall after the ground cools. In wet climates, avoid piling thick mulch against plants before winter.
Fertilize only when plants need it
Many perennials grow well with compost and no routine fertilizer. Too much nitrogen creates soft, leafy growth and fewer flowers. It can also increase aphids and make some plants flop.
If a soil test shows a need, use a slow-release fertilizer. A balanced product such as 10-10-10 may help in some beds, but the proper rate depends on the soil test and plant group. Follow the label.
Avoid fertilizer spikes in mixed beds. They place nutrients in small hot spots and can damage nearby roots.
Control weeds without harming flowers
Pull weeds when the soil is slightly damp. Small weeds are much easier to remove than mature weeds with seed heads. A stirrup hoe works well in open spaces, while a hand fork works around perennials.
Do not use a string trimmer near tree bark, plastic edging, or young shrubs. A trimmer line can remove bark in one pass. Use hand pruners or hand pulling near plant crowns.
Solve common corner flower bed problems
Most problems come from a mismatch between the site and the plant. A sun-loving flower will not bloom well in deep shade. A moisture-loving plant may wilt in sandy soil beside a hot wall.
Look at the pattern before treating the symptom. Yellow leaves across the whole bed may point to poor drainage, while yellow leaves on one plant may show root damage or nutrient stress.
| Symptom | Likely cause | Practical fix |
|---|---|---|
| Wilting with wet soil | Root rot or poor drainage | Reduce watering and improve drainage |
| Thin, weak growth | Too little light | Move or replace with shade plants |
| Brown leaf edges | Drought, salt, or wind | Deep-water and check nearby runoff |
| White leaf coating | Powdery mildew | Improve air flow and avoid overhead water |
| Chewed leaves | Slugs, beetles, or caterpillars | Inspect at dusk and hand-pick pests |
| Few flowers | Too much shade or nitrogen | Increase light or stop high-nitrogen feed |
Do not spray an insecticide simply because you see one insect. Many insects are pollinators or predators. Identify the pest first, then use the least harmful control that works.
Fix standing water
If water pools after rain, first check for compacted soil and blocked downspouts. Redirect roof water away from the bed. Do not bury a drainage problem under more soil and mulch.
For a small wet corner, choose plants such as cardinal flower, swamp milkweed, turtlehead, iris, or astilbe, depending on light and climate. For constant water against a foundation, consult a drainage professional.
Handle pests and disease
Aphids often gather on tender growth. Spray them with a strong stream of water in the morning and check again after a few days. Lady beetles, lacewings, and syrphid fly larvae may control them without help.
Powdery mildew looks like white dust on leaves. It becomes worse with crowded plants, shade, and poor air flow. Space plants correctly, water at the soil, and remove badly infected leaves.
Slugs hide under mulch, boards, and pots. Reduce hiding spots, water in the morning, and hand-pick slugs at dusk. Iron phosphate bait can help when used according to the label and kept away from pets and wildlife.
🔧 Quick Fix: If a flower bed looks sparse in its first year, do not fill every gap at once. Add temporary annuals, such as marigolds or alyssum, and wait to see how perennials spread after one full growing season.
My experience building corner beds
I built a small corner bed beside a cedar fence in USDA Zone 6b. The site received morning sun and afternoon shade. I used coral bells, catmint, white coneflower, dwarf fountain grass, and creeping thyme along the edge.
The first layout failed because I placed the catmint too close to the path. By July, it leaned over the walkway after rain. I moved it back 12 inches the next spring and used a low sedum at the edge instead.
The biggest surprise was the soil. It looked rich, but a simple test showed low organic matter and a pH near 5.6. Two inches of compost and a thin layer of shredded leaves improved growth more than a strong fertilizer did. After four weeks, the plants held water longer, and by the second season, the bed needed less watering.
Compare common flower bed construction methods
There is no single right way to build a corner bed. Your choice depends on budget, soil, time, and whether you want a permanent structure.
| Method | Advantages | Limitations |
|---|---|---|
| In-ground bed | Low cost and natural look | More weeds and soil work |
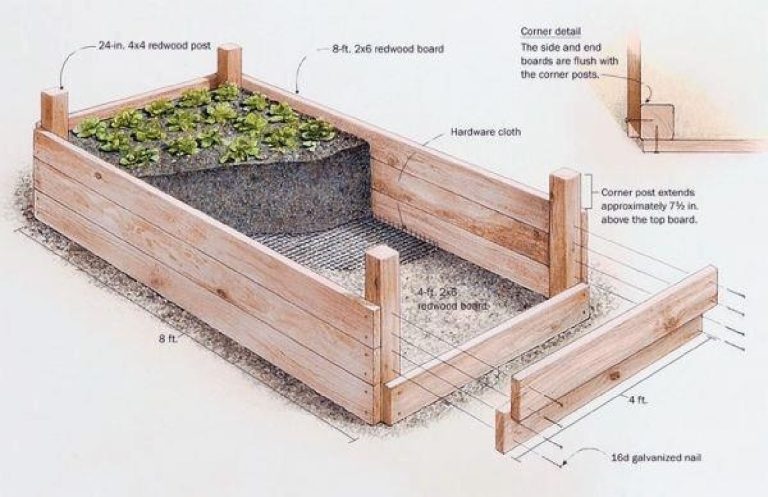
| Raised timber bed | Good drainage control and clear edges | Costs more and can rot |
| Stone-edged bed | Durable and attractive | Heavy labor and higher cost |
| No-dig cardboard bed | Easy on poor soil and grass | Settles and may attract slugs |
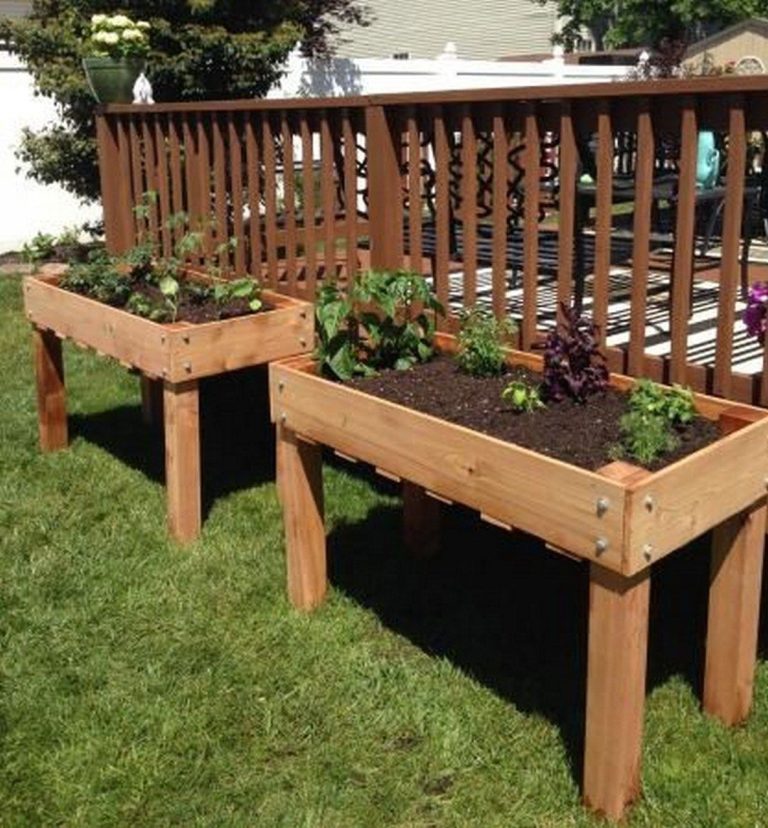
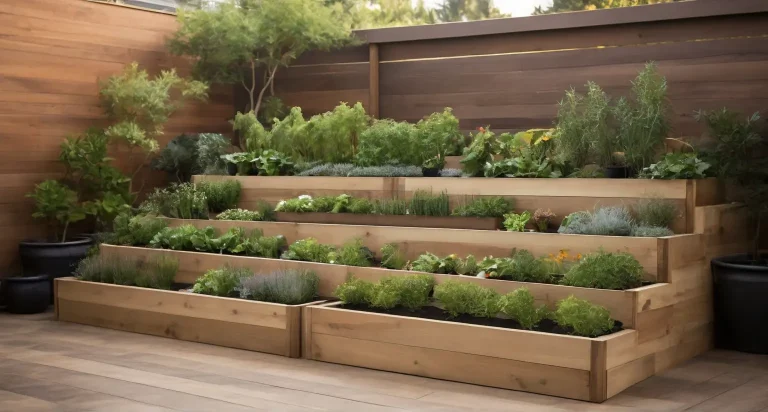
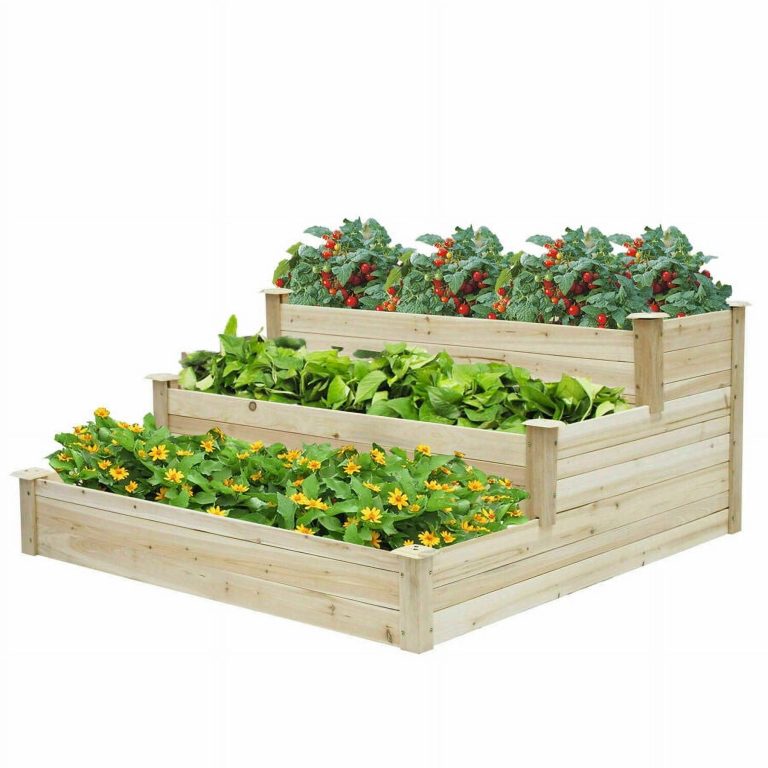
An in-ground bed suits most homeowners. A raised bed helps when native soil is rocky, contaminated, or poorly drained. Stone looks durable, but moving heavy blocks may require help.
Estimate time and cost
A small 4-by-6-foot bed usually takes 4 to 8 hours for one person. Sod removal and soil preparation take the most time. Planting goes quickly once the outline and soil are ready.
Current pricing ranges from about $50 for a basic DIY bed with divisions from existing plants to $250 or more for nursery plants, edging, compost, mulch, and delivery. Stone, irrigation, shrubs, and hired labor can raise the cost sharply.
| Project level | Typical cost | What it includes |
|---|---|---|
| Low-cost DIY | $50–$100 | Existing plants, compost, simple trench edge |
| Standard DIY | $100–$250 | New perennials, mulch, and metal or plastic edging |
| Installed bed | $400–$1,500+ | Labor, delivery, soil work, edging, and plants |
Reuse healthy divisions from hostas, daylilies, iris, and ornamental grasses to reduce costs. Never move plants from wild land or public spaces without permission.
Avoid these common mistakes
A corner flower bed can fail even when the plants are healthy. Most failures start with poor planning, crowded spacing, or incorrect watering. Fixing these issues early saves money and effort.
Planting too close together
Close planting creates a full look right away, but mature plants soon compete for light and air. Crowding also raises the risk of powdery mildew and fungal leaf spots.
Use mature width from the plant tag. You may see bare soil at first, but mulch and annual flowers can cover it while perennials fill in.
Ignoring the view from inside the house
Many people design a bed from the street only. The corner may look good outside but block a window or create a messy view from the kitchen.
Stand inside the house and view the space through each window. Place the most attractive flowers where you see them often.
Using landscape fabric everywhere
Landscape fabric can slow weeds for a time, but it often becomes visible as mulch shifts. Weed seeds still land on top and grow in the decomposed mulch. Perennials also become difficult to divide.
For most flower beds, thick organic mulch and regular hand weeding work better. Use fabric only for specific paths or under stable decorative stone.
Building a bed against the house
Soil and mulch against siding can cause rot, insect issues, and staining. Roots may also crowd utility lines or damage shallow drainage systems.
Leave a clear gap near the foundation. Use gravel or a clean, shallow strip if you need a tidy transition.
Add pollinator value and year-round interest
A corner bed can support bees, butterflies, hummingbirds, and other useful wildlife. Choose flowers with different bloom times rather than one short burst of color.
Native plants often support more local insects than highly bred ornamentals. Examples include native asters, goldenrod, milkweed, bee balm, mountain mint, and coneflower. Match each plant to your region and soil.
Use a simple bloom sequence
Plant spring bulbs such as crocus, daffodils, and tulips for early color. Follow them with peonies, salvia, catmint, and iris. Summer flowers can include coneflower, rudbeckia, yarrow, and zinnia.
For fall, use asters, sedum, goldenrod, and chrysanthemums. Leave seed heads on some plants through winter. They add texture and feed birds.
Choose flowers with different forms
Round flowers, spikes, flat clusters, and fine leaves create visual contrast. A bed of only large round blooms can look heavy. Add ornamental grass, fern, or airy verbena to break up the mass.
Use one main color family and one accent. For example, purple salvia, blue catmint, and white coneflower create a calm palette. Orange daylilies and yellow rudbeckia create a warmer look.
Know when to hire a professional
You can build most small flower beds yourself. Hire help when the corner includes utility lines, major tree roots, drainage problems, retaining walls, large rocks, or contaminated soil.
A landscape designer can help when you need a planting plan that works across several seasons. A drainage contractor is the right choice for water against the foundation. An arborist should assess large roots or a tree that may be at risk.
DIY is usually enough when
- The bed is smaller than 100 square feet
- The ground has no major drainage issue
- You can access the area with hand tools
- No large roots or utility lines need work
- You can carry compost and mulch safely
Do not operate a tiller, chainsaw, or powered edger without reading the manual. Wear gloves, eye protection, long pants, and sturdy shoes. Keep children and pets away while cutting sod or using power tools.
Frequently asked questions
Q: What is the easiest shape for a corner flower bed?
A: A curved wedge or quarter-circle is usually easiest to mark, plant, and mow around. A triangle also works in a tight fence corner, but its point can be hard to weed.
Q: How deep should a corner flower bed be?
A: Make it about 3 feet deep when you can reach from one side. A 4- to 6-foot bed works when you can access it from two sides.
Q: Should I remove grass before making a flower bed?
A: Removing sod gives the fastest result. A cardboard no-dig bed can work, but it needs 6 to 8 inches of organic material and may settle during the first year.
Q: How much compost should I add?
A: Spread 2 to 3 inches of finished compost over the bed and mix it into the top 6 to 8 inches. For an existing bed, add about 1 inch each year.
Q: What flowers grow well in a sunny corner bed?
A: Coneflower, black-eyed Susan, salvia, catmint, yarrow, sedum, coreopsis, lavender, daylily, and zinnia can work in full sun when their hardiness and soil needs match your site.
Q: What can I plant in a shady corner?
A: Hostas, coral bells, astilbe, ferns, hellebores, Japanese forest grass, foamflower, and impatiens are useful options. Check soil moisture, since shade may still be dry beneath trees.
Q: How far should a flower bed be from the house?
A: Leave at least 6 to 12 inches between soil or mulch and the foundation. Keep siding, wood trim, and weep holes clear.
Q: Why are my new flowers wilting even though I water them?
A: Wet soil, damaged roots, transplant shock, heat, and poor drainage can all cause wilting. Check the soil below the surface before watering again.
Q: How often should I water a new flower bed?
A: Check it daily for the first two weeks. After that, water deeply two or three times per week as needed, then reduce watering once roots grow into the surrounding soil.
Q: Can I use potting soil in a flower bed?
A: Use native soil mixed with compost instead. Potting soil drains too quickly, costs more, and may dry out when spread across a large bed.
Q: Is mulch necessary in a flower bed?
A: Mulch is not required, but it reduces weeds, slows evaporation, and protects roots. Apply 2 to 3 inches and keep it away from stems and trunks.
Q: When is the best time to build a corner flower bed?
A: Early spring and fall are usually easiest in most US zones. Build in summer only if you can water often and protect new plants from heat.
Q: How long does a corner flower bed last?
A: The bed itself can last for decades with routine edging and soil care. Plants vary: annuals last one season, perennials may last 3 to 15 years or longer, and shrubs can last for many years.
Conclusion: Build the bed around the site
A successful corner flower bed starts with the space, not the plant catalog. Measure the light, observe drainage, test the soil, and choose plants that match the conditions. Then create a clear outline, improve the topsoil, plant by mature height, and protect the roots with mulch.
Start small if this is your first bed. A 4-by-6-foot corner can hold a strong mix of texture, color, and pollinator plants without becoming hard to manage. After one growing season, you will know what thrives, what spreads, and what needs to move.
The best flower bed is not the most expensive one. It is the one that fits your yard, your climate, and the time you truly want to spend caring for it.
Meta description: Learn how to build a corner flower bed from layout and soil prep to plant choices, edging, watering, mulch, costs, maintenance, and common fixes.