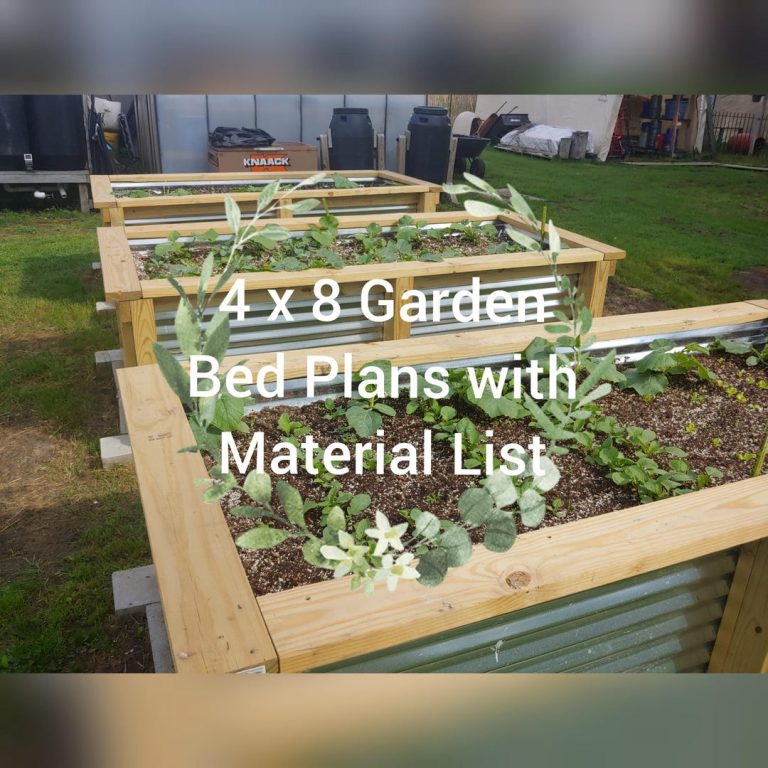
How To Build A Tiered Herb Garden: Easy DIY Guide
A tiered herb garden turns a small space into a useful, fragrant growing area. Each level gives herbs better access to light, air, and water. You can build one beside a kitchen door, on a balcony, along a patio wall, or in a raised bed.
The basic idea is simple: place taller herbs toward the back or top, and keep low herbs near the front. This stops plants from shading one another. With good drainage, fresh soil, and six to eight hours of sun, many herbs can produce for one growing season or several years.
I have built tiered herb gardens from cedar boards, reclaimed pallets, stone blocks, and stackable containers. The most reliable design was not the tallest one. It was a three-level garden with wide steps, strong drainage, and enough space to reach every plant. This guide explains how to build that type of garden, choose herbs, avoid common mistakes, and keep the structure productive in different USDA hardiness zones.
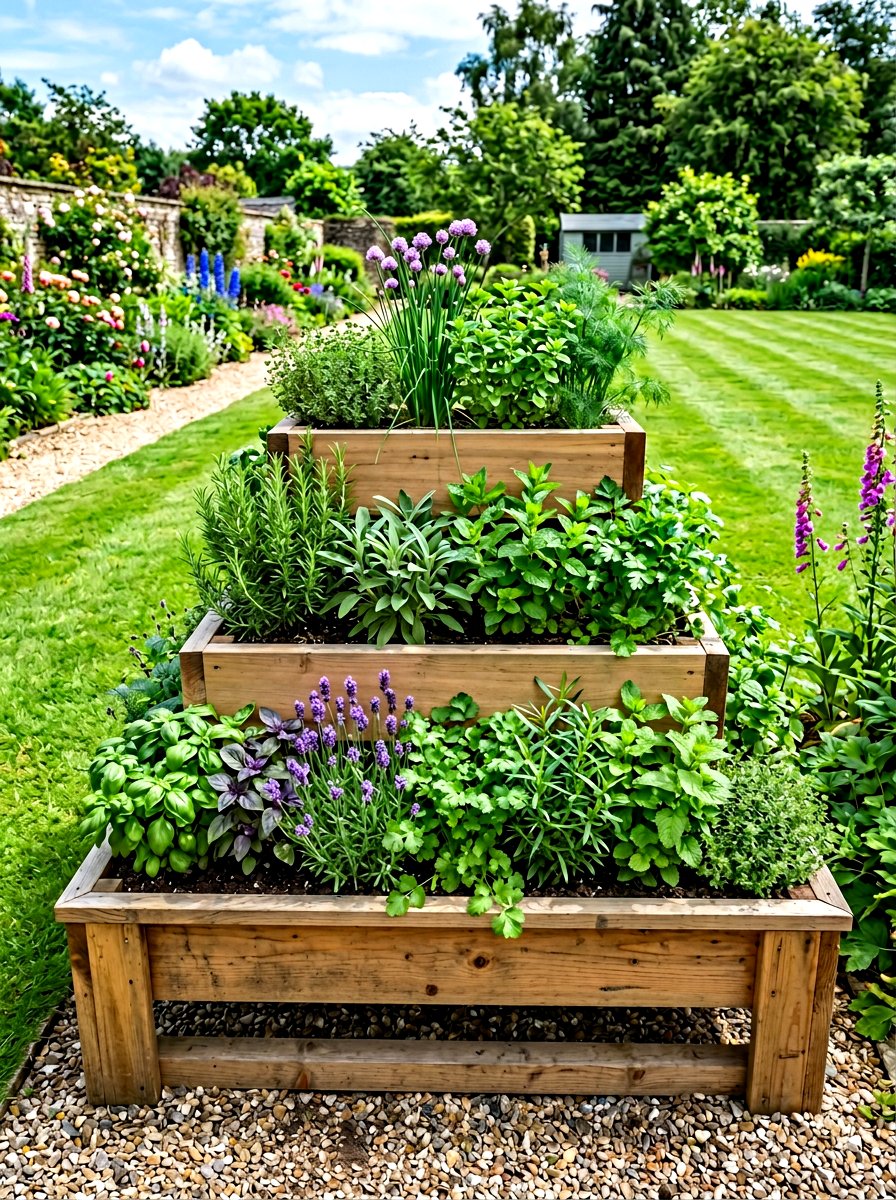
The Best Way to Build a Tiered Herb Garden
The best way to build a tiered herb garden is to choose a sunny site, create a stable three-level frame, fill each tier with well-drained soil, and group herbs by water and light needs. Keep the lower levels for creeping herbs, the middle for medium plants, and the top or rear for tall herbs. Plan for drainage before adding soil.
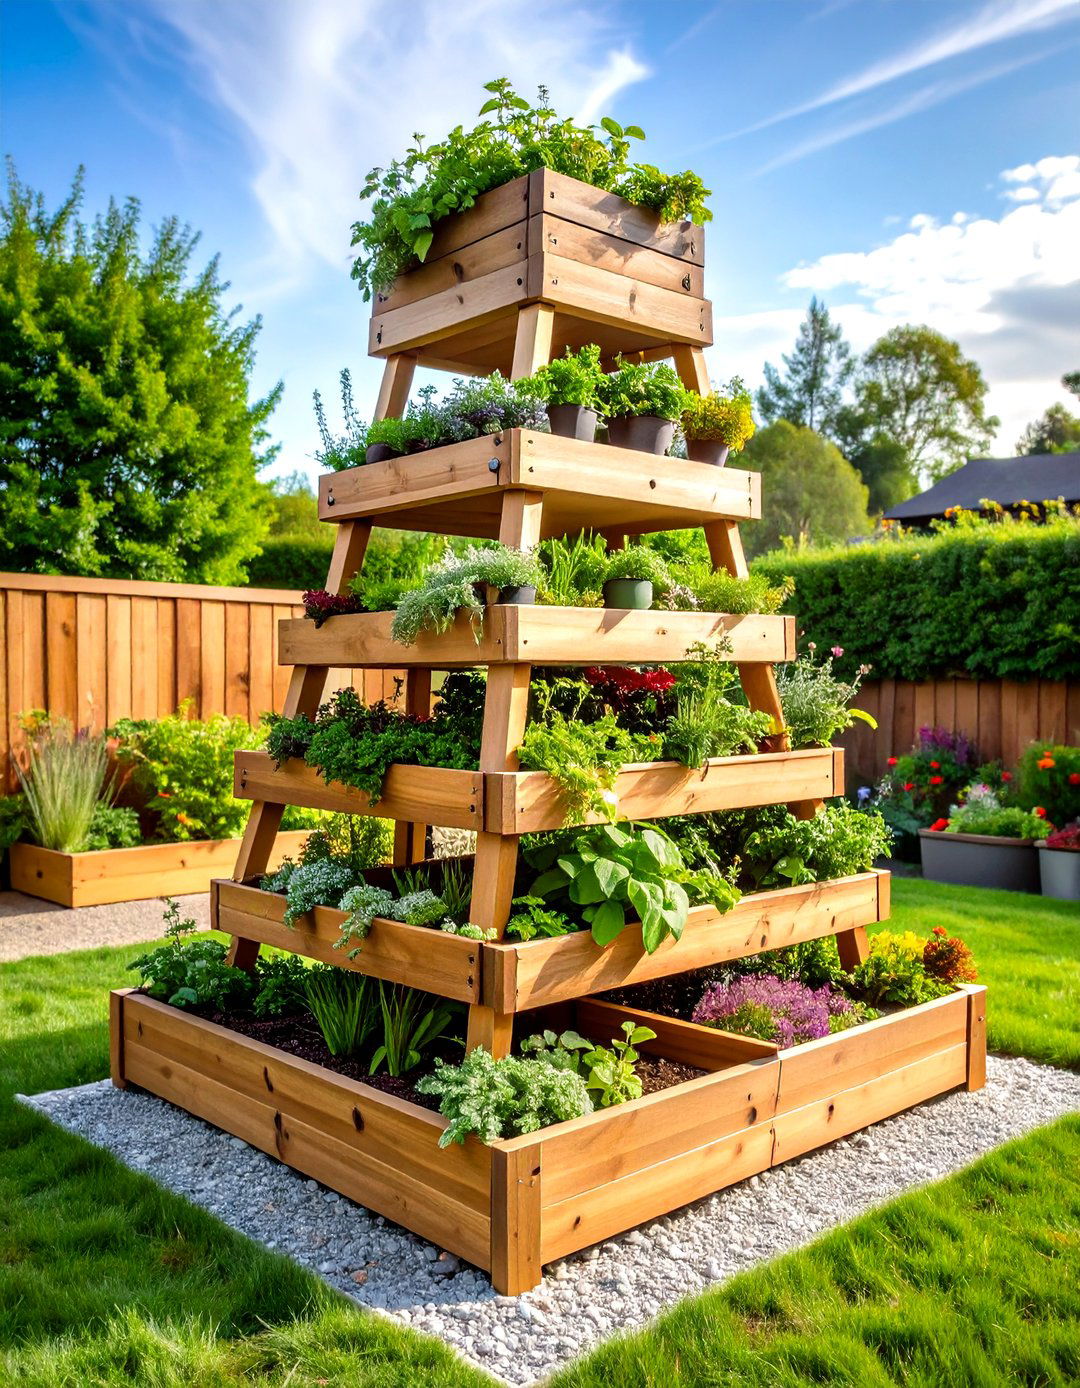
A tiered herb garden works well because it uses vertical space without forcing every plant into one crowded row. It also lets you separate herbs with different needs. Rosemary and thyme prefer lean, dry soil, while basil, parsley, and cilantro need more moisture.
A small garden can measure only 3 feet wide by 3 feet deep. A larger version may run 6 feet long and 4 feet deep. For most beginners, three tiers are enough. Four or more tiers can become hard to reach and may place too much weight on a deck or balcony.
Choose the Site, Size, and Garden Style
Your site controls the garden’s success more than the wood, paint, or decorative finish. Most culinary herbs need at least six hours of direct sun each day. In hot areas such as USDA Zones 8 through 10, a spot with morning sun and light afternoon shade can prevent basil, cilantro, and parsley from wilting.
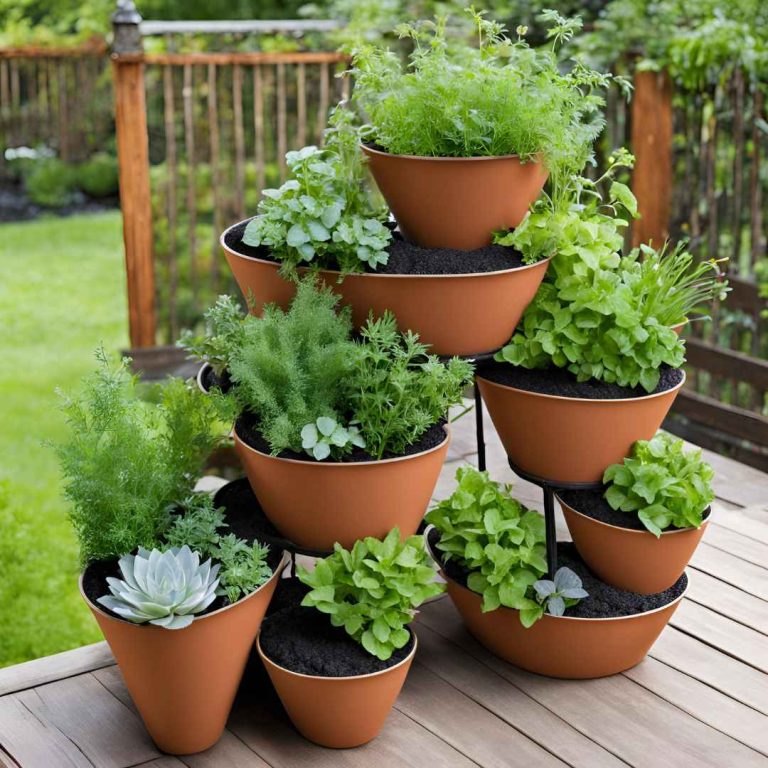
Check sunlight and access first
Watch the proposed site for one full day if possible. Note when the sun reaches the area and when nearby fences, walls, or trees create shade. Avoid placing the garden under dense tree cover. Tree roots compete for water, and falling leaves can increase fungal problems.
Keep the garden close to the kitchen if you can. A garden that sits 20 steps from the back door often gets harvested more than one hidden at the far end of the yard. Leave at least 24 inches of walking space in front of the lowest tier.
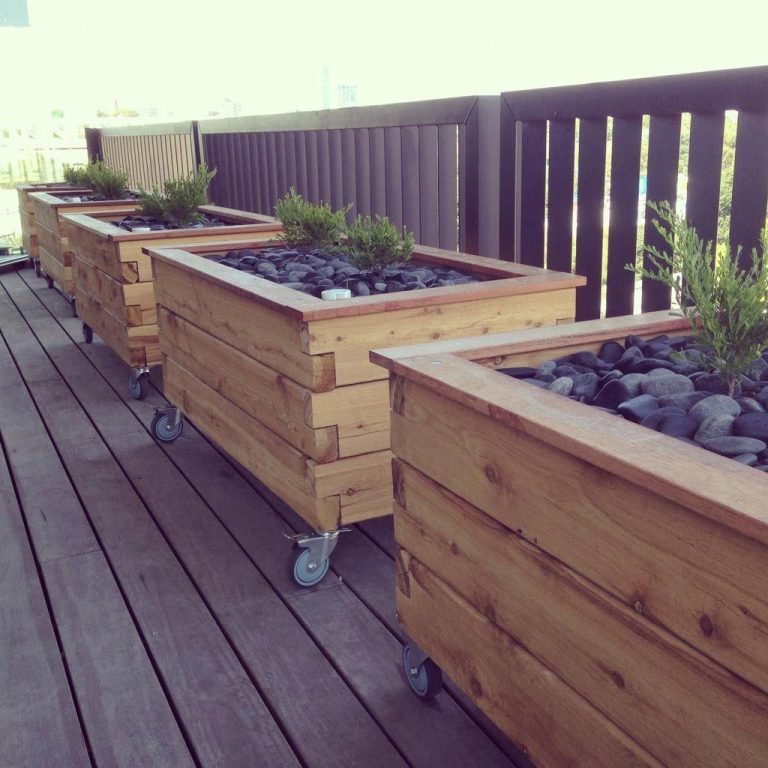
A tiered planter on a balcony needs extra care. Wet soil is heavy. A 20-gallon container can weigh more than 150 pounds after watering. Check the balcony load limit before building, and use lightweight potting mix rather than garden soil.
Pick a practical shape
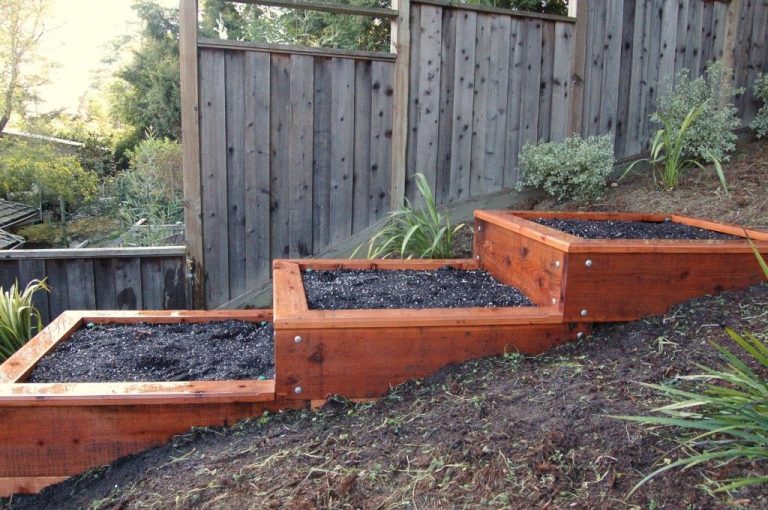
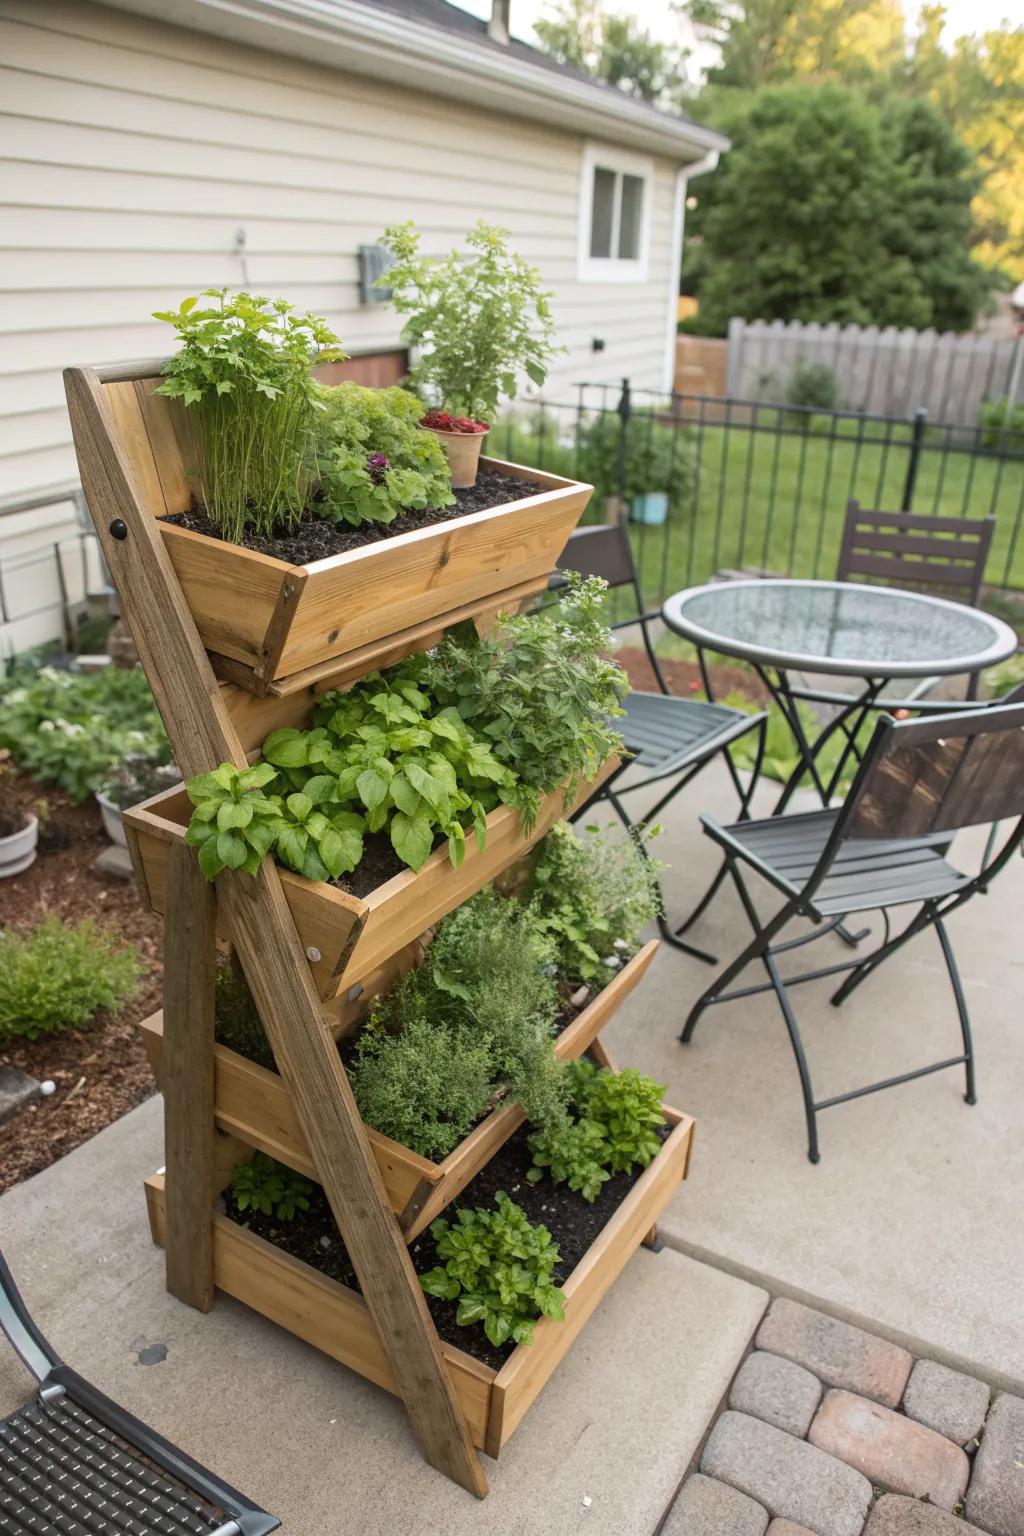
The easiest design uses three horizontal boxes. Each box sits slightly behind the one below it, like wide steps. This style gives every level access to light and makes watering simple.
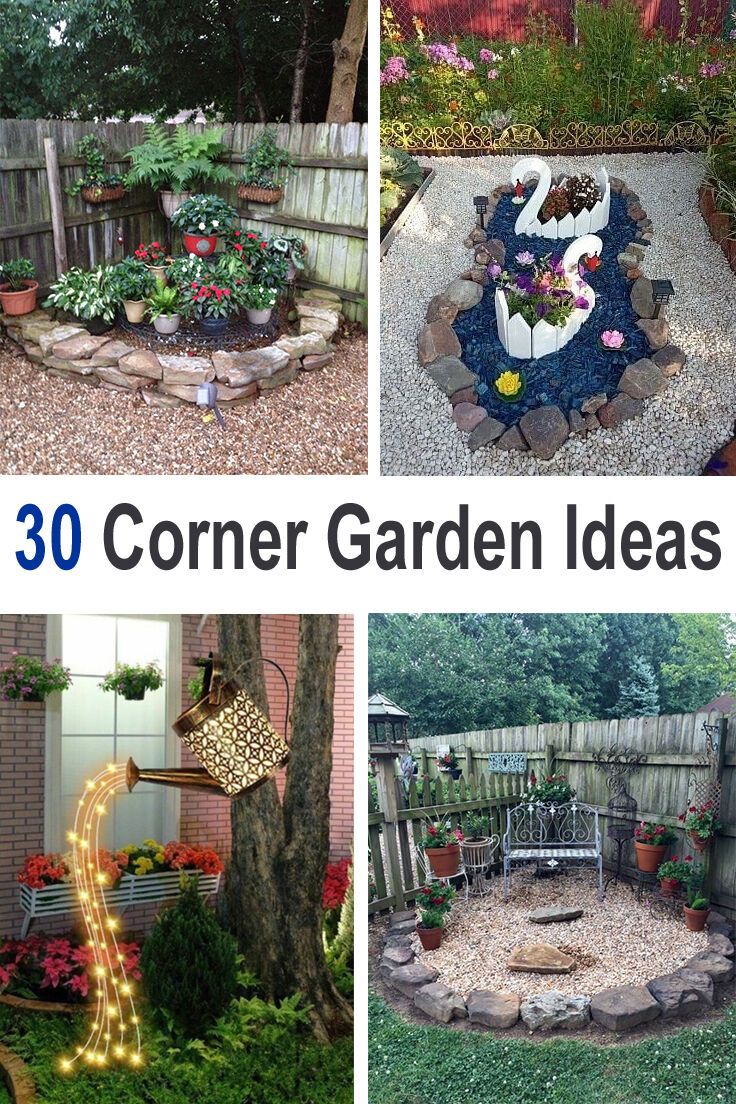
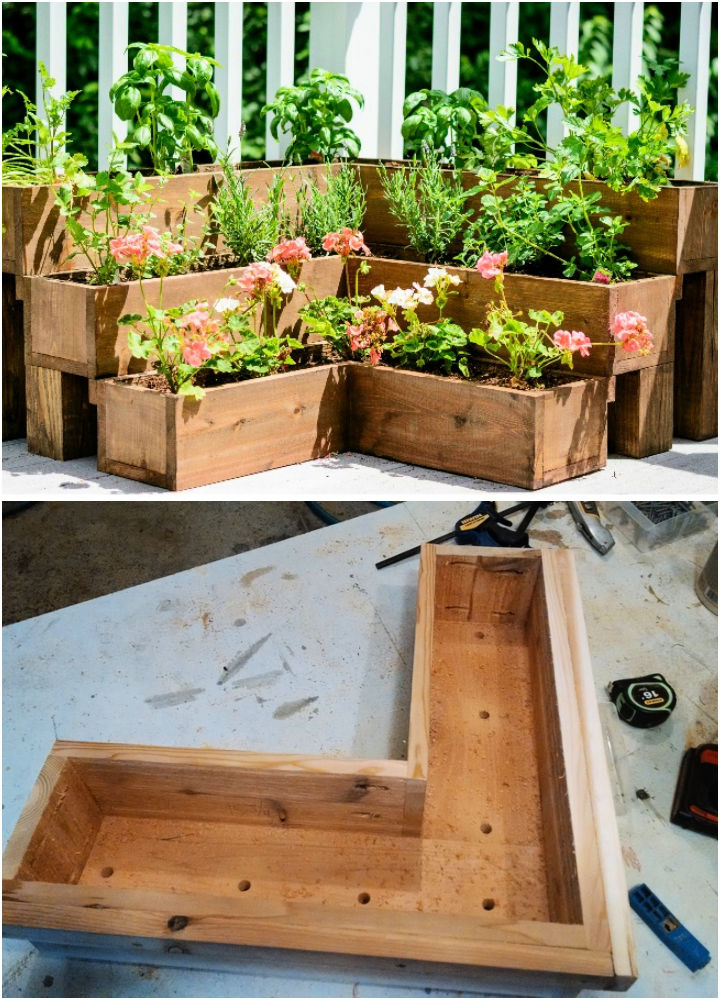
A corner design works well in small yards. Two tiered runs meet at a right angle, but the inside corner must remain reachable. A narrow wall planter saves floor space, yet it dries faster and needs more frequent watering.
| Garden style | Good choice for | Main limitation |
|---|---|---|
| Three-step planter | Beginners, patios, small yards | Uses more depth than a wall planter |
| Corner tier garden | Empty corners and raised beds | Inner plants can be hard to reach |
| Stacked containers | Renters, balconies, low-cost builds | Dries out faster and can tip |
| Sloped in-ground tiers | Large yards and permanent gardens | Needs more digging and erosion control |
A three-step planter gives the best balance of stability, access, and soil volume. Stacked containers cost less at first, but they need closer watering and more frequent checking.
Decide between wood, stone, and containers
Cedar is a strong choice for a wooden tier garden. It resists rot and usually lasts several seasons. Redwood also performs well, but it often costs more. Untreated pine can work if you accept a shorter life, often three to five years in wet climates.
Avoid old wood with unknown chemical treatment. Do not use railroad ties or painted boards that may contain harmful residues. Modern pressure-treated lumber made for garden use is generally designed for outdoor contact, but some gardeners still prefer untreated cedar for edible crops.
Stone blocks last longer than wood and do not rot. They also hold heat, which can help rosemary, oregano, and thyme. The downside is weight. A stone structure must sit on firm, level ground.
Plastic or resin planters offer a light, quick option. They are useful for renters and balconies. Choose containers with drainage holes and a wide base. Thin, dark plastic can heat the root zone in summer.
Tools and Materials You Need
You can build a basic tiered herb garden with common hand tools and untreated or garden-rated materials. Accurate cuts matter more than expensive equipment. A cordless drill, such as an 18-volt model with a 2.0- to 4.0-amp-hour battery, handles most assembly work.
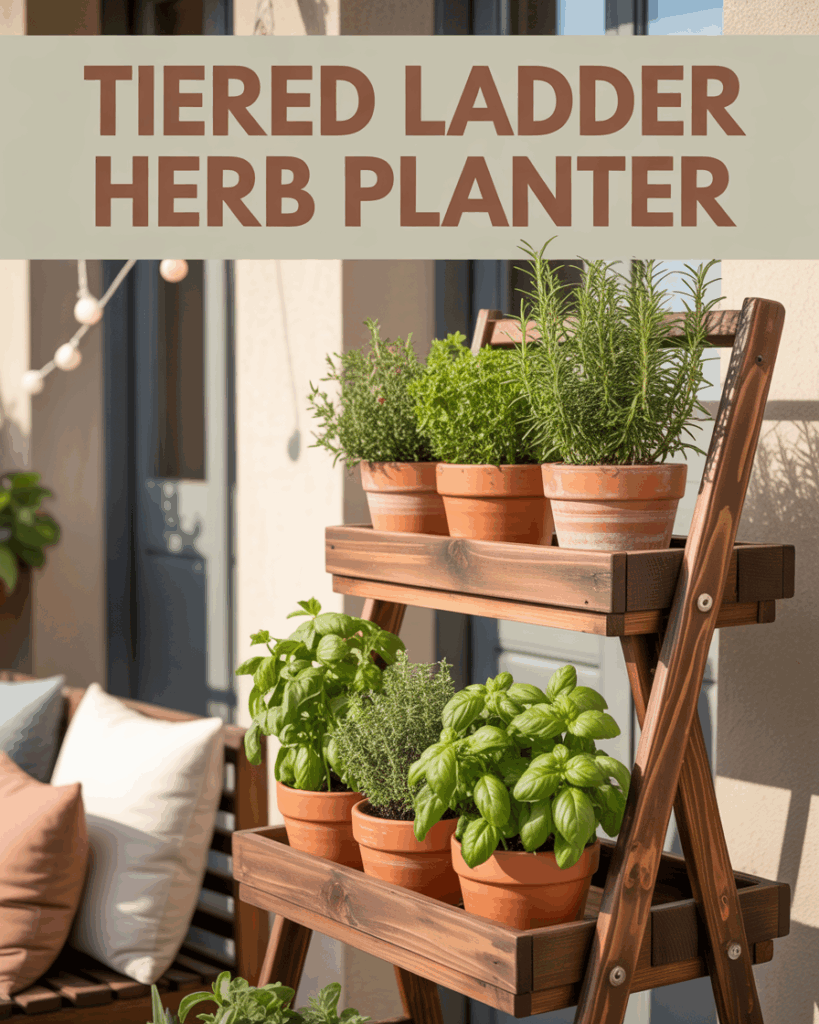
The table below lists a practical three-tier wood design. You can change the length, but keep each level deep enough for the roots of the herbs you plan to grow.
| Material or tool | Suggested amount or size | Purpose |
|---|---|---|
| Cedar or redwood boards | 1-inch thick, 8- to 10-inch wide | Build tier walls |
| Exterior screws | 2 1/2-inch stainless or coated screws | Join boards |
| Cordless drill and driver bits | 18-volt or similar | Drill pilot holes and drive screws |
| Saw | Circular saw or handsaw | Cut boards to length |
| Level and tape measure | 24-inch level | Keep each tier even |
| Landscape fabric or cardboard | Enough for the base | Reduce weeds under the structure |
| Gravel or coarse bark | 2 to 3 inches | Improve base drainage |
| Raised-bed soil | About 1 cubic yard for a medium build | Fill planting areas |
| Compost | 10% to 20% of soil volume | Add organic matter |
For a garden that measures about 4 feet long, 3 feet deep, and 30 inches tall, expect to spend roughly $100 to $250 on materials. Current pricing changes by region, wood type, and soil brand. Reclaimed boards and homemade compost can reduce the cost, but never trade safety for a lower price.
Estimate soil volume before buying
Soil volume is easy to underestimate. A 4-by-3-foot tier that is 10 inches deep holds about 10 cubic feet before accounting for the shape of the levels. Three tiers may need 15 to 25 cubic feet of mix.
Use this simple formula:
Length × width × soil depth = cubic feet
Convert inches to feet before multiplying. For example, a 4-foot-long box that is 2 feet wide and 0.75 feet deep needs 6 cubic feet of soil.
Buy a little extra. Soil settles after the first few rains, often by 10% to 20%. Add more mix rather than leaving roots exposed.
Select safe fasteners and finishes
Use exterior-rated screws instead of nails. Stainless steel screws resist rust, especially in coastal gardens or damp climates. Drill pilot holes near board ends to prevent splitting.
Leave wood unfinished, or use a plant-safe exterior finish on the outside only. Avoid coating the inside surfaces where soil will sit. Do not seal drainage openings.
💡 Pro Tip: Build the frame in its final location. A filled tiered garden can weigh several hundred pounds, and even a small planter becomes almost impossible to move once wet soil is inside.
Build the Tiered Frame Step by Step
A strong frame starts with a flat base and wide, stable levels. Build the lowest box first, then place or attach the smaller upper boxes behind it. Take time to check each tier with a level before adding soil.

Step 1: Prepare the ground
Remove grass, weeds, and large roots from the area. Dig down 2 to 4 inches if the site has thick turf. Level the soil with a rake.
Lay landscape fabric or several layers of plain cardboard over the ground. Overlap cardboard pieces by at least 6 inches. This layer blocks light from many weeds, but it will break down over time and allow roots to enter the soil below.
Add 2 to 3 inches of compacted gravel or coarse bark. Gravel works better for a permanent wood or stone structure. Tamp it firmly, then check the surface in several directions.
Step 2: Build the lowest tier
Cut two long boards and two short boards for the base box. Set the boards in place and check the corners. Use two screws at each corner for boards up to 10 inches wide.
The lowest tier should be the widest. A depth of 24 to 36 inches gives enough room for roots and helps the garden resist tipping. Keep the front edge low enough to reach the back of the tier.
Do not make the bottom box too tall. A soil depth of 8 to 12 inches suits most annual herbs. Woody herbs such as rosemary and sage need good drainage more than extreme soil depth.
Step 3: Add the second tier
Place the second box 8 to 16 inches behind the front edge of the lower box. The exact setback depends on the height of the lower level and the sun angle at your site.
In northern regions, a smaller setback may still provide good light because the sun sits lower in the sky. In southern regions, use a wider setback or arrange the tiers from north to south so taller plants do not shade shorter ones.
Secure the second tier to the lower frame with corner blocks, screws, or sturdy brackets. The upper box must not slide when pushed from the side.
Step 4: Install the top tier
The top box can be 12 to 24 inches wide. Keep it centered or place it toward the back if you want the lower tiers to receive more sun.
Test the structure by applying firm pressure to each side. If it rocks, add ground material under the base or reinforce the corners. A wobbly garden will shift as soil settles.
Step 5: Add drainage openings
Drill drainage holes in every enclosed box. Place holes about 8 to 12 inches apart along the bottom, using a 3/8- to 1/2-inch bit. If the box sits directly on gravel, leave a small gap under the boards so water can escape.
A tiered herb garden must never hold standing water. Saturated soil pushes air from the root zone and can cause root rot, especially in rosemary, lavender, and thyme.
Step 6: Fill with the right soil
Use a loose raised-bed mix rather than heavy native clay. A useful blend contains about 60% quality topsoil, 30% compost, and 10% coarse material such as pine bark fines or perlite.
For a container-style garden, use potting mix. Do not fill large containers with garden soil alone. It becomes dense and drains poorly.
Aim for a soil pH between 6.0 and 7.5 for most culinary herbs. Rosemary, thyme, oregano, basil, parsley, and chives grow well in this broad range. A basic soil test helps before you add lime or sulfur.
| Soil ingredient | Typical amount | Best use |
|---|---|---|
| Quality topsoil | 50% to 60% | Main soil body in raised tiers |
| Mature compost | 20% to 30% | Nutrients and moisture balance |
| Pine bark fines or perlite | 10% to 20% | Air space and drainage |
| Coconut coir | Up to 10% | Extra moisture in dry climates |
Do not use fresh manure. It can burn roots and may contain weed seeds or pathogens. Mature compost should smell earthy, not sour or sharp.
Step 7: Settle and top off the soil
Water each layer slowly after filling it. The mix will settle, often by several inches. Add more soil until it sits 1 inch below the rim.
Do not pack the soil down with your feet. Pressing hard removes air spaces and creates a dense root zone. Let water and time settle the mix instead.
Step 8: Add mulch
Apply 1 to 2 inches of fine bark, straw, shredded leaves, or untreated grass clippings. Keep mulch 2 inches away from herb stems. Thick mulch against stems can trap moisture and encourage crown rot.
Gravel mulch suits Mediterranean herbs, but it can increase heat in hot climates. Organic mulch works better for basil, parsley, cilantro, and chives.
Arrange Herbs by Height, Light, and Water
The most useful herb layout places tall plants where they will not shade short ones. It also groups plants with similar water needs. This matters more than matching herbs by color or appearance.
Use the front tier for low herbs
Place low or trailing herbs in the front. Good choices include:
- Creeping thyme
- Oregano
- Marjoram
- Chives
- Compact parsley
- Alpine strawberries, if you want a fruit companion
- Nasturtiums for edible flowers and pollinators
Creeping thyme stays low and handles dry soil. Oregano can spread quickly, so keep it in a separate section or trim it often.
Use the middle tier for medium herbs
The middle level suits basil, curly parsley, cilantro, dill, and compact sage. These plants need more regular moisture than rosemary and thyme.
Basil grows best when night temperatures stay above 50°F. Genovese basil works well for pesto. Thai basil has purple stems and a stronger anise flavor. In Zones 3 through 6, grow basil as an annual or move a potted plant indoors before the first frost.
Use the rear or top tier for tall herbs
Tall herbs include rosemary, sage, fennel, lemon balm, and mature dill. Fennel can reach 4 to 6 feet and may shade nearby plants. Lemon balm spreads by roots and seeds, so a container sunk into the bed can limit its spread.
Rosemary prefers full sun, sharp drainage, and a dry period between waterings. In USDA Zones 7 through 10, it may survive winter outdoors with protection. In colder zones, grow it in a pot that you can move indoors.
| Tier position | Herbs to consider | Light and water pattern |
|---|---|---|
| Front or lowest | Thyme, oregano, chives, marjoram | Full sun; moderate to low water |
| Middle | Basil, parsley, cilantro, compact sage | Full sun; even moisture |
| Rear or top | Rosemary, dill, fennel, lemon balm | Full sun; varies by plant |
| Shaded edge | Mint in a pot, parsley, cilantro | Part sun; higher moisture |
Mint should stay in its own container. Even one small plant can send runners through the whole bed. Parsley and cilantro tolerate some afternoon shade, especially in hot Zones 8 through 10.
Match plants by root and water needs
Do not plant rosemary beside cilantro simply because both are kitchen herbs. Rosemary likes dry, gritty soil. Cilantro prefers cooler, evenly moist soil. One of these plants will receive the wrong care.
A simple solution is to give the driest tier its own watering zone. You can also plant rosemary in a separate pot and set the pot into the tier. This makes winter storage easier.
Plant the Herbs Correctly
Planting depth and spacing affect harvest more than many new gardeners expect. Crowded herbs grow weak stems, stay damp after rain, and compete for nutrients.

Start with nursery plants or seeds
Nursery transplants give fast results. Choose plants with strong color, firm stems, and roots that are white or light tan. Avoid plants with black roots, wilted tops, or a sour smell from the pot.
Seeds cost less and offer more variety. Basil, cilantro, dill, chervil, and parsley grow well from seed. Start seeds indoors four to six weeks before the last frost date, or sow them outdoors when the soil reaches the temperature listed on the seed packet.
In warm climates, cilantro and dill often bolt in late spring. Sow small batches every two to three weeks for a longer harvest.
Space plants for mature size
Read the plant tag and use the mature width, not the size of the small starter plant. Basil often needs 10 to 12 inches between plants. Sage may need 18 to 24 inches. Thyme can grow 8 to 12 inches wide, even if it starts as a tiny plug.
Set transplants at the same depth they grew in their pots. Burying the stem can cause rot in many herbs. The exception is leggy basil, which can sometimes root along a buried stem, but do this only with healthy plants.
Water after planting
Give each plant a slow drink after planting. Water at the soil line rather than spraying the leaves. Wet foliage that stays damp overnight can raise the risk of fungal disease.
For the first two weeks, check moisture daily. After roots spread, most herbs need water when the top 1 inch of soil feels dry. Rosemary and thyme may need the top 2 to 3 inches to dry before watering again.
Water, Feed, and Prune the Garden
A tiered garden dries at different rates. The top tier usually loses water first because it receives more wind and sun. The bottom tier may stay wet longer, especially after heavy rain.

Follow a flexible watering schedule
Touch the soil before you water. If it feels cool and damp below the surface, wait. If it feels dry and crumbly, water slowly until a little drains from the bottom.
| Herb group | Water when | Typical summer frequency |
|---|---|---|
| Rosemary, thyme, oregano | Top 2 to 3 inches are dry | Every 5 to 10 days |
| Basil, parsley, chives | Top 1 inch is dry | Every 2 to 4 days |
| Cilantro and dill | Surface begins to dry | Every 2 to 4 days |
| Container herbs in hot weather | Top 1 inch is dry | Daily checks; sometimes daily water |
These intervals are starting points, not fixed rules. Sandy soil, strong wind, and temperatures above 90°F increase water demand. Clay-rich soil, rain, and shade reduce it.
A drip line works well for a permanent garden. Use 1/4-inch distribution tubing for small containers or 1/2-inch poly tubing for longer runs. A pressure regulator and filter help prevent uneven flow. Hand watering gives better control when herbs have different needs.
Feed lightly
Most herbs do not need heavy fertilizer. Too much nitrogen creates soft, leafy growth with weak flavor and poor drought tolerance.
At planting, mix mature compost into the soil. During the growing season, apply a balanced organic fertilizer such as 5-5-5 at the label rate every four to six weeks if plants show slow growth.
Leafy annuals such as basil may benefit from feeding. Rosemary, thyme, oregano, and sage often need little extra fertilizer once established.
Prune for fuller growth
Pinch basil above a leaf pair when plants reach 6 to 8 inches tall. Remove flower buds if you want more leaves. Once basil flowers heavily, the leaves may become smaller and stronger in flavor.
Trim thyme and oregano lightly throughout the season. Do not cut woody herbs back into old, leafless wood unless you know the plant can regrow from it. Rosemary often responds poorly to severe pruning.
Cut chives close to the soil after flowering if you want fresh new growth. Harvest no more than one-third of a plant at one time.
🌱 Beginner Note: Harvesting is a form of pruning. Regular small cuts often produce a fuller herb than one large harvest at the end of the season.
Protect Herbs From Pests, Disease, and Weather
Healthy herbs resist many problems, but crowded tiers can create weak airflow. Inspect stems and leaf undersides once a week. Early action is easier than trying to rescue a badly damaged plant.

Identify common problems
| Symptom | Likely cause | First fix |
|---|---|---|
| Yellow leaves and wet soil | Overwatering or poor drainage | Let soil dry; clear blocked holes |
| Sticky leaves and curled growth | Aphids | Spray with water; use insecticidal soap if needed |
| Fine webbing and pale speckles | Spider mites | Rinse leaves; improve humidity and airflow |
| White powder on leaves | Powdery mildew | Thin plants; water at soil level |
| Basil leaves turn black after cold nights | Cold injury | Move or cover plants; wait for warm weather |
| Rosemary wilts in wet soil | Root rot | Improve drainage; replace damaged plant |
Aphids often gather on new growth. A firm stream of water can remove them. Lady beetles, lacewings, hoverflies, and parasitic wasps provide natural control, so avoid broad-spectrum insecticides when possible.
Fungal disease becomes more likely when plants remain wet and crowded. Remove badly affected leaves and place them in the trash rather than compost if the disease is active.
Manage heat and cold
Basil, cilantro, and parsley can suffer in extreme heat. Use 30% shade cloth during the hottest part of the day in desert or southern climates. Cilantro may bolt even with good care once temperatures rise.
Cold harms tender herbs first. Cover basil with frost cloth when temperatures may drop below 40°F. Rosemary, sage, and thyme handle cool weather better, but a hard freeze can still damage them.
Control erosion and soil wash
Water can wash soil from the upper tiers onto the lower ones. Add a front lip to each box, use mulch, and water with a gentle stream. Drip irrigation reduces soil movement.
If the garden sits on a slope, anchor the base with landscape pins or stone. A tiered structure should not rest on loose fill.
⚠️ Warning: Never stand on a tiered planter or use it as a step. Even a sturdy box is not designed to carry a person’s weight, and a sudden shift can cause serious injury.
Maintain the Structure Through the Seasons
A tiered herb garden can last many years when you inspect the frame and soil at the right times. The planting season is not the only time the garden needs care.

The following schedule suits much of the United States. Adjust the timing for your frost date and local rainfall.
| Season | Main tasks | What to watch |
|---|---|---|
| Early spring | Repair boards, refresh compost, sow parsley and cilantro | Rot, loose screws, compacted soil |
| Late spring | Plant basil after frost, add mulch, set irrigation | Cold nights and transplant shock |
| Summer | Harvest often, check water, prune, scout pests | Dry top tiers and bolting |
| Fall | Remove annuals, bring rosemary indoors, add leaf mulch | Frost and wet winter soil |
| Winter | Inspect frame, protect empty soil, store tools | Standing water and snow load |
Replace soil that has settled more than 3 inches. Add compost to the top few inches rather than turning the whole bed and disturbing roots.
Inspect wood each spring. Soft spots near the base show early rot. Tighten loose screws and replace damaged boards before the planter becomes unstable.
Prepare annual and perennial herbs
Basil, cilantro, dill, and chervil usually finish after flowering or frost. Pull spent annuals and compost healthy material. Remove diseased plants from the bed.
Rosemary, sage, thyme, chives, and oregano can return for several years, depending on the climate. In Zones 3 through 6, potted rosemary should move indoors before frost. Place it near a bright window and reduce watering.
Mint can survive cold weather underground. Cut back the stems after frost, but check the container edges for escaped runners in spring.
Store movable gardens safely
If you use stackable containers, move them to a sheltered area before severe winter weather. Empty containers that may freeze and crack, especially thin plastic or glazed ceramic pots.
Do not store wet garden tools inside a sealed box. Dry hand pruners and trowels, then wipe metal parts with a light coat of oil. A clean bypass pruner with a sharp blade makes herb harvesting less damaging.
Common Building and Growing Mistakes
Most tiered herb garden problems come from poor planning, not difficult plants. A few small design errors can lead to constant watering, weak growth, or a structure that fails early.
Making the tiers too narrow
A 10-inch-wide tier may look neat, but it limits soil volume and dries quickly. Use at least 12 inches for small herbs and 18 to 24 inches for mixed plantings.
Blocking the lower levels
Tall plants placed on the south side can shade the rest of the garden in the Northern Hemisphere. Arrange tiers so taller plants sit north of shorter plants when possible.
In the Southern Hemisphere, reverse that orientation. Local sun angle still matters, so observe the site rather than trusting a fixed layout.
Using garden soil in containers
Native clay can form a hard mass in a raised planter. Water then runs around the sides while the center stays dry. Use a screened raised-bed mix or blend clay soil with compost, bark fines, and coarse material.
Overwatering Mediterranean herbs
Rosemary, thyme, oregano, and sage often die from wet roots rather than drought. The leaves may look wilted, which leads gardeners to water more. Check the soil before adding water.
Planting mint directly in the bed
Mint spreads fast and can dominate a small garden. Keep it in a separate pot with drainage holes. Cut flowers before they set seed if you want to reduce volunteer plants.
Skipping support
A tall, narrow planter can tip in wind. Use a wide base, anchor it to the ground, or place it against a stable wall. Do not attach a heavy planter to siding without proper structural support.
My Experience Building Tiered Herb Gardens
I have tested several styles in both humid and dry conditions. In a humid Zone 7 garden, untreated pine softened at the bottom after about four seasons. Cedar lasted much longer, especially when the base sat on gravel instead of wet soil.

One early design used four narrow levels. It looked attractive but failed in daily use. The top shelf dried almost every afternoon, the lowest shelf stayed wet, and I could not reach the back plants without leaning over the front edge.
The three-tier version worked better. I planted thyme and oregano low, basil and parsley in the middle, and rosemary and sage in the rear. After four weeks, the basil filled out well, while the rosemary showed stress until I reduced watering.
In a hot Zone 9 summer, a dark plastic tiered planter became too warm near a south-facing wall. The basil survived, but parsley wilted each afternoon. Moving the planter 3 feet away from the wall and adding light-colored mulch solved most of the problem.
I also found that compost-heavy mixes settled faster than expected. The beds dropped nearly 3 inches by the next spring. Since then, I leave room to top off each tier and keep extra soil under cover.
The biggest surprise was how often I used herbs placed near the door. Easy access changed the harvest routine. I picked a few leaves while cooking, which encouraged the plants to branch and kept them productive.
Tiered Herb Garden Cost, Life Span, and Alternatives
A DIY tiered herb garden usually costs less than a large commercial planter, but the total price depends on the material and soil volume. The structure may last three to ten years, while the soil needs small repairs each season.

| Option | Approximate cost | Expected service life |
|---|---|---|
| Reclaimed wood tier garden | $40 to $120 | 2 to 5 years |
| Cedar DIY planter | $100 to $300 | 6 to 12 years |
| Stone or concrete block tiers | $120 to $500 | 15 years or more |
| Resin or plastic tier unit | $50 to $250 | 3 to 8 years |
| Simple stacked pots | $30 to $150 | 2 to 6 years |
These ranges exclude premium soil, irrigation, and delivery. Stone may last the longest, but it costs more to move and install. Cedar gives the best balance for many homeowners who want a permanent edible garden.
Choose a different system when needed
A tiered herb garden may not suit every site. Choose a few large containers instead if you rent, move often, or have a weak balcony. Containers also make it easier to isolate rosemary from moisture-loving herbs.
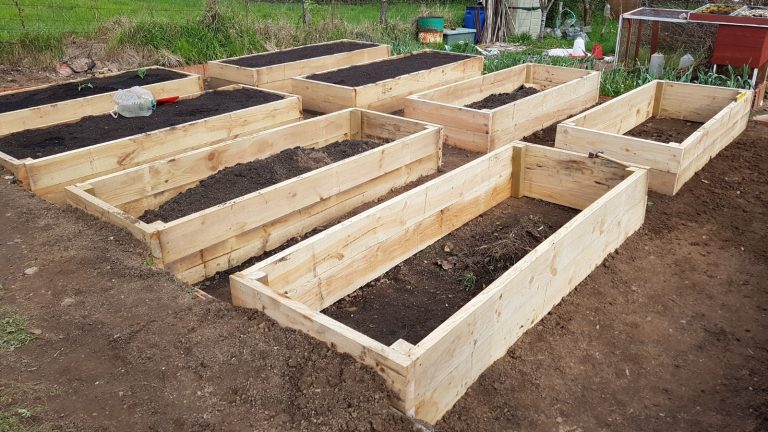
Use a single raised bed if you have plenty of ground space. It offers more root room and easier irrigation, though it does not create the same vertical effect.
A vertical wall planter works in very narrow spaces. It usually holds less soil, dries faster, and needs more frequent feeding. It suits small plants such as thyme, chives, and parsley better than large rosemary bushes.
Decide whether the cost is worth it
The design is worth the money when you have limited space, want easy kitchen access, or need separate soil zones. It is less useful if your yard already has a large sunny bed and you do not want frequent watering.
Do not judge value only by the number of plants. A small three-tier garden can produce a steady supply of basil, thyme, parsley, chives, and oregano for a household. It can also reduce bending, which helps gardeners with limited mobility.
Advanced Tips for Better Results
Small design refinements can improve harvests without making the garden complex. Focus on airflow, soil depth, and access before adding decorative features.

Add simple irrigation zones
Use one drip line for moisture-loving herbs and another for dry-loving herbs. A battery timer can run both zones for different lengths of time. Check emitters by hand because small clogs can stop water to one plant.
For a short garden, a watering wand with a gentle rose works well. Avoid high-pressure spray, which can expose roots and splash soil onto leaves.
Use companion planting with care
Some combinations make practical sense. Chives and thyme attract pollinators when they flower. Basil can grow near tomatoes in a broad bed, though a tiered garden should prioritize light and root space over traditional companion claims.
Calendula, nasturtium, and sweet alyssum can bring bees and hoverflies. Keep vigorous flowers trimmed so they do not shade small herbs.
Improve drainage for woody herbs
Plant rosemary, sage, and thyme in the driest upper or rear section. Mix extra pine bark fines or perlite into that zone. A raised mound within the tier can also move water away from the crown.
Do not place a saucer under a planter outdoors where it can hold water. Empty standing water after rain.
Grow from cuttings
Rosemary, thyme, oregano, and sage can grow from stem cuttings. Take a 4- to 6-inch cutting from nonflowering growth, remove the lower leaves, and place it in moist perlite or a light potting mix.
Roots may form in three to six weeks under bright, indirect light. Move the new plant into the garden after it develops a firm root ball. This method saves money and preserves a plant you already know performs well.
🔧 Quick Fix: If one tier dries much faster than the others, add 1 inch of mulch, move the thirsty herb down one level, or install a separate drip emitter. Do not solve every dry plant by watering the entire garden more often.
When to Ask for Help
Most small tiered herb gardens are simple DIY projects. You may need help when the structure is large, built on a slope, attached to a deck, or made from heavy stone.

Ask a professional to check a balcony load before adding a soil-filled planter. Consult a contractor if the garden presses against a retaining wall or needs deep footings. A landscaper can help control erosion on steep ground.
Get help with power tools if you have never used a circular saw or drill. Wear safety glasses, hearing protection, work gloves, and closed-toe shoes. Keep hands away from the blade, and secure boards before cutting.
A professional may cost more at the start, but correct drainage and anchoring can prevent a full rebuild. The first part to fail is often not the soil. It is a weak corner, rotted base board, or unstable support.
Frequently Asked Questions
Q: How many tiers should a beginner build?
A: Start with three tiers. Three levels provide useful height without creating difficult watering or access problems. A garden with four or more tiers may look impressive, but the upper levels can dry fast and the lower plants may receive less light.
Q: What is the best wood for a tiered herb garden?
A: Cedar and redwood are strong choices because they resist rot. Use untreated boards or lumber rated for garden contact. Avoid old painted wood, railroad ties, and boards with unknown chemical treatments.
Q: How deep should each tier be?
A: Use at least 8 to 12 inches of soil for most herbs. Make the lower tier 18 to 36 inches deep if you want larger plants or better moisture stability. Rosemary and thyme need sharp drainage more than deep soil.
Q: Can I build a tiered herb garden on concrete?
A: Yes. Use a planter with drainage holes and place it on feet or blocks so water can escape. Protect the concrete from constant wet soil, and check that runoff will not stain walls or create a slippery surface.
Q: How much sun does a tiered herb garden need?
A: Most culinary herbs need six to eight hours of direct sun. Basil, rosemary, sage, oregano, and thyme prefer full sun. Parsley, cilantro, and chives tolerate some afternoon shade, especially in hot climates.
Q: Why is my rosemary dying in a tiered planter?
A: The most common cause is wet soil or poor drainage. Let the top 2 to 3 inches dry before watering again. Check that drainage holes are open, and move rosemary away from herbs that need frequent irrigation.
Q: Can I grow herbs in a tiered garden all year?
A: You can grow some herbs year-round in mild Zones 7 through 10, but frost limits basil, cilantro, and other tender plants. In colder zones, move potted rosemary indoors and grow annual herbs again after the last frost.
Q: Should I line a wooden herb planter with plastic?
A: A full plastic liner can trap water unless it has well-placed drainage holes. It may also speed wood decay if moisture stays against the boards. A drainage gap, gravel base, and proper holes usually work better.
Q: How often should I replace the soil?
A: You usually do not need to replace all the soil each year. Remove dead roots, loosen the top few inches, and add compost. Replace the mix when it becomes compacted, contaminated by disease, or badly depleted after several seasons.
Q: Is a tiered herb garden safe for pets?
A: Many common herbs are safe in small amounts, but plants such as rosemary, basil, and parsley can still cause problems if pets eat large quantities. Keep fertilizer, slug bait, and treated plants away from animals. Check each plant with a trusted veterinary source before planting.
Build Small, Then Improve
A successful tiered herb garden does not need perfect carpentry or expensive equipment. It needs a stable frame, open drainage, suitable soil, enough sun, and a layout that matches each herb’s needs.
Start with three levels and five or six reliable herbs. Try thyme, oregano, basil, parsley, chives, and rosemary. After one season, you will know which tier dries fast, which plants spread, and how much space your household really uses.
The garden should make growing easier, not create another chore. Build it where you will see it, keep every plant within reach, and adjust watering by soil moisture rather than the calendar. With those habits, a small tiered garden can supply fresh flavor from spring through fall and, in mild climates, for much of the year.
Meta description
Learn how to build a tiered herb garden with simple tools, safe materials, the right soil, herb layouts, watering tips, pest fixes, seasonal care, and cost guidance.