How To Make A Hot Bed In A Greenhouse: Easy Guide
A hot bed turns fresh organic matter into gentle, steady heat for a greenhouse. As the material breaks down, microbes release warmth below the soil or growing trays. This can help you start seeds earlier, root cuttings in winter, and grow cool-season crops when outdoor soil stays cold.
The method is simple, but the mix must be right. Too much wet manure can create smell and excess heat. Too much dry straw may never warm up. I have built hot beds in small tunnel houses and glass greenhouses, and the most reliable results came from a balanced mix of fresh manure, straw, water, and time.
A well-built hot bed can stay warm for four to eight weeks. In some cases, it gives useful heat for two months or more. Results vary with the material, bed depth, greenhouse size, outside temperature, and USDA hardiness zone.

Quick answer: How do you make a hot bed in a greenhouse?
To make a hot bed in a greenhouse, dig or frame a bed 18 to 24 inches deep, then fill it with layers of fresh horse manure and straw. Moisten each layer, tamp it lightly, and let the pile heat for 7 to 10 days. Add 4 to 6 inches of compost-rich soil on top, then plant when the root-zone heat settles near 70–85°F.

A hot bed works best when the heating material sits below the growing soil. The bed does not heat the whole greenhouse like a furnace. It warms the soil, roots, seed trays, and low air around the plants.
The best time to build one is late winter or early spring. In USDA Zones 3–6, a hot bed can give seedlings a strong start before outdoor planting. In Zones 7–10, it may help with winter greens, but overheating becomes a bigger risk in sunny weather.
What a greenhouse hot bed is and how it works
A greenhouse hot bed is a raised or sunken growing bed that uses decomposing organic matter as a heat source. Fresh horse manure mixed with straw is the classic fuel. Composting microbes feed on carbon-rich bedding and nitrogen-rich manure, and their activity creates heat.
The process is much like a compost pile, but the heat is used under plants. A hot bed differs from a cold frame because a cold frame only traps solar heat. It differs from an electric soil-heating mat because it uses biological heat instead of electricity.

The science behind the heat
Microbes need four things: food, moisture, air, and warmth. Manure supplies nitrogen and moisture. Straw supplies carbon and air spaces. Water starts microbial activity, while light tamping keeps the pile compact enough to hold heat without cutting off oxygen.
A properly built bed often reaches 120–150°F inside the manure layer. That is too hot for roots, so the planting soil must form a buffer. The soil above the hot layer may warm to 65–85°F, which suits germination and early root growth.
Fresh manure can release ammonia and other gases. For this reason, plants should not sit directly in fresh manure. The soil layer also reduces the risk of root burn and keeps the crop away from raw waste.
Hot bed versus compost pile
A compost pile aims to make stable compost. A hot bed aims to use heat while the material breaks down. You can later remove the spent material and add it to a compost pile, but it may still contain straw and partly decomposed manure.
The main difference between a hot bed and a compost pile is placement. A hot bed sits under a crop or seed tray. A compost pile sits apart from plants and needs more turning and curing before use.
Choose the right place and bed design
Place the hot bed in the sunniest part of the greenhouse. South-facing exposure works well in the Northern Hemisphere, while a clear roof and clean glazing help solar heat reach the bed. Keep the bed away from low doors where cold air enters.
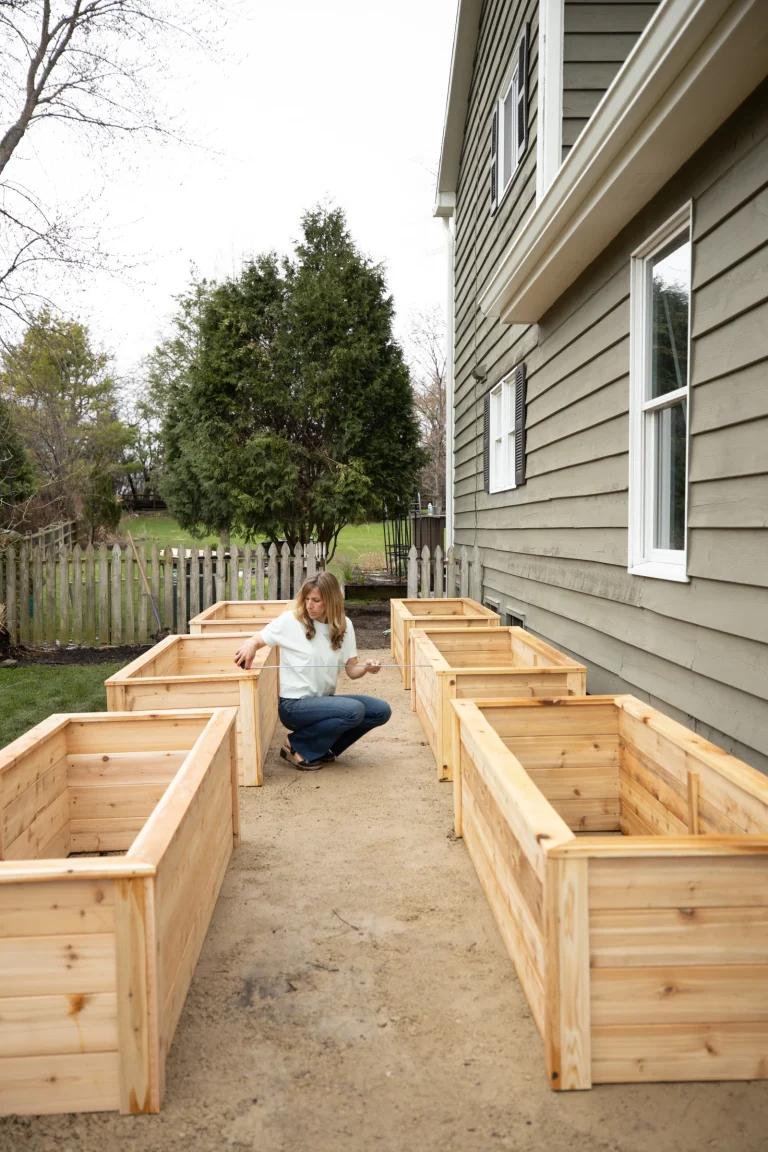
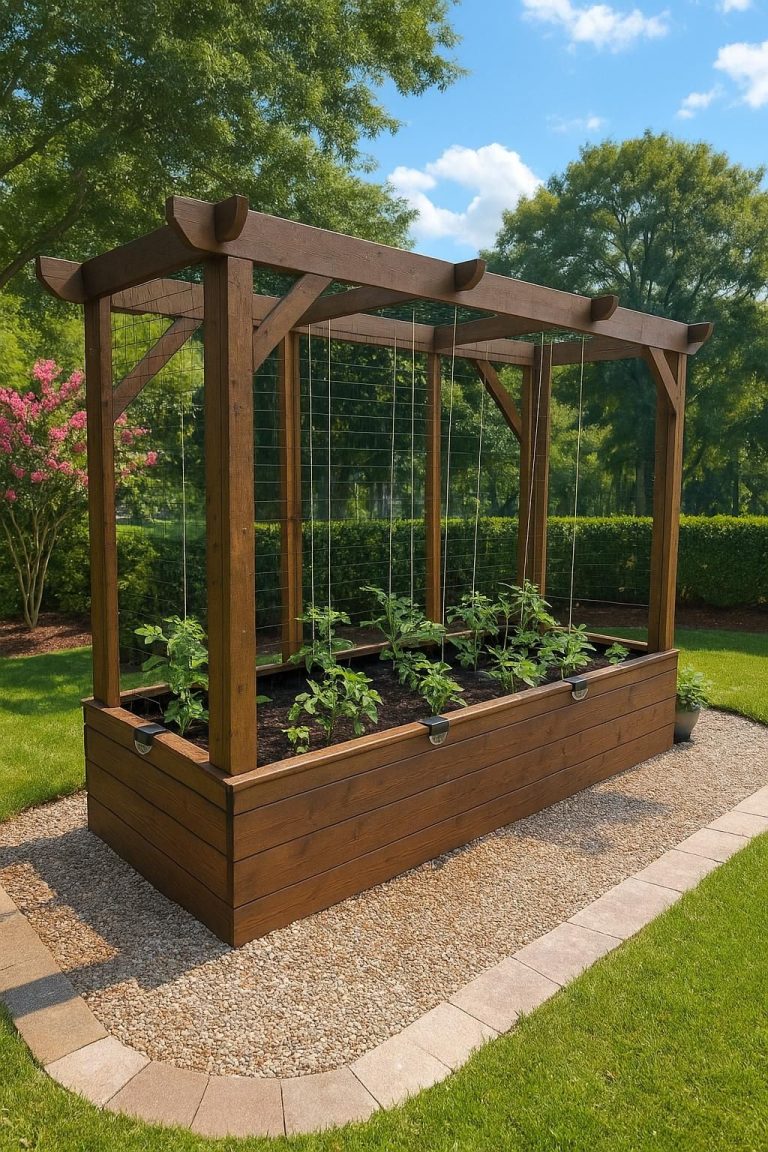
You can build a hot bed inside a raised frame, below ground, or under a bench. A sunken bed holds heat well, but it needs good drainage. A framed bed costs less labor and works well for renters or gardeners who want to remove it later.

Recommended hot bed dimensions
For most home greenhouses, a bed 3 to 4 feet wide is easy to reach from both sides. Make it as long as the greenhouse allows. A depth of 18 inches gives mild heat, while 24 inches gives stronger and longer heat.
Avoid beds wider than 4 feet unless you can reach the center. Stepping on the bed compresses the material and harms air flow. A narrow path of 18 to 24 inches also makes it easier to check temperature and water plants.
| Bed feature | Practical home-garden range | Why it matters |
|---|---|---|
| Width | 3–4 feet | Lets you reach the center |
| Heating layer | 18–24 inches | Provides steady heat |
| Soil layer | 4–6 inches | Protects roots from raw manure |
| Frame height | 24–30 inches | Holds the mix and soil |
| Path width | 18–24 inches | Allows safe access |
A 4-by-8-foot bed with a 24-inch heating layer needs about 64 cubic feet of material. That equals roughly 2.4 cubic yards, so plan your supply before you dig.
Drainage and structure
The bed must drain excess water. If the greenhouse floor is compacted clay, dig down 4 to 6 inches and add coarse wood chips or gravel below the heating layer. Do not seal a wet bed in plastic unless you also provide drainage.
For a frame, use untreated cedar, larch, or thick recycled boards that have not held chemicals. Avoid freshly treated lumber in direct contact with the soil. Concrete blocks also work and last for many seasons.
Cover the outside of a sunken bed with rigid insulation if your winter soil freezes deeply. In very cold areas, insulation reduces heat loss into the ground. In mild Zones 8–10, insulation may be unnecessary and can cause excessive warmth.
Gather materials and tools
A hot bed needs more than manure. The quality of the bedding, the moisture level, and the soil depth all affect how well it works. Horse manure with straw bedding usually heats faster than old manure from a dry pile.
Cow manure can work, but it often contains more moisture and may compact. Chicken manure is rich in nitrogen and can overheat the bed or release strong ammonia. I use chicken manure only as a small part of a mixed compost system, not as the main hot-bed fuel.

| Material or tool | Suggested amount or type | Use |
|---|---|---|
| Fresh horse manure | Enough for 18–24 inches | Main heat source |
| Straw bedding | Mixed with manure | Adds carbon and air space |
| Clean water | Several watering cans | Activates microbes |
| Compost-rich soil | 4–6 inches | Planting layer |
| Garden fork | Long, sturdy tines | Loosens and mixes material |
| Soil thermometer | Probe style, 12-inch stem | Checks heat |
| Wheelbarrow | 4–6 cubic feet | Moves bulky material |
| Gloves and boots | Waterproof and durable | Protects skin and feet |
You may need 1.5 to 2.5 cubic yards of manure and bedding for a small to medium bed. Exact volume depends on the bed size. Buy or collect extra because the material settles by 20–30 percent during the first week.
Use mature compost mixed with loam or screened topsoil for the planting layer. A simple mix is two parts screened topsoil, one part finished compost, and one part leaf mold or coco coir. Aim for a pH between 6.0 and 7.0 for most vegetables and herbs.
Manure sourcing and safety
Ask the supplier what bedding and feed the animals receive. Hay or straw bedding is useful. Shavings can work, but large amounts of fresh wood shavings may slow heating because they tie up nitrogen.
Avoid manure from animals treated with persistent herbicides unless you know the source is safe. Some herbicides pass through animals and remain active in manure and compost. They can damage tomatoes, peppers, beans, peas, and potatoes.
Wash vegetables before eating them, even when the crop grows in a clean soil layer. Keep raw manure away from greenhouse paths, tools, harvest bins, and irrigation tanks.
⚠️ Warning: Do not use a hot bed in a sealed greenhouse with no ventilation. Strong ammonia smell, eye irritation, or headaches mean you should open vents and doors, leave the structure, and let the bed air out before planting.
Build the hot bed step by step
Build the bed when you can manage the first week of heating. Most gardeners need half a day for construction, then seven to ten days for the material to reach a stable temperature. Do not rush the planting step.
1. Mark and prepare the bed
Mark the bed with a tape measure and string. Remove weeds, roots, and sharp stones. If you want a sunken bed, dig 4 to 12 inches below the greenhouse floor, depending on local drainage and frost.
Keep the excavated soil nearby if it is clean and free of weeds. You may use some of it in the final planting mix. Do not use soil that contains glass, construction waste, or a known herbicide residue.
Check that the greenhouse roof vents and side vents open fully. You will need airflow during the heating phase and on bright days.
2. Add a drainage base
Place 4 to 6 inches of coarse wood chips, straw, or small branches at the bottom. In a very wet site, use a thin gravel layer below that. The base should allow water to escape but should not act like a deep mulch layer that isolates the heat.
Do not line the entire bed with airtight plastic. A sealed liner can hold water and create anaerobic conditions. Anaerobic decomposition smells sour or rotten and produces little useful heat.
3. Mix the heating material
Mix fresh horse manure and straw before adding it. A practical starting ratio is about two parts manure to one part straw by volume. The exact mix changes with the manure source.
If the manure looks dry, add water as you build. If it drips when squeezed, it is too wet. The correct moisture level feels like a wrung-out sponge: damp, but not muddy.

4. Add the first layer
Spread 8 to 12 inches of the manure-and-straw mix over the drainage base. Walk around the bed and press it lightly with a fork or the flat side of a rake. Do not stomp hard.
Light compaction removes large gaps while keeping enough air for aerobic microbes. A very loose pile dries out. A hard-packed pile turns sour and loses heat.
5. Water each layer
Water the layer evenly with a rose nozzle. Avoid a strong jet that washes manure to one side. The center often stays dry, so check it with your hand or fork.
Repeat the layering process until the heating material reaches 18 to 24 inches. Make the surface level. Uneven depth creates hot and cool spots under the plants.
6. Cap the pile with soil
Add 4 to 6 inches of compost-rich soil over the heating material. Use 6 inches if you plan to grow tomatoes, cucumbers, or peppers later. Use at least 4 inches for lettuce, spinach, radishes, and seed trays.
A thin soil cap can dry fast and may let roots reach raw manure. A very thick cap reduces the heat that reaches the roots. In my beds, 5 inches has been a good middle ground.
7. Let the bed heat
Close the greenhouse during cool weather, but open the vents if the air becomes humid or the bed smells strongly. Insert a soil thermometer into the planting layer and another probe into the manure layer if you have two.
The bed may warm slowly for two days, then rise quickly. Wait until the planting soil measures about 65–85°F. If the soil is hotter than 90°F, delay planting and ventilate.
| Day after building | Typical internal change | What to do |
|---|---|---|
| Days 1–2 | Little heat or a slow rise | Keep material moist |
| Days 3–5 | Strong microbial heating | Check smell and vents |
| Days 6–10 | Peak heat often occurs | Test the soil layer |
| Weeks 2–4 | Stable, useful warmth | Plant hardy crops |
| Weeks 5–8 | Heat begins to fade | Add insulation or remove crops |
The schedule is a guide, not a rule. Fresh spring manure may heat in three days. Cold, wet manure may need two weeks. Measure the soil rather than relying on the calendar.
8. Plant at the right time
Start with crops that like cool roots and mild air. Lettuce, spinach, arugula, kale, radish, onion, parsley, cilantro, and many seedlings handle a new hot bed well.
Wait before planting heat-sensitive roots or shallow-rooted seedlings. Cucumbers, basil, melons, and young tomato plants may wilt if the soil stays above 85°F. Set trays on a board or shelf if the bed runs too hot.
Plant seeds at the depth listed on the packet. The warm soil may speed germination, so inspect trays each day. A seed that dries once can fail even when the bed temperature looks perfect.
Manage temperature, water, and ventilation
A hot bed needs daily checks during its first two weeks. The greenhouse air may feel comfortable while the root zone becomes too hot. A soil thermometer gives a better answer than your hand.
Water the soil layer when the top half inch dries. The heating layer should remain damp, but the planting layer should not stay wet. Overwatering cools the bed and can cause damping-off in seedlings.
Ventilation controls both heat and humidity. Open roof vents on sunny days, even in winter, if the air inside rises above the crop’s safe range. Close them before late afternoon when outside temperatures fall.
| Reading or sign | Likely meaning | Response |
|---|---|---|
| Soil layer 65–85°F | Good for most starts | Plant and monitor |
| Soil layer above 90°F | Root stress risk | Ventilate and wait |
| Sour or rotten odor | Poor air flow or excess water | Loosen and drain |
| Ammonia smell | Too much fresh manure | Ventilate; delay planting |
| Dry, cool bed | Low moisture or weak fuel | Add water and cover |
| Condensation on leaves | Humidity is too high | Vent early and reduce watering |
The main risk is not a lack of heat. It is heat combined with wet leaves and still air. That mix invites damping-off, gray mold, powdery mildew, and fungal leaf spots.
💡 Pro Tip: Place a flat stone or ceramic tile on the soil and check its temperature with an infrared thermometer. It gives a quick surface reading, while a probe thermometer tells you the temperature at root depth.
Choose plants that match the hot bed
A hot bed can extend the season, but it does not change every crop’s light needs. Plants still need enough sunlight, the right day length, and good air flow. Warm roots cannot fix a dark greenhouse.
Good first crops
Cool-season vegetables are the safest choice. Loose-leaf lettuce, ‘Winter Density’ romaine, spinach, mizuna, mustard greens, baby kale, radish, turnip, and scallions all grow well in a warm root zone.
Herbs such as parsley, chives, cilantro, and dill also perform well. Cilantro may bolt quickly if the greenhouse becomes hot, so sow small batches every two weeks.
Seed trays for brassicas, lettuce, onions, and flowers can sit on the soil cap. For peppers and tomatoes, use trays only after the bed cools to a stable 70–80°F.
Crops that need caution
Tomatoes, peppers, eggplants, basil, cucumbers, squash, and melons need warm soil but dislike extreme root heat. Use a board to create a small air gap, or place containers on a bench above the hot bed.
Root crops can fork if the soil is coarse or full of straw. Carrots need a clean, fine soil layer at least 8 inches deep. For that reason, I prefer to grow carrots in containers rather than directly over fresh heating material.
Companion planting and pollinators
A hot bed does not replace pollination. Cucumbers, squash, and melons may need hand pollination if the greenhouse lacks bees. Grow flowers such as alyssum, calendula, or dwarf marigolds near the entrance, but do not overcrowd the bed.
Alyssum can attract hoverflies and other useful insects. Those insects may help with aphids, but they do not solve every pest issue. Inspect leaves for aphids, whiteflies, fungus gnats, and spider mites each week.
Maintain the bed as the heat fades
Most hot beds give their strongest warmth in the first two to four weeks. After that, the material cools as the easy food breaks down. The bed may still remain warmer than the surrounding ground.
Add a light layer of finished compost if the soil settles. Do not dig deeply into the heating layer while crops are growing. You can damage roots and release raw material into the planting zone.
Use mulch only on the soil surface. A thin layer of leaf mold or fine compost can reduce water loss. Avoid thick straw mulch in a damp greenhouse because it can shelter slugs and fungus gnats.
A simple maintenance checklist
| Task | How often | What to check |
|---|---|---|
| Check soil temperature | Daily at first | Root-zone heat |
| Check greenhouse vents | Daily in sun | Heat and humidity |
| Test soil moisture | Every 1–3 days | Dry surface, wet core |
| Inspect leaves | Twice each week | Pests and disease |
| Top up settled soil | After 1–2 weeks | Exposed manure |
| Remove spent plants | As crops finish | Rot and pests |
Keep a small log with the date, soil temperature, air temperature, and watering. After one season, you will know how quickly your local manure heats. This helps more than copying a schedule from a different climate.
Common hot-bed problems and fixes
Most failures come from poor moisture, weak material, or planting too soon. The problem often appears at the surface, but the cause lies deeper in the heating layer.
| Problem | Likely cause | Fix |
|---|---|---|
| Bed never warms | Old manure or too little nitrogen | Mix in fresher manure |
| Bed smells rotten | Too wet or tightly packed | Add dry straw and loosen |
| Soil dries quickly | Thin soil cap or strong sun | Add compost and water deeply |
| Seedlings wilt | Root zone too hot | Move trays and ventilate |
| Mold on soil | Still air and excess water | Increase air flow |
| Heat fades in one week | Bed too shallow | Rebuild at 18–24 inches |
| Roots burn | Soil cap too thin | Add clean soil and delay planting |
Why is my hot bed not heating?
A hot bed may fail to heat if the manure is old, frozen, too dry, or too wet. It may also lack enough nitrogen if it contains mostly straw or wood shavings. Mix in fresh manure, moisten the pile, and keep it loosely packed.
Cold outdoor temperatures slow microbial activity. In Zones 3–5, an uninsulated bed may need extra time. Cover the outside of the frame with straw bales or rigid insulation, but leave the top open to air.
Why is my hot bed too hot?
A bed becomes too hot when the layer is deep, the manure is very fresh, or the greenhouse traps strong sun. Remove some soil from the cap only if you need to let heat escape, and never plant into exposed manure.
Open roof vents and doors during the day. Move seed trays to a bench or place a thick board under containers. Check again in several hours because the temperature can rise fast after a sunny morning.
Why does the bed smell bad?
A sour smell usually means the pile lacks oxygen. Excess water, heavy compaction, or poor drainage can create anaerobic zones. Ammonia smell often means the mix has too much fresh nitrogen or not enough carbon.
Loosen the top layer with a fork and add dry straw. Improve drainage if water collects below the soil. Keep people and pets out of the greenhouse until the odor clears.
Hot bed safety and food hygiene
Wear waterproof gloves, long sleeves, eye protection, and boots when handling fresh manure. Wash tools after use. Do not eat, smoke, or store food while building the bed.
Fresh manure can contain pathogens such as E. coli and Salmonella. A clean soil cap lowers contact risk, but it does not make raw manure safe to handle. Keep leafy greens and low-growing crops from touching exposed manure.
Do not use a hot bed if you cannot ventilate the greenhouse. Avoid sleeping or working for long periods in a closed structure with a strong manure smell. If you feel dizzy, sick, or short of breath, leave at once and get fresh air.
Protect children, pets, and tools
Fence off the work area while the bed contains raw manure. Dogs may dig into the warm material, and cats may use loose soil as a litter area. A simple mesh cover can protect young plants and keep animals out.
Use separate gloves and tools for manure work when possible. If you use the same tools for harvest, scrub them with hot soapy water and let them dry in sunlight.
Cost, lifespan, and value
A DIY hot bed can cost very little if you have manure, straw, compost, and reclaimed boards. Current pricing ranges from nearly free to several hundred dollars, based on lumber, delivery, insulation, and soil.
The heating material lasts one crop cycle, often four to eight weeks. The frame can last five to fifteen years, depending on the wood and moisture. A soil thermometer usually lasts many seasons if you store it dry and do not bend the probe.
| Setup | Typical cost range | Best fit |
|---|---|---|
| Reclaimed frame and local manure | $20–$80 | Budget gardeners |
| New wood frame and delivered material | $100–$300 | Medium greenhouses |
| Insulated permanent bed | $250–$600+ | Cold zones and long use |
| Electric heat mat | $30–$150 | Small trays and clean setups |
| Composting greenhouse bench | $150–$500 | Gardeners who want bench height |
A hot bed is worth the effort when you have access to clean manure and want early crops. It may not be worth it if you need only a few seed trays. In that case, an electric propagation mat is cleaner, easier to control, and often cheaper.
Alternatives to a manure hot bed
A hot bed is only one way to warm greenhouse plants. Your choice depends on greenhouse size, crop type, power access, and how much daily care you want to provide.
Electric heat mats
Heat mats give steady heat under seed trays. Most include a thermostat and use little power compared with whole-greenhouse heaters. They work well for tomatoes, peppers, basil, and flower seedlings.
Their main limit is size. A mat warms trays but does not heat a large soil bed. It also needs a safe outdoor-rated connection and protection from water.
Compost-heated benches
A compost bench uses a deep box of active compost below a growing tray. It can provide gentle heat and places plants at a comfortable working height. The design is useful for gardeners with back pain.
Compost benches need a strong frame and careful moisture control. They also take up more vertical space, which may reduce headroom in a small greenhouse.
Passive solar beds
Dark water barrels, stone, and thermal mass store sunlight and release it at night. They do not create heat, but they reduce temperature swings. Combine them with row covers for better winter protection.
Passive solar heat works best in sunny climates. It cannot replace a hot bed during long cloudy periods in the Pacific Northwest or northern New England.
My experience building hot beds in different climates
In a Zone 6 greenhouse, a 24-inch horse-manure bed reached peak heat on the fifth day. The soil stayed near 75°F for about six weeks. Lettuce and onion seedlings grew well, but tomato trays wilted until I moved them onto a board.
In a colder Zone 4 site, the first bed failed because the manure was partly frozen and the frame had no insulation. I rebuilt it with warmer material, added straw bales around the outside, and waited twelve days before planting. The second bed warmed more slowly but held useful heat longer.
In a Zone 9 winter greenhouse, heat was less helpful than air control. The bed reached 90°F on bright days, and humidity caused gray mold on dense lettuce. I used a thinner 12-inch heating layer and opened the roof vent early each morning.
The lesson was clear: deeper is not always better. Match the bed size and heat level to your climate, greenhouse ventilation, and crop list.
Seasonal use and storage
The best time to start a hot bed is late winter, about two to four weeks before you want to plant. In spring, it helps germinate seeds and grow transplants. By late summer, the heat may be too strong unless the greenhouse has excellent ventilation.
A hot bed can also support winter greens in Zones 7–10. Use a lower bed depth, a light soil cap, and crops such as spinach, claytonia, mâche, and winter lettuce. In Zones 3–5, combine the bed with row covers and greenhouse insulation.
At the end of the season, remove diseased plants and roots. Let healthy spent material break down in a separate compost pile. Do not spread unfinished manure around root crops or leafy greens that you plan to harvest soon.
Clean the frame, wash tools, and check for rot. If the wood has softened, replace it before the next build. Store soil thermometers indoors and keep greenhouse vents free of dust and debris.
Mistakes that reduce heat and crop growth
The most common mistake is planting before the bed settles. A hot center can damage roots even when the top looks cool. Wait for a stable reading in the planting layer.
Another mistake is using only fresh manure. Pure manure can become dense, wet, and overly hot. Straw or another carbon-rich material creates the air spaces that healthy decomposition needs.
Avoid these errors:
- Building the bed in a shaded corner
- Making the soil cap less than 4 inches deep
- Sealing the base with plastic
- Adding too much water at once
- Growing tall crops before checking ventilation
- Ignoring herbicide risk in manure
- Leaving fallen leaves and dead plants in the bed
- Letting the bed dry completely during the first week
🌱 Beginner Note: Start with one 3-by-6-foot bed instead of filling the whole greenhouse. A small bed is easier to measure, vent, water, and rebuild if the mix is wrong.
When another method makes more sense
Choose an electric heat mat if you grow only a few trays or need exact temperature control. Choose a compost bench if you want a waist-high work surface and have room for a strong structure.
Use a small propane or electric greenhouse heater only when you need to protect the air temperature, not just the roots. Whole-air heaters cost more to run and can dry plants quickly. A hot bed is quieter and cheaper to run, but it cannot respond as quickly to a sudden freeze.
For a rented greenhouse, use removable trays, water barrels, and electric mats. For a permanent home greenhouse with local horse manure, a framed hot bed often gives the lowest long-term cost.
Frequently asked questions
Q: How deep should a greenhouse hot bed be?
A: Make the heating layer 18 to 24 inches deep. Add 4 to 6 inches of clean planting soil above it. A shallower bed warms briefly, while a deeper bed may become too hot or hard to manage.
Q: Can I make a hot bed without manure?
A: Yes, but the heat may be weaker. Mix green plant material, fresh grass, kitchen scraps, and carbon-rich straw in a compost-style bed. Avoid meat, dairy, diseased plants, and large amounts of wood chips.
Q: Can I use chicken manure in a hot bed?
A: Use it sparingly. Chicken manure contains high nitrogen and can create strong ammonia, excess heat, and root burn. Mix it with plenty of straw and other bulky material, then give the bed extra time before planting.
Q: How long does a greenhouse hot bed stay hot?
A: Most beds provide useful heat for four to eight weeks. Fresh material, a 24-inch depth, insulation, and good moisture can extend the warm period. Cold or very wet conditions can shorten it.
Q: Can I plant directly into fresh manure?
A: No. Fresh manure can burn roots and release harmful gases. Cover it with at least 4 to 6 inches of clean, compost-rich soil and wait until the planting layer reaches a safe temperature.
Q: What temperature should a hot bed reach?
A: The manure layer may reach 120–150°F, but the planting soil should usually stay near 65–85°F. Delay planting if the root zone rises above 90°F, especially for lettuce and young seedlings.
Q: Can a hot bed heat the entire greenhouse?
A: Not reliably. It warms the soil and nearby air, but it does not replace a heater during hard freezes. Use insulation, row covers, thermal mass, or a safe greenhouse heater when air temperature is the main concern.
Q: Why did my hot bed cool down after one week?
A: The bed may be too shallow, too dry, too wet, or made from old manure. It may also have poor insulation in a cold climate. Check moisture, loosen compacted areas, and measure the temperature at several points.
Q: Is horse manure safe for vegetables?
A: It can be useful when sourced carefully and kept below a clean soil layer. Ask about herbicide exposure, use gloves, wash produce, and avoid direct contact between raw manure and edible plant parts.
Q: Can I reuse the old hot-bed material?
A: Yes. Move it to a compost pile and let it cure until it becomes dark, crumbly, and free of a strong manure smell. Use finished material as a soil amendment, not as a raw planting layer.
Q: Do hot beds attract pests?
A: Warm, damp soil can attract fungus gnats, slugs, and sowbugs. Keep the greenhouse clean, avoid overwatering, improve air flow, and remove plant debris. Sticky traps can help monitor adult fungus gnats.
Q: Can I grow tomatoes in a hot bed?
A: Yes, after the root-zone heat drops to about 70–80°F. Give tomatoes at least 6 to 8 hours of light, strong air flow, and a deep soil layer. Move plants if the bed rises above 85°F for long periods.
Q: Is a hot bed better than an electric heat mat?
A: A hot bed suits large soil beds and gardeners with free manure. An electric mat suits small seed trays and growers who want precise control. Neither option is right for every greenhouse.
Final thoughts
A greenhouse hot bed is a simple form of natural heating, but success comes from control. Use clean, fresh materials, keep the mix damp but airy, build a deep heating layer, and wait for the soil temperature to settle before planting.
Start small, record your temperatures, and match the bed to your crop and climate. Once you learn how your local manure behaves, a hot bed can give you earlier seedlings, stronger roots, and several extra weeks of growing without a large power bill.
Meta description: Learn how to make a hot bed in a greenhouse with manure, straw, soil, and simple tools. Follow safe steps for steady heat, early seedlings, and winter crops.