How To Build A Terraced Garden Bed: Easy DIY Guide
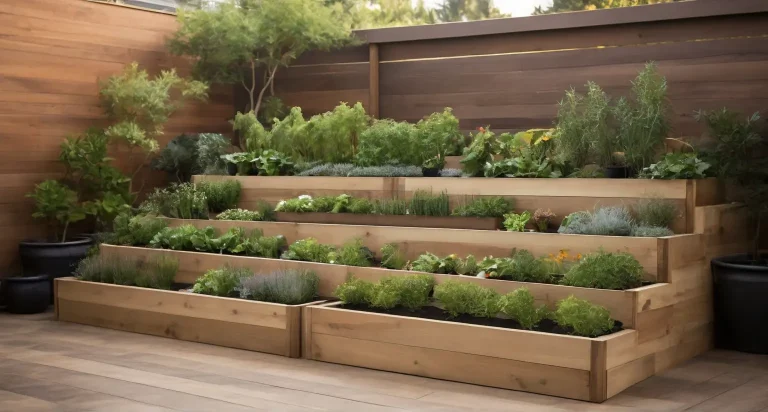
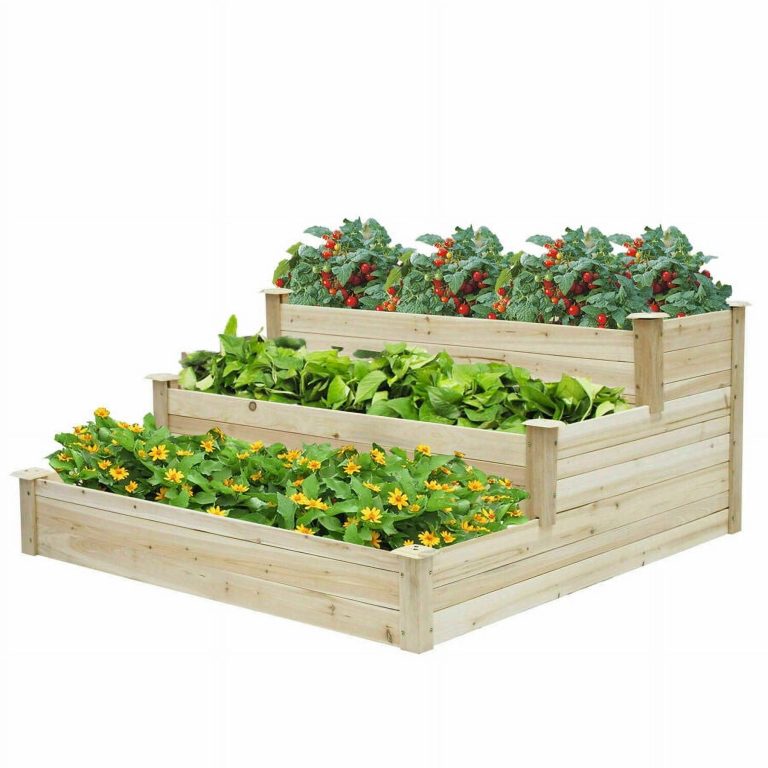
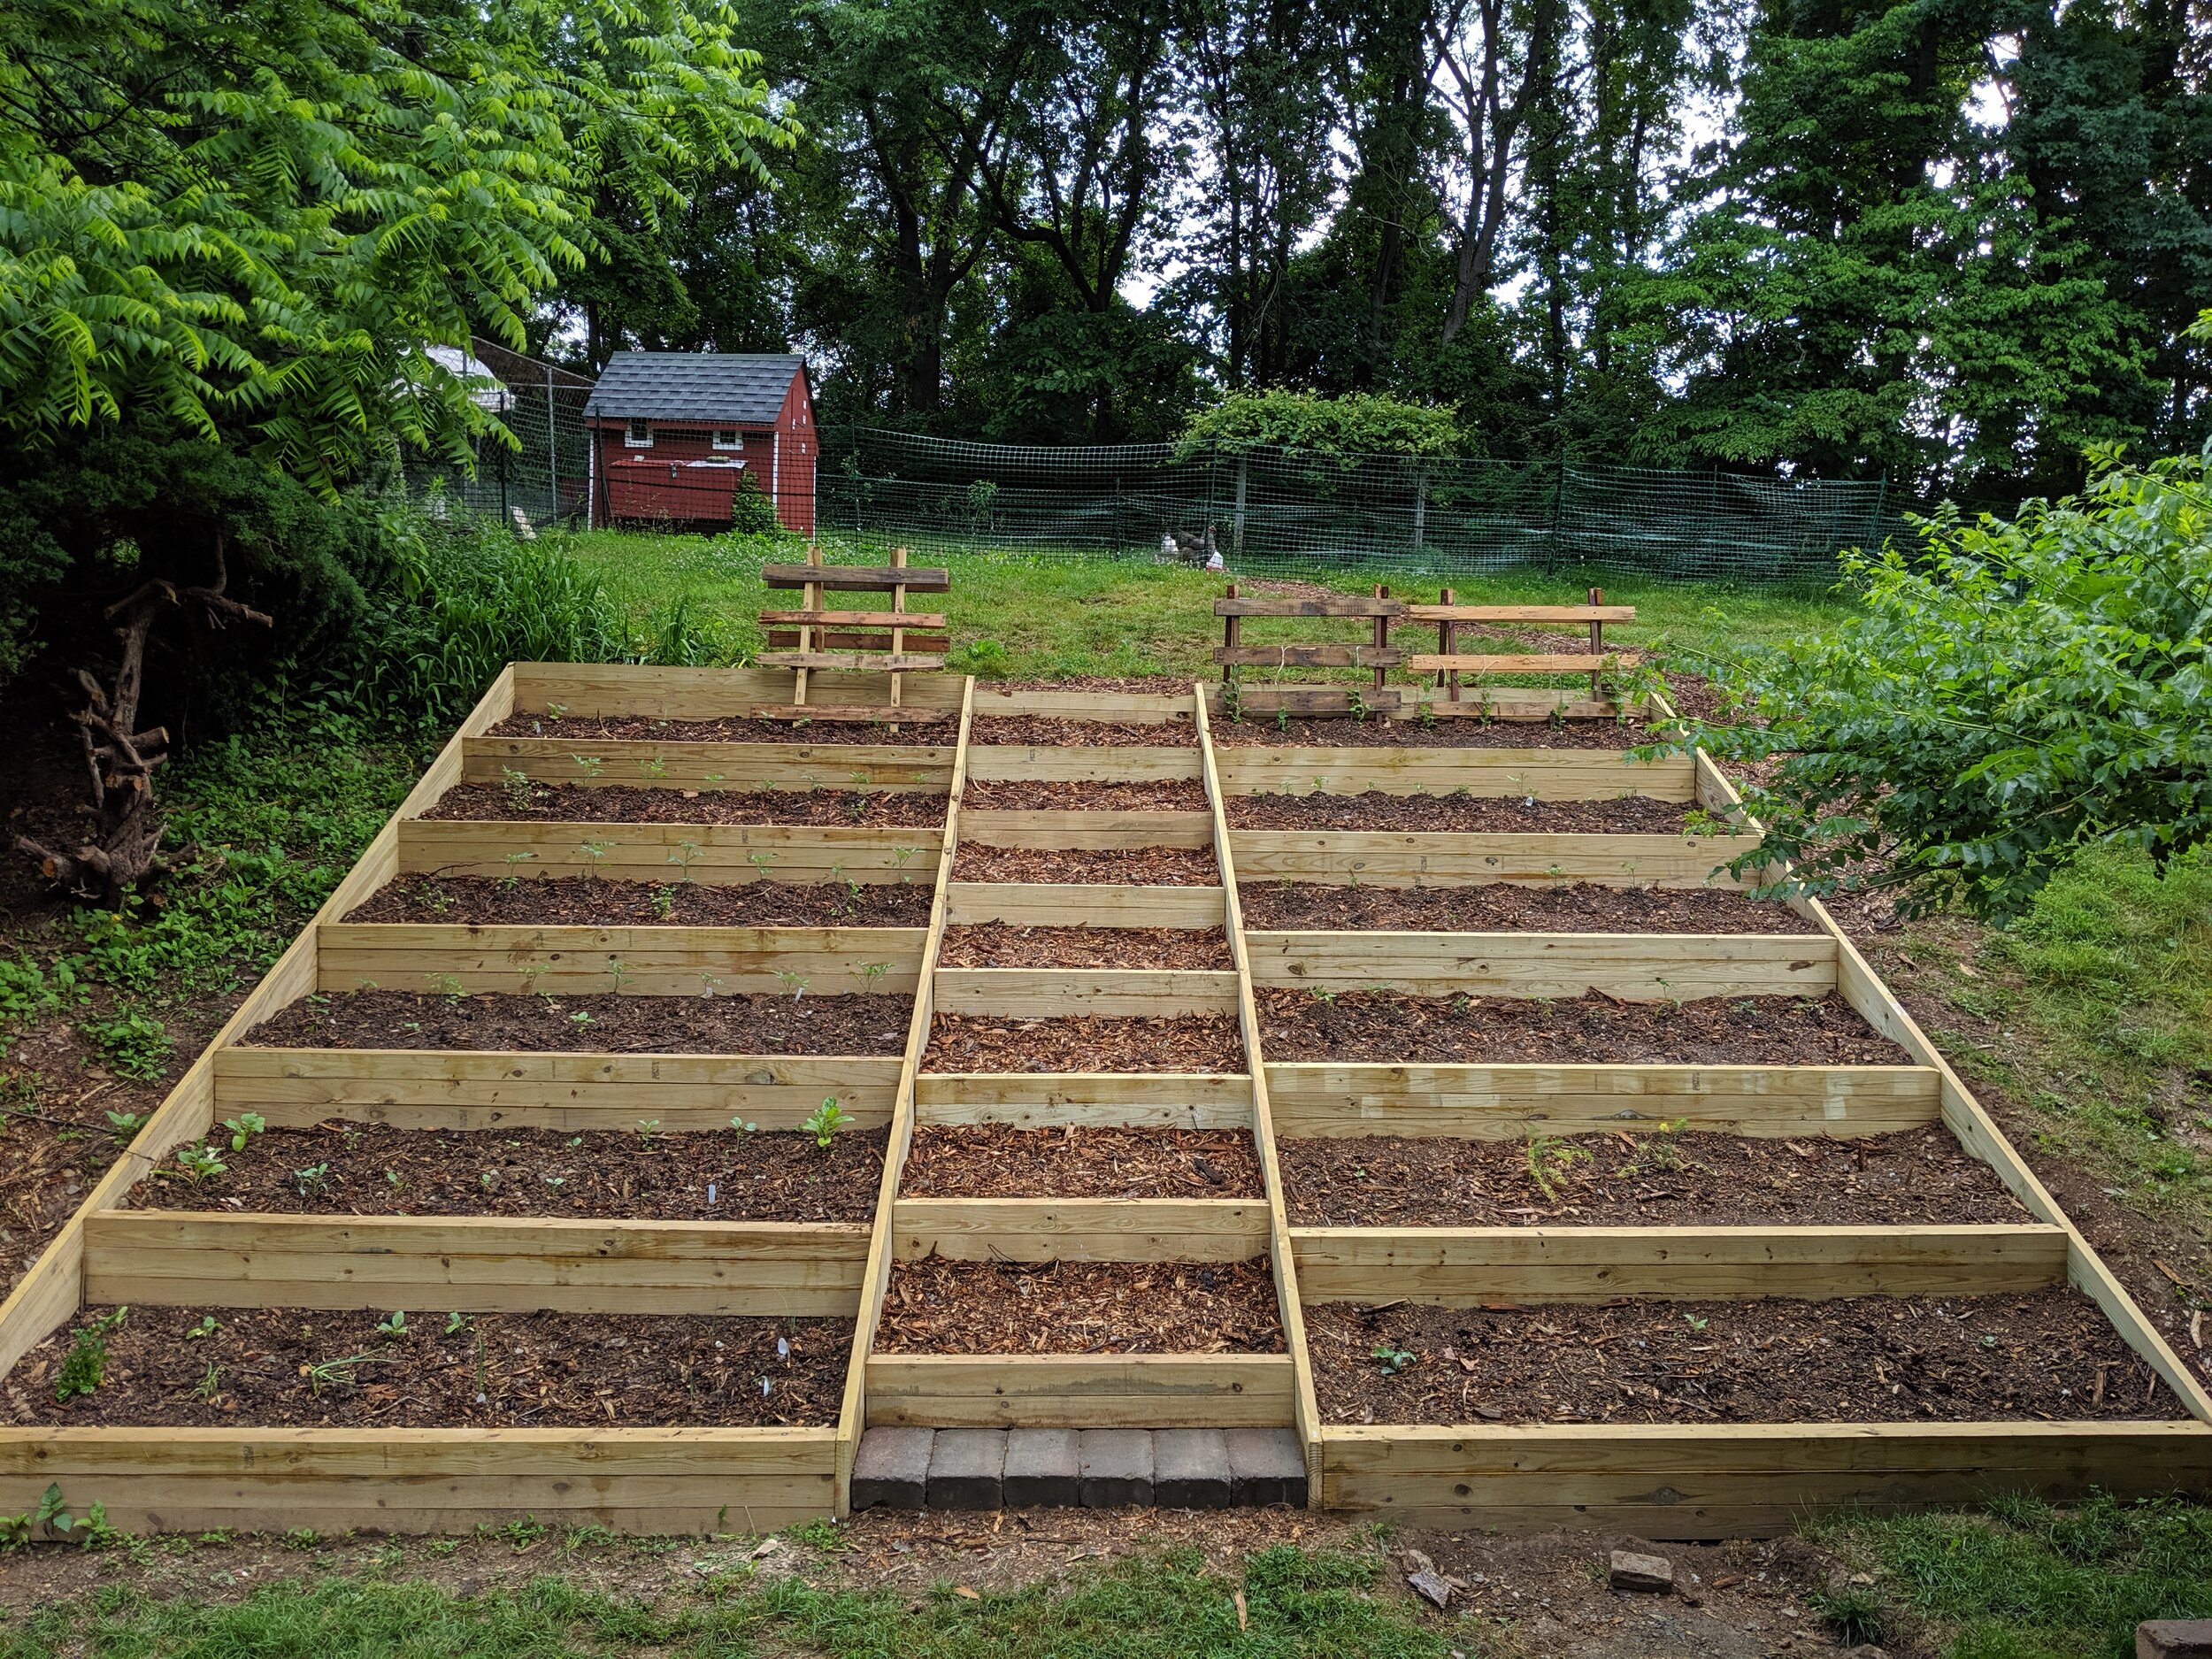
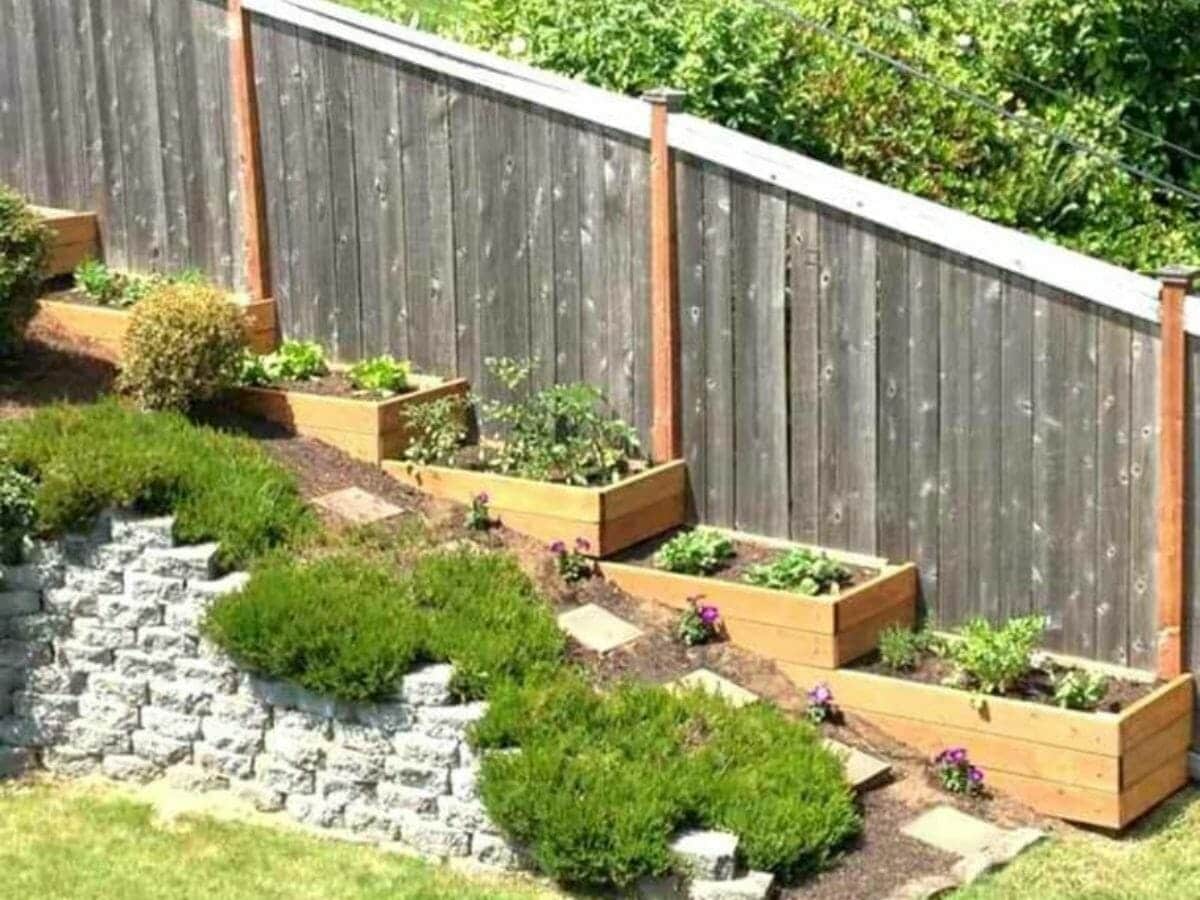
A terraced garden bed turns a sloped yard into a set of level planting spaces. Instead of fighting runoff, erosion, and hard-to-reach soil, you create several small beds that hold water, soil, and plants in place. The result can look like a staircase made of flowers, herbs, vegetables, or fruit.
I have built terraced beds on gentle slopes in USDA Zones 5 and 7, and I have repaired beds that failed after one wet winter. The biggest lesson is simple: a terrace is not just a raised bed on a hill. Each level needs a stable edge, a slight slope for drainage, and a safe way to move water downhill.

Quick answer: how to build a terraced garden bed
The best way to build a terraced garden bed is to work across the slope, from the lowest level upward. Mark equal-height contours, dig each step into the hill, build a strong retaining edge, add gravel and drainage behind it, then fill with quality soil. Use untreated stone, brick, concrete blocks, or rot-resistant wood. Keep each terrace low unless you use engineered retaining walls.
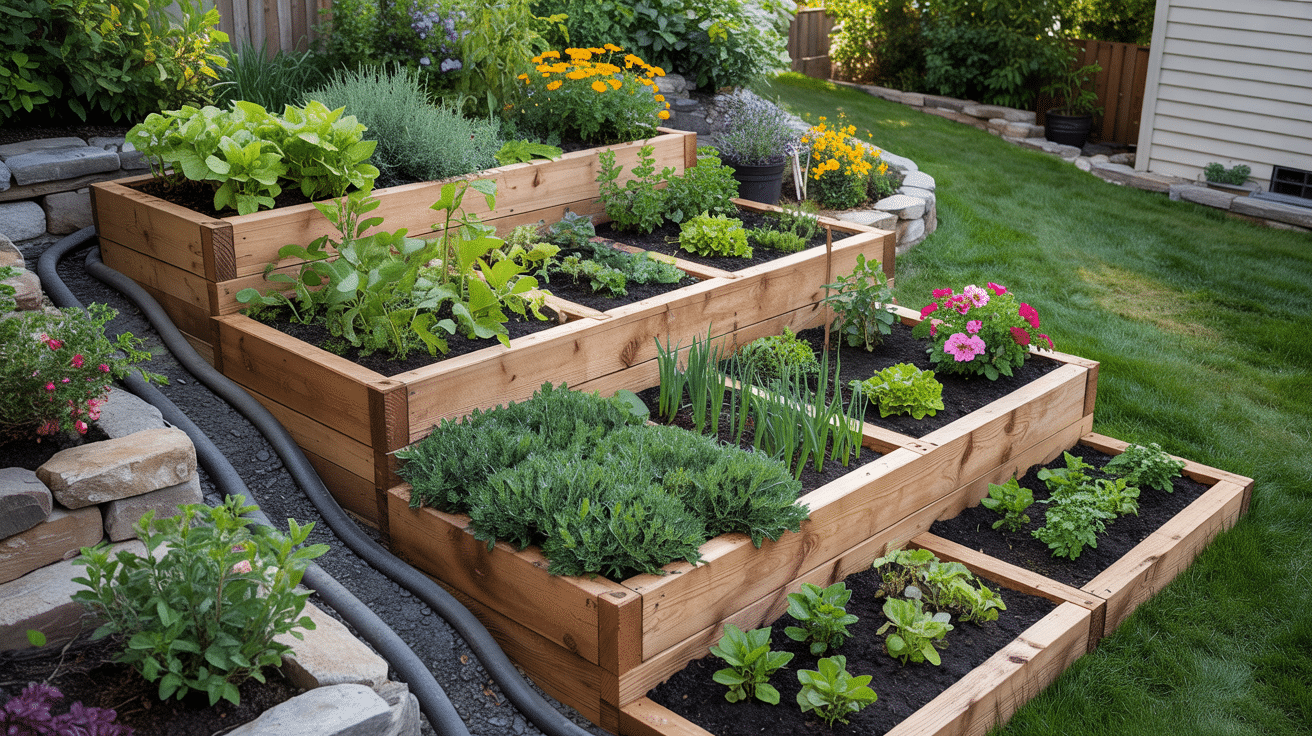
A small terrace can be a weekend project. A larger slope may need several weekends, a rented plate compactor, or help from a landscape contractor. The cost often ranges from $100 for a small timber terrace to more than $2,000 for a long stone system.
What a terraced garden bed does
A terraced garden bed divides one steep slope into multiple flat or gently sloped planting areas. Each retaining edge holds soil at a different height. The beds slow rain, reduce soil loss, and make planting and watering much easier.
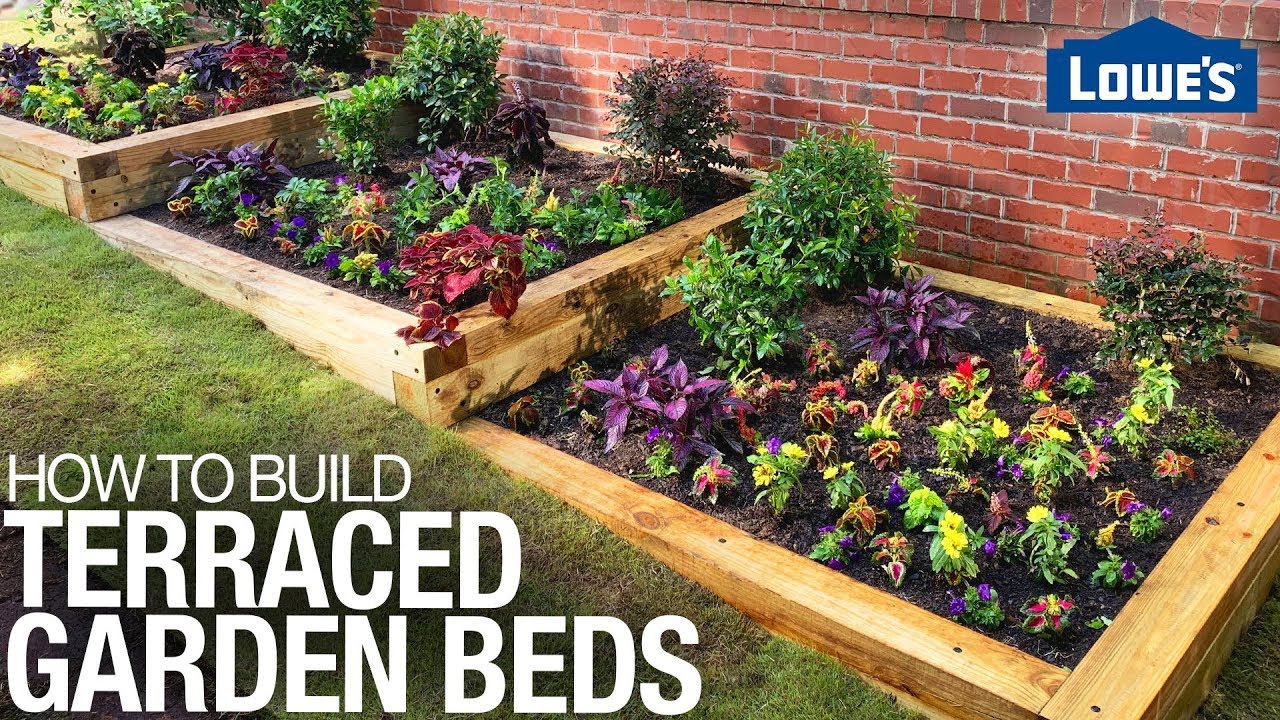
Terraces work through three parts:
- The cut: Soil is removed from the uphill side.
- The retaining edge: A wall or frame holds the exposed soil.
- The level bed: The flat area receives plants, compost, and mulch.
A terrace does not stop water. It redirects and slows it. Water still needs a safe path around, through, or below the structure.
When terracing makes sense
Terracing works well when your slope is too steep for a normal garden bed but not so unstable that it needs major earthwork. A slope with a rise of 2 to 8 feet over 20 feet often responds well to two or three low terraces.
It also helps in yards with compacted clay, thin topsoil, or strong runoff. In my Zone 7 garden, a single terrace stopped a muddy stream from crossing a vegetable patch during spring storms.
When another method may be better
Terracing is not always the right answer. A mild slope may need only contour planting, a swale, ground covers, or a few stone paths. A very steep slope may need an engineered retaining wall, geogrid, drainage pipe, and a soil report.
Avoid building a tall wall beside a house, driveway, pool, septic system, or property line without professional advice. A failed wall can move tons of wet soil.
Plan the slope before you dig
Good planning prevents most terrace failures. Start by measuring the slope, checking where water moves, and deciding how many beds you can safely maintain.
Walk the site after a hard rain. Look for puddles, muddy channels, exposed roots, and places where water leaves the property. Mark those paths before you place a wall.
Test the soil as well. A basic soil test should show pH, phosphorus, potassium, and organic matter. Most vegetables prefer a pH of 6.0 to 7.0, while blueberries need a much more acidic bed near pH 4.5 to 5.5.
Measure rise and run
Use a long level, stakes, and string to estimate the slope.
- Place one stake at the high point.
- Place a second stake downhill.
- Stretch a level string between them.
- Measure the vertical distance from the ground to the string.
- Measure the horizontal distance between stakes.
If the ground rises 4 feet over a 20-foot run, the slope is 20 percent. That slope may suit three low beds, each about 12 to 18 inches high.
Choose the number of terraces
Low terraces are safer and easier to build. They also blend better with a home garden.
| Slope condition | Suggested layout | Main concern |
|---|---|---|
| Mild slope | One or two beds, 8–12 inches high | Keep water from pooling |
| Moderate slope | Two to four beds, 12–24 inches high | Strong walls and drainage |
| Steep slope | Engineered wall system | Soil pressure and runoff |
The table gives a starting point, not a structural design. Local soil, rainfall, frost, and wall material can change the safe height.
Check local rules
Some areas require a permit for retaining walls over 3 or 4 feet. Rules may also apply near property lines, sidewalks, utilities, and drainage easements.
Call 811 in the United States before digging. The service can mark buried electric, gas, water, and communication lines. A shovel can damage a line in seconds.
⚠️ Warning: Do not guess where underground utilities run. Marking the area may take a few days, but replacing a damaged gas or power line can cost far more than the garden.
Pick the right retaining material
The retaining edge is the part that does the hardest work. It holds back wet soil, roots, mulch, and sometimes snow. Choose a material that matches the wall height, soil type, and look of your yard.

Untreated and treated wood
Wood is easy to cut and beginner-friendly. Cedar, black locust, and redwood can last many years, though their lifespan varies by soil moisture.
Modern pressure-treated lumber rated for ground contact can last 10 to 20 years. Use lumber labeled for ground contact, not indoor or above-ground use. Avoid old salvaged railroad ties, which may contain creosote.
For a small bed, 4-by-4 posts or 6-by-6 timbers work better than thin fence boards. Anchor the wood with rebar, galvanized spikes, or buried deadmen.
Stone and pavers
Natural stone gives a long-lasting, soft look. Dry-stacked stone can work for low walls if each stone sits firmly and leans slightly into the slope. Larger walls need a compacted base and careful stone placement.
Concrete landscape blocks are more predictable. Many have a lip or tongue that locks each row into the one below. Follow the maker’s height limits and batter angle.
Concrete block and poured concrete
Concrete block can support taller terraces when built on a proper footing. Mortared walls need a stable base and drainage. Poured concrete offers strength but costs more and may look formal in a cottage garden.
Do not rely on loose cinder blocks placed on soil. They can shift, crack, or tip when the soil behind them becomes wet.
| Material | Typical life | Good use |
|---|---|---|
| Cedar or redwood | 8–15 years | Small beds and light slopes |
| Ground-contact treated lumber | 10–20 years | Low-cost structural beds |
| Natural stone | 30+ years | Low walls and natural landscapes |
| Concrete landscape block | 25–50 years | Clean, stable terrace walls |
| Mortared masonry | 30+ years | Taller or formal walls |
These are broad field estimates. Wet clay, freeze-thaw cycles, poor drainage, and wall movement can shorten any material’s life.
Compare cost and labor
Wood usually costs less at the start and takes less time to install. Stone and block cost more, but they often last longer and need less replacement.
A simple 8-by-4-foot timber terrace may cost $100 to $300. A similar block terrace may cost $250 to $700. Delivery, soil, gravel, tools, and erosion control can add more.
Gather tools and materials
The right tools make a terrace safer and more accurate. You do not need a mini excavator for a small bed, but you do need a way to check level and compact the base.

Basic tool list
- Tape measure
- Stakes and mason’s line
- Line level or 4-foot level
- Shovel and digging bar
- Mattock for roots and hard clay
- Hand tamper or plate compactor
- Wheelbarrow
- Garden rake
- Drill and exterior screws for wood
- Circular saw for timber
- Rubber mallet for blocks
- Work gloves
- Eye protection
- Steel-toe boots
- Hearing protection for power tools
A cordless reciprocating saw can cut old roots, but use it carefully. A compact electric cultivator may loosen soil, yet it can also mix wet clay into a sticky mess. Do not till soil when it forms a ball in your hand.
Materials for a small terrace
| Material | Starting amount for an 8-foot bed | Purpose |
|---|---|---|
| Wall timber or block | 8–12 linear feet | Retaining edge |
| Crushed gravel | 0.25–0.5 cubic yard | Base and drainage |
| Landscape fabric | As needed | Keeps soil out of gravel |
| Topsoil or garden soil | 1–2 cubic yards | Planting medium |
| Compost | 4–8 bags or 0.25 cubic yard | Adds organic matter |
| Rebar or spikes | 4–8 pieces | Anchors timber |
| Mulch | 2–4 bags | Protects soil surface |
The exact amount depends on wall height and bed depth. Order a little extra gravel because compacted material takes up less space than loose material.
Build a terraced garden bed step by step
Build from the bottom of the slope upward. This gives you a firm lower level and lets you use excavated soil in the next terrace.

Step 1: Mark the terrace lines
Place stakes across the slope at the front edge of each future bed. Use a level string to mark the same height from one side to the other.
The lines do not need to be perfectly straight. A gentle curve can look more natural, but keep the wall easy to build and mow around.
Leave at least 2 feet between terraces if you need a walking path. A 3-foot path is better for a wheelbarrow.
Step 2: Remove plants and topsoil
Cut back grass, weeds, and shrubs. Save healthy topsoil in a pile. You can use it later in the planting mix.
Remove perennial weeds such as bindweed, quackgrass, and Bermuda grass as fully as possible. A terrace can make these weeds harder to reach once the wall goes in.
Step 3: Dig the first level
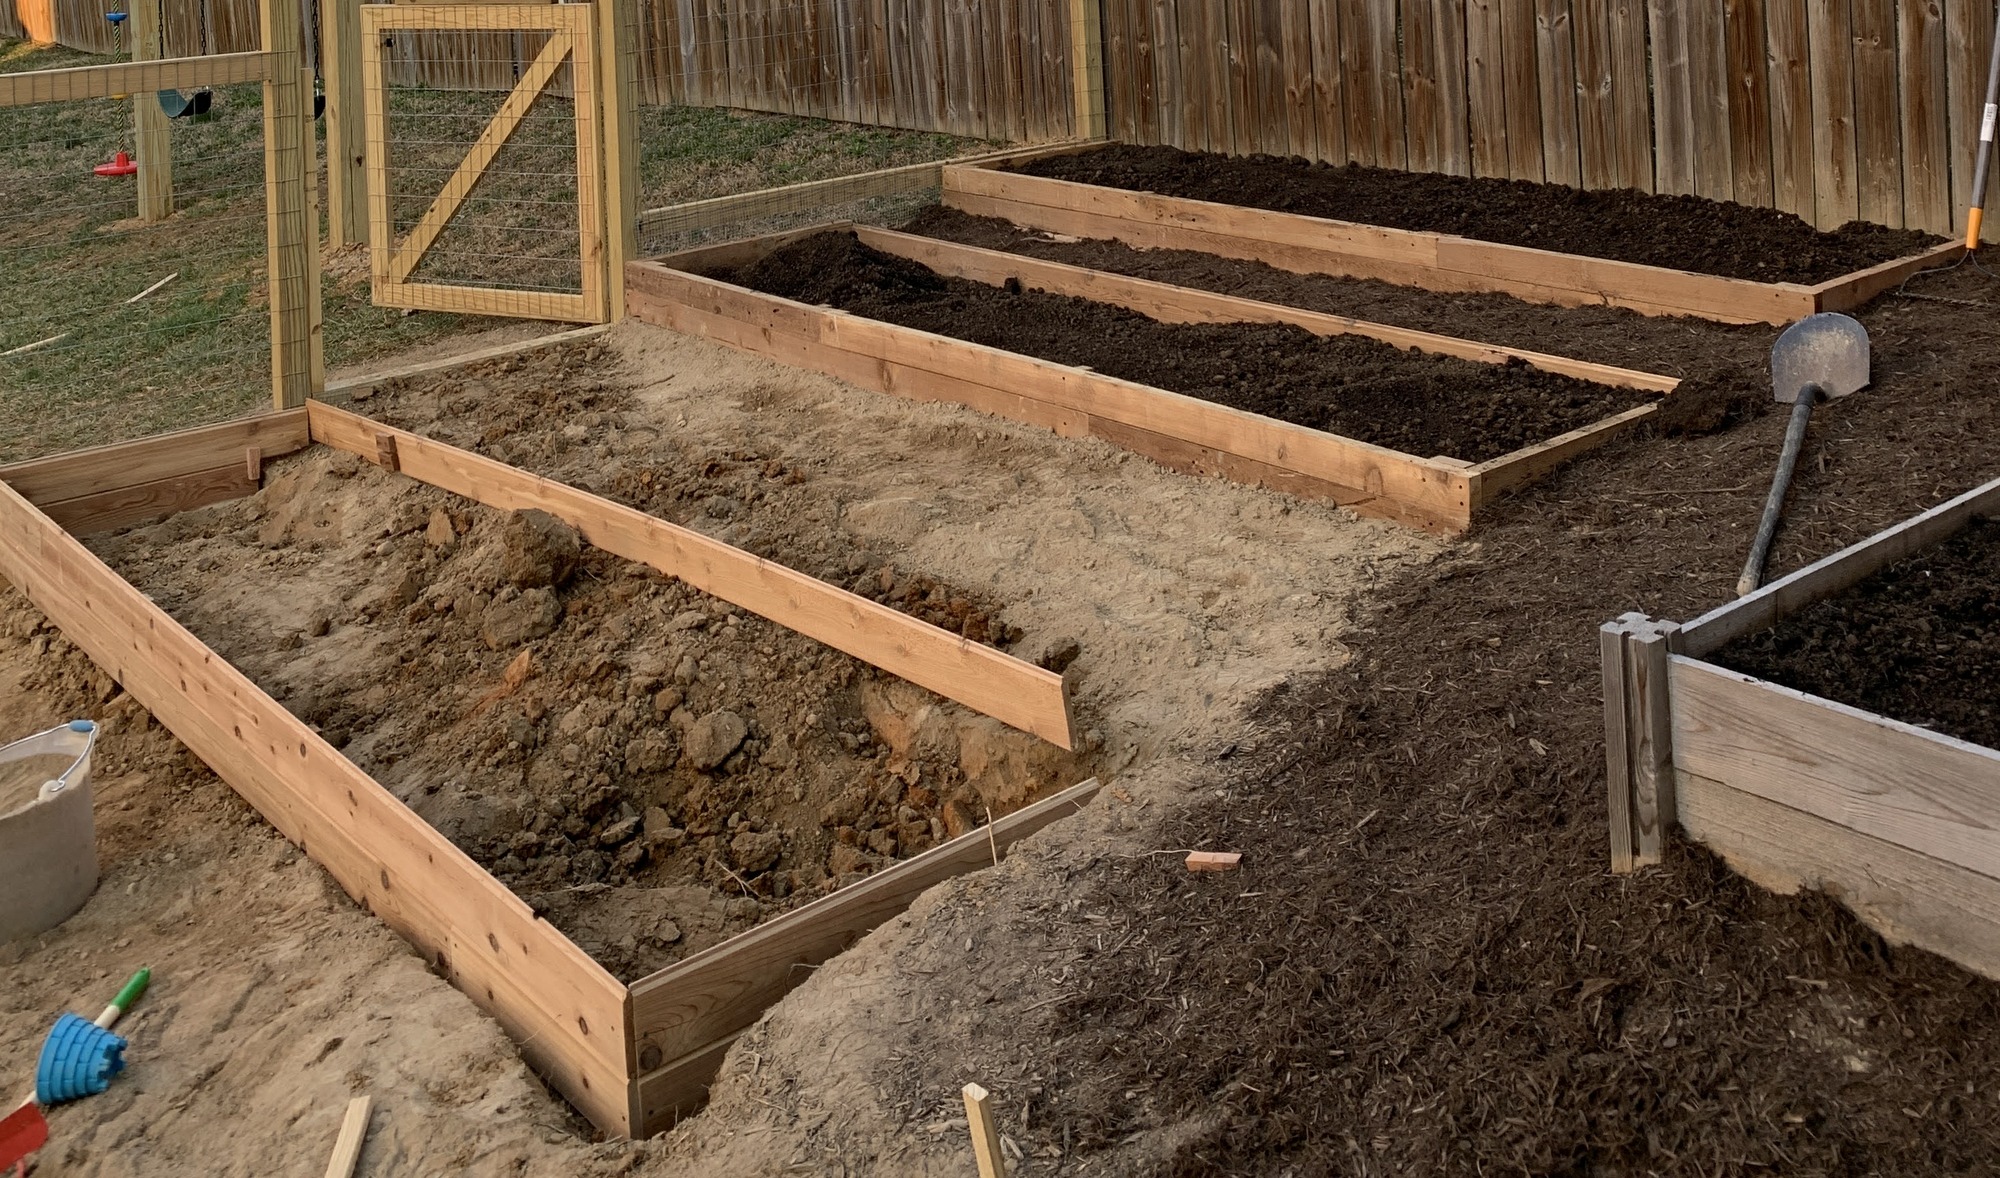
Start at the lowest terrace. Cut into the slope until you create a nearly level shelf.
Do not simply pile soil on the downhill side. That creates loose fill with little support. Cut into the hill, then use the removed soil to level the bed behind the retaining edge.
Check the shelf from side to side and front to back. A tiny slope of about 1 to 2 percent toward the front or toward a drain helps water move. Do not make the bed bowl-shaped.
Step 4: Prepare a compacted base
Dig a trench beneath the wall. For a low timber or block wall, make the trench about 6 to 8 inches deep. Add 4 to 6 inches of crushed angular gravel.
Compact the gravel in thin layers. A hand tamper works for a small bed. A reversible plate compactor works better for long walls.
The base should be wider than the wall. If the wall is 6 inches thick, make the gravel base about 12 inches wide.
Step 5: Install the retaining edge
Set the first timber, stone, or block course firmly on the compacted gravel. Check level often. A wall that starts out of level will look worse with every row.
For wood, overlap joints at the corners. Drill through the timber and drive galvanized spikes or rebar into the soil. For blocks, follow the manufacturer’s setback and stacking pattern.
Lean the wall slightly into the hill if the system allows it. This backward angle, called batter, helps the wall resist soil pressure.
Step 6: Add drainage behind the wall
Place clean, washed gravel behind the wall. A 6- to 12-inch layer works for many low terraces. Add perforated drainpipe at the base when the soil is clay, the slope is steep, or water collects uphill.
Wrap the pipe in a fabric sleeve or surround it with washed gravel. Slope it toward a safe outlet. Never send water toward a foundation, neighbor’s yard, septic field, or footpath.
Step 7: Add landscape fabric
Lay nonwoven geotextile fabric between the gravel drainage zone and the soil. This keeps fine clay and silt from clogging the gravel.
Do not use thin plastic sheeting behind a retaining wall. Plastic can trap water and increase pressure. It also prevents roots from helping hold the soil.
Step 8: Backfill and compact
Add soil behind the wall in lifts of 4 to 6 inches. Tamp each layer before adding the next. Loose backfill settles later and can pull the wall forward.
Use a mix of screened topsoil, compost, and mineral material. A common starting mix is about 60 percent topsoil, 30 percent compost, and 10 percent pumice, pine fines, or coarse sand. Adjust this for your native soil.
Step 9: Build the next terrace
Measure uphill from the first bed and mark the next front edge. Repeat the cut, base, wall, drainage, and backfill process.
Keep the upper wall from sitting directly above the lower wall unless the design allows enough setback. A common rule is to leave the next wall back at least twice its height on steep slopes, but local conditions matter.
Step 10: Shape and settle the soil
Rake each bed smooth. Water it lightly to settle air pockets, then top up low spots after a few days.
Do not plant at once if the fill is loose. Wait one to two weeks when possible. This reveals settling before you add valuable plants.
🌱 Beginner Note: Build one short terrace first. It lets you learn how your soil drains and settles before you commit to a large hillside system.
Use good soil, drainage, and mulch
Terraced beds need soil that drains well but still holds moisture. The right mix depends on whether you plan to grow vegetables, herbs, berries, or ornamentals.

Soil for vegetables and herbs
For tomatoes, peppers, beans, cucumbers, lettuce, basil, and parsley, use fertile soil with plenty of organic matter. Compost improves structure, but too much fresh compost can cause salt buildup and excess nitrogen.
Aim for loose soil that crumbles in your hand. Avoid a mix that feels like wet modeling clay or blows away like dust.
Soil for drought-tolerant plants
Lavender, thyme, sage, yarrow, sedum, and many native prairie plants need sharper drainage. Use more mineral material and less compost. A terraced rock garden can contain 50 to 70 percent gravel, crushed stone, or sandy soil.
Soil for berries
Strawberries grow well in sunny terrace beds with rich, slightly acidic soil. Blueberries need acidic soil, pine bark, and a dedicated bed. Do not mix blueberries into a bed limed for vegetables.
Raspberries need strong support and room to spread. Their roots can escape a terrace, so use a root barrier or plant them where spreading will not create a problem.
Mulch the finished bed
Apply 2 to 3 inches of shredded bark, leaf mold, straw, or clean compost. Keep mulch 2 inches away from plant stems and wood walls.
Mulch reduces splash, slows weeds, and protects the soil from summer heat. On a wet site, use a thinner layer so the surface can dry.
| Soil problem | What you may see | Better approach |
|---|---|---|
| Heavy clay | Water sits for hours | Add compost, coarse organic matter, and drainage |
| Sandy soil | Plants wilt quickly | Add compost and leaf mold |
| Compacted fill | Roots stay shallow | Loosen soil and add organic matter |
| Excess compost | Fast leafy growth, few fruits | Blend with mineral soil and test nutrients |
| Acid soil | Pale leaves in some crops | Test pH before adding lime |
A soil test is more useful than guessing from plant color. Pale leaves can result from iron, nitrogen, root damage, excess water, or high pH.
Choose plants for each terrace
A terraced bed creates small climate zones. The top bed often dries faster and receives more wind. The lower bed may stay cooler and wetter.

Sunny upper terraces
Use plants that tolerate heat and fast drainage:
- Rosemary
- Thyme
- Lavender
- Oregano
- Zinnias
- Coneflowers
- Tomatoes
- Peppers
- Eggplant
- Strawberries
In USDA Zones 8 to 10, afternoon heat can stress rosemary and lavender if the wall reflects sun. Add mulch and water deeply in the morning.
Lower terraces
Lower beds suit crops that prefer steady moisture:
- Lettuce
- Kale
- Swiss chard
- Parsley
- Cilantro
- Radishes
- Bush beans
- Hostas
- Astilbe
- Coral bells
Avoid placing plants that dislike wet roots in the lowest bed. Root rot can affect lavender, rosemary, and many succulents.
Use companion planting with care
Companion planting can improve space use and attract pollinators, but it will not fix poor soil or bad drainage. Try basil near tomatoes, alyssum near vegetables, and dill or fennel only where their spread will not crowd crops.
Plant marigolds for color and pollinator activity, not as a guaranteed pest cure. Rotate tomatoes, peppers, eggplants, and potatoes because they share diseases such as early blight and verticillium wilt.
Give each plant enough space
Crowded plants create shade, poor airflow, and disease. Follow mature plant size, not the size of the nursery pot.
A 4-by-8-foot terrace can hold about 32 square feet of growing area. That may fit eight tomato plants at a 2-foot spacing, or far more lettuce plants. Leave a narrow edge for hand access.
Water and fertilize terraces correctly
Terraced beds often dry in different ways. The upper bed may need water twice as often as the lower bed. Check each level with your finger before turning on the hose.
Water slowly at the soil line. A soaker hose or drip line works better than a sprinkler on a slope. Run irrigation in short cycles so water can soak in instead of running over the wall.
A 1-inch layer of water equals about 0.62 gallons per square foot. A 32-square-foot bed needs about 20 gallons for a 1-inch watering. Rainfall changes that need.
| Plant group | Watering target | Fertilizer approach |
|---|---|---|
| Leafy greens | Even moisture, often 1 inch weekly | Light compost or balanced feed |
| Fruiting crops | Deep watering, 1–2 inches weekly | Tomato feed after flowering |
| Herbs | Let the top inch dry | Little fertilizer |
| Native perennials | Water deeply during establishment | Compost only if soil is poor |
| Berries | Steady moisture during fruit set | Crop-specific fertilizer |
These figures vary with heat, wind, soil, and plant size. New transplants may need water every day for the first week, while established perennials may need much less.
Use a soil test before adding lime or strong fertilizer. For many vegetables, a balanced fertilizer such as 5-5-5 works well when applied at the label rate. Avoid pushing nitrogen late in the season because it can produce leaves instead of fruit.
Avoid common terrace-building mistakes
Most failures come from poor drainage, weak foundations, or too much wall height. A beautiful wall can move after one season if water has nowhere to go.

Building on loose fill
A wall placed on loose soil may settle unevenly. One end drops, the wall twists, and gaps appear.
Dig down to firm soil. Add compacted gravel in thin layers. If the ground remains soft, consult a contractor before building.
Making the wall too tall
A 4-foot wall holds far more pressure than a 1-foot wall. Wet soil weighs about 100 to 120 pounds per cubic foot, and clay can create strong sideways force.
Use several low terraces instead of one tall wall whenever the site allows. Taller walls may require footings, drainage design, tiebacks, geogrid, or an engineer.
Skipping the drainpipe
Gravel alone may not handle a wet slope. Water can fill the backfill and push the wall outward.
Add a perforated drainpipe when water runs toward the terrace. Give it a visible, protected outlet. Inspect that outlet after storms.
Using round river rock as a base
Round stones shift under pressure. Use angular crushed gravel that locks together. A material such as ¾-inch minus often compacts well for a base, while clean washed gravel suits the drainage zone.
Filling with pure compost
Pure compost shrinks as it breaks down. It can also hold too much water or release excess nutrients.
Blend compost with mineral soil. Recheck the bed after several weeks and top up with a similar mix.
Planting too soon
Plants hide soil movement. Wait until the bed settles, especially after heavy rain. If the wall shifts before planting, repairs are much easier.
| Problem | Likely cause | Fix |
|---|---|---|
| Wall leans outward | Wet backfill or weak base | Remove soil, improve drainage, rebuild |
| Soil washes over wall | Bed slopes toward edge | Regrade and add mulch or edging |
| Lower bed stays soggy | Blocked drain or low outlet | Clear pipe and redirect water |
| Timber rots at base | Constant moisture | Improve drainage or replace timber |
| Plants wilt in wet soil | Poor root drainage | Add drainage and move sensitive plants |
| Wall cracks after frost | Shallow or unstable base | Rebuild below frost depth where required |
Do not patch a moving wall by adding soil at the front. That may hide the problem but increases pressure.
Maintain the garden through the seasons
A terraced garden bed needs regular inspection, especially during wet seasons and freeze-thaw weather. Five minutes after a storm can prevent a major repair.

Spring
Check for frost heave, loose blocks, split timber, and clogged drain outlets. Pull weeds before their roots spread into the wall.
Top up soil only after the ground dries enough to walk on. Add compost before planting vegetables.
Summer
Inspect irrigation lines and look for dry upper beds. Trim plants that block paths or press against the wall. Reapply mulch if rain has washed it downhill.
Watch for aphids, flea beetles, squash bugs, powdery mildew, and blossom-end rot. Correct watering and airflow before reaching for pesticides.
Fall
Remove diseased plant debris. Healthy leaves can become compost, but do not compost tomato vines or plants with serious fungal disease unless your pile reaches sustained high heat.
Plant garlic, perennial herbs, or native flowers suited to your USDA zone. Avoid heavy digging when the soil is wet.
Winter
Do not pile snow against a retaining wall. Inspect after freeze-thaw cycles. In cold Zones 3 to 6, frost can lift shallow walls and shift pavers.
Store hoses indoors or drain them before hard freezes. Remove battery packs from timers and keep them in a dry place.
| Season | Main inspection | Main garden task |
|---|---|---|
| Spring | Frost damage and blocked outlets | Repair walls and add compost |
| Summer | Dry soil and leaking irrigation | Water deeply and refresh mulch |
| Fall | Plant disease and soil erosion | Clean beds and plant hardy crops |
| Winter | Wall movement and ice buildup | Keep drains open and reduce snow load |
The best maintenance plan is short and regular. A small repair in spring costs far less than rebuilding a wall in midsummer.
My experience building terraced beds
The first terrace I built used treated 4-by-4 timbers on a clay slope in Zone 7. I set the timbers on gravel but skipped the drainpipe because the bed was only 14 inches high.
The wall looked fine through summer. After two weeks of fall rain, the center bowed forward about an inch. I removed the soil, added a perforated pipe with a gravel outlet, and rebuilt the wall with better anchors.
That repair taught me not to judge drainage by wall height alone. A low wall on a wet slope can face more pressure than a taller wall on dry, sandy soil.
I also learned that terraced beds dry at different rates. The top bed needed deep watering every four days in July. The bottom bed needed water about once a week. A single timer setting overwatered the lower level.
After two growing seasons, the strongest plants were thyme, chives, kale, coneflower, and strawberries. Lavender struggled in the lower bed, even though it grew well in the upper terrace.
How long does a terraced garden bed last?
A terraced garden bed can last from 8 years to more than 50 years, depending on material, drainage, soil pressure, and climate. Timber usually fails first, often where it touches wet soil. Stone and concrete last longer but still move if the base fails.

Inspect the wall twice each year. Look for:
- A forward lean
- New cracks
- Gaps between blocks
- Rot near timber joints
- Sinkholes behind the wall
- Water bubbling from unexpected places
- Soil spilling through the front
- Drain outlets that stop flowing
A wall that moves more than an inch deserves attention. Do not wait for plants to hide it.
Repair or rebuild?
You may repair a small gap by resetting a block, replacing an anchor, or adding drainage. A wall that leans across its full length usually needs partial or complete rebuilding.
Move plants before repair. Save healthy soil in a tarp-lined pile. Reuse clean gravel if it has not mixed with clay.
Seasonal storage and tool care
Drain hoses and store them out of sunlight. Clean soil from shovels, pruners, and mattocks. Dry metal tools, then apply a thin coat of oil to prevent rust.
Charge cordless tool batteries according to the maker’s instructions. Most lithium-ion packs last longer when stored cool and partly charged rather than empty.
🔧 Quick Fix: If a drip line clogs, remove the end cap and flush the line for 30 seconds. Do not poke hard wire into the emitter because it can damage the flow path.
Know when to hire a professional
DIY terracing suits small beds with low walls and clear drainage. Professional help makes sense when the slope carries serious water or the wall affects a structure.

Hire a qualified contractor or landscape engineer when:
- The wall will exceed about 3 to 4 feet
- The terrace sits near a foundation
- The slope is steep or unstable
- The soil contains wet clay or fill
- Water flows toward a home or road
- The wall borders a neighbor’s property
- A driveway or pool sits above the wall
- You need a permit or engineered plan
Ask for a written drainage plan, material list, wall height, and warranty terms. A low bid that ignores drainage is not a bargain.
DIY versus professional cost
Small DIY terraces may cost $100 to $800, plus your labor. A contractor-built system can cost several thousand dollars, especially with excavation, hauling, drainage, and engineered walls.
The right comparison is not just material price. Include tool rental, soil delivery, disposal fees, repair risk, and your available time.
Pros and cons of terraced garden beds
Terracing can transform a difficult slope, but it also adds structure and maintenance. Consider both sides before you buy materials or begin digging.
| Pros | Cons |
|---|---|
| Reduces erosion | Requires careful drainage |
| Creates level planting space | Costs more than flat-bed gardening |
| Improves access | Walls can fail if poorly built |
| Uses water more efficiently | Soil may settle after construction |
| Adds visual interest | Repairs can disturb plants |
| Supports many plant types | Tall walls may need permits |
Terracing is most useful when a slope already limits planting or causes runoff. It may not be worth the cost on a mild slope that can support contour beds.
Frequently asked questions
Q: What is the best material for a terraced garden bed?
A: The best material depends on wall height, budget, and climate. Ground-contact treated lumber works well for low DIY beds. Natural stone and concrete landscape blocks last longer. Use engineered masonry or professional design for tall walls.
Q: How deep should a terraced garden bed be?
A: Make the planting area at least 2 feet deep for vegetables and herbs. A 3- to 4-foot depth gives better access and root space. Leave enough room behind the wall for drainage gravel and pipe.
Q: Do terraced beds need drainage?
A: Yes, most terraces need a drainage plan. Use a compacted gravel base, clean gravel behind the wall, and a perforated drainpipe when water moves downhill or the soil contains clay.
Q: Can I build a terraced garden bed without retaining walls?
A: You can use contour berms, swales, logs, stone rows, or living ground covers on gentle slopes. These methods suit mild grades but may not hold soil on a steep hill.
Q: How much soil do I need for a terrace?
A: Multiply length by width by soil depth. For an 8-by-4-foot bed filled to 12 inches, you need about 32 cubic feet, or nearly 1.2 cubic yards, before settling. Add extra for compaction and later top-up.
Q: Can I grow vegetables in terraced beds?
A: Yes. Terraces work well for tomatoes, peppers, lettuce, carrots, beans, kale, onions, herbs, and strawberries. Place drought-tolerant crops higher and moisture-loving crops lower.
Q: Why is water running over my terrace wall?
A: The bed may slope toward the wall, the soil may be compacted, or the drainage outlet may be blocked. Regrade the surface, add mulch, inspect the drainpipe, and slow irrigation with drip lines.
Q: How tall can I make a terrace wall?
A: Low walls under about 2 feet are easier for homeowners to build. Walls above 3 to 4 feet may require permits, reinforcement, and professional design. Soil type and water can lower the safe height.
Q: Should I use landscape fabric behind a retaining wall?
A: Use a permeable geotextile fabric between soil and drainage gravel. Do not use solid plastic because it can trap water and increase pressure behind the wall.
Q: What plants stop erosion on a terrace?
A: Deep-rooted and spreading plants such as creeping thyme, sedum, yarrow, switchgrass, native asters, coneflower, and certain ornamental grasses can help. Match the plant to sun, soil moisture, and your USDA zone.
Q: How often should I water a terraced garden bed?
A: Check each level separately. Many vegetable beds need about 1 inch of water per week, but upper beds may need more during hot, windy weather. Water slowly at the soil line.
Q: Can I build a terrace in winter?
A: You can plan and gather materials in winter, but avoid digging frozen or waterlogged soil. Build when the soil crumbles rather than smears, and avoid working on a slope during heavy rain.
Final thoughts
A terraced garden bed succeeds when the wall, soil, and water system work together. Start with a low terrace, build on compacted ground, leave room for drainage, and choose plants that match each bed’s moisture level.
Take your time with the first level. A level base and a safe water outlet matter more than decorative stone or perfect planting. Once the structure settles, the slope becomes a productive garden instead of a constant source of runoff and erosion.
Meta description: Learn how to build a terraced garden bed with step-by-step instructions for slope planning, retaining walls, drainage, soil, plants, costs, maintenance, and safety.