How To Build A Wooden Raised Garden Bed: Easy DIY Guide
A wooden raised garden bed gives you more control over soil, water, weeds, and plant spacing. It can turn hard clay, poor sand, or a small patio into a productive growing space. A well-built bed also warms up faster in spring and helps many gardeners avoid bending as far.
I have built raised beds in heavy clay in the Pacific Northwest, dry soil in USDA Zone 6, and hot summers in Zone 8. The same basic plan works in most areas, but wood choice, bed depth, drainage, and watering need to match your climate. The goal is not just a neat box. The goal is a safe, strong growing system that lasts for years.
Quick answer: Build the bed in one day
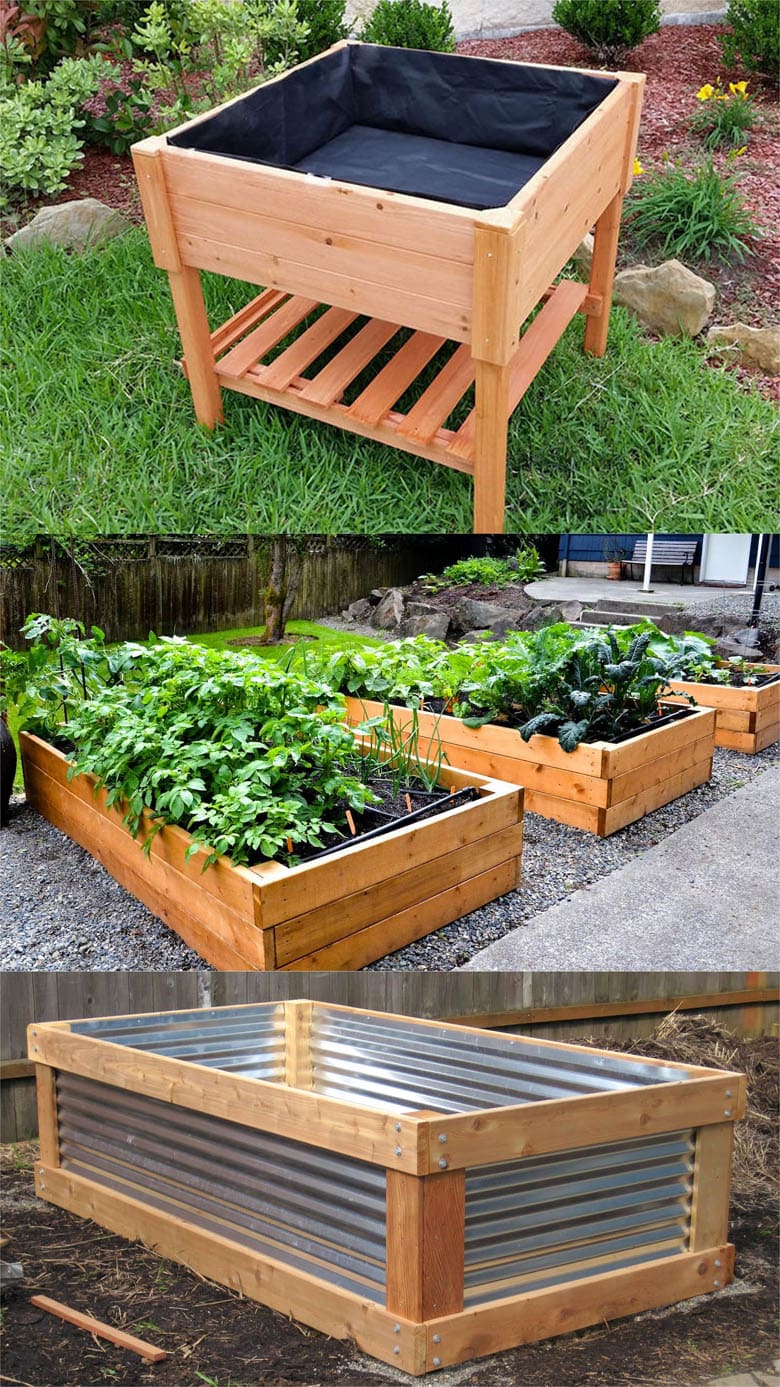
The best way to build a wooden raised garden bed is to choose untreated, rot-resistant lumber, cut boards to size, fasten the corners with exterior screws, level the site, and fill the bed with quality soil and compost. A simple 4-by-8-foot bed, 12 inches deep, needs four 8-foot boards, corner supports, about 2 cubic yards of growing mix, and a level base.

For most vegetables, build the bed 10 to 12 inches deep. Use 18 to 24 inches if you want deep-rooted crops, better drainage over poor ground, or easier access for gardeners with limited mobility. Leave at least 24 inches between beds so you can walk and use a wheelbarrow.
Plan the bed before you buy wood
Good planning prevents most raised-bed problems. Start by choosing the site, then decide the size, depth, wood type, and soil volume. A few minutes with a tape measure can save hours of cutting and hauling.
Choose a sunny location
Place the bed where it receives at least six hours of direct sun. Eight hours is better for tomatoes, peppers, cucumbers, squash, beans, and eggplant. Leafy crops such as lettuce, spinach, kale, and arugula can handle four to six hours, especially in hot climates.
Watch the sun for a full day if possible. A spot that looks sunny at 10 a.m. may sit in shade by 3 p.m. Avoid areas beneath black walnut trees, whose roots and fallen leaves can harm some plants. Also avoid low spots where rainwater collects.

Pick a practical size
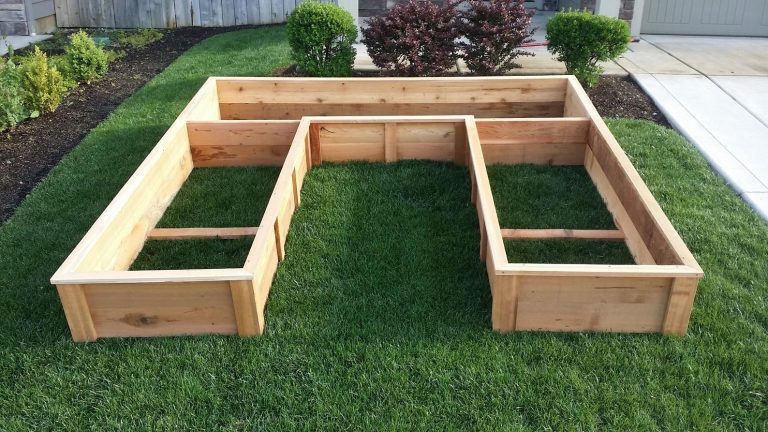
A 4-by-8-foot raised bed offers a lot of growing space, but you should not make it too wide. You need to reach the center without stepping on the soil. For most adults, 4 feet is the maximum useful width when the bed is accessible from both sides.
A 3-by-6-foot bed works well in a small yard. A 2-by-8-foot bed fits beside a fence or walkway. If you can reach only one side, keep the width near 2 feet.
Select the right bed depth
A 6-inch bed can grow shallow-rooted herbs, lettuce, radishes, and some strawberries. A 12-inch bed gives most vegetables enough room. A 24-inch bed works well for wheelchair access and deep-rooted crops, but it costs more to fill.
Do not assume you need to remove all the grass below a tall bed. You do need to kill or cover grass and perennial weeds. Their roots can push into the bed and compete with crops.
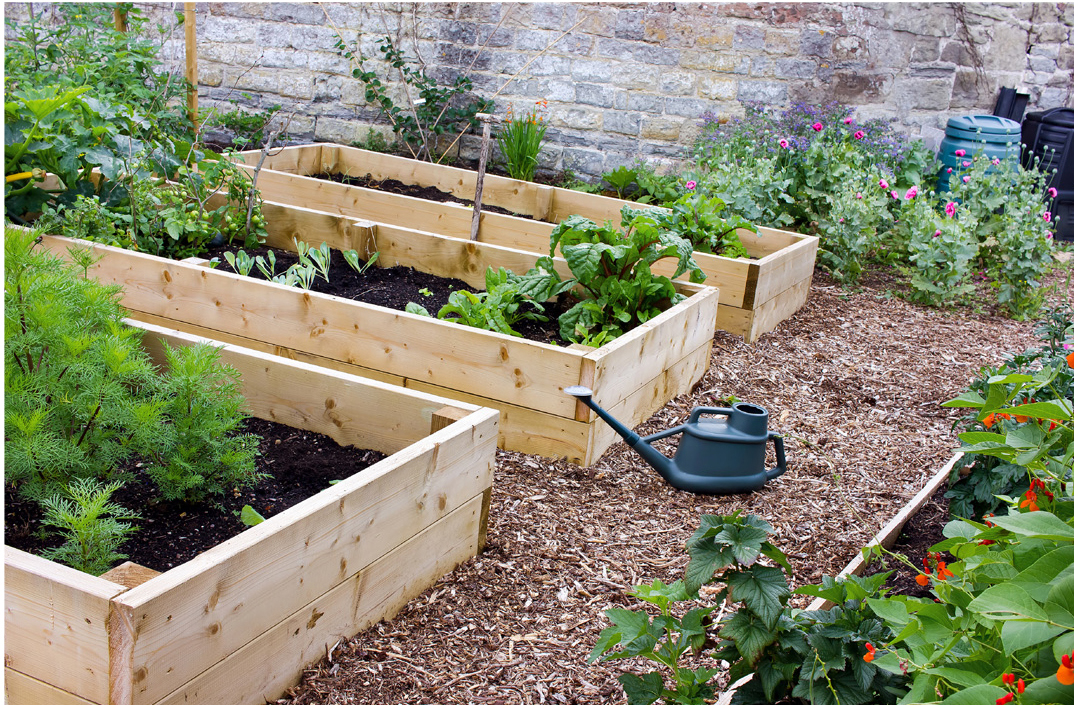
| Bed depth | Good choices | Main limitation |
|---|---|---|
| 6–8 inches | Herbs, lettuce, radishes, onions | Too shallow for many root crops |
| 10–12 inches | Tomatoes, beans, peppers, carrots, greens | Needs careful soil filling |
| 18–24 inches | Deep roots, poor native soil, easy access | Higher material and soil cost |
A 12-inch bed is the most useful starting point for beginners. If you grow carrots, parsnips, or daikon, use loose soil or build a deeper bed.
Calculate the soil volume
Measure the inside length, width, and depth in feet. Multiply those numbers to find cubic feet. Divide by 27 to estimate cubic yards.
For example, a 4-by-8-foot bed filled 1 foot deep needs:
4 × 8 × 1 = 32 cubic feet
That equals about 1.2 cubic yards. Buy a little extra because soil settles after watering and rain.
| Bed size | Depth | Approximate soil needed |
|---|---|---|
| 4 × 4 feet | 12 inches | 0.6 cubic yard |
| 4 × 8 feet | 12 inches | 1.2 cubic yards |
| 4 × 8 feet | 18 inches | 1.8 cubic yards |
Bulk soil usually costs less than bags, but bags are easier for a small bed or a backyard with limited access. Ask the supplier whether the mix contains screened topsoil, compost, and clean organic matter. Avoid soil with a strong sewage smell or visible plastic.
Gather tools and materials
A simple raised garden bed needs basic tools, not specialized equipment. I build most beds with a circular saw, drill, level, tape measure, and shovel. A miter saw can make cleaner crosscuts, but it is not required.

Materials for a 4-by-8-foot bed
The list below assumes a 12-inch-high bed made with two stacked boards on each side. The boards are 2 inches thick and about 6 inches wide. Actual lumber sizes vary, so measure before cutting.

| Item | Amount | Purpose |
|---|---|---|
| Untreated 2×6×8 boards | 8 | Four sides, two boards high |
| Exterior structural screws, 3 inches | 24–32 | Join boards and corner supports |
| 2×2 or 4×4 corner posts | 4 | Strengthen each corner |
| Landscape fabric or cardboard | Optional | Suppress grass under the bed |
| Compost and soil mix | About 1.2 yd³ | Fill the growing space |
| Wood chips or straw mulch | 2–3 inches | Reduce weeds and water loss |
Use exterior-rated structural screws, such as GRK RSS or Simpson Strong-Tie exterior screws. Standard drywall screws can snap, rust, or strip when the wood expands and contracts.
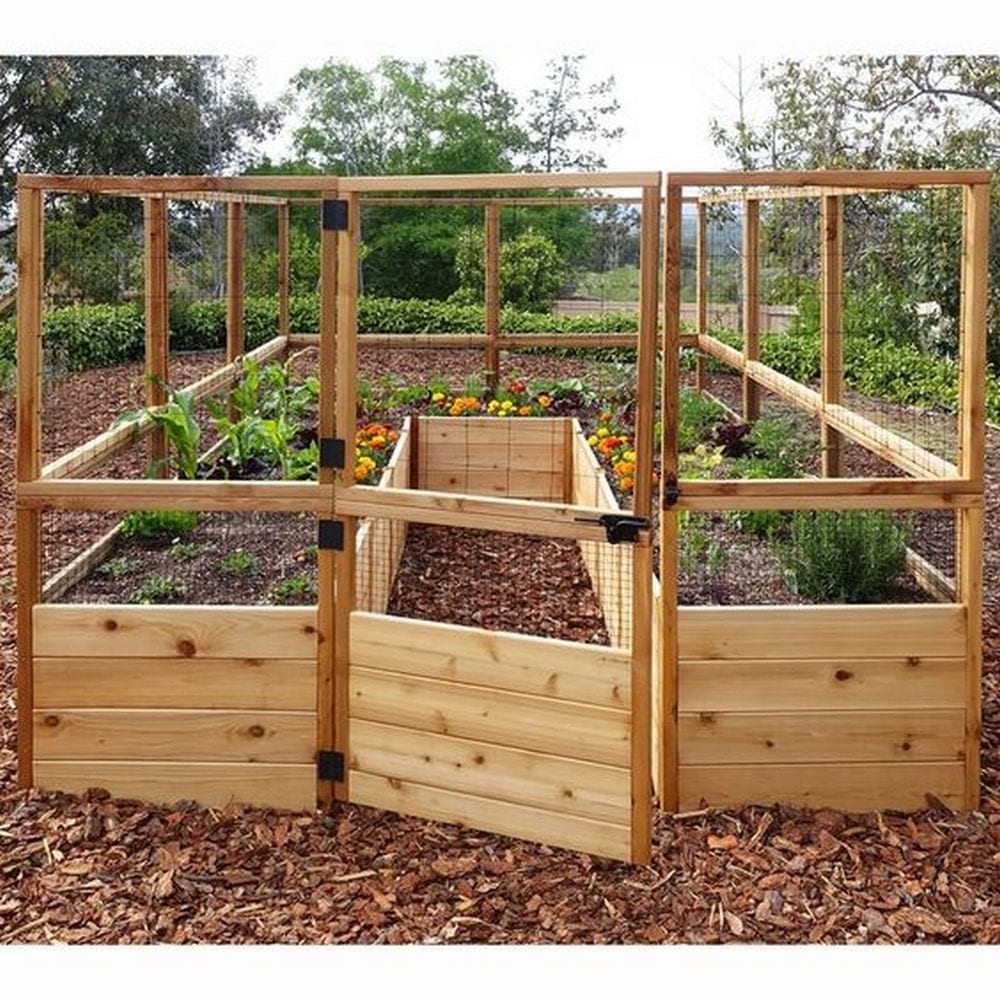
Tools you will use
Wear safety glasses when cutting or drilling. Use hearing protection with a circular saw, and keep your hands away from the blade path. A cordless drill with a clutch makes it easier to avoid stripping screws.
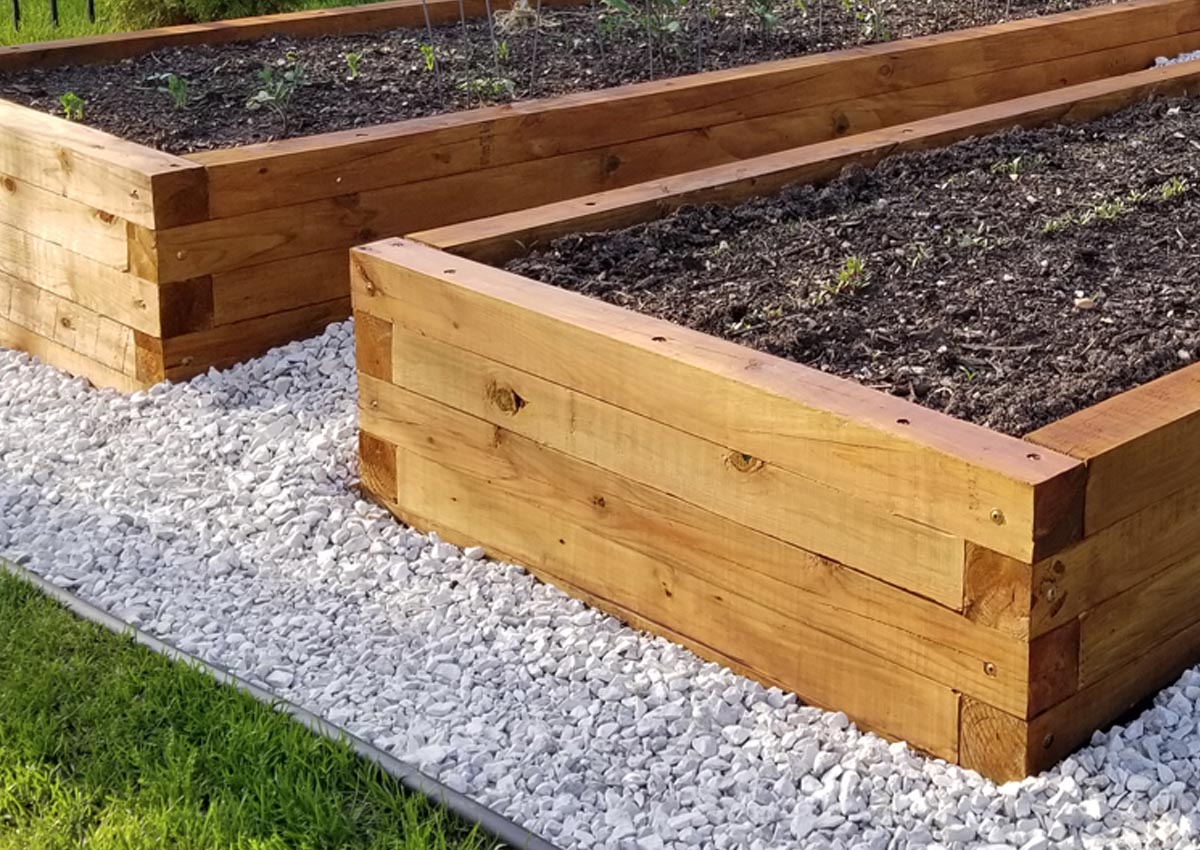
- Tape measure
- Pencil and square
- Circular saw or handsaw
- Drill and driver bits
- ⅛-inch or 3/16-inch drill bit for pilot holes
- Level
- Shovel and rake
- Wheelbarrow or garden cart
- Work gloves
- Safety glasses and hearing protection
A battery saw works well for one bed. For repeated projects, a corded circular saw delivers steady power. You do not need a tiller, pressure washer, chainsaw, or powered auger for a basic raised bed.
Choose safe wood for a long-lasting frame
Wood selection affects bed life, plant safety, and cost. Use untreated lumber unless you understand the treatment label and local gardening advice. Modern residential pressure-treated wood uses preservatives that differ from older chromated copper arsenate products, but some gardeners still prefer untreated cedar or naturally durable wood.
Compare common lumber choices
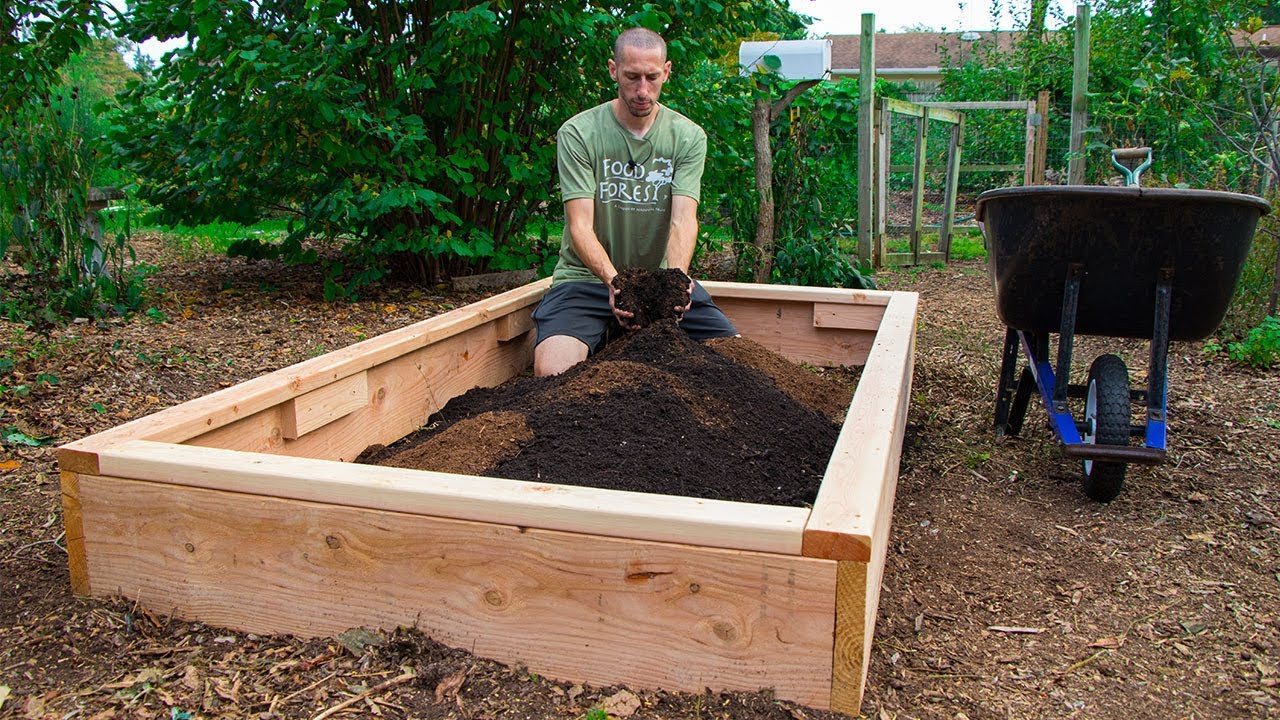
Cedar is the common premium choice because it resists rot and weighs less than many hardwoods. White oak and black locust can last a long time, but they cost more and are harder to cut and drill. Pine costs less, yet it may last only four to seven years in wet soil.
| Wood type | Typical life in contact with soil | Notes |
|---|---|---|
| Cedar | 8–15 years | Good balance of rot resistance and cost |
| Pine or fir | 4–7 years | Low cost; may decay sooner in wet climates |
| Black locust or white oak | 15–25 years | Durable but costly and heavy |
Life varies with rainfall, soil moisture, wood thickness, and drainage. A cedar bed in dry USDA Zone 6 may outlast the same bed in rainy Zone 8.
Avoid risky materials
Do not use railroad ties, old utility poles, painted boards, or salvaged wood with an unknown history. Railroad ties may contain creosote. Painted wood may contain lead or other old coatings.
Do not coat the inside of the bed with roofing tar, used motor oil, or unknown wood preservatives. These products can leach into soil and add risks that are not worth the small gain in wood life.
💡 Pro Tip: Buy straight boards and place them on a flat surface before paying. A board that twists like a propeller will fight every screw and make the finished frame look uneven.

Prepare and level the garden site
Site preparation matters as much as the frame. A level bed holds soil evenly, keeps irrigation predictable, and prevents one corner from sitting in standing water.

Mark the footprint
Use stakes and string to mark the outside dimensions. Check the diagonals from corner to corner. If both diagonal measurements match, the layout is square.
For a 4-by-8-foot bed, mark the corners at 4 and 8 feet. Add a few inches if you want room to install edging or work around the outside.
Remove grass and perennial weeds
Cut the grass short, then remove sod with a shovel if the bed is only 6 to 12 inches tall. You can also cover the ground with overlapping cardboard. Use plain brown cardboard with tape and labels removed.
For bindweed, quackgrass, Bermuda grass, or creeping buttercup, cardboard alone may not stop every root. Dig out the largest roots, overlap two layers of cardboard, and watch the bed edges through the first season.
Level the ground
Use a shovel to cut high areas and fill low areas. Do not build a raised bed on a steep slope unless you plan a terraced design. A small slope is manageable, but a large one creates uneven soil depth and can push the frame downhill.
Set one board on the ground and place a level on top. Check both directions. Keep digging and packing until the board sits steady.
| Site condition | Recommended preparation | Reason |
|---|---|---|
| Lawn or bare soil | Remove sod or add overlapping cardboard | Stops grass and weeds |
| Heavy clay | Loosen the top 6–8 inches if possible | Improves early drainage |
| Gravel or patio | Use a bottom liner and deeper frame | Holds soil in place |
| Sloped ground | Dig into the high side or terrace | Prevents frame movement |
A raised bed should not rock when you push it. If it moves before you add soil, it will move more after rain and watering.
Build the wooden raised garden bed
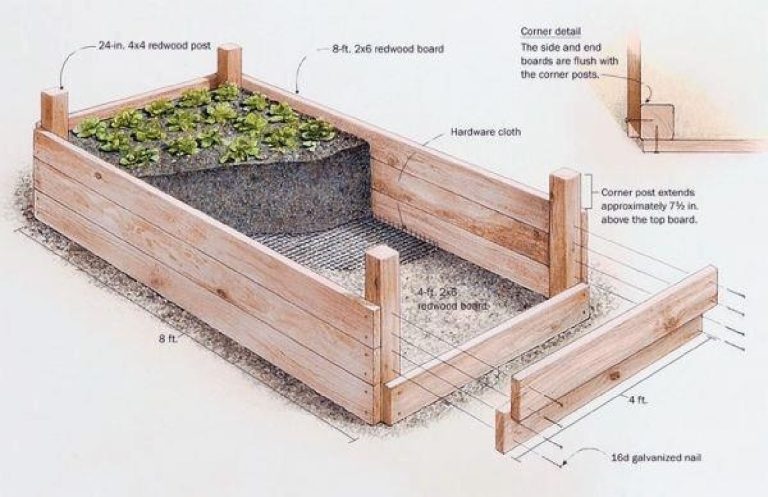
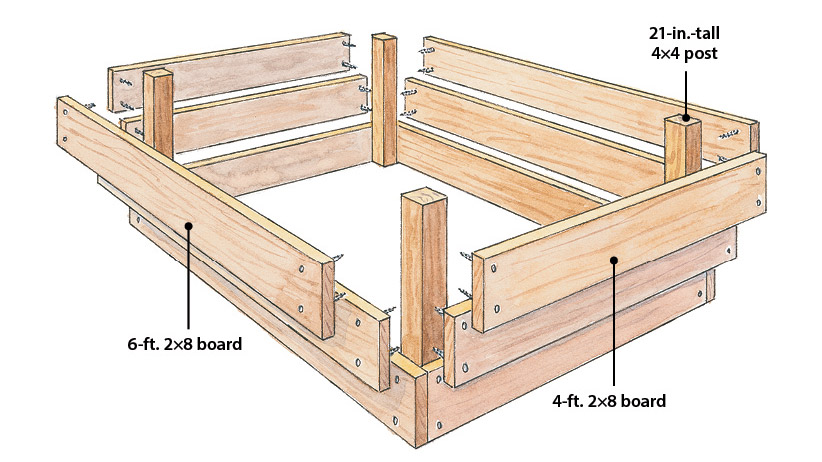
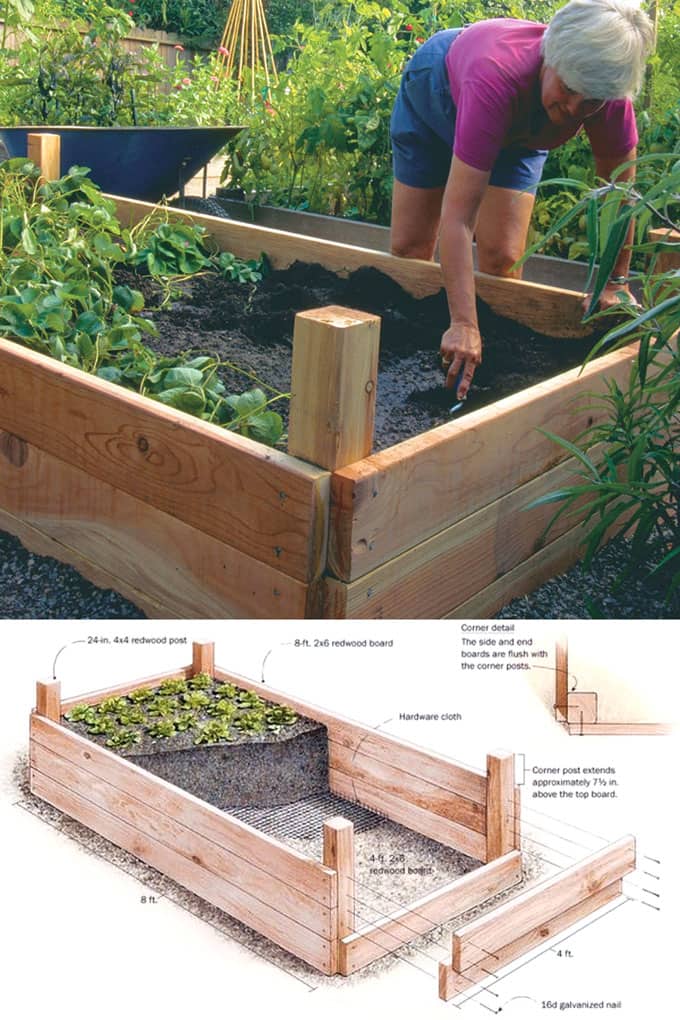
The simplest strong design uses two boards stacked on each side, with a post or block at each corner. This method works for cedar, pine, fir, and most common garden lumber.
1. Cut the boards
For a 4-by-8-foot bed, cut four boards to 8 feet for the long sides. Cut four boards to 4 feet for the short sides. If you want the short boards to fit between the long boards, subtract twice the board thickness from their length.
For true 2-inch-thick lumber, a short board placed between two long boards would be about 44 inches long. Many store-bought 2×6 boards measure about 1½ inches thick, so the inside-fit length would be about 45 inches. Measure the actual board before cutting.
2. Make the corner supports
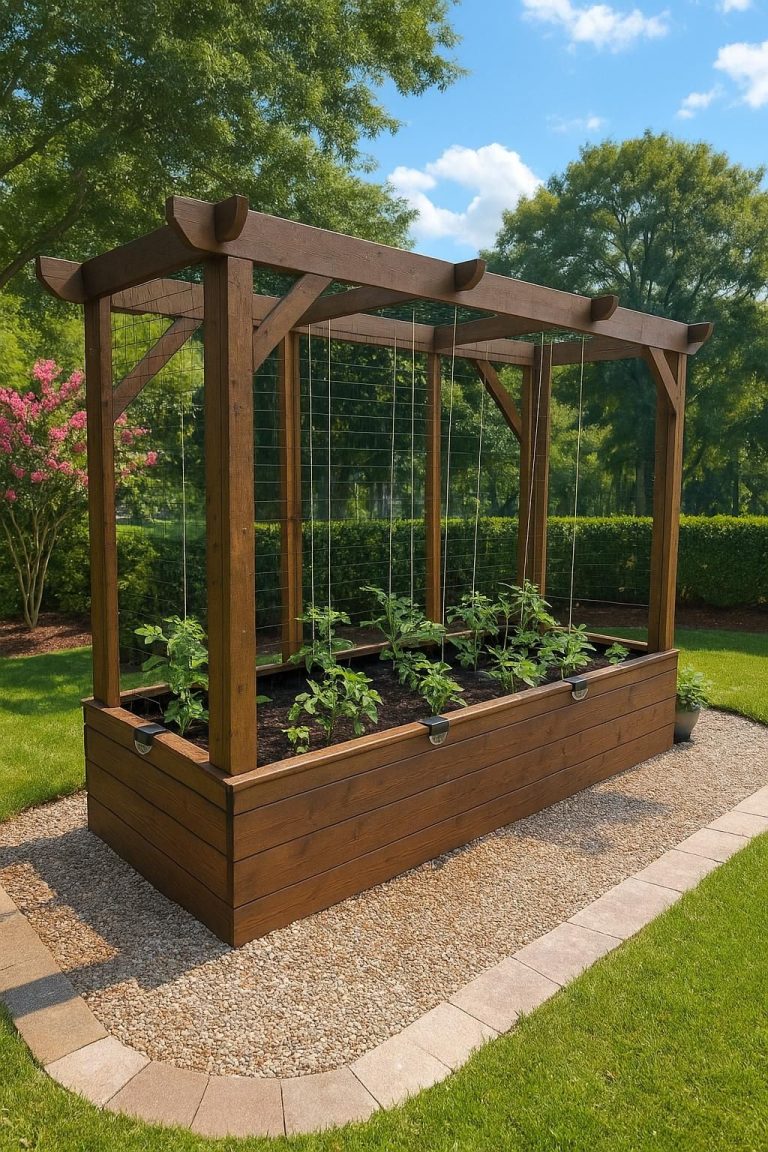
Cut four corner posts about 14 to 16 inches long. A 2×2 post can work for a small bed, but a 4×4 post gives stronger corners. The post should extend above the upper board only if you want to attach a trellis, hoop, or protective net.
Use scraps of the same lumber for corner blocks if you do not have posts. Place the blocks inside the corners so they do not reduce the bed’s outside dimensions.
3. Assemble the first layer
Lay the boards around the marked site. Check that the corners meet cleanly. Drill pilot holes before driving screws, especially near the ends of cedar or dry pine.
Drive two screws through each long board into the corner post. Use one screw near the top and one near the bottom. Do not place screws too close to the end, or the board may split.
4. Add the second layer
Set the second course of boards on top of the first. Stagger the joints if your design allows it. Staggering reduces one long split line and adds stability.
Use a level as you work. Secure the upper boards to the corner posts with two screws at each corner. If the boards bow, press them into alignment with a clamp or your knee before driving the screw.
5. Check the frame
Measure both diagonals again. Check the top edges with a level. Push against each corner and side.
If the frame shifts, add a third screw at each corner or install a short interior brace. A 4-by-8-foot bed may also benefit from a center tie across the width, especially when filled 18 inches deep.
6. Add a bottom barrier when needed
Do not put plastic sheeting across the bottom of a bed placed on soil. Plastic can trap water and reduce drainage. Use cardboard or landscape fabric only to suppress weeds, and allow water to pass through.
On a patio, gravel surface, or balcony, use a strong liner designed for planters. Add drainage holes and make sure the structure can support the wet soil. Wet soil can weigh more than 100 pounds per cubic foot.
7. Fill the bed in layers
Place the soil mix into the frame and spread it with a rake. Add a few inches at a time. Water each layer lightly to settle air pockets.
A reliable mix contains screened topsoil, finished compost, and a material that improves structure, such as aged bark fines. Do not fill the whole bed with pure compost. Pure compost can shrink, dry quickly, hold too much water, or release excess nutrients.
| Bed use | Soil mix approach | Target pH |
|---|---|---|
| Most vegetables | About 60% topsoil, 30% compost, 10% aged bark or similar material | 6.0–7.0 |
| Acid-loving crops | Soil with pine-based organic matter; test before adding amendments | 5.5–6.5 |
| Root crops | Loose topsoil and compost with few large chunks | 6.0–6.8 |
A soil test is more useful than guessing with lime or sulfur. Many vegetables grow well near pH 6.5, but blueberries need a much more acidic mix and usually perform better in a dedicated container.
🌱 Beginner Note: Soil settles most during the first month. Fill the bed to within 1 inch of the top, water it well, and top it off after two to four weeks.
Plant the bed with a simple layout
A raised bed works best when you treat it as a small system, not a row garden. Put tall plants on the north side so they do not shade shorter crops. Plant herbs and flowers near vegetables to support pollinators and beneficial insects.
Use intensive spacing with care
Raised beds support close spacing because the soil stays loose and fertile. Follow the mature size of each plant, not just the size of the seedling.
A determinate tomato such as ‘Roma’ may need 18 to 24 inches. An indeterminate tomato such as ‘Sun Gold’ may need 24 to 36 inches and a sturdy trellis. Lettuce can grow 8 to 10 inches apart, while bush beans often need 6 to 8 inches.
Match plants to the season
Cool-season crops include spinach, peas, kale, broccoli, cabbage, radishes, and carrots. Warm-season crops include tomatoes, peppers, cucumbers, squash, basil, and beans.
Planting dates vary by USDA hardiness zone, but hardiness zones mainly describe winter cold. Use your local last frost and first frost dates for vegetables. In Zone 5, tomatoes may wait until late May. In Zone 8, gardeners may plant them in March or early April.
| Season | Crops to consider | Main care need |
|---|---|---|
| Early spring | Peas, spinach, lettuce, radish, onion sets | Protect from late frost |
| Late spring and summer | Tomato, pepper, bean, cucumber, basil | Even water and mulch |
| Fall | Kale, carrots, broccoli, garlic, arugula | Protect from hard freezes |
Succession planting keeps the bed productive. Sow small rows of lettuce or radish every two to three weeks instead of planting all the seed at once.
Water, feed, and mulch the bed
Raised beds often drain faster than native soil. They also warm faster, which can increase evaporation. Check the soil with your finger before watering rather than following a rigid calendar.
Water deeply and evenly
Water when the top 1 to 2 inches feels dry. Apply water slowly until the soil is moist 6 to 8 inches down. A soaker hose or drip line works better than a hand sprayer for most beds.
Tomatoes, cucumbers, and peppers may need water every day during a heat wave in USDA Zone 8. In a cool, cloudy Zone 6 spring, the same bed may need water only once or twice a week.
| Crop group | Normal watering pattern | Heat adjustment |
|---|---|---|
| Leafy greens | 1–2 inches per week | Check daily in hot weather |
| Tomatoes and peppers | Deep water 2–3 times weekly | Water more often if soil dries fast |
| Herbs and drought-tolerant plants | Let the top layer dry slightly | Avoid wet stems and soggy soil |
Use a rain gauge or straight-sided can to track irrigation. One inch of water across 4 by 8 feet equals about 20 gallons, so a quick sprinkle often does less than you think.
Feed based on soil needs
Finished compost supplies mild nutrition and improves soil structure. Add 1 to 2 inches of compost to the surface each spring, then mix it gently into the top few inches.
Heavy feeders such as tomatoes, squash, cabbage, and corn may need more. Use a soil test and follow the label on a complete fertilizer. A product labeled 5-5-5 contains 5% nitrogen, 5% phosphate, and 5% potash by weight.
Do not pile fertilizer against plant stems. Excess nitrogen can produce large leaves with fewer tomatoes or peppers. It can also wash into groundwater and nearby streams.
Add the right mulch
Use 2 to 3 inches of shredded leaves, straw, untreated grass clippings, or fine wood chips. Keep mulch 2 inches away from stems to reduce rot and pest shelter.
Avoid fresh wood chips mixed into the soil. They can tie up nitrogen as they break down. Use them on the surface instead.
Common mistakes and quick fixes
Most raised-bed failures come from poor drainage, weak corners, bad soil, or plants packed too tightly. The good news is that many problems have simple fixes.
| Problem | Likely cause | Fix |
|---|---|---|
| Bed walls bow outward | Thin boards or wide span | Add corner posts and a center brace |
| Soil stays wet | Poor site drainage or compacted fill | Reduce watering and improve soil structure |
| Grass grows through the bed | Weak cardboard layer or open edges | Remove roots and add overlapping cardboard |
| Plants turn pale | Low nitrogen, poor roots, or wet soil | Test soil before adding fertilizer |
| Tomato leaves wilt daily | Small bed, root crowding, or dry soil | Water deeply and check root space |
| Wood rots quickly | Wet climate or poor lumber | Improve drainage and replace damaged boards |
Do not solve every pale leaf with fertilizer. Yellow leaves can also signal waterlogged roots, root-knot nematodes, iron lockout, or natural aging.
Why is the wood rotting?
Wood rots when it stays wet and air cannot move around it. Soil touching the outside wall, dense weeds, and a bed placed in a low spot all increase moisture.
Keep grass trimmed around the frame. Do not mound mulch against the boards. If one board begins to soften, remove it before the rot spreads to the corner post.
Why is the soil sinking?
Some sinking is normal. Compost breaks down, air pockets collapse, and roots leave open spaces. Large amounts of fresh organic matter cause more settling.
Top up the bed with a blend of finished compost and topsoil. Avoid adding only compost every year. A soil test can show whether nutrients or pH have moved too far.
Why are roots damaged by pests?
Raised beds do not stop every pest. Cutworms, slugs, cabbage worms, flea beetles, aphids, and root-knot nematodes can still move in. Inspect leaves twice a week and check the soil around weak plants.
Use insect netting for cabbage moths, hand-pick large pests, and remove diseased leaves. For nematodes, rotate crops and use resistant varieties where available. Do not use broad insecticide sprays when bees and other pollinators are active.
⚠️ Warning: Never use pressure-treated scraps, painted boards, railroad ties, or unknown salvaged lumber for a food garden. The risk comes from what the wood may contain, not from how clean it looks.
Maintain the bed through the seasons
A wood bed needs light care, not constant repair. Inspect the corners each spring, keep the soil covered, and refill the bed as it settles.
Spring maintenance
Check for loose screws, cracked boards, and soil erosion. Tighten screws only if the wood still feels solid. Replace any board that crumbles when pressed with a screwdriver.
Top-dress with compost, test the soil if plants struggled, and clean old plant debris. If you grow tomatoes or peppers in the same bed each year, rotate them with beans, lettuce, or herbs to reduce disease buildup.
Summer maintenance
Watch water levels and keep mulch in place. Tie tomatoes before they sprawl across paths. Harvest beans, cucumbers, zucchini, and greens often to keep plants producing.
Look under leaves for aphids, spider mites, whiteflies, and powdery mildew. Good spacing and morning watering help leaves dry before night.
Fall and winter care
Remove diseased plants and dispose of them in the trash rather than the compost pile. Healthy stems and leaves can go into a hot compost system after chopping.
Cover bare soil with compost, leaves, or straw. In cold zones, leave some healthy roots in place because they add organic matter as they decay. Do not cover the entire bed with an airtight plastic sheet unless you are managing a specific solarization process.
| Task | Timing | Why it matters |
|---|---|---|
| Check screws and corners | Early spring | Finds damage before the bed is full |
| Add compost | Spring or fall | Replaces settled organic matter |
| Inspect pests and disease | Weekly in the growing season | Stops small problems early |
| Clear diseased debris | After harvest | Reduces disease carryover |
| Refresh mulch | As needed | Protects moisture and soil life |
Wooden raised beds do not need indoor storage. Leave them in place, but protect empty soil with mulch or a cover crop. If you use removable hoops, trellis parts, or frost cloth, clean and store those pieces in a dry shed.
How long does a wooden raised bed last?
A wooden raised garden bed often lasts four to seven years with ordinary pine and eight to fifteen years with cedar. Black locust, white oak, and other durable hardwoods can last much longer. Wet soil, poor drainage, and thin boards shorten every estimate.
The first parts to fail are usually the bottom edges of the side boards and the corner posts. Screws may rust or loosen before the boards fail. In my beds, the side facing the prevailing rain rotted first, even though the top edge still looked sound.
You can extend the life by keeping soil and mulch below the top edge, avoiding constant overspray, and using wide boards rather than thin fence pickets. A removable inner liner may slow soil contact, but it must not block drainage.
Is a wooden raised bed worth the cost?
A raised bed costs more than planting directly in the ground, but it can pay off when native soil drains poorly, contains construction rubble, or has heavy clay. It also reduces weed pressure and makes soil improvement more focused.
Current pricing ranges from roughly $80 to $250 for a basic 4-by-8-foot cedar frame, depending on lumber prices, hardware, and whether you buy soil in bags or bulk. The soil often costs more than the wood.
A ground garden may be cheaper if you already have good loam and space. Galvanized steel beds last longer and resist rot, but they can heat up in hot regions and cost more. Concrete blocks are durable and easy to replace, but they take more room and may leach lime into the soil near the wall.
| Option | Best for | Main drawback |
|---|---|---|
| Wooden bed | Natural look, easy DIY work, moderate cost | Wood eventually rots |
| Galvanized metal bed | Long life and quick setup | Higher cost and heat in hot sun |
| In-ground garden | Low cost and large space | More weeds and soil correction |
| Fabric grow bag | Renters and small spaces | Dries fast and needs replacement |
Choose wood if you want a repairable frame that blends into the yard. Choose metal if long life matters more than a natural appearance. Choose an in-ground plot if you have fertile, safe soil and enough space.
Safety and access considerations
A raised bed is not automatically safer. Tall frames can tip on slopes, and wet soil can put a huge load on patios, decks, and balconies. Confirm that the surface can handle the weight before filling a container-style bed.
Keep the bed away from buried utilities and avoid digging near marked lines. Wear eye protection when cutting lumber. Lift soil bags with your knees, use a cart, and ask for help with bulk soil.
For children and pets, sand sharp board corners and remove splinters. A 2-inch-wide top cap can provide a comfortable edge and shield the end grain from rain. If you use a trellis, anchor it well because cucumber and bean vines catch wind.
When to hire a professional
Most gardeners can build a simple ground-level bed with hand tools. Hire help if the bed sits on a roof, balcony, retaining wall, steep slope, or large deck. These sites need load calculations and stronger structural design.
A professional can also help with terraced beds, drainage trenches, stone retaining walls, and accessible beds with complex irrigation. Do not guess when a failed frame could damage a building or injure someone.
Questions gardeners often ask
Q: Should I put landscape fabric under a raised garden bed?
A: Use landscape fabric or cardboard to block weeds, but do not use plastic on soil unless you have a specific drainage plan. Cardboard breaks down and lets roots and water pass through. Fabric lasts longer, but roots may grow into it and make later removal harder.
Q: Can I build a raised bed on grass?
A: Yes. Cut the grass short, remove thick sod, and cover the area with overlapping cardboard. Watch for creeping grasses such as Bermuda grass and quackgrass because they can return at the edges or through weak seams.
Q: How deep should a raised bed be for tomatoes?
A: Use at least 12 inches of soil for tomatoes, with 18 inches preferred when the native ground is poor or compacted. Indeterminate varieties also need vertical support and about 24 to 36 inches of horizontal space.
Q: Can I use ordinary topsoil in a raised bed?
A: You can use topsoil as part of the mix, but avoid filling the bed with dense topsoil alone. Blend it with finished compost and a material that improves structure. Test the soil if you do not know its pH or nutrient level.
Q: Do raised beds need drainage holes?
A: Beds placed on soil usually drain through the bottom and do not need holes in the side walls. Beds on concrete, patios, or balconies need drainage openings and a liner that allows water to escape.
Q: What should I plant in my first raised bed?
A: Start with crops that match your season and sunlight. Lettuce, radishes, kale, bush beans, basil, peppers, and compact tomatoes are manageable choices. Avoid planting mint directly in the bed because it spreads aggressively; grow it in a container instead.
Q: How often should I replace raised-bed soil?
A: You usually do not need to replace all the soil. Add compost each year, top up after settling, and use a soil test every two to three years. Replace soil only when it contains contaminants, severe disease, or a major structural problem.
Q: Can I use pressure-treated wood for vegetables?
A: Modern pressure-treated lumber is regulated for residential use, but gardeners differ in comfort with it. Untreated cedar, larch, black locust, or oak avoids that concern. Never use old treated wood with an unknown preservative history.
Q: Why is my raised bed drying out so fast?
A: Raised beds dry faster when they sit in full sun, use light soil, lack mulch, or contain many large plants. Add 2 to 3 inches of organic mulch, water slowly at the root zone, and check moisture below the surface rather than sprinkling often.
Q: What is the cheapest way to build a raised garden bed?
A: Use untreated local pine, a simple rectangular design, and bulk soil. Reclaimed wood can reduce cost only when you know it is clean and untreated. Do not save money with pallets, painted boards, or old railroad ties.
Final thoughts
A strong wooden raised garden bed starts with a level site, safe lumber, sturdy corners, and soil that drains well. Build the frame to a size you can reach, fill it with a balanced mix, and plant according to your sun and frost dates.
My most reliable design remains a 4-by-8-foot cedar bed, 12 inches deep, with corner posts, compost-rich soil, drip irrigation, and a thick mulch layer. It is large enough to grow a useful mix of vegetables but simple enough to repair. Start with one bed, watch how it handles your rain and heat, then expand when you know what your garden needs.
Meta description: Learn how to build a wooden raised garden bed with safe lumber, simple tools, strong corners, soil calculations, planting advice, drainage tips, maintenance, and cost guidance.