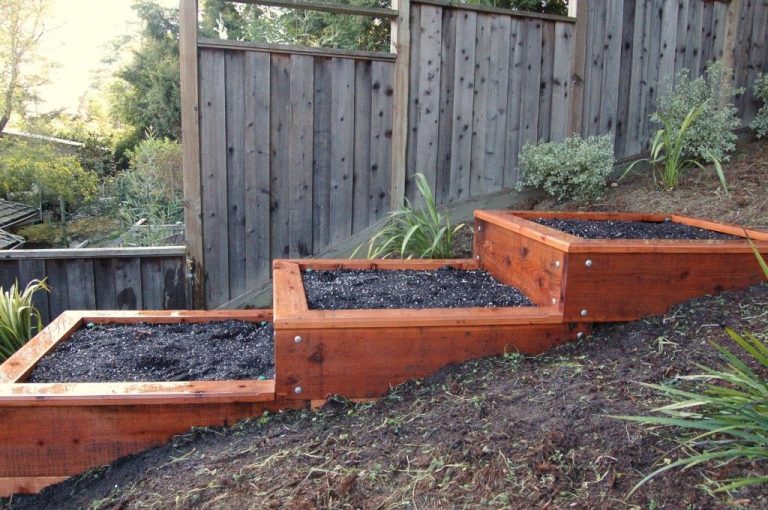
How To Design A Raised Bed Vegetable Garden: Easy Guide
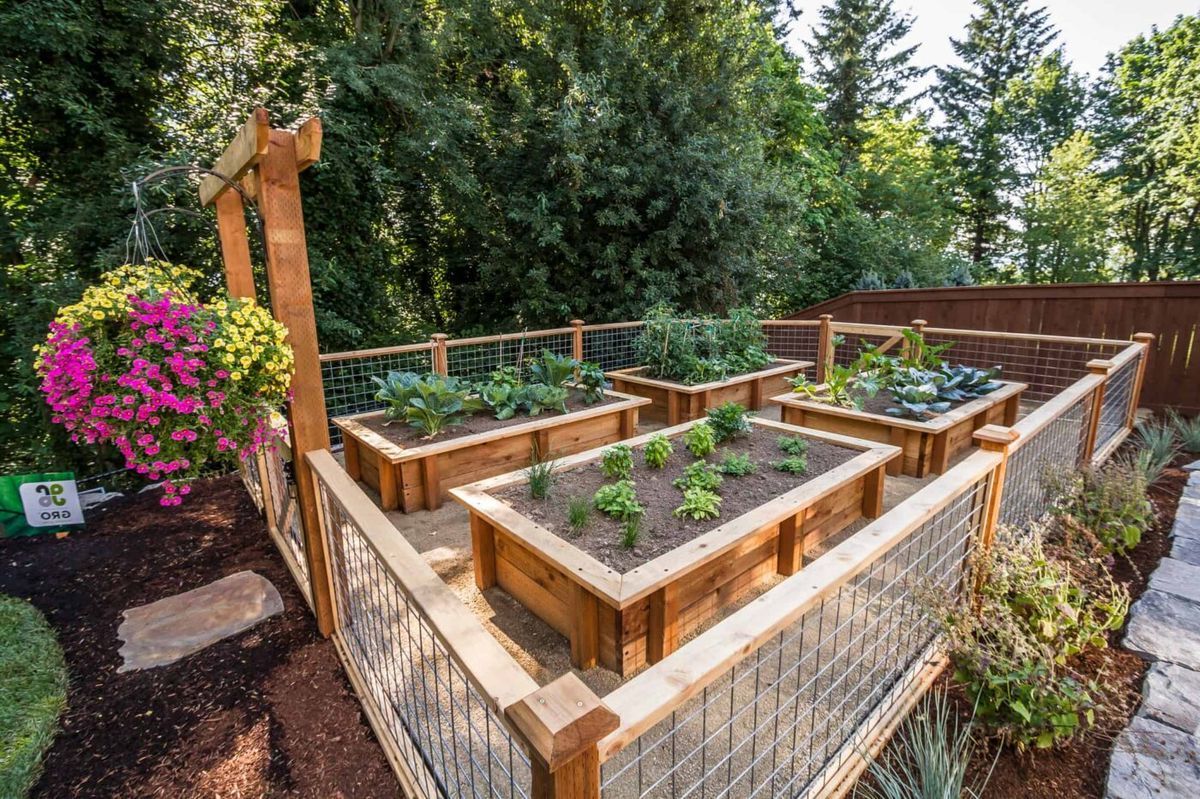
A raised bed vegetable garden gives you control over soil, drainage, spacing, and access. You can grow more food in a small yard, reduce bending, and start earlier in spring because raised soil warms faster. The method works in a city lot, suburban yard, patio, or community garden.
I have built raised beds in sandy soil in North Carolina, heavy clay in Ohio, and short-season gardens in USDA Zone 5. The same lesson came up each time: the bed frame matters, but the soil mix, sunlight, water plan, and layout matter more. A strong design can last for years. A poor design can leave you with dry corners, crowded roots, and costly repairs.
This guide explains how to design a raised bed vegetable garden from the ground up. You will learn how to choose a site, pick the right size, build safe beds, mix soil, plan crops, install irrigation, and care for the garden through the seasons.

Quick answer: Start with sun, access, and soil depth
The best way to design a raised bed vegetable garden is to choose a level site with at least 6–8 hours of direct sun, keep beds no wider than 4 feet, leave 2–3 feet for paths, and fill the bed with a loamy soil mix rich in compost. Use untreated wood, safe hardware, drip irrigation, and crop spacing based on the mature size of each plant.
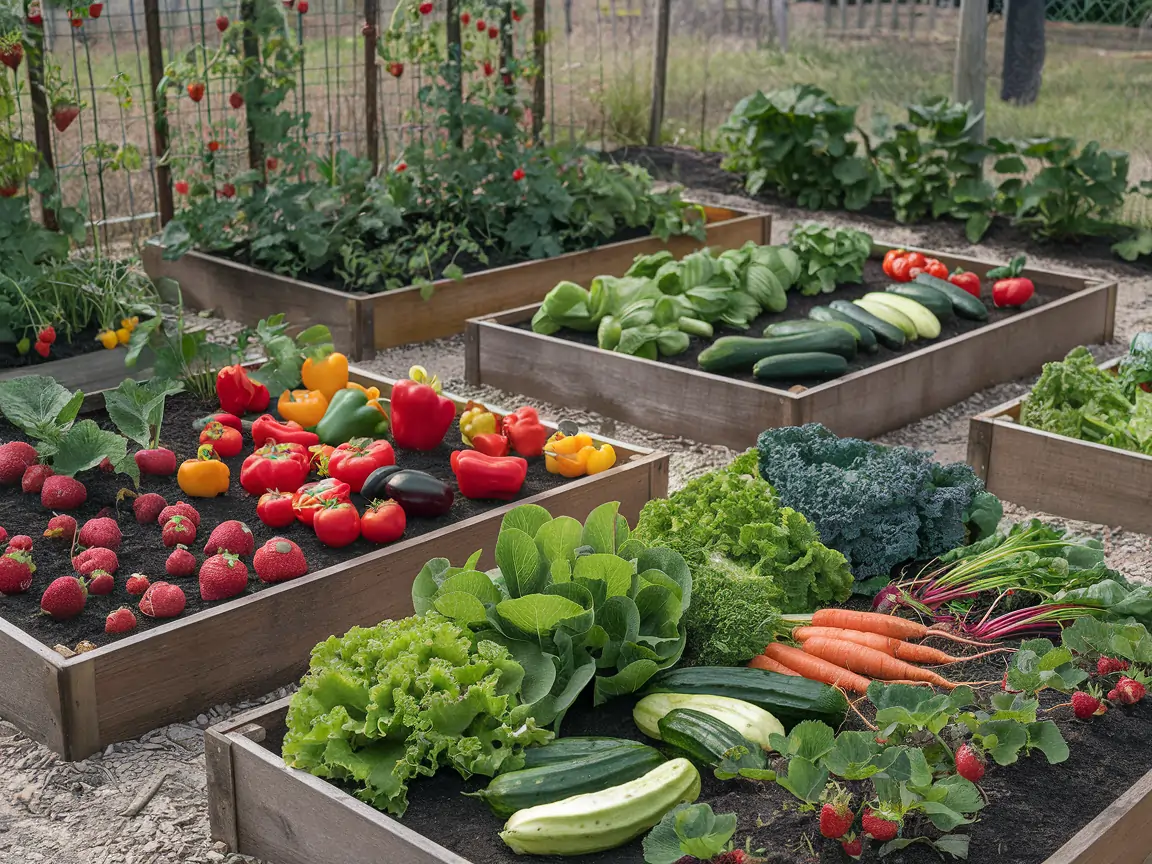
A good beginner layout uses one or two 4-by-8-foot beds. Place them with the long side facing north–south when possible. This reduces shade from tall crops such as tomatoes, corn, trellised cucumbers, and pole beans.
Raised beds do not need a bottom. In most yards, an open-bottom bed gives roots access to native soil and helpful organisms. A bottom can help on a balcony or over contaminated soil, but it changes the bed into a large container and demands more water.
Choose the right place before you build
Site choice controls what you can grow. A raised bed will not fix deep shade, standing water, tree-root pressure, or poor access. Spend a day watching the area before you buy lumber or soil.

Measure sunlight through the day
Most vegetables need at least 6 hours of direct sun. Fruiting crops need closer to 8–10 hours for steady growth and good yields.
Track the site from morning to late afternoon. Note shade from:
- Houses and fences
- Trees and shrubs
- Sheds and play structures
- Neighboring buildings
- Tall crops in nearby beds
Leafy crops such as lettuce, spinach, kale, and arugula can produce with 4–6 hours of sun. Tomatoes, peppers, eggplant, melons, cucumbers, squash, and okra need more.
In USDA Zones 3–5, full sun also helps warm the bed during a short growing season. In Zones 8–10, a little afternoon shade can protect lettuce and cilantro from bolting. Bolting means a plant sends up a flower stalk and turns bitter.
Avoid wet and unsafe ground
Do not place a raised bed at the bottom of a slope where rain collects. Raised sides cannot overcome constant saturation. Roots need air in the soil, and waterlogged roots often develop rot.
Keep beds away from dripping roof edges. Roof runoff can carry asphalt particles, paint flakes, or metal residue. Do not build over soil that may contain lead, especially near old painted homes, busy roads, or former industrial sites. Use a soil test before planting food crops.
Leave room to mow, weed, repair fences, and carry compost. A bed that fits on paper may become frustrating if you cannot walk around it with a wheelbarrow.
Check the slope
A slight slope is manageable, but a steep slope needs terracing. Level a small area with a rake and shovel. For a larger slope, build separate beds that follow the contour rather than forcing one long box to sit level.
Use a 4-foot level on the frame during construction. A bed that is off by an inch or two will still grow plants, but uneven soil depth can cause water to pool at one end.
💡 Pro Tip: Mark the bed with stakes and string before building. Leave it in place for a week. You will quickly notice if the path is too narrow or if a fence blocks your reach.
Plan bed size, height, and walking space
A raised bed should fit your reach, your crops, and your budget. Bigger is not always better. A narrow bed often produces more food because you can tend every plant without stepping on the soil.

Use a practical bed width
Keep a bed 3–4 feet wide if you can reach from both sides. A bed against a wall or fence should be no wider than 2 feet. Most adults can reach about 2 feet into loose soil without leaning across plants.
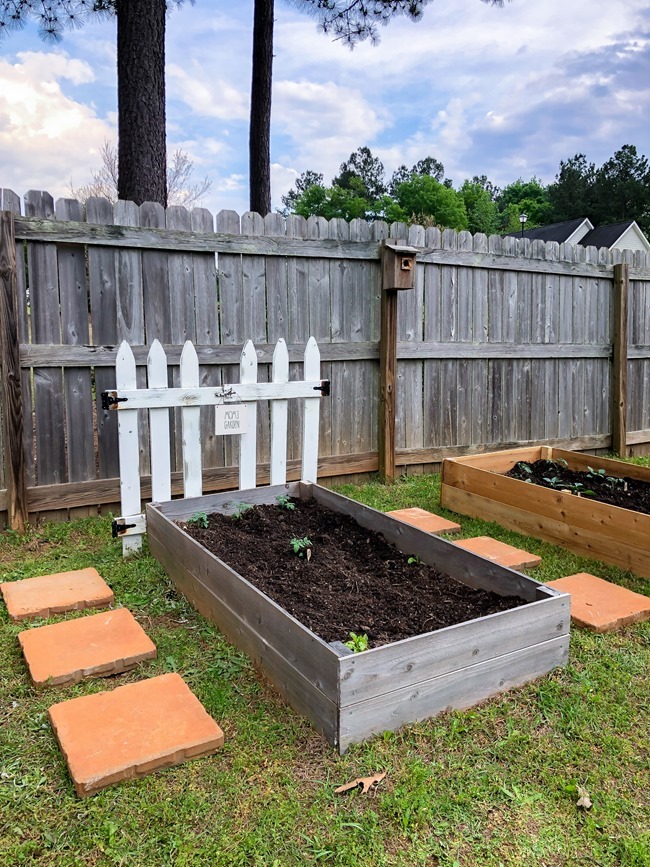
A 4-by-8-foot bed gives 32 square feet of growing space. It is large enough for tomatoes, herbs, greens, carrots, beans, and a trellis, yet small enough for a beginner to manage.
Avoid beds wider than 4 feet unless you add a narrow access path through the center. Never plan to step into the bed. Foot traffic compresses soil and harms earthworm channels.
Pick a suitable height
A 6–8-inch bed improves soil structure and gives shallow-rooted crops a cleaner growing area. A 12-inch bed holds more soil and feels easier to work. Beds 18–30 inches high help gardeners with limited mobility, but they cost more and dry out faster.
Use deeper beds for crops with long roots. Carrots, parsnips, daikon, and some indeterminate tomatoes benefit from 12–18 inches of loose soil. Lettuce, radishes, onions, strawberries, and herbs can grow in 6–8 inches.
The frame height also affects safety. Tall beds need strong corner posts and sturdy side boards. Thin boards can bow outward when wet soil presses against them.
Leave enough space between beds
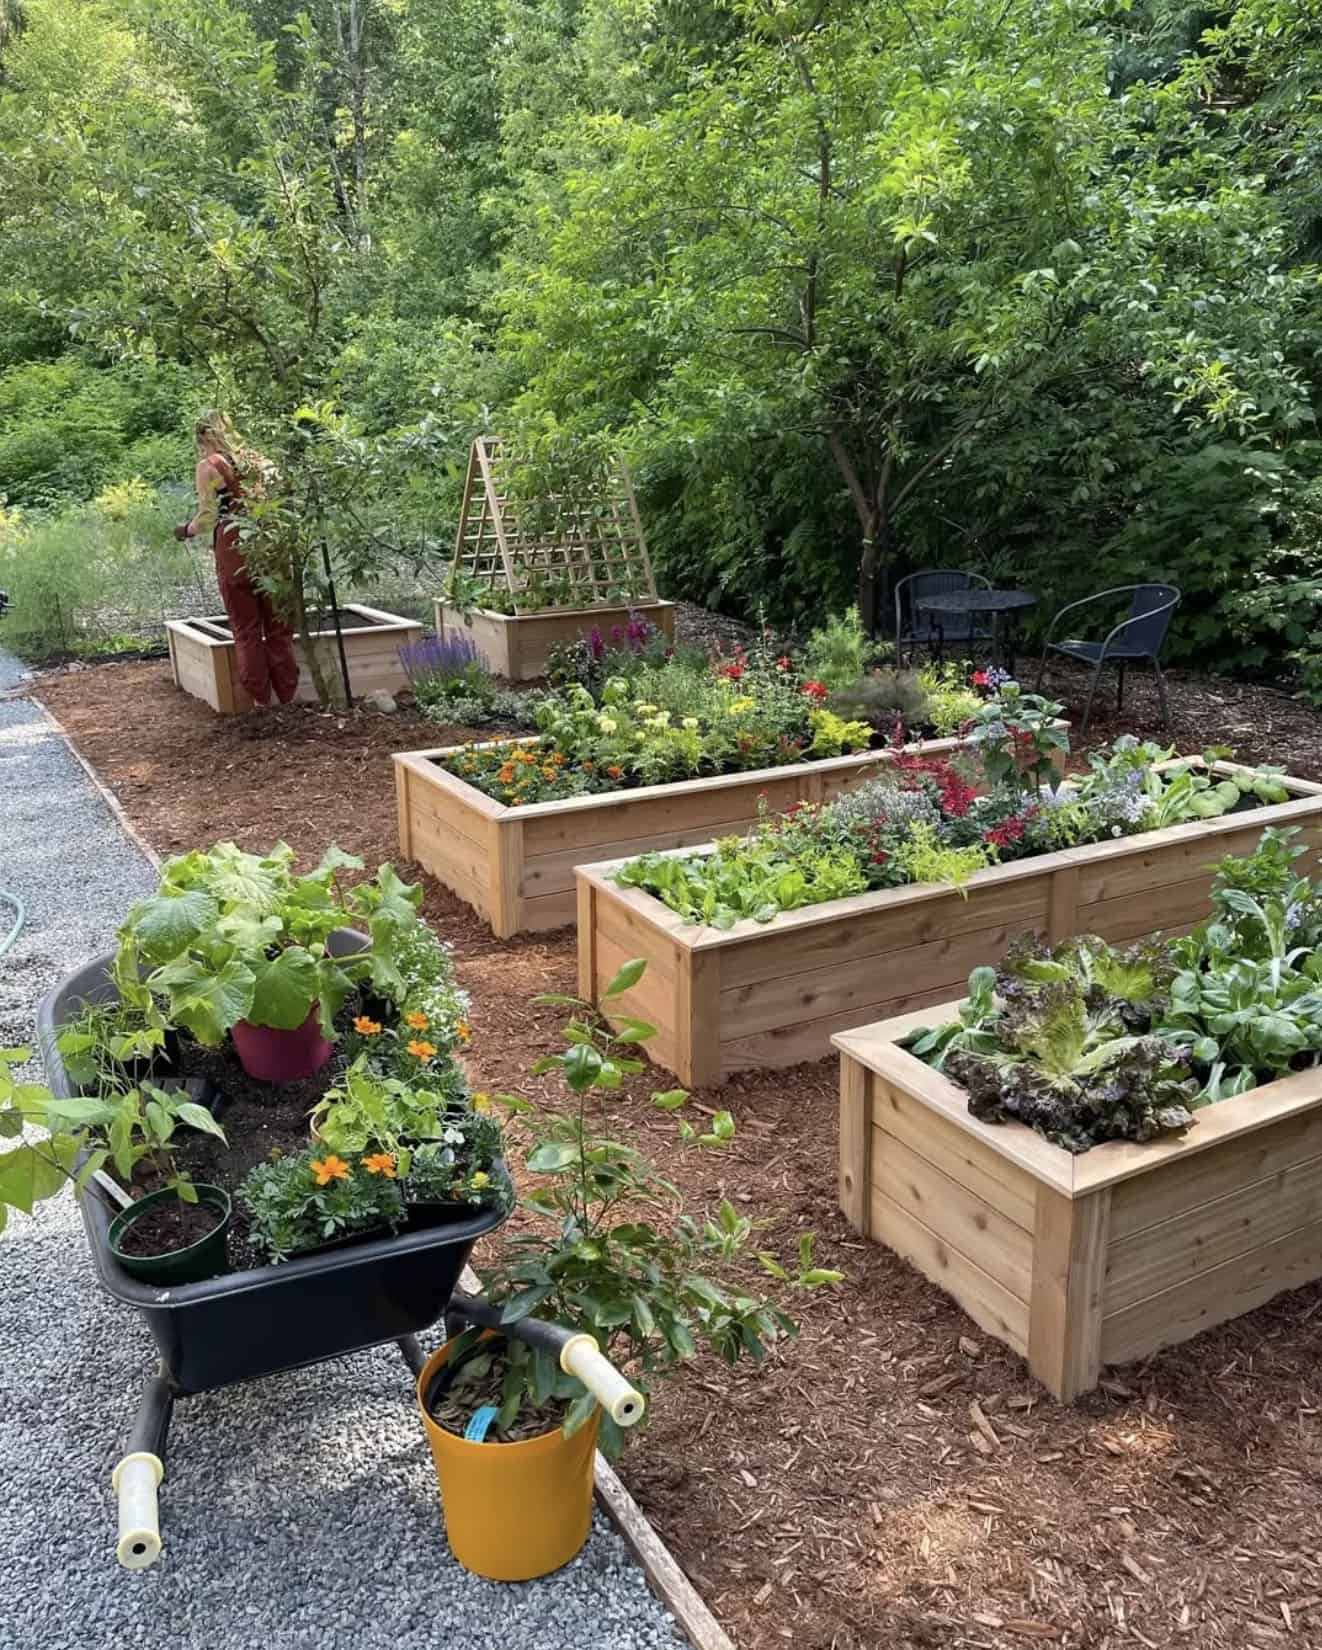
Paths should be at least 24 inches wide. I prefer 30–36 inches when space allows, especially if I need to move a cart or wheelbarrow.
Use paths made from:
- Wood chips
- Straw
- Gravel
- Brick or pavers
- Grass kept short
- Landscape fabric covered with mulch
Avoid bare soil paths in wet climates. They turn muddy and invite weeds. Wood chips work well in most home gardens, but keep them on paths rather than mixing fresh chips into the bed soil.
This table gives a useful starting point for bed dimensions.
| Garden need | Recommended design | Why it works |
|---|---|---|
| Small beginner garden | One 4-by-8-foot bed, 8–12 inches high | Easy to build and manage |
| Narrow side yard | Two-by-8-foot bed, 8–12 inches high | Keeps every plant within reach |
| Wheelchair-friendly layout | 30–36-inch-wide bed, 24–30 inches high | Allows reach from one side |
| Patio or balcony | 18–24-inch-deep container bed | Limits weight and soil volume |
| Large family garden | Several 4-by-8-foot beds | Supports crop rotation and access |
Start with one bed if you are new to gardening. After one season, you will know how much time, water, and food your garden really needs.
Select safe materials for the frame
The best raised bed material depends on your climate, budget, and expected lifespan. Wood is easy to cut and repair. Metal lasts longer in many settings. Masonry looks permanent but takes more labor.

Wood options
Untreated cedar and redwood resist decay better than pine. Cedar often lasts 8–15 years, depending on thickness, moisture, soil contact, and climate. Redwood can last longer but costs more in many regions.
Untreated pine is affordable and may last 3–7 years. It works well for a starter bed. Use thick 2-by-8 or 2-by-10 boards rather than thin fence pickets.
Do not use old railroad ties or lumber treated with creosote. Avoid salvaged wood with unknown coatings. Modern treated lumber rules differ from older products, but many gardeners still choose untreated cedar for peace of mind.
Metal, stone, and composite materials
Galvanized steel beds can last 15–30 years or longer. They warm quickly in spring, which helps in cool climates. In hot areas, soil near the metal wall may dry faster, so use mulch and check moisture often.
Stone and concrete blocks can last for decades. They need a stable base and may create more heat near the edge. Concrete can raise soil pH over time, although the change varies with the material and local rain.
Recycled plastic and composite boards resist rot. Check that the product is rated for garden use and does not shed brittle pieces. Some composite boards become flexible in heat and may need extra support.
Build strong corners
A simple 4-by-8-foot wood bed needs:
- Four side boards
- Four corner stakes or posts
- Exterior-grade screws
- A drill and driver bit
- A level
- A tape measure
- A saw, if boards need cutting
Use screws rather than nails for easier repair. Pre-drill near board ends to reduce splitting. Add a center brace to long beds, especially when using thinner boards.
The frame does not need a sealed finish. If you use a stain or oil, choose a product labeled for garden or food-growing areas and let it cure fully before adding soil.
⚠️ Warning: Never burn treated, painted, or stained lumber from an old bed. The smoke and ash may contain harmful compounds.
Build the bed and prepare the ground
A raised bed works best when the ground under it is clean, level, and open to drainage. Building on native soil saves money and gives roots more space.

Gather the basic tools and materials
You do not need expensive equipment. A cordless drill such as a 20V DeWalt or 18V Ryobi works well for screws. A bow rake, shovel, wheelbarrow, hand trowel, tape measure, and level cover most tasks.
The table below matches common jobs with useful supplies.
| Task | Tools or materials | Practical note |
|---|---|---|
| Marking the layout | Stakes, string, tape measure | Confirm size before cutting |
| Building the frame | Boards, screws, drill, level | Pre-drill board ends |
| Clearing the site | Shovel, rake, hoe | Remove sod and large roots |
| Filling the bed | Compost, topsoil, wheelbarrow | Add soil in layers |
| Installing irrigation | Drip tubing, filter, timer | Flush lines before covering |
| Protecting young plants | Hoops, mesh, clips | Secure edges against pests |
A wheelbarrow saves time once the bed is deeper than 8 inches. For a single 4-by-8-foot bed, hand-carrying bags is possible but tiring.
Prepare grass and weeds
Mow the site short. Remove persistent perennial weeds such as bindweed, quackgrass, Bermuda grass, and nutsedge. These weeds can push through loose soil.
You can place cardboard over short grass before filling the bed. Use plain brown cardboard with tape and labels removed. Wet it first so it stays in place. Do not use glossy colored cardboard.
Cardboard breaks down over time. It works as a temporary barrier, not a permanent floor. If your bed sits over aggressive grass, add a thick layer of mature compost and mulch the paths.
Assemble and fill the frame
Set the frame in place and check that it is square. Measure both diagonals. If the two diagonal measurements match, the frame is square.
Anchor tall beds with posts driven into the ground or attached to the inside corners. Fill in 4–6-inch layers and water each layer lightly. This settles the mix and reveals low spots.
Do not fill the entire bed with pure compost. Compost shrinks, dries unevenly, and can hold too much water when used alone. A balanced mix contains mineral soil, compost, and air space.
Create a soil mix that supports strong roots
Good raised bed soil should drain well but hold enough water for steady growth. It should contain mineral particles, organic matter, air pores, and living organisms.
Use a simple soil recipe
For most open-bottom raised beds, use:
- 60% screened topsoil or loam
- 30% mature compost
- 10% aeration material, such as pine fines or coarse leaf mold
You can adjust the mix based on native soil. If your topsoil is already sandy and drains quickly, use less coarse material. If it contains heavy clay, add compost and avoid adding large amounts of sand. Clay plus fine sand can form a hard, dense mix.
For a 4-by-8-foot bed that is 12 inches deep, you need about 32 cubic feet of soil. Add 10–15% extra for settling. That equals about 1.2 cubic yards.
Use volume, not bag count, when comparing prices. A 1-cubic-foot bag may look cheap until you need 35 bags.
Test pH and nutrients
Most vegetables grow well in soil with a pH of 6.0–7.0. Blueberries prefer a much lower pH, around 4.5–5.5, so they usually belong in a separate container or bed.
A soil test can show pH, phosphorus, potassium, calcium, magnesium, and organic matter. Test both the native soil and the finished bed if possible. Extension offices often provide reliable tests at a modest cost.
Do not add lime because a gardening video suggested it. Lime raises pH, and excess lime can lock up nutrients. Add it only when a test supports its use.
Add fertilizer with care
Compost supplies some nutrients, but heavy-feeding crops may need more. Tomatoes, peppers, cucumbers, squash, corn, and cabbage-family crops often use more nitrogen and potassium than herbs or radishes.
Start with a balanced organic fertilizer, such as 4-4-4, at the label rate. The three numbers show the percentage of nitrogen, phosphate, and potash. Avoid repeated high-nitrogen feeding, which can produce large leaves and few fruits.
Side-dress long-season crops with compost or a light fertilizer application after four to six weeks. Water after applying dry fertilizer.
Mulch the soil surface
Add 1–2 inches of clean straw, shredded leaves, or finished compost around plants. Mulch slows evaporation, reduces weeds, and softens soil temperature swings.
Keep mulch a few inches away from tomato stems and the crowns of strawberries. Wet mulch touching stems can encourage rot and shelter slugs.
🌱 Beginner Note: If your plants grow slowly after several weeks, do not assume they need more fertilizer. Check sunlight, soil moisture, root crowding, and pH first. Poor light cannot be fixed with fertilizer.
Design the planting layout for easy harvests
A raised bed should grow food, not become a crowded puzzle. Plan around plant height, root depth, harvest timing, and plant family.

Place tall plants on the north side
Put tomatoes, corn, pole beans, trellised cucumbers, and sunflowers along the north edge. This keeps them from shading shorter crops.
Plant medium-height crops in the center. Place lettuce, radishes, carrots, onions, and herbs along the south edge. This layout works well in most of the United States.
In the Southern Hemisphere, reverse the direction. In a narrow bed beside a wall, use the side that receives the strongest sun.
Use succession planting
Succession planting means replacing a finished crop with another crop. For example, plant radishes in early spring, then use the space for bush beans after the radishes finish.
A 4-by-8-foot bed can produce several crops in one season:
- Spinach and peas in early spring
- Bush beans and cucumbers in late spring
- Fall carrots, kale, and lettuce
- Garlic planted in autumn for harvest the next summer
Your frost dates control the schedule. Use the average last frost in spring and first frost in fall as starting points, then adjust for local weather.
Match crops to available depth
Root depth varies by crop. The table below helps match plants to bed design.
| Root depth | Crops that fit | Suggested soil depth |
|---|---|---|
| Shallow | Lettuce, radish, onion, spinach, herbs | 6–8 inches |
| Medium | Beans, beets, kale, peppers, Swiss chard | 8–12 inches |
| Deep | Carrots, parsnips, tomatoes, cucumbers, squash | 12–18 inches |
| Very spreading | Melons, winter squash, pumpkins | Bed plus trellis or nearby ground |
Large vining plants can overwhelm a small bed. Train cucumbers and small melons on a strong trellis. Let pumpkins and winter squash run outside the bed if space permits.
Try square-foot spacing with judgment
Square-foot gardening can help beginners use space well. Common spacing includes:
- 16 carrots or radishes per square foot
- 9 onions or beets per square foot
- 4 lettuce plants per square foot
- 1 pepper plant per square foot
- 1 tomato plant per 2–4 square feet
- 1 cucumber plant per 2 square feet with a trellis
These are starting points, not strict laws. Give plants more space in humid climates where airflow helps prevent fungal disease. In dry climates, closer spacing can shade the soil and reduce water loss.
Rotate plant families
Do not plant tomatoes, peppers, eggplant, and potatoes in the same spot every year. They all belong to the nightshade family and can share diseases such as early blight and bacterial wilt.
Rotate these groups when possible:
- Nightshades: tomato, pepper, eggplant, potato
- Brassicas: cabbage, broccoli, kale, collards
- Legumes: beans and peas
- Cucurbits: cucumber, squash, melon
- Roots: carrot, beet, radish
With one bed, rotation is limited. Remove diseased plant debris, add fresh compost, and avoid saving seed from sick plants.
Add irrigation, trellises, and pest barriers early
Raised beds dry faster than ground soil because they have more exposed surface and better drainage. A water plan saves time and helps prevent plant stress.
Choose drip irrigation for steady moisture
Drip tubing delivers water near the root zone. It uses less water than overhead sprinklers and keeps leaves dry, which can reduce foliar disease.
A simple system includes:
- Outdoor faucet connection
- Backflow preventer
- Pressure regulator
- Filter
- 1/2-inch main tubing
- 1/4-inch lines or emitters
- Battery or hose timer
Run the system early in the morning. Check the soil with your finger or a moisture meter before increasing the timer. Soil should feel moist several inches down, not wet and shiny.
Estimate watering needs
New transplants may need water every day or two during hot weather. Once roots spread, one deep watering two or three times per week often works better than shallow daily watering. Sandy soil needs more frequent watering than clay-loam soil.
The right schedule changes with zone, crop, wind, mulch, and rainfall.
| Garden stage | Typical watering pattern | What to check |
|---|---|---|
| Seeds germinating | Light water once or twice daily | Keep the top inch moist |
| New transplants | Every 1–2 days | Watch for wilting at midday |
| Established crops | Deep water 2–3 times weekly | Check soil 2–4 inches down |
| Hot, windy weather | More often, based on soil | Look for dry edges and curled leaves |
| Cool or rainy weather | Reduce or stop irrigation | Avoid soggy soil |
Use a rain gauge or straight-sided container to measure rainfall. One inch of rain wets the bed more evenly than a few minutes of light sprinkling.
Build a sturdy trellis
A trellis should support the mature plant and fruit weight. A flimsy tomato cage often collapses under an indeterminate variety such as ‘Cherokee Purple’ or ‘Sungold’.
Use cattle panel, galvanized wire mesh, cedar stakes, or a strong A-frame. Secure the trellis before planting. Adding it later can damage roots.
Trellises also change shade patterns. Place them on the north side when possible. Tie vines with soft cloth or garden clips rather than tight wire.
Protect against common pests
Raised beds reduce some weed pressure but do not stop pests. Common problems include:
- Slugs and snails
- Cabbage worms
- Flea beetles
- Tomato hornworms
- Cutworms
- Aphids
- Squirrels and rabbits
- Deer
Use insect mesh over hoops for cabbage-family crops. A low fence helps with rabbits. Remove tomato hornworms by hand. Encourage lady beetles, lacewings, ground beetles, bees, and other beneficial insects by growing alyssum, dill, calendula, and native flowers nearby.
Avoid broad insecticide sprays. They can kill pollinators along with pests.
Plant the bed without crowding it
Planting time depends on the crop and climate. Cool-season crops can handle light frost. Warm-season crops need warm soil and nights above their preferred minimum.

Start with cool-season vegetables
In Zones 3–6, plant peas, spinach, lettuce, kale, radishes, and onions several weeks before the last frost. Use row cover when hard freezes threaten.
In Zones 7–10, these crops may grow through winter. Plant them in fall as summer heat fades.
Peas and spinach struggle in hot weather. Plant them early and harvest often. ‘Bloomsdale Long Standing’ spinach handles heat better than some types, but no spinach enjoys midsummer heat in much of the South.
Wait for warm soil
Tomatoes, peppers, basil, cucumbers, beans, squash, and eggplant need warm soil. Plant after the danger of frost has passed and soil temperatures reach about 60°F for most warm-season crops.
Peppers and eggplant grow slowly when nights stay cool. In Zone 5, I get better results by using sturdy transplants rather than direct sowing. In Zone 8, direct-sown beans and cucumbers can catch up quickly once the soil warms.
Give each plant room
Crowding causes weak growth and poor airflow. It can also hide pests until damage becomes severe.
Use the plant tag as a starting guide, but consider the variety. A dwarf patio tomato may need 18 inches. An indeterminate tomato may need 24–36 inches and a tall support.
When unsure, give a plant more space. You can fill open soil with basil, lettuce, radishes, or flowers while the main crop grows.
Maintain the garden through the seasons
Raised beds are easier to maintain than large in-ground plots, but they still need regular care. A short weekly visit prevents small problems from becoming expensive ones.

Spring tasks
In early spring:
- Remove winter mulch from soil that stays cold and wet
- Check boards, screws, stakes, and trellises
- Add 1–2 inches of compost
- Test soil if plants struggled last year
- Repair drip lines
- Plant cool-season crops
- Watch for slugs and cutworms
Do not work wet soil. If soil sticks to your boots or tools, wait. Working wet soil can create hard clods and destroy air pockets.
Summer tasks
In summer:
- Check moisture at least twice each week
- Tie tomatoes and climbing crops
- Harvest beans, cucumbers, zucchini, and peppers often
- Remove diseased leaves
- Reapply mulch as it thins
- Watch for blossom-end rot
- Feed long-season crops if growth slows
Blossom-end rot appears as a dark, sunken spot on the bottom of tomatoes, peppers, and squash. It usually relates to uneven water uptake, not simply a lack of calcium. Keep moisture steady and avoid root damage.
Fall and winter tasks
After harvest:
- Remove diseased plants and dispose of them
- Leave healthy roots to decompose or add them to compost
- Plant garlic, cover crops, or cold-hardy greens
- Clean and store hoses and timers
- Tighten loose hardware
- Add compost or leaf mulch
- Cover empty beds with leaves or a winter cover crop
Do not leave bare soil exposed all winter if erosion is a concern. Shredded leaves protect the surface and feed soil life as they break down.
This seasonal schedule keeps the structure and soil in working order.
| Season | Main jobs | What not to do |
|---|---|---|
| Spring | Test soil, add compost, plant cool crops | Do not work wet soil |
| Late spring | Install supports, plant warm crops | Do not rush tender plants |
| Summer | Water, mulch, harvest, scout pests | Do not let beds dry for long periods |
| Fall | Remove disease, plant garlic, add leaves | Do not compost diseased debris |
| Winter | Inspect frame, store tools, plan crops | Do not leave irrigation full of water in freezing zones |
A few minutes each week protects the work you put into the bed. Maintenance also extends the life of the frame.
Fix common raised bed problems
Most raised bed problems have a clear cause. Look at the soil, roots, leaves, and watering pattern before reaching for a product.

Why is the soil drying too fast?
Fast drying often comes from shallow beds, light soil, strong wind, full sun, or too little mulch. Metal beds may dry fastest along the outer edges.
Add 1–2 inches of organic mulch. Check drip emitters for clogs. Increase the depth of each watering rather than watering for only a few minutes.
If the mix contains too much compost or peat, it may become hydrophobic when very dry. Water slowly in two or three passes so the soil can absorb moisture.
Why are plants yellow?
Yellow leaves can result from low nitrogen, poor drainage, root damage, cold soil, or natural aging. Yellow lower leaves on an otherwise healthy plant may not signal a serious issue.
Check the roots if possible. Healthy roots are usually white, cream, or tan and firm. Brown, mushy roots suggest excess water or disease.
Test soil before adding nitrogen. Too much fertilizer can burn roots and cause fast, weak growth.
Why is water pooling?
Pooling usually means compacted soil, poor grading, blocked drainage, or an overly fine mix. Raised beds should drain, but they should not drain so quickly that plants wilt every day.
Use a garden fork to loosen the top layer without turning the whole bed. Add compost over time. If the bed sits on compacted clay, open the bottom and improve the soil beneath it.
Do not add a layer of gravel under the soil. This common practice does not improve drainage in a raised bed and reduces root space.
Why are seedlings disappearing?
Cutworms often chew young stems at soil level. Slugs leave ragged holes and slime trails. Birds and rodents may pull seedlings from loose soil.
Place a cardboard collar around individual stems. Hand-pick slugs in the evening. Use mesh covers for birds and insects. Replant only after identifying the cause.
Why do tomatoes have lots of leaves but few fruits?
Too much nitrogen, low light, high heat, or poor pollination can reduce fruit set. Some tomato varieties also take longer to produce, especially indeterminate types.
Use a balanced fertilizer, not a high-nitrogen lawn product. Provide 8 or more hours of sun when possible. In hot weather, shade cloth during the worst afternoon heat can help protect blossoms.
Pros and cons of raised vegetable beds
Raised beds solve many garden problems, but they also create new costs and tasks. Consider both sides before building several beds.
| Pros | Cons | Best response |
|---|---|---|
| Better control of soil | Soil can cost more than seeds | Buy soil in bulk when possible |
| Easier access | Frames need repair | Use thick boards and strong corners |
| Warms early in spring | Dries faster | Add mulch and drip irrigation |
| Fewer weeds | Limited crop rotation in one bed | Use compost and remove disease |
| Good for poor native soil | Heavy beds are hard to move | Plan the site carefully |
| Works in small spaces | May need pest barriers | Add mesh or fencing early |
Raised beds are worth the money for gardeners who have poor soil, limited space, or mobility needs. They may not be worth it for a large garden with deep, fertile soil and easy access to a tractor or tiller.
Use a simple maintenance plan
A bed frame can last for years if you inspect it. The soil also changes as organic matter breaks down and roots remove nutrients.

Check the frame twice each year
Look for:
- Bowed boards
- Loose screws
- Rot near the soil line
- Cracked corner posts
- Rusted metal
- Leaning trellises
- Standing water near the base
Repair small problems before the bed fails. Replace one board at a time if the rest of the structure remains sound. Emptying an entire bed is rarely needed for a small repair.
Refresh soil without rebuilding it
Add 1–2 inches of compost each spring or fall. Mix only the top few inches with a hand fork. Deep digging can disturb roots, fungal networks, and soil layers.
Top up beds when soil settles. Settling is normal, especially during the first year. Use compost and screened topsoil rather than loose potting soil for a large open bed.
Replace soil only when it has contamination, severe disease, salt buildup, or a major structural problem. Routine soil replacement wastes money and removes living soil.
Know the expected lifespan
Lifespan depends on material and climate:
- Untreated pine: about 3–7 years
- Cedar: about 8–15 years
- Redwood: about 10–20 years
- Galvanized steel: often 15–30 years
- Stone or concrete: several decades
Wet climates shorten wood life. Good drainage, thick boards, and strong joinery extend it. Wood that stays wet at the base breaks down first.
Compare raised beds with other garden methods
A raised bed is not the only way to grow vegetables. The right choice depends on soil, space, budget, and mobility.

Raised beds versus in-ground rows
Raised beds offer tighter control and easier access. In-ground rows cost less and provide more space for crops such as corn, pumpkins, potatoes, and winter squash.
Choose in-ground planting if your native soil drains well, has a safe test result, and you have enough space. Choose raised beds when your soil is rocky, compacted, contaminated, or difficult to reach.
Raised beds versus grow bags
Grow bags are portable and useful for patios or rentals. They dry out faster and may last only a few seasons. A 10-gallon bag suits one pepper or compact tomato. A 20-gallon bag works better for an indeterminate tomato.
Raised beds hold moisture more steadily and support trellises. They are less portable but better for a long-term garden.
Raised beds versus containers
Containers need potting mix, not ordinary topsoil. They are good for herbs, lettuce, peppers, strawberries, and dwarf tomatoes. Large crops need large containers and frequent watering.
A 4-by-8-foot bed is more efficient for families who want many vegetables. Containers work better where ground access is impossible.
| Method | Best for | Main limitation |
|---|---|---|
| Raised bed | Home food gardens and poor soil | Initial cost and fixed location |
| In-ground rows | Large plots and low-cost growing | Harder soil and weed control |
| Grow bags | Renters and patios | Fast drying and shorter life |
| Containers | Herbs and small crops | Limited root space |
| Hügel-style bed | Sites with woody debris | Takes planning and settling time |
The main difference between a raised bed and a container is root access. An open-bottom bed can connect with native soil, while a container depends on the mix inside it.
Decide when to hire help
Most raised beds are suitable for DIY work. Ask for help when the project involves heavy materials, steep slopes, drainage changes, or contaminated soil.

Hire a professional or experienced contractor when:
- The bed must retain a steep slope
- You need a retaining wall over several feet high
- The site has buried utilities
- Soil tests show lead or other contamination
- You need a wheelchair-accessible structure with custom height
- Water regularly floods the area
- You plan a large irrigation system
Call your local utility marking service before digging posts or irrigation trenches. Even a shallow project can hit cables or pipes.
For mobility-friendly beds, consider 24–30 inches of height, 30–36 inches of width, smooth edges, and a firm 36-inch path. Make sure the structure can hold wet soil without shifting.
Learn from common design mistakes
The most costly mistakes happen before planting. Fixing them later can mean moving soil, rebuilding frames, or removing crowded crops.
Making beds too wide
A 6-foot bed looks productive but forces you to lean or step inside. Keep the width at 4 feet or less when you can reach from both sides.
Using pure compost
Pure compost can settle, dry unevenly, and release nutrients too quickly. Mix it with mineral soil and use compost as a regular amendment.
Skipping a water plan
A garden may survive hand watering in spring, then fail during July heat. Install drip lines before the plants fill the bed.
Ignoring mature plant size
A single zucchini can cover several square feet. A pumpkin may run 10–20 feet. Read the seed packet and plan for the full size, not the seedling size.
Adding gravel under the soil
Gravel does not create a helpful drainage layer under a raised bed. It takes up space and can slow water movement at the soil boundary. Improve the soil and site grade instead.
Building without pest access
If you cannot reach the bed edge, you cannot inspect stems, harvest hidden vegetables, or repair a net. Leave enough space on all sides.
Forgetting crop rotation
Growing tomatoes in the same soil year after year can increase disease pressure. Use more than one bed, rotate plant families, or replace diseased plant debris and add fresh compost.
Follow this beginner-friendly build plan
A simple first bed can be completed over a weekend, not counting soil delivery. Work in stages so you do not rush the layout.
- Observe the site. Watch sunlight, drainage, wind, and nearby roots.
- Mark the bed. Use string to outline a 4-by-8-foot rectangle.
- Measure paths. Leave 24–36 inches around the bed.
- Test the soil. Check pH and possible contamination.
- Build the frame. Use untreated cedar, redwood, or another safe material.
- Level and square it. Check both diagonals and use a level.
- Prepare the base. Remove sod, loosen compacted soil, and add cardboard only when needed.
- Install irrigation. Lay drip tubing before planting.
- Fill with soil. Use loamy topsoil, mature compost, and a small amount of aeration material.
- Add supports. Install trellises, cages, or hoops before roots spread.
- Plan crops. Put tall plants north, short plants south, and leave room for mature growth.
- Plant by season. Follow local frost dates and soil temperatures.
- Mulch and label. Add a thin mulch layer and mark varieties.
- Inspect weekly. Check moisture, pests, weeds, supports, and harvests.
A first bed does not need to be perfect. Keep notes on what grew well, where water pooled, and how often you watered. Those notes will make the second season far easier.
Frequently asked questions
Q: How deep should a raised bed be for vegetables?
A: Use 6–8 inches for lettuce, radishes, onions, and herbs. Use 12–18 inches for carrots, tomatoes, cucumbers, peppers, and other deep-rooted crops. An open-bottom bed can be shallower if the native soil below is loose and safe.
Q: Should I put landscape fabric under a raised bed?
A: Usually, no. Landscape fabric can block roots and slow drainage. Use cardboard over short grass, or remove persistent weeds by hand. Use a solid bottom only when growing over concrete, a contaminated surface, or a balcony.
Q: How much soil does a 4-by-8-foot raised bed need?
A: A 4-by-8-foot bed filled 12 inches deep needs 32 cubic feet of soil, or about 1.2 cubic yards. Buy 10–15% extra because the mix settles after watering.
Q: Can I use garden soil in a raised bed?
A: You can use screened native soil in an open-bottom bed, but avoid filling a raised bed with heavy, unamended clay. Mix garden soil with mature compost and improve the texture over time. Do not use dense soil alone in a container-style bed.
Q: What is the best wood for a vegetable garden bed?
A: Untreated cedar and redwood offer good rot resistance. Untreated pine costs less but usually wears out sooner. Avoid railroad ties, creosote wood, painted boards, and lumber with an unknown history.
Q: How often should I water a raised bed?
A: Check soil moisture several times each week. Established vegetables often need deep watering two or three times weekly, but sandy soil, wind, heat, and small containers may require more. Water when the soil is dry several inches below the surface.
Q: Can tomatoes and peppers grow in the same raised bed?
A: Yes, but they belong to the same nightshade family. Give them full sun, good airflow, and enough space. Rotate them away from that bed in later seasons when possible to reduce disease buildup.
Q: How do I protect raised beds from rabbits and deer?
A: Use wire mesh or hardware cloth for rabbits. Deer need a fence high enough to prevent jumping, often 7–8 feet for reliable protection. Lightweight insect netting will not stop a determined deer.
Q: Are raised beds worth the cost?
A: They are often worth it when native soil is poor, contaminated, compacted, or hard to reach. They may not offer much benefit when your soil is already fertile and well drained. Start with one bed so you can measure the real value in time and harvests.
Q: How long does a raised bed last?
A: Untreated pine may last 3–7 years, cedar about 8–15 years, and galvanized steel 15–30 years or more. Wet conditions shorten wood life. Strong corners, good drainage, and regular inspections extend it.
Q: What vegetables should beginners grow in a raised bed?
A: Lettuce, radishes, bush beans, kale, Swiss chard, herbs, carrots, and cherry tomatoes are reliable starting crops. Avoid planting too many sprawling crops until you understand how much space they need.
Final thoughts
A well-designed raised bed vegetable garden is simple at its core: give plants sun, loose soil, steady water, enough room, and regular care. Keep the bed narrow enough to reach, build it from safe materials, and plan for mature plants rather than tiny seedlings.
Start with one 4-by-8-foot bed if you have space. Fill it with quality soil, grow a mix of quick and long-season crops, and watch how the site behaves through one full season. After four weeks, you will see what needs adjustment. After two seasons, you will have a garden design shaped by real results rather than guesswork.
Meta description: Learn how to design a raised bed vegetable garden with practical guidance on site choice, bed size, soil mix, materials, crop spacing, irrigation, pest control, and seasonal care.