How To Set Up A Raised Garden Bed: Easy Step-By-Step Guide
A raised garden bed gives you more control over soil, water, weeds, and plant spacing. It can turn hard clay, poor sandy soil, or a small patio into a productive growing space. I have built beds in humid Zone 7 gardens, dry Zone 9 yards, and cold Zone 5 plots. The same rule held each time: careful planning mattered more than expensive materials.
A good raised bed does not need to be tall, fancy, or costly. Most home gardeners can build one in a day with basic tools. The key is choosing a safe site, using untreated materials, filling the bed with healthy soil, and leaving enough room to reach every plant without stepping inside.
Quick answer: how to set up a raised garden bed
To set up a raised garden bed, choose a level site with at least six hours of sun, build a frame 8 to 12 inches tall, place it on soil or turf, and fill it with a mix of topsoil, compost, and organic matter. Make the bed no wider than 4 feet so you can reach the center. Water deeply, add mulch, and plant according to your USDA hardiness zone and local frost dates.

Choose the right location before building
The best raised garden bed location gets six to eight hours of direct sun each day, has good drainage, and sits close to a water source. Watch the site for a full day if possible. Morning shade may be fine for leafy greens, but tomatoes, peppers, cucumbers, squash, and melons need strong afternoon light.
Avoid placing the bed beneath large trees. Tree roots can steal water and nutrients, while dense shade reduces growth. Black walnut trees deserve extra caution because their roots and leaves can release juglone, a compound that harms some plants, including tomatoes and peppers.
A site near the kitchen often gets better care. I have seen beds fail simply because the gardener placed them at the far end of the yard. A bed that takes five minutes to reach usually gets watered and harvested more often than one hidden behind a shed.
Check sunlight, drainage, and access
Walk around the proposed site after heavy rain. Do not build where water sits for more than a few hours. Raised beds improve drainage, but a low, wet area can still stay cold and soggy below the frame.
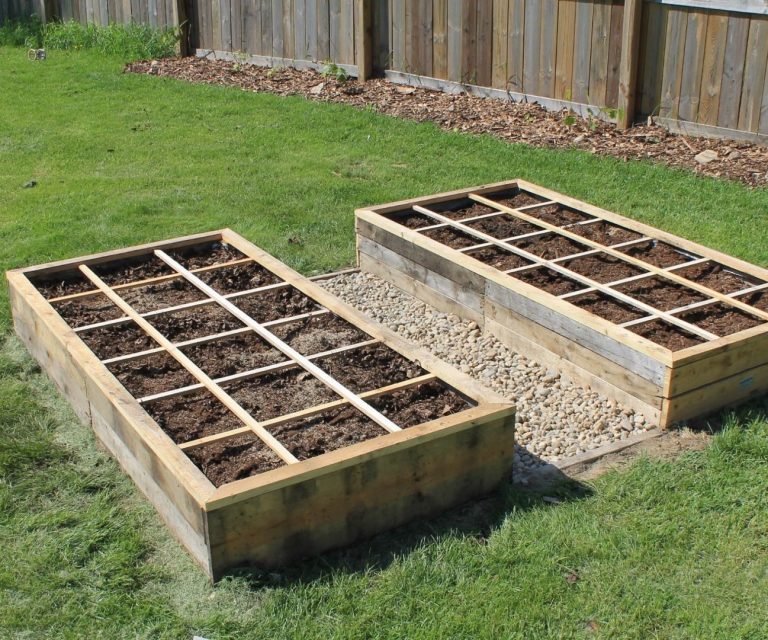
Leave at least 24 inches between beds for walking. Use 30 to 36 inches if you plan to move a wheelbarrow through the garden. If you want to use a lawn mower around the beds, keep the outside edge open and avoid narrow corners.

A simple soil test helps, even when you plan to bring in new soil. A test can show pH, phosphorus, potassium, and organic matter. Most vegetables grow well at pH 6.0 to 7.0. Blueberries need much more acidic soil, so they usually belong in a separate container or specialty bed.
Raised bed placement by sunlight
The table below matches common crops with the light they need. Use it when deciding whether a site will support vegetables, herbs, or flowers.
| Crop group | Minimum direct sun | Good raised-bed examples |
|---|---|---|
| Full-sun fruiting crops | 8 hours | Tomatoes, peppers, eggplant, cucumbers |
| Moderate-sun crops | 6–8 hours | Carrots, beans, beets, onions |
| Partial-sun crops | 4–6 hours | Lettuce, spinach, kale, cilantro |
More sunlight usually means faster growth, but it also increases water loss. In hot Zone 8 and Zone 9 gardens, a bed with morning sun and light afternoon shade can help lettuce and spinach last longer.
Pick a practical size and shape
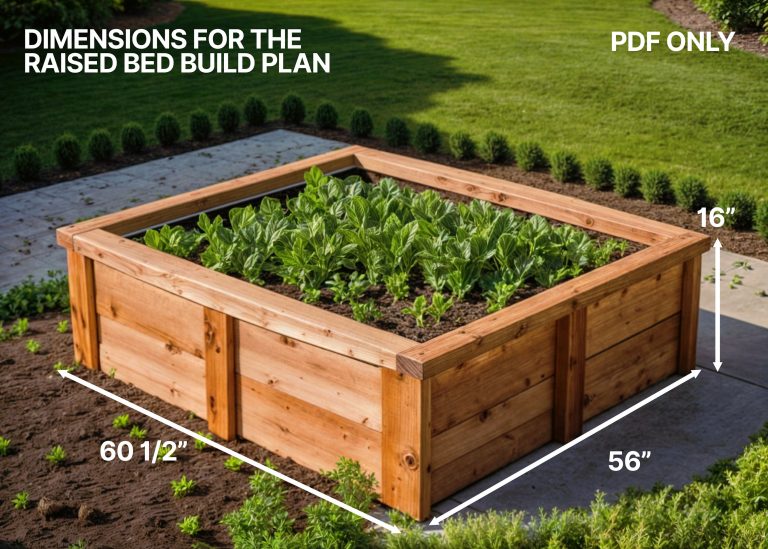
A raised bed should fit your reach, not just your yard. The most useful width for a bed that you can access from both sides is 3 to 4 feet. A bed against a wall or fence should stay 2 feet wide or less because you can reach it from only one side.
A length of 6 to 8 feet works well for beginners. Longer beds are fine, but they may need extra support to stop the boards from bowing. A 4-by-8-foot bed gives you 32 square feet of growing space and fits many standard lumber lengths.
The height depends on your soil, plants, and mobility needs. An 8-inch bed is enough to improve soil and drainage. A 12-inch bed gives roots more room. Beds 18 to 30 inches high are easier to tend from a seated position, but they cost more and need stronger construction.
Bed dimensions and what they change
| Bed size | Best use | Main trade-off |
|---|---|---|
| 2 × 4 feet | Balcony, narrow side yard, herbs | Small harvest area |
| 4 × 4 feet | Beginner vegetable garden | Center can be hard to reach |
| 4 × 8 feet | Family vegetable garden | Needs strong corner support |
| 3 × 6 feet | Easy access from both sides | Less space than a 4-foot-wide bed |
Do not make a bed wider just to gain planting space. If you must step into it, you compact the soil and damage roots. Several narrow beds often work better than one large block.
Use the right bed depth
Most vegetables grow well in 8 to 12 inches of soil. Root crops need more depth. Carrots, parsnips, and long daikon varieties may need 12 to 18 inches of loose soil. Potatoes can grow in a shallower bed if you mound soil around the stems as they develop.
You can place an 8-inch bed directly over healthy ground. For a bed over concrete, compacted gravel, or contaminated soil, use at least 18 inches of growing mix and choose crops with shallow roots if the total depth is limited.
Gather safe materials and useful tools
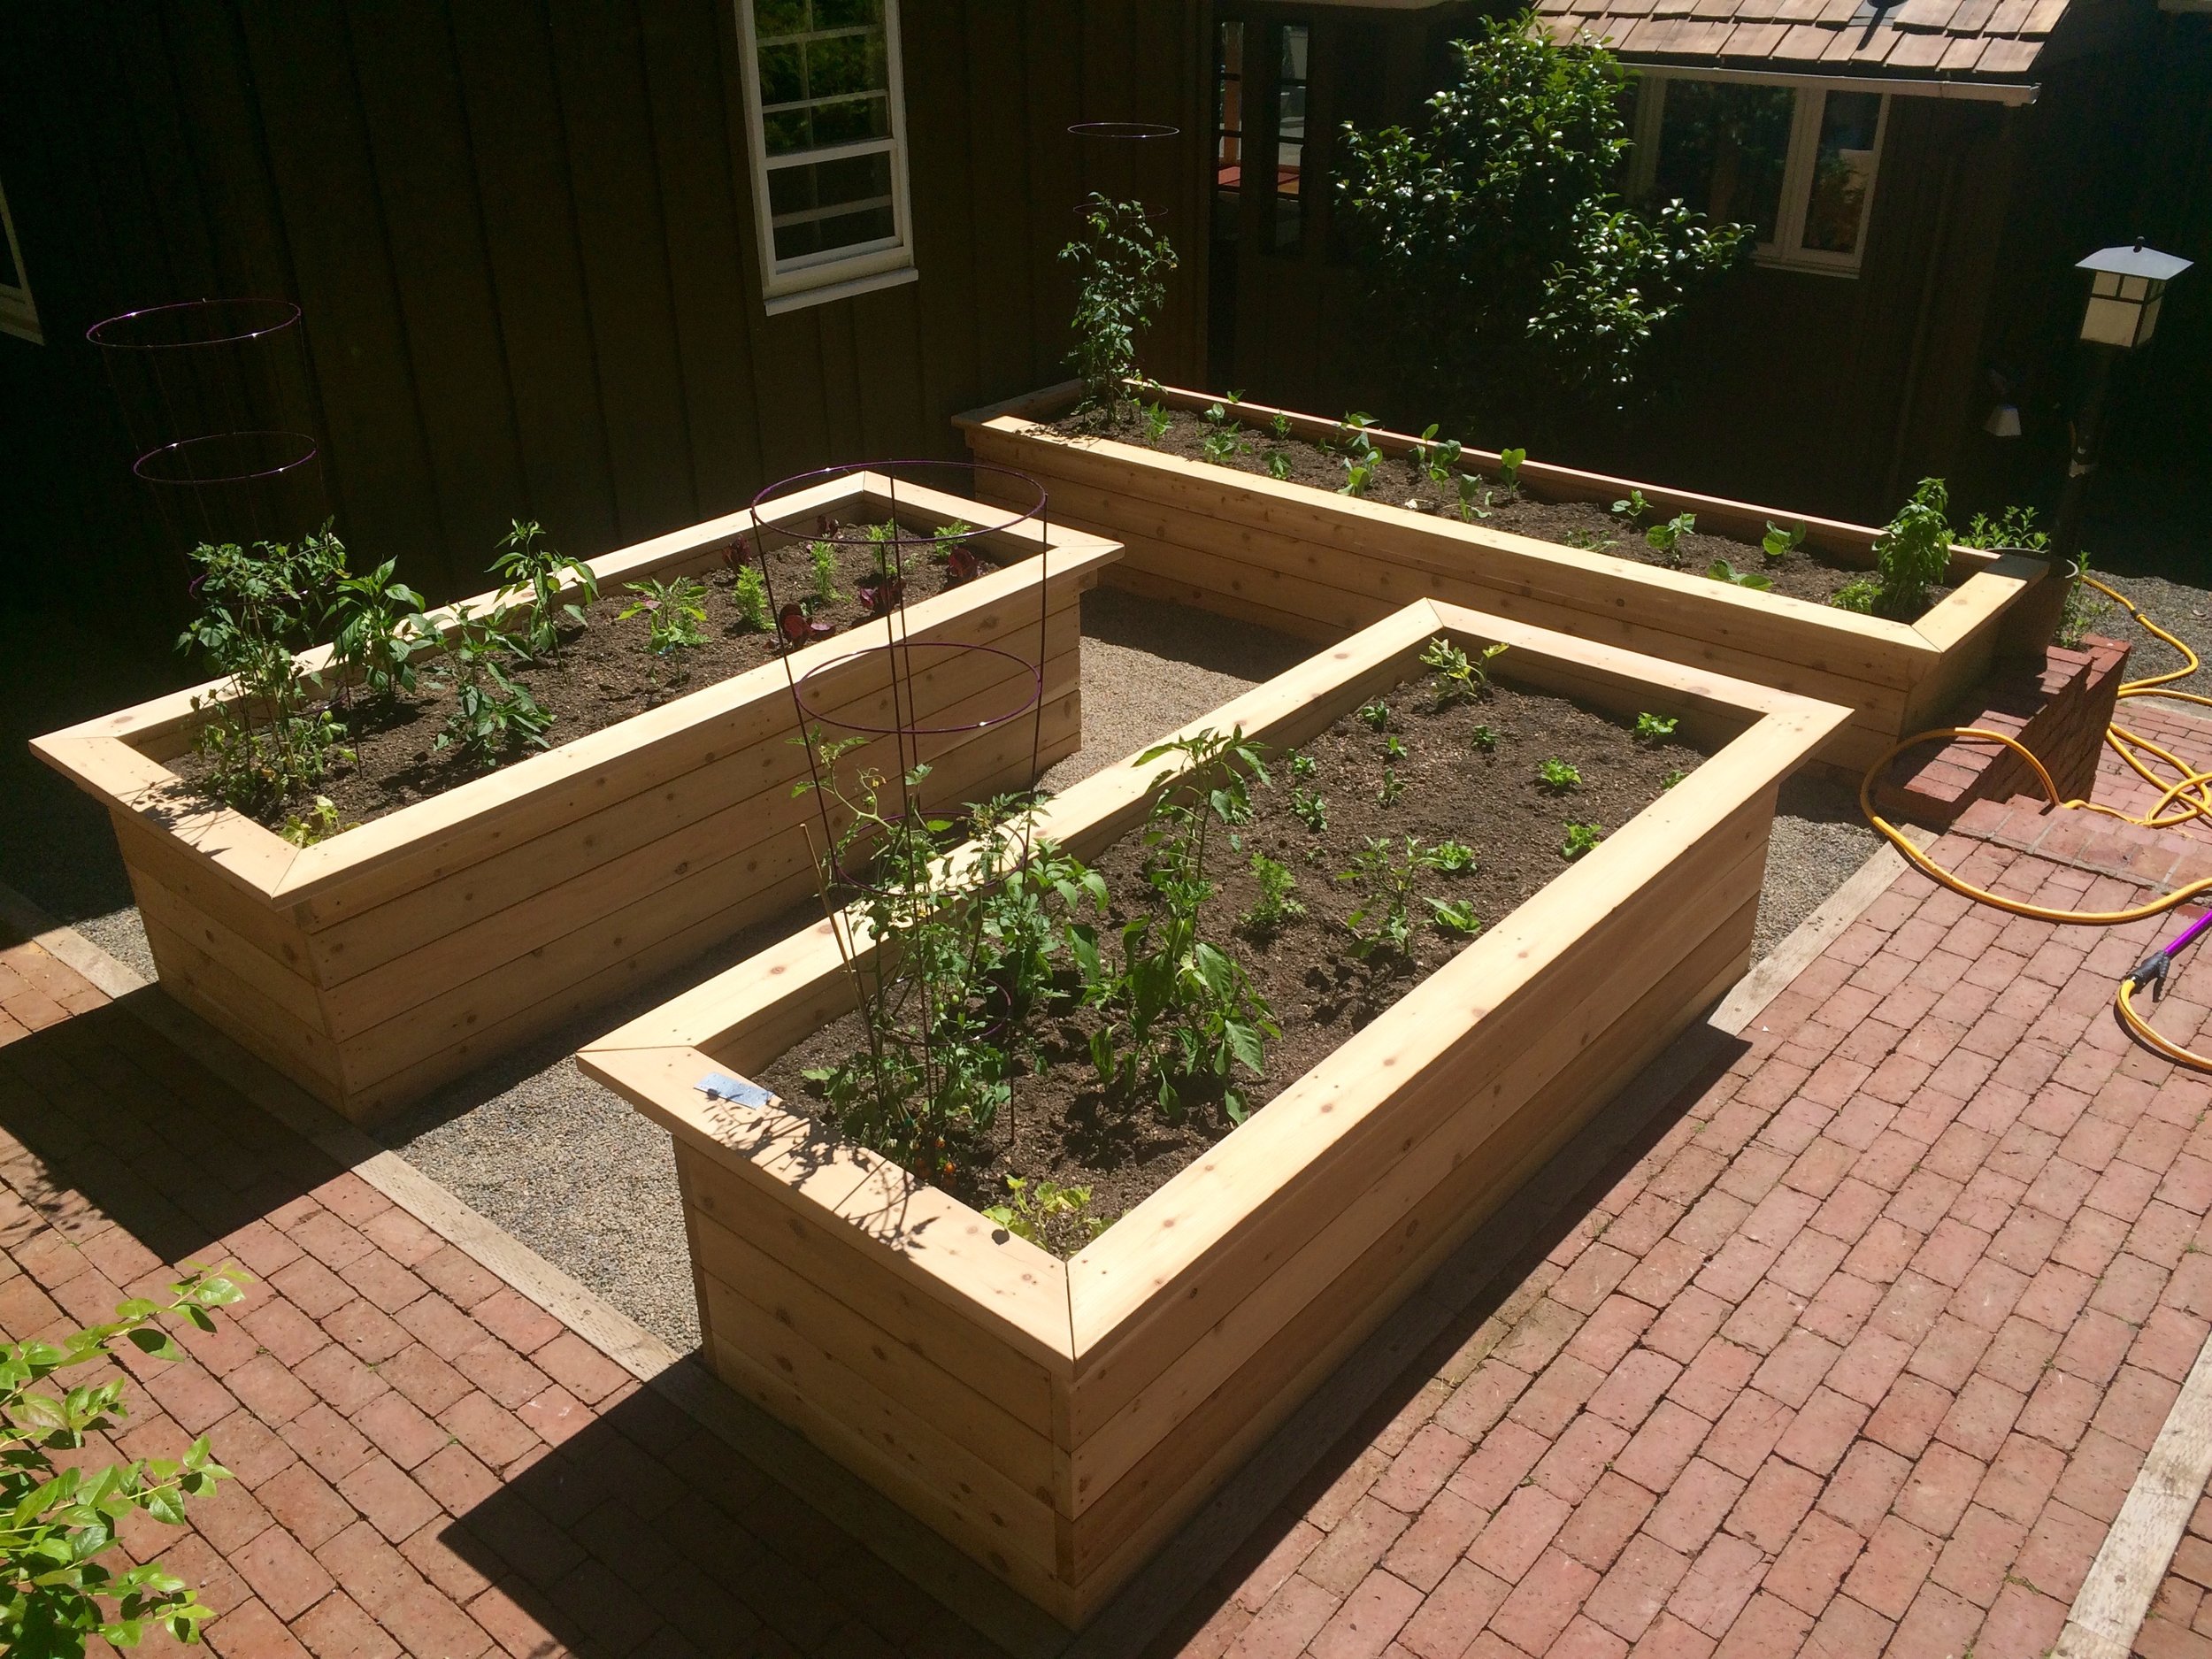
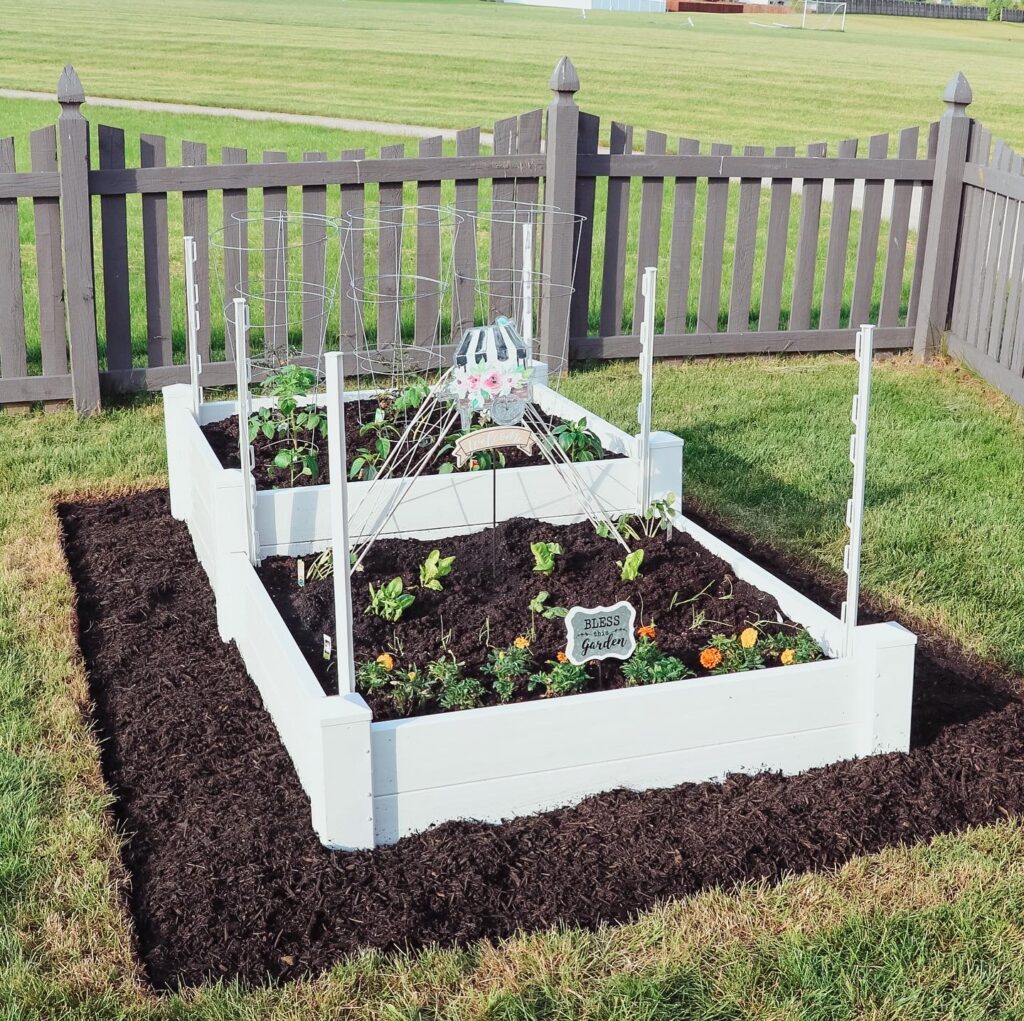
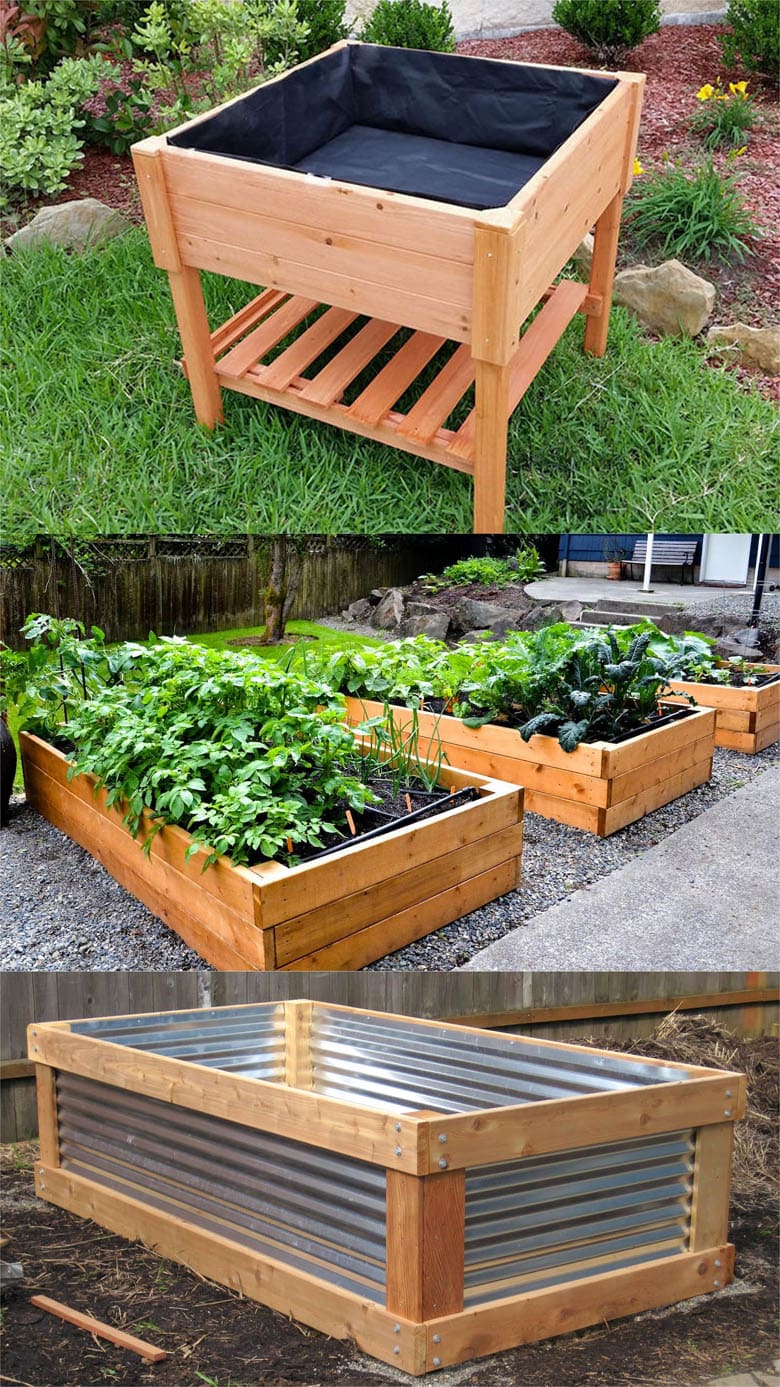
You can build a basic raised bed with untreated cedar, pine, or another durable wood. Cedar lasts longer but costs more. Untreated pine often works for three to seven seasons, while cedar may last eight to fifteen years depending on rainfall, soil contact, and wood thickness.
Do not use old railroad ties, painted boards, or lumber treated with unknown chemicals. Avoid reclaimed wood from demolition sites unless you know its history. Modern pressure-treated lumber is regulated, but some gardeners still choose untreated cedar or recycled plastic lumber for peace of mind around edible crops.
You do not need a rototiller for most raised beds. A digging fork, shovel, level, drill, and tape measure handle the job. A cordless drill such as a DeWalt 20V MAX or Ryobi ONE+ works well, but a manual screwdriver can build a small bed too.
Basic tools and materials
| Item | Why you need it | Helpful detail |
|---|---|---|
| Untreated 2×6 boards | Bed walls | Cedar lasts longer; pine costs less |
| Exterior screws | Join the frame | Use 3-inch galvanized or coated screws |
| Drill and driver bit | Make pilot holes and drive screws | Pilot holes reduce splitting |
| Tape measure and level | Check size and slope | A 4-foot level is useful |
| Shovel and digging fork | Clear turf and loosen soil | Forks disturb soil less than tillers |
| Cardboard or newspaper | Smother grass and weeds | Remove glossy tape and labels |
| Wheelbarrow or garden cart | Move soil and compost | Saves time with beds over 4×4 feet |
Buy screws rated for outdoor use. Ordinary indoor screws rust quickly and can stain the wood. Use corner braces or stakes if the bed is longer than 6 feet or taller than 12 inches.

Compare common frame materials
Material choice affects cost, lifespan, safety, and appearance. The table below shows the main options for edible gardens.
| Material | Typical life | Best fit and limitation |
|---|---|---|
| Untreated cedar | 8–15 years | Attractive and durable; higher cost |
| Untreated pine | 3–7 years | Budget-friendly; rots sooner |
| Metal panels | 10–30 years | Long life; can heat in hot climates |
| Recycled plastic lumber | 15–30 years | Rot-proof; can flex and cost more |
| Concrete block | 20+ years | Stable; takes more space and labor |
Wood is the easiest choice for a first bed. Metal beds work well in wet areas, but dark metal can heat the soil in Arizona, Texas, and other hot regions. Light-colored panels or afternoon shade reduce that problem.
Build the raised garden bed step by step
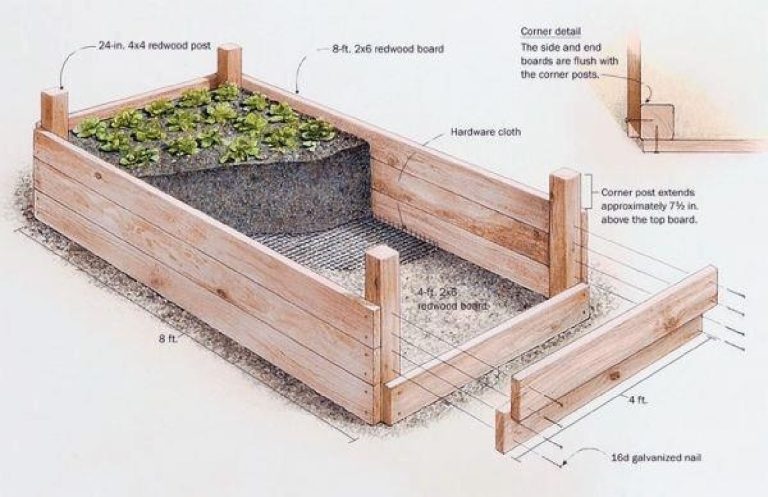
A simple rectangular bed needs four boards, screws, and a level site. Build the frame before filling it. Soil becomes heavy very fast, and even a 4-by-8-foot bed can hold more than 1,000 pounds of moist soil.
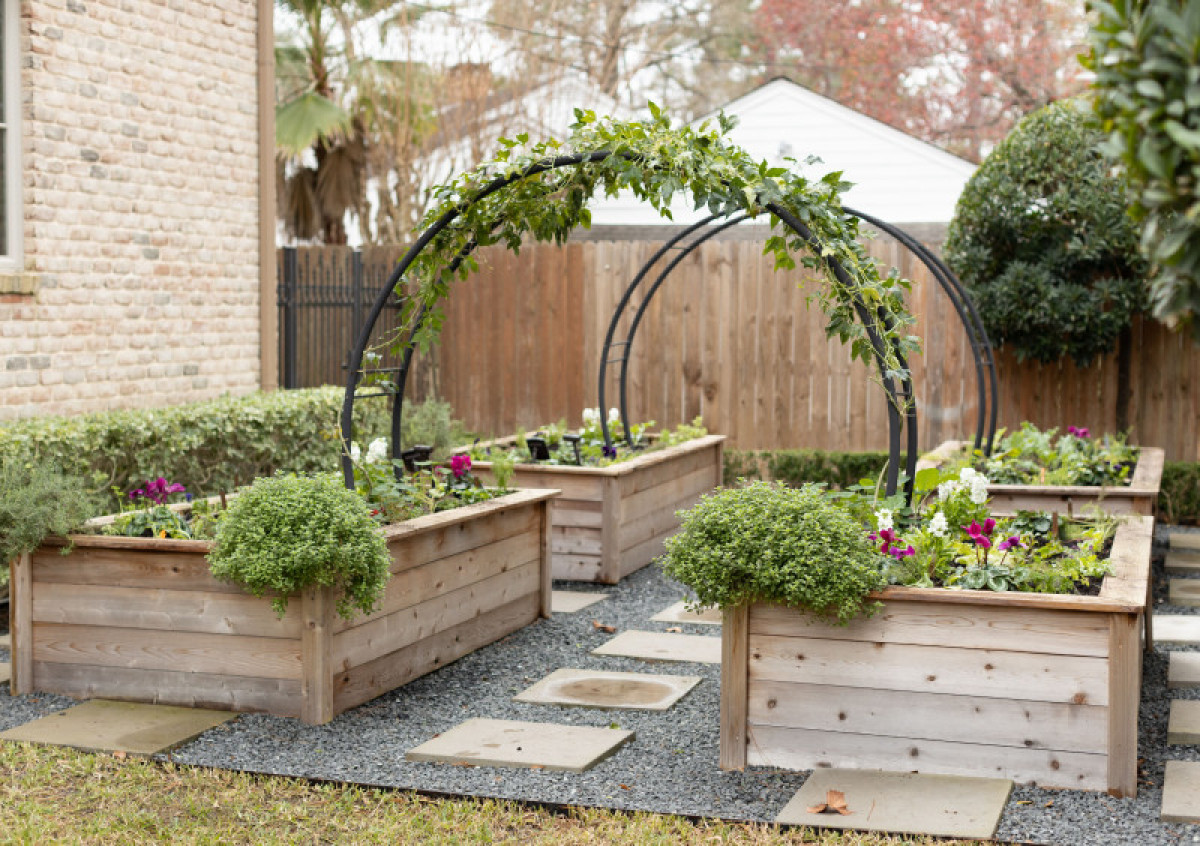
1. Mark the bed outline
Measure the outside dimensions and mark the corners with stakes or sticks. Use string to connect the corners. Check the diagonals from corner to corner. Equal diagonal measurements show that the outline is square.
If the site has a mild slope, you can remove soil from the high side. Do not bury one side several inches without checking the frame. A level bed makes watering more even and prevents soil from washing out.
2. Remove grass and perennial weeds
Cut the grass short, then remove thick sod with a flat shovel. You do not need to strip every root if you cover the ground with several layers of plain cardboard. Overlap the cardboard by at least 6 inches so weeds cannot find gaps.
Remove aggressive perennial weeds such as bindweed, quackgrass, and nutgrass by hand. Cardboard can slow them, but it may not stop them. Do not use landscape fabric beneath a bed that sits on soil. It can block earthworms and make future changes harder.
3. Assemble the frame
Lay the boards on the ground and line up the corners. Drill pilot holes, then drive two or three exterior screws into each corner. Check the frame with a square or measure the diagonals again.
For a 4-by-8-foot bed, add a center brace or internal stake. Without support, long boards may bow outward after you add wet soil. Use a 2-by-2 stake driven into the ground at each long side, or connect the opposite walls with a safe, weather-resistant brace.
4. Set the frame in place
Move the frame onto the cardboard or cleared soil. Place a level on each side and across the corners. Adjust the ground under the frame with a shovel until the top edges sit close to level.
Perfect accuracy is not vital, but a large tilt can cause water to run toward one end. That end may stay wet while the high end dries out. A small slope is fine in a rainy garden, but keep it less than about 2 inches across the bed.
5. Secure taller beds
A bed 12 inches high or less may hold together with strong corner joints. Taller beds need extra support. Drive stakes inside the corners, add posts at the midpoint, or use threaded rod that connects opposite walls.
Do not rely on decorative brackets alone. Soil exerts steady outward pressure, especially after rain. I once built a 16-inch bed without a center brace. It looked fine for two months, then the long wall pushed out nearly 2 inches after a wet spring.

6. Line only when the site needs it
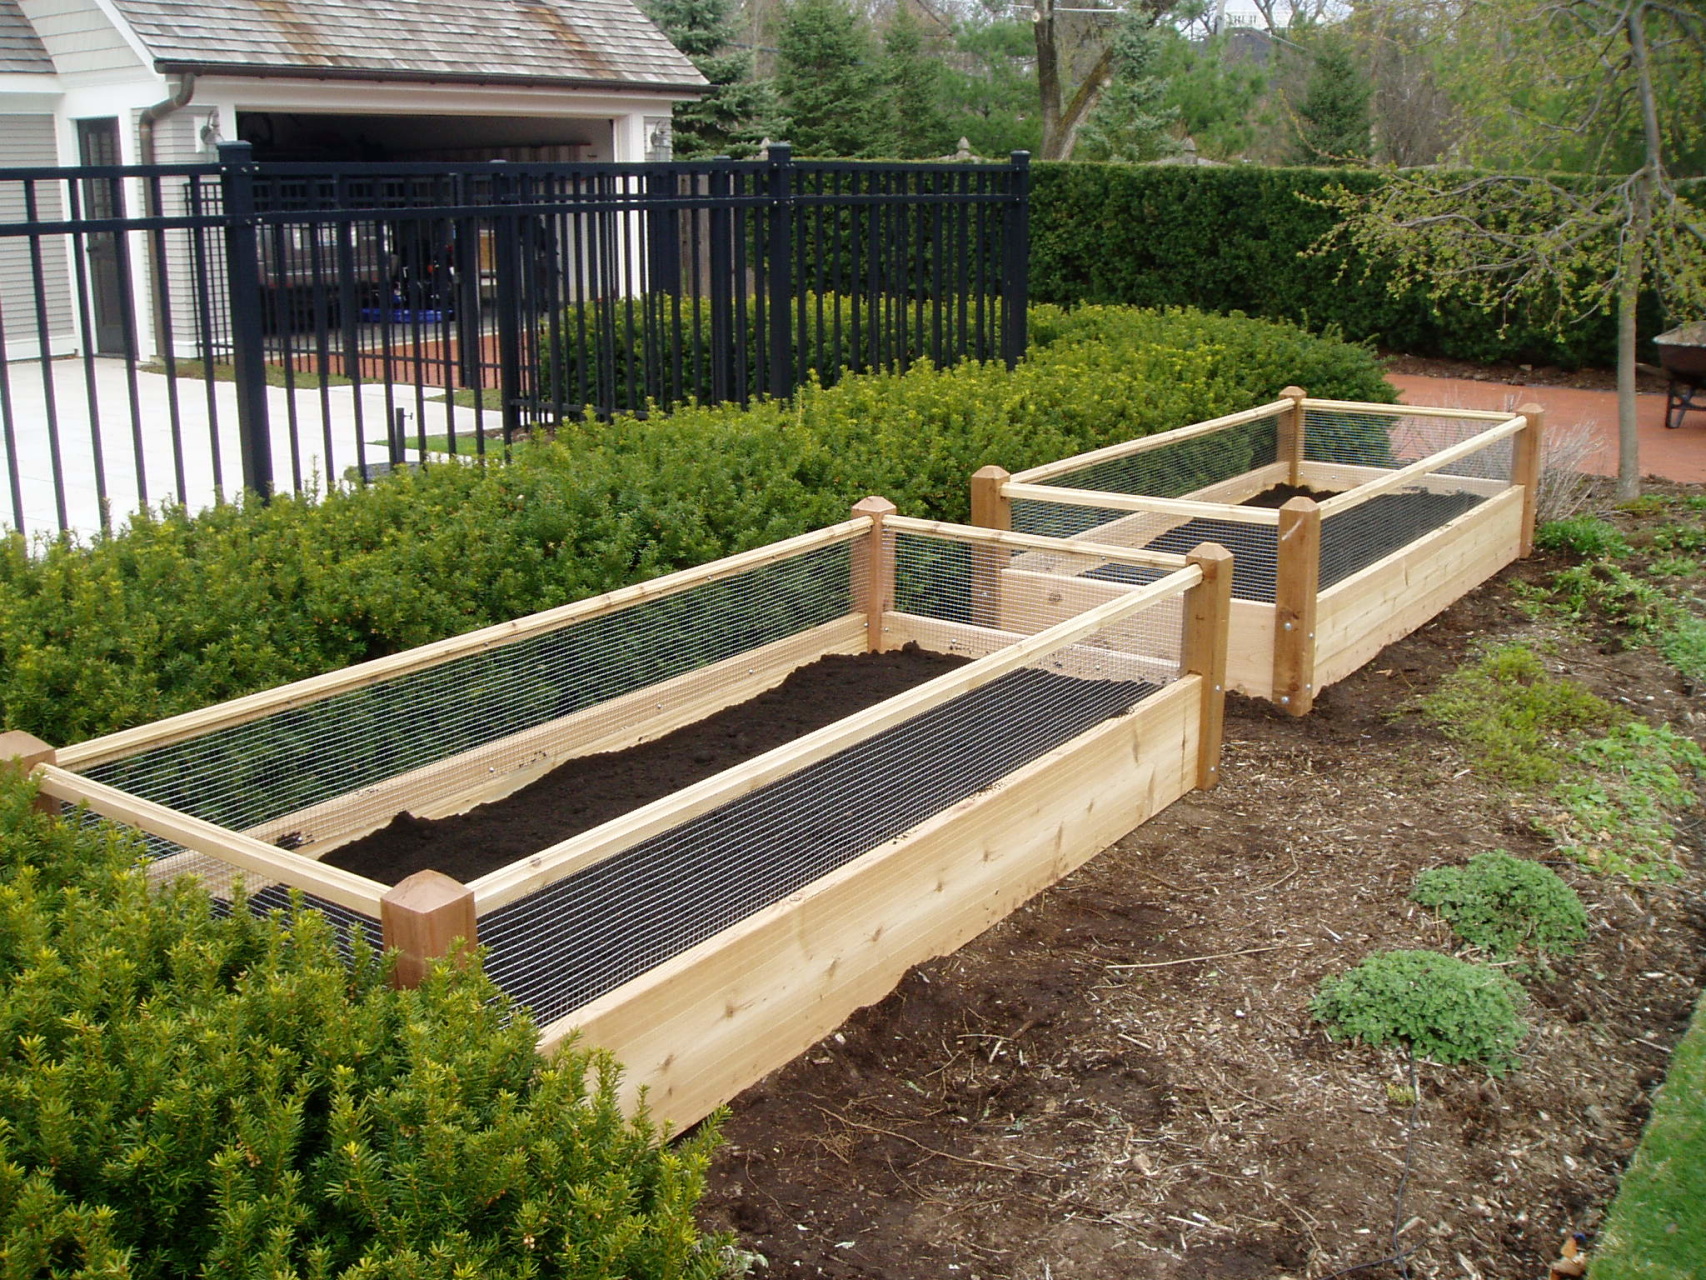
A bed over clean soil usually needs no bottom liner. Roots, earthworms, and water can move into the native ground. Add hardware cloth under the frame if voles, moles, or gophers damage roots.
For a bed on concrete, cover the base with landscape fabric or a porous geotextile. Do not use plastic sheeting, which traps water. If you line against aggressive roots, use a durable root barrier along the sides rather than sealing the entire bottom.
Fill the bed with the right soil mix
The best raised-bed soil holds moisture but drains excess water. A common starting blend is 60% screened topsoil, 30% finished compost, and 10% aeration material such as aged leaf mold, pine fines, or coarse coconut coir.
Do not fill the bed with pure compost. Compost shrinks as it breaks down and may hold too much water or release too many soluble salts. Do not use fresh manure, which can burn roots and may carry pathogens. Use compost that is dark, crumbly, and free from a sharp ammonia smell.
A 4-by-8-foot bed that is 12 inches deep holds about 32 cubic feet of material. That equals roughly 1.2 cubic yards. Buy a little extra because the mix will settle after watering.
Soil mix choices for common beds
| Bed situation | Starting mix | Notes |
|---|---|---|
| Bed over healthy soil | 60% topsoil, 30% compost, 10% leaf mold | Good for most vegetables |
| Bed over concrete | 50% topsoil, 30% compost, 20% coir or leaf mold | Use at least 18 inches of depth |
| Dry climate | 50% topsoil, 30% compost, 20% coir | Add mulch to slow water loss |
| Wet climate | 70% topsoil, 20% compost, 10% pine fines | Avoid heavy clay and excess peat |
Use finished compost from a trusted source. Yard-waste compost is often a good choice. Mushroom compost can help, but it may contain more soluble salts, so mix it with other materials rather than using it alone.
Calculate how much soil to buy
Multiply length by width by depth, all in feet. A 4-by-8-foot bed that is 1 foot deep needs 32 cubic feet. Divide cubic feet by 27 to convert to cubic yards.
For bags, divide the total cubic feet by the bag size. A 2-cubic-foot bag covers about 2 square feet at 12 inches deep. Bulk soil usually costs less, but delivery access matters. A dump truck may not reach a backyard gate.
Add soil in layers and water it
Pour in a few inches of soil, then water lightly. Add another layer and mix it with a garden fork. This reduces large air pockets and shows you where the soil settles.
Fill the bed to within 1 to 2 inches of the top. Soil that reaches the rim spills out during watering. Leave a slight dip in the center only if your climate is very dry and you want to hold more water.
🌱 Beginner Note: Soil volume shrinks after the first few rains. Wait two weeks, top up with compost and soil, then plant. Do not worry if the level drops by an inch or two.
Plan plants for the season and the space
Raised beds warm earlier than open ground, but they also dry faster. In USDA Zones 3–5, you can often plant cool-season crops earlier once the soil is workable. In Zones 8–10, heat may shorten the cool season, so plant lettuce, peas, and spinach in fall or winter instead.
Use the bed for crops with similar needs. Tomatoes and basil enjoy full sun and steady moisture. Lettuce, cilantro, and radishes prefer cooler conditions. Rosemary, thyme, and lavender need sharper drainage than lettuce, so do not place them in the wettest part of the bed.
Square-foot spacing can help, but do not crowd plants. A dwarf tomato such as ‘Patio’ may fit in a small bed, while an indeterminate ‘Cherokee Purple’ needs a strong trellis and about 2 to 3 feet of space.
Simple first-bed planting plan
| Bed area | Crops | Spacing guide |
|---|---|---|
| Tall back row | Tomatoes, trellised cucumbers | 18–36 inches apart |
| Middle zone | Bush beans, peppers, kale | 8–18 inches apart |
| Front edge | Lettuce, radishes, scallions | 3–8 inches apart |
| Corners or borders | Basil, marigolds, alyssum | 6–12 inches apart |
Place tall plants on the north side so they do not shade shorter crops. In the Southern Hemisphere, use the south side. Planting marigolds may attract beneficial insects, but they do not create a pest-proof shield. Good crop rotation and regular inspection matter more.

Water and mulch the new bed
Water the bed slowly after filling it. The first watering should wet the full soil depth, not just the top inch. A soaker hose or drip line works better than a spray nozzle because it puts water near the roots and reduces leaf wetness.
For the first two weeks, check moisture every day in warm weather. After roots settle, most vegetables need about 1 to 1½ inches of water per week from rain and irrigation. Sandy mixes may need more frequent watering, while clay-heavy mixes need less.
Push a finger 2 inches into the soil. If it feels dry at that depth, water. If it feels wet and sticky, wait. Young seedlings have shallow roots, so they need closer checks than mature plants.
Watering methods for raised beds
| Method | Best use | Main concern |
|---|---|---|
| Hand watering wand | Small beds and seedlings | Uneven coverage if rushed |
| Soaker hose | Long beds and mixed crops | Can clog or water unevenly |
| Drip irrigation | Consistent watering and automation | Needs a filter and pressure control |
| Sprinkler | Large mixed beds | More leaf wetness and evaporation |
Add 1 to 3 inches of straw, shredded leaves, or untreated grass clippings around established plants. Keep mulch 2 inches away from stems to prevent rot and hide fewer slugs. Avoid thick wood chips in the planting zone because they can tie up nitrogen as they break down.

Feed plants without overfertilizing
Fresh raised-bed soil with compost often supports the first crop well. Test before adding fertilizer. Too much nitrogen creates large leaves but fewer tomatoes, peppers, and flowers. It can also wash into waterways.
If plants show slow growth and pale lower leaves, a balanced organic fertilizer may help. A product close to 4-4-4 NPK supplies modest amounts of nitrogen, phosphorus, and potassium. Follow the label because product strength varies.
Leafy greens may benefit from a light nitrogen feed. Fruiting crops need steady water, sunlight, and potassium, but adding extra phosphorus rarely fixes poor flowering unless a soil test shows low phosphorus.
Basic feeding guide
| Crop group | Feeding approach | Timing |
|---|---|---|
| Lettuce and greens | Compost or light balanced fertilizer | At planting and after 4 weeks |
| Tomatoes and peppers | Compost plus labeled vegetable fertilizer | At planting and when fruit sets |
| Root crops | Low to moderate nitrogen | Mix compost in before planting |
| Herbs | Little fertilizer | Feed only if growth is weak |
Do not fertilize drought-stressed or wilted plants. Water first and wait a day or two. Fertilizer salts can damage dry roots.
Maintain the bed through the year
A raised bed needs less work than a traditional garden, but it still needs checks. Inspect the frame each spring for loose screws, cracked boards, and soil pushing against the walls. Look for ants nesting under the frame and rodents tunneling below it.
Top up the soil when the level drops. Add 1 to 2 inches of finished compost each season instead of turning the whole bed deeply. Deep digging breaks fungal networks and can bring weed seeds to the surface.
Rotate plant families when space allows. Follow tomatoes, peppers, eggplant, and potatoes with beans, lettuce, or carrots. This reduces the buildup of diseases such as early blight and pests such as Colorado potato beetles.
Seasonal raised-bed schedule
| Season | Main tasks | Crops to consider |
|---|---|---|
| Early spring | Repair frame, add compost, plant cool crops | Peas, spinach, lettuce, radish |
| Late spring | Install trellises, mulch, transplant warm crops | Tomatoes, peppers, beans |
| Summer | Check water, tie plants, harvest often | Cucumbers, squash, basil |
| Fall | Remove diseased plants, add compost, plant cover crops | Garlic, kale, cover crop rye |
| Winter | Inspect wood, clean tools, plan rotation | Dormant beds and hardy greens |
In Zones 6–10, garlic planted in fall may overwinter well. In colder Zones 3–5, use mulch and choose cold-hardy varieties. In a mild climate, you can keep a bed productive all winter with kale, chard, carrots, and herbs.

Fix common raised-bed problems
Most raised-bed problems come from water, soil, crowding, or pests. The table below connects visible symptoms with practical fixes.
| Symptom | Likely cause | Fix |
|---|---|---|
| Soil dries within one day | Small bed, sandy mix, wind, heat | Add compost, mulch, and drip irrigation |
| Water pools on top | Heavy clay or compacted mix | Add pine fines, compost, and avoid walking on soil |
| Plants grow tall and pale | Low light or low nitrogen | Increase light and test soil before feeding |
| Tomato leaves spot and yellow | Wet foliage, disease, poor airflow | Water at soil level and remove infected leaves |
| Seedlings vanish overnight | Slugs, cutworms, birds | Use collars, hand-pick pests, add netting |
| Frame bows outward | Long unsupported wall | Add stakes, braces, or a center tie |
The fastest fix is not always more fertilizer. Check light and moisture first. Plants cannot use nutrients well when roots stay cold, dry, or waterlogged.
🔧 Quick Fix: If a bed drains too slowly, pull back mulch and check the soil 3 inches down. Mix coarse compost or pine fines into the top 6 inches between crops. Avoid adding sand to clay; small amounts can create a hard, cement-like mix.
Avoid the mistakes that shorten bed life
The most common mistake is building before measuring the site. A bed that blocks a gate, sits in shade, or leaves no room for a hose becomes a daily irritation. Sketch the layout first.
Another mistake is using too much compost. Compost is valuable, but it is not a complete replacement for mineral soil. Pure compost can shrink, dry quickly, hold excess salts, and cause weak root growth.
Many new gardeners also plant too much at once. A 4-by-8-foot bed can produce a lot of food. Start with lettuce, herbs, beans, one or two tomatoes, and a few peppers. Add crops after you learn how quickly the bed dries and how much your family eats.
Raised bed pros and cons
| Pros | Cons |
|---|---|
| Warms earlier in spring | Soil dries faster |
| Easier control of soil quality | Initial cost can be high |
| Less bending with taller beds | Frames eventually rot or bow |
| Good drainage in wet sites | Needs regular watering |
| Easier access for many gardeners | More exposed to heat and wind |
| Can fit small yards and patios | Soil must be purchased or moved |
Raised beds suit gardeners who need better access, cleaner soil, or a defined growing area. They may not suit someone with abundant fertile ground who wants the lowest-cost garden possible.
Learn from real garden results
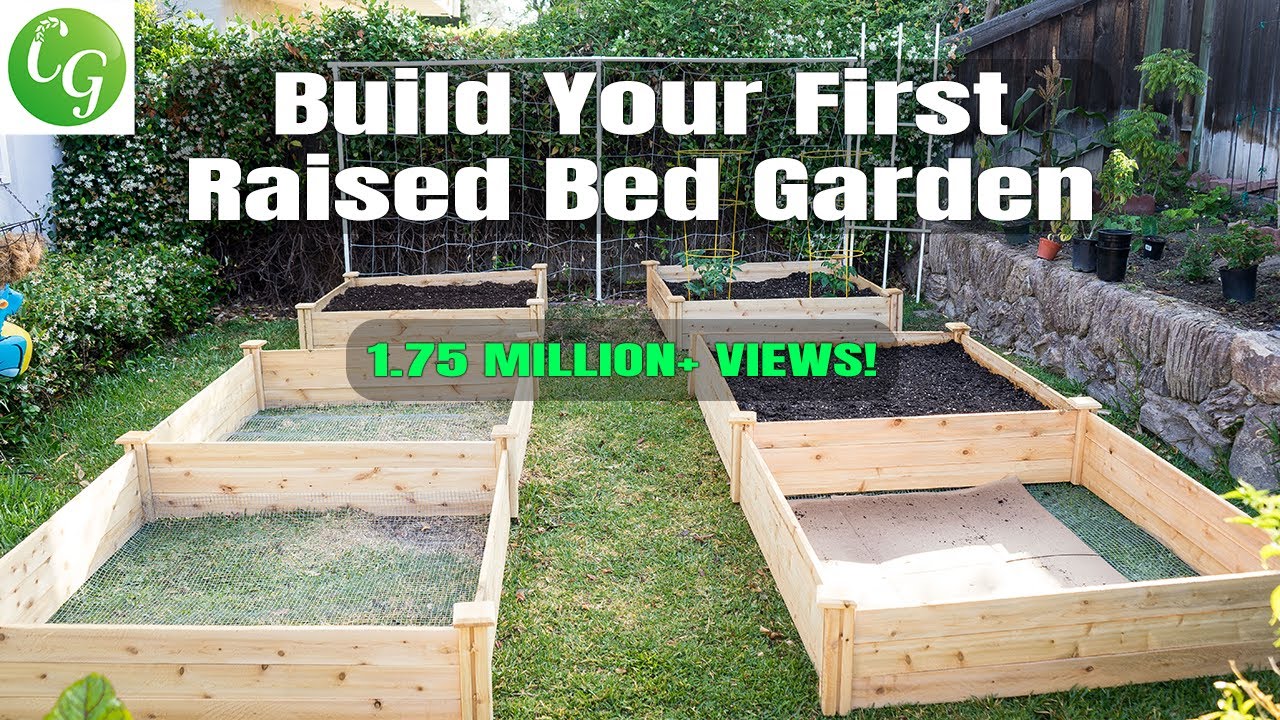
In my Zone 7 garden, an 8-inch cedar bed filled with a topsoil-compost mix warmed about a week earlier than nearby ground. Radishes and lettuce grew quickly in spring, but the same bed needed watering every other day during a dry July.
A dark metal bed gave excellent growth in spring but overheated in a south-facing spot. Soil near the metal wall became too hot for lettuce by late May. Moving the bed where it received afternoon shade solved the problem.
I also tested a tall bed for easier access. It worked well for carrots and herbs, but it required more soil than expected and dried quickly at the corners. Taller is not automatically better. Height should match your mobility needs, budget, and climate.
A realistic cost and time estimate
A basic 4-by-8-foot wood bed often costs about $100 to $300, including lumber, screws, compost, topsoil, and mulch. Cedar and delivered soil can push the total higher. A small 4-by-4-foot pine bed may cost less than $100 if you already own tools.
Building takes two to four hours for one person. Filling and mixing soil may take another one to three hours, depending on access. A tall bed, hard ground, or poor delivery path can double the labor.
Current pricing ranges from roughly $3 to $12 per square foot for a simple DIY bed, not counting irrigation. Kits cost more but save cutting time. Their main benefit is convenience, not better plant growth.
Use safety practices while building and planting
Wear gloves when handling lumber, screws, compost, and rough soil. Safety glasses protect your eyes while drilling. If you cut boards, use hearing protection and keep hands clear of the blade.
Wash produce before eating, especially if you use compost or manure-based products. Follow the label’s waiting period when applying any approved pesticide. Organic products can still harm pollinators, fish, or beneficial insects when used carelessly.
Keep treated wood, fuel, and paint away from edible crops. Do not burn scrap lumber in or near the garden. Remove broken glass, rusty wire, and sharp screws from reclaimed materials before using them.
⚠️ Warning: Never use fresh manure in a bed that grows food. Compost it fully first, or wait at least 120 days before harvesting crops that touch the soil. This reduces the risk of harmful pathogens.
Know when to hire help
Most gardeners can build a low bed without professional help. Hire a contractor or experienced landscaper if the bed requires retaining a slope, moving large amounts of soil, cutting concrete, installing permanent irrigation, or removing contaminated soil.
A tall bed for wheelchair access also deserves careful planning. The top width, seat height, drainage, and path surface should fit the gardener. A 24- to 30-inch bed can be comfortable, but only if the gardener can reach the center without leaning too far.
Professional help costs more at the start but may prevent drainage failure or a collapsed wall. Never build a large retaining wall from garden boards without checking local rules and soil pressure.
FAQs about setting up raised garden beds
Q: Should a raised garden bed sit on grass or soil?
A: Soil is the best base for most raised beds because roots and water can move downward. Remove thick sod or cover it with overlapping cardboard first. Place hardware cloth below the bed if rodents are a problem.
Q: Do I need landscape fabric under a raised bed?
A: Usually, no. Landscape fabric can restrict roots, slow earthworm movement, and make soil renewal harder. Use hardware cloth for rodents or a breathable geotextile only when the bed sits on concrete or another hard surface.
Q: How deep should a raised bed be for vegetables?
A: An 8- to 12-inch bed works for most vegetables. Use 12 to 18 inches for carrots, parsnips, potatoes, and other deep-rooted crops. A bed over concrete should be deeper because roots cannot enter native soil.
Q: What is the best soil mix for a raised bed?
A: Start with about 60% screened topsoil, 30% finished compost, and 10% leaf mold, pine fines, or coconut coir. Adjust the mix for your climate. Dry regions need more moisture-holding organic matter, while wet regions need better drainage.
Q: Can I use potting soil in a raised bed?
A: You can, but it is costly and usually too light for a large bed. Potting soil works well for a small container bed. For a full-size raised bed, combine quality topsoil with compost and organic matter.
Q: How often should I water a raised garden bed?
A: Check the soil every day for the first two weeks. After roots establish, most vegetables need about 1 to 1½ inches of water each week, including rain. Water when the soil feels dry 2 inches below the surface.
Q: How do I keep a raised bed from drying out?
A: Add 1 to 3 inches of organic mulch, use drip irrigation or a soaker hose, and mix compost into the soil. Avoid dark metal in full afternoon sun in hot climates. Group plants with similar water needs.
Q: How long does a wooden raised bed last?
A: Untreated pine may last three to seven years. Cedar often lasts eight to fifteen years. Lifespan varies with wood thickness, rainfall, soil contact, and drainage. Replace boards when they soften, split, or bow outward.
Q: Can I grow tomatoes and peppers in the same raised bed?
A: Yes, if the bed receives at least eight hours of sun and has good airflow. Give each tomato 18 to 36 inches, depending on the variety. Add a sturdy cage or trellis before plants become large.
Q: What should I plant in my first raised bed?
A: Start with easy crops such as lettuce, radishes, bush beans, basil, kale, and one or two compact tomato plants. Choose crops that match your season and light. Avoid filling the whole bed with crops that need daily attention.
Q: Is a raised bed better than an in-ground garden?
A: A raised bed is better for poor soil, wet sites, small yards, and gardeners who want easier access. An in-ground garden costs less when native soil is fertile and well drained. Raised beds still need water, soil, and seasonal maintenance.
Q: Can I use a raised bed in a cold climate?
A: Yes. Raised beds warm sooner in spring, but they also lose heat faster at night. Use row cover, cold frames, or low tunnels in Zones 3–5. Plant cool-season crops early and protect roots with mulch before hard freezes.
Final thoughts
A raised garden bed works best when it matches your site, reach, climate, and time. Start with one level 3-by-6-foot or 4-by-8-foot bed, use safe materials, fill it with a balanced soil mix, and plant fewer crops than you think you need.
The bed will settle, the wood will age, and your watering habits will change as the seasons pass. That is normal. Build a sound frame, watch the soil, and improve one small detail each season. A simple bed cared for often will outperform a costly garden that is hard to reach.
Meta description: Learn how to set up a raised garden bed with simple tools, safe materials, soil mix ratios, planting tips, watering advice, costs, and seasonal maintenance.