How To Build The Best Raised Garden Bed: Easy DIY
A raised garden bed turns a small patch of ground into a neat, productive growing space. It can improve drainage, warm the soil, reduce weeds, and make planting easier on your back. But a bed only works well when its size, soil mix, location, and drainage match your plants and climate.
I have built raised beds from cedar, pine, metal, and recycled boards in gardens from USDA Zone 5 to Zone 9. The beds that lasted longest were not always the most costly. They had good drainage, strong corners, safe materials, and soil that settled without turning hard as a brick.
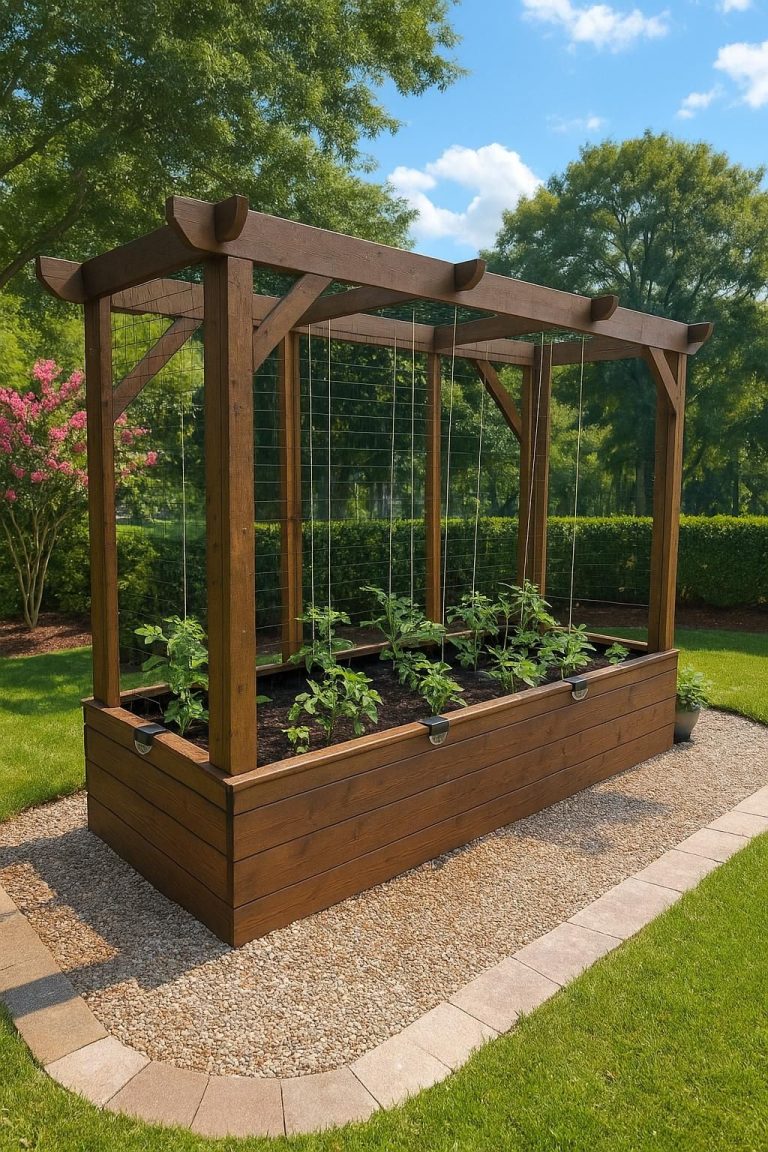
The best raised garden bed for most home growers is a 4-by-8-foot bed, 10 to 12 inches tall, placed in full sun and filled with a quality soil mix. Use untreated cedar or another rot-resistant material, keep the width at 4 feet or less, and add compost each season.

Quick answer: build a strong, well-drained bed
To build the best raised garden bed, choose a sunny, level site; make the bed no wider than 4 feet; use untreated lumber or a safe metal frame; secure the corners with exterior screws; and fill it with about 60% topsoil, 30% compost, and 10% aeration material. Add a thick mulch layer, water slowly, and refresh the soil with compost each spring.
A 4-by-8-foot bed gives you 32 square feet of growing space. At 12 inches deep, it holds about 32 cubic feet of soil, or roughly 1.2 cubic yards. That is enough room for tomatoes, peppers, carrots, lettuce, herbs, beans, and flowers without making the bed hard to reach.
For most vegetables, place the bed where it gets at least 6 to 8 hours of direct sun. Leaf crops such as lettuce and kale can manage with 4 to 6 hours, especially in hot areas. Fruiting crops, including tomatoes, cucumbers, squash, and peppers, need more light.
Choose the right site before buying materials
The best location for a raised bed has full sun, easy access to water, and enough room to walk around all sides. Do not place it beneath a large tree. Tree roots steal water and nutrients, while tree shade can reduce harvests.
Check sunlight, slope, and access
Watch the site for one full day if possible. Morning sun helps dry leaves and lowers the chance of fungal disease. Strong afternoon sun helps tomatoes and peppers ripen, but it can stress lettuce in hot climates.
A nearly level site is ideal. A small slope is workable, but a steep slope can cause soil to wash out after heavy rain. If you must build on a slope, use a stepped design or level the ground with a shovel and hand tamper.
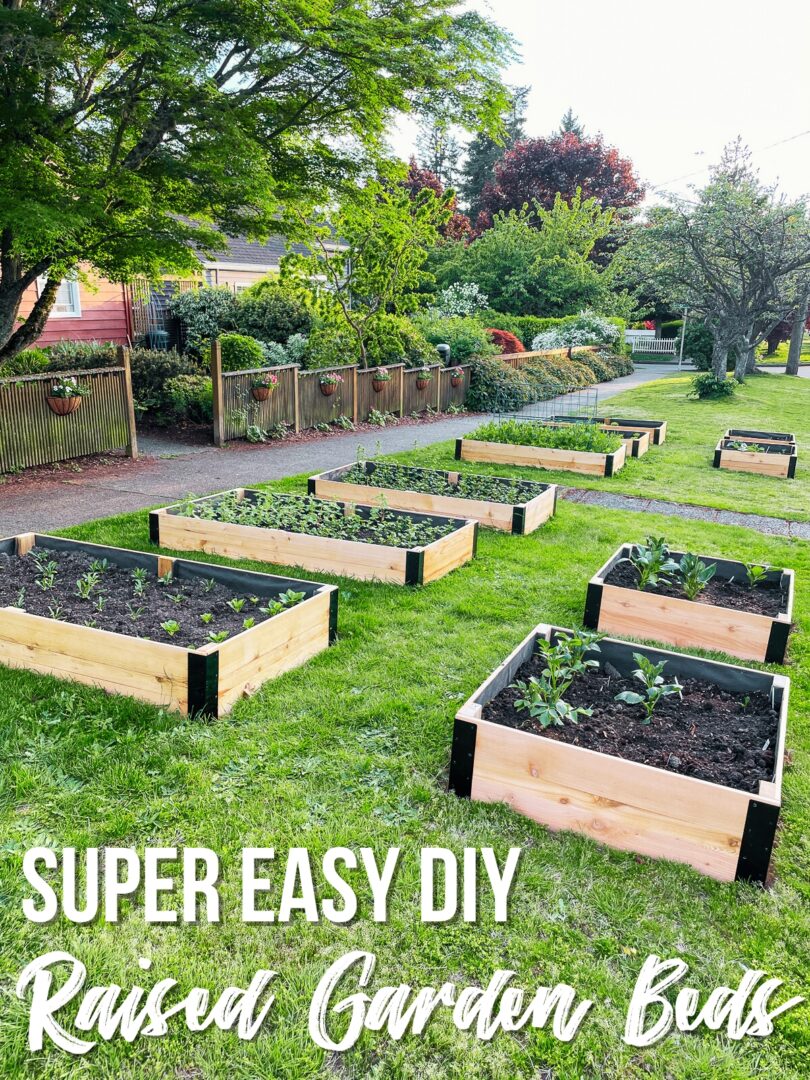
Leave at least 24 inches between beds. Thirty-six inches feels much better if you use a wheelbarrow, kneeling bench, or garden cart. I once built beds with only 18-inch paths. The layout looked efficient, but moving compost between them became a weekly annoyance.
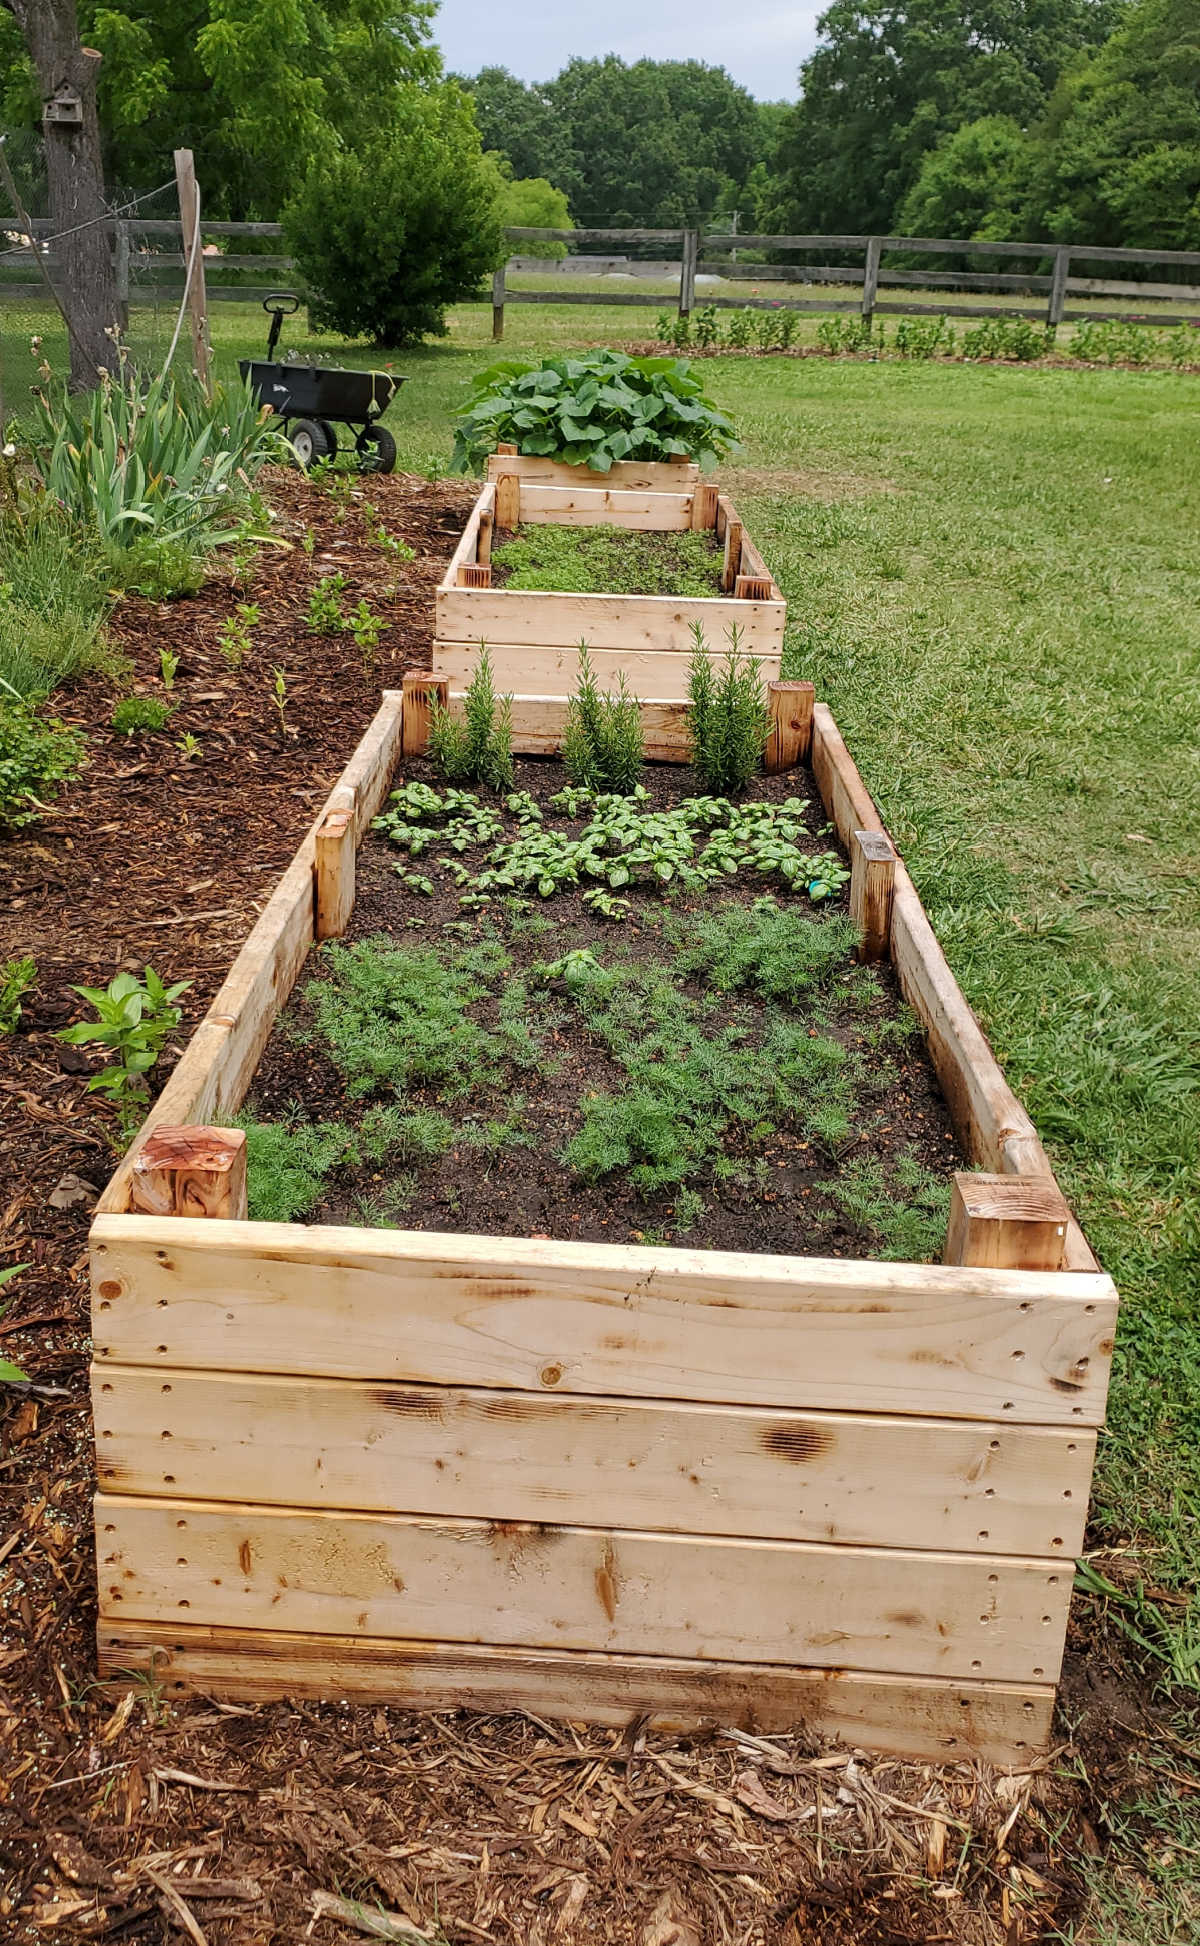
Avoid contaminated or unsafe ground
Do not build over soil that may contain lead, oil, treated wood waste, or industrial residue. This matters most near old homes, painted structures, roads, and former workshops. A raised bed does not create a perfect barrier if roots grow through the bottom or soil splashes into the bed.
You can cover questionable ground with overlapping cardboard, landscape fabric, or a geotextile barrier. For severe contamination, use a bed with a safe liner and a closed bottom, but remember that a closed bottom needs careful watering and drainage.
💡 Pro Tip: Test the soil below the bed if you plan to grow root crops such as carrots, parsnips, and beets. A bed filled with clean soil still benefits from a safe, stable base.

Pick a size that stays easy to reach
Keep a raised bed no wider than 4 feet when you can reach from both sides. If the bed touches a wall or fence, limit the width to 2 feet. This prevents you from stepping into the soil and compacting it.
A 12-inch bed works for most vegetables. A 6-inch bed can grow lettuce, herbs, onions, and shallow-rooted flowers. Use 18 to 24 inches for long carrots, parsnips, potatoes, raspberries, or plants that need deep root space.
| Bed size | Best use | Soil volume |
|---|---|---|
| 2 × 4 feet, 8 inches deep | Herbs, lettuce, flowers | 5.3 cubic feet |
| 4 × 8 feet, 12 inches deep | Mixed vegetables | 32 cubic feet |
| 4 × 8 feet, 24 inches deep | Root crops and easier access | 64 cubic feet |
The 4-by-8-foot size offers a strong balance of space, cost, and reach. Taller beds use much more soil, so plan the fill before you build.
Select safe, durable bed materials
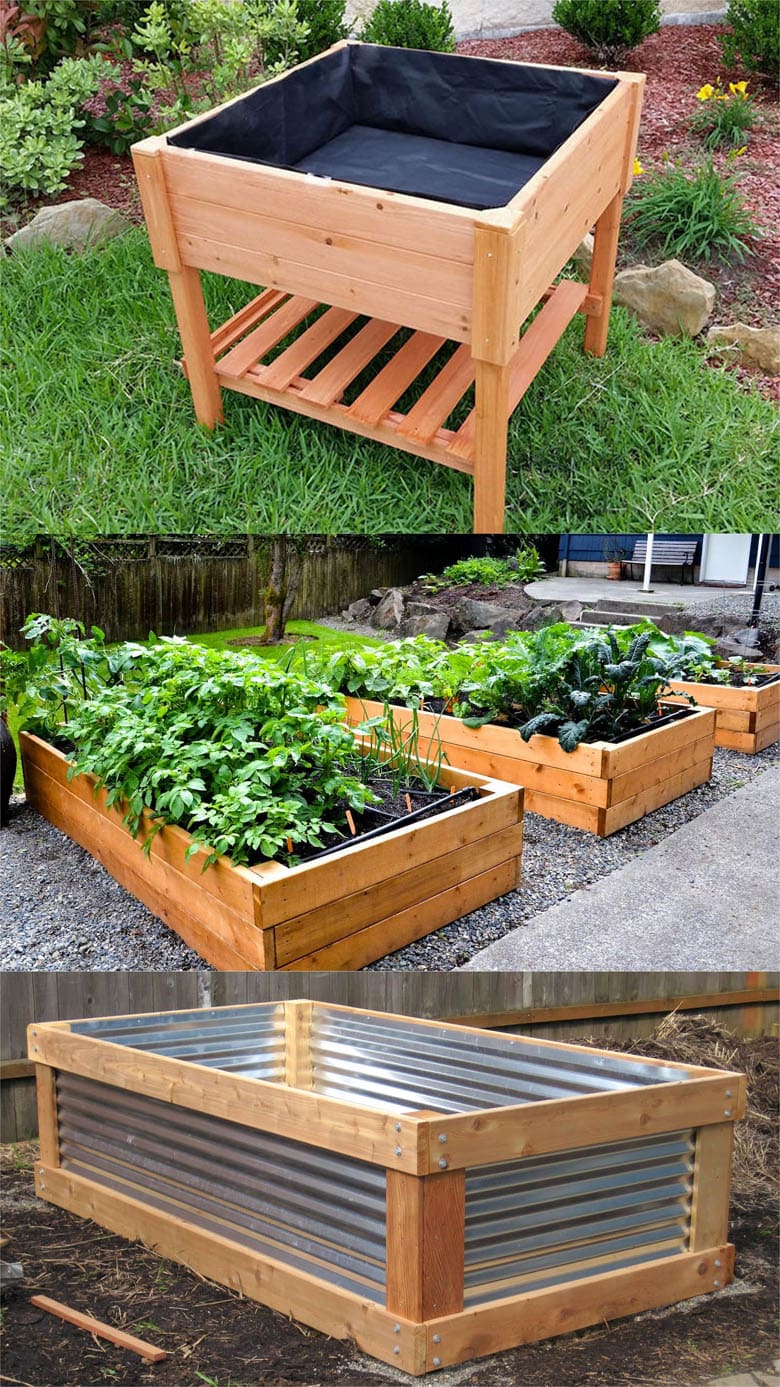
The best material depends on your budget, climate, and expected lifespan. Untreated cedar is a reliable choice for many home gardens, but galvanized steel, stone, brick, and composite boards can also work well.

Untreated wood
Cedar, redwood, and black locust resist decay better than common pine. Cedar is easy to cut and usually lasts about 7 to 15 years, depending on soil moisture, rain, and wood thickness. Redwood and black locust can last longer but often cost more.
Use 2-by-6 or 2-by-8 boards for a standard bed. Two stacked 2-by-6 boards create a wall about 11 inches high. A 2-by-12 board gives about 11¼ inches of actual height because lumber sizes are smaller than their names suggest.
Do not use old railroad ties, creosote-treated timbers, or boards with unknown chemical treatment. Avoid painted or stained wood if the coating may flake into the soil.
Pressure-treated lumber
Modern pressure-treated lumber is regulated for residential use and does not contain the older arsenic-based CCA treatment used in the past. Still, some organic gardeners prefer cedar, metal, or stone because they want the simplest material choice.
If you use pressure-treated wood, buy new material marked for current residential use. Do not burn scraps. Wear gloves and eye protection when cutting it, and wash your hands before handling food.
Metal, stone, and composite
Galvanized steel beds last for many years and resist rot. They heat faster than wood, which can help early crops in cool climates but may dry soil quickly in hot areas such as USDA Zones 8 and 9. Stone and brick look good and last a long time, but they need more labor and may be less easy to change.
Composite boards resist rot, but some products can bend when filled with wet soil. Check the manufacturer’s load guidance before building a long, tall wall.
| Material | Main advantage | Main limitation |
|---|---|---|
| Cedar or redwood | Easy to build and naturally rot resistant | Costs more than pine |
| Galvanized steel | Long life and clean lines | Can heat and dry soil |
| Stone or brick | Very long life | Heavy, costly, and harder to alter |
For a first bed, untreated cedar is the easiest all-around choice. Metal suits gardeners who want a long service life, while stone makes sense for a permanent landscape design.
Use the right fasteners
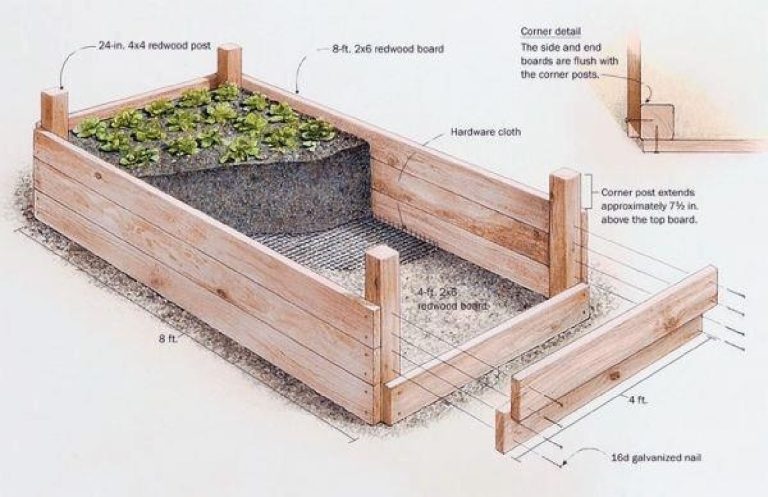
Use exterior-rated screws, not interior drywall screws. For wood, 3-inch galvanized or coated structural screws hold corners well. Add 4-by-4 corner posts or inside cleats if the bed is tall.
A raised bed filled with wet soil creates strong outward pressure. A long 4-by-8-foot bed may bow if its sides lack support. Add a center brace across the width for beds taller than 12 inches or longer than 8 feet.
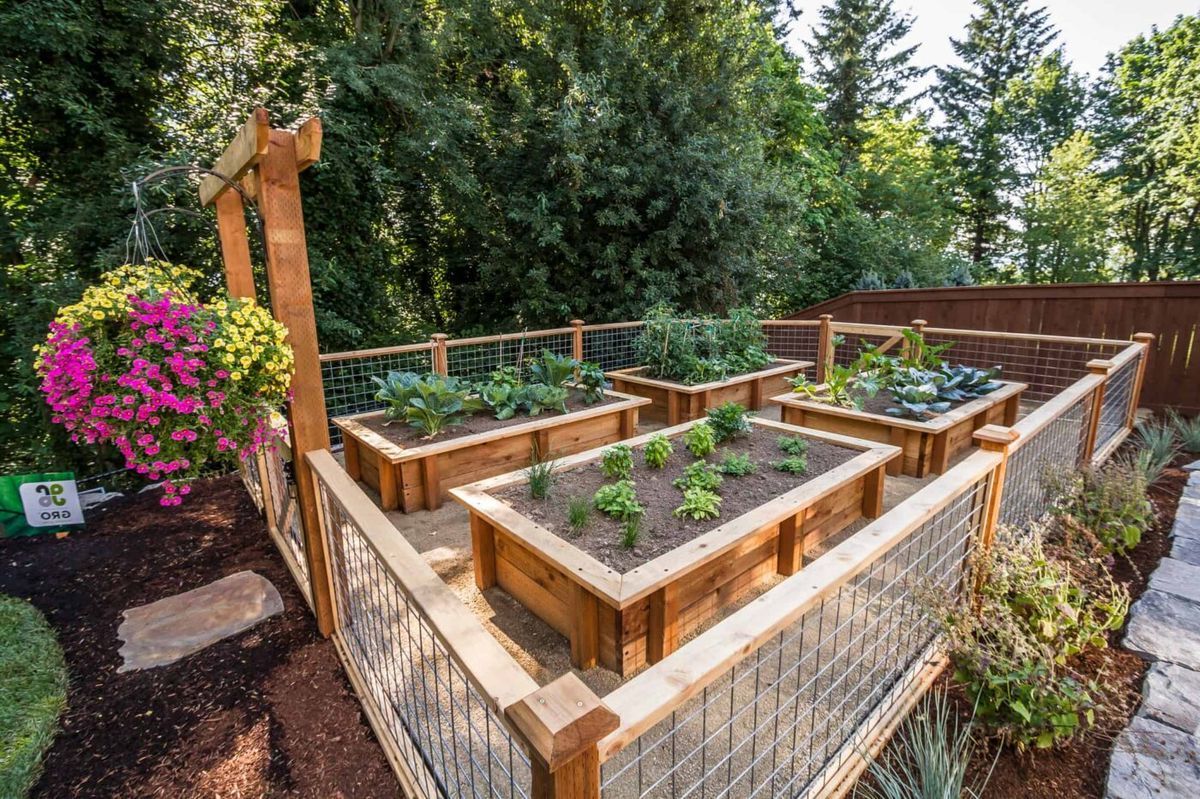
Gather the tools and materials
A simple raised bed does not need a large tool collection. You need accurate measurements, a safe saw, a drill, a level, and a way to move soil.

Basic materials list
Plan your shopping list before you cut boards. Buying all materials at once reduces delays and helps you calculate the soil volume correctly.
| Item | Suggested amount for a 4 × 8-foot bed | Purpose |
|---|---|---|
| 2 × 6 lumber, 8 feet long | 4 boards | Two long sides and two short sides |
| Exterior screws, 3 inches | 24–32 | Secure corners and braces |
| Corner blocks or 4 × 4 posts | 4 | Strengthen each corner |
| Compost and topsoil | About 32 cubic feet | Fill a 12-inch bed |
| Mulch | 1–2 cubic feet | Protect the soil surface |
This list makes one 12-inch bed. If you stack two layers of boards, double the lumber and fasteners. Buy 10% extra soil if the site is uneven or the mix settles heavily.
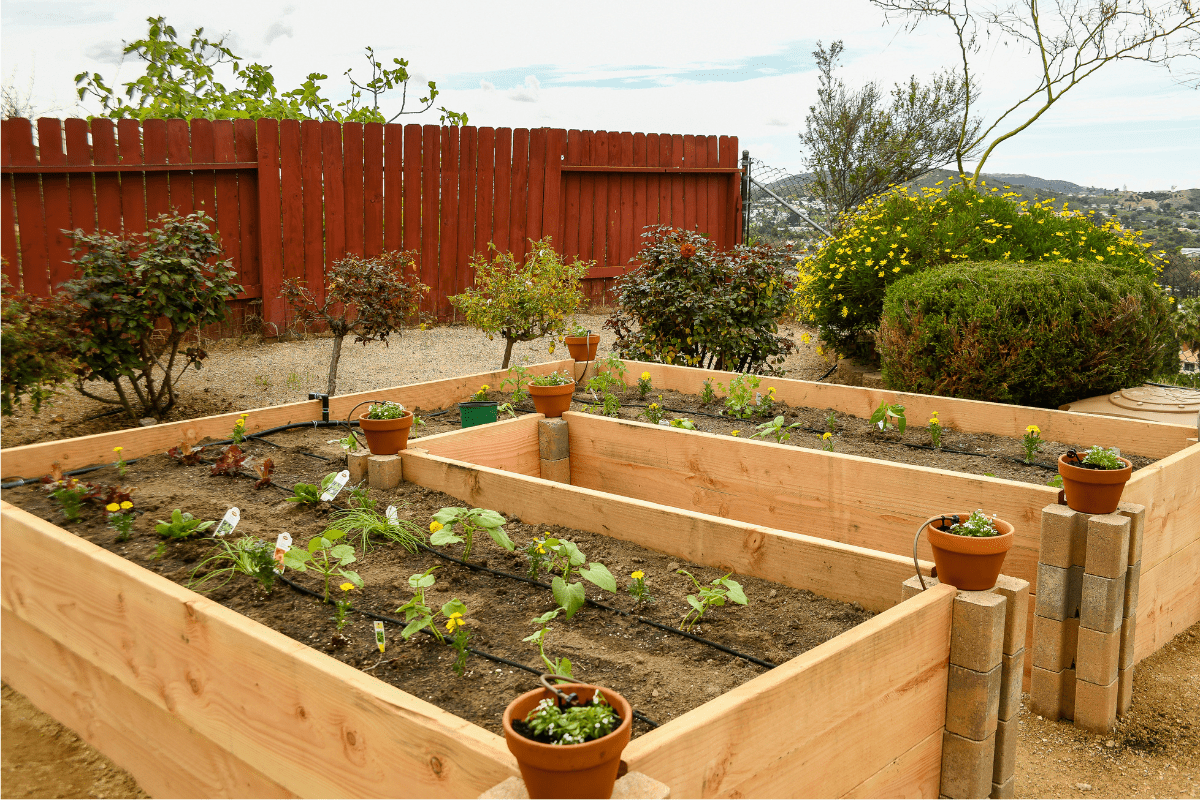
Tools for clean construction
Use a tape measure, carpenter’s square, pencil, drill, drill bits, level, shovel, rake, and wheelbarrow. A circular saw makes quick, straight cuts, but a handsaw works for one small bed.
Wear safety glasses when cutting or drilling. Use hearing protection with loud power tools. Keep children and pets away from the cutting area and never hold a board on your knee while sawing.
Build the frame step by step
Build the frame on a flat surface first, then move it into position. A careful layout at this stage prevents twisted corners and uneven walls.
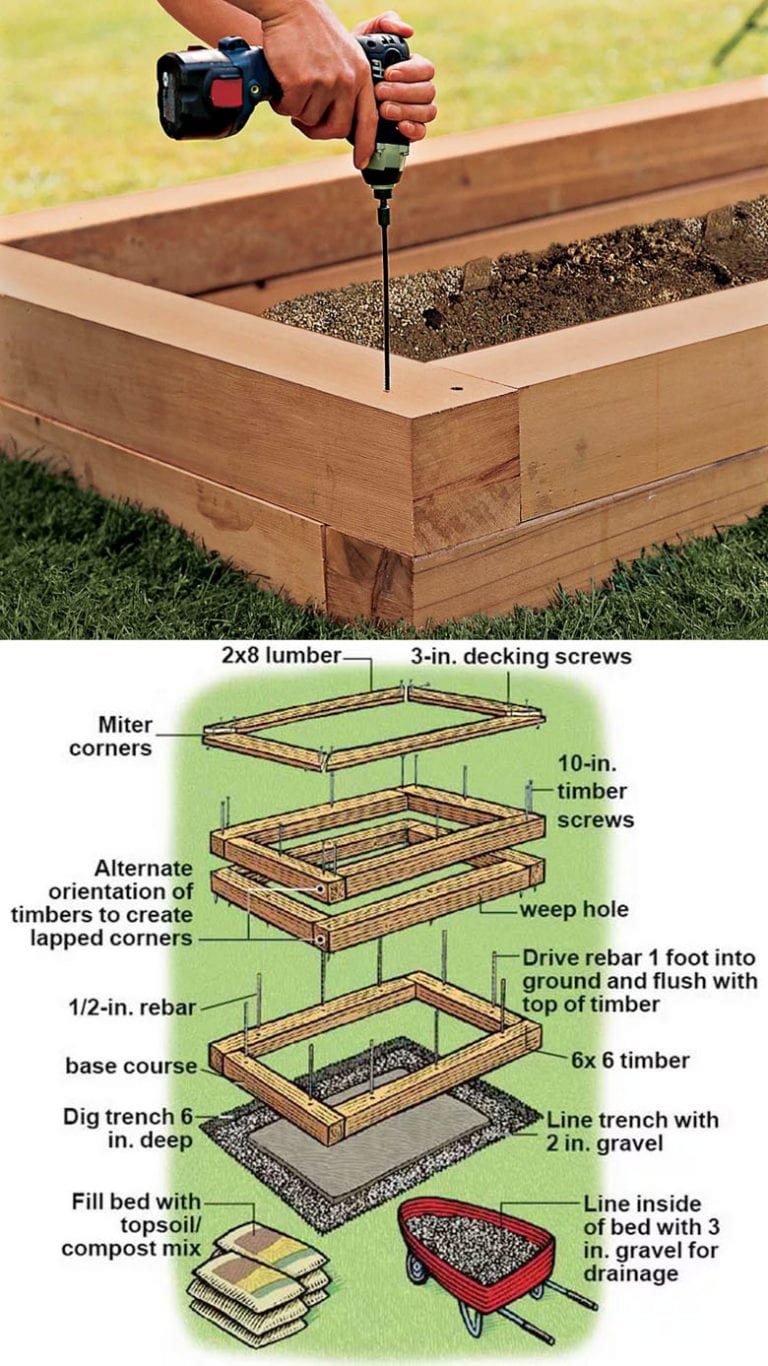
1. Measure and cut the boards
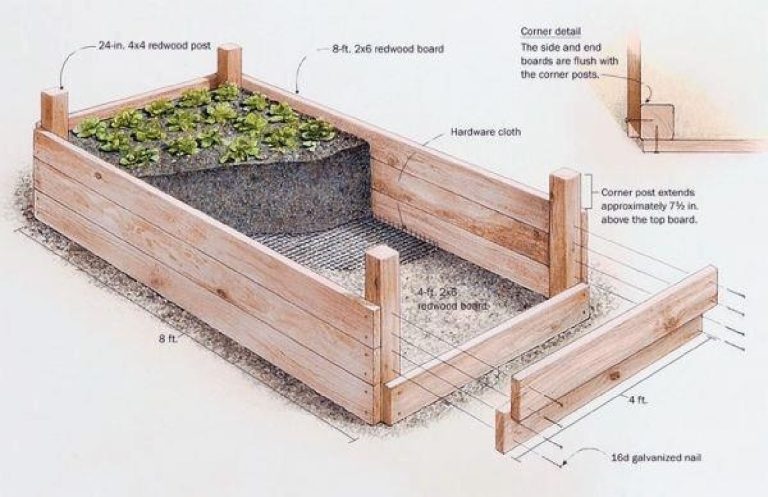
For a 4-by-8-foot bed, use two 8-foot boards for the long sides. Cut two boards to 45 inches for the short sides if the long boards overlap the ends. This creates an outside size close to 4 by 8 feet when using 1½-inch-thick lumber.
If your actual lumber size differs, measure the finished width rather than trusting the label. A small error can affect the amount of soil and the fit of row covers or hoops.
2. Assemble each corner
Stand the boards on edge. Place the short board between the long boards, or overlap the boards in a consistent pattern. Drive two or three exterior screws into each corner.
Check each corner with a square. If the frame is out of square, the diagonal measurements will differ. Measure from one corner to the opposite corner, then compare the other diagonal. Adjust until they match.
3. Add corner posts and braces
For a 12-inch bed, corner cleats may provide enough support. For a taller bed, attach 4-by-4 posts inside each corner. The post should extend from the bottom to the top of the wall.
Add a center brace on long beds. A threaded rod, galvanized pipe, or wood cross brace can stop the sides from spreading. This small step can save the frame after a heavy rain.

4. Set the bed in place
Place the frame on the prepared ground. Check the level from side to side and end to end. Remove high spots and fill low spots with soil.
Do not bury untreated wood in wet ground if you can avoid it. Set the frame on firm soil, gravel, or a thin layer of pavers. The goal is stable contact, not a perfectly sealed foundation.
5. Add a bottom only when needed
Most raised garden beds should remain open at the bottom. Open bottoms let earthworms move in, allow excess water to drain, and give deep-rooted plants more room.
Use a bottom if you need to block gophers, voles, tree roots, or contaminated soil. Galvanized hardware cloth with ½-inch openings works well for many pest problems. Secure it to the underside before filling the bed.
Landscape fabric can reduce weeds below the bed, but it also slows soil life and root movement. Avoid plastic sheeting unless you have a special reason and a clear drainage plan.
⚠️ Warning: Do not build a sealed, tall bed without drainage holes or a free-draining base. Water trapped at the bottom can suffocate roots and create a sour smell within days.
Fill the bed with healthy soil
Soil quality matters more than the frame. A beautiful cedar bed filled with dense clay will still produce weak plants.

Use a simple soil mix
For most vegetable beds, start with about 60% quality topsoil, 30% finished compost, and 10% aeration material such as pine bark fines or coarse perlite. This mix gives roots structure, nutrients, and air.
You can use a 50-50 blend of topsoil and compost for a shallow bed, but a very high compost mix may shrink, dry quickly, or release too many nutrients. Compost improves soil, but it does not replace mineral soil.
Avoid “topsoil” that smells sour, contains large chunks of wood, or feels sticky when wet. Ask for a screened product with no construction waste, glass, or invasive weed roots.
Calculate the soil volume
Multiply length by width by depth, using feet. A 4-by-8-foot bed that is 1 foot deep needs 32 cubic feet of soil.
For a 6-inch bed, use 4 × 8 × 0.5, which equals 16 cubic feet. Divide cubic feet by 27 to convert to cubic yards. A 32-cubic-foot bed needs about 1.19 cubic yards.
| Bed depth | Volume for a 4 × 8-foot bed | Good crops |
|---|---|---|
| 6 inches | 16 cubic feet | Lettuce, herbs, radishes |
| 12 inches | 32 cubic feet | Most vegetables |
| 18 inches | 48 cubic feet | Carrots, potatoes, larger roots |
Buy a little extra because soil settles after watering. Fill the bed to within 1 or 2 inches of the top, not to the rim.

Use logs or rough organic matter with care
The hugelkultur method uses logs and woody material below the soil. It can work in deep beds, but fresh wood may tie up nitrogen while it decomposes. It also settles unevenly and can make a shallow bed dry at the top.
For a standard 12-inch vegetable bed, I prefer a full soil mix. In a bed 24 inches or deeper, you can place rotting wood at the bottom, then add compost and soil above it. Do not use black walnut wood because it may release juglone, a compound that harms some plants.

Test soil pH and nutrients
Most vegetables grow well in soil with a pH between 6.0 and 7.0. Blueberries prefer more acidic soil, often near pH 4.5 to 5.5, so they usually need a separate container or dedicated bed.
A soil test can show pH, phosphorus, potassium, calcium, and organic matter. Do not add lime, sulfur, or strong fertilizer based only on guesswork. Excess phosphorus can build up and harm waterways.
Plant the bed for easy harvests
A raised bed works best when you plan the plant spacing before you sow. Place tall crops on the north side so they do not shade shorter plants.
Match crops to the bed depth
Shallow beds suit lettuce, spinach, arugula, radishes, green onions, thyme, and many annual flowers. A 12-inch bed supports tomatoes, peppers, beans, cucumbers, broccoli, cabbage, Swiss chard, and most herbs.
Carrots need loose soil at least 12 inches deep for short varieties such as ‘Paris Market’ and 18 inches for long types such as ‘Danvers.’ Potatoes need room for tubers and benefit from a bed 12 to 18 inches deep.
Large vining squash can overwhelm a small bed. Train cucumbers on a trellis, let determinate tomatoes grow with sturdy cages, and place mint in a container because it spreads fast.
Use spacing instead of rows
Square-foot gardening can help new growers use space well. Plant one large plant, such as a cabbage, per square foot. Plant four lettuce heads, nine onions, or sixteen radishes in the same area.
Do not pack plants so tightly that leaves stay wet all day. Good air movement reduces powdery mildew, downy mildew, and leaf spot. Follow the seed packet spacing when the plant grows large.
Add flowers and companion plants
Nasturtiums, calendula, alyssum, borage, and dill attract bees, hoverflies, and other pollinators. Basil near tomatoes may help you use the space well, but no companion plant can replace good soil, water, and pest control.
Plant dill and parsley for swallowtail butterfly larvae if you can share a few leaves. Keep fennel separate because it can inhibit nearby growth and attract pests that you may not want in a small bed.
Water and feed the bed correctly
A raised bed often drains better than ground soil, so it may need more frequent watering. The best schedule depends on soil, weather, plant size, and whether the bed uses wood, metal, or stone.
Water deeply, not lightly
Push a finger 2 inches into the soil. If the top feels dry but the soil below remains moist, wait. If the root zone feels dry, water slowly until moisture reaches 6 to 8 inches deep.
New beds may need water every day for the first week in hot weather. After roots grow, most vegetables need about 1 inch of water per week from rain and irrigation, though plants may need 1½ inches during heat waves.
Drip irrigation or a soaker hose works better than a sprinkler. It places water near the roots and keeps leaves dry. Run the hose for 20 to 40 minutes, then test the soil rather than relying on a timer alone.
| Season or condition | Typical watering need | Best method |
|---|---|---|
| Cool spring | 1–2 times per week | Slow hand watering or drip line |
| Hot summer | 3–5 times per week | Drip irrigation with soil checks |
| Heavy rain period | Little or none | Check drainage before watering |
| New seedlings | Short, frequent watering | Fine spray or gentle drip |
Water needs vary by USDA zone and crop. A tomato in dry Zone 6 soil may need less water than a shallow-rooted lettuce crop in hot Zone 9 soil.
Feed with compost first
Add 1 to 2 inches of finished compost over the bed each spring. Mix it lightly into the top 2 to 3 inches or leave it as a surface layer for soil organisms to pull down.
Heavy feeders such as tomatoes, corn, cabbage, and squash may need extra fertilizer. A balanced organic fertilizer with an NPK ratio near 5-5-5 can work when a soil test does not show excess nutrients. Follow the label rate.
Do not place fresh manure around edible crops. It can burn roots and may carry pathogens. Use composted manure, and follow the waiting period on the product label.
Mulch the soil surface
Apply 1 to 2 inches of shredded leaves, straw, compost, or untreated grass clippings. Mulch slows evaporation, buffers soil temperature, and blocks many weed seeds.
Keep mulch a few inches away from tomato stems and plant crowns. Wet mulch touching stems can invite rot and shelter slugs.
Protect plants from common raised-bed problems
Raised beds reduce some problems but do not make a garden pest-free. The warm, rich soil can attract weeds, slugs, cutworms, squirrels, rabbits, and voles.
| Sign | Likely cause | Practical fix |
|---|---|---|
| Wilting soil by midday | Dry root zone or damaged roots | Check soil depth and water slowly |
| Yellow lower leaves | Overwatering, poor drainage, or low nitrogen | Test moisture before adding fertilizer |
| Chewed leaf edges | Slugs, caterpillars, or beetles | Inspect at dusk and use row cover |
| Seedlings cut at soil level | Cutworms | Use collars and clear plant debris |
| Mushy roots or sour odor | Waterlogged soil | Improve drainage and reduce watering |
| White leaf coating | Powdery mildew | Improve air flow and water soil, not leaves |
The first step is always close inspection. Look under leaves, along stems, and at the soil line. Many problems look alike from a distance.
Manage pests without harming pollinators
Use insect netting or floating row cover over cabbage, kale, broccoli, and radishes. Remove the cover when squash, cucumbers, melons, or other plants need insect pollination, unless you hand-pollinate.
Hand-pick tomato hornworms, squash bugs, and Japanese beetles when numbers are low. Spray water to knock aphids off young shoots. If you use insecticidal soap, apply it in the evening and cover the pests fully.
Avoid broad-spectrum pesticides on open flowers. They can harm bees, hoverflies, lady beetles, and other helpful insects.
Improve drainage when soil stays wet
If the soil remains wet two days after rain, check whether the bed sits in a low spot or has a sealed bottom. A raised frame alone cannot overcome a clay site with no outlet for water.
Remove some soil and mix in compost and coarse organic matter. Do not add a thin layer of gravel under the soil and expect it to fix drainage. That setup can create a perched water table, where water collects above the boundary.
🔧 Quick Fix: If one corner holds water, lift that side of the frame, remove the low soil, and level the base. A 1-inch correction can prevent months of root trouble.
Maintain the bed through every season
A raised garden bed needs simple care, not constant work. Most maintenance involves checking the frame, refreshing the soil, managing water, and removing sick plants.
Spring maintenance
Inspect screws, corner posts, and boards before planting. Replace boards that split, bow, or feel soft when pressed with a screwdriver.
Top up the bed with compost. Check irrigation lines for cracks. If you grew tomatoes or peppers in the bed last year and saw disease, rotate crops or replace the top few inches of soil.
Summer maintenance
Check moisture at root depth twice each week during hot weather. Tie tomatoes before they lean, train cucumbers onto trellis netting, and harvest beans and zucchini often to keep plants productive.
Remove yellow leaves that touch the soil. Do not strip all tomato leaves, since the plant needs healthy foliage for photosynthesis and fruit growth.
Fall maintenance
Remove diseased plants and place them in the trash unless your compost reaches a reliable hot temperature. Healthy roots can stay in the bed and feed soil life as they decay.
Plant garlic, spinach, kale, or cover crops such as crimson clover where your climate allows. In cold USDA Zones 3 to 5, cover the soil with compost and leaves before deep winter freezes.
Winter protection
A raised bed can freeze faster than ground soil because its sides are exposed. This usually does not harm hardy crops, but it can stress overwintering herbs and young shrubs.
Use straw, leaves, or a low tunnel to protect plants. Brush heavy snow off fragile hoops and frames. Store loose row covers, irrigation timers, and small tools in a dry shed.
| Task | Timing | Why it matters |
|---|---|---|
| Check frame and screws | Early spring and fall | Finds rot and loose joints |
| Add compost | Spring or after a crop | Replaces settled organic matter |
| Inspect irrigation | Spring and during heat | Prevents dry spots and leaks |
| Remove diseased plants | As soon as found | Reduces disease spread |
| Renew mulch | Spring and midsummer | Saves water and blocks weeds |
A small inspection twice a year can add several seasons to a wooden bed. The first parts to fail are often the bottom edges of boards and the corner joints.
Know how long a raised bed will last
A raised bed lasts about 7 to 15 years when made from cedar and kept well drained. Pine may last 3 to 7 years, while galvanized steel, stone, and quality composite can last much longer.
Lifespan varies by climate. In wet USDA Zone 8 gardens, wood may decay faster than in dry Zone 6 gardens. A bed that touches constantly wet soil may fail early even if the lumber itself is high quality.
Look for these warning signs:
- Soft wood at the bottom edge
- Split or bowed boards
- Screws pulling out of corners
- Soil leaking through gaps
- Rust holes in thin metal
- Standing water after normal rain
Repair small problems early. Add corner braces, replace one board, or move wet mulch away from the frame. Rebuilding the entire bed is harder than replacing a single weak side.
Compare raised beds with other garden methods
A raised bed is useful, but it is not the right answer for every gardener. In-ground beds cost less and offer more root space, while containers suit patios and renters.
| Method | Best for | Main drawback |
|---|---|---|
| Raised bed | Better access, drainage, and soil control | Higher setup cost |
| In-ground garden | Large crops and low-cost expansion | More weeds and poor native soil control |
| Fabric or plastic container | Patios, rentals, and small spaces | Dries out faster |
| Garden rows | Large harvests and farm-style planting | More bending and walking space |
Raised beds often pay off when native soil is heavy clay, rocky, compacted, or contaminated. They may not be worth the expense if your ground soil already drains well and grows healthy crops.
A 4-by-8-foot bed can cost anywhere from about $100 to $400, depending on lumber, soil, irrigation, and hardware. Current pricing ranges from low-cost pine frames to premium cedar or metal systems. Buying bulk soil often reduces the cost per cubic foot.
Avoid common building mistakes
Most raised-bed failures come from poor planning rather than poor gardening skill. Fixing these issues early saves money and frustration.
Making the bed too wide
A 5- or 6-foot bed may look efficient, but you will step into it or stretch across it. Compacted soil holds less air and can damage shallow roots.
Using fresh compost or manure
Fresh material can heat up, smell, burn roots, and contain weed seeds. Use mature compost that looks dark and crumbly.
Filling the bed with only compost
Pure compost settles fast and may hold too much water or too little structure. Blend it with topsoil and a coarse material.
Skipping drainage
A raised bed is not automatically well drained. Test the site after rain and keep the bottom open unless pests or contamination require a barrier.
Planting without a crop plan
A single zucchini plant can cover much of a 4-by-8-foot bed. Large crops need trellises, wider spacing, or their own area.
Ignoring the north side
Place tall crops on the north side of the bed. If you live in the Southern Hemisphere, use the opposite sun pattern for your site.
Adding landscape fabric everywhere
Fabric can block weeds below the bed, but it also limits worms and root growth. Use it only when the ground calls for a barrier.
🌱 Beginner Note: Start with one 4-by-4-foot bed if the project feels large. You can learn your watering needs, pest pressure, and planting schedule before expanding.
My practical raised-bed setup
My most reliable layout uses two 4-by-8-foot cedar beds with a 3-foot path between them. One bed holds warm-season crops, and the other holds greens, herbs, onions, and a fall cover crop.
I place tomatoes on the north side with cages set before planting. Basil, parsley, lettuce, and scallions fill the open spaces, while a trellis supports cucumbers along the back edge. In cooler Zone 5 conditions, I use black plastic mulch only for early soil warming, then replace it with straw once summer arrives.
One mistake I made was filling a new bed with nearly equal parts compost and topsoil. The plants grew fast for several weeks, but the mix shrank and dried unevenly by midsummer. After I added mineral topsoil and pine bark fines, the bed held moisture more evenly.
Another surprise came from metal beds during a hot summer. The plants near the side wall dried first. A wider mulch layer and drip irrigation solved the issue, but wood would have been more forgiving in that spot.
Over two growing seasons, the beds became easier to manage. The soil settled into a loose, dark layer, earthworms appeared, and weeds dropped sharply once I stopped turning the soil.
Decide whether to hire help
You can build a basic raised garden bed yourself in one afternoon. Hire help when the bed needs retaining walls, masonry, electrical irrigation controls, major grading, or a sealed design for contaminated ground.
A professional can also help on steep slopes or sites with poor drainage. A badly placed bed may flood, lean, or damage a foundation. Moving 32 cubic feet of soil is hard work, so ask for help if lifting is unsafe.
For a basic bed, the project usually takes 3 to 6 hours, not counting soil delivery. Add another hour for leveling and hardware-cloth installation. A simple frame is a good weekend project, but a tall accessible bed can require more planning.
Frequently asked questions
Q: What is the best height for a raised garden bed?
A: Twelve inches is the best general height for vegetables. Use 18 to 24 inches for easier access, deep-rooted crops, or gardeners who cannot bend easily. Six inches works for lettuce, herbs, radishes, and shallow flowers.
Q: Should a raised bed have a bottom?
A: Usually, no. An open bottom improves drainage and lets roots, worms, and soil organisms move freely. Add hardware cloth or a solid barrier only for rodents, tree roots, contaminated soil, or a hard surface such as concrete.
Q: What is the best soil mix for raised beds?
A: Use about 60% quality topsoil, 30% finished compost, and 10% pine bark fines, coarse perlite, or another aeration material. Adjust the mix after a soil test. Avoid filling the bed with compost alone.
Q: Can I use regular garden soil in a raised bed?
A: You can mix a small amount with compost, but do not fill the bed with heavy native clay or dense soil. Garden soil may compact and drain poorly. Screened topsoil gives a more reliable base.
Q: How deep should a raised bed be for tomatoes?
A: Use at least 12 inches of soil for tomatoes, though 18 inches gives roots more room. Support indeterminate types with a strong cage or trellis. Place tomatoes where they receive 8 or more hours of sun when possible.
Q: How often should I water a raised garden bed?
A: Check the soil 2 inches below the surface. Water slowly when the root zone feels dry. Most established vegetables need about 1 inch of water per week, but hot weather, sandy soil, metal beds, and small containers need more.
Q: Is cedar safe for growing vegetables?
A: Untreated cedar is widely used for vegetable beds and is a durable choice. Do not use old railroad ties, creosote-treated wood, or lumber with an unknown chemical history.
Q: How long does a wooden raised bed last?
A: Cedar often lasts 7 to 15 years, while untreated pine may last 3 to 7 years. Wet climates shorten the life of wood. Good drainage, strong fasteners, and early board replacement help extend its service.
Q: Can I grow carrots in a raised bed?
A: Yes. Use loose soil at least 12 inches deep for short carrots and 18 inches for long varieties. Remove stones and wood pieces that can split roots. ‘Danvers’ and ‘Nantes’ grow well in prepared raised-bed soil.
Q: Why is my raised-bed soil sinking?
A: Soil sinks as compost, roots, and organic matter decompose. Top it up with finished compost and quality topsoil each season. Large amounts of fresh wood below the bed can cause faster and uneven settling.
Q: What should I plant in a raised bed in early spring?
A: In cool climates, plant peas, spinach, lettuce, radishes, kale, onions, and carrots as soon as the soil can be worked. In USDA Zones 8 and 9, you can often grow these crops through winter and early spring.
Q: Can I build a raised bed on concrete?
A: Yes, but use a deeper container with strong drainage holes and a free-draining soil mix. Place it where water can escape. The bed will dry faster and may need more frequent irrigation than a bed over soil.
Q: Do raised beds need fertilizer every year?
A: Not always. Add compost first and use a soil test to guide fertilizer. Heavy feeders may need a balanced fertilizer during the growing season, but excess nitrogen can produce leaves instead of fruit.
Q: What is the best mulch for a raised garden bed?
A: Shredded leaves, clean straw, compost, and untreated grass clippings work well. Apply 1 to 2 inches and keep it away from plant stems. Avoid dyed mulch of unknown origin around edible crops.
Final recommendations
The best raised garden bed is one you can reach, water, fill, and maintain without strain. Build it in a sunny spot, keep it 4 feet wide or less, use safe materials, and give the soil as much attention as the frame.
For most gardeners, a 4-by-8-foot cedar bed about 12 inches tall is the strongest starting point. Add a center brace, fill it with a balanced soil mix, cover the surface with mulch, and plan tall plants on the north side. If your budget is tight, start with a smaller pine bed and upgrade parts as they wear out.
A raised bed should make gardening feel simpler, not more complicated. When the structure drains well and the soil stays loose, your plants get a steady root zone—and you get more time to enjoy the harvest.
Meta description: Learn how to build the best raised garden bed with safe materials, ideal sizes, soil mix ratios, drainage tips, planting plans, costs, and seasonal maintenance.