How To Build An L Shaped Raised Garden Bed: Easy DIY Guide
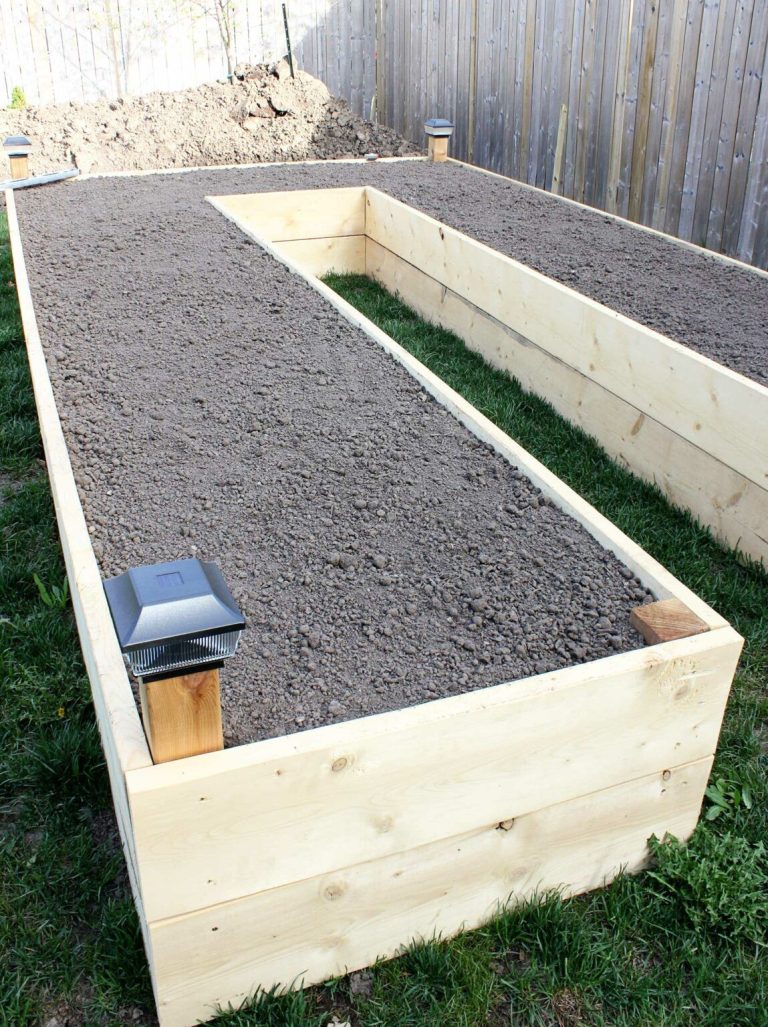
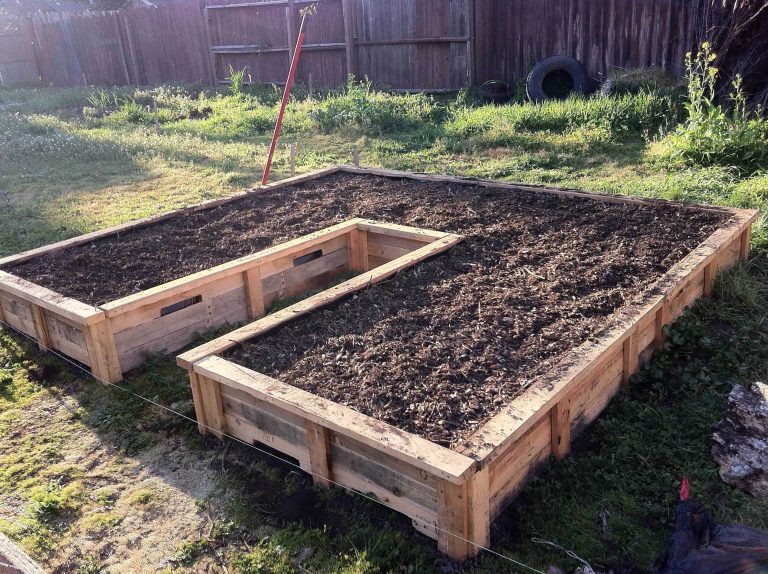
An L-shaped raised garden bed gives you more growing space without taking over the yard. The two arms fit neatly into a corner, along a fence, or beside a patio. The shape also creates a small work zone in the center, so you can reach many plants without stepping on the soil.
I have built raised beds in clay soil in the Midwest, sandy soil in the South, and wet spring ground in the Pacific Northwest. The same lesson comes up each time: good layout matters more than fancy lumber. A level base, strong corner joints, safe wood, and the right soil mix will decide whether the bed lasts two seasons or ten.
This guide explains how to build an L-shaped raised garden bed from start to finish. You will learn how to choose a size, calculate soil, cut and join the boards, protect the wood, avoid common drainage errors, and plant the bed for steady harvests.

Quick answer: build the L-shaped bed in one weekend
To build an L-shaped raised garden bed, choose a level site, cut two long boards and two short boards for each leg, join them with exterior screws and corner supports, line the base with cardboard if needed, and fill the bed with a soil-and-compost mix. A practical beginner size is 8 feet by 4 feet on one leg and 4 feet by 4 feet on the other, with a height of 12 to 18 inches.

A simple L shape has two rectangles that meet at a corner. For example, an 8-by-4-foot leg joined to a 4-by-4-foot leg creates about 48 square feet of planting area if both legs are 4 feet wide. The outside dimensions may change based on the way you overlap the boards.
The bed works best when each arm stays no wider than 4 feet. Most people can reach about 2 feet from one side without leaning on the soil. If the bed sits against a wall or fence, keep it closer to 2 to 3 feet wide.
A good beginner design
Use 2-by-8 or 2-by-10 lumber for a 12- to 18-inch bed. Use two stacked courses of 2-by-6 boards for a bed about 11 inches high. A taller bed helps people with sore knees, but it needs stronger corner posts and more soil.

Do not make the inside corner too tight. Leave enough room for a hand trowel and a small watering can. A 24-inch-wide path between the bed and a fence also makes weeding much easier.
Choose the best site and dimensions
The best site for an L-shaped raised garden bed gets at least six hours of direct sun each day, drains well, and leaves room to walk around the outside. Morning sun is helpful, but vegetables such as tomatoes, peppers, cucumbers, beans, and squash need strong afternoon light for good yields.

Watch the site for a full day before you build. A spot that looks sunny at noon may sit in shade by 3 p.m. Trees also create root competition. Large roots can push into the bed, steal water, and make digging hard later.
Match the site to your plants
leafy greens such as lettuce, kale, arugula, and spinach can tolerate four to six hours of sun. Fruiting crops usually need six to eight hours. Herbs vary: basil likes full sun, while cilantro can handle some afternoon shade in hot USDA Zones 8 through 10.
The bed should sit near a water source, but not where roof runoff floods it. Avoid low areas that stay wet after rain. Raised beds drain better than ground soil, yet a bed placed in a puddle can still become sour and waterlogged.
Use a layout that you can reach
A useful plan has one 8-foot arm and one 4-foot arm, both 4 feet wide. You can also build a 6-foot-by-3-foot arm with a 3-foot-by-3-foot return if your yard is small.
| Bed feature | Recommended beginner choice | Why it works |
|---|---|---|
| Bed height | 12–18 inches | Enough root space and easier work |
| Arm width | 3–4 feet | Most plants stay within reach |
| Long arm | 6–8 feet | Gives useful space without board sag |
| Walking path | 24–30 inches | Allows a wheelbarrow or kneeling pad |
| Inside corner | 2 feet of clear access | Prevents a hard-to-reach dead spot |
These sizes fit most home gardens. If children or pets use the yard, a wider path also reduces damage from running feet and dropped tools.
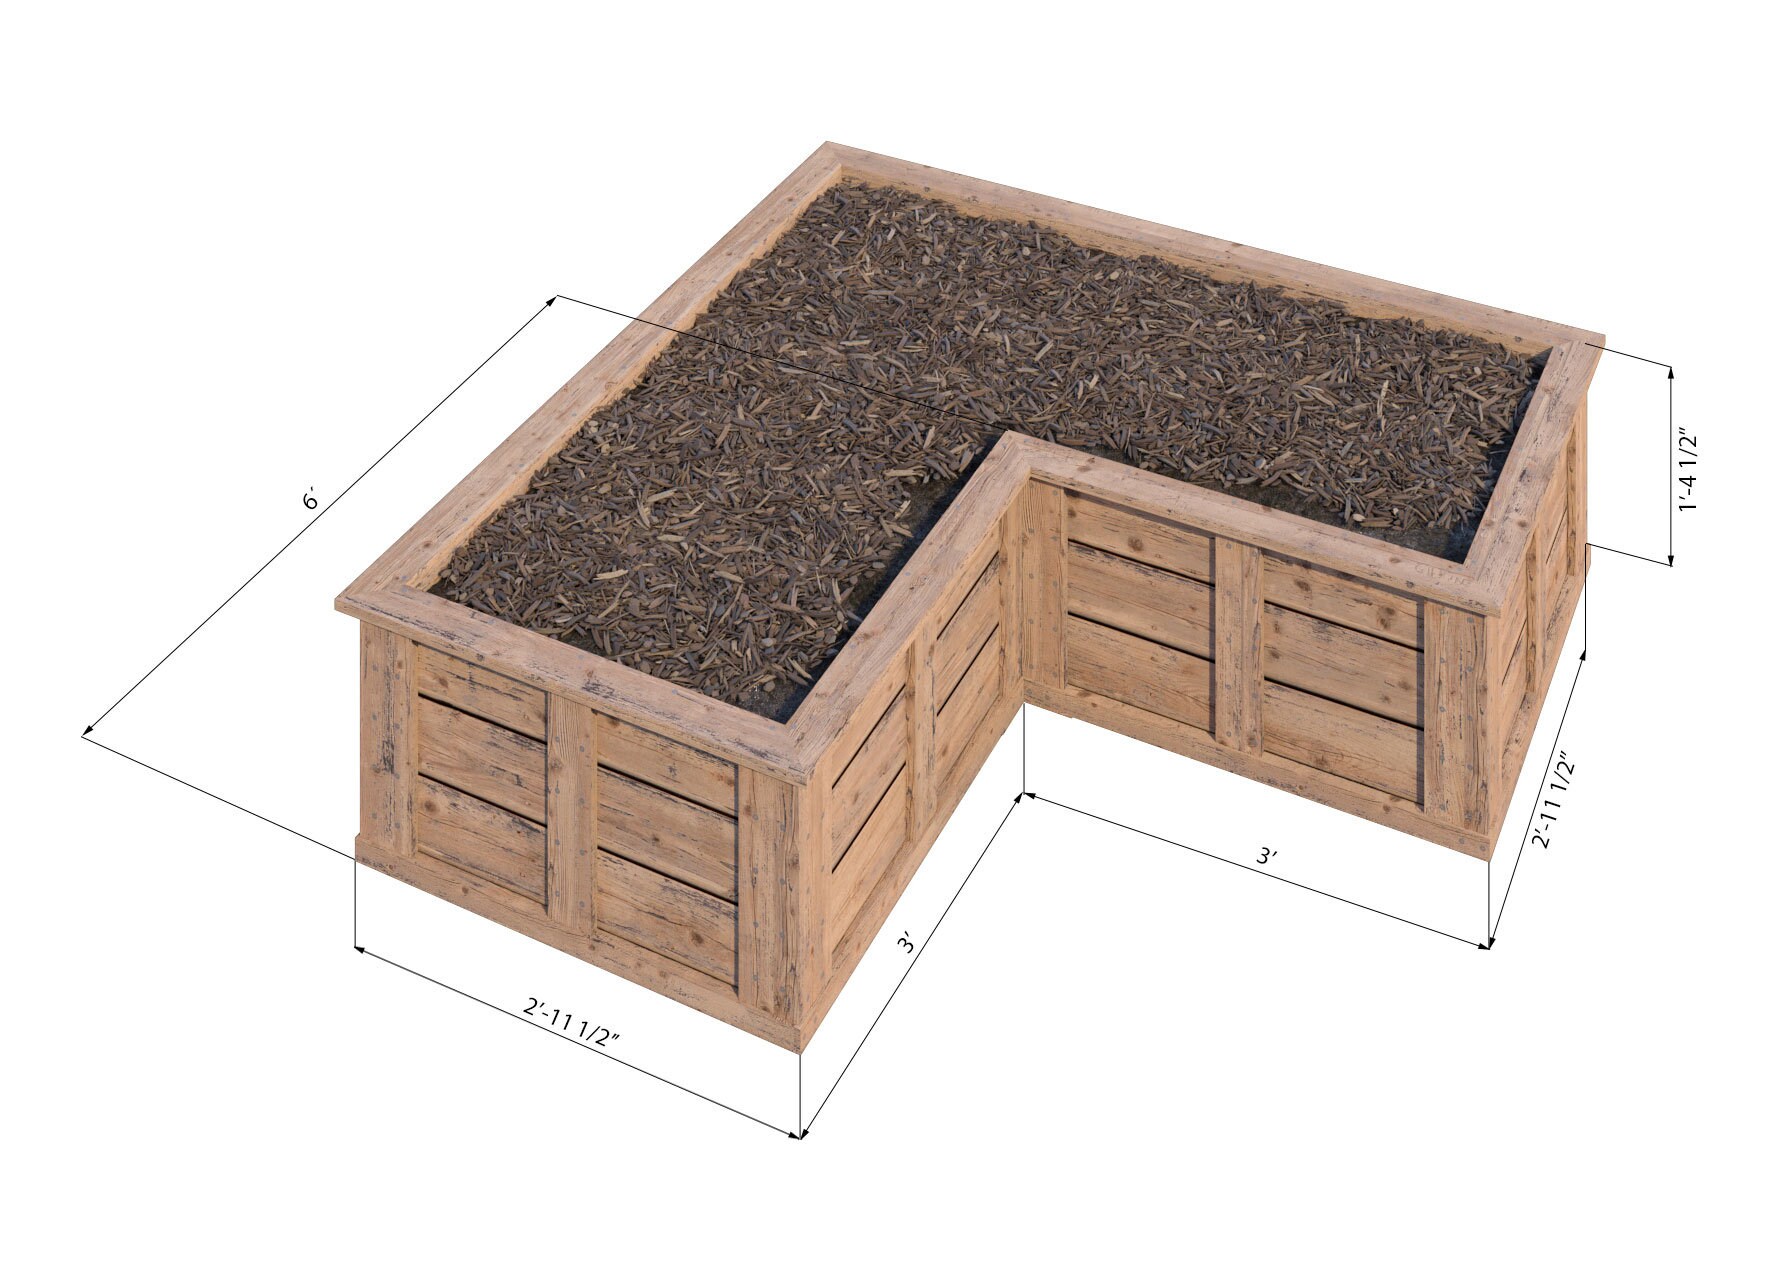
Measure the bed with stakes and string before cutting wood. Walk the outline. Pretend to reach the inside corner. If you cannot comfortably touch every planting area, make one arm narrower.
Gather safe materials and basic tools
You need outdoor-rated lumber, corrosion-resistant screws, corner supports, landscape fabric or cardboard when appropriate, and a quality soil mix. Avoid old railroad ties, painted boards of unknown age, and salvaged wood treated with chemicals you cannot identify.

Modern pressure-treated lumber made for residential landscaping is widely used for raised beds. Look for boards labeled for ground contact and follow local guidance. Cedar, redwood, and cypress resist decay naturally, but they cost more in many areas.
Materials list
The table below covers a common 8-by-4-foot L bed with 12-inch walls. Change the count to suit your plan.
| Material | Suggested amount | Notes |
|---|---|---|
| 2-by-8 lumber, 8 feet long | 6–8 boards | Two courses may be needed |
| Exterior structural screws | 1 box | Use 3-inch screws for thick boards |
| 4-by-4 corner posts | 4–6 pieces | Cut to wall height plus 2–4 inches |
| 1-by-2 or 2-by-2 stakes | 8–12 | Add support along long sides |
| Compost | 1–2 cubic yards | Use mature, screened compost |
| Topsoil or garden soil | 2–3 cubic yards | Avoid pure potting soil |
| Cardboard | Enough for the footprint | Use plain brown sheets |
| Mulch | 2–3 cubic feet | Keep it off plant stems |
The soil amount depends on the final height and the exact overlap at the corner. Buy a little extra if you order bulk soil. A small shortage at the end is common because soil settles after watering.
Tools to prepare
You need a tape measure, pencil, speed square, circular saw, drill, drill bits, level, shovel, rake, mallet, and safety glasses. A cordless circular saw such as a 20-volt model from DeWalt, Makita, or Milwaukee will handle common 2-inch boards with a sharp 24-tooth framing blade.
A handsaw can work for a small bed, but it makes long, square cuts harder. A miter saw speeds up crosscuts, though it does not replace a circular saw for long boards. Wear hearing protection with powered saws and keep both hands clear of the blade path.
⚠️ Warning: Never cut pressure-treated lumber indoors. Sawdust can irritate your lungs and eyes. Work outside, wear eye protection and a dust mask, and wash your hands before eating.

Prepare the ground before assembly
A level base prevents twisting and stress at the joints. Remove grass, large roots, stones, and weeds from the footprint. You do not need to excavate the whole area deeply, but you should remove sod so it does not grow through the new bed.

Set stakes at the outer corners and connect them with string. Check the diagonals of each rectangle. Equal diagonal measurements show that the corners are square. This small check saves trouble when you join the boards.
Level the site
Use a shovel to shave high spots and fill low spots with compacted soil. Do not build on loose mulch, fresh compost, or soft topsoil. The bed may settle unevenly, and the boards can pull apart.
A slight slope of less than 1 inch across the full bed is manageable. A steep slope needs a stepped design, retaining support, or a different location. Do not bury a tall wood wall into a hillside without checking the pressure on the boards.
Decide whether to remove sod
Remove sod when the bed is low, the grass is aggressive, or the site has perennial weeds such as bindweed, quackgrass, or Bermuda grass. If the soil has no invasive weeds, lay overlapping cardboard over the ground and build on top.
Cardboard blocks light and breaks down over time. It also feeds soil organisms as it decomposes. Do not use glossy cardboard, waxed boxes, or sheets with heavy colored ink.
🌱 Beginner Note: A raised bed does not need a solid floor. Soil microbes, earthworms, and plant roots benefit from contact with the ground. Use hardware cloth under the bed only when rodents are a serious problem.

Build the L-shaped frame step by step
The most reliable way to build an L-shaped raised garden bed is to assemble each rectangle with square corners, then connect the two sections with an interior support. Work on a flat surface when possible. A driveway or patio makes it easier to spot gaps and twists.

1. Mark every board before cutting
Write the length on each board with a pencil. For a simple overlap design, the outside length of one board includes the thickness of the board it meets. A 2-by-8 board is about 1.5 inches thick, not a full 2 inches.
For example, if you want an outside leg length of 8 feet and one end board overlaps the long board, you may cut one piece at 96 inches and the joining piece at 94.5 inches. The exact cut depends on your corner plan, so draw the layout first.
2. Cut the lumber square
Support long boards at both ends and near the middle. Make a clean, straight cut with a sharp blade. A rough cut can leave a gap that lets water sit against the end grain.
Brush off loose sawdust. You do not need to seal every cut with a chemical product, but an exterior end-grain sealer can slow moisture entry in wet climates such as western Oregon or coastal Washington.
3. Build the first short rectangle
Lay out the boards for the shorter leg. Clamp the corners if you have clamps. Drill pilot holes through the outside board and into the board end, then drive two exterior screws near each corner.
Pilot holes reduce splitting, especially in cedar and dry pressure-treated pine. Keep screws at least ¾ inch from the board edge. Use a square after each screw rather than waiting until the end.
4. Build the long section
Assemble the longer leg in the same way. Long boards can bow outward, so use a straight board or string line to check the side. Add a 4-by-4 post or doubled 2-by material near the center of any side longer than 6 feet.
A long side does not always fail at the corner first. In my beds, the middle of a long wall usually bows after repeated freeze-thaw cycles or when wet soil presses against it. A center stake prevents much of that movement.
5. Join the two sections
Place the short section against the long section to form the L. Use a 4-by-4 post at the inside corner and another at the outside corner if the design needs one. Drive screws through both boards into the post.
The inside corner carries a lot of pressure. Use at least four screws across the two wall courses, with the screws staggered. Add a metal angle bracket rated for outdoor use if the boards shift during assembly.
6. Add middle stakes and top supports
Drive stakes on the outside of long walls or attach them inside the bed before filling. Keep the top of each stake slightly below the soil line or cut it flush with the board.
For a 16- to 18-inch bed, use support posts every 3 to 4 feet. For a 12-inch bed, posts every 4 to 6 feet often work in mild climates. Frozen soil and wet clay create more pressure than dry sandy soil.
7. Check the finished frame
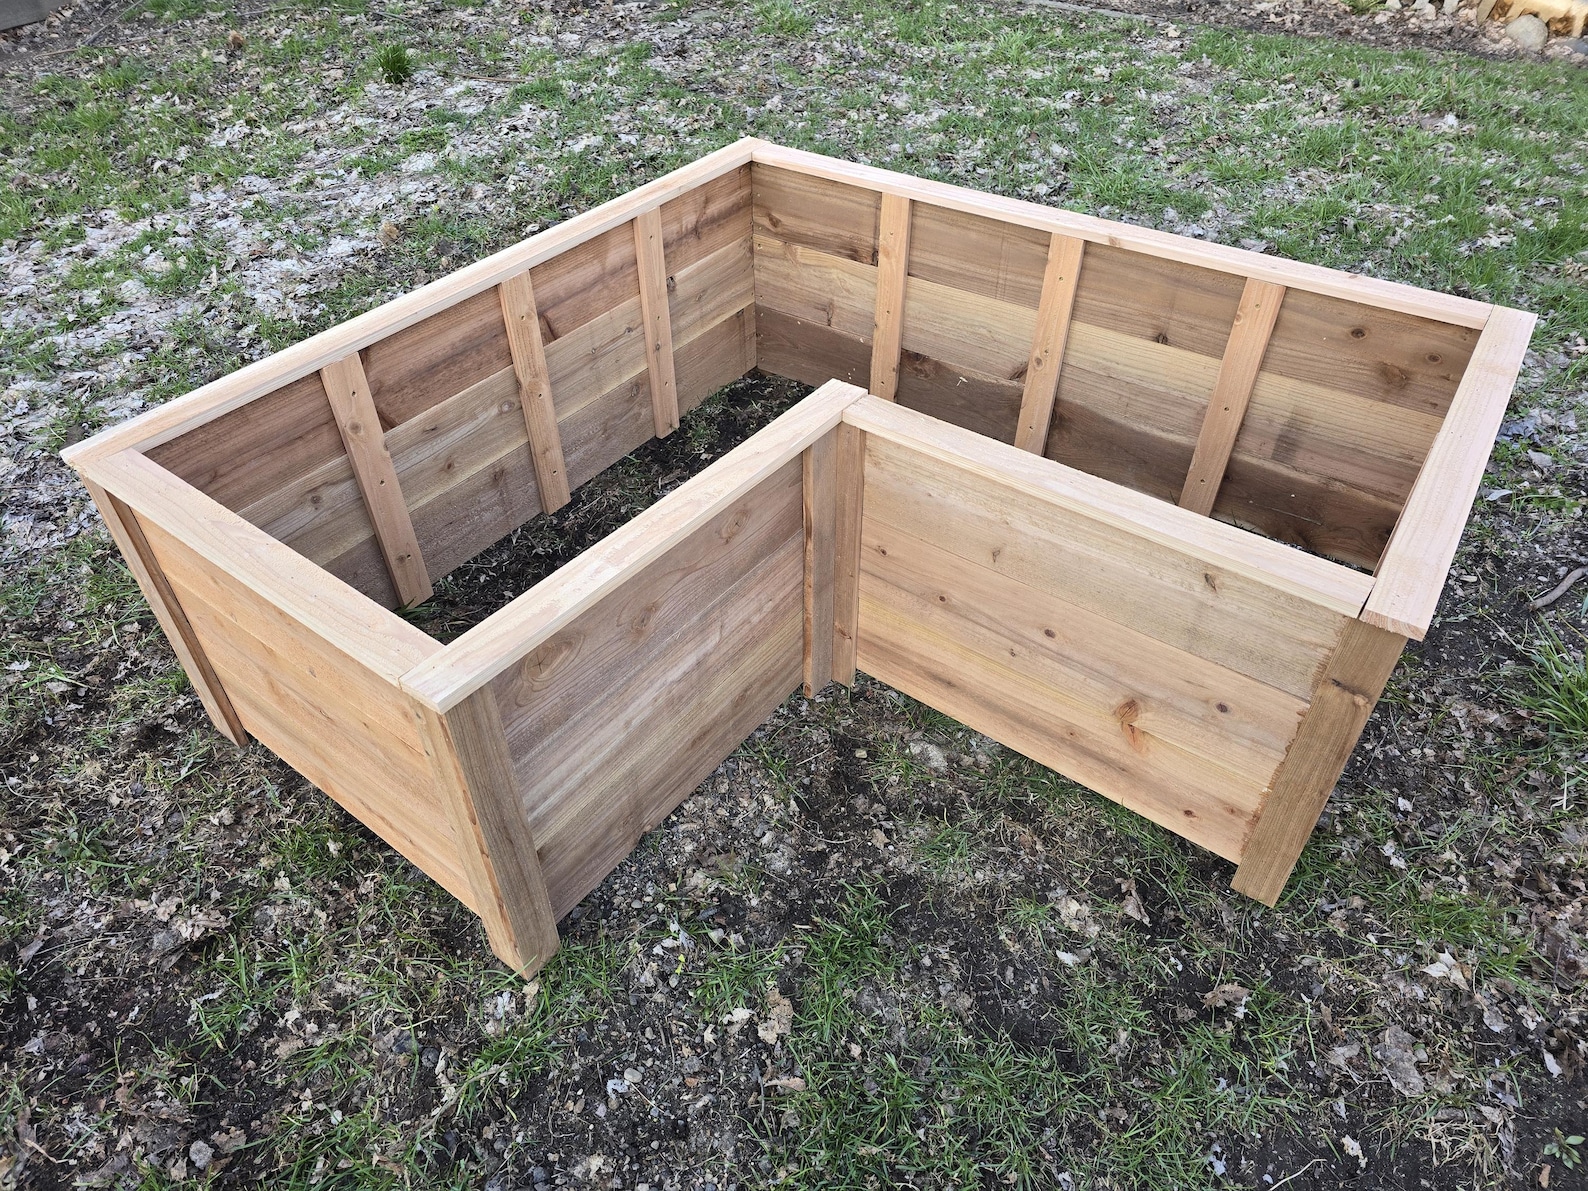
Measure the level across the top boards in several directions. Check that the inside corner stays open and that no screw points protrude into the planting space.
| Check | How to test it | Fix if it fails |
|---|---|---|
| Square corners | Compare diagonal measurements | Shift boards before adding screws |
| Level top | Place a level on each wall | Dig or add compacted soil below |
| Firm joints | Push each corner by hand | Add screws or a corner post |
| Straight walls | Sight down each long side | Add a center stake |
| Safe edges | Run a gloved hand along boards | Sand splinters and sharp corners |
A frame that feels solid before filling will become much stronger once the soil supports it. Do not skip this inspection. Soil is heavy, and small flaws become large gaps under pressure.
Fill the bed with the right soil mix
The best raised bed soil drains well, holds moisture, and contains enough organic matter for roots. A practical mix uses about 60% quality topsoil, 30% mature compost, and 10% aeration material such as pine bark fines or coarse coconut coir.

Avoid filling the whole bed with compost. Pure compost can shrink, dry quickly, hold too many salts, or release nutrients too fast. It may also become hydrophobic after drying, which means water runs off instead of soaking in.
Calculate soil volume
Calculate the volume of each rectangle, then subtract the overlapping square at the inside corner if you count the full rectangles. Use this formula:
Length × width × depth = cubic feet
Convert inches to feet before calculating. A 4-by-8-foot rectangle filled to 1 foot needs 32 cubic feet, or about 1.19 cubic yards. A 4-by-4-foot rectangle needs 16 cubic feet. Subtract the 4 cubic feet where the sections overlap, and the full L shape needs about 44 cubic feet.
| Bed depth | Soil needed for a 4-by-8 L shape | Approximate bulk volume |
|---|---|---|
| 12 inches | 44 cubic feet | 1.63 cubic yards |
| 16 inches | 58.7 cubic feet | 2.17 cubic yards |
| 18 inches | 66 cubic feet | 2.44 cubic yards |
These figures assume a 4-foot-wide, 8-foot-by-4-foot L shape with one 4-by-4-foot overlap. Add 10% for settling. If you use bags, check the bag volume; a 1.5-cubic-foot bag will take many trips for a large bed.
Test soil pH and texture
Most vegetables grow well at a soil pH between 6.0 and 7.0. Blueberries need a far more acidic mix, so they usually belong in a separate container or dedicated bed. A basic soil test can show pH, phosphorus, potassium, and organic matter.
Do not add lime just because someone recommends it. Lime raises pH, and many garden soils already sit near neutral. Follow the soil test rate and retest after one season.

Fill in layers
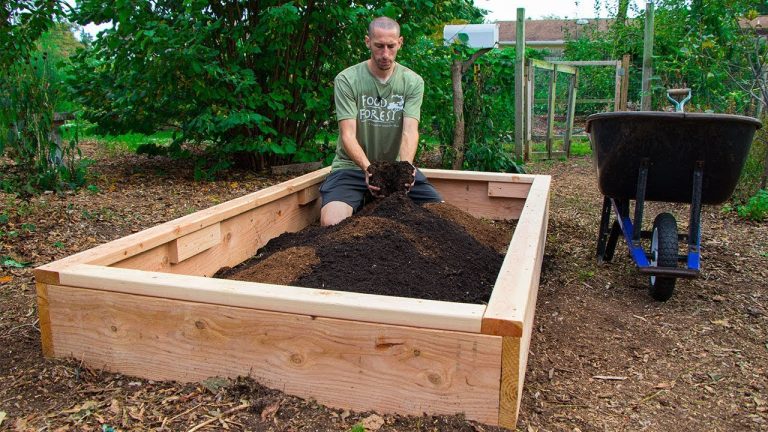
Spread the soil mix in 4- to 6-inch layers. Water each layer lightly to settle air pockets, then rake it level. Avoid walking inside the bed because wet soil compacts quickly.
Stop 1 to 2 inches below the top edge. A small gap keeps soil from washing over the boards during heavy rain. Finish with 2 inches of straw, shredded leaves, or fine bark mulch.
🔧 Quick Fix: If the bed settles by several inches after the first month, add a thin layer of compost and garden soil. Do not dump a thick layer of fresh compost on top of seedlings, since it can bury stems and change nutrient levels.

Plan irrigation and drainage
A raised bed needs steady moisture, not constant wetness. Water slowly at the soil surface so roots receive a deep soak. Drip irrigation or a soaker hose uses less water than a handheld sprinkler and keeps tomato and cucumber leaves dry.
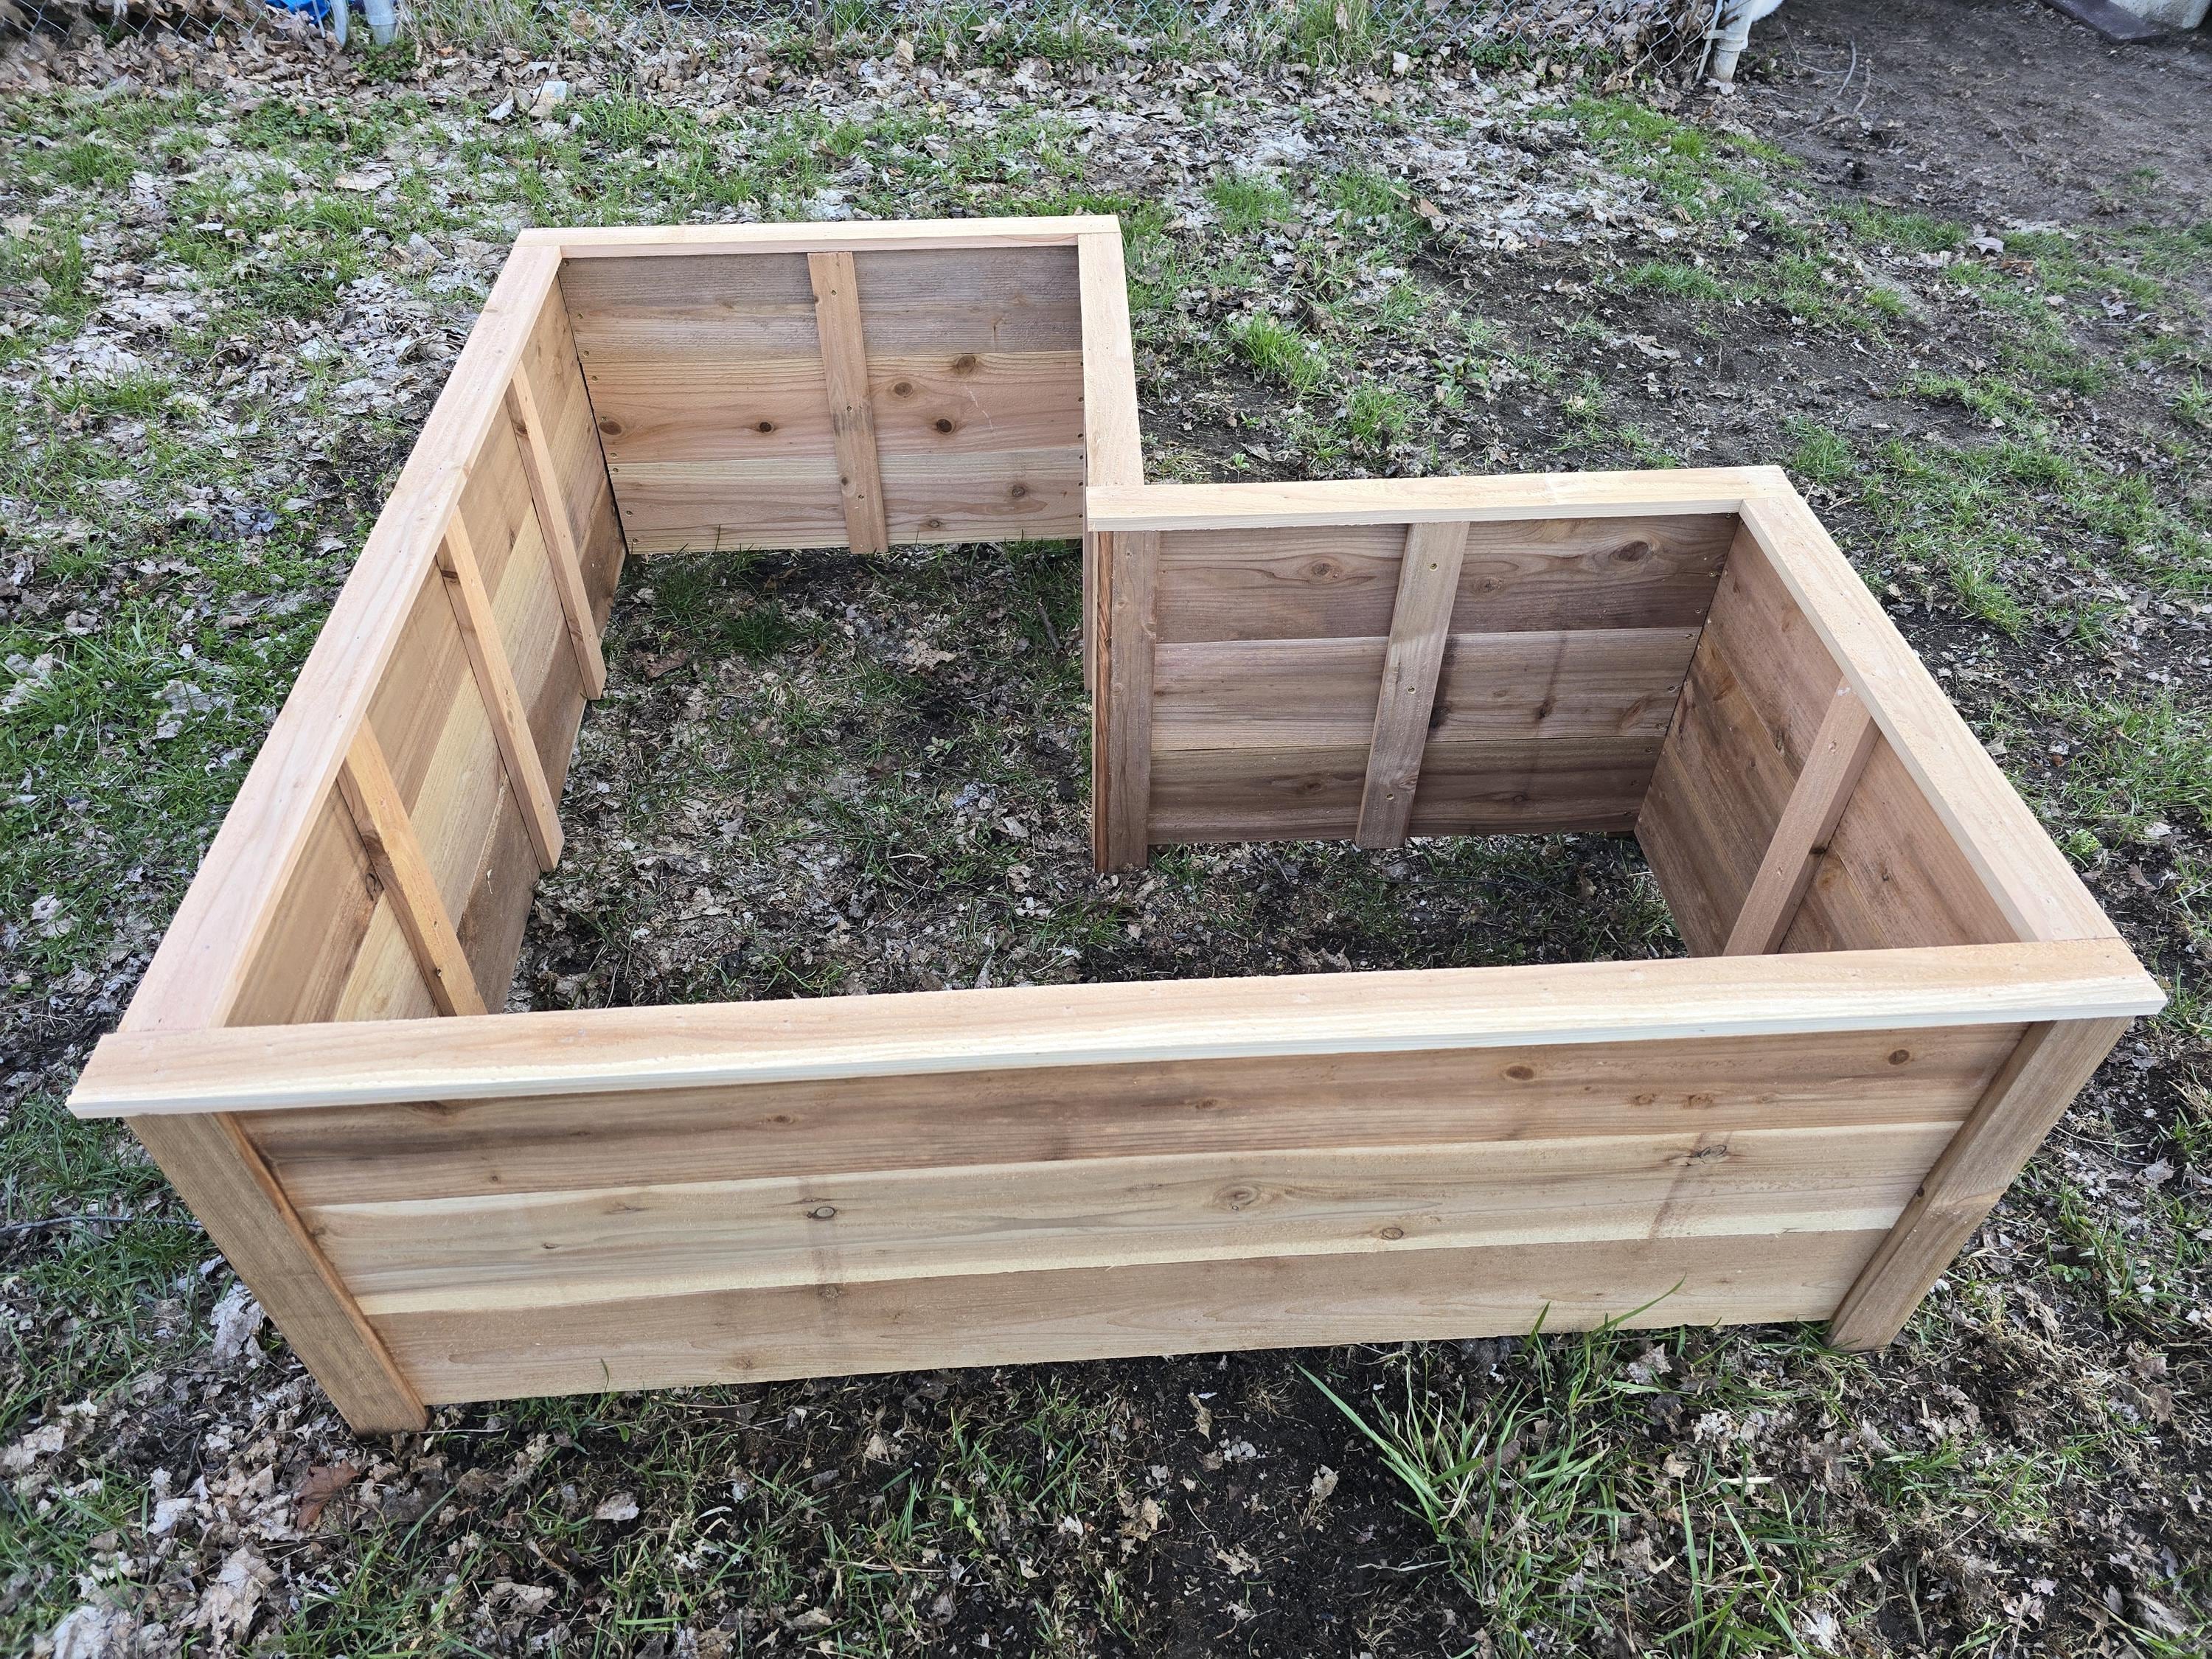
Place a soaker hose in each arm of the L. Keep the hose 2 to 4 inches from plant stems, and use a separate line for each leg if water pressure drops at the far end.
Water by soil condition
Push a finger 2 inches into the soil. If it feels dry at that depth, water. Seedlings and newly transplanted crops need more frequent checks than established plants.
In hot USDA Zones 7 through 10, a raised bed may need water every day during a heat wave. In cooler Zones 3 through 6, two deep waterings per week may be enough in spring, depending on rain and soil texture.
| Plant group | Sun need | Typical water pattern | Useful mulch |
|---|---|---|---|
| Lettuce and spinach | 4–6 hours | Light, frequent checks | Shredded leaves |
| Tomatoes and peppers | 6–8 hours | Deep water 1–3 times weekly | Straw |
| Carrots and beets | 6+ hours | Even moisture during root growth | Fine compost |
| Beans and cucumbers | 6–8 hours | Deep water when top soil dries | Straw or bark |
| Rosemary and thyme | 6–8 hours | Let soil dry slightly | Gravel or light bark |
The table gives a starting point, not a fixed rule. Sandy mixes dry faster than clay-heavy mixes, and plants drink more during flowering and fruit set.
Do not seal the base
A raised bed should drain through the bottom unless you build it on concrete. Plastic sheeting under a soil-filled bed traps water and can cause root rot. If the bed sits on a hard surface, use a liner designed for planters, add drainage holes, and keep the soil depth suitable for containers.
If voles, moles, or gophers are common, attach galvanized hardware cloth with ¼-inch or ½-inch openings under the frame. Overlap the edges by at least 6 inches. This barrier protects roots without blocking normal drainage.
Plant the bed for easy care
The inside corner of an L bed creates a useful microclimate, but it can also become crowded. Put tall crops on the north side so they do not shade shorter plants. Use the east or west ends for herbs, salad greens, and flowers that attract pollinators.
Tomatoes, peppers, eggplants, and pole beans need strong sun. Lettuce, cilantro, parsley, radishes, and baby kale fit well in areas that receive some afternoon shade. Plant mint in a container, not loose in the raised bed, because it spreads by underground stems.
A simple planting plan
Place two or three indeterminate tomatoes, such as ‘Cherokee Purple’ or ‘Sungold’, along the north edge with sturdy cages. Put basil near the tomatoes for easy harvest, but do not rely on companion planting to control pests.
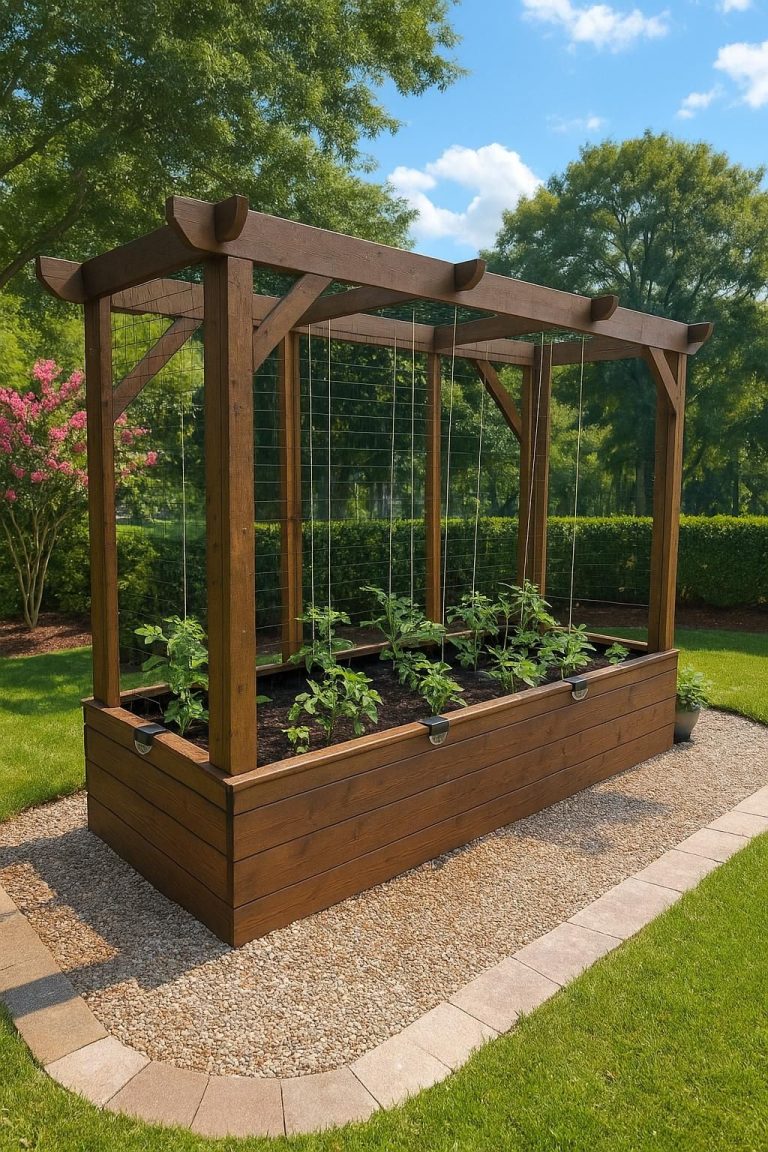
Use trellises for cucumbers, peas, and pole beans. Mount or anchor the trellis before plants grow large. A mature cucumber vine can pull a light trellis over during a windy storm.
Plant carrots, beets, onions, and radishes in short rows. Follow with lettuce and spinach in spring or fall. In USDA Zones 8 through 10, leafy greens often perform better from October through March than during the hot summer.
Leave room for airflow
Crowded plants invite powdery mildew, early blight, and aphids. Follow the spacing on the seed packet, even when the empty soil looks wasteful. Good airflow saves time later.
Rotate plant families when you reuse the bed. Avoid planting tomatoes, peppers, and eggplants in the same exact section year after year. These crops belong to the nightshade family and can share diseases such as verticillium wilt and bacterial leaf spot.
Maintain the bed through the seasons
A raised bed needs less digging than a ground garden, but it still needs care. Add compost once a year, keep mulch at a shallow depth, check the boards, and adjust watering as weather changes.
Spring routine
In early spring, remove dead plant debris and inspect the inside corners. Pull weeds while they are small. Add 1 inch of mature compost and mix it into only the top few inches with a hand fork.
Do not turn the whole bed deeply. Deep digging breaks soil structure and can disturb earthworms and beneficial fungi. A light top-dress works well in no-till gardens.
Summer routine
Check moisture at least twice each week. Tie tomatoes and beans before they flop. Harvest zucchini, beans, cucumbers, and greens often to keep the plants producing.
Mulch after the soil warms. A 2-inch layer of straw or shredded leaves reduces evaporation and protects surface roots. Keep mulch 2 inches away from stems to reduce rot and slug shelter.
Fall and winter routine
Remove diseased plants and place them in the trash, not the compost pile, unless your compost reaches a reliable high temperature. Healthy leaves and spent plants can feed a home compost system.
In cold USDA Zones 3 through 6, leave the soil covered with mulch or a winter cover crop such as oats, crimson clover, or winter rye. In wet climates, keep leaves from forming a thick, soggy mat against the wood.
| Season | Main task | Why it matters |
|---|---|---|
| Early spring | Add compost and inspect joints | Restores nutrients and catches damage |
| Late spring | Install trellises and irrigation | Prevents rushed work after growth starts |
| Summer | Check water and harvest often | Supports fruit set and limits stress |
| Fall | Remove diseased debris | Reduces disease carryover |
| Winter | Mulch or plant cover crops | Protects soil from erosion and compaction |
A seasonal routine takes less time than repairing a neglected bed. Ten minutes each week can prevent most small problems from becoming expensive ones.
Fix common L-shaped bed problems
Most raised bed problems come from poor drainage, weak joints, compacted soil, or poor plant spacing. The L shape adds one extra concern: the inside corner can become difficult to reach and easy to overplant.
Why is the bed wall bowing?
Bowing usually means the wall lacks support or the soil is pushing outward. Wet soil weighs more than dry soil, and freeze-thaw movement adds force in northern zones.
Add a 4-by-4 post or exterior stake at the center of the wall. For a serious bow, remove some soil, straighten the board, and add a second board or metal brace. Do not simply drive more screws into a board that has already split.
Why does water pool in the bed?
Water can pool when the bed sits on compacted clay, plastic, concrete without drainage holes, or a low part of the yard. Heavy compost can also hold more water than expected.
Check the soil 4 inches down after rain. If it remains saturated for more than a day, improve the site drainage, add coarse organic material, or move the bed. Do not add gravel to the bottom of a soil bed as a general fix; it does not create a magic drainage layer and can reduce root space.
Why are plants growing poorly?
Poor growth may come from low sun, immature compost, compacted soil, low nitrogen, or root damage from pests. Pale older leaves often point to nitrogen shortage, but yellow leaves can also result from wet roots.
Use a soil test before adding fertilizer. If nitrogen is low, a balanced organic fertilizer such as 5-5-5 may help. Follow the label rate. Too much fertilizer can burn roots and push soft leafy growth that attracts aphids.
| Symptom | Likely cause | Practical response |
|---|---|---|
| Wall leans outward | Weak support or wet soil pressure | Add posts and reduce soil load |
| Plants wilt in wet soil | Poor drainage or root damage | Check base and improve drainage |
| Tomato leaves spot and yellow | Fungal or bacterial disease | Remove damaged leaves and improve airflow |
| Seedlings vanish overnight | Slugs, cutworms, or birds | Use collars, hand-pick pests, or add netting |
| Soil shrinks quickly | High compost content or dry mix | Add topsoil and water slowly |
| Inside corner stays empty | Poor reach or heavy shade | Use herbs, greens, or a container |
Treat the cause, not just the symptom. A wilted plant in dry soil needs water, while a wilted plant in soaked soil may need less water and better drainage.
Estimate cost, time, and lifespan
A basic DIY L-shaped raised bed often costs about $150 to $450, depending on lumber, soil delivery, hardware, and irrigation. Cedar and redwood raise the price. Bulk soil usually costs less than bags, but delivery fees vary by distance and order size.
Plan on four to eight hours for a first build, not counting soil delivery. A skilled gardener with prepared ground may finish the frame in two to three hours. Filling and planting can take another half day.
How long does the bed last?
Untreated cedar may last 8 to 15 years in many climates. Pressure-treated pine can last 10 to 20 years when the boards stay above standing water. In wet soil, poor drainage can cut that life sharply.
The first parts to fail are often the bottom board, inside corner, and screws near end grain. Inspect them every spring. Replace one damaged board rather than tearing down the whole bed.
| Construction choice | Typical cost level | Expected service life |
|---|---|---|
| Untreated pine | Low | 3–7 years |
| Ground-contact treated pine | Low to medium | 10–20 years |
| Cedar | Medium to high | 8–15 years |
| Redwood or cypress | High | 10–20 years |
| Stone or block | High labor | 20+ years |
These are broad ranges, not guarantees. Rain, snow, soil moisture, termites, sun, and construction quality all change the result.
Compare alternatives before you build
An L-shaped wooden bed suits many yards, but it is not the only choice. Galvanized metal beds last well and assemble quickly, while masonry beds resist rot but take more work. A simple rectangular bed may cost less and offer easier crop rotation.
Wood versus metal versus block
Wood is easy to cut and repair. Metal panels stay thin and leave more growing room, but they can heat soil in hot, dry regions. Concrete blocks last a long time, yet their rough edges can catch clothing and their hollow cores may need filling.
| Bed type | Best for | Main limitation |
|---|---|---|
| Wood L bed | DIY gardeners and natural looks | Boards eventually decay |
| Galvanized metal | Fast setup and long service life | Can heat up in hot sun |
| Concrete block | Permanent beds and slopes | Heavy, hard to move, more labor |
| In-ground garden | Low cost and large crops | More weeds and poor access |
| Grow bags or containers | Renters and small patios | Dry out faster and hold less soil |
Choose the L shape when the corner layout solves a real space problem. If you have an open, sunny yard, two straight beds may provide better access and simpler irrigation.
Use these practical building tips
Small choices can make the bed easier to use for years. Sand sharp corners, label the plant sections, and keep a few spare screws in a dry container. I also like to take a photo of the frame before filling it so I know where the support posts sit under the soil.
- Use exterior screws, not drywall screws. Drywall screws snap and rust quickly outdoors.
- Pre-drill near board ends, especially with cedar or dry pine.
- Use a level before every soil load.
- Keep the top edge below the height of a wheelbarrow tire if you move soil by hand.
- Install trellis posts before planting.
- Leave a clear path around the outer corner.
- Keep fertilizer and fresh manure away from young roots.
- Use row cover or insect netting when cabbage moths, flea beetles, or cucumber beetles appear.
💡 Pro Tip: Mark the north side of the bed with a small stake. That simple marker helps you place tall crops correctly each season, even after the bed fills with mulch.
Know when to hire a professional
Most gardeners can build a small L-shaped raised bed with basic tools. Hire a professional or get help when the site has a steep slope, buried utility lines, major drainage issues, or a retaining wall that holds back soil.
Call before digging if you are unsure where gas, electric, water, or communication lines run. In the United States, use the local utility-locate service before driving stakes or digging deeply.
A professional may also help if you need an accessible bed for a wheelchair. The bed height, path width, turning space, and irrigation controls need careful planning. A 24-inch-high bed can reduce bending, but it may not offer enough knee clearance for every gardener.
Frequently asked questions
Q: Can I build an L-shaped raised bed on grass?
A: Yes. Remove the sod or cover it with overlapping plain cardboard. Build on a level surface, and watch for aggressive perennial weeds. Do not use cardboard where the site stays flooded.
Q: How deep should an L-shaped raised garden bed be?
A: Twelve inches works for lettuce, herbs, radishes, and many vegetables. Eighteen inches gives more root room and is easier to reach. Root crops such as long carrots need deeper loose soil.
Q: Should I put landscape fabric under a raised bed?
A: Usually, no. Soil contact improves drainage and lets roots reach deeper ground. Use hardware cloth for rodent control, or fabric only when you need to block a known weed problem on a hard surface.
Q: What is the best wood for a raised garden bed?
A: Cedar, redwood, and cypress resist decay naturally. Ground-contact pressure-treated lumber also works and often costs less. Avoid unknown salvaged wood and old treated boards.
Q: How do I calculate soil for an L-shaped bed?
A: Divide the L into two rectangles, calculate length × width × depth for each, subtract the overlapping square, and convert cubic feet to cubic yards by dividing by 27. Add about 10% for settling.
Q: Can I use garden soil in a raised bed?
A: Use garden soil as part of the mix, not by itself. Heavy native clay can compact, while pure bagged potting soil costs too much and dries fast. Mix quality topsoil, compost, and an aeration material.
Q: How often should I water a raised garden bed?
A: Check the soil 2 inches down. Water when it feels dry at that depth. New plants may need daily checks, while established plants may need one to three deep waterings per week, based on weather and soil.
Q: Can tomatoes grow in an L-shaped raised bed?
A: Yes. Place tomatoes on the north side, give each plant strong sun and airflow, and use cages or stakes. Space plants according to the variety, often 18 to 36 inches apart.
Q: What should I plant in the inside corner?
A: Use compact herbs, lettuce, parsley, radishes, or flowers such as alyssum and calendula. Avoid tall crops that make the corner hard to reach or shade the rest of the bed.
Q: How do I stop an L-shaped bed from bowing?
A: Add corner posts and stakes along long walls before filling. Use supports every 3 to 4 feet for taller beds or wet climates. Replace split boards instead of forcing them back with more screws.
Q: Is an L-shaped raised bed worth the cost?
A: It is worth the cost when it improves access, uses an awkward corner, or gives you better control over poor soil. A rectangular bed or in-ground garden may be cheaper when space is open and level.
Final thoughts
A well-built L-shaped raised garden bed is simple in form, but the details matter. Keep the arms reachable, build on a firm level base, support long walls, and fill the bed with a balanced soil mix. Those steps prevent most failures before the first seed goes in.
Start with one modest bed rather than a large project you cannot maintain. After one full season, you will know where the sun falls, which crops thrive, how fast the soil dries, and whether the inside corner works for your body. Then you can add a second bed, a trellis, drip irrigation, or a pollinator border with confidence.
Meta description: Learn how to build an L-shaped raised garden bed with clear plans, tool lists, soil math, safe lumber tips, assembly steps, plant ideas, costs, maintenance, and common fixes.