How To Build A Corner Garden: Easy Design Guide
A corner garden can turn an empty, awkward space into one of the most useful parts of your yard. A sunny corner can grow tomatoes, basil, peppers, and flowers for bees. A shady corner can hold ferns, hostas, coral bells, and a small bench. Even a narrow space beside a fence can become a neat garden with the right layout.
The key is to study the corner before you dig. Check the sun, soil, drainage, wind, nearby roots, and access to water. Then choose plants that fit the space instead of forcing the space to fit plants. I have built corner beds in heavy clay, dry sandy soil, and small urban yards, and the same rule always wins: start small, improve the soil, and leave room to reach every plant.

Quick Answer: How Do You Build a Corner Garden?
To build a corner garden, measure the space, watch its light for one full day, test drainage and soil, choose a simple shape, improve the soil with compost, and plant in layers. Place tall plants at the back, medium plants in the middle, and low plants along the edge. Add mulch, water deeply, and keep paths wide enough for care.

A corner garden can be in the ground, in a raised bed, or in containers. The best choice depends on your soil, budget, mobility, and the plants you want to grow. Most small corner gardens cost about $50 to $500, depending on edging, soil, plants, irrigation, and hardscape.
Start by Reading the Corner
The best garden plan begins with observation, not shopping. Spend one day checking the corner in the morning, at noon, and late afternoon. Note where shadows fall, where water collects after rain, and whether a fence blocks wind or reflects heat.
A corner beside a south- or west-facing wall may receive strong heat. This works well for rosemary, thyme, lavender, peppers, and tomatoes, but it can stress lettuce and other cool crops. A north-facing corner may receive bright shade or only a few hours of sun, which suits hostas, ferns, astilbe, and some leafy greens.

Measure Sunlight and Space
Use a tape measure to record the length of each side. Also measure the height and width of nearby gates, steps, and paths. A garden that looks spacious on paper can feel cramped once plants mature.
Most vegetables need at least six hours of direct sun. Fruiting crops such as tomatoes, cucumbers, squash, and eggplant often perform better with eight hours. Many herbs need six hours, while leafy crops such as lettuce, spinach, and arugula can grow with four to six hours.
Check Drainage Before Planting
Dig a hole about 12 inches wide and 12 inches deep. Fill it with water and let it drain. Fill it again and watch how fast the water drops.
If the water drains within a few hours, the site probably has acceptable drainage. If water remains after 24 hours, you may need a raised bed, a drainage channel, or plants that tolerate wet soil. Do not place gravel under a shallow bed and expect it to solve poor drainage. That often creates a perched water layer instead.
Find the Best Access Point
You need to reach the center of the garden without stepping on the soil. In a large corner, add a narrow path or stepping stones. In a small bed, keep the width below four feet so you can reach the middle from both sides.
Leave at least 30 inches for a main walking path. A 36-inch path feels much better if you use a wheelbarrow, garden cart, or mobility aid. Good access saves plants from broken stems and saves your back during weeding.
Choose the Right Corner Garden Style
The best corner garden style depends on the site and your goals. A simple soil bed costs less than a raised bed, but a raised bed gives you more control over soil and drainage. Containers offer the most flexibility, though they dry out faster.

In-Ground Corner Bed
An in-ground bed works well when the soil drains fairly well and you want a natural look. You can outline it with metal edging, brick, stone, logs, or a simple spade-cut border.
This option suits perennial flowers, shrubs, herbs, and many vegetables. It also gives plant roots more room to spread. Before digging, call 811 in the United States to locate buried utility lines.
Raised Corner Bed
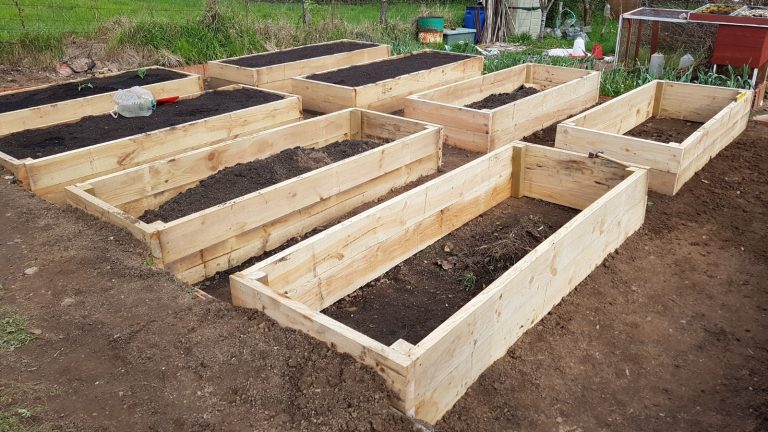
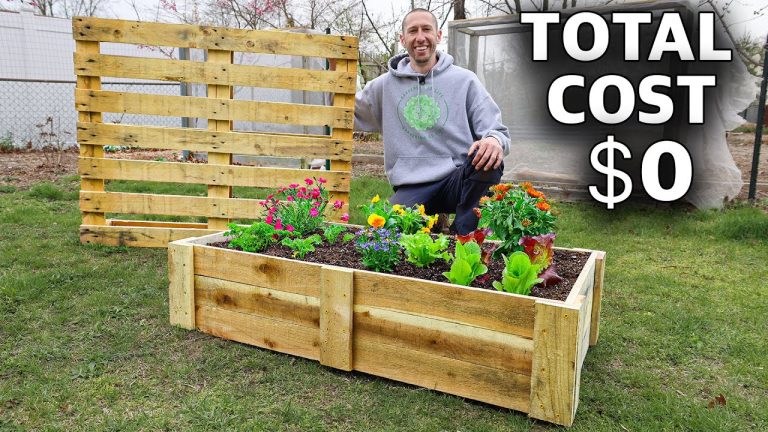
A raised bed is useful in heavy clay, compacted soil, or areas with poor drainage. A bed 8 to 12 inches tall works for most annual flowers and vegetables. Deep-rooted crops such as carrots and parsnips need at least 12 to 18 inches of loose soil.
Use untreated cedar, redwood, composite boards, or stone. Avoid old railroad ties and wood treated with unknown chemicals. A corner raised bed can be triangular, L-shaped, or rectangular, but avoid narrow points that dry out quickly.
Container Corner Garden
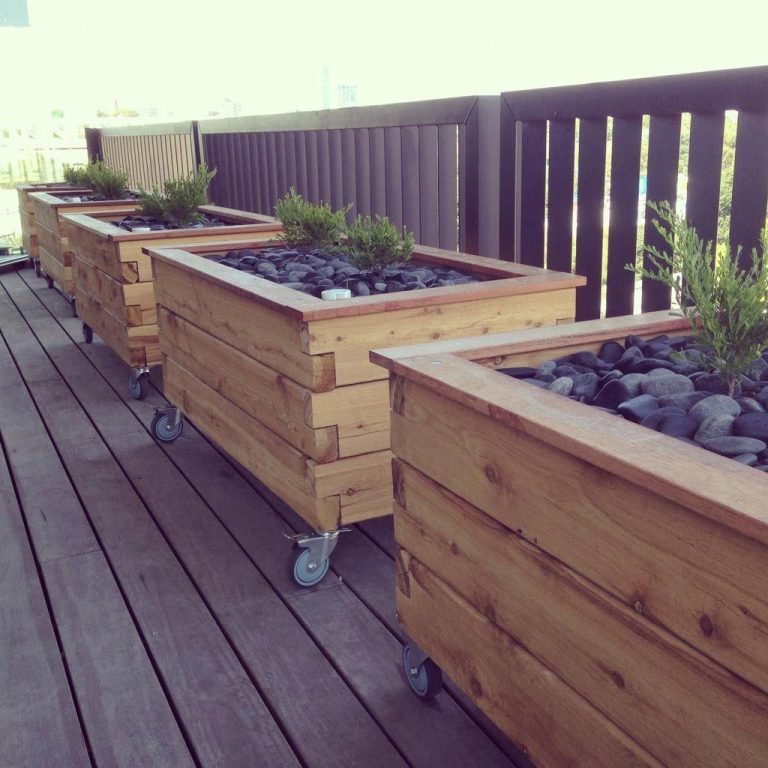
Containers are a good answer for patios, balconies, rentals, and paved corners. Use pots at least 12 inches wide for herbs and 18 to 24 inches wide for tomatoes or peppers. Large pots hold moisture longer than small pots.
Use potting mix, not garden soil, in containers. Garden soil becomes hard and airless in a pot. Choose containers with drainage holes, and place them where you can reach them with a hose.
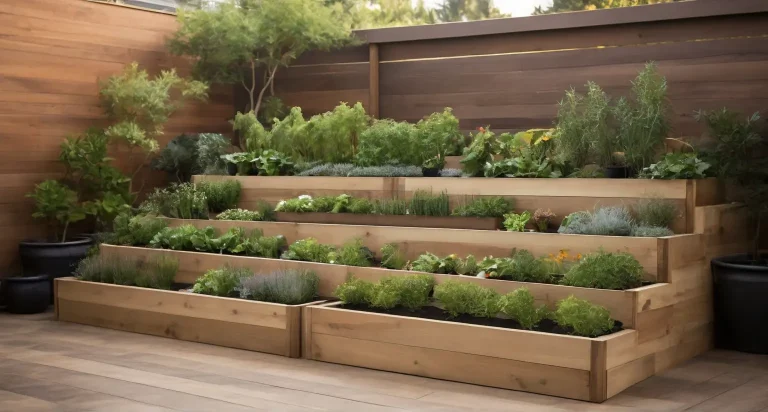
Layered Ornamental Corner
A layered corner garden combines a tall anchor plant, shrubs, perennials, ground covers, and mulch. This style can make a bare fence line feel established within one season.
Try a dwarf serviceberry, Japanese maple, or hydrangea as a focal point where the climate allows. Add coral bells, coneflowers, salvia, catmint, and creeping thyme around it. Check mature size before planting. A one-gallon shrub may become six feet wide.
The table below compares the main garden styles by cost, control, and effort.
| Garden style | Best use | Main limitation |
|---|---|---|
| In-ground bed | Large planting areas and natural borders | Soil may need major improvement |
| Raised bed | Clay, poor drainage, or easier access | Higher cost and more drying |
| Containers | Small spaces, rentals, and patios | Frequent watering and feeding |
| Layered ornamental bed | Low-maintenance beauty and wildlife | Plants need careful spacing |
An in-ground bed is usually the lowest-cost choice. A raised bed is often worth the money where drainage or soil quality causes trouble. Containers work best when you can check them often.
Plan the Shape and Plant Layers
A corner garden looks balanced when the shape echoes the space. An L-shaped bed works well along two fences. A quarter-circle softens a hard corner. A triangle can fit a small junction, but avoid making the point too narrow for planting.
Keep the tallest plants along the back or in the deepest part of the corner. Place medium plants in front of them, then use low plants at the edge. This creates depth and prevents small plants from disappearing.

Use a Simple Spacing Rule
Plan for mature width, not the size of the plant in its nursery pot. If a coneflower grows 18 to 24 inches wide, allow that space even when the plant looks tiny.
For annual vegetables, use spacing from the seed packet. Tomatoes may need 18 to 36 inches, depending on the variety and support system. Bush beans often need 4 to 6 inches, while cucumbers need a trellis or 12 to 24 inches of ground space.
Add a Focal Point
A focal point gives the eye somewhere to rest. It can be a small tree, a tall ornamental grass, a birdbath, a large pot, or a simple bench.
Choose one main focal point in a small corner. Too many strong features make the garden look busy. A dark-leaved plant such as ‘Black Pearl’ pepper, purple smoke bush, or ‘Obsidian’ heuchera can also create contrast.
Group Plants by Water Need
Place plants with similar water needs together. Lavender, sage, rosemary, and sedum prefer soil that dries between waterings. Lettuce, parsley, astilbe, and cardinal flower need more even moisture.
This approach prevents overwatering drought-tolerant plants just to keep thirsty plants alive. It also makes drip irrigation easier to install and adjust.
Gather Tools and Materials
You do not need a long list of expensive tools to build a corner garden. A sharp spade, hand trowel, rake, tape measure, garden hose, level, gloves, and wheelbarrow can handle most small projects.
A soil test gives better information than guesswork. Most garden plants prefer a pH between 6.0 and 7.0, though blueberries prefer more acidic soil near pH 4.5 to 5.5. A lab test can also show phosphorus, potassium, calcium, and organic matter levels.

| Material or tool | Suggested amount for a small corner | Purpose |
|---|---|---|
| Compost | 2–4 inches over the bed | Adds organic matter and improves soil |
| Mulch | 2–3 inches | Holds moisture and limits weeds |
| Spade and hand trowel | 1 each | Digging and planting |
| Tape measure and level | 1 each | Layout and even edging |
| Soaker hose or drip line | 25–50 feet | Slow, deep watering |
| Plant supports | As needed | Keeps tomatoes, peas, and flowers upright |
Buy quality hand tools with comfortable grips and solid steel blades. A flimsy trowel often bends in clay. For larger beds, a digging fork can loosen soil with less damage to earthworms than repeated tilling.
Build the Garden Step by Step
Building a corner garden is easier when you complete the work in stages. Do not rush to plant before you solve drainage, access, and soil problems. A well-prepared bed can save hours of repair later.

1. Mark the Garden Outline
Use a garden hose to draw the shape on the ground. A hose lets you adjust curves before you commit. For straight beds, use stakes and string.
Walk around the outline and check the view from windows, doors, and the street. Make sure the bed does not block a gate, cover a drain, or create a trip hazard. Leave space around fences so you can paint, repair, or inspect them.
2. Remove Weeds and Grass
Cut the existing grass short. Remove perennial weeds such as bindweed, quackgrass, and Canada thistle by the roots when possible. Do not add weeds with mature seed heads to a home compost pile.
For a no-dig start, cover grass with overlapping cardboard. Wet the cardboard, add 4 to 6 inches of compost and soil, and wait several weeks before planting shallow-rooted annuals. For a faster start, remove the sod with a flat spade.
3. Improve the Soil
Spread 2 to 4 inches of finished compost over the bed. Mix it into the top 6 to 8 inches if the soil is compacted. Do not add large amounts of sand to clay soil; the mix can become like concrete.
Heavy clay benefits from compost, leaf mold, and plant roots over time. Sandy soil needs compost and mulch to hold water. Avoid fresh manure, which can burn roots and may contain excess salts or weed seeds.
4. Build the Edge or Frame
Install edging after the soil is prepared. Set wood, stone, or metal firmly so it cannot shift into a path. Check the top with a level, but do not worry if a natural stone edge has small variations.
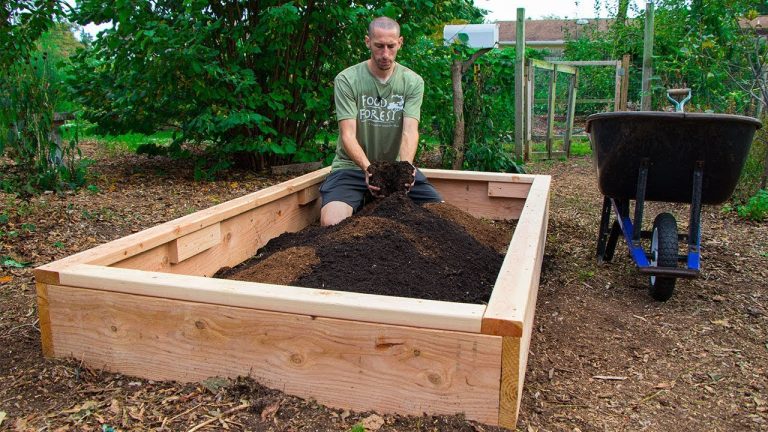
For a raised bed, keep the frame level and secure. Add soil in layers rather than dumping one large pile in the center. Fill the bed with about 60% topsoil, 30% compost, and 10% aged bark or another stable organic material.
5. Install Watering Before Planting
Lay out a soaker hose or drip line before the plants go in. It is much easier to adjust tubing on bare soil. Keep emitters near the root zones, not against the plant stems.
A timer can reduce missed watering. In my Zone 6 garden, new beds need water two or three times per week during hot summer weather, but rainfall can change that schedule. Always check the soil first.
6. Place Plants While They Are Still in Pots
Set plants on the soil surface before digging. Move them until the height, color, and spacing look right. This is the easiest point to correct a poor layout.
Put shrubs and tall perennials at the back. Place plants with similar leaf shapes in groups of three or five instead of scattering one of everything. Repetition makes a small corner look calm and planned.
7. Plant at the Correct Depth
Dig a hole as deep as the root ball and about twice as wide. Set the plant so the top of the root ball sits level with the soil surface. Burying stems can cause rot, especially in tomatoes, peppers, lavender, and woody herbs.
Loosen circling roots on pot-bound plants. Water the hole before planting in dry soil. Backfill with the soil you removed, press gently, and water again.
8. Add Mulch
Spread 2 to 3 inches of shredded bark, chopped leaves, pine straw, or composted mulch. Keep mulch 2 to 3 inches away from plant stems and tree trunks.
Thick mulch against stems creates a damp hiding place for slugs, voles, and fungal disease. Mulch should protect the soil, not smother the plant crown.
9. Label and Record the Layout
Write down plant names, varieties, planting dates, and sun conditions. Labels help when a plant is dormant or slow to emerge. A simple phone photo also helps you remember where bulbs and perennials are planted.
After four weeks, inspect the bed for leaning plants, dry spots, weeds, and pest damage. Small corrections are easier than major changes after roots spread.
Pick Plants for Sun, Shade, and Climate
Plant choice decides whether a corner garden thrives or struggles. Match each plant to light, soil moisture, winter temperature, and mature size. USDA hardiness zones help with winter survival, but they do not tell you how much sun or water a plant needs.

Sunny Corner Plant Ideas
For six or more hours of sun, consider:
- Tomatoes such as ‘Sungold’ or ‘Celebrity’
- Peppers such as ‘Jimmy Nardello’ or ‘King of the North’
- Basil, thyme, oregano, and sage
- Coneflower, yarrow, salvia, and catmint
- Lavender in sharply drained soil
- Strawberries in a raised bed or container
- Zinnias, marigolds, and calendula for pollinators
Tomatoes and peppers need warm soil and steady moisture. Basil grows quickly but suffers when nights stay cold. Lavender often fails in wet clay, even when it receives full sun.
Part-Shade Corner Plant Ideas
For four to six hours of sun or bright shade, try:
- Lettuce, spinach, kale, and arugula
- Parsley, chives, cilantro, and mint in containers
- Coral bells, hostas, and Japanese forest grass
- Astilbe, foxglove, and bleeding heart
- Begonias and impatiens
- Alpine strawberries
Morning sun and afternoon shade can protect plants from heat in USDA Zones 7 through 10. In cooler Zones 3 through 6, a part-shade site may support more sun-loving plants during summer.
Dry Corner Plant Ideas
A dry corner near a wall or roof overhang needs drought-tolerant plants. Use sedum, hens-and-chicks, yarrow, Russian sage, thyme, and ornamental grasses where they are hardy.
Water new drought-tolerant plants regularly during their first season. A plant becomes drought-resistant after its roots establish, not the day you put it in the ground.
Wet Corner Plant Ideas
For damp soil, consider swamp milkweed, cardinal flower, iris, sedges, astilbe, and turtlehead. Do not plant a moisture-loving species in a dry raised bed and expect it to thrive.
If the wet spot comes from a downspout, redirect the water first. A rain garden with native plants may solve the problem while supporting butterflies and birds.
The table below gives a simple plant match for common corner conditions.
| Site condition | Plants to consider | Plants to avoid |
|---|---|---|
| Full sun, dry soil | Lavender, sedum, thyme, yarrow | Astilbe, lettuce, cardinal flower |
| Full sun, moist soil | Tomato, basil, coneflower, bee balm | Lavender in heavy clay |
| Part shade | Hostas, coral bells, parsley, spinach | Sunflowers, lavender, rosemary |
| Wet soil | Swamp milkweed, sedges, iris | Cactus, sage, thyme |
| Hot wall or patio | Peppers, rosemary, oregano, zinnias | Cool-season lettuce in midsummer |
The table is a starting point, not a strict rule. Cultivars differ, and local weather can change plant behavior from one season to the next.
Water, Feed, and Maintain the Bed
New plants need close care during the first six weeks. Water slowly and deeply when the top 1 to 2 inches of soil feel dry. A quick sprinkle wets leaves but may not reach the root zone.
Morning watering reduces evaporation and gives leaves time to dry. Drip irrigation sends water to the soil with less waste than overhead sprinklers. In containers, check moisture daily during hot, windy weather.

| Plant group | Watering guide after establishment | Feeding guide |
|---|---|---|
| Vegetables | About 1 inch per week, more in heat | Compost plus balanced fertilizer as needed |
| Herbs | Let soil dry slightly between waterings | Light feeding; avoid rich nitrogen |
| Perennials | Deep watering during dry spells | Compost in spring; little extra fertilizer |
| Containers | Check daily in hot weather | Liquid feed every 2–4 weeks |
| Native plants | Water during the first season | Usually little fertilizer |
Do not follow the table during heavy rain or drought restrictions without checking the soil. A rain gauge can show whether the garden received enough water. One inch of rain usually wets the soil more evenly than a short hand-watering session.
Fertilize Based on Soil Needs
Compost is often enough for a new ornamental bed. Vegetables may need more nutrients, especially nitrogen for leafy growth and potassium for fruit production. Use a soil test before adding phosphorus.
A balanced fertilizer such as 5-5-5 can support mixed plantings. A high-nitrogen feed can produce large leaves but fewer flowers and fruits. Never use fertilizer as a substitute for poor soil structure or weak light.
Control Weeds Early
Pull weeds when they are small. A five-minute check twice a week works better than one exhausting session each month. Mulch blocks many annual weeds, but perennial weeds can grow through it.
Use a hand cultivator only near shallow-rooted plants. Deep hoeing can cut roots and bring new weed seeds to the surface. Remove weeds before they flower and set seed.
Watch for Pests and Disease
Common pests include aphids, slugs, flea beetles, tomato hornworms, spider mites, and squash bugs. Look under leaves and along stems. A strong water spray can remove aphids, while handpicking works well for hornworms and squash bugs.
Good airflow limits powdery mildew and leaf spot. Do not crowd plants or water foliage late in the day. Remove diseased leaves and place them in the trash if the disease may spread through compost.
Avoid These Corner Garden Mistakes
Most failed corner gardens do not fail because of one bad plant. They fail because the site, layout, and maintenance plan do not match. Small corners also make mistakes more visible, so thoughtful planning matters.

| Mistake | What happens | Better choice |
|---|---|---|
| Planting too close | Crowding, weak airflow, disease | Use mature plant width |
| Ignoring shade | Leggy plants and poor flowers | Track sun before planting |
| Using garden soil in pots | Hard, slow-draining mix | Use quality potting mix |
| Mulching against stems | Rot and pest shelter | Leave a bare ring |
| Skipping a water plan | Dry plants and missed care | Add drip or a clear routine |
| Choosing too many species | Busy, uneven appearance | Repeat a few reliable plants |
The most common mistake I made was planting a dwarf shrub too close to a fence. It looked small in spring, then pressed into the fence by the next summer. I had to move it in autumn, which caused more stress than giving it extra space at the start.
Another mistake was using black plastic around a sunny herb bed. The plastic heated the soil and made watering uneven. Organic mulch worked better and improved the soil as it broke down.
Add Pollinators and Helpful Companions
A corner garden can support bees, butterflies, hummingbirds, and beneficial insects. Plant flowers with different bloom times so food remains available from spring through fall.
Native plants usually support local insects better than unfamiliar ornamentals. In the eastern United States, native options may include milkweed, asters, goldenrod, mountain mint, and coneflower. In the West, look for regional buckwheat, penstemon, lupine, and native sage.

Companion planting can help with space and timing, but it is not magic pest control. Basil grows well near tomatoes because both like warm conditions. Chives, dill, and alyssum attract beneficial insects, while marigolds add color and may help cover bare soil.
Avoid spraying broad-spectrum insecticides while flowers are open. If treatment is needed, identify the pest first and use the least harmful option. Even organic products can harm bees when misused.
Make the Garden Work Through the Seasons
A corner garden changes through the year. Good design includes spring bulbs, summer flowers, fall color, and winter structure. Evergreen foliage, seed heads, stems, stones, and bark can keep the bed from looking empty in winter.

| Season | Main tasks | Good planting choices |
|---|---|---|
| Spring | Test soil, add compost, plant cool crops | Lettuce, peas, pansies, kale |
| Summer | Mulch, water, stake, harvest | Basil, tomatoes, zinnias, peppers |
| Fall | Divide perennials, plant bulbs, clean lightly | Garlic, tulips, asters, spinach |
| Winter | Protect pots, check structures, plan changes | Evergreen shrubs and ornamental grasses |
Do not cut every perennial to the ground in fall. Seed heads provide food for birds and hollow stems shelter insects. Remove diseased foliage, but leave healthy structure until late winter or early spring.
In USDA Zones 3 through 5, protect tender container plants from freeze damage. In Zones 8 through 10, focus more on heat, irrigation, and winter sun. Climate changes the work, but the design principles stay the same.
My Experience Building Corner Gardens
I built one of my first productive corner gardens along a west-facing fence in Zone 6. The site received seven hours of sun, but the fence reflected heat and dried the soil by late June. Tomatoes loved it, while lettuce bolted within days.
I replaced the lettuce with peppers, basil, thyme, and zinnias. I also added a 2-inch layer of shredded leaf mulch and ran a soaker hose for 45 minutes twice a week. After four weeks, the plants were steadier, and the soil stayed cooler.
Another corner sat under a maple tree. I first tried tomatoes there, but the roots competed for water and the plants grew thin. Hostas, coral bells, heucheras, and woodland phlox worked far better.
The unexpected lesson was that a corner does not need to produce food to be valuable. A shady planting of native flowers and a small seat became the place where I spent the most time. Garden success is not only measured in pounds of vegetables.
Estimate Time and Cost
A small 4-by-6-foot corner bed can be built in a weekend if the soil needs little work. Removing sod, moving soil, or building a raised frame may add another one to three days. Planting takes less time than preparing the site.
Current pricing ranges from about $50 for a simple in-ground bed with seeds and compost to $500 or more for a framed raised bed with purchased soil, mature plants, edging, and irrigation. Reusing stone, dividing plants, and growing from seed can reduce the cost.

| Project size | Typical time | Approximate cost |
|---|---|---|
| 3-by-3-foot container corner | 2–4 hours | $60–$200 |
| 4-by-6-foot in-ground bed | 1–2 days | $50–$250 |
| 4-by-8-foot raised bed | 1–3 days | $200–$600 |
| Large layered corner | 2–5 days | $300–$1,000+ |
Costs vary by region, plant size, lumber prices, and soil delivery. Mature shrubs cost more but create an immediate effect. Seeds cost less but require more time and care.
Know When to Hire Help
You can build most small corner gardens yourself. Hire a professional when the project involves retaining walls, electrical lines, drainage changes, irrigation backflow, large trees, or unstable slopes.
A landscape designer can help with scale and plant selection. An arborist should assess tree roots and major limbs. A drainage contractor may be needed if water threatens your foundation or repeatedly floods the corner.
Do not use a tiller near tree roots, buried utilities, or shallow irrigation lines. A hand fork takes longer but gives you better control in tight spaces.
FAQs About Building a Corner Garden
Q: What is the best shape for a corner garden?
A: An L-shaped bed usually works best along two walls or fences. A curved bed softens a hard corner, while a small quarter-circle fits a patio or entry area. Choose a shape that leaves room to walk and reach the center.
Q: How deep should a corner garden bed be?
A: Most flowers and vegetables need 8 to 12 inches of soil. Carrots, parsnips, shrubs, and deep-rooted perennials need 12 to 24 inches. The bed depth matters less than good drainage and loose soil.
Q: Can I build a corner garden in full shade?
A: Yes. Use plants suited to shade, such as hostas, ferns, coral bells, astilbe, hellebores, and Japanese forest grass. Avoid tomatoes, peppers, lavender, and most flowering herbs unless the site receives enough direct sun.
Q: How do I build a corner garden with poor soil?
A: Use compost, leaf mold, and mulch to improve soil over time. A raised bed gives faster control over clay, compacted soil, or contamination concerns. Do not add large amounts of sand to clay.
Q: Should I use landscape fabric under a corner garden?
A: Usually no for planting beds. Landscape fabric can restrict root growth, become exposed, and make future planting harder. A thick layer of organic mulch controls most weeds while feeding the soil as it breaks down.
Q: How often should I water a new corner garden?
A: Check the soil daily for the first week. Water when the top inch feels dry, then water deeply. Most new plants need two or three deep waterings each week during hot, dry weather, but rainfall and soil type change the schedule.
Q: How do I stop a corner garden from drying out?
A: Add 2 to 3 inches of mulch, group plants by water needs, use drip irrigation, and choose plants suited to the site. A large raised bed or large container holds moisture better than a narrow bed or small pot.
Q: What can I grow in a north-facing corner?
A: Try hostas, ferns, coral bells, hellebores, astilbe, mint in a container, parsley, spinach, and lettuce. Light reflected from pale walls can improve growth, but a dark wall may create deeper shade.
Q: Can I build a garden beside a fence?
A: Yes, but leave space for access and maintenance. Keep shrubs far enough from the fence to reach both sides when possible. Check local rules before attaching trellises or irrigation to a shared fence.
Q: How long does it take for a corner garden to fill in?
A: Annuals can look full within six to eight weeks. Perennials often need one full season to establish and two or three seasons to reach mature size. Shrubs may take several years, depending on the variety and climate.
Q: What is better for a corner garden: raised beds or containers?
A: Raised beds hold more soil and need less frequent watering. Containers offer more control and work well on patios or rental properties. Choose raised beds for production and containers for flexibility.
Q: How do I protect a corner garden from rabbits and deer?
A: Use 24- to 36-inch fencing for rabbits and 7- to 8-foot fencing for deer where practical. Repellents can help but need regular application. Choose plants that local wildlife tends to avoid, though no plant is completely deer-proof.
Q: Can a corner garden grow food and flowers together?
A: Yes. Mix herbs, vegetables, and flowers by light and water needs. Basil, calendula, nasturtium, chives, alyssum, and marigolds can add color while supporting pollinators. Keep aggressive mint in a container.
Q: What should I plant first in a new corner garden?
A: Start with the permanent structure, such as a small tree, shrub, trellis, or path. Then add reliable plants that match the site. Wait before buying rare plants until you learn how the corner behaves through one season.
Build a Corner Garden That Fits Real Life
A successful corner garden does not need a perfect design or a large budget. It needs the right plant for the right light, healthy soil, steady water, and enough room for future growth. Begin with a small outline, improve what you can, and choose plants that make care simple.
If the corner receives strong sun, grow herbs, vegetables, flowers, and berries. If it stays cool and shaded, create a leafy retreat with ferns, hostas, coral bells, and a place to sit. The best corner garden is the one you can reach, enjoy, and maintain season after season.
Meta description: Learn how to build a corner garden with simple layouts, soil tips, plant ideas, watering advice, costs, tools, and step-by-step instructions for sun or shade.