How To Build A Raised Garden Bed On Legs: Easy DIY Guide
A raised garden bed on legs gives you a productive growing space without asking you to kneel, bend, or fight poor soil. It works well on patios, decks, balconies, driveways, and small yards. The extra height can also reduce weed pressure and make daily care easier for gardeners with back or knee pain.
I have built raised beds from cedar, pine, and metal kits in gardens from USDA Zone 5 to Zone 9. The frame is not the hard part. The real work lies in making the legs strong, adding safe drainage, choosing a light soil mix, and matching the bed depth to the plants you want to grow.
This guide explains how to build a raised garden bed on legs from common materials. You will learn how high to make it, how much soil it needs, how to stop rot, which plants grow well, and how to keep the bed stable for many seasons.

Quick Answer: Build the Frame First, Then Add Drainage and Soil
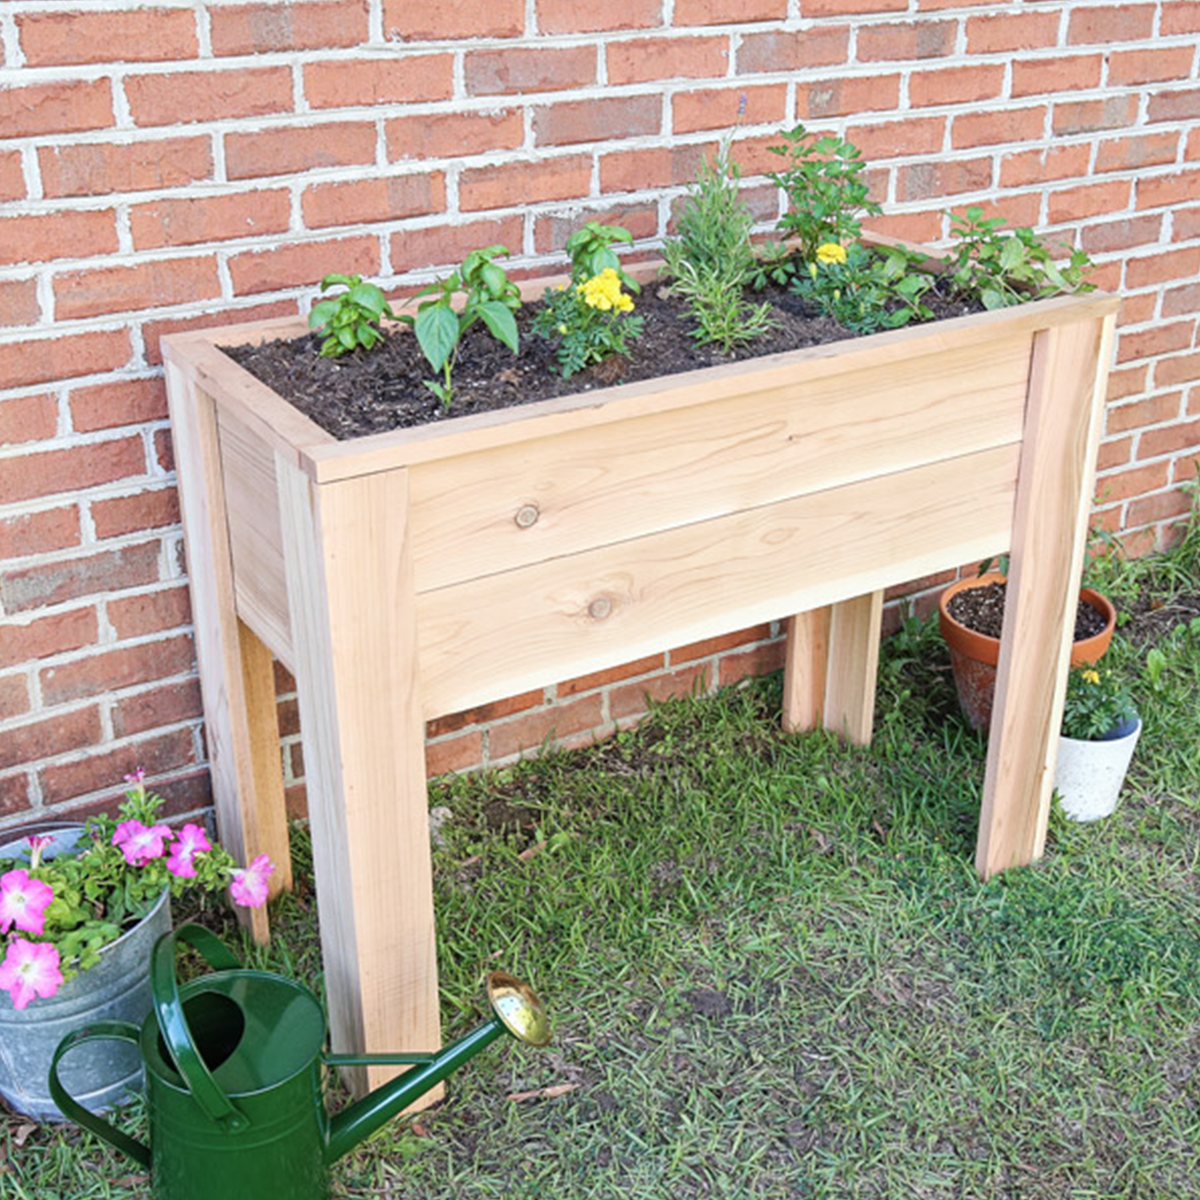
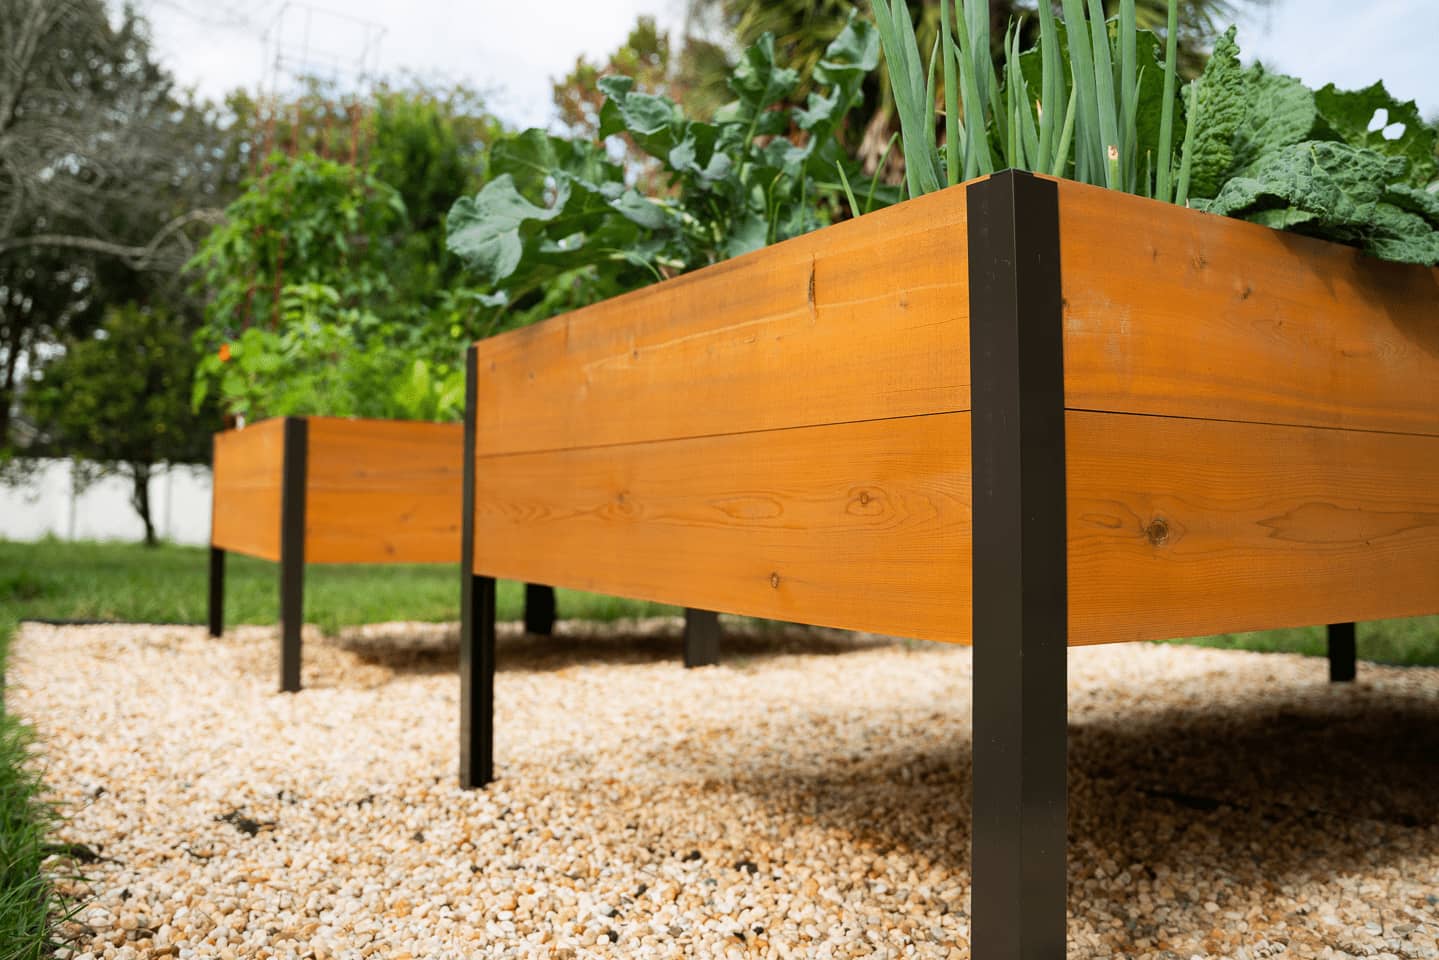
To build a raised garden bed on legs, make a sturdy box from rot-resistant boards, attach four strong legs with bolts or structural screws, add a support shelf beneath the soil, and drill drainage holes in the base. A practical size is 2 feet wide by 4 feet long and 30 to 36 inches tall. Fill it with a light mix of compost, topsoil, and coconut coir or peat moss.
Choose the Right Design Before You Cut Wood
The best raised garden bed on legs has a narrow width, strong corner joints, open drainage, and a lower shelf that supports the full weight of wet soil. Start with the plants, not the lumber. Leafy greens need less depth than tomatoes or carrots, and that choice affects the bed height, soil cost, and leg strength.
Decide How High the Bed Should Be
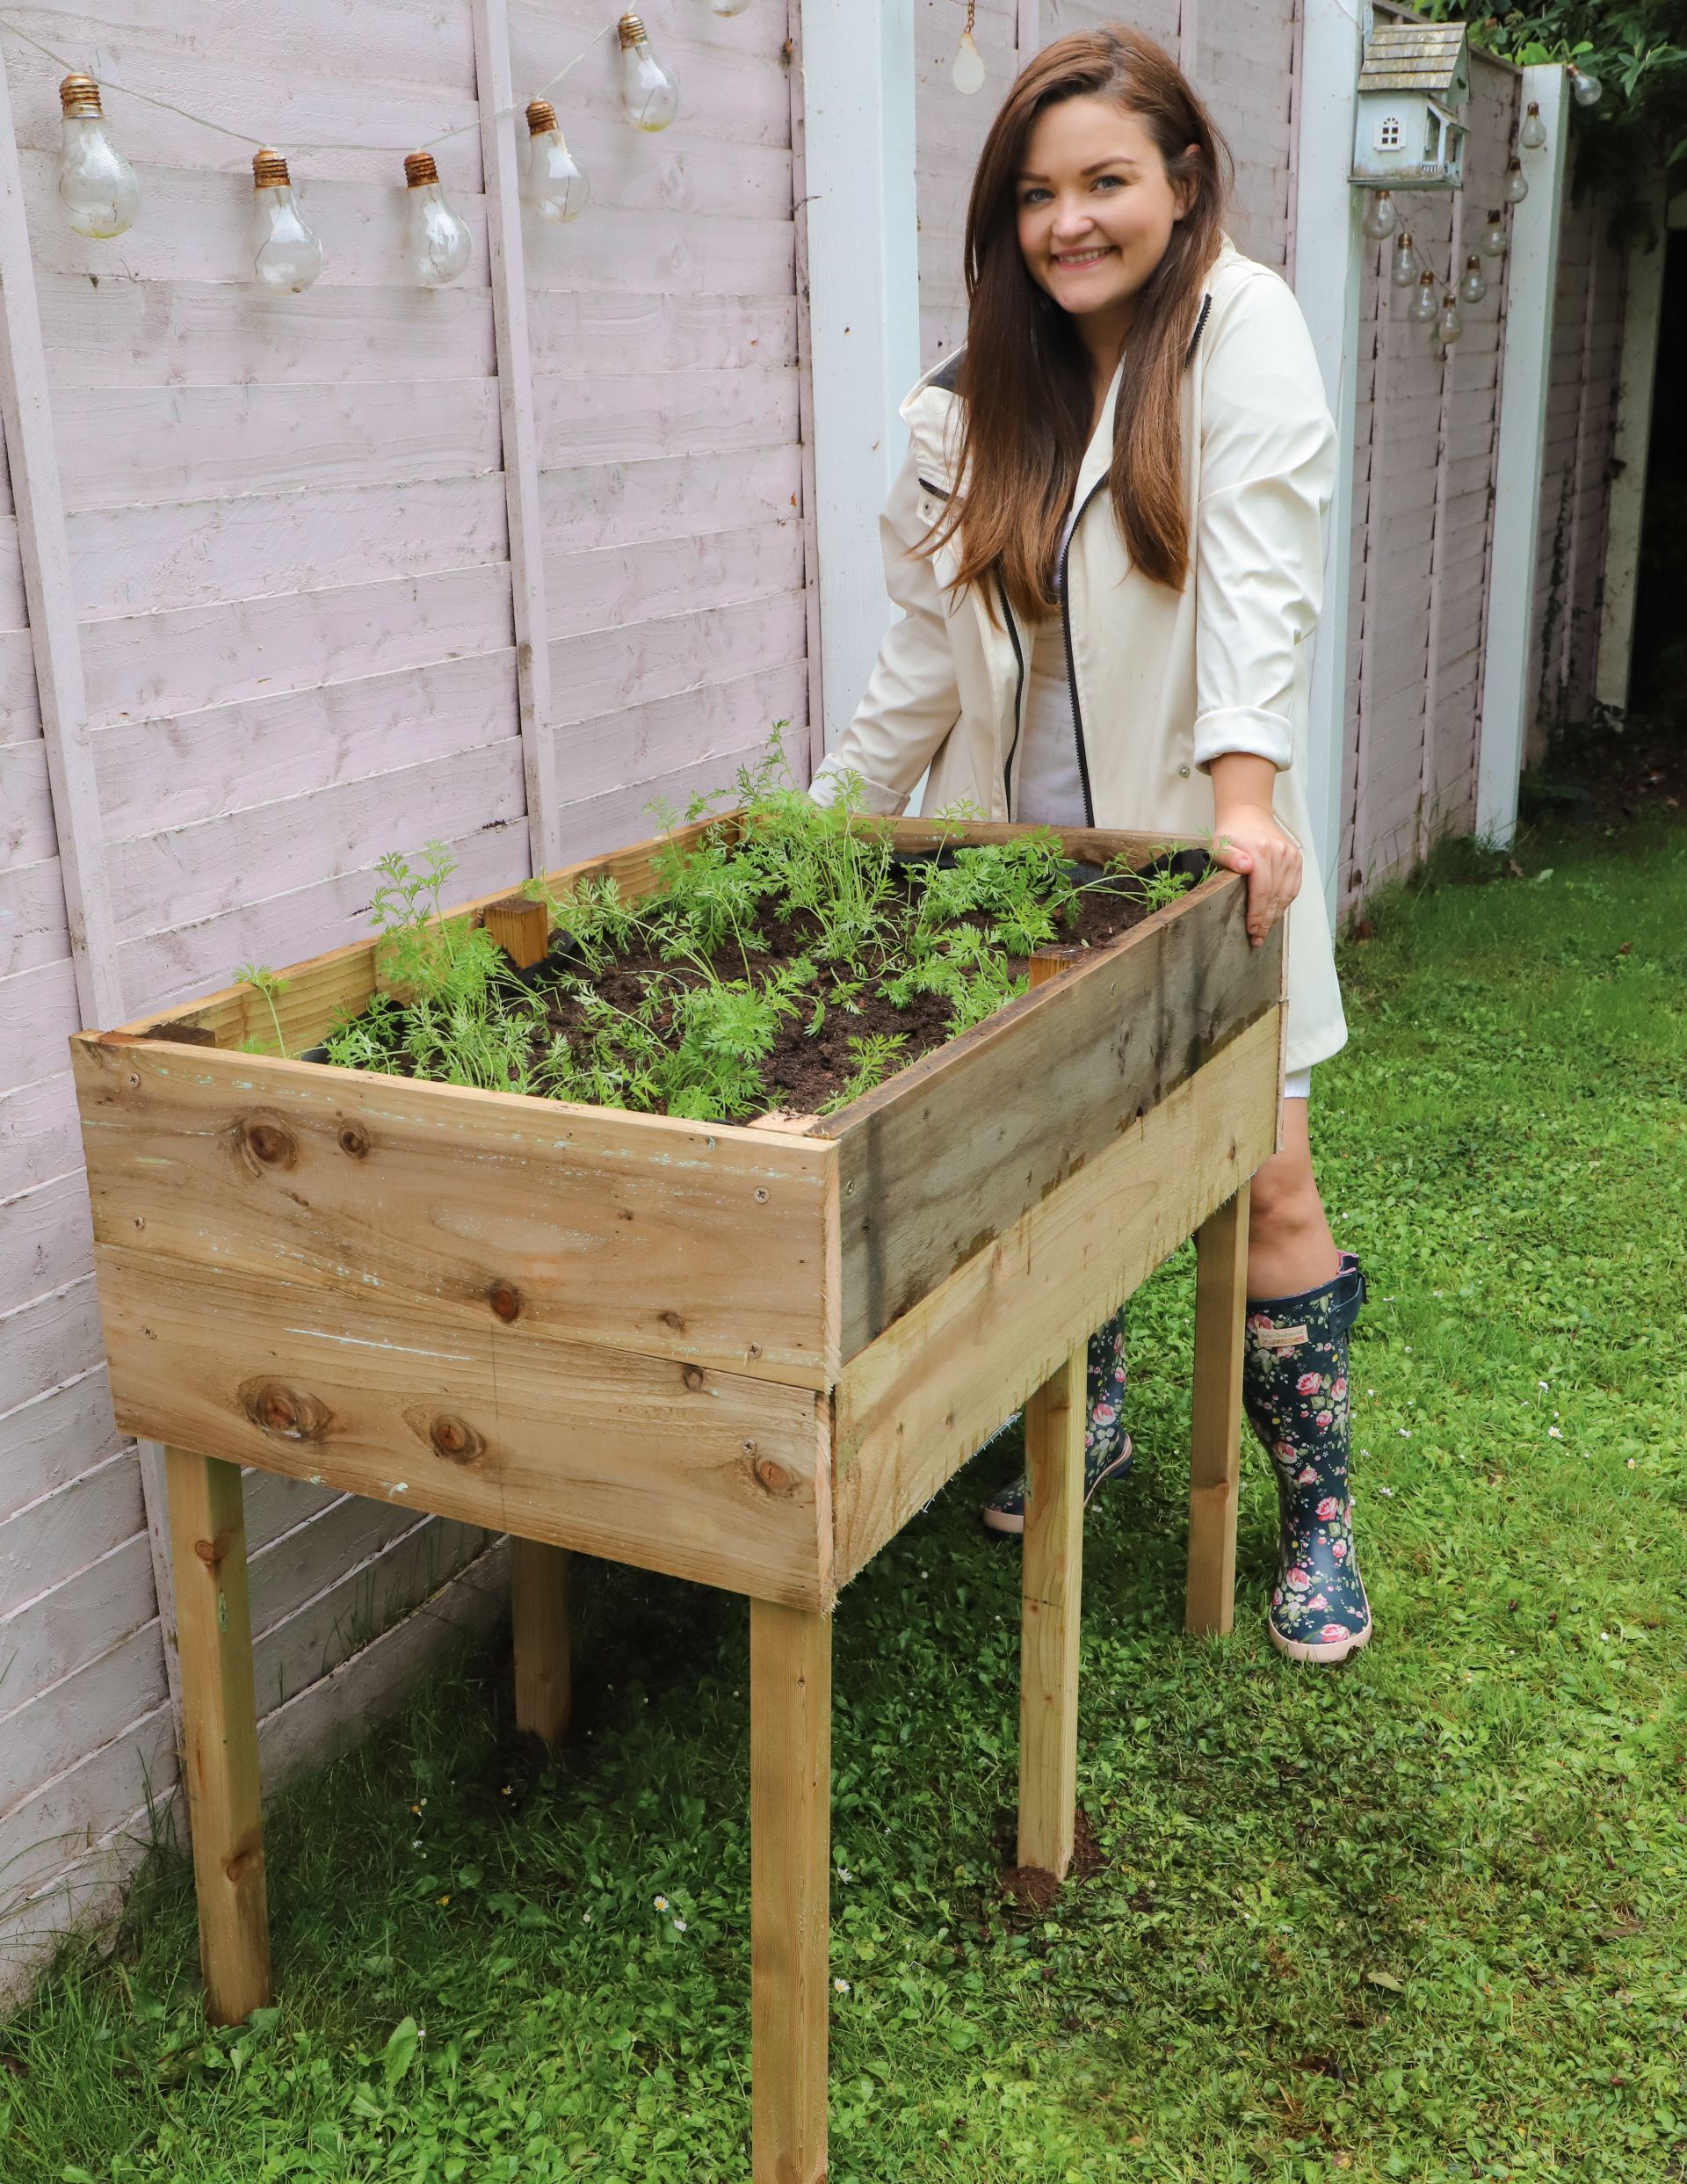
A bed that stands 30 to 36 inches high works well for most adults. This height lets you garden while standing or sitting on a stool. A 24-inch bed may suit children or wheelchair users, while a 40-inch bed can help someone who cannot bend at all.
Remember that the growing box adds to the total height. A 30-inch frame with 6-inch legs stands only 36 inches high, but a 24-inch frame on 30-inch legs stands 54 inches high. Tall beds need wider legs, cross braces, and a low center of gravity.
Keep the Width Manageable
Keep a raised bed on legs no more than 24 inches wide if you can reach it from one side. A 36-inch width works only when you can reach both sides. If the bed sits against a wall, make it 18 to 24 inches wide.
For length, 4 feet is easy to move and easy to reach. A 6-foot bed offers more growing room, but the long sides may bow unless you add a center brace. I prefer two 2-by-4-foot beds over one 2-by-8-foot unit because they are easier to repair and move.
Pick a Safe Location
Place the bed where it gets at least six hours of direct sun. fruiting crops such as tomatoes, cucumbers, peppers, and eggplants prefer eight or more hours. Lettuce, spinach, cilantro, and parsley can manage with four to six hours, especially in hot climates.
Set the bed on a level surface. A patio, compacted gravel pad, or firm section of lawn works well. Avoid soft, wet ground that lets one leg sink. Leave at least 2 feet of walking space around the bed so you can water, harvest, and inspect the underside.
Tools and Materials for a Raised Bed on Legs
A simple 2-by-4-foot bed does not need a large tool collection. You need a saw, drill, measuring tools, and hardware that can handle outdoor moisture. I use a 20V cordless drill with a clutch, a 7 1/4-inch circular saw, a 1/8-inch drill bit for pilot holes, and a 1/2-inch bit for drainage holes.

The table below lists a durable setup for a medium bed. Adjust the board count if you change the size.
| Item | Suggested choice | Why it matters |
|---|---|---|
| Side boards | Four 2-by-6-inch cedar boards, 4 feet long | Cedar resists rot and keeps the soil box light |
| End boards | Four 2-by-6-inch cedar boards, 2 feet long | Two boards per end create a 12-inch-deep box |
| Legs | Four 4-by-4-inch posts, 30 inches long | Wide legs resist twisting and sinking |
| Base | 2-by-4-inch joists plus exterior plywood or slats | Supports wet soil from below |
| Hardware | Exterior structural screws and galvanized carriage bolts | Holds joints together in damp weather |
| Drainage layer | Hardware cloth or plastic drainage mesh | Stops soil from falling through while allowing water out |
| Soil | Compost, topsoil, and coir or peat | Gives roots air, moisture, and nutrients |
Cedar costs more than untreated pine, but it often lasts longer in wet conditions. For the lowest cost, use untreated cedar fence boards or untreated fir, then accept a shorter service life. Never use old railroad ties or lumber treated with creosote near edible crops.
Select Lumber That Will Not Harm Edible Crops
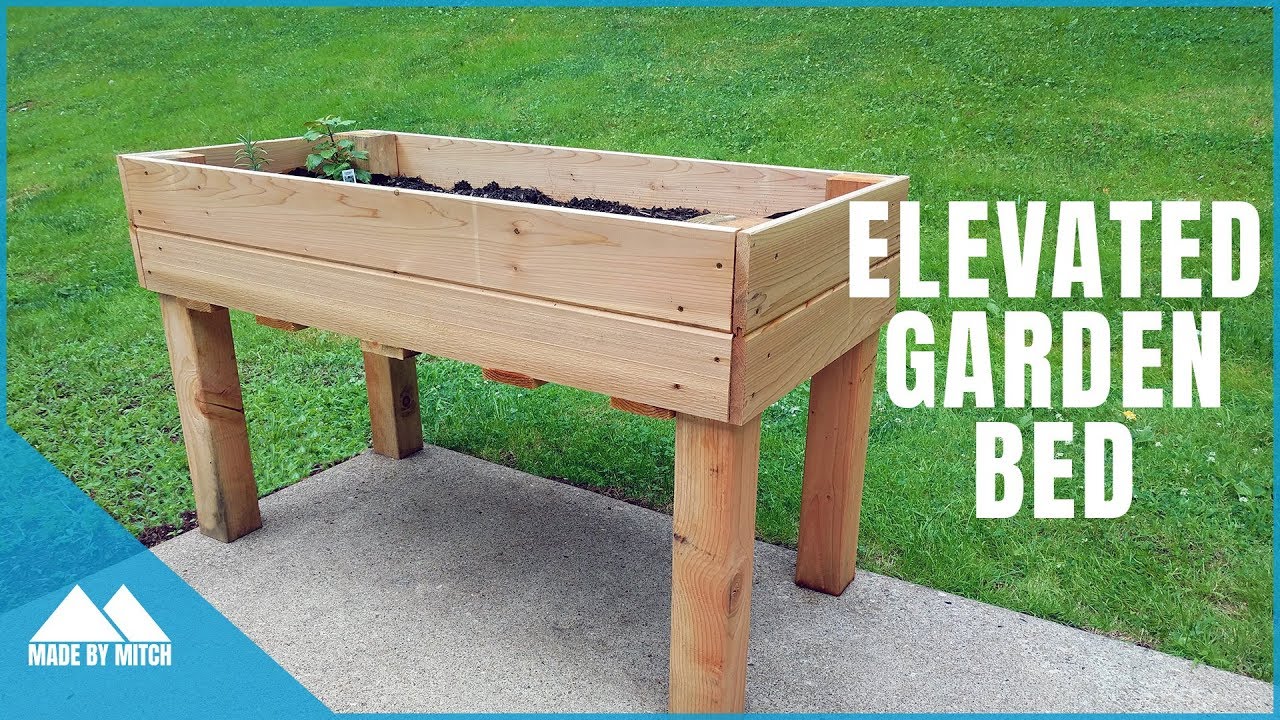
Use untreated wood labeled for outdoor use, cedar, redwood, cypress, or durable black locust. Avoid boards with a strong chemical smell, oily residue, or unknown treatment history. Modern pressure-treated lumber is generally made without older arsenic compounds, but some gardeners still choose untreated wood for peace of mind.
Do not paint the inside of the bed with unknown coatings. If you want to seal the wood, use a product labeled for garden beds or food-contact-safe exterior use. A natural oil finish may slow weathering, but it will not make soft wood rot-proof.
Choose Hardware for Outdoor Loads
Wet soil is heavy. One cubic foot of moist soil can weigh 50 to 80 pounds. A bed that holds 8 cubic feet may carry 400 to 640 pounds before you add the frame and plants.
Use galvanized or stainless steel hardware. Interior drywall screws can rust and snap. Structural screws from brands such as GRK or Simpson Strong-Tie work well for wood joints. For the legs, 5/16-inch or 3/8-inch galvanized carriage bolts offer more strength than screws alone.
Use a Support Base, Not Just a Thin Bottom
The bottom must carry the soil load without sagging. A 1/2-inch exterior plywood panel may work for a small 2-by-4-foot bed if it rests on several joists. For longer beds, use 3/4-inch exterior plywood or closely spaced 2-by-4-inch slats.
Do not place a solid bottom without drainage holes. Water trapped under the soil can drown roots, freeze and split the base, and speed wood rot.
Step-by-Step: How to Build a Raised Garden Bed on Legs
Build the bed on a flat work surface and test each joint before adding soil. Measure twice, drill pilot holes, and do not rush the waterproofing or drainage work. A careful build often takes one weekend, including finish work and filling.

1. Plan the Bed Size and Soil Depth
Choose a final outside size before buying lumber. A useful beginner design is 24 inches wide, 48 inches long, and 12 inches deep, with the soil surface about 30 inches above the ground.
A 12-inch-deep box suits lettuce, kale, chard, basil, parsley, strawberries, bush beans, radishes, and many annual flowers. Tomatoes, carrots, beets, and larger peppers benefit from 14 to 18 inches of root space. For dwarf blueberries, use a separate acidic container rather than a mixed vegetable bed.
Sketch the frame and mark every cut. Include the thickness of the end boards when calculating the final length. This simple step prevents the common mistake of building a bed that is several inches shorter than planned.
2. Cut and Sand the Boards
Cut four long boards and four short boards for a double-layer box. Stack two boards to create a 12-inch side wall. Sand sharp corners and remove splinters, especially if children will help.
Wear safety glasses and hearing protection when cutting. A sharp circular saw blade makes cleaner cuts and puts less strain on the tool. I use a fine-finish blade with 40 to 60 teeth for cedar because it leaves a cleaner edge than a rough framing blade.
3. Build the Side Panels
Place two long boards together on a flat surface. Clamp them so the edges line up, then drive exterior structural screws through the upper board into the lower board.
Repeat for the second long panel and the two end panels. Pre-drill near board ends to reduce splitting. Keep screws at least 3/4 inch from the edge and use two or three screws at each connection.
4. Join the Four Corners
Stand the panels on edge and form a rectangle. Check each corner with a carpenter’s square. Attach the end boards to the long boards with structural screws or bolts.
For a stronger joint, add an inside corner block made from a 2-by-2 or 2-by-4. The block gives the screws more wood to grip and reduces movement as the lumber dries. This matters most for beds that will be moved while full.
Measure the diagonals from corner to corner. When both diagonal measurements match, the box is square. If one diagonal is longer, push the longer corner inward until the measurements match.
5. Add the Legs
Cut four 4-by-4 posts to the desired leg height. For a 30-inch growing height with a 12-inch box, use legs about 24 to 30 inches long, depending on how you measure the top and base.
Position each leg inside a corner or flush with the outside corner. Inside-mounted legs usually look cleaner and protect the ends from bumps. Attach each leg with two or three carriage bolts or structural screws through the side boards.
Add a second fastener lower down if the leg extends above or below the box. Do not rely on one screw per corner. One fastener acts like a hinge and allows the frame to twist.
💡 Pro Tip: Drill a shallow counterbore for the bolt head on the outside of the bed. The bolt will sit nearly flush, so clothing and garden tools will not catch on it.
6. Install Lower Braces and the Shelf Frame
The legs need side-to-side support. Add 2-by-4 rails between the legs on all four sides, about 6 to 10 inches above the ground. These rails reduce wobble and create a frame for a lower shelf.
For a 2-by-4-foot bed, add two or three cross joists under the soil box. Space them 12 to 16 inches apart. Attach each joist with joist hangers or structural screws.
A lower shelf can hold pots, hand tools, bags of compost, or a watering can. Do not overload it. Keep heavy items low and centered so the bed stays stable.
7. Add the Base and Drainage
Place exterior plywood or wood slats on the support joists. If you use plywood, drill 1/2-inch drainage holes every 6 to 8 inches across the base. Add more holes near the edges because water often collects there.
Cover the base with galvanized 1/4-inch hardware cloth or garden mesh. The mesh keeps the soil from washing out while allowing excess water to escape. Do not use fine landscape fabric as the only drainage layer; it can clog with soil and compost.
If the bed sits on a deck, protect the surface with rubber feet, pavers, or a catch tray with a drain path. Never allow wet soil water to sit against painted decking or house siding.
8. Add a Moisture Barrier Only When It Makes Sense
A plastic liner can slow wood rot, but it can also trap water. If you use one, line only the side walls and leave the base open. Poke drainage holes through the liner at the same points as the wood base.
In dry climates, a liner may reduce water loss. In humid regions such as the Southeast, it can create a wet pocket that encourages root rot and fungal growth. Good airflow and open drainage matter more than a fully sealed box.
9. Fill the Bed With a Light Soil Mix
Do not fill a raised bed on legs with straight garden soil. Native soil is dense, and its weight can bow the base or overload the legs. It also drains poorly in a confined container.
For a general vegetable mix, combine:
- 40% quality topsoil
- 40% finished compost
- 20% coconut coir or peat moss
You can replace part of the coir with aged pine bark fines for more air space. In a dry area, add a small amount of vermiculite, but do not add too much. Vermiculite holds water and may make a wet bed stay too wet.
Fill the box in 2- to 3-inch layers. Water each layer lightly to settle it, but do not pack it down with your feet. Leave 1 to 2 inches below the rim to reduce runoff.
10. Test the Bed Before Planting
Push gently against each corner and side. The bed should feel firm, with only slight movement. If it wobbles, add diagonal braces between the legs or tighten the bolts.
Water the soil deeply and watch the drainage. Water should begin leaving the base within a few minutes. If the surface stays flooded, open more drainage holes or remove a blocked liner.
Wait several days before planting if the soil mix settles sharply. Add more mix, then plant. This saves you from exposing roots later.
Soil Volume, Weight, and Planting Depth
The amount of soil depends on the inside length, width, and depth of the box. Multiply those three measurements in feet to find cubic feet. A 2-by-4-foot bed with 1 foot of soil needs 8 cubic feet of mix, which equals about 0.30 cubic yards.
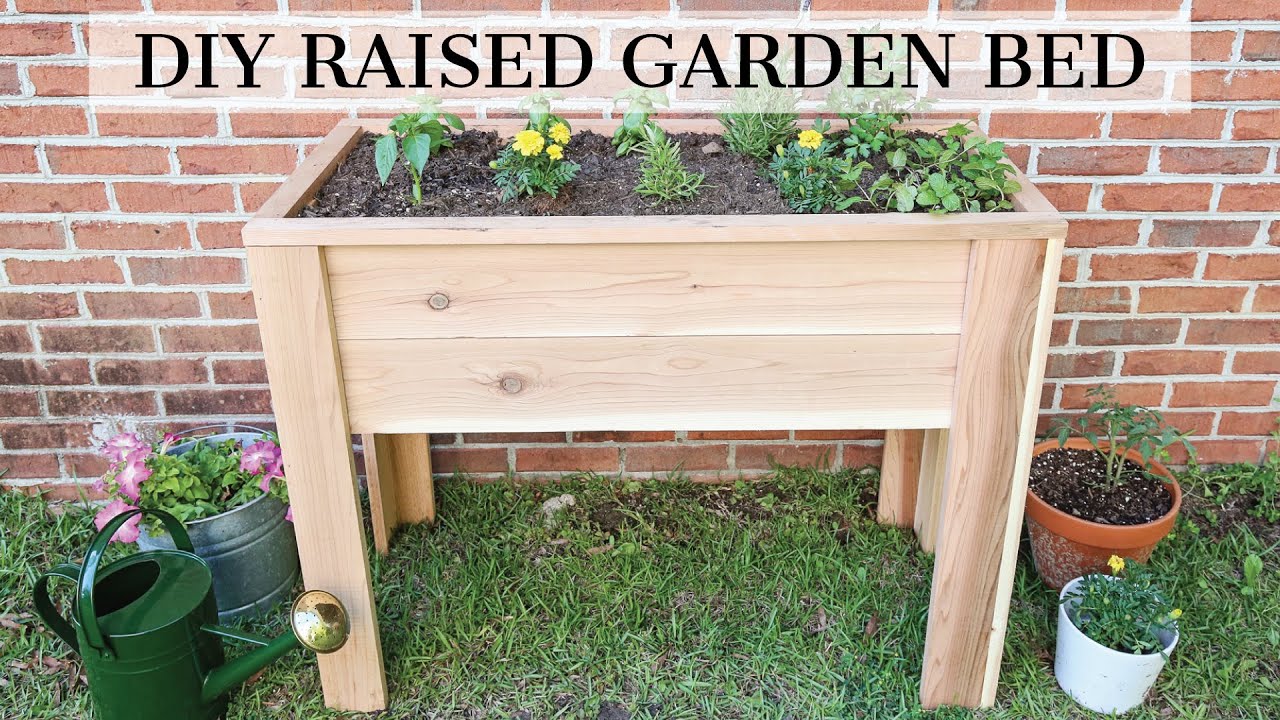
The chart below shows common sizes and approximate soil weight. Actual weight changes with moisture, compost content, and mineral soil.
| Bed size and depth | Soil needed | Approximate wet weight |
|---|---|---|
| 2 × 4 × 1 foot | 8 cubic feet | 400–640 pounds |
| 2 × 6 × 1 foot | 12 cubic feet | 600–960 pounds |
| 2 × 4 × 1.5 feet | 12 cubic feet | 600–960 pounds |
| 3 × 6 × 1 foot | 18 cubic feet | 900–1,440 pounds |
These numbers explain why a raised garden bed on legs needs strong support. If the structure feels light or shaky before filling, it will not improve when loaded with wet soil.
Use the Right Soil pH
Most vegetables grow well at a soil pH of 6.0 to 7.0. Blueberries need a much lower pH, near 4.5 to 5.5, so grow them in a separate container with acidic soil. Potatoes tolerate a slightly acidic mix, while brassicas such as broccoli and cabbage prefer near-neutral soil.
Test the mix with a mail-in soil test or a reliable home kit. Do not add lime, sulfur, or fertilizer by guesswork. Compost can change pH over time, and bagged soil may already contain lime.
Avoid Fresh Manure and Unfinished Compost
Fresh manure can burn roots and may carry pathogens. Unfinished compost can heat up, shrink, and rob nitrogen as it breaks down. Use dark, crumbly compost that smells earthy and shows no large pieces of food or bedding.
If you make compost at home, let it mature fully before adding it to a bed with lettuce, carrots, or other crops eaten raw. This matters even more when the bed stands near a food preparation area.
Planting a Raised Bed on Legs
A raised garden bed on legs works like a large container. It warms faster in spring, dries faster in summer, and gives roots less soil volume than an in-ground bed. Plant spacing and watering must reflect those limits.

Crops That Grow Well
Start with compact plants that do not need deep support. Leaf lettuce, spinach, arugula, kale, Swiss chard, radishes, scallions, bush beans, dwarf peas, strawberries, basil, thyme, oregano, and parsley perform well.
Choose compact tomato varieties such as ‘Patio Choice Yellow’, ‘Tiny Tim’, or ‘Tumbling Tom’. For peppers, look for dwarf or container types. Cucumbers can grow if you add a trellis, but the trellis must attach to the frame or stand on its own so it does not pull the bed over.
Crops That Need Extra Planning
Carrots need at least 10 to 12 inches of loose soil for short types such as ‘Paris Market’ and 14 to 18 inches for long varieties. Tomatoes can grow in a 12-inch bed, but their roots perform better with more depth and steady moisture.
Corn, pumpkins, winter squash, and full-size fruit trees do not suit most raised beds on legs. Their size, wind load, and root spread can make the structure unstable. Use a ground-level bed for these crops.
Use Companion Planting With Common Sense
Basil near tomatoes can help you use space, but it will not stop every pest. Marigolds may attract pollinators and beneficial insects, yet they do not create an insect-proof barrier. Plant flowers such as alyssum, calendula, nasturtium, and dwarf zinnias to support pollinators.
Keep aggressive herbs such as mint in their own pot. Plant rosemary and thyme near the driest edge because they dislike wet soil. Group plants with similar water needs instead of forcing every crop into one watering plan.
Watering, Feeding, and Mulching the Bed
Raised beds on legs often need more frequent watering than beds in the ground. The open base, warm sides, and small soil volume can dry the root zone quickly during July and August. Check the soil with your finger rather than following a fixed schedule.

Water when the top inch feels dry for shallow-rooted greens. Tomatoes, peppers, and beans may need water when the top 2 inches dry. Apply water slowly until a little drains from the base, then empty any tray below the bed so the roots do not sit in water.
The table below gives a starting point for mild weather. Adjust it for sun, wind, humidity, plant size, and local rainfall.
| Crop group | Typical check interval | Feeding approach |
|---|---|---|
| Lettuce, spinach, herbs | Check daily; water when the top inch dries | Add compost before planting; use a mild balanced feed if growth slows |
| Beans and peas | Check daily in warm weather | Use compost; avoid high nitrogen that creates leaves with few pods |
| Tomatoes and peppers | Check daily; water at 1–2 inches dry | Feed at transplanting, flowering, and early fruit set |
| Strawberries | Check every day in heat | Use compost and a low-nitrogen berry feed |
| Root crops | Check every 1–2 days | Avoid fresh manure and high nitrogen |
A 1- to 2-inch layer of shredded leaves, straw, or fine bark helps reduce evaporation. Keep mulch 1 inch away from plant stems. Thick mulch touching stems can shelter slugs and cause rot.
🌱 Beginner Note: Fertilizer cannot fix a bed that drains poorly. Check water flow, sunlight, and soil texture before adding more plant food.
Keep the Bed Stable and Safe
Stability matters as much as appearance. A full bed can weigh more than a small refrigerator, and a tall frame can act like a sail in strong wind. Place the bed where buildings or fences do not create sudden wind tunnels.

Add Bracing for Tall or Long Beds
Install diagonal braces if the bed is taller than 36 inches, longer than 6 feet, or placed in an exposed location. A 2-by-2 brace from the lower leg to the upper corner can stop side-to-side sway.
For wheelchair access, leave room for the chair footrests and avoid sharp corner bolts. A bed 28 to 32 inches high may work well, but test the height before filling it. Ergonomics vary by chair and user.
Protect Children and Pets
Round sharp corners or add wooden corner caps. Keep power tools, loose screws, and wood preservative away from children and pets during construction. A raised bed will not stop cats, squirrels, birds, or insects by itself.
If you use a wire cover, make sure the ends do not stick out. Bird netting can trap birds and snakes when installed loosely. Use rigid hoops or a framed cover that you can remove for harvest.
⚠️ Warning: Do not place a heavy raised bed on an elevated balcony without checking the building rules and load limits. Wet soil can exceed 1,000 pounds in a surprisingly small footprint.
Common Problems and Practical Fixes
Most failures come from weak support, poor drainage, or a soil mix that holds too much water. Watch the bed during the first month, when settling and early leaks reveal weak points.

| Problem | Likely cause | Practical fix |
|---|---|---|
| Bed wobbles | Legs lack cross braces or bolts are loose | Add diagonal braces and tighten structural hardware |
| Soil stays soggy | Too few holes or blocked liner | Clear holes, remove the solid liner, and improve the base |
| Plants wilt every afternoon | Small soil volume dries fast | Add mulch, water deeply, and use drip irrigation |
| Boards split at corners | Screws too close to ends | Pre-drill, move fasteners inward, and add corner blocks |
| Soil falls through the base | Mesh openings are too large | Add 1/4-inch hardware cloth under the soil |
| Bed leans | One leg sinks or surface is uneven | Level the site with pavers and add adjustable feet |
The main difference between normal summer wilt and a watering problem is recovery. Plants that perk up in the evening may need more consistent water. Plants that remain wilted overnight may have root damage, poor drainage, or a disease such as Pythium root rot.

Watch for Pests
A raised bed can still attract aphids, flea beetles, cabbage worms, slugs, spider mites, and tomato hornworms. Inspect the undersides of leaves twice a week. Remove hornworms by hand, spray aphids with a firm stream of water, and use row cover over young brassicas.
Avoid broad insecticide sprays when possible. They can harm bees, syrphid flies, lacewings, and other helpful insects. If you use an organic product such as insecticidal soap or Bt, follow the label and spray at the correct pest stage.
Prevent Root Diseases
Root disease often begins with wet soil and poor airflow. Use clean containers, mature compost, and tools that have not touched diseased plants. Do not plant tomatoes, peppers, eggplants, or potatoes in the same mix year after year if disease has been severe.
At the end of the season, remove dead plant material. Do not compost leaves with obvious blight, mildew, or severe pest damage unless your compost pile reaches a reliable high temperature.
Maintenance Through the Seasons
A raised garden bed on legs can last 8 to 15 years with cedar and careful maintenance. Untreated pine may last 3 to 7 years, depending on rain, humidity, soil contact, and finish. The base and leg joints often fail before the side boards.
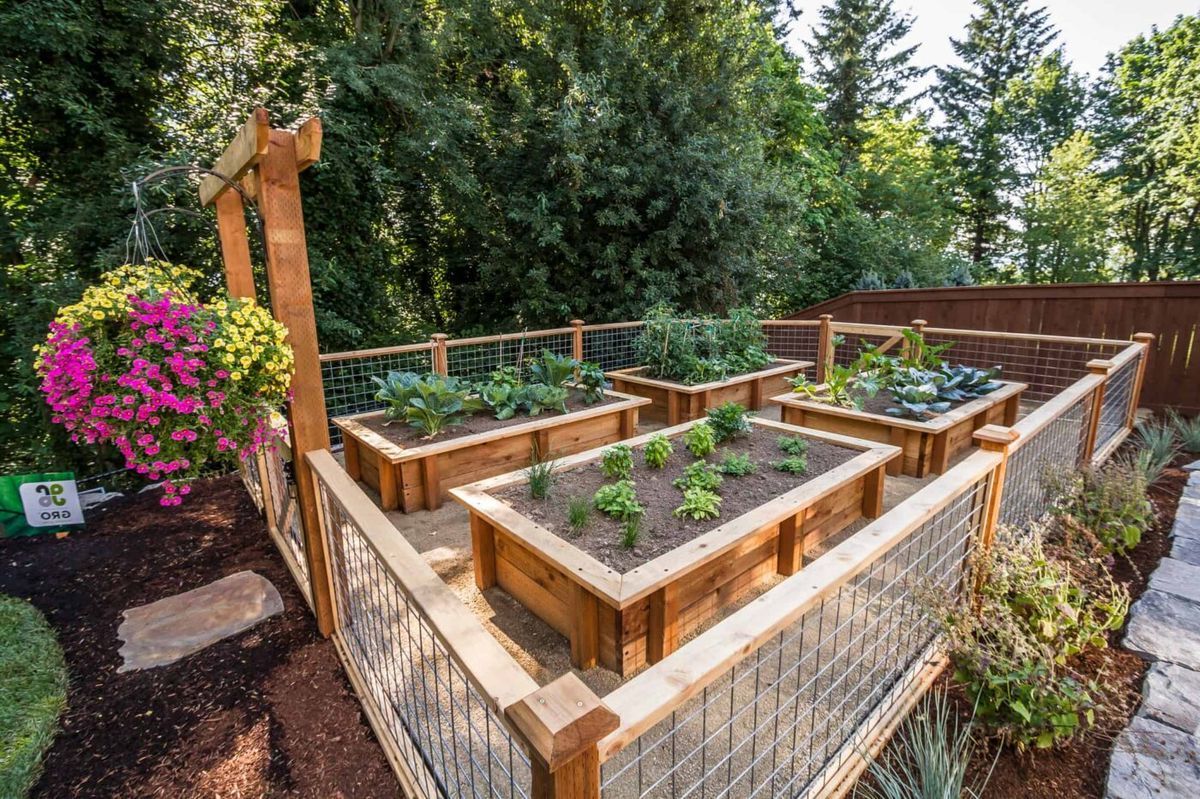
Inspect the bed in early spring and late fall. Look for soft wood, rusted bolts, loose screws, cracked plywood, leaning legs, and blocked drainage holes. Lift the bed slightly only when empty, never when full.
| Season | Maintenance task | What to check |
|---|---|---|
| Spring | Tighten hardware and refresh soil | Loose joints, winter heaving, settled mix |
| Summer | Check moisture and drainage | Dry corners, clogged holes, insect damage |
| Fall | Remove old crops and clean the frame | Rot, disease debris, cracked base |
| Winter | Protect or empty the bed in cold areas | Frozen water, snow load, wind movement |
In USDA Zones 3 to 5, do not let a full bed stay waterlogged through repeated freeze and thaw cycles. In Zones 8 to 10, inspect more often for termites, carpenter ants, sun damage, and rapid soil drying.

Store or Protect the Bed in Winter
If the bed is small and portable, empty it after the growing season and store it under cover. Do not move a full bed. The frame may twist, and the base can fail under the shifting load.
For a permanent bed, remove annual plants, top-dress with compost, and cover the soil with leaves or straw. Keep the bed off standing water. A breathable cover protects the wood better than wrapping the entire structure in plastic.
Refresh the Soil Without Rebuilding
Soil settles as compost breaks down. Add 1 to 2 inches of compost each spring and mix it gently into the top few inches. Avoid deep digging, which can damage roots from perennial herbs and disturb the bed structure.
Replace the soil only when it contains persistent disease, heavy salt buildup, severe compaction, or chemical contamination. Most healthy mixes improve with annual compost and careful watering.
Cost, Time, and Alternatives
A basic DIY raised garden bed on legs often costs $120 to $300, depending on lumber, hardware, soil, and finish. Cedar and bagged organic soil can push the price above $350. A kit may cost more at first but can save cutting time.
Expect three to six hours for construction if you have the tools and work alone. Add another hour or two for filling. The heaviest task is moving soil, not building the frame, so buy soil in bulk or ask a helper to share the lifting.
| Option | Typical cost range | Best fit |
|---|---|---|
| DIY cedar bed | $180–$350 | Gardeners who want custom size and repairable parts |
| Metal raised planter | $100–$300 | Modern patios and gardeners who want low rot risk |
| Plastic resin planter | $80–$250 | Light use, renters, and easy relocation |
| Ground-level raised bed | $50–$180 | Larger crops and gardeners who do not need height |
A ground-level raised bed is usually cheaper and holds more soil. A fabric grow bag is cheaper still, but it dries fast and may not suit someone who needs a firm work surface. A metal trough lasts well but can become very hot in full sun, especially in Zones 8 to 10.
Know When a Kit Makes More Sense
Buy a kit if you lack a saw, need a quick setup, or want adjustable legs and a built-in liner. Read the load rating before filling it. Some decorative planters look strong but use thin panels and small plastic legs.
DIY makes more sense when you need a custom height, a wheelchair-friendly shape, or a bed that matches other garden structures. It also makes future repairs easier because you know the board sizes and hardware used.
Mistakes That Shorten the Bed’s Life
The most common mistake is building a beautiful box on weak legs. Gardeners often focus on the top frame and treat the support system as an afterthought. The soil load exposes that weakness within weeks.
Avoid these errors:
- Using drywall screws outdoors
- Skipping pilot holes in cedar
- Making the bed too wide to reach
- Filling it with heavy clay soil
- Drilling too few drainage holes
- Lining the whole box with sealed plastic
- Adding tall crops without bracing
- Placing the bed on soft or uneven ground
- Overloading the lower shelf
- Letting mulch touch plant stems or wood sides
🔧 Quick Fix: If your bed already wobbles, empty it before repairing it. Add diagonal braces between the legs, replace loose screws with structural screws, and level each foot on a paver.
A second common mistake is planting only one crop family. Repeating tomatoes or brassicas can increase disease and nutrient problems. Rotate plant families when possible, even in a small bed.
My Experience Building and Using Legged Beds
My first raised bed on legs used 2-by-4-inch legs. It looked fine empty but shifted after I filled it with moist compost. I rebuilt the corners with 4-by-4 posts, added lower rails, and installed diagonal braces. That version stayed solid through two wet winters.
I also learned that a full 12-inch bed dries faster than expected in a hot, windy garden. In Zone 8, lettuce needed water almost every morning by midsummer, while thyme and rosemary needed far less. A simple drip line with 1/2-inch poly tubing saved time and kept the leaves dry.
One design choice did not work well: a full plastic liner. It held too much water after heavy rain. I removed the bottom liner, kept a thin liner on the side walls, and opened the drainage holes. The roots improved within two weeks.
For cold climates, the elevated soil warmed early in spring but also froze faster at night. In Zone 5, I used a low frost cloth cover and planted spinach and kale first. Warm-season tomatoes waited until nighttime temperatures stayed above 50°F.
When to Hire Help
You can build a small bed yourself if you can safely cut lumber, drill pilot holes, and lift soil. Ask for help with large panels, heavy soil bags, and moving the finished frame. One person should not lift a filled bed.
Hire a carpenter or handyman when the bed must support a wheelchair user, sit on a deck, attach to a wall, or stand more than 36 inches high. Professional help also makes sense if the site has drainage problems or the structure must meet local accessibility rules.
Do not build on a balcony without approval from the property owner or a qualified professional. A structural engineer can confirm whether the surface can handle the load and where that load should sit.
Frequently Asked Questions
Q: How deep should a raised garden bed on legs be?
A: Use 12 inches for lettuce, herbs, greens, beans, and many flowers. Use 14 to 18 inches for tomatoes, carrots, beets, peppers, and other crops with deeper roots. Deeper soil also holds moisture longer, but it adds major weight.
Q: How high should a raised bed be for someone with back pain?
A: A 30- to 36-inch growing surface suits many adults who want to garden with less bending. Test the height with an empty box first. Wheelchair users may prefer 28 to 32 inches, but chair design and reach range matter.
Q: Can I put a raised garden bed on legs on a deck?
A: Yes, but check the deck’s load capacity first. Wet soil can weigh hundreds or thousands of pounds. Use a waterproof tray or drainage path, protect the deck surface, and keep the bed away from house walls.
Q: Should a raised bed on legs have a bottom?
A: Yes. A bottom supports the soil and keeps the structure rigid. It must also have many drainage holes covered with 1/4-inch hardware cloth or similar mesh.
Q: Can I use pressure-treated wood for a raised bed?
A: Modern pressure-treated wood does not contain the older arsenic formula once used for residential lumber, but many gardeners still choose cedar or untreated wood for edible crops. Never use railroad ties, creosote lumber, or wood with an unknown treatment history.
Q: How long does a raised garden bed on legs last?
A: Cedar often lasts 8 to 15 years, while untreated pine may last 3 to 7 years. Good drainage, dry air flow, strong hardware, and protection from standing water can extend the life. The base and leg joints usually need repair first.
Q: Can I grow tomatoes in a raised bed on legs?
A: Yes, if the bed is at least 12 inches deep and the legs can support the wet soil. Use compact varieties, add a sturdy cage or trellis, and water consistently. A full-size indeterminate tomato may outgrow a small elevated bed.
Q: Why is my raised bed on legs leaning?
A: One leg may have sunk, the ground may be uneven, or the frame may lack diagonal bracing. Empty the bed before correcting it. Level the feet on pavers, tighten the hardware, and add braces between the legs.
Q: What is the best soil mix for a raised bed on legs?
A: Use about 40% quality topsoil, 40% finished compost, and 20% coconut coir, peat moss, or aged pine bark. The mix should hold moisture without becoming muddy. Do not use straight garden soil because it is heavy and often drains poorly.
Q: How often should I water a raised bed on legs?
A: Check the soil every day during hot weather. Water when the top 1 to 2 inches feels dry, then water slowly until a little drains from the base. Wind, sun, crop size, and climate can change the schedule.
Q: Can I leave the bed full of soil during winter?
A: Yes, if the frame and base are strong and the bed drains well. Remove annual plants, add compost, and cover the soil with leaves or straw. In very cold or wet areas, an empty portable bed lasts longer.
Q: Is a raised garden bed on legs worth the cost?
A: It is worth the cost for gardeners who need better access, live above poor soil, or have limited space. A ground-level bed costs less and suits large crops. Choose the elevated design when reduced bending and clean access matter most.
Final Advice for a Strong, Productive Bed
Build the support system as if the bed will carry more weight than you expect. Use strong legs, outdoor-rated hardware, a fully supported base, and open drainage. Keep the box narrow enough to reach, and choose plants that match its depth and soil volume.
Start with one 2-by-4-foot bed rather than building a large garden at once. After one season, you will know how much water your climate requires, which crops fit your reach, and which parts need improvement. A well-built raised garden bed on legs can turn a hard-to-use space into a comfortable and productive garden for many years.
Meta description: Learn how to build a raised garden bed on legs with strong wood joints, safe drainage, the right soil mix, crop choices, costs, repairs, and seasonal care tips.