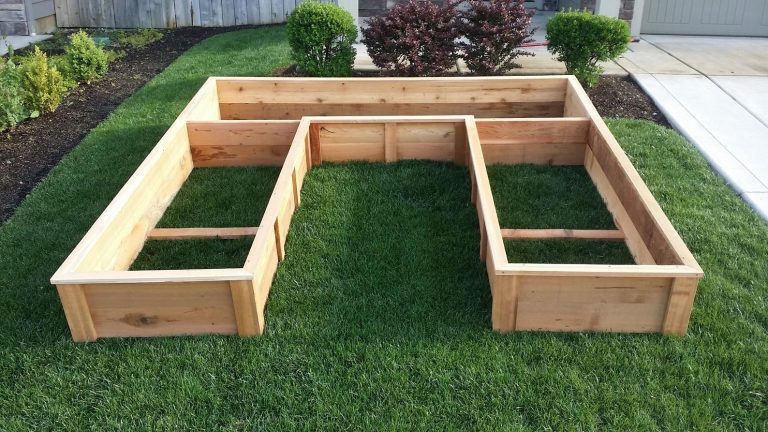
How To Build A Raised Garden Border: Easy DIY Guide
A raised garden border gives a bed a clear edge, keeps soil and mulch in place, and makes a garden easier to plant and maintain. It can turn a tired lawn edge into a neat vegetable bed in one weekend. You do not need advanced building skills, but you do need a level layout, safe materials, good drainage, and a border that can handle wet soil and seasonal movement.
I have built raised borders with cedar, pressure-treated lumber, stone, and reclaimed brick in gardens from USDA Zone 5 to Zone 9. The biggest lesson is simple: most border failures start below the soil line. If you skip leveling, drainage, or proper anchoring, even a handsome border can lean within one wet season.

Quick answer: build the border in one day
The best way to build a raised garden border is to mark the shape, remove grass, level the ground, set rot-resistant boards or stones, anchor the sides, and fill the bed with quality soil. Use untreated cedar, redwood, stone, brick, or modern ground-contact lumber. Keep the border 6–12 inches high for most vegetables and flowers, and leave enough width for easy access.

A simple 4-by-8-foot wood border often costs $80–$220, depending on the lumber and soil. A small stone or brick border may cost less if you already have materials, but it takes more time to set. For beginners, a straight rectangular bed is easier to level, anchor, and water than a curved design.
Choose the right border style before you dig
A raised garden border is a low wall that holds soil above the surrounding ground. It may form a full raised bed, frame an existing planting area, or create a clean edge between lawn, path, and garden soil.
The border does not need to be tall to work. A 4-inch edge can hold mulch and define a flower bed. A 6- to 12-inch wall works well for vegetables, herbs, annual flowers, and shallow-rooted perennials. Walls higher than 18 inches need stronger construction and may need professional advice.
Wood borders
Wood is the easiest material for most DIY projects. Cedar and redwood resist rot better than common pine. Ground-contact pressure-treated lumber also works, but choose modern products labeled for ground contact and follow the label directions.
Use 2-by-6 or 2-by-8 boards for a simple bed. A 2-by-4 can work for a low edge, but it may not hold much soil. Avoid thin fence boards unless you add strong stakes and accept a shorter life.
Stone and brick borders
Stone and brick suit formal gardens and can last for decades. They also handle sunlight, rain, and mulch better than most wood. The tradeoff is weight and setup time.
Dry-stacked stone needs a firm, level base. Brick needs careful alignment and may need a compacted gravel footing. Do not stack loose stone beside a play area or walkway where it could shift.
Metal and recycled borders
Steel edging gives a sharp, modern look. It works well for low borders around ornamental beds, but thin metal can bend during installation. Some metal products also develop hot surfaces in full sun, which may dry nearby soil faster.
Recycled plastic boards resist rot, but quality varies. Cheap boards can bow when filled with wet soil. Read the product thickness and anchoring instructions before buying.
This quick comparison helps match the material to your site, budget, and expected lifespan.
| Border material | Typical life and best use |
|---|---|
| Cedar or redwood | About 8–15 years; vegetable and flower beds |
| Ground-contact treated lumber | About 10–20 years; budget-friendly raised beds |
| Brick or natural stone | 25 years or more; formal and permanent beds |
| Metal edging | 10–25 years; low, clean garden borders |
| Recycled plastic | About 10–20 years; light, rot-free edging |
Stone and brick last the longest, but wood offers the fastest build. In wet climates such as western Oregon or coastal North Carolina, good drainage matters more than the material alone.
Plan the garden border around sun, roots, and access
The best garden border starts with the site, not the lumber. Watch the area for one full day and note how much direct sun reaches it. Most vegetables need at least six hours of direct sun, while lettuce, spinach, and many leafy herbs can manage four to six hours.
Keep tall crops on the north side of the bed if possible. This reduces shade on shorter plants. A bed beside a south-facing wall may warm early in spring, but it can also dry out quickly in July.
Check the soil and drainage
Dig a small hole 12 inches deep. Fill it with water and watch how fast it drains. If water remains after 24 hours, avoid building a tall raised bed until you solve the drainage issue.
Heavy clay soil often benefits from a raised bed, but do not seal the bottom. A raised border should sit on the ground so earthworms, roots, and water can move through. Add compost and soil above the native ground instead.
Do not place a vegetable bed where water flows from a driveway or roof. Runoff may carry salt, oil, weed killer, or other pollutants. Test questionable soil for lead, especially near old painted buildings or busy roads.
Measure the bed for easy reach
Keep a raised bed no wider than 4 feet if you can reach both sides. A bed against a wall should stay close to 2 feet wide. This reduces soil compaction and makes weeding much easier.
Leave 18–24 inches for a walking path. If you use a wheelbarrow, aim for 30–36 inches. I once built a narrow path that looked fine on paper, but it became frustrating once tomato cages and squash leaves spread into it.

Gather tools and materials before starting
You can build a small border with basic hand tools. A circular saw speeds up cuts, but a handsaw works for a single bed. Use a sharp blade and support boards well to prevent splintering.
The soil is often the largest part of the budget. For a 4-by-8-foot bed that is 10 inches deep, you need about 26.7 cubic feet, or nearly 1 cubic yard, of soil mix. Buy in bulk when possible.
| Item | Suggested choice | Why it matters |
|---|---|---|
| Border boards | Two 2-by-6 or 2-by-8 boards per side | Holds soil with less bowing |
| Stakes | 2-by-2 or 2-by-4, 18–24 inches long | Anchors the border |
| Fasteners | Exterior-rated 3-inch screws | Resist rust and pullout |
| Base material | Crushed gravel or compactable stone | Helps level stone or brick |
| Soil | 60% topsoil, 30% compost, 10% pine fines | Supports roots and drainage |
| Tools | Tape, level, shovel, drill, saw, gloves | Covers most DIY builds |
Choose exterior screws instead of indoor drywall screws. Drywall screws snap more easily and rust fast in damp soil. Wear eye protection when cutting wood or driving stakes.

A mix of screened topsoil, finished compost, and pine fines works well for many vegetables. Avoid using pure compost, which may shrink, hold too much water, or contain too much salt. For acid-loving crops such as blueberries, use a separate bed with a suitable low-pH mix.
Prepare the site with care
The best time to build a raised garden border is when the soil is workable but not wet. In cold climates, late spring often works better than early spring because frozen or saturated ground shifts after thaw. In hot climates, build in fall, winter, or early spring when digging is easier.
Mark the shape with stakes and string. Spray paint also works on grass, but string gives you a true line and helps check square corners.
Remove grass and weeds
Cut the sod inside the marked area with a sharp spade. Remove the top 2–3 inches if the bed sits over lawn. Shake soil from the sod and turn it into compost only if the grass has no weed seed heads or herbicide history.
For a no-dig option, mow the grass short and cover it with overlapping cardboard. Wet the cardboard, then add 6–10 inches of soil. This works best when the cardboard has no glossy coating or colored plastic layer.
Level the ground
Set a long, straight board across the site and place a level on top. Check the surface in both directions. Remove high spots and fill low spots with native soil.
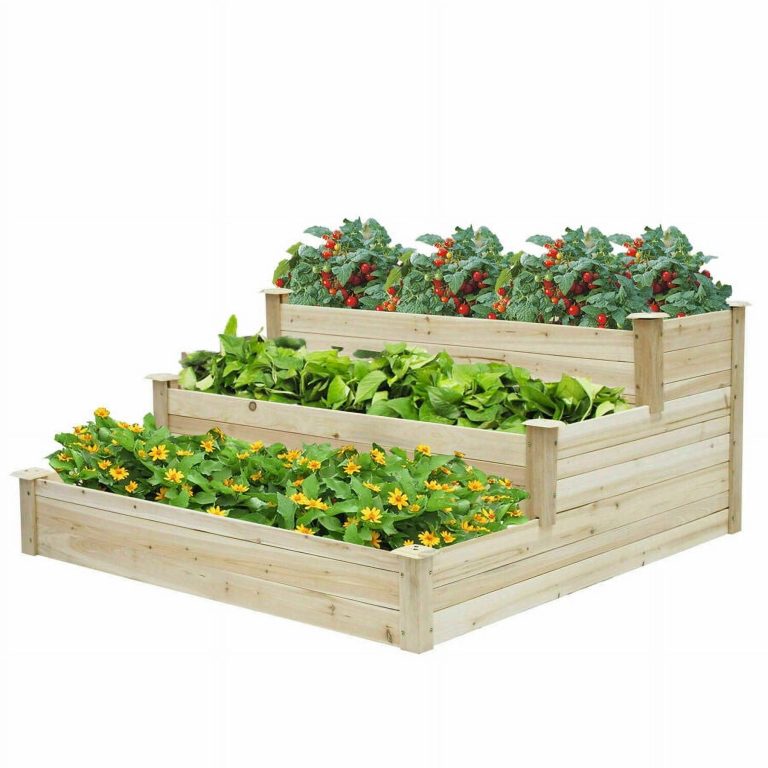
Do not try to force a long wooden border to follow a sharp slope unless you plan a stepped design. On a sloped yard, stepped beds look cleaner and hold soil more safely than one tilted frame.
Improve poor soil before filling
Break up compacted soil below the bed with a garden fork. Do not turn wet clay into a paste. Wait until the soil crumbles when squeezed instead of forming a shiny ball.
If the native soil contains construction debris, test it before planting food crops. A raised bed does not automatically make contaminated soil safe if plant roots can reach the ground below.
⚠️ Warning: Never build a vegetable bed over soil that may contain lead, petroleum, or chemical waste without testing it. Use a lined, bottomless bed only as a short-term barrier, and remember that roots and water still need a safe path.
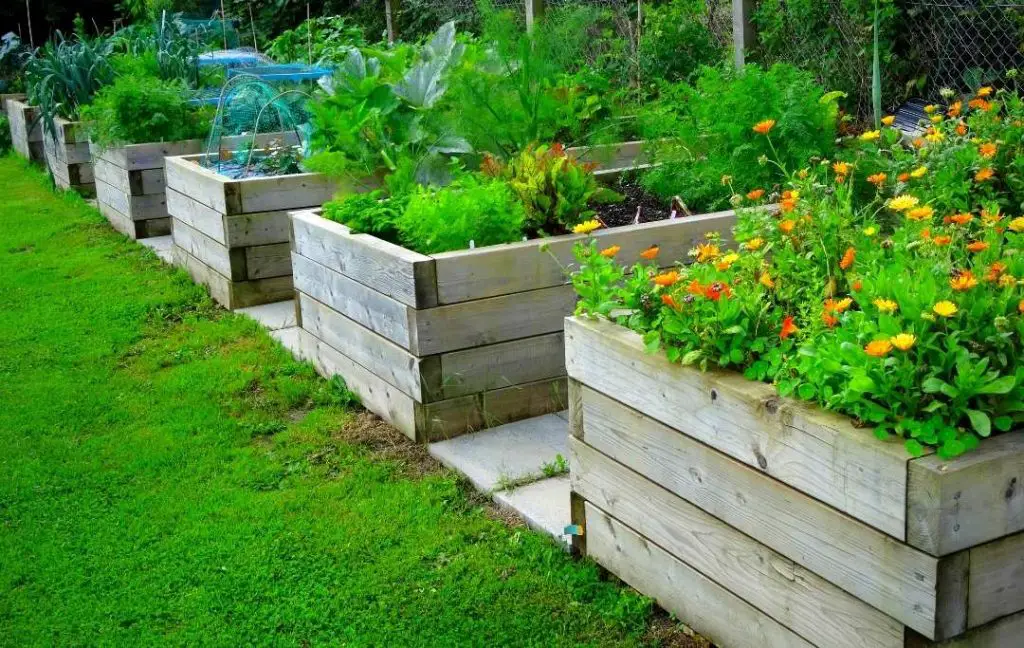
Build the wood frame step by step
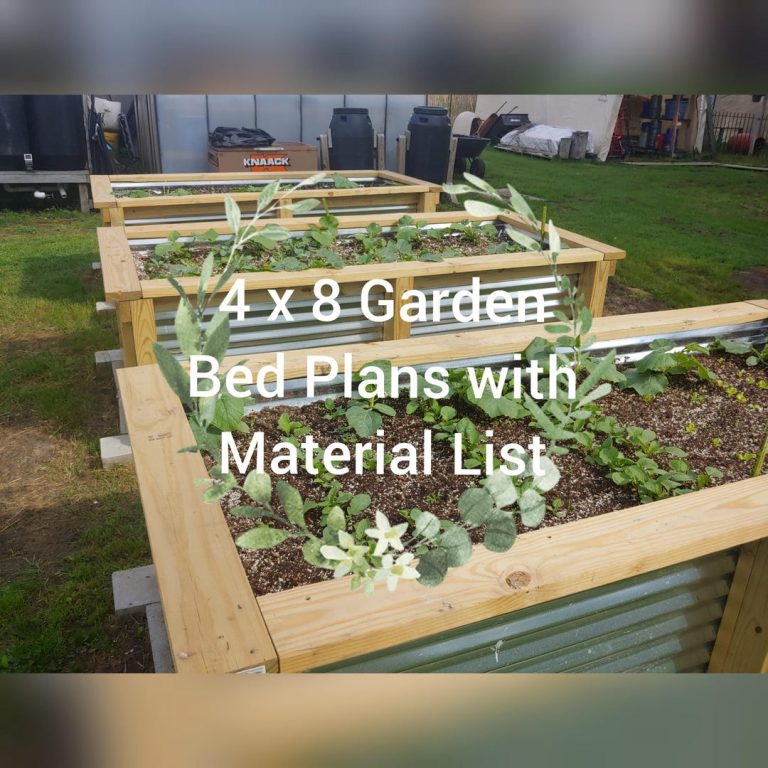
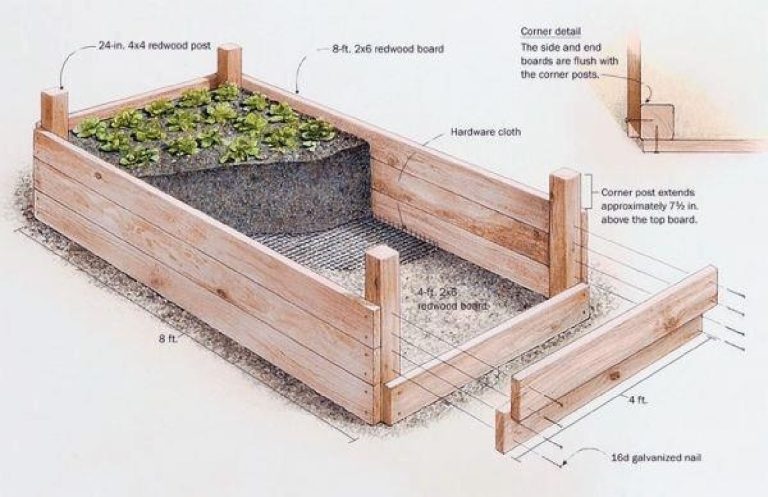
A straight wood frame is the easiest raised garden border for a first project. The steps below fit a basic 4-by-8-foot bed made from 2-by-8 boards.
1. Cut and inspect the boards
Cut two boards to 8 feet and two boards to 4 feet. Check each board for deep cracks, large knots, and severe bowing. A slight curve can face outward, but a twisted board will make the corners hard to join.
Use cedar, redwood, or ground-contact lumber. Do not use old railroad ties, painted boards, or wood treated with unknown chemicals around edible crops.
2. Lay out the frame
Place the boards on the ground in a rectangle. Keep the board faces aligned. Use a framing square if you have one, or measure the diagonals.
A rectangle is square when both diagonal measurements match. For a 4-by-8-foot layout, the outside diagonal will be about 8 feet 11 inches, depending on the true board width. Matching diagonals matter more than a perfect number.
3. Join the corners
Drive two or three exterior screws through each short board into the end grain of the long board. Pre-drill near the ends to reduce splitting. Keep the drill straight.
For a stronger joint, add an inside corner block made from treated or cedar scrap. This helps when the soil pushes against the frame after heavy rain.
4. Set the frame in place
Move the frame onto the prepared site. Check the level from side to side and end to end. Add or remove soil under the low side until the top edge sits level.
A level top is not required for plant growth, but it prevents water from pooling at one end and makes the bed look finished. On a slope, build separate stepped boxes rather than burying one side deeply.
5. Anchor the sides
Drive stakes inside the frame every 3–4 feet. Place one near each corner and screw the boards to the stakes. For a 10-inch-high bed, stakes 18–24 inches long usually work.
If the bed is more than 12 inches high, use thicker posts and stronger corner joints. Wet soil is heavy. One cubic yard can weigh more than 1,000 pounds, depending on moisture and soil type.
6. Add a path and finish the edge
Fill gaps beside the border with soil, mulch, gravel, or pavers. Keep wood from sitting in a constantly wet pocket. A narrow strip of gravel can improve airflow and reduce splashback.
Round sharp corners with sandpaper. This small step protects knees, hands, and garden hoses.

Wood frame problems and practical fixes
Wood borders often fail in predictable ways. Fixing them early costs less than rebuilding a full bed.
| Problem | Likely cause | Practical fix |
|---|---|---|
| Wall leans outward | Weak or missing stakes | Add inside stakes every 3 feet |
| Corners open | Screws pulled from end grain | Add corner blocks or structural screws |
| Board rots at the base | Constant wet soil contact | Improve drainage and replace the board |
| Frame bows | Thin boards or long unsupported sides | Add a center brace or thicker boards |
| Water pools at one end | Uneven foundation | Re-level the frame or build stepped beds |
A small gap between boards is not a crisis. Wood shrinks and expands with moisture. Large gaps that let soil escape need a brace, a replacement board, or an inner liner made for garden use.

Fill the bed with healthy soil
Fill the bed after the border is secure. If you add soil first, the weight can shift the frame and make leveling harder.
A general raised-bed mix contains mineral soil, compost, and a light aeration material. The right mix varies by climate. In dry Arizona gardens, extra organic matter helps hold water. In wet Zone 7 gardens, too much fine compost can stay soggy.
| Bed depth | Suitable crops |
|---|---|
| 4–6 inches | Lettuce, herbs, annual flowers, shallow roots |
| 8–12 inches | Beans, carrots, beets, peppers, tomatoes |
| 12–18 inches | Long carrots, potatoes, larger perennials |
| 18 inches or more | Wheelchair-accessible beds or deep-rooted plants |
For tomatoes, peppers, and eggplant, aim for a loose mix with a pH near 6.0–6.8. Blueberries need much more acidic soil, often near pH 4.5–5.5, so they should not share a standard vegetable bed.
Avoid settling problems
Fill the bed in 3-inch layers. Water each layer lightly, then top it off. Do not stomp the soil down, because that removes air spaces that roots need.
Expect the soil to settle by 10–20% during the first season. Keep a few bags of soil or finished compost nearby for spring top-ups. Add no more than 1 inch of compost each year unless a soil test shows a larger need.
💡 Pro Tip: Add a 1–2-inch layer of shredded leaves, straw, or clean leaf compost after planting. Mulch reduces evaporation, protects soil from crusting, and limits weed seeds. Keep mulch 2 inches away from tomato stems and woody plant trunks.

Plant the border for long-term success
A raised border changes the soil environment, but it does not remove the need for good plant choices. Match crops to sun, depth, temperature, and water needs.
Plant cool-season crops such as kale, spinach, peas, carrots, and lettuce in early spring or fall. Warm-season crops such as tomatoes, cucumbers, basil, beans, and peppers need warm soil and protection from late frost.
For a small 4-by-8-foot bed, use a simple layout:
- North side: trellised peas, cucumbers, or indeterminate tomatoes
- Middle: peppers, bush beans, Swiss chard, or kale
- South side: basil, lettuce, radishes, or marigolds
- Corners: thyme, oregano, or compact flowers for pollinators
Avoid planting mint directly in the bed. It spreads fast and can crowd vegetables. Grow it in a container instead.
Water the new bed evenly
Water slowly after planting so the soil settles around roots. A new bed may need water two or three times per week during hot weather, while an established bed often needs about 1 inch per week from rain and irrigation.
Check the soil with your finger. If the top 1–2 inches feel dry and the plants wilt in the morning, water deeply. If the bed smells sour or stays wet for days, improve drainage before adding more water.
Drip irrigation or a soaker hose works better than a sprinkler for most raised beds. It keeps foliage dry and reduces fungal disease on tomatoes, cucumbers, and squash.

Maintain the border through every season
A raised garden border needs a quick check each season. Look for leaning walls, loose screws, rotting wood, ant nests, and soil that has washed out after storms.
In spring, top up settled soil and inspect the corners. In summer, watch for dry edges because wood and stone can heat the soil. In fall, remove diseased plant debris and clean tools before storing them.
| Season | Border and soil tasks |
|---|---|
| Spring | Level loose soil, add compost, check screws and stakes |
| Summer | Check moisture, repair mulch gaps, watch for bowing |
| Fall | Remove diseased plants, clear leaves from wood contact |
| Winter | Inspect after freeze-thaw cycles, cover loose soil if needed |
Freeze-thaw cycles affect borders in USDA Zones 3–6 more than in mild Zones 8–10. Frost can lift stones and shift stakes. Do not repair a frozen bed until the ground thaws and drains.

Know what breaks first
The first failure is often not the board. It is usually a loose corner, a missing stake, or water trapped against the lower edge. Cheap screws may rust before cedar shows serious decay.
Wood life varies by climate. A cedar border may last 10–15 years in a well-drained Colorado garden but only 6–10 years in a wet, shaded Pacific Northwest site. Direct soil contact, irrigation leaks, and poor airflow shorten its life.
Replace one damaged board rather than tearing out the whole bed. Move soil away from the inside, remove the old board, install the new one, and reset the stakes.
Compare raised borders with other garden edges
A raised wood border is not right for every site. Some gardeners need a low mowing edge, while others need a permanent retaining wall or a no-build approach.
| Option | Best for | Main limitation |
|---|---|---|
| Raised wood border | Vegetables and quick DIY beds | Eventually rots |
| Stone wall | Permanent formal beds | Heavy and slow to build |
| Brick edging | Paths and classic gardens | Needs a firm base |
| Steel edging | Low modern borders | Can bend or heat nearby soil |
| No border | Low-cost natural beds | Soil and mulch spread outward |
A low flat border may suit a lawn edge better than a tall raised bed. If your goal is only to stop mulch from spreading, 4-inch steel or brick edging may save money and work.
For steep slopes, use a professional retaining wall design. A garden border that holds only 8–12 inches of soil is not the same as a structural wall holding several feet of earth.

Pros and cons of raised garden borders
Raised borders improve access and soil control, but they also add cost and maintenance. Weigh both sides before you buy lumber or move stone.
| Pros | Cons |
|---|---|
| Defines beds and paths clearly | Costs more than an unframed bed |
| Improves drainage in heavy soil | Soil dries faster in hot weather |
| Warms earlier in spring | Wood can rot and need replacement |
| Reduces lawn spread into beds | Requires careful leveling |
| Makes soil easier to amend | Can restrict roots if built too shallow |
A raised border is usually worth the money for people who garden often, have poor native soil, or want clean paths. It may not be worth it for a rental home, a temporary garden, or a site with severe drainage problems.
Avoid these common building mistakes
Small errors can create large repairs. Most are easy to prevent before the first screw goes in.
Building directly on wet soil
Wet soil compacts under the frame and shifts later. Wait until the ground crumbles in your hand. If the area stays wet, solve the drainage issue first.
Making the bed too wide
A bed wider than 4 feet looks efficient but becomes hard to weed. You may step into it, compacting soil and damaging roots. Add a path or split the bed into two sections.
Using untreated cheap pine without a plan
Untreated pine may last only a few years, especially in wet soil. It can work for a temporary garden, but do not expect the same life as cedar or stone.
Filling with pure compost
Pure compost can shrink, repel water when dry, or burn sensitive roots if it contains high salts. Blend it with mineral soil and test pH if plants struggle.
Forgetting mature plant size
A tiny tomato transplant can become a 6-foot plant. Give tomatoes, zucchini, cucumbers, and raspberries enough space from the border and from each other.
Ignoring access for hoses and tools
Leave room to turn a wheelbarrow and reach a faucet. A beautiful bed that blocks the only garden path becomes a daily nuisance.
🌱 Beginner Note: Start with one 4-by-8-foot bed. It gives enough room for a useful crop mix without creating a large soil bill or a maintenance task that feels overwhelming.

My field-tested approach to a first border
When I build a bed for a new gardener, I use a straight 4-by-8-foot frame, 2-by-8 cedar boards, inside stakes, and a 24-inch path on all sides. I place it where it gets morning sun and afternoon light shade if the climate is hot.
In my Zone 6 garden, I found that an 8-inch border warmed lettuce and carrots earlier, but it also dried faster than the native bed by midsummer. Adding shredded leaf mulch solved most of the problem. The first soil mix I used contained too much fine compost and crusted after rain, so I added pine fines and reduced the compost share.
After four weeks, the frame stayed square, but the soil had settled nearly 2 inches. I topped it with a mix of screened topsoil and finished compost. After two growing seasons, the cedar remained sound, while one low-grade exterior screw had rusted and needed replacement.
For a hot Zone 9 garden, I would build in late fall and use drip irrigation from the start. For a wet Zone 8 garden, I would add a gravel strip outside the border and keep mulch away from the wood.

Decide when to hire help
You can build most raised garden borders yourself when the bed is low, the site is level, and the soil is safe. Hire a professional when the border must retain a steep slope, sit beside a foundation, or manage heavy runoff.
Call before digging if underground electrical, gas, or water lines may cross the site. In the United States, contact 811 for utility marking. Wear gloves, eye protection, and sturdy shoes when cutting boards or moving stone.
A professional landscape contractor can also help with drainage, grading, accessible bed height, and masonry. Expect labor to cost more than materials, but proper grading may prevent years of soil loss and water damage.

Frequently asked questions
Q: How high should a raised garden border be?
A: Use 6–12 inches for most vegetables and flowers. Choose 18–24 inches for easier access or wheelchair gardening, but use stronger posts and joints because the soil load increases.
Q: Should I put a bottom on a raised garden bed?
A: Usually, no. A bottom blocks drainage and limits root growth. Use a bottom only for a special case, such as a contaminated patio site, and make sure the container has large drainage holes.
Q: What is the best wood for a raised garden border?
A: Cedar and redwood resist rot and work well around edible crops. Ground-contact pressure-treated lumber can last longer and cost less, but use current products labeled for ground contact and follow the safety label.
Q: Can I build a raised garden border on grass?
A: Yes. Remove the sod or cover short grass with wet, overlapping cardboard. Add 6–10 inches of soil, but expect the bed to settle as the grass and cardboard break down.
Q: How much soil do I need for a 4-by-8-foot raised bed?
A: A 4-by-8-foot bed that is 10 inches deep needs about 26.7 cubic feet, or almost 1 cubic yard, of soil. Add 10–20% more for settling and uneven ground.
Q: Can I use landscape timbers for vegetables?
A: Use them only when you know the treatment and product rating. Avoid old creosote railroad ties and reclaimed timbers with unknown chemicals. For food crops, cedar, untreated hardwood, or approved ground-contact lumber offers a clearer choice.
Q: Why is my raised bed border leaning?
A: Common causes include soft ground, poor leveling, long unsupported sides, or too few stakes. Remove soil from the leaning side, reset the base, and add stakes every 3 feet or less.
Q: How long does a wooden garden border last?
A: Cedar often lasts 8–15 years, while pressure-treated ground-contact lumber may last 10–20 years. Wet soil, poor drainage, shade, and irrigation leaks can shorten those ranges.
Q: Is a raised bed better than planting in the ground?
A: Raised beds offer better control over soil, access, and drainage. In a dry climate, in-ground beds may conserve water better because they dry out more slowly. The better option depends on soil, climate, budget, and mobility.
Q: Can I use a weed barrier under a raised bed?
A: Use cardboard over lawn when you want to smother grass. Avoid plastic sheets that trap water. Landscape fabric can block roots and earthworms, so use it only for a specific weed or contamination concern.
Build a border that fits your garden
A strong raised garden border begins with a modest design, a level base, and materials suited to your climate. Cedar or ground-contact lumber gives beginners a fast start, while brick and stone offer longer life with more work.
Build the frame before buying soil, check drainage before planting, and leave room for paths. Add compost in measured amounts, mulch the surface, and inspect the corners each season. A well-built border should make gardening simpler, not turn into another structure you must constantly repair.
Start with one bed, learn how your soil dries and settles, and adjust the next one. That slow approach has produced better gardens for me than any large weekend project.
Meta description: Learn how to build a raised garden border with wood, stone, or brick. Get tools, measurements, soil tips, steps, costs, mistakes, maintenance, and expert advice.