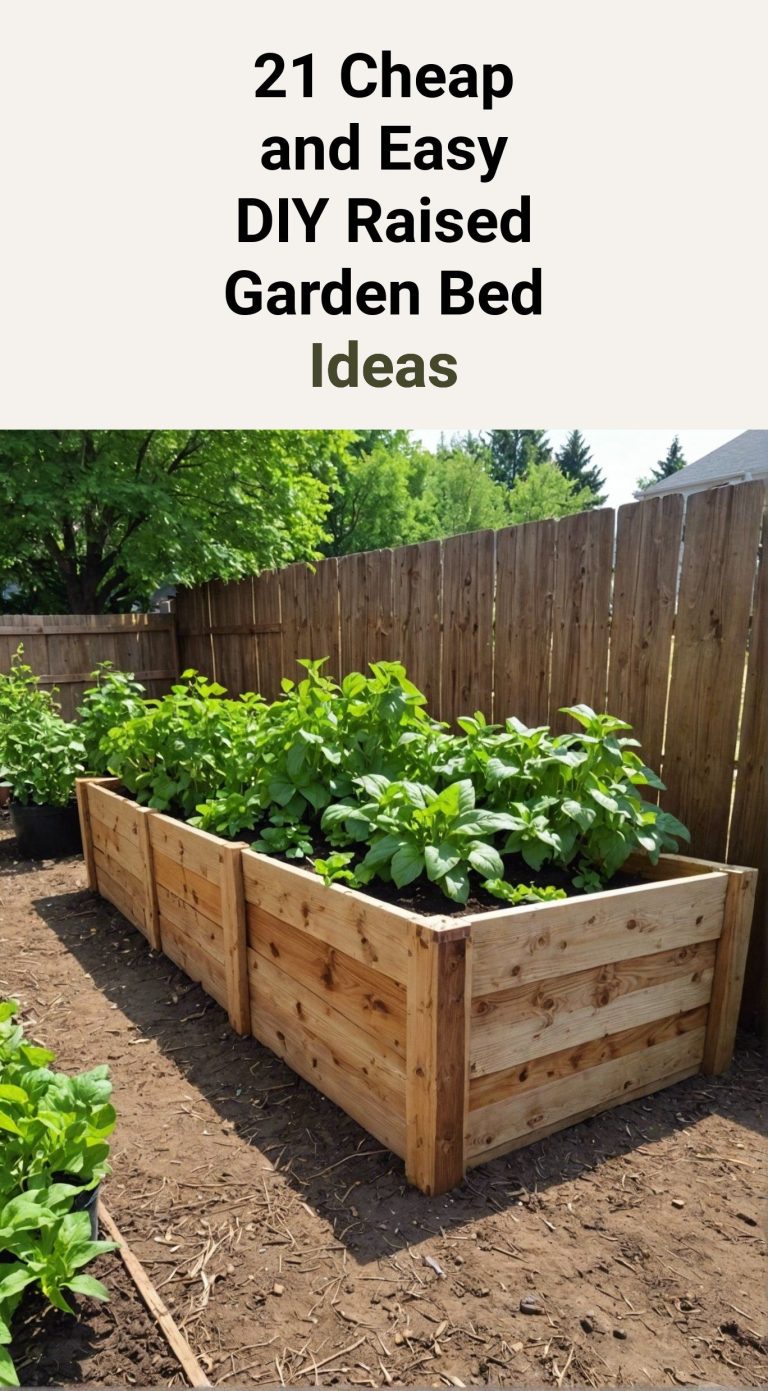
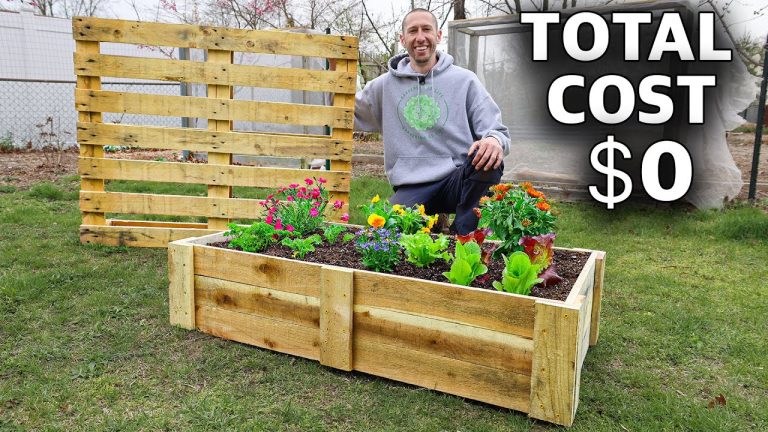
How To Build A Raised Flower Bed: Easy DIY Guide
A raised flower bed gives you more control over soil, drainage, weeds, and plant layout. It can turn a hard clay yard, a flat patch of lawn, or a small patio into a bright growing space. You can build one in a weekend with basic tools, but the bed will last much longer if you choose the right site, wood, soil mix, and drainage plan first.
I have built raised beds in sandy soil in USDA Zone 8 and heavy clay in Zone 6. The same mistake showed up in both places: gardeners built the frame first and thought about water later. A raised flower bed is not just a box filled with dirt. It is a small root zone with its own sun, moisture, temperature, and soil needs.
The best design depends on your plants and your body. A 6-inch bed works well for annual flowers and shallow-rooted herbs. A 12- to 18-inch bed offers better drainage and easier planting. A taller bed can reduce bending, but it costs more and needs stronger walls.
Quick answer: Build a raised flower bed in one day
To build a raised flower bed, choose a level site with at least six hours of sun, mark the shape, remove grass, assemble untreated rot-resistant boards, set the frame level, fill it with quality soil and compost, and water it well. Use a depth of 6 to 12 inches for most flowers, leave room to walk around it, and mulch after planting.

A simple 4-by-8-foot bed usually costs about $100 to $300, depending on the wood and soil. Most beginners can finish it in four to eight hours. Do not use pressure-treated landscape lumber of unknown age, railroad ties, painted boards, or wood treated with creosote near flowers, herbs, or edible crops.
Choose the best place before you build
The right site matters more than a fancy frame. Most flowering plants need six to eight hours of direct sun, although begonias, impatiens, heuchera, and some ferns prefer part shade. Watch the area for one full day before you mark the bed.

Pick a spot with good access to water. Carrying a hose across a yard is easy in spring and annoying by July. Keep the bed close enough that you can check it often, but not so close to a downspout that storm water floods it.
Avoid low areas where water sits after rain. A raised bed improves drainage, but it cannot fix a site that receives a steady flow of runoff. Also avoid placing the bed under large trees. Tree roots compete for water, and dense shade limits flower choices.
How much sun does a flower bed need?
Most sun-loving flowers need six or more hours of direct light. Zinnias, marigolds, coneflowers, black-eyed Susans, lavender, salvia, and roses grow best in full sun. Part-shade plants need two to six hours of sun, often with protection from harsh afternoon heat.
In hot areas such as USDA Zones 8 through 10, morning sun and afternoon shade can help flowers avoid wilt. In cooler Zones 3 through 6, full sun helps warm the soil and extend the growing season. Light changes with the seasons, so check for shade from fences, buildings, and trees.
Pick a shape that is easy to reach
Keep a raised flower bed no wider than 4 feet if you can reach it from both sides. A bed against a wall should stay about 2 feet wide. This keeps you from stepping into the soil and crushing plant roots.
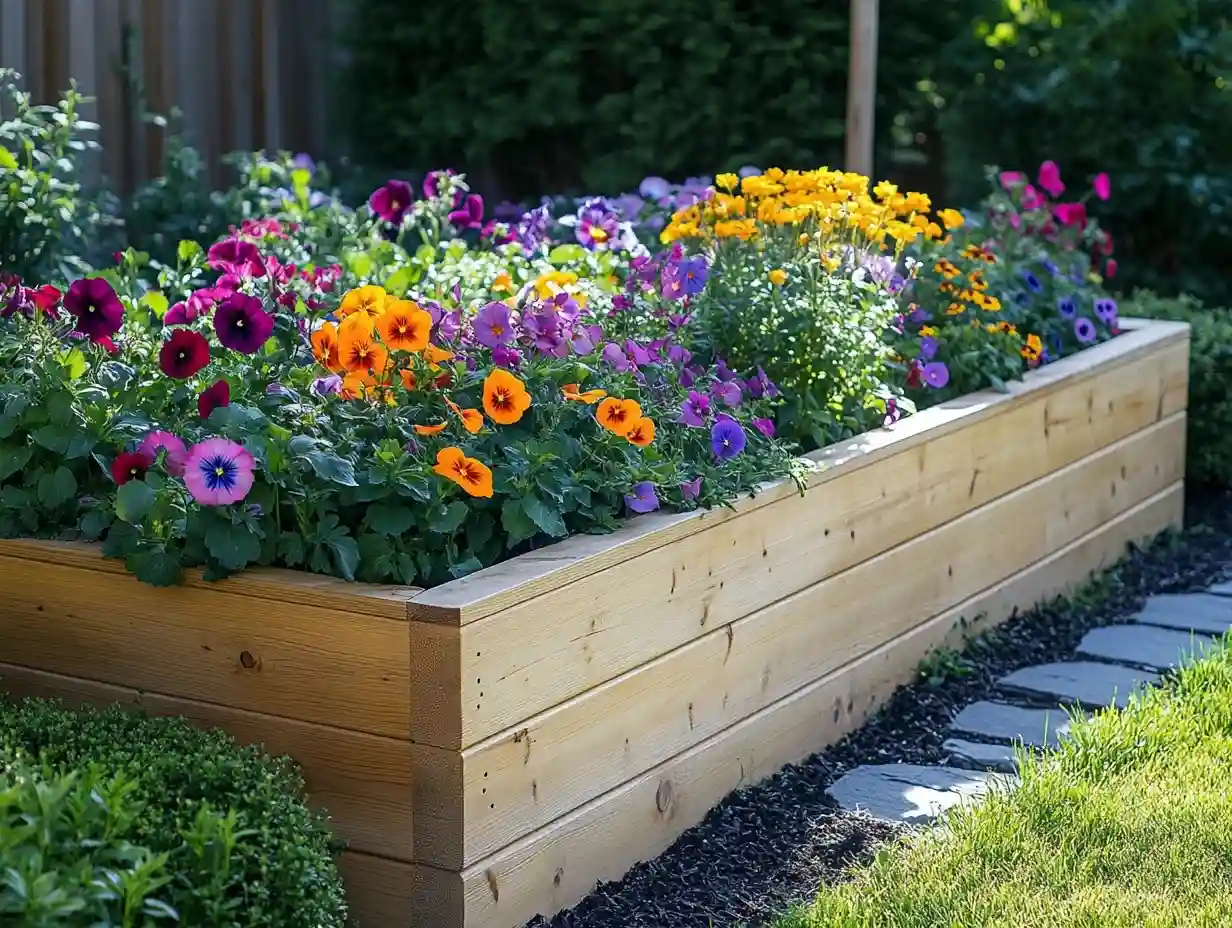
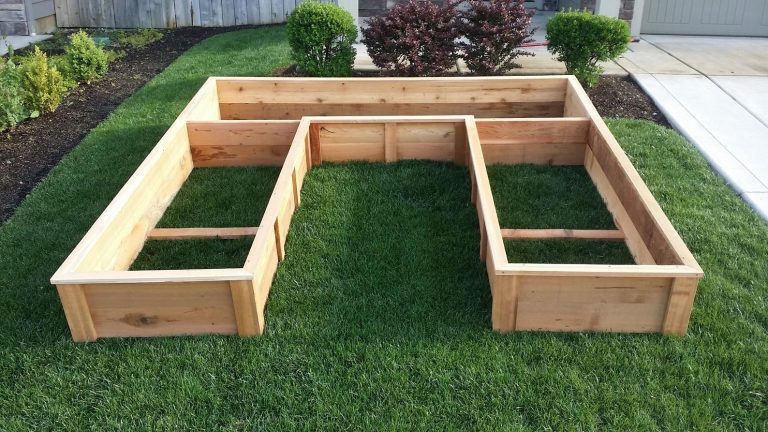
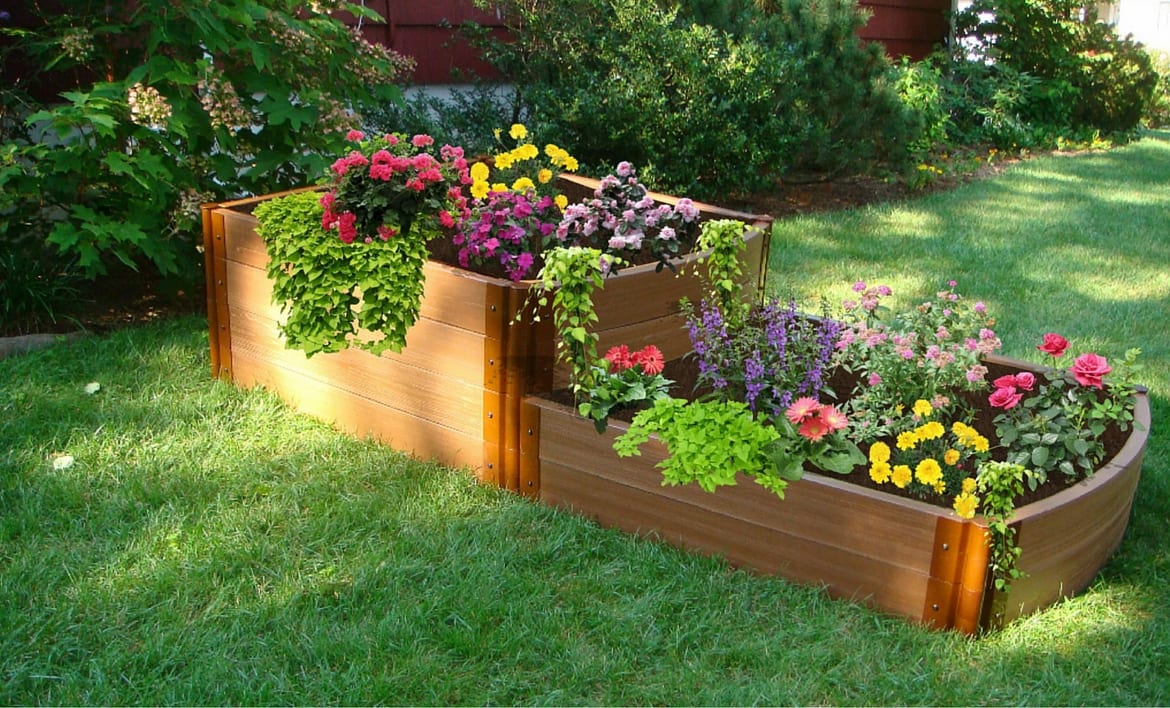
Rectangles use lumber efficiently and make irrigation simple. Square beds work well in small yards. Curved beds look soft and natural, but they need flexible edging, short boards, stone, or composite material. Avoid narrow points and tight corners where soil dries out faster.
A 4-by-8-foot bed gives you 32 square feet of planting space. It also leaves enough room for groups of three, five, or seven plants, which usually look more natural than a single plant of each kind.
Select safe, durable materials
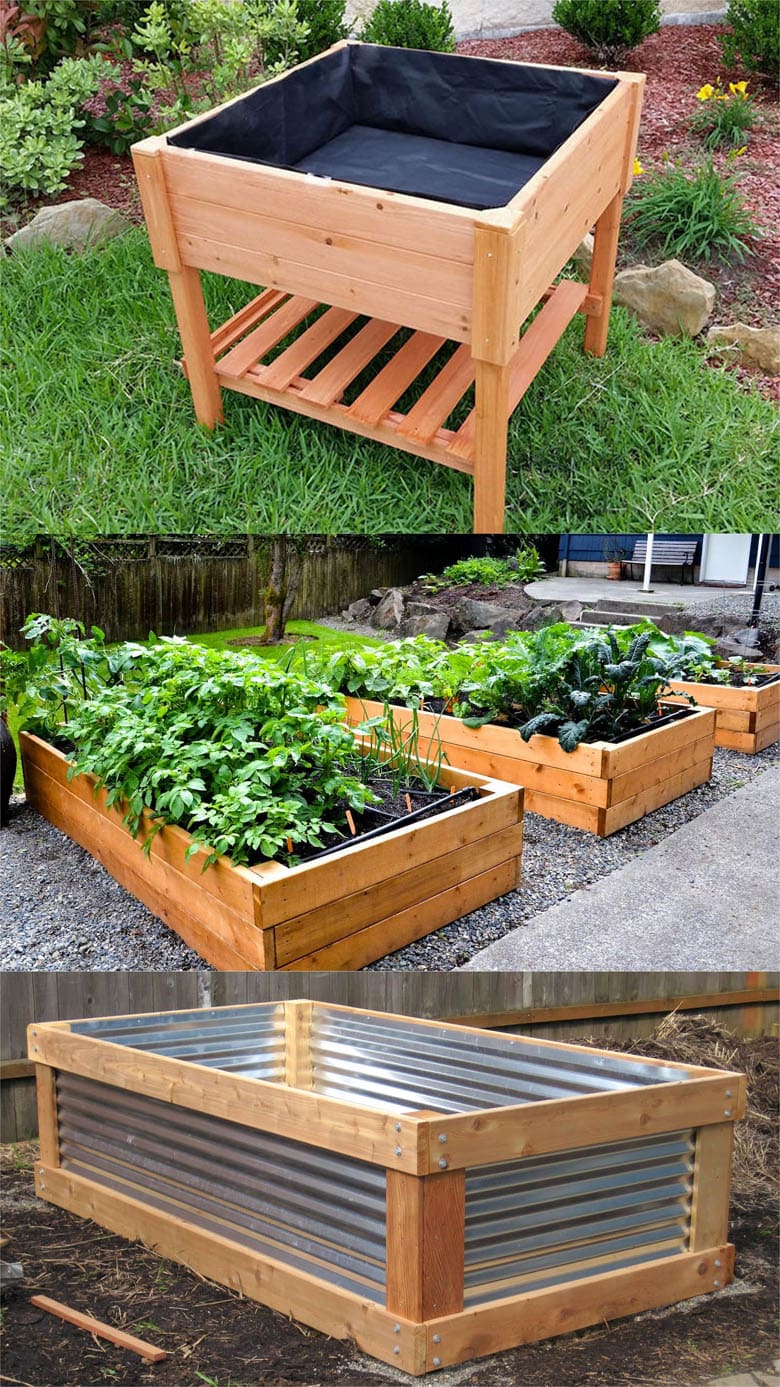
Use untreated cedar, redwood, black locust, or another naturally rot-resistant wood for a classic raised flower bed. Cedar is common because it is light, easy to cut, and often lasts 7 to 15 years, depending on climate and soil contact.

Composite boards can last longer and resist rot, but they cost more and may need special brackets. Stone and concrete blocks can last for decades, but they take more work to level. Metal panels last well in many climates, though they can heat up in full sun.
For flowers, you have more material choices than you do for vegetables. Still, avoid old painted wood, utility poles, railroad ties, and boards with an oily smell. You do not want unknown chemicals leaching into the root zone or washing into nearby soil.
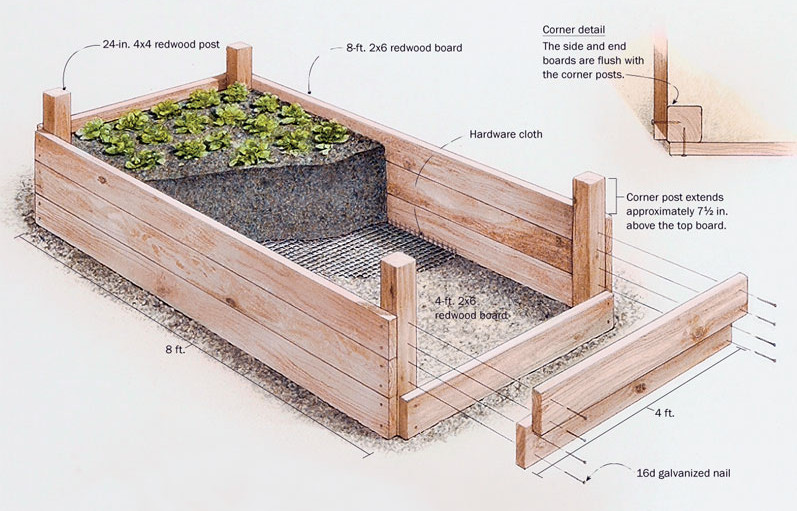
Materials for a standard 4-by-8-foot bed
The list below fits a simple 12-inch-high bed made from two layers of 2-by-8 boards. Actual board size is often about 1½ by 7¼ inches, so check the lumber yard before you buy.
| Material | Suggested amount | Purpose |
|---|---|---|
| Untreated cedar or redwood boards | Four 8-foot boards and four 4-foot boards | Build two layers of side walls |
| Exterior screws, 3-inch | 32 to 40 | Join boards and corners |
| Corner braces or timber stakes | 4 to 8 | Strengthen the frame |
| Cardboard or newspaper | Enough for the footprint | Smother grass and weeds |
| Topsoil, compost, and planting mix | About 1.2 cubic yards | Fill the bed |
| Mulch | 2 to 3 cubic feet | Protect soil and reduce weeds |
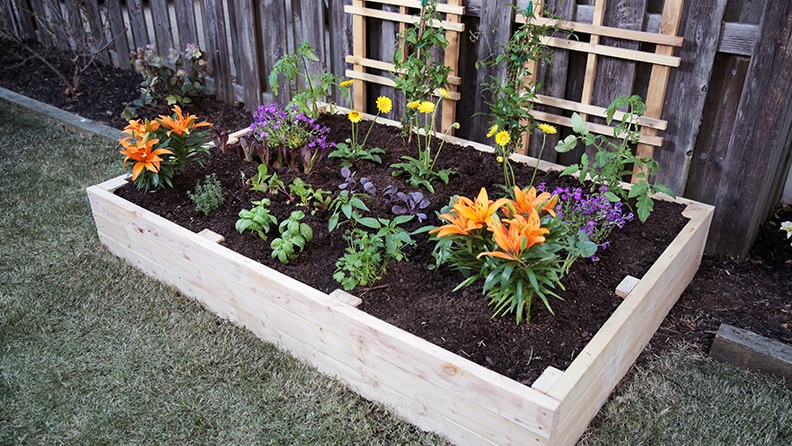
The key takeaway is to buy soil by volume, not by guesswork. A 4-by-8-foot bed that is 12 inches deep holds 32 cubic feet, or about 1.2 cubic yards, before you account for settling.
Soil volume and wall height
Use this formula to calculate the fill you need:
Length in feet × width in feet × depth in feet = cubic feet
For example, a 4-by-8-foot bed that is 1 foot deep needs 32 cubic feet of soil. Divide cubic feet by 27 to convert to cubic yards.
| Bed size | Bed depth | Soil needed before settling |
|---|---|---|
| 4 × 4 feet | 12 inches | 16 cubic feet, about 0.6 cubic yard |
| 4 × 8 feet | 12 inches | 32 cubic feet, about 1.2 cubic yards |
| 4 × 8 feet | 18 inches | 48 cubic feet, about 1.8 cubic yards |
| 3 × 6 feet | 24 inches | 36 cubic feet, about 1.3 cubic yards |
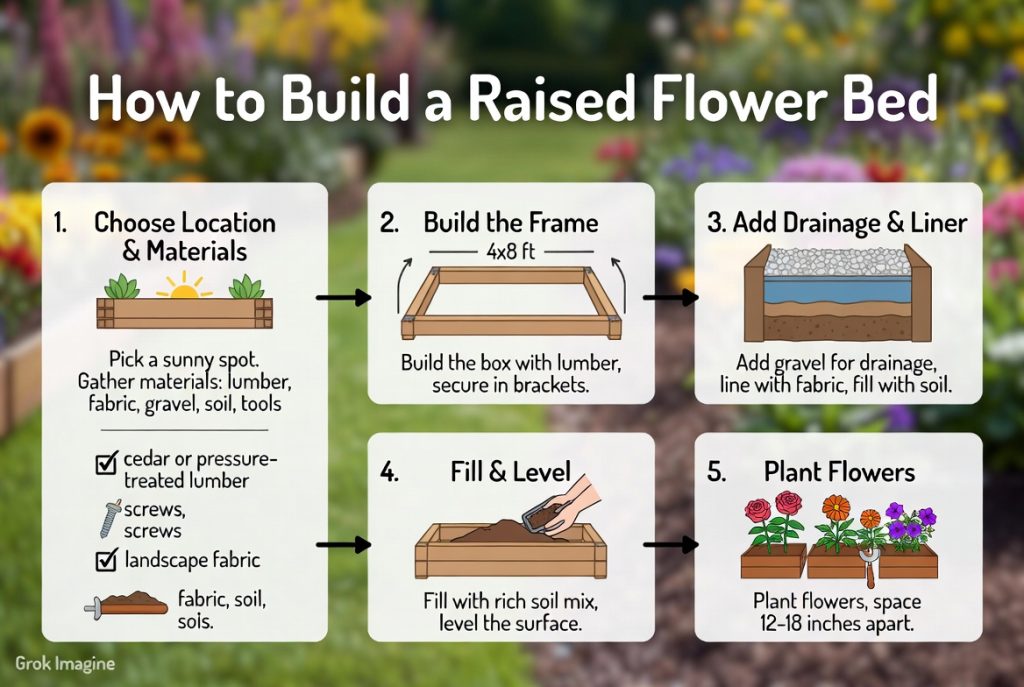
Order 10% to 15% extra because organic matter settles as it breaks down. I usually add extra compost at the top rather than filling the entire bed with expensive bagged planting mix.
Pros and cons of common bed materials
Each material solves a different problem. Wood is the easiest choice for a first build, while stone and composite make more sense when you want a long service life.
| Material | Advantages | Limitations |
|---|---|---|
| Cedar or redwood | Easy to cut, attractive, moderate cost | Eventually rots, especially in wet climates |
| Composite boards | Rot-resistant, low maintenance | Higher cost, can flex or expand |
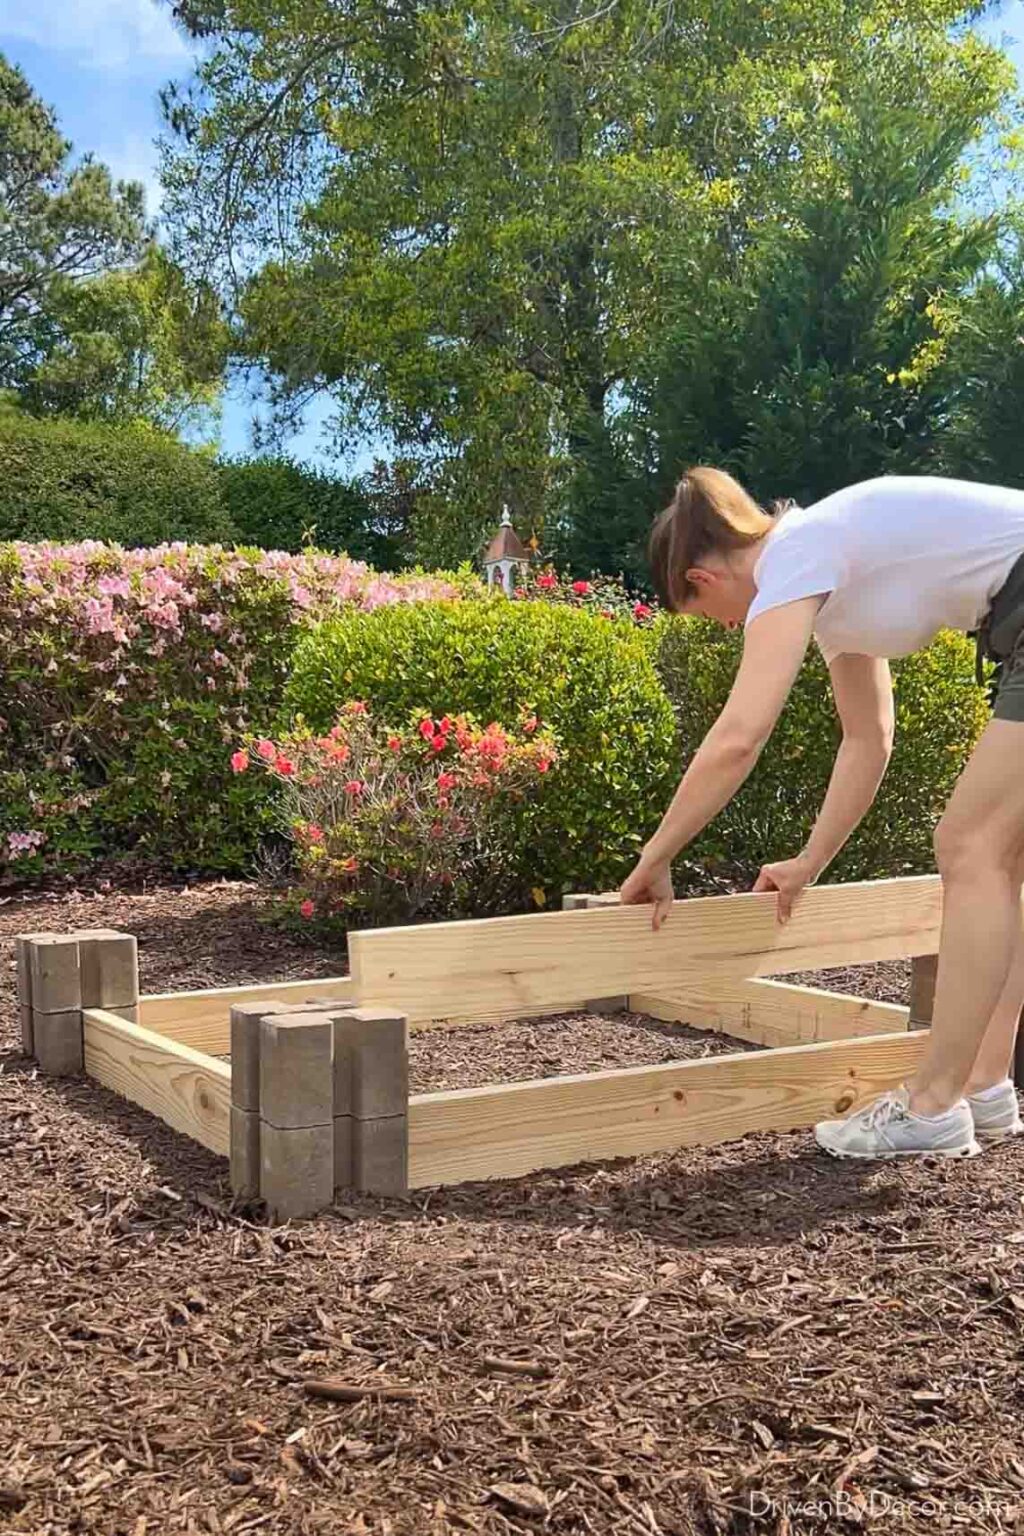
| Stone or concrete block | Very long life, strong, heat-stable | Heavy, slower to level and build |
| Galvanized metal | Modern look, durable, quick to install | Can heat soil in hot climates |
| Untreated pine | Low starting cost, easy to find | Often lasts only 3 to 7 years |
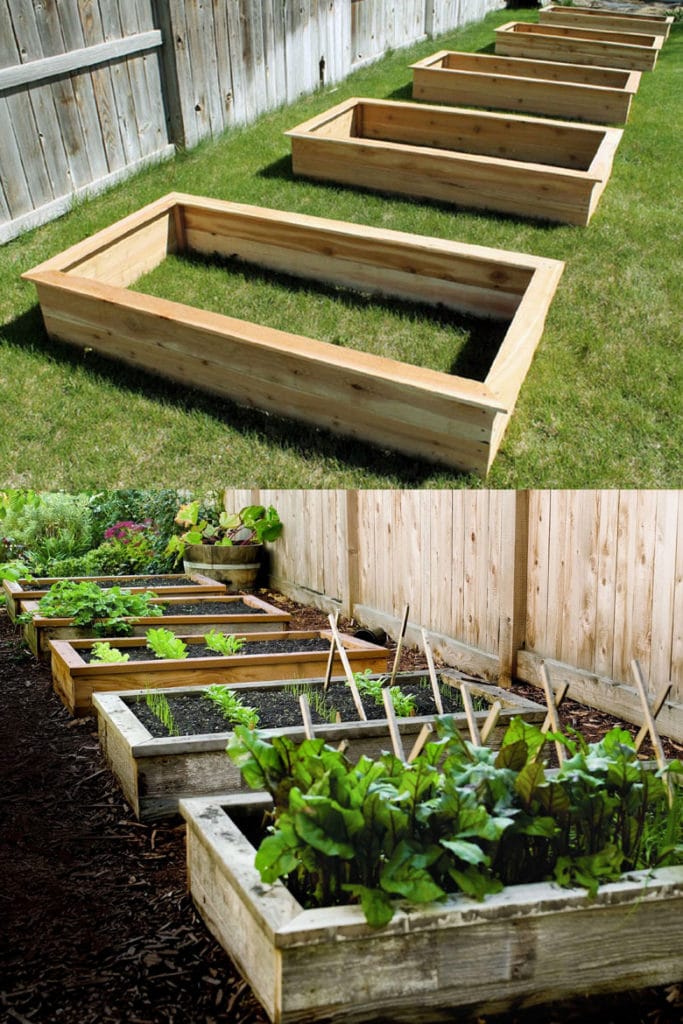
For most home gardens, cedar offers the best balance of cost, safety, and ease. If you rent, move often, or garden on a patio, a metal or composite kit may be easier than cutting lumber.
Gather the tools and prepare safely
You do not need a full workshop. A tape measure, level, drill, shovel, rake, hand saw, and wheelbarrow can handle most builds. A circular saw speeds up cuts, but the lumber yard may cut boards for you.
Wear safety glasses when cutting or drilling. Use work gloves when handling rough boards. If you use a circular saw, keep the cord or battery away from the blade path and support the board so the cut does not pinch the blade.
Call your utility locating service before driving stakes or digging more than a few inches. In the United States, 811 can help identify buried utility lines. This matters even for a shallow bed because some lines sit close to the surface.
| Tool | Why you need it | Useful alternative |
|---|---|---|
| Tape measure and stakes | Mark the bed and check size | String and a ruler |
| Level | Keep the frame even | Straight board and small level |
| Drill with driver bit | Install exterior screws | Manual screwdriver, if needed |
| Shovel and garden fork | Remove grass and loosen soil | Mattock for hard ground |
| Rake | Smooth soil and compost | Hand cultivator for a small bed |
| Wheelbarrow or garden cart | Move soil and mulch | Buckets for very small beds |
A cordless drill with a 12- or 18-volt battery is enough for most home beds. You do not need a heavy impact driver, though it helps when you work with thick hardwood. A sharp spade makes cleaner edges than a dull shovel and saves your back.
Build the raised flower bed step by step
A good build starts with a level base and strong corners. Take time during layout and assembly. A frame that is slightly slow to build but square and level will drain better and look better for years.

1. Mark the bed on the ground
Place stakes at the four corners. Tie string between them to show the outside edges. Measure the diagonals from corner to corner. If both diagonal measurements match, the rectangle is square.

For a 4-by-8-foot bed, measure from one 4-foot corner to the opposite 8-foot corner. Both diagonals should be close to 8 feet 11 inches. Small differences are fine, but large differences will make the boards fight you at the corners.
Spray marking paint along the string or use a garden hose for a curved outline. Step back and look at the shape from the house, patio, and main path before you start digging.
2. Remove grass and large weeds
Cut the sod inside the outline with a sharp spade. Slide the blade under the grass and lift it in thin pieces. Remove perennial weeds such as bindweed, quackgrass, Bermuda grass, and Canada thistle as completely as you can.
You do not need to excavate a deep trench. Remove enough sod to create a firm base and reduce the chance of grass growing through the bed. On a flat site, a 2- to 4-inch scrape is often enough.
If the site has aggressive grass, lay overlapping cardboard after removing the sod. Wet the cardboard so it settles. Use plain brown cardboard with tape and labels removed. Do not use glossy paper or cardboard with heavy ink.
3. Level the base
Set a straight board across the soil and place a level on top. Move soil from high areas to low areas until the base sits close to level. Check both the length and width.

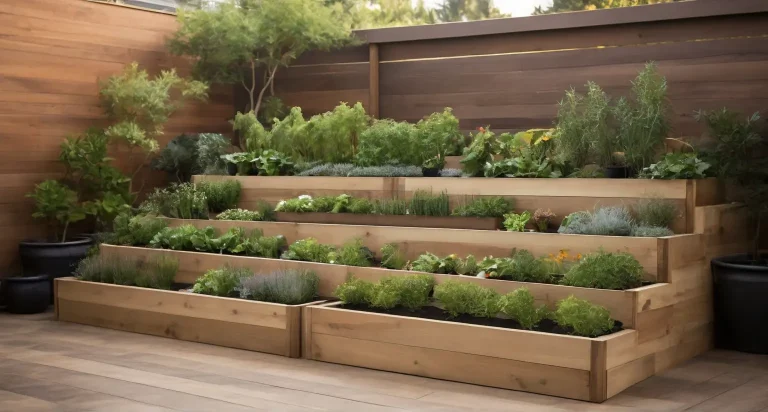
Do not build on a steep slope without a plan. A bed on a mild slope can be stepped into terraces, but a tall wall on a sharp slope may need drainage stone, anchors, or professional design. Soil is heavy, and a failed wall can damage plants, paths, or property.
4. Cut and dry-fit the boards
Lay the boards around the outline before fastening them. Put the long boards on the outside of the short boards or use butt joints at the corners. Either method works if the frame stays square.
If you build two or three layers high, stagger the joints. Do not place every seam directly above the one below it. Staggered seams spread stress and reduce the chance of a long crack.
Pre-drill near board ends to prevent splitting. This matters most with cedar, redwood, and dry lumber. Use exterior-rated screws rather than interior drywall screws, which rust and snap more easily outdoors.
5. Assemble and reinforce the frame
Fasten each corner with at least two screws per board connection. Add a vertical stake inside each corner. For beds longer than 6 feet, add a center brace or cross tie to stop the long walls from bowing.
A 12-inch bed often needs less reinforcement than an 18- or 24-inch bed. Taller walls hold more soil and receive more outward pressure after rain. Use heavier boards, corner posts, and cross braces as height increases.
Check the level after each layer. A small error at the first layer becomes obvious at the top. If a board rocks, remove soil under the low side instead of forcing the frame down with screws.
6. Improve the soil below the bed
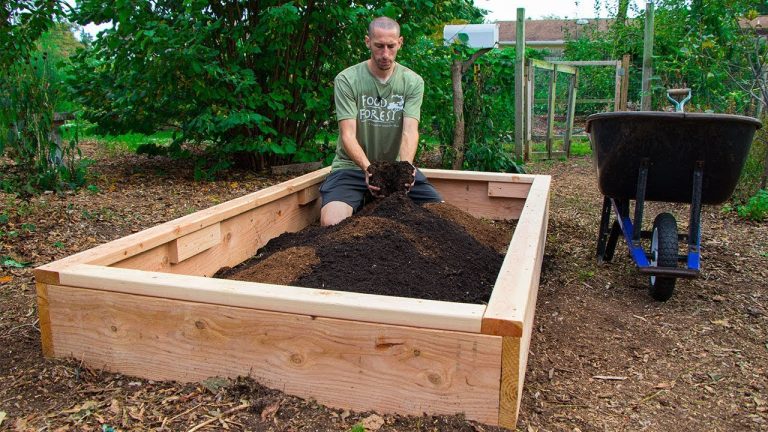
Loosen the native soil with a garden fork before you add the fill. You only need to loosen the top 6 to 8 inches. This helps roots move into the ground and lets excess water drain away.
Do not line the bottom with plastic. Plastic blocks drainage and can create a wet pocket. Landscape fabric also has limited value in a raised flower bed because roots, worms, and water need to move through the soil.
If burrowing pests are common, place ¼-inch galvanized hardware cloth under the bed before filling it. Overlap the edges by 6 inches and secure them to the frame. Chicken wire has holes that are too large for many voles and mice.
7. Fill the bed with a balanced soil mix
Use a mix that drains well but holds moisture. A practical blend is about 60% quality topsoil, 30% finished compost, and 10% aged pine fines or coarse organic matter. Do not use pure compost because it can shrink, dry quickly, or contain too much soluble salt.
For acid-loving plants such as blueberries, azaleas, and some hydrangeas, test and adjust the soil rather than guessing. Most flowers prefer a pH between 6.0 and 7.0. Blueberries need a much lower pH, often about 4.5 to 5.5, and usually deserve a separate bed.
Fill the bed in 3- to 4-inch layers. Water each layer lightly to settle air pockets. Stop when the soil sits 1 to 2 inches below the top edge. A full bed will settle over the first few months.
8. Add irrigation and mulch
Install a soaker hose or drip line before planting if the bed is large. Lay the line in loops 8 to 12 inches apart. Use a pressure regulator and filter with drip systems, and test the flow before covering the lines.
Add 2 to 3 inches of shredded bark, leaf mold, pine straw, or another suitable mulch. Keep mulch 2 inches away from plant crowns and woody stems. Thick mulch against stems can trap moisture and invite rot, slugs, and voles.
Water the finished bed slowly until water begins to drain from the bottom edge. This reveals dry pockets and shows whether the soil settles unevenly.
Plant the bed for height, bloom, and pollinators
Place tall flowers at the back of a bed viewed from one side. Put tall plants in the center of an island bed. Use medium plants in the middle and low or trailing plants along the edge.
This design gives each plant room and keeps shorter flowers from sitting in deep shade. It also makes maintenance easier because you can reach the edge without stepping into the soil.
Good full-sun choices include purple coneflower, black-eyed Susan, yarrow, salvia, catmint, coreopsis, zinnia, marigold, cosmos, and bee balm. For part shade, try coral bells, astilbe, foxglove, impatiens, hellebore, Japanese forest grass, and woodland phlox.
| Bed position | Plant height | Suitable examples |
|---|---|---|
| Back or center | 3 to 6 feet | Sunflower, hollyhock, Joe-Pye weed, delphinium |
| Middle | 1½ to 3 feet | Coneflower, salvia, yarrow, bee balm |
| Front edge | 6 to 18 inches | Alyssum, creeping thyme, marigold, dianthus |
| Trailing edge | 6 to 24 inches | Sweet potato vine, nasturtium, trailing petunia |
Use groups rather than a scattered collection of single plants. Three coneflowers look stronger than one coneflower beside five unrelated flowers. Mix bloom times so the bed has color in spring, summer, and fall.
Add plants that support pollinators. Lavender, anise hyssop, bee balm, mountain mint, aster, goldenrod, and native coneflowers feed bees and butterflies. Avoid spraying broad-spectrum insecticides when flowers are open.
Water, feed, and maintain the bed
Raised beds often dry faster than ground-level beds, especially when they contain loose soil and sit in full sun. Check moisture with your finger about 2 inches below the surface. If that layer feels dry, water deeply.
New plants may need water two or three times each week during hot weather. Established perennials often need less frequent but deeper watering. Sandy soil drains fast, while clay-based mixes hold water longer.
Water at the soil line in the morning. Wet leaves can increase fungal disease, especially in humid areas. Drip irrigation and soaker hoses reduce splash and keep foliage dry.
Seasonal raised bed schedule
Your care plan should change with the season. Plants use more water in summer, while soil protection matters most in winter.
| Season | Main tasks | What to watch for |
|---|---|---|
| Spring | Add compost, plant after frost, check screws and corners | Slugs, cutworms, soggy soil |
| Summer | Water deeply, deadhead, stake tall flowers, refresh mulch | Wilt, spider mites, powdery mildew |
| Fall | Cut back diseased stems, collect seed, add light mulch | Rodents, excess wet leaves |
| Winter | Check wall movement, clear heavy snow from edges | Rot, frost heave, standing water |
In cold Zones 3 through 5, avoid piling wet leaves against wood walls. In warm Zones 8 through 10, mulch helps keep roots cool and slows moisture loss. In mild climates, many annuals can bloom through winter.
Fertilizing flowers without causing weak growth
Start with a soil test if the bed will support perennials for many years. A test can show pH, phosphorus, potassium, and organic matter. Do not add lime or fertilizer based only on a plant’s leaf color.
Many flower beds need only a ½- to 1-inch layer of compost each spring. Heavy nitrogen can produce large leaves and few blooms. If plants need extra feed, choose a slow-release product close to the needs of the plants.
A balanced fertilizer such as 5-5-5 works for many ornamentals when used at the label rate. Roses, annuals, and container-grown plants may have different needs. Always water after applying dry fertilizer.
Maintenance checklist
Small, regular jobs prevent most raised bed problems. Spend five minutes checking the bed every few days during the growing season.
| Task | How often | Why it matters |
|---|---|---|
| Check soil moisture | Two to four times per week in summer | Prevents wilt and root stress |
| Pull small weeds | Weekly | Stops weeds before they seed |
| Deadhead flowers | Weekly or as needed | Encourages more blooms |
| Inspect walls and screws | Monthly | Finds rot, bowing, or loose joints |
| Refresh mulch | Once or twice per year | Saves water and limits weeds |
| Remove diseased leaves | As soon as seen | Slows disease spread |
The first part to fail is often not the soil. It is the lower edge of a wood wall where wet mulch stays against the board. Keep mulch off the frame, improve airflow, and inspect the base each spring.
Fix common raised flower bed problems
Raised beds solve some problems but can create others. The most common issues are dry soil, poor drainage, settling, leaning walls, and plants that grow tall but fail to bloom.
Why is the soil drying out so fast?
Loose soil, strong wind, full sun, and a shallow bed can cause rapid water loss. Dark metal beds may heat the root zone and increase evaporation. Sandy soil dries faster than soil with clay or compost.
Add 2 to 3 inches of mulch, use drip irrigation, and water slowly. If water runs off the surface, apply it in two passes about 20 minutes apart. This gives dry soil time to absorb moisture.
Why is my raised bed staying wet?
Wet soil usually comes from poor site drainage, too much compost, a blocked bottom, or frequent shallow watering. Dig a small hole near the plant. If water remains after several hours, investigate before adding more plants.
Remove plastic liners. Clear blocked drainage paths. Reduce irrigation and mix in coarse organic matter only if the soil lacks structure. Do not add sand to heavy clay in small amounts. It can create a dense, concrete-like mix.
Why are my flowers growing leaves but few blooms?
Too much nitrogen is a common cause. Low light, excess water, crowded plants, and pruning at the wrong time can also reduce flowers.
Move sun-loving plants into more light if possible. Stop high-nitrogen fertilizer and check the plant’s bloom season. Some perennials spend their first year building roots and may bloom lightly until the second season.
Why is the wood wall bowing?
Long walls bow when soil pressure exceeds the strength of the boards. Saturated soil adds weight. A tall bed without cross braces is more likely to move.
Add a center brace or internal stake if the wall has not cracked. If the boards are splitting or leaning badly, empty the soil in stages and rebuild the weak side. Do not try to force a badly bowed wall straight while it is full.
| Problem sign | Likely cause | Practical fix |
|---|---|---|
| Water pools after rain | Poor site drainage or plastic liner | Improve the base and remove the liner |
| Plants wilt each afternoon | Dry soil, heat, or shallow roots | Add mulch and water deeply |
| Lower boards turn soft | Constant wet mulch or wood contact | Replace boards and improve airflow |
| Soil sinks several inches | Organic matter breaking down | Top-dress with soil and compost |
| Plants have leaves but few flowers | Low light or excess nitrogen | Increase light and reduce nitrogen |
| Ants or voles appear | Dry mulch, gaps, or nearby habitat | Adjust watering and use hardware cloth |
Do not treat every wilted plant as thirsty. In hot weather, some plants wilt briefly at midday and recover by evening. Check the soil before watering again, since repeated soaking can cause root rot.
Learn from my first raised bed builds
My first raised flower bed was a 4-by-8-foot cedar frame in heavy clay. I filled it with a cheap “garden soil” blend that contained too much fine compost. The plants grew fast in spring, but the soil shrank and crusted by late summer.
The next season, I mixed in screened topsoil and aged pine fines, then added a soaker hose. The bed drained better and held moisture longer. After four weeks, the plants looked less dramatic than the first year, but they stayed healthier through a hot July.
I also learned to leave more space around the bed. My first path was only 18 inches wide. A wheelbarrow barely fit, and I could not kneel without crushing the edge plants. A 30- to 36-inch path works much better for routine care.
In Zone 6, my cedar bed stayed sound for about 10 years before the lowest boards needed replacement. In a wet Pacific Northwest garden, expect faster decay. In a dry climate, wood may last longer, but irrigation leaks can still rot one section.
Estimate the time and cost
A basic raised flower bed costs less when you use local materials and build a simple shape. Soil often costs as much as the frame, especially when you buy many bags instead of bulk soil.
Current pricing ranges from about $100 for a small pine bed with bagged soil to $600 or more for a tall cedar, composite, or stone bed with delivered soil. Delivery fees can change the total more than the soil itself.
| Project type | Typical time | Approximate cost |
|---|---|---|
| 3 × 6-foot pine bed | 3 to 5 hours | $80 to $180 |
| 4 × 8-foot cedar bed | 4 to 8 hours | $150 to $350 |
| 4 × 8-foot composite bed | 3 to 6 hours | $300 to $700 |
| Stone or block bed | 1 to 3 days | $300 to $1,000+ |
| 18- to 24-inch tall accessible bed | 1 to 2 days | $400 to $1,200+ |
Costs vary by region, lumber grade, soil delivery, and whether you already own tools. A simple bed is worth the money when your native soil is poor or your yard drains badly. It may not be worth building one if your ground already has rich, well-drained soil and you only need a small flower border.
Use these design tips for better results
A few design choices make the bed easier to plant and maintain. They also help the bed fit the rest of your landscape instead of looking like a box dropped onto the lawn.
- Use one main shape and repeat it elsewhere in the yard.
- Keep the top edge low enough to sit on if children will use the garden.
- Add a broad path with wood chips, gravel, pavers, or lawn.
- Install irrigation before you plant.
- Put taller flowers where they will not block windows or paths.
- Use native plants where they suit your soil and climate.
- Leave gaps for airflow between crowded perennials.
- Keep a few flowers with seed heads for winter birds.
💡 Pro Tip: Make a paper plan before buying plants. Draw the bed to scale, mark north, and note morning and afternoon shade. This prevents the common mistake of putting a 6-foot sunflower in front of a 12-inch alyssum.
🌱 Beginner Note: You do not need to fill a tall flower bed with expensive planting mix from bottom to top. For a 24-inch bed, use clean logs or untreated woody material in the lower section only if the design allows it, then add quality soil above. Avoid fresh wood chips, diseased wood, and material that may settle sharply.
Raised beds versus ground-level flower borders
A raised bed gives you more control, but a ground-level border costs less and often supports deeper root growth. Choose based on the site, not fashion.
A ground-level bed is a good alternative when the soil drains well and you have space to amend it. A container is better for a rental, balcony, or very small garden. A retaining wall is the safer choice for a steep slope or a bed taller than about 24 inches.
When a tall accessible bed makes sense
A tall bed helps gardeners who have back pain, use a wheelchair, or cannot kneel safely. Build the top at a height that suits the gardener, often 24 to 32 inches, and leave enough knee or foot space below the working edge.
Tall beds need strong construction. Use posts, thick boards, corner connectors, and cross braces. Think about how soil will reach the bed. A narrow opening may make it hard to dump a wheelbarrow or move bags.
Know when to hire a professional
You can build most low raised flower beds yourself. Hire help when the bed also acts as a retaining wall, sits beside a foundation, blocks drainage, or requires major grading.
A professional can design a stepped bed on a slope and account for water pressure. An engineer or qualified contractor may be needed for tall masonry walls. Call before digging if you suspect buried utilities or irrigation lines.
You should also ask for help if lifting boards or moving soil could cause injury. Soil weighs a great deal. A cubic yard of moist soil can weigh more than 2,000 pounds, so use a cart and ask for assistance.
Frequently asked questions
Q: How deep should a raised flower bed be?
A: Use 6 to 12 inches for annual flowers and many shallow-rooted perennials. Use 12 to 18 inches for roses, ornamental grasses, shrubs, and plants with deep roots. A taller wall improves access but needs stronger bracing and more soil.
Q: Can I build a raised flower bed on grass?
A: Yes. Remove the sod, loosen the soil, and cover the base with wet cardboard if needed. Do not place a frame directly over thick grass without a barrier because grass can grow into the new soil.
Q: Should I line my raised flower bed with plastic?
A: No, not in most cases. Plastic can trap water and reduce drainage. Use cardboard to smother grass, and use ¼-inch hardware cloth beneath the bed only when rodents are a concern.
Q: What is the best soil mix for a raised flower bed?
A: Use about 60% quality topsoil, 30% finished compost, and 10% aged pine fines or another coarse organic material. Adjust the mix based on your native soil, local climate, and plant needs. Pure compost is usually too unstable for the full bed.
Q: Can I use pressure-treated wood for flowers?
A: Modern pressure-treated lumber is widely used outdoors, but many gardeners still prefer untreated cedar, redwood, composite, stone, or metal for planting beds. Never use old treated wood, railroad ties, or wood with creosote or an unknown coating.
Q: How long does a wooden raised flower bed last?
A: Untreated pine may last 3 to 7 years. Cedar and redwood often last 7 to 15 years. Wet climates, poor drainage, and mulch touching the wood shorten the life. Composite, stone, and metal can last much longer.
Q: How often should I water raised flowers?
A: Check the soil two inches down. Water when that layer feels dry, then soak the root zone deeply. New plants may need water two or three times per week in hot weather, while established perennials may need less.
Q: Can I grow shrubs in a raised flower bed?
A: Yes, if the bed is deep and wide enough. Small shrubs such as dwarf hydrangea, potentilla, spirea, and compact roses can work well. Check mature size before planting because a shrub that fits at 2 feet may need 5 feet later.
Q: Why is my raised bed sinking?
A: Soil settles as compost and other organic matter decompose. This is normal during the first year. Add a thin layer of topsoil and compost each spring, but do not bury plant crowns or raise the soil above the frame.
Q: What should I plant in a raised flower bed for pollinators?
A: Try native coneflower, bee balm, aster, goldenrod, mountain mint, yarrow, salvia, lavender, and anise hyssop. Choose species suited to your USDA hardiness zone and provide blooms from spring through fall.
Q: Is a raised flower bed worth the money?
A: It is usually worth the cost when your soil is heavy clay, compacted, contaminated, poorly drained, or hard to work. It may not be worth it on naturally rich, well-drained soil unless you need easier access or a stronger landscape design.
Q: What is the best time to build a raised flower bed?
A: Build it any time the ground is workable, but early spring and fall are often easiest. In cold zones, build before the last frost and plant after the soil warms. In hot zones, build in fall or late winter to avoid working in extreme heat.
Finish the project with a simple care plan
A raised flower bed works best when the frame, soil, plants, and water plan support each other. Start with a sunny or suitably shaded site, build a level frame, use safe materials, and fill it with a stable soil mix. Then plant for mature size instead of the small size you see at the nursery.
The best raised flower bed is not the tallest or most expensive one. It is the bed you can reach, water, weed, and repair without strain. Build a modest frame first, watch how it handles one full growing season, and improve it as you learn what your yard needs.
Meta description: Learn how to build a raised flower bed with simple steps, safe materials, soil mix tips, plant ideas, costs, drainage advice, and seasonal maintenance.