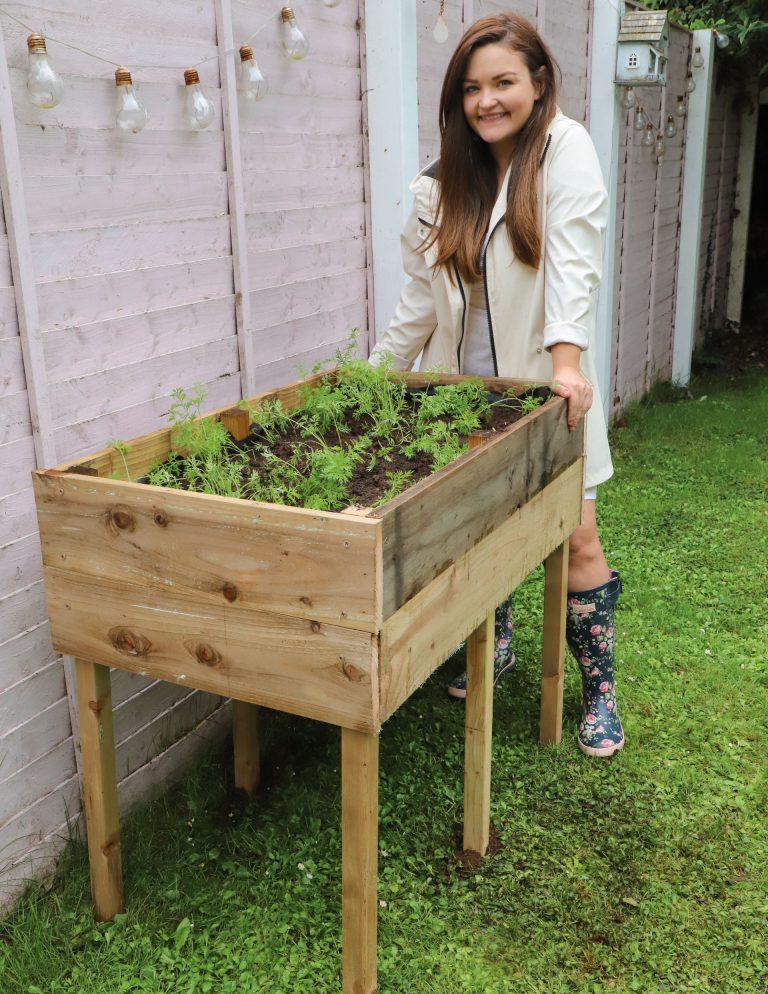
How To Build An Indoor Planter: Easy DIY Guide
Indoor planters bring green life into rooms that lack garden space. They can hold herbs on a kitchen sill, a fern in a dark corner, or a small citrus tree near a bright window. A good planter also protects floors, controls moisture, and gives roots enough room to grow.
You can build a simple indoor planter in one afternoon with basic tools and low-cost wood. The key is not complex joinery. The key is choosing safe materials, adding real drainage, sealing the wood well, and matching the planter size to the plant. I have built indoor planters from pine, cedar, plywood, and reclaimed boards. Each material works, but each has limits.
This guide shows how to build an indoor planter box step by step. It also covers drainage, soil, liners, lighting, plant choice, maintenance, cost, safety, and common failures. The design suits herbs, houseplants, succulents, and many compact vegetables.

Quick answer: How do you build an indoor planter?
To build an indoor planter, cut untreated wood into four sides and a base, assemble the box with screws and waterproof glue, drill drainage holes, sand the edges, and seal the outside with a low-VOC finish. Add a waterproof liner or inner pot, then fill it with indoor potting mix. Keep the planter near light and never let excess water sit on the floor.

Choose the right indoor planter design
The best indoor planter design depends on the plant, the space, and how much water the container will hold. A small herb box needs less wood and less support than a deep planter for a fiddle-leaf fig or dwarf lemon tree.
For most homes, I recommend a rectangular box with a removable plastic liner. The wooden box acts as a decorative shell. The liner holds the soil and water. This design reduces rot, protects floors, and lets you replace the liner if it cracks.
A direct-fill wooden planter can work, but it needs careful sealing. Water will touch the wood each time you irrigate. Even cedar can soften or stain after long exposure to wet soil.
Pick a useful size
Measure the place where you will use the planter before buying wood. Leave at least 2 inches of space behind the planter for airflow and 4 to 6 inches around it for watering and pruning.
Use these starting sizes:
- Small herb planter: 24 inches long, 8 inches wide, and 8 inches deep
- Medium houseplant planter: 24 to 30 inches long, 12 inches wide, and 12 inches deep
- Large floor planter: 30 to 36 inches long, 14 to 18 inches wide, and 16 to 20 inches deep
- Window box style planter: 18 to 30 inches long, 6 to 8 inches wide, and 6 to 8 inches deep
The inside depth matters more than the outside height. Basil, mint, parsley, and chives grow well in 6 to 8 inches of soil. Snake plants and pothos can manage in 8 to 10 inches. A fiddle-leaf fig needs more root space and may do better in a separate nursery pot inside the box.
Decide between a box and a stand
a box sits on the floor, shelf, or table. A planter stand lifts it above the surface. A stand can improve airflow and make watering easier, but it adds weight and raises the risk of tipping.
For homes with pets or young children, use a wide base and low height. For a narrow apartment window, a low box works better than a tall planter. In my own rooms, I use floor boxes for heavy plants and raised stands only for light nursery pots.

Tools and materials for the project
You do not need a full workshop to build an indoor planter. A drill, saw, square, clamp, and sanding block handle most of the work. A circular saw gives clean, straight cuts, but a hardware store can often cut boards for you.
Choose untreated, dry lumber. Avoid old painted boards, pressure-treated wood, railroad ties, and wood with an unknown history. Chemicals and old coatings can leach into wet soil or create dust during cutting.
| Item | Recommended choice | Typical amount |
|---|---|---|
| Wood | Untreated pine, cedar, poplar, or exterior-grade plywood | 1 project set |
| Screws | 1¼-inch or 1½-inch coated wood screws | 12–20 |
| Glue | Waterproof wood glue, such as Titebond III | 2–4 ounces |
| Drill bit | ¼-inch to ½-inch bit for drainage | 1 |
| Finish | Low-VOC polyurethane, tung oil, or plant-safe exterior finish | 1 small can |
| Liner | Plastic nursery pot, tray, or pond-liner sheet | 1 |
| Safety gear | Eye protection, dust mask, and hearing protection | 1 set |
The table gives a safe starting list for one medium planter. Adjust the screw count and wood size for longer boxes.
Choosing wood for an indoor planter
Pine costs less and is easy to cut. It works well when you use a liner and seal the outside. Its main weakness is that it dents and absorbs water faster than cedar.
Cedar resists decay and has a warm look. It costs more, and its strong scent can linger in a small room. Poplar paints well and has a smooth surface, but it is not as rot resistant as cedar.
Exterior-grade plywood works for large boxes. Use plywood with sealed edges, since exposed layers can swell. Avoid particleboard and MDF. Both can fail quickly when exposed to water.
Select safe finishes
Use a water-based, low-VOC finish for most indoor projects. “Low-VOC” means the finish releases fewer volatile organic compounds into the air. Let the finish cure fully before you add plants.
Oil finishes can look beautiful, but they may smell for days. If you use tung oil or another plant-based oil, follow the label and allow extra cure time. Do not treat the inside of a planter with a product unless the maker states that it suits wet use.
| Finish | Good for | Main limitation |
|---|---|---|
| Water-based polyurethane | Low odor and easy indoor use | Needs careful surface prep |
| Pure tung oil | Natural wood look | Slow cure and strong early odor |
| Exterior wood sealer | Strong moisture protection | May contain more fumes |
| Paint plus clear coat | Color and stain blocking | Chips can expose bare wood |
No finish makes wood permanently waterproof. A liner still provides the best protection for indoor use.

Prepare the wood before assembly
Good preparation prevents most planter problems. Measure twice, cut once, and label each board as you work. Small errors add up when four sides must meet.
For a planter with outside dimensions of 24 inches long, 10 inches wide, and 10 inches tall, cut:
- One base: 24 by 10 inches
- Two long sides: 24 by 10 inches
- Two end sides: 8½ by 10 inches
The end pieces are shorter because they fit between the long sides. If your boards are ¾ inch thick, subtract 1½ inches from the outside width when you cut the end pieces.
Make a simple cut plan
Write the outside length, width, and height on paper. Then decide which boards will form the long sides and which will form the ends. This prevents confusion when the pieces look similar.
Use a carpenter’s square to mark each cut. A square cut helps the box close without gaps. If you use a circular saw, clamp a straight board as a guide.
Dry-fit the pieces before adding glue. Place the base on a flat surface and stand the sides around it. Check that the corners meet and that the box does not rock.
Sand all cut edges
Start with 80- or 100-grit sandpaper if the boards feel rough. Move to 150-grit, then finish with 180-grit on touch surfaces. You do not need a polished finish inside a covered wooden shell.
Round the top edges slightly. A sharp corner can cut skin, snag clothing, or chip during moving. Wipe away dust with a clean, dry cloth before applying glue or finish.
⚠️ Warning: Wear eye protection when cutting or drilling. Fine wood dust can irritate the lungs, and some hardwood dust causes stronger reactions. Work outdoors or use a dust collector when possible.

Assemble the planter box
Assembly goes smoothly when you build on a flat surface. Keep a square nearby and check each corner before the glue sets.
1. Mark the screw points
Place the two long sides beside the base. Mark screw points about ¾ inch from the lower edge and 2 inches from each end. Add one or two center points for a box longer than 24 inches.
Mark matching points on the end pieces. Stagger the screws so they do not collide inside the corner.
2. Drill pilot holes
A pilot hole is a small hole that guides the screw. It lowers the risk of splitting, especially in pine or cedar. Use a bit slightly smaller than the screw shaft.
Drill straight and do not push too hard. A countersink bit can let the screw head sit just below the surface. Fill the holes later with wood filler if you want a smooth painted finish.
3. Glue and screw the sides
Apply a thin bead of waterproof wood glue along the joint. Do not flood the seam. Excess glue can squeeze out and leave a hard ridge.
Hold the pieces together with a clamp or your hand. Drive the screws slowly. Check the corner with a square before tightening the last screw.
4. Attach the base
Set the box sides around the base. Apply glue to the lower edges, then drive screws through the sides into the base. Keep the base flush with the bottom or raise it ¼ inch to create a small shadow line.
Wipe away glue with a damp cloth before it dries. Dried glue can block stain and leave pale marks on the wood.
5. Check for movement
Push gently on each corner. A small amount of flex is normal before the glue cures. A large shift means the joints need another screw, a clamp, or a better fit.
Let the box cure for the time listed on the glue label. Most waterproof wood glues need at least 24 hours for a strong bond.

Add drainage and a waterproof liner
Drainage is the most important part of an indoor planter. Plant roots need air as well as water. When soil stays saturated, roots can rot, fungus gnats can increase, and leaves may turn yellow.
The best setup uses a removable inner pot or tray with drainage holes. Put the plant in its nursery pot, then place that pot inside the wooden box. You can lift it out to water, inspect roots, and clean the shell.
Option one: Use a removable nursery pot
This is the safest method for beginners. Choose a pot that leaves ½ to 1 inch of space around it. Set the pot on a shallow waterproof tray inside the wooden box.
Do not fill the gap with soil. Soil holds water against the wood and makes the box heavy. Use thin cork pads or small rubber feet under the inner pot if you need airflow.
Option two: Install a plastic liner
For a built-in planter, use a rigid plastic tray or a pond-liner sheet. Fold the liner into the box with extra material rising 2 inches above the soil line. Secure the top edge below the rim with small staples or trim.
Do not puncture the liner near the bottom. If the liner has no drainage holes, the planter will still hold excess water. Drill or cut holes at the lowest points, then place the planter on a waterproof tray.
Option three: Drill the wooden base
You can drill ½-inch drainage holes through the wood if you plan to fill the box directly. Drill one hole every 6 to 8 inches. Place a tray beneath the planter to catch runoff.
This method gives roots more room but exposes the wood to water. I use it only with cedar or well-sealed pine, and I still add a liner that directs water toward the holes.
| Drainage setup | Best use | Risk level |
|---|---|---|
| Nursery pot inside box | Most houseplants and beginners | Low |
| Plastic tray liner | Herbs and grouped plants | Low to medium |
| Direct soil in sealed box | Large custom planters | Medium to high |
| No drainage | Decorative artificial plants only | High for living plants |
A drainage hole does not fix poor watering. It only gives extra water a path out of the container.
💡 Pro Tip: Place a thin cork, rubber, or plastic mat under the finished planter. It protects wood floors from small leaks and lets air move under the box.

Seal, paint, and finish the planter
Finish the planter before adding soil. Apply the first coat to clean, dry wood. Keep the box in a warm, well-ventilated area, but avoid direct sun while the finish cures.
Brush with the grain and use thin coats. Thick coats may stay soft, wrinkle, or trap odor. Lightly sand with 220-grit paper between coats if the product label allows it.
Paint gives the most control over color. White or light gray can brighten a dark room, while deep green, black, or natural cedar can frame bright foliage. Use a primer on pine or plywood to reduce blotchy areas.
Protect the bottom
The bottom takes the most abuse. Add two or three coats of finish there, including the lower edges. Water can collect under a pot even when the sides stay dry.
Add small rubber feet after the finish cures. They reduce floor marks and stop the box from sitting in a shallow puddle. For a heavy planter, use wide feet rather than tiny point feet.
Let the finish cure
Dry to the touch does not mean fully cured. Follow the label’s cure time. Many water-based products need several days before regular moisture exposure.
If the planter still smells strong, wait longer. Plants may tolerate some odor, but people and pets may not. I once rushed a pine planter after two days, and the room smelled like finish for over a week.
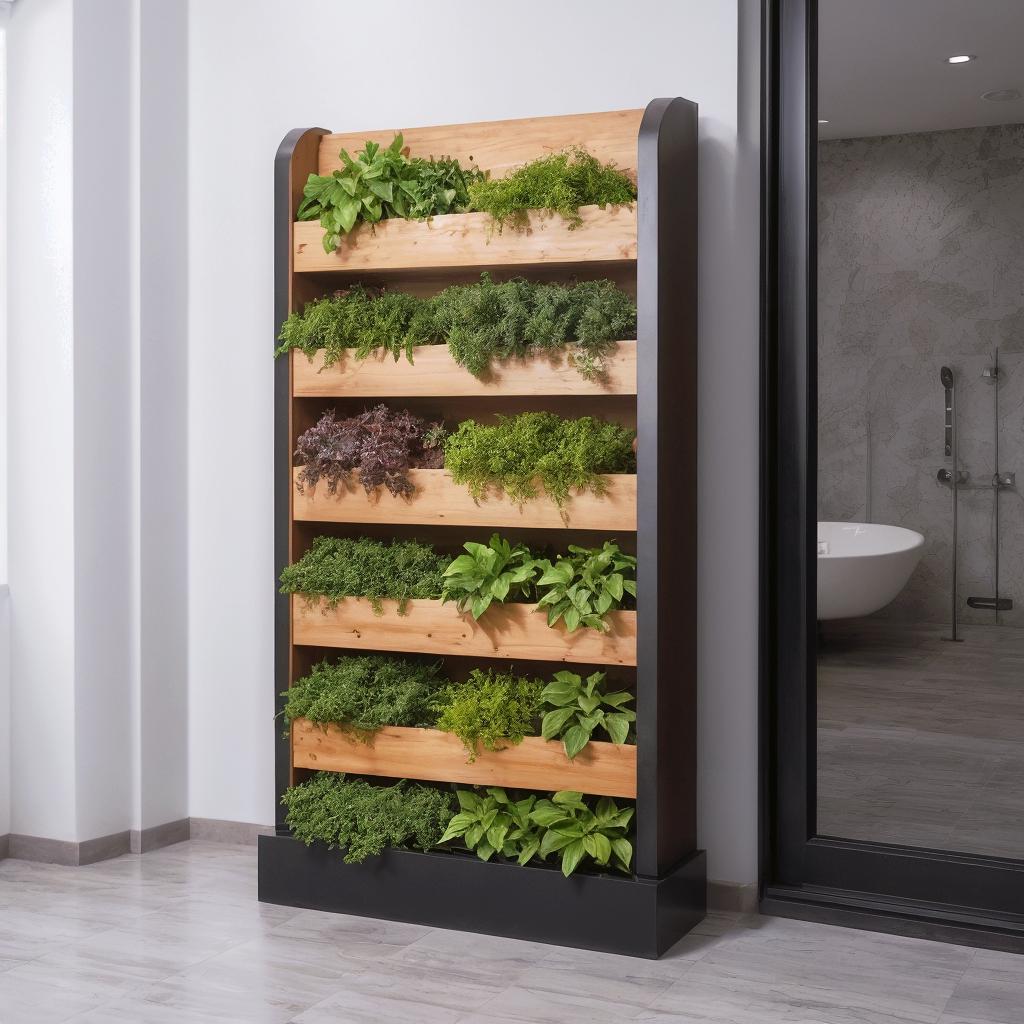
Fill the planter with the right soil
Indoor plants need a loose, clean potting mix. Garden soil is too dense for most containers. It can hold too much water and may carry weed seeds, insects, or disease spores.
A basic indoor mix contains peat moss or coconut coir, fine pine bark, and perlite. Perlite is a light volcanic material that improves air space and drainage. For succulents, increase the mineral part with coarse perlite, pumice, or gritty sand.
Use a soil mix that fits the plant:
- Tropical foliage: 2 parts potting mix, 1 part orchid bark, 1 part perlite
- Herbs: 2 parts potting mix, 1 part compost, 1 part perlite
- Succulents: 1 part potting mix, 1 part perlite, 1 part pumice
- African violets: A light mix with peat or coir, perlite, and vermiculite
- Citrus: A fast-draining citrus or cactus mix with extra bark or perlite
Most indoor plants prefer a slightly acidic to neutral pH, often between 6.0 and 7.0. Blueberries and azaleas need more acidic soil, but they often outgrow a small indoor planter.
Fill in layers without packing
Put the inner pot or liner in place first. Add mix around the root ball until the plant sits at its old soil level. Do not bury the stem or trunk.
Tap the sides of the planter to settle the mix. Avoid pressing hard with your hands. Compacted soil blocks air and makes water move poorly.
Leave ½ to 1 inch of space below the rim. This gap gives water room to soak in without spilling over the edge.
| Plant group | Light need | Watering pattern | Suitable soil |
|---|---|---|---|
| Basil and parsley | 6–8 hours bright light | Keep lightly moist | Potting mix with perlite |
| Pothos and philodendron | Bright indirect light | Water after top inch dries | Airy tropical mix |
| Snake plant and ZZ plant | Low to bright light | Let half the mix dry | Gritty, fast-draining mix |
| Aloe and echeveria | 6–8 hours bright light | Let most mix dry | Cactus mix with pumice |
| Spider plant | Bright indirect light | Water when top 1–2 inches dry | General indoor mix |
Plant needs vary with room heat, humidity, pot size, and season. A sunny room in Phoenix dries a planter faster than a cool room in Portland.

Choose plants that fit the location
A planter cannot create light. Choose plants based on the window or add a grow light. South- and west-facing windows provide strong light in much of the United States, but summer glass can scorch thin leaves.
East windows give softer morning light. North windows often suit low-light plants, though growth may slow in USDA Zones 3 to 6 during winter. A full-spectrum LED grow light can help when natural light stays weak.
Good indoor planter choices include:
- Pothos
- Heartleaf philodendron
- Spider plant
- Snake plant
- ZZ plant
- Peperomia
- Fittonia
- African violet
- Basil
- Thyme
- Chives
- Compact rosemary
- Dwarf chili pepper
Avoid grouping plants with very different water needs. A cactus and a basil plant may look attractive together, but one will usually suffer. Match plants by light, moisture, and root space.
Grow herbs with care
Herbs need stronger light than many foliage plants. Basil, thyme, rosemary, and oregano need at least 6 hours of direct sun or a grow light placed 6 to 12 inches above the leaves.
Mint grows fast and can crowd other herbs. Put it in its own inner pot. Parsley and cilantro prefer cooler conditions and may bolt when a warm room stays above 75°F.
Use caution with pets
Some common houseplants can harm cats or dogs if eaten. Pothos, philodendron, dieffenbachia, peace lily, and sago palm need careful placement. Sago palm is especially dangerous to dogs.
Choose spider plants, Boston ferns, parlor palms, or many peperomia types when pet safety matters. Check a trusted veterinary or extension source before bringing an unfamiliar plant home.
🌱 Beginner Note: Start with one plant per inner pot. A single plant shows you how fast the mix dries and makes watering much easier to learn.

Place and water the finished planter
Set the planter on a level surface near the light source. Keep leaves from touching cold glass in winter. In USDA Zones 4 to 7, a plant against a cold window may suffer even when the room feels warm.
Rotate the planter one-quarter turn each week. This helps the plant grow evenly instead of leaning toward the glass. Wipe dust from broad leaves with a damp cloth.
Water based on the soil, not the calendar. Push a finger into the top inch or use a wooden chopstick. If the mix feels moist and the plant has no signs of stress, wait.
When watering, soak the soil until a small amount drains from the inner pot. Empty the tray after 10 to 15 minutes. Never let the planter sit in standing water for days.
| Season or condition | Check soil | Common adjustment |
|---|---|---|
| Bright summer window | Every 2–3 days | Water more often if mix dries fast |
| Cool winter room | Every 7–10 days | Water less and move away from cold glass |
| Heated dry air | Every 3–5 days | Add humidity nearby, not wet soil |
| Low-light corner | Every 7–14 days | Use less water and consider a grow light |
| Freshly repotted plant | Every 3–5 days | Water only when the top layer dries |
These ranges are starting points, not rules. A large planter dries slowly, while a small herb pot may need water often.

Maintain the planter through the seasons
A wood planter can last 5 to 10 years indoors when it stays dry on the outside and receives regular care. A direct-fill box may last less if water reaches unsealed joints. Liners can extend the life of pine and plywood.
Inspect the planter once each month. Look under the base, check the liner, and feel for soft wood. Catching a small leak early is much easier than replacing a swollen bottom.
Spring and summer care
Plants often grow faster as light increases. They may need more water, light feeding, and pruning. Rotate the planter and check for spider mites, aphids, fungus gnats, and scale.
Use a balanced liquid fertilizer, such as a 10-10-10 or 3-1-2 houseplant formula, at half the label rate during active growth. Do not fertilize dry soil. Water first, then feed if the product label allows it.
Fall and winter care
Growth slows in shorter days. Reduce fertilizer and check soil less often. Move tropical plants away from heaters, wood stoves, and drafty doors.
Clean the planter before bringing outdoor plants inside. Outdoor plants may carry whiteflies, thrips, or mealybugs. Quarantine new plants for two weeks when possible.
| Task | Frequency | What to inspect |
|---|---|---|
| Check soil moisture | Every few days | Top layer and pot weight |
| Empty drip tray | After watering | Standing water or stains |
| Wipe leaves | Every 2–4 weeks | Dust, mites, and scale |
| Inspect wood and liner | Monthly | Soft spots, cracks, and leaks |
| Rotate planter | Weekly | Uneven growth |
| Refinish outer wood | Every 2–4 years | Dull finish or exposed grain |
The climate inside your home matters more than the outdoor USDA zone. Zone 8 plants still need indoor light and water that fit your room.

Fix common indoor planter problems
Most failures come from too much water, poor light, or a weak liner. The plant often shows the problem before the planter does.
| Symptom | Likely cause | Practical fix |
|---|---|---|
| Yellow leaves and wet soil | Overwatering or poor drainage | Check holes, empty tray, and wait longer |
| Brown leaf tips | Dry air, salt buildup, or missed watering | Flush soil and improve steady care |
| Fungus gnats | Wet organic mix | Let top layer dry and use sticky traps |
| Musty wood smell | Trapped moisture | Remove liner, dry box, and repair leak |
| Soft bottom | Water damage | Move plant, replace base, and reseal |
| Leaning plant | Uneven light | Rotate planter or add a grow light |
| White crust on soil | Fertilizer salts | Flush with clean water |
Never cover drainage holes with a thick layer of gravel. Gravel does not create a raised water table. It can reduce the space available for roots and leave wet soil above it.
Repair a small leak
Remove the plant and liner first. Dry the box for at least 24 hours in a warm, ventilated place. Check whether the leak comes from a split liner, an open seam, or a crack in the base.
Replace a damaged plastic liner. For a small wood seam, clean away loose finish, apply exterior-rated wood filler or sealant, let it cure, and add two new finish coats. Do not seal over wet or soft wood.
Deal with fungus gnats
Let the top 1 to 2 inches of mix dry between waterings. Place yellow sticky cards near the soil to catch adults. A thin layer of coarse sand can reduce egg-laying, but it will not fix saturated soil.
For a serious problem, repot into fresh mix and wash the inner pot. Keep new plants separate until you know they have no pests.
🔧 Quick Fix: If you are unsure whether the plant needs water, lift the inner pot. A light pot usually needs water; a heavy pot usually does not. This simple check works better than a fixed weekly schedule.

Avoid these common building mistakes
A planter can look good and still fail after a few months. These mistakes cause most damage:
- Using garden soil indoors: It stays dense and may bring pests.
- Skipping drainage: Roots need oxygen, not constant wet soil.
- Filling the wooden shell directly: Water attacks joints and the base.
- Using pressure-treated lumber: It is not suited to an indoor plant container.
- Applying finish inside a wet box: Moisture can trap odor and weaken adhesion.
- Making the planter too deep: Extra soil stays wet and adds weight.
- Ignoring total weight: Wet soil can weigh more than expected.
- Placing it on bare hardwood: Tiny leaks can stain or warp flooring.
A 24-by-10-by-10-inch planter can hold more than 10 gallons of mix if filled fully. Wet potting mix can add 60 to 100 pounds, depending on the blend. Make sure the shelf, table, or floor can support it.
Check stability before adding a plant
Push lightly from each side. The box should not slide, twist, or tip. For tall plants, use a wide planter or add a hidden wall anchor.
Keep heavy planters low in earthquake-prone areas such as parts of California and the Pacific Northwest. A tall, narrow box is more likely to tip when a cat jumps near it or a child pulls on a leaf.

Compare a DIY planter with other options
Building your own planter gives you control over size, color, wood, and drainage. It also takes time and requires some care. A ready-made planter may cost more but can save hours of work.
| Option | Main benefit | Main drawback |
|---|---|---|
| DIY wooden planter | Custom size and style | Needs tools and finish |
| Plastic planter | Light and water resistant | Less natural appearance |
| Ceramic planter | Heavy and attractive | Can crack and lacks easy drainage |
| Metal planter | Strong modern look | Can heat roots near a sunny window |
| Woven basket with liner | Low cost and soft texture | Liner can leak or split |
| Self-watering planter | Fewer watering trips | Costs more and may stay too wet |
For renters, use a plastic or fabric planter inside a decorative wood shell. For a large permanent piece, build a wooden box with a removable fiberglass or plastic insert.
Is building one worth the money?
A small DIY planter often costs $25 to $70, depending on wood and finish. A larger box can reach $100 or more. Store-bought wood planters with liners often cost $60 to $200.
The project becomes more worthwhile when you need a custom length or a matching set. It may not save money if you must buy a saw, clamps, finish, and several specialty bits.

Estimate cost, time, and lifespan
A simple planter takes about 3 to 5 hours of hands-on work. Most of that time goes to measuring, sanding, finishing, and waiting for coats to dry.
Current material pricing ranges from about $25 for a small pine box to $120 for a large cedar planter with a quality liner. Tool ownership changes the calculation. Hardware store cutting can lower the cost for beginners.
| Project size | Hands-on time | Expected material cost |
|---|---|---|
| Small herb box | 2–3 hours | $20–$45 |
| Medium houseplant box | 3–5 hours | $35–$80 |
| Large floor planter | 5–8 hours | $70–$150 |
| Box with stand and liner | 6–10 hours | $90–$220 |
A well-sealed decorative shell can last a decade indoors. The liner, finish, and base usually fail before the side boards. Plan to replace a flexible liner every few years if it becomes brittle.
My experience building indoor planters
I first built indoor planter boxes from leftover pine for basil and spider plants. The boxes looked fine, but I filled them directly with soil. Within one winter, the base darkened and the corners began to swell.
The better design uses a removable liner. I later built a cedar box with a plastic tray, raised it on rubber feet, and kept the soil in nursery pots. After two full growing seasons, the cedar still looked sound, and I could remove each plant for pruning and root checks.
The unexpected lesson was weight. A medium box filled with wet mix became too heavy to move alone. I now place the empty shell first, then add the liner and plants. This also protects the floor from dragging scratches.
In a dry Zone 6 home, my planters needed more frequent checks near a south window. In a humid Zone 9 home, the same plants dried more slowly and needed less water. Room conditions change the schedule more than the label on the plant.
Follow a simple safety checklist
Indoor planters combine wood, water, electricity, and weight. Take a few extra steps before you place one near a window or grow light.
- Keep water away from power strips and extension cords.
- Use a grounded outlet for grow lights and heating mats.
- Do not lift a heavy planter by its rim.
- Ask for help with planters over 50 pounds.
- Use a tray on wood, laminate, and carpeted floors.
- Keep toxic plants away from pets and children.
- Let finishes cure before bringing the planter indoors.
- Store saws, blades, and finish cans away from living areas.
If you use a grow light, choose a timer with a safe load rating. LED lights produce less heat than older fluorescent or HID fixtures, but the power supply can still get warm.
Know when to hire a professional
You can build a small planter with hand tools. Hire help when the planter will hold very heavy soil, attach to a wall, sit above people, or connect to a built-in irrigation system.
A professional can also help with custom cabinetry, hidden drainage, structural stands, and moisture protection for expensive floors. If you plan to place a large planter on a balcony, ask a qualified contractor or building manager about load limits.
Do not attach a tall planter to drywall with light anchors. Find studs or use a proper structural mounting system. A falling planter can cause serious damage.
FAQs about building an indoor planter
Q: Can I use a wooden planter indoors without a liner?
A: Yes, but a liner is safer. Direct soil exposes wood to constant moisture and shortens its life. If you skip the liner, use decay-resistant wood, seal all surfaces, add drainage holes, and place a waterproof tray below the box.
Q: What wood is safest for an indoor planter?
A: Untreated pine, cedar, poplar, and exterior-grade plywood are common choices. Avoid pressure-treated lumber, painted reclaimed boards, and wood with an unknown coating. A removable plastic inner pot keeps soil and water away from the wood.
Q: Should an indoor planter have drainage holes?
A: Yes, if it holds a living plant. Drainage holes let excess water leave the root zone. The inner pot or liner should have holes, and you should empty the drip tray after watering.
Q: How deep should an indoor planter be?
A: Six to eight inches suits many herbs and small houseplants. Use 8 to 12 inches for larger foliage plants. Deep boxes hold more wet soil, so they need a fast-draining mix and a strong base.
Q: Can I put rocks in the bottom of an indoor planter?
A: Do not use a thick rock layer to improve drainage. It can leave a wet zone above the rocks. Use a pot with real drainage holes and an airy potting mix instead.
Q: What finish should I use on an indoor planter?
A: A low-VOC, water-based polyurethane works well on the outside. Pure tung oil gives a natural look but needs more cure time. Follow the product label and wait until the odor is gone before using the planter indoors.
Q: How do I stop an indoor planter from leaking?
A: Remove the plant and find the leak. Replace a cracked liner, seal a small wood seam, and let everything dry before reuse. Always place the planter on a waterproof tray or mat.
Q: Can I grow vegetables in an indoor planter?
A: Yes, but vegetables need strong light. Basil, chives, lettuce, microgreens, dwarf peppers, and compact tomatoes can work near a bright window or under a full-spectrum LED grow light. Large vegetables need more root space than most decorative boxes provide.
Q: How often should I water plants in an indoor planter?
A: Check the soil every few days at first. Water when the top inch dries for many tropical plants, and wait until most of the mix dries for succulents. Room temperature, light, humidity, and pot size all change the timing.
Q: How long does a DIY indoor planter last?
A: A lined and sealed planter can last 5 to 10 years or longer indoors. The liner, bottom, and finish usually need attention first. Keeping water off the outside extends the life of the wood.
Q: Can I use reclaimed wood?
A: Use reclaimed wood only when you know its source and finish. Avoid wood from old barns, industrial sites, pallets with unknown treatment, or boards covered in old paint. Sanding unknown coatings can release harmful dust.
Q: Why are my plant leaves yellow in the new planter?
A: Yellow leaves often point to wet soil, poor drainage, low light, or transplant stress. Check the roots and soil before adding fertilizer. If roots smell sour or look brown and soft, repot into fresh, airy mix.
Final thoughts
A successful indoor planter is more than a wooden box. It is a small root system, drainage system, furniture piece, and care routine working together. Build the shell to fit your room, use a removable liner, and choose a plant that matches your light.
Start with a small herb box or a nursery pot inside a simple cedar frame. Once you learn how fast the soil dries in your home, you can build larger planters with more confidence. The best result is not the most complex design. It is a safe, stable planter that keeps both the plant and your floor healthy.
Meta description: Learn how to build an indoor planter with simple tools, safe wood, drainage, liners, soil, plant choices, finishing tips, costs, and maintenance advice.