How To Start A Raised Bed Garden For Beginners: Easy Guide
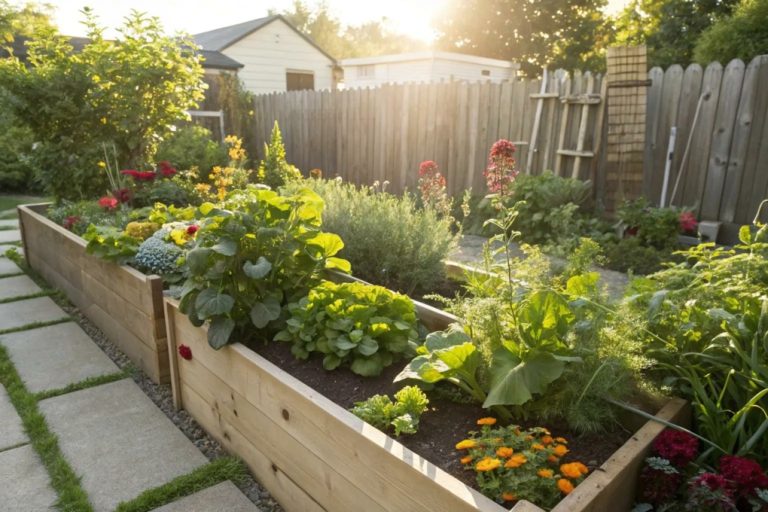
A raised bed garden gives beginners a clean, simple place to grow food. You do not need perfect native soil, a large yard, or years of skill. With good sun, safe lumber, rich soil, and a basic watering plan, you can grow lettuce, herbs, tomatoes, peppers, beans, carrots, and flowers in one weekend.
I have built raised beds in sandy soil, heavy clay, and wet ground across several USDA hardiness zones. The bed itself is rarely the hard part. The real success comes from choosing the right site, filling the bed without wasting money, and planting crops that match your season. This guide walks through each step, from the first measurement to harvest and winter care.
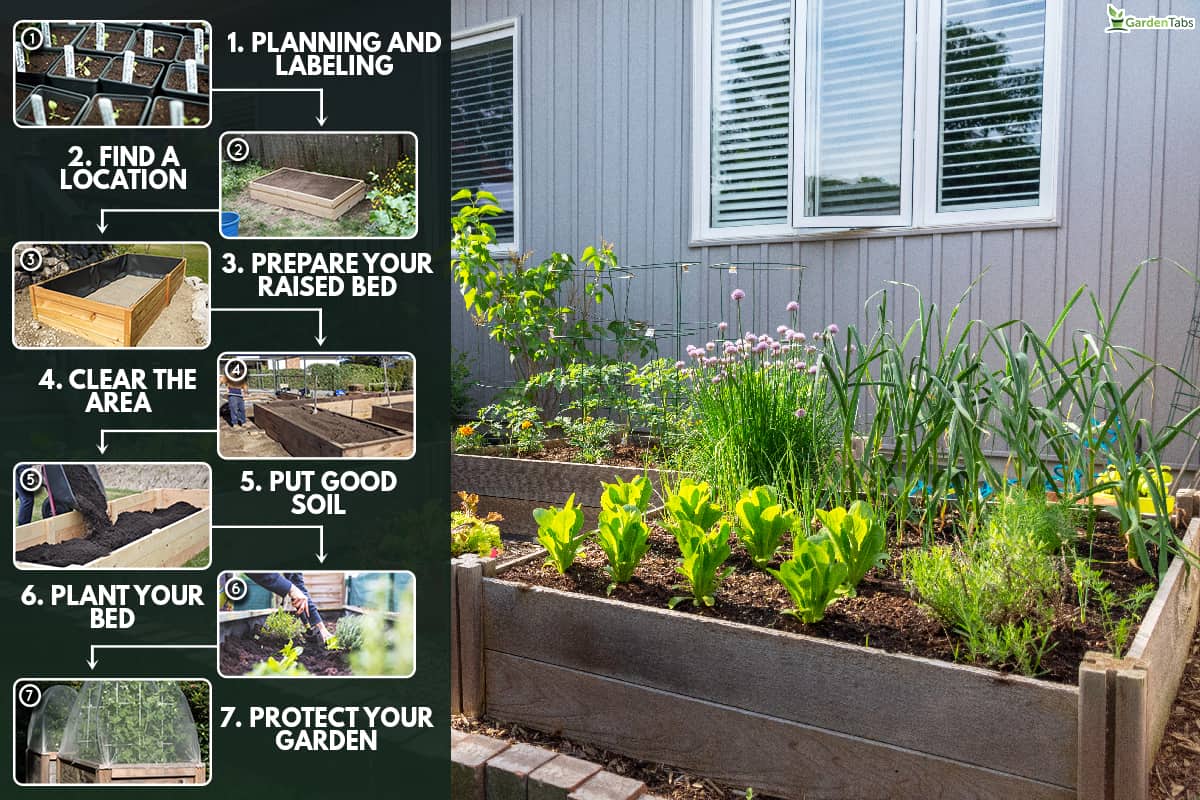
Quick answer: how to start a raised bed garden
The best way to start a raised bed garden is to choose a level site with at least six hours of sun, build a 4-by-8-foot bed from untreated wood, and fill it with a mix of topsoil, compost, and aerating material. Keep the bed 8 to 12 inches deep for most crops, add mulch, water the root zone, and start with easy plants such as lettuce, basil, bush beans, radishes, and cherry tomatoes.

A 4-by-8-foot bed is a useful beginner size because you can reach the center from both sides. It also gives enough room for a small mix of vegetables without creating a large maintenance job.
You can build a raised bed on grass, bare soil, gravel, or a patio. The site changes the base layer and drainage plan, but the growing steps stay much the same.
Why raised beds work well for new gardeners
Raised beds work by creating a separate growing space above or slightly above the native ground. You control the soil, plant spacing, drainage, and access. This gives beginners a smaller problem to solve than an entire yard.
A raised bed can also warm faster in spring. In cool USDA Zones 3 through 6, that may help early crops such as peas, spinach, and radishes. In hot Zones 8 through 10, the same bed can dry out faster, so mulch and steady watering become more important.
The benefits are strong, but raised beds are not magic. They cost more at the start than a row garden, and they need fresh compost, water, and occasional repairs.
| Benefit | What it means for beginners |
|---|---|
| Better soil control | You can correct clay, sand, low fertility, and poor drainage |
| Easier access | A narrow bed reduces bending and foot traffic |
| Fast spring warming | Soil may warm sooner than ground soil |
| Fewer weeds | Clean soil and mulch limit many weed problems |
| Clear crop layout | You can see what grows where and rotate crops |
Raised beds suit people with poor native soil, limited space, or mobility needs. They also help families teach children where food comes from.
The main limitation is water. A bed above ground loses moisture faster than flat soil, especially when it sits in full sun beside a wall or fence.
Pick the right place before you build
choose a site before buying lumber or soil. The best location gets six to eight hours of direct sun, has easy access to water, and does not collect standing water after rain.
Watch the site for one full day if you can. Morning sun may look strong, while a tree or house casts shade by midafternoon. Tomatoes, peppers, cucumbers, squash, and beans need the most light. Lettuce, kale, parsley, and some herbs can manage with four to six hours.
Check sunlight, water, and access
Place the bed near a hose or rain barrel, but do not put it where water runs off a roof. Roof runoff can carry dirt, algae, and old paint residue. Leave at least 18 to 24 inches around the bed so you can kneel, weed, and harvest.
Avoid low spots that stay soggy. Raised beds drain well only when water can leave the bed. A bed placed over compacted clay may still hold water if the surrounding ground cannot absorb it.
Test the ground and nearby risks
A simple soil test helps if the bed will sit over native soil. Test kits from a local extension office often provide more useful results than cheap color strips. Most vegetables grow well around pH 6.0 to 7.0.
Do not build a food garden beside peeling old paint, treated railroad ties, a busy road, or a place where chemicals collect. Modern pressure-treated lumber made for residential use is widely used, but avoid reclaimed wood with an unknown history.
💡 Pro Tip: Mark the bed outline with a hose or flour before you build. Walk around it with a full watering can. If you cannot move with ease, make the bed smaller or widen the paths.

A good beginner site saves work every week. A poor site forces you to fight shade, dry soil, roots, mud, or long hose runs all season.
Choose a bed size, shape, and material
A raised bed should be narrow enough to reach the center without stepping into it. Most gardeners can reach 2 feet from one side, so a 4-foot-wide bed works well when you can reach both sides.
Length matters less than width. A 4-by-8-foot bed gives 32 square feet of growing space. A 3-by-6-foot bed may work better on a small patio or in a narrow side yard.
Common bed materials
Untreated cedar and redwood resist rot and are popular choices. Pine costs less but may last only three to seven years, depending on rain, soil contact, and drainage. Cedar often lasts eight to fifteen years, while composite boards can last longer but cost more.
Use galvanized screws, exterior deck screws, or structural screws. Bright indoor screws rust quickly. Do not use nails alone if the bed walls will hold deep, wet soil.
| Material | Typical life | Best use |
|---|---|---|
| Untreated pine | 3–7 years | Low-cost starter bed |
| Cedar or redwood | 8–15 years | Long-term food garden |
| Composite boards | 10–25 years | Low-maintenance site |
| Concrete blocks | 20+ years | Permanent bed or slope |
| Metal panels | 10–30 years | Modern bed with fast setup |
Life varies with climate. A pine bed may rot faster in the damp Pacific Northwest than in a dry part of Colorado. Metal can last well, but dark panels may heat the soil in hot climates.
How deep should a raised bed be?
An 8-inch bed works for lettuce, spinach, basil, radishes, and many herbs. A 12-inch bed gives better room for tomatoes, peppers, beans, carrots, and onions. A 16- to 24-inch bed helps where the native ground is contaminated, rocky, compacted, or hard to reach.
Large plants still need room for roots. Indeterminate tomatoes can grow 6 to 10 feet tall and need a trellis, cage, or strong stake. Sweet potatoes, pumpkins, and winter squash need more surface space than most new gardeners expect.
Tools and materials for a first bed
You do not need a tiller or power saw for every project. Many garden centers sell pre-cut boards, and a cordless drill makes assembly easy.
The table below covers a practical 4-by-8-foot bed. Adjust quantities for another size or height.
| Item | Suggested amount | Notes |
|---|---|---|
| 2-by-6-inch boards, 8 feet long | 4 | Two layers make a 12-inch wall |
| Exterior screws, 3-inch | 24–32 | Use galvanized or coated screws |
| Cordless drill and driver bit | 1 | An 18V or 20V model is enough |
| Level and tape measure | 1 each | Check the base and corners |
| Compost and soil mix | About 1.2 cubic yards | Needed for a 4-by-8-by-12-inch bed |
| Cardboard or hardware cloth | As needed | For grass or burrowing pests |
| Hose, watering wand, or drip line | 1 | Gentle water protects soil |
A 4-by-8-foot bed that is 12 inches deep holds 32 cubic feet of material. One cubic yard equals 27 cubic feet, so you need about 1.19 cubic yards before settling. Order a little extra if the soil will settle after rain.
You can use a hand saw, circular saw, or have the lumber yard cut the boards. Wear safety glasses when cutting wood. Keep pets and children away from the work area while tools are in use.

Build the raised bed step by step
Build the frame on a calm, dry day. Do not rush the base. A level, firm foundation keeps the boards aligned and prevents the soil from pushing one corner outward.
1. Mark and level the bed site
Measure a 4-by-8-foot rectangle with stakes and string. Remove large rocks, weeds, and thick sod. You do not need to strip every root from the site, but remove perennial weeds such as bindweed, quackgrass, and Bermuda grass.
Check the ground with a level. If one end is much lower, dig down the high side instead of piling soil under the low side. The frame should rest firmly on the ground.
2. Cut and assemble the frame
For a 4-by-8-foot frame, place two 8-foot boards on the long sides. Fit shorter boards between them, or overlap the corners based on your chosen design. Drive two or three screws into each corner.
If you want a 12-inch bed, stack two 2-by-6 boards. Stagger the seams between layers. Add a center brace on an 8-foot bed if the walls bow outward.
3. Add a base layer when needed
Place plain, brown cardboard over grass if you want to smother it. Overlap the sheets by at least 6 inches and soak them before adding soil. Newspaper can work, but glossy paper and colored inserts should stay out of a food bed.
Use 1/2-inch hardware cloth under the bed if voles, moles, or gophers cause trouble. Hardware cloth is a wire mesh, not chicken wire. Extend it slightly up the inside wall and secure it with staples.
Do not add landscape fabric under a bed placed on healthy soil. It can slow earthworm movement and make future soil renewal harder. Use it only when you need to separate soil from gravel, concrete, or a contaminated surface.
4. Fill the bed in layers
Add the soil in several lifts. Spread 3 to 4 inches, mix lightly, water it, and repeat. This reduces large air pockets and helps the material settle evenly.
Do not walk inside the bed. Your weight can compact the soil and reduce air near plant roots. Use a board across the frame if you need to reach the center during construction.
5. Water and let the soil settle
Water the finished bed slowly until moisture reaches the bottom. Add more mix if the level drops by several inches. Wait one to three days before planting if the bed contains a large amount of fresh compost.

A newly filled bed often looks full on day one and low by week four. That drop is normal. Add compost to the top each season rather than trying to pack the bed tight at the start.
Fill the bed with healthy soil
The best raised bed soil holds moisture but drains excess water. It should contain mineral soil, compost, and material that improves structure.
For most vegetable beds, use about 60 percent screened topsoil, 30 percent finished compost, and 10 percent aerating material such as aged pine fines. A commercial raised-bed mix can work well, but compare the ingredients before buying.
Compare common soil mixes
Avoid using pure compost. Compost is rich, but it can shrink, hold too much water, or contain excess salts if used alone. Manure-based compost may also burn young roots when it is not fully finished.
Avoid garden soil sold for in-ground planting as the only fill. It can become heavy and compact in a raised frame. Potting soil costs too much for a large bed and may dry out quickly.
| Fill choice | Strength | Limitation |
|---|---|---|
| 60% topsoil, 30% compost, 10% pine fines | Balanced and affordable | Needs local sourcing |
| Bagged raised-bed mix | Easy and clean | Costs more for large beds |
| Topsoil plus compost | Simple and useful | May need extra aeration |
| Pure compost | High organic matter | Can settle, dry, or hold salts |
| Potting mix | Light and sterile | Too costly for most beds |
Buy compost from a source that lists its ingredients. Compost should smell earthy, not sour or sharp. If you see many wood chips, plastic pieces, or weed seeds, choose another supplier.
Add amendments only after a soil test
Do not add lime, sulfur, bone meal, or large amounts of fertilizer by guesswork. Lime raises pH, while sulfur lowers it. A soil test tells you whether either product fits your bed.
Compost usually provides a gentle nutrient boost. After the first season, many heavy-feeding crops benefit from a balanced organic fertilizer, such as a product close to 5-5-5 NPK. NPK means nitrogen, phosphorus, and potassium.

🌱 Beginner Note: Healthy soil is not black soil alone. A good mix feels crumbly, drains after watering, and holds together lightly when squeezed. If it forms a hard ball, it has too much clay or moisture.
Plan crops for your first season
Start with crops that match your local planting calendar. The last spring frost date matters in Zones 3 through 7, while extreme summer heat matters more in Zones 8 through 10.
Cool-season crops include peas, lettuce, spinach, kale, radishes, cilantro, and broccoli. Warm-season crops include tomatoes, peppers, cucumbers, basil, beans, and eggplant.
Use a simple crop layout
Do not fill the first bed with only tomatoes. One healthy cherry tomato plant can produce more fruit than a small family can eat. Pair one or two tomatoes with herbs, greens, roots, and beans.
A sample 4-by-8-foot plan might include:
- One cherry tomato with a cage at the north end
- Two basil plants near the tomato
- Six lettuce plants for spring or fall
- Six bush bean plants
- One row of radishes
- Two pepper plants
- A small patch of scallions or chives
Place tall crops on the north side so they do not shade shorter plants. Use trellises for peas, cucumbers, and pole beans. Keep sprawling zucchini and pumpkins outside the bed unless you want them to take over.
Follow spacing, not guesswork
Seed packets list mature spacing and days to harvest. Crowding may look efficient, but it increases disease risk and makes watering harder. Square-foot spacing can help, but adapt it to the variety and your climate.
Carrots, radishes, and beets tolerate close spacing. Tomatoes, peppers, cucumbers, and squash need more air and root space.
Plant, water, and mulch correctly
Plant seeds at the depth on the packet. Most small seeds need only a shallow cover. Large seeds such as beans, peas, corn, and squash can go deeper.
Water the soil before planting small seeds. After planting, use a watering wand with a gentle shower or a fine hose nozzle. Strong water can wash seeds into one corner.
Water by soil condition
Check the soil with your finger. If the top inch feels dry and plants look firm, water slowly at the base. In hot weather, a raised bed may need water every day or two. In cool spring weather, once or twice per week may be enough.
Drip irrigation and soaker hoses put water near the roots and keep leaves dry. This can reduce foliar diseases such as powdery mildew and leaf spot. Set the hose under mulch, not on top where sunlight can damage it.
| Crop | Water need after establishment | Useful mulch |
|---|---|---|
| Lettuce and spinach | Even moisture, often 2–4 times weekly | Straw or shredded leaves |
| Tomatoes and peppers | Deep water 1–3 times weekly | Straw or compost |
| Beans and cucumbers | Regular moisture during flowering | Straw |
| Herbs | Moderate; let the surface dry slightly | Fine compost |
| Carrots and radishes | Even moisture for smooth roots | Shredded leaves |
These ranges change with rain, heat, wind, soil texture, and bed depth. Sandy mixes need more frequent watering than clay-heavy mixes.
Add 1 to 2 inches of clean straw, shredded leaves, or finished compost around plants. Keep mulch a few inches away from tomato stems to reduce rot and pest shelter.

⚠️ Warning: Never let a drip line run on a timer without checking the soil during a heat wave or heavy rain. A timer can flood a new bed or leave plants dry when a hose connection fails.
Feed the garden without overfertilizing
A raised bed needs nutrients because plants remove them when you harvest leaves, roots, fruit, and seeds. Still, more fertilizer does not mean more food. Too much nitrogen creates large leaves and weak growth, while flowers and fruit lag behind.
Mix 1 to 2 inches of finished compost into the top few inches of soil each spring. For heavy feeders, follow the fertilizer label and avoid applying extra products with the same nutrients.
Tomatoes and peppers benefit from steady moisture and balanced nutrition. A high-nitrogen lawn fertilizer can cause lush leaves but poor fruit. Use a fertilizer labeled for vegetables, and never apply a concentrated product against the stem.
Rotate plant families when possible. Avoid putting tomatoes, peppers, eggplant, or potatoes in the same area year after year. These plants belong to the nightshade family and can share diseases.

Manage common raised bed problems
Most raised bed problems come from water, crowding, poor compost, or pests. Look at the whole bed before reaching for a spray.
Why are my plants wilting?
Wilting can mean dry soil, root damage, heat stress, or too much water. Push a finger 2 inches into the soil. Dry soil calls for a deep soak, while wet soil calls for better drainage and less frequent watering.
Plants can wilt at midday and recover at night during hot weather. If they remain limp in the morning, inspect the roots and stem base.
Why are leaves yellow?
Older leaves may turn yellow from low nitrogen, but yellow leaves can also signal waterlogged roots. If the soil stays wet for days, do not add fertilizer first. Improve drainage and check for compacted soil.
Yellow leaves with green veins may point to a nutrient issue, but a soil test is more reliable than guessing from leaf color.
How do I control pests?
Inspect the underside of leaves twice each week. Common pests include aphids, flea beetles, cabbage worms, cucumber beetles, and slugs.
Handpick large insects, use row cover on young crops, and remove badly damaged leaves. Encourage pollinators and beneficial insects by growing dill, alyssum, yarrow, calendula, and native flowers nearby.
| Symptom | Likely cause | First fix |
|---|---|---|
| Small holes in leafy greens | Flea beetles or caterpillars | Use insect netting and inspect leaves |
| Sticky leaves and curled growth | Aphids | Spray with water and remove badly affected tips |
| Blossom end rot on tomatoes | Uneven water uptake | Keep moisture steady; do not add random calcium |
| White powder on leaves | Powdery mildew | Improve air flow and water the soil |
| Seedlings cut at soil level | Cutworms | Use collars and clear plant debris |
Do not spray broad-spectrum insecticide when flowers are open. It can harm bees, butterflies, and other pollinators. If treatment becomes necessary, identify the pest first and follow the product label.

🔧 Quick Fix: If water runs off the top instead of soaking in, scratch the mulch aside and water in short cycles. Run the hose for five minutes, pause for ten minutes, then repeat. This helps dry soil absorb water.
Maintain the bed through the seasons
A raised bed needs simple care all year. Spring focuses on soil and planting. Summer focuses on water, support, and harvest. Fall focuses on cleanup and soil cover. Winter focuses on protection and planning.
Spring tasks
Remove dead stems and inspect the frame. Top-dress with compost, repair loose screws, and check irrigation. Start cool crops as soon as the soil and weather fit your USDA zone.
In cold climates, use hoops and row cover to protect seedlings from frost. Do not let row cover rest directly on tender plants during wind or freezing rain.
Summer tasks
Harvest often. Beans become tough, cucumbers become oversized, and basil flowers if you wait too long. Tie tomatoes before they lean and check the underside of leaves for pests.
Mulch before a heat wave, not after plants wilt. A layer of organic mulch can reduce evaporation and keep soil temperature more stable.
Fall and winter tasks
Remove diseased plants and place healthy plant residue in compost only if it breaks down fully. Do not compost tomato or squash foliage with serious disease unless your compost pile reaches a sustained high temperature.
In Zones 3 through 6, cover bare soil with compost and shredded leaves. In Zones 7 through 10, you may grow greens through much of winter, depending on frost and local conditions.
| Season | Main tasks |
|---|---|
| Spring | Repair frame, add compost, plant cool and warm crops at the right time |
| Summer | Water deeply, mulch, stake plants, harvest often, watch pests |
| Fall | Remove diseased plants, plant cover crops or greens, add compost |
| Winter | Protect soil, check drainage, plan rotation, store tools dry |
A covered bed is easier to restart in spring. Bare, eroding soil loses fine particles and nutrients during heavy rain.
What I learned from my own raised beds
My first raised bed used inexpensive pine and a rich compost blend. The frame worked well, but the soil settled almost four inches by the next spring. I had filled it with too much light compost and not enough mineral soil.
A later bed used roughly 60 percent screened topsoil, 30 percent compost, and 10 percent pine fines. It settled less, drained better, and supported tomatoes without constant feeding. The biggest improvement came from adding drip irrigation under straw mulch.
I also learned not to crowd tomatoes. In one 4-by-8-foot bed, I planted four indeterminate tomatoes because the young plants looked small. By midsummer, the leaves stayed wet, airflow collapsed, and early blight spread. Two plants in the same space performed much better the following year.
In a dry part of Zone 6, I watered that bed every other day during a hot July. In a wet Zone 8 garden, the same schedule would have caused root stress. Raised bed care must match local rain, heat, wind, soil mix, and crop type.

Common beginner mistakes to avoid
The most expensive mistake is building too large too soon. A single 4-by-8-foot bed can grow a surprising amount of food. Learn its watering pattern before adding more beds.
Other common mistakes include:
- Placing the bed in partial shade
- Using pure compost as the fill
- Building wider than you can reach
- Planting warm crops before the last frost
- Skipping a support for tomatoes or cucumbers
- Watering shallowly every day
- Adding fertilizer without a soil test
- Ignoring weeds that spread by roots
- Leaving diseased leaves in the bed
- Forgetting that wood eventually rots
A beginner garden should feel manageable. If you dread watering or weeding, the bed is too large, the crop list is too demanding, or the site is inconvenient.
Raised beds compared with other garden methods
Raised beds are only one way to grow food. In-ground rows cost less and can support large crops, but they require better native soil and more bending. Containers suit patios, but they dry out quickly and limit root space.
Grow bags offer a low-cost option for tomatoes, potatoes, peppers, and herbs. They usually last two to five seasons, depending on fabric quality and sun exposure. A small galvanized stock tank can make a durable bed, but it costs more and needs drainage holes.
| Method | Best for | Main drawback |
|---|---|---|
| Raised bed | Beginners who want soil control | Higher start-up cost |
| In-ground garden | Large plots and low budget | Harder soil and more weeds |
| Grow bags | Renters and small patios | Dry out fast |
| Containers | Herbs and a few vegetables | Limited root space |
| Stock tank | Durable, neat garden area | Heavy and expensive |
Choose a raised bed when you want a stable growing area and can reach it easily. Choose containers or grow bags when you may move soon. Choose in-ground rows when you have good soil and need a large planting area.
Cost, lifespan, and long-term care
A basic DIY 4-by-8-foot bed may cost about $100 to $300, including lumber, screws, soil, compost, and simple irrigation. Premium cedar, composite panels, delivery fees, and purchased soil can raise the total above $500.
The soil is often the largest cost. Calculate volume before ordering. For a 12-inch-high 4-by-8-foot bed, plan for about 1.2 cubic yards. A 24-inch bed needs roughly 2.4 cubic yards, which can make a tall bed expensive.
Wood breaks down first at the bottom edges, corners, and places where water stays trapped. Check the outside walls each spring. Replace one board rather than rebuilding the whole bed when the frame uses separate layers.
Keep tools dry and clean. A basic hand trowel, pruner, hose nozzle, and garden fork can last many years with simple care. A battery-powered drill such as a common 18V or 20V model is useful for building and repairs, but you do not need a garden tiller for a raised bed.

When to hire help
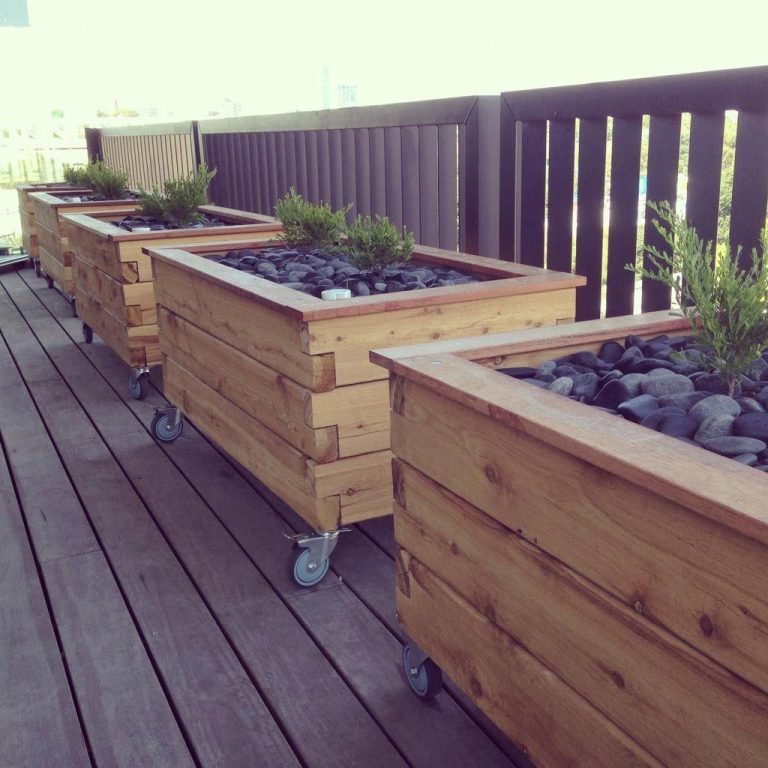
You can build most beginner beds yourself. Get help when the bed will sit on a steep slope, roof deck, balcony, contaminated soil, or a surface that cannot support the weight.
Wet soil is heavy. A 4-by-8-foot bed filled 12 inches deep may weigh several thousand pounds after rain. Ask a structural professional before placing a deep bed on a deck or balcony.
Hire a landscaper for retaining walls, major grading, drainage work, or large beds that require machinery. For a simple ground-level frame, DIY saves money and teaches you how the garden works.
Frequently asked questions
Q: What is the easiest raised bed size for beginners?
A: A 4-by-8-foot bed that is 12 inches high is a strong starting point. You can reach the center from both sides, and it holds enough soil for a useful mix of vegetables. A 3-by-6-foot bed works better in a small yard or on a patio.
Q: Can I put a raised bed directly on grass?
A: Yes. Mow the grass short, remove thick sod, cover the area with overlapping plain cardboard, and add soil. For aggressive grass such as Bermuda, remove the sod or use a barrier that extends beyond the bed.
Q: Do raised beds need a bottom?
A: No, not when they sit on healthy soil with good drainage. A bottom can block earthworms and trap water. Use hardware cloth under the bed when rodents are a serious problem, or use a solid base only on a patio or similar hard surface.
Q: What is the best soil mix for a vegetable raised bed?
A: Use about 60 percent screened topsoil, 30 percent finished compost, and 10 percent aged pine fines or another aerating material. Adjust the mix if your local topsoil is heavy clay or very sandy.
Q: How much soil does a 4-by-8-foot raised bed need?
A: A 12-inch-deep bed holds 32 cubic feet, or about 1.19 cubic yards. Order a little more because soil settles. A 24-inch bed holds about 64 cubic feet, or 2.37 cubic yards.
Q: Should I use treated wood for a raised garden bed?
A: Modern residential pressure-treated lumber is commonly used for raised beds, but some gardeners prefer untreated cedar or composite for peace of mind. Avoid old railroad ties, utility poles, and reclaimed wood with unknown chemical exposure.
Q: How often should I water a raised bed?
A: Check the top 1 to 2 inches of soil. Water deeply when that layer feels dry. During hot weather, plants may need water every day or two; during cool, rainy weather, watering may not be needed for a week.
Q: Can I grow tomatoes and peppers in the same raised bed?
A: Yes. Both need full sun, rich soil, steady moisture, and warm weather. Give each tomato about 18 to 24 inches of space, and avoid crowding the bed with too many plants.
Q: What can I plant in a raised bed in early spring?
A: Plant peas, lettuce, spinach, radishes, kale, onions, and cilantro when local weather allows. Wait for warm soil and frost-free nights before planting tomatoes, peppers, basil, cucumbers, beans, and eggplant.
Q: Why is my raised bed soil sinking?
A: Soil sinks as compost and organic matter break down, and air pockets collapse after watering. Add 1 to 2 inches of finished compost each year. Do not refill the bed with pure compost.
Q: How do I stop slugs in a raised bed?
A: Water in the morning, remove hiding places, keep weeds down, and handpick slugs after dark. A loose layer of dry straw can help, but no single barrier works in every wet climate.
Q: How long does a wooden raised bed last?
A: Pine may last three to seven years, while cedar or redwood often lasts eight to fifteen years. Drainage, rainfall, soil contact, and wood thickness change the result. Inspect the bottom boards each spring.
Q: Can raised beds be used in winter?
A: Yes. In mild Zones 7 through 10, you can grow greens, herbs, carrots, and some brassicas through winter. In colder Zones 3 through 6, use row cover, low tunnels, or plant a cover crop to protect the soil.
Q: Is a raised bed worth the money?
A: It is worth the cost when your native soil is poor, compacted, wet, rocky, or hard to reach. An in-ground garden may be cheaper when your soil is healthy and you want a large growing area.
Start small and build skill
A raised bed garden succeeds when it fits your time, climate, space, and budget. Begin with one well-built bed, a short crop list, and soil that drains well. Grow a few reliable plants, watch how the bed holds water, and take notes through the season.
The best first crops are often the least dramatic: lettuce, radishes, basil, bush beans, kale, chives, and one cherry tomato. After four weeks, you will know more about your site than any general planting chart can tell you. After two seasons, you can add a second bed with confidence and avoid the mistakes that cost the most.
A garden should feed you, but it should also teach you. Build a bed you can reach, water, and enjoy.
Meta description: Learn how to start a raised bed garden for beginners, including site choice, bed materials, soil mix, planting, watering, pests, costs, and seasonal care.