
How To Put Raised Beds On Grass: Easy Setup Guide
Grass can look like a simple base for a raised garden bed, but it can cause trouble if you build over it without a plan. Living grass can grow through soil, hold water against wood, attract pests, and leave the bed uneven. The good news is that you usually do not need to dig out every blade.
The best method depends on your grass type, soil, climate, and bed design. In most yards, you can mow the grass short, cover it with cardboard, add a weed-blocking layer, and fill the bed with quality soil. I have used this method in clay soil, sandy soil, and lawns with thick cool-season grass. Good prep made the difference between a bed that settled well and one that sprouted weeds for months.

Quick answer: build over grass in layers
To put a raised bed on grass, mow the area short, remove large weeds and stones, level the ground, and place overlapping plain cardboard over the grass. Set the bed on top, wet the cardboard, and fill the bed with a mix of topsoil, compost, and aerating material. Use thicker cardboard or remove sod first if you have aggressive grass such as Bermuda or quackgrass.

A cardboard base works because it blocks light. The grass dies as it breaks down, while roots and soil organisms help turn the layer into organic matter. The bed should have at least 8 to 12 inches of soil for shallow crops and 12 to 18 inches for root crops.
This method suits most annual vegetables, herbs, and flowers. It works less well for permanent beds, very wet yards, slopes, or lawns filled with spreading perennial weeds.
Tools and materials you need
A raised bed on grass needs fewer tools than a dug garden, but each item has a job. Gather everything before you start so the bed does not sit half-built during rain or wind.

| Item | Why you need it | Useful detail |
|---|---|---|
| Mower or string trimmer | Cuts grass very short | A mower set near 1–2 inches works well |
| Spade or flat shovel | Removes sod and levels high spots | Most useful for thick turf or slopes |
| Rake | Clears debris and spreads soil | Use a stiff garden rake for roots |
| Plain cardboard | Blocks light and grass growth | Remove tape, labels, and glossy coatings |
| Garden hose | Wets cardboard and checks drainage | A short soak helps it settle |
| Level and measuring tape | Keeps the bed even and square | A 4-foot level is easier to read |
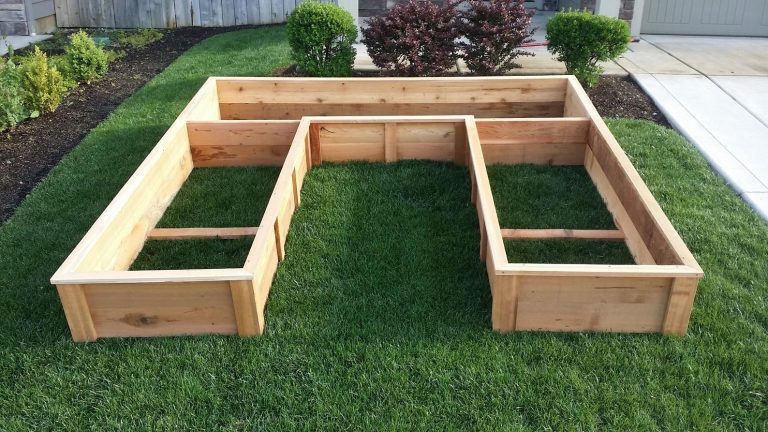
| Raised-bed frame | Holds the soil | Cedar, metal, stone, or recycled plastic can work |
| Soil mix | Gives roots space, nutrients, and air | Plan about 1 cubic yard for a 4-by-8-foot bed filled 12 inches deep |
| Compost | Adds organic matter and nutrients | Use finished compost with an earthy smell |
| Wheelbarrow or garden cart | Moves soil and compost | A cart saves your back on large beds |
| Gloves and safety glasses | Protect hands and eyes | Wear glasses when cutting boards or metal |

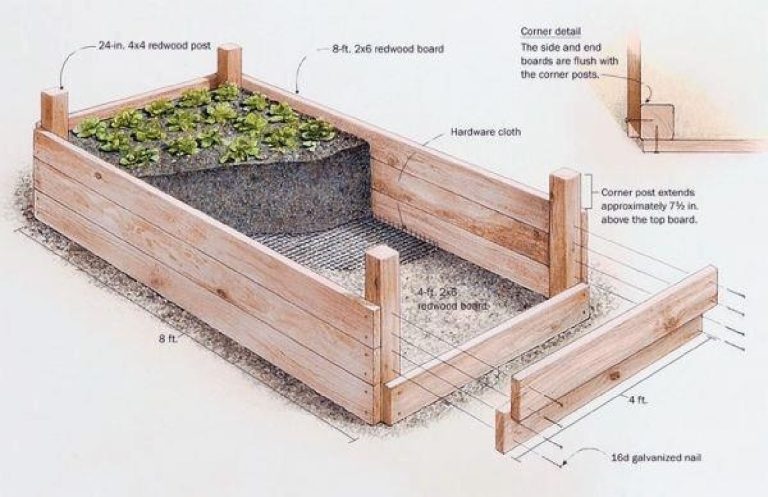
For a wood bed, use untreated cedar, redwood, or a naturally durable hardwood. Avoid old railroad ties and lumber treated with unknown chemicals. Food-safe metal beds also work well, but dark metal can heat soil in hot areas such as USDA Zones 8 through 10.
You may also need exterior screws, corner brackets, a drill, landscape pins, and a hand saw. Do not use plastic sheeting under the bed. It can trap water and stop earthworms from moving into the soil.
Choose the right site before you build
The site controls how well your raised bed grows. Most vegetables need six to eight hours of direct sun, good airflow, and easy access to water.

Check sunlight, slope, and drainage
Watch the area for a full day before building. Morning sun and afternoon shade may suit lettuce, spinach, cilantro, and parsley. Tomatoes, peppers, cucumbers, squash, beans, and melons need stronger sun.
Avoid low spots where rain collects. After a hard rain, check whether water remains for more than 24 hours. A raised bed improves drainage, but it cannot fully correct a yard with a high water table.
A gentle slope is manageable. A steep slope needs terracing, retaining support, or a different site. Soil pressure can push a bed downhill, especially after heavy rain.
Keep the bed easy to reach
Place the bed where you can reach the center from both sides. A 3- to 4-foot width works well for most gardeners. A 4-by-8-foot bed gives 32 square feet of growing space, but you should not make it wider than 4 feet unless you can enter from both sides.
Leave at least 18 to 24 inches between beds for walking. Give a wheelbarrow 30 to 36 inches if you plan to move compost or mulch through the garden.
Avoid placing the bed right beside a fence if one side becomes hard to reach. Also keep it away from tree trunks. Tree roots can invade the bed, while tree shade and thirsty roots compete with vegetables.
🌱 Beginner Note: Start with one 3-by-6-foot bed if you are unsure. It needs less soil, costs less, and gives you enough room to learn spacing, watering, and pest control.
Test the soil below the lawn
A raised bed reduces contact with poor soil, but the ground below still affects drainage and roots. Test the native soil if you plan to grow deep-rooted crops or build a bed without a solid bottom.
A soil test can show pH, phosphorus, potassium, and organic matter. Most vegetables grow well at a pH between 6.0 and 7.0. Blueberries need a much lower pH, near 4.5 to 5.5, so they usually need a special acidic bed or container.
Do not add lime, sulfur, or large amounts of fertilizer based on guesswork. Excess phosphorus can harm waterways, and too much nitrogen can produce leafy plants with poor fruit.
Decide whether to remove the grass
You do not always need to remove sod. Cardboard is faster and less tiring, while sod removal gives more control over weeds and bed height.

| Method | Best use | Main drawback |
|---|---|---|
| Cardboard over grass | Healthy lawn with mild weeds | May fail against spreading grasses |
| Sod removal | Thick turf, low bed, or neat edge | Takes more labor and exposes bare soil |
| Tarp smothering | Large area planned weeks ahead | Needs time and can look untidy |
| Double cardboard layer | Bermuda grass or persistent weeds | Uses more material and takes longer to break down |
| Digging and loosening | Compact soil or poor drainage | Can disturb weed roots and bring seeds up |

Use cardboard when the bed will hold at least 10 to 12 inches of soil. Remove sod when the bed is only 6 to 8 inches tall, since shallow soil gives grass a better chance to reach light.
I remove sod when I see rhizomes or runners. Rhizomes are underground stems that spread new plants. Bermuda grass, quackgrass, bindweed, and some types of couch grass can cross weak seams and enter a bed.
When cardboard is enough
Cardboard works well over common lawn grasses such as Kentucky bluegrass, perennial ryegrass, tall fescue, and fine fescue. It also works over many annual weeds when the layer overlaps and stays damp.
Choose plain brown cardboard without wax, plastic film, glossy ink, or heavy tape. Open boxes and remove staples. Use two layers when the cardboard is thin or the grass is vigorous.
When sod removal is safer
Remove the top 2 to 4 inches of sod if the lawn has Bermuda grass, quackgrass, nutgrass, or a heavy mat of perennial weeds. Cut the grass short first, then slice under the roots with a flat shovel.
You do not need to throw the sod away. Stack it grass-side down in a separate pile and let it rot for a year or more. Do not place fresh sod in a compost pile unless you can keep the pile hot enough to kill roots and seeds.
Prepare the grass and ground
Good preparation prevents most problems later. Take time to create a level, clean base before you add the frame.

1. Mark the bed
Use stakes, string, a garden hose, or marking paint to outline the bed. Measure the diagonals of a rectangular bed. If both diagonals match, the corners are square.
Make the layout wider than the final frame by a few inches if you plan to remove sod. For a no-dig setup, keep the frame inside the marked line so the cardboard extends slightly beyond the walls.
2. Mow and clear the area
Mow the grass as short as your mower allows without scalping the soil. A height of about 1 to 2 inches works for most lawns. Use a string trimmer around edges and remove the clippings if the grass has seed heads.
Pull large weeds by hand. Remove sticks, stones, glass, and buried wire. Check for irrigation lines, low-voltage cables, and buried utility lines before driving stakes or digging.
3. Level the site
Use a shovel to shave down high spots. Fill low spots with native soil, not loose compost. A frame that sits on a level base holds soil better and looks cleaner.
Do not try to force a tall rectangular bed onto a steep slope. The downhill wall may need to be taller, and the structure may require stakes or a small retaining wall.
4. Water the ground
Water the grass and soil before laying cardboard. Damp material bends around small bumps and begins to soften at once.
Do not work on saturated clay. Walking on wet clay compacts it into hard plates. Wait until the soil crumbles when you squeeze it rather than forming a shiny lump.
Lay the cardboard barrier correctly
Cardboard is the main grass-blocking layer. The key is full coverage, generous overlap, and enough moisture.

5. Overlap every sheet
Lay sheets in a brick-like pattern. Overlap edges by at least 8 to 12 inches, and use 18 inches where grass grows aggressively. Extend the cardboard 2 to 4 inches beyond the bed frame.
Cover the whole footprint. One small gap can let grass reach the surface, especially near a sunny edge. Use stones, bricks, or a little soil to hold sheets in place while you work.
6. Wet the cardboard
Soak the cardboard with a hose until it becomes flexible. This removes air pockets and helps it touch the soil.
Do not flood the site. The goal is damp cardboard, not a muddy pool. If rain is due within a day, you can let nature do part of the work.
7. Add a second layer when needed
Use two layers for Bermuda grass, quackgrass, or a lawn with many perennial weeds. Turn the second layer so its seams do not line up with the first layer.
Do not use landscape fabric as the only barrier under a vegetable bed. Fabric can block roots and soil life, and weeds may grow into the fabric from above. It also becomes difficult to remove after soil settles.
⚠️ Warning: Never use old carpet, roofing felt, painted wood, or unknown plastic under food crops. These materials can shed fibers, chemicals, or small plastic pieces into the soil.
Assemble and anchor the raised bed
Build the frame after the cardboard is ready. A sturdy frame should sit flat, resist spreading, and last through repeated wet and dry cycles.

8. Check the frame before filling
Set the frame in place and use a level on every side. Measure the diagonals again. Make small corrections now, because moving a full bed is difficult and often damages the frame.
For wood beds, pre-drill near board ends to reduce splitting. Use exterior-rated screws rather than indoor drywall screws. For beds taller than 18 inches, add internal braces or cross supports to stop the long walls from bowing.
9. Secure the bed
Short beds often stay in place through their own weight. Taller beds or beds on slopes need stakes, corner posts, or ground anchors.
Drive stakes on the outside of wood beds where they will not interfere with roots. Metal beds may need anchor pins, especially in windy areas or loose sandy soil.
10. Protect the frame
Line the inside of a wood bed with cardboard if you want to slow soil contact, but do not seal the base. Water and earthworms should still move through the bottom.
You can use a narrow strip of pond liner or heavy plastic along the inside wall to protect wood, but keep it above the soil line. Do not wrap the whole bed in plastic.
Fill the bed with the right soil mix
The soil mix matters more than the color or label on the bag. Roots need air, water, nutrients, and stable structure.
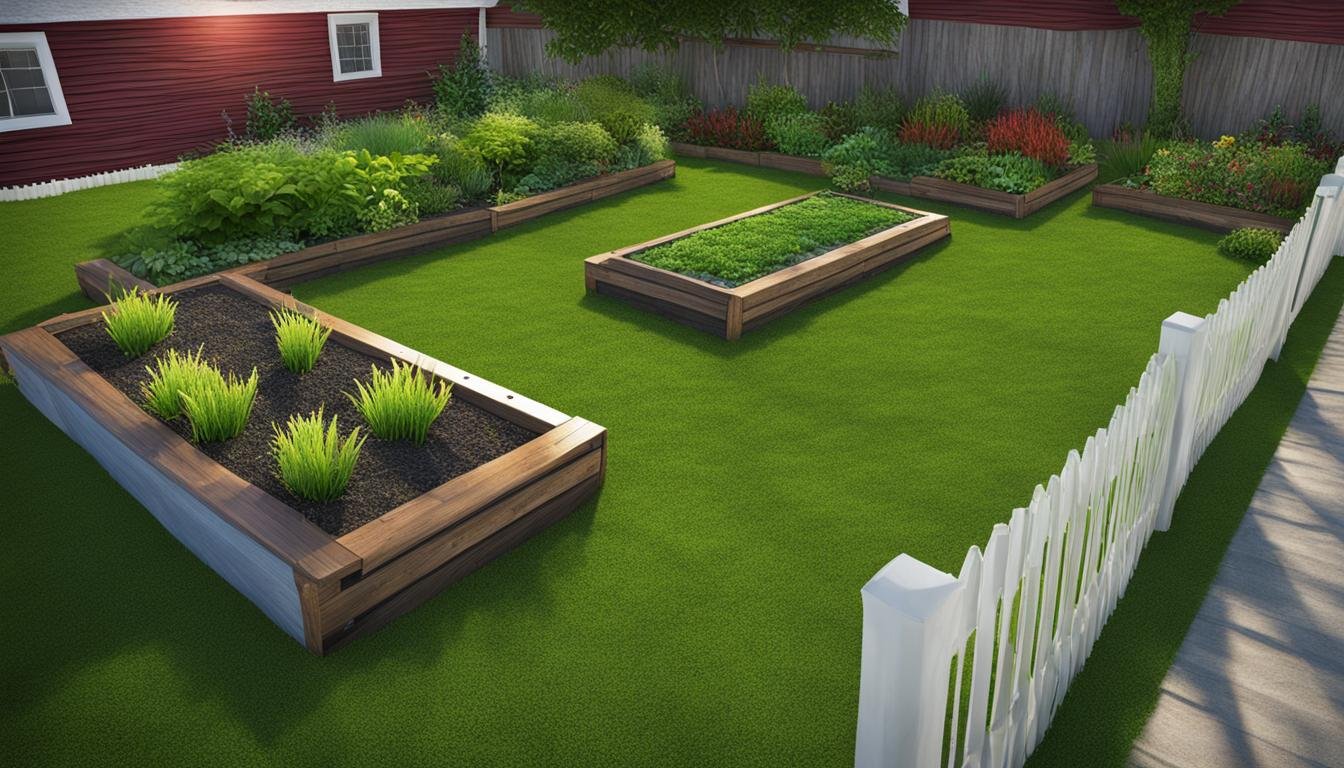
A practical blend for vegetables is:
- 50% screened topsoil
- 30% finished compost
- 20% aged pine bark fines, leaf mold, or another stable organic material
For a 4-by-8-foot bed filled 12 inches deep, you need about 32 cubic feet, or nearly 1.2 cubic yards, of material. Soil settles after watering, so order 10% to 15% extra.
Avoid filling a bed with pure compost. Compost shrinks, holds more water than many roots need, and may contain excess salts or nutrients. Avoid pure topsoil too. It can compact and drain poorly.
| Bed size | Depth | Approximate volume |
|---|---|---|
| 3 × 6 feet | 8 inches | 12 cubic feet |
| 3 × 6 feet | 12 inches | 18 cubic feet |
| 4 × 8 feet | 8 inches | 21 cubic feet |
| 4 × 8 feet | 12 inches | 32 cubic feet |
| 4 × 8 feet | 18 inches | 48 cubic feet |

Add soil in 3- to 4-inch layers. Water each layer lightly, then mix any large clumps with a rake. Do not walk inside the bed, since foot traffic removes air space and compacts the soil.
Leave 1 to 2 inches below the top edge. This keeps soil from washing out during heavy rain and gives you room for mulch.
Choose soil for the crops
Most vegetables, including carrots, beets, onions, lettuce, beans, and tomatoes, grow well in a balanced loam-based mix. Carrots need loose soil free of stones and fresh manure.
Leafy greens prefer steady moisture and moderate fertility. Fruiting crops such as tomatoes and peppers need good drainage and even water, but too much nitrogen can cause leaves instead of fruit.
Permanent herbs such as rosemary, thyme, and sage prefer leaner, drier soil. Plant them in a separate bed or add extra drainage material rather than giving every crop the same mix.
Calculate soil volume
Multiply length by width by depth, using the same unit. For a 4-by-8-foot bed at 1 foot deep, multiply 4 × 8 × 1 for 32 cubic feet.
Divide cubic feet by 27 to convert to cubic yards. Thirty-two cubic feet equals about 1.19 cubic yards. Bagged soil often costs more than bulk soil, but bags make sense for a small bed or a garden with no truck access.
Plant the first crops without overcrowding
A new raised bed is ready to plant after you fill and water it. Wait a few days if the soil settles sharply or if the mix feels hot, sour, or strongly manure-like.

Plant according to your local season, not just the calendar. In USDA Zones 3 through 5, cool crops such as peas, kale, lettuce, and radishes can start weeks before tomatoes. In Zones 8 through 10, fall and winter may offer the best season for greens.
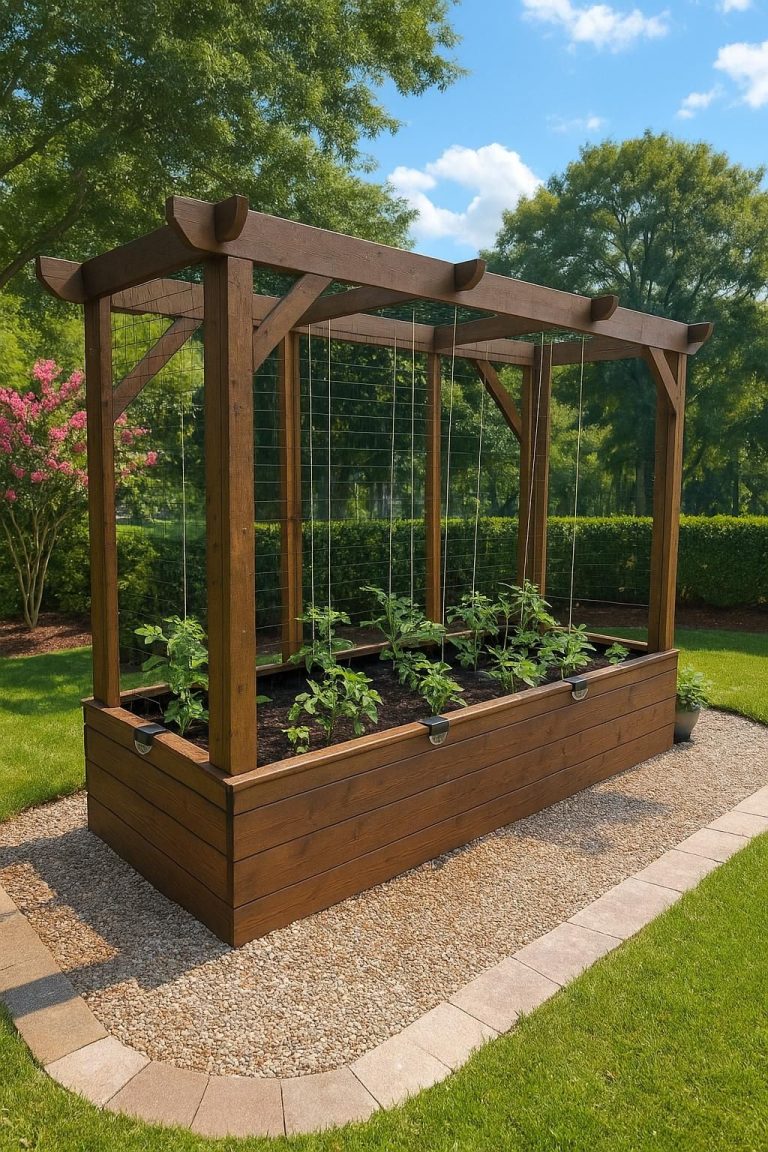
Use the mature size of each plant. One indeterminate tomato such as ‘Sungold’ can need 3 to 4 square feet and a strong trellis. Bush beans may need about 6 inches between plants, while carrots can grow 2 to 3 inches apart after thinning.
Good first crops include:
- Lettuce and salad greens
- Bush beans
- Radishes
- Carrots
- Basil and parsley
- Bush cucumbers with a trellis
- Peppers
- Dwarf tomatoes
- Marigolds and calendula for flowers and pollinators
Do not plant mint directly in the bed unless you want it to spread. Keep mint in a container. Also avoid putting large pumpkins, winter squash, or vigorous melons in a small bed unless their vines can run outside it.
Water, mulch, and feed the new bed
New beds dry faster than ground soil, especially when they stand above hot grass or sit in full sun. Check moisture with your finger rather than watering by habit.

Water when the top 1 to 2 inches feels dry. Apply water slowly until it reaches 6 to 8 inches deep. A soaker hose or drip line works better than a sprinkler because it keeps leaves dry and reduces fungal disease.
Add 1 to 2 inches of shredded leaves, weed-free straw, or fine bark mulch after seedlings establish. Keep mulch 2 to 3 inches away from tomato stems and other plant crowns. Mulch reduces evaporation and stops grass from creeping over the edge.
| Crop group | Water check | Feeding approach |
|---|---|---|
| Lettuce, spinach, kale | Daily in hot weather; soil should stay lightly moist | Compost before planting; light fish emulsion if growth is pale |
| Tomatoes, peppers, eggplant | Check every 2–3 days | Compost plus a balanced fertilizer; avoid excess nitrogen |
| Beans and peas | Check when the top inch dries | Usually need little added nitrogen |
| Carrots and beets | Keep the seed zone moist | Use finished compost; avoid fresh manure |
| Herbs | Let the surface dry between waterings | Feed lightly; too much fertilizer weakens flavor |
Use fertilizer only after plants show a need or a soil test supports it. A balanced product such as 5-5-5 can suit many beds, but rates vary by brand. Organic fertilizers release more slowly and often need warm soil and moisture to work.
Do not pile fresh manure in a new bed. It can burn roots, raise salt levels, and introduce weed seeds or pathogens. Use composted manure that has fully finished.
Handle common problems early
Most raised-bed problems come from poor drainage, weak barriers, settling, or uneven watering. Early signs are easier to fix than a full bed failure.
| Sign | Likely cause | Practical fix |
|---|---|---|
| Grass appears inside the bed | Gaps in cardboard or spreading rhizomes | Pull roots, add cardboard around the edge, and mulch |
| Soil sinks several inches | Compost or loose mix settled | Top up with soil and compost after a few weeks |
| Water pools after rain | Poor site drainage or compacted soil | Improve the site, reduce fine compost, or raise the bed |
| Plants wilt in moist soil | Root stress, disease, or damaged roots | Check roots, reduce watering, and improve airflow |
| Wood walls bow outward | Soil pressure or weak joints | Add braces, corner posts, or stronger fasteners |
| Ants or dry pockets appear | Soil is too dry or mulch shelters them | Deeply water and inspect for aphids |
| White mold grows on mulch | Fungal breakdown of organic matter | Rake it lightly; it is usually harmless |
| Leaves turn pale | Low nutrients, cold roots, or high pH | Test soil before adding fertilizer |
Grass at the edge is common. Trim it with a hand pruner or string trimmer, but do not let a line trimmer strike wood, metal, or plastic. A narrow mulch strip around the bed makes edge care much easier.
If you find grubs, cutworms, or slugs, identify the pest before treating. Beneficial insects, birds, frogs, and pollinators are part of the garden system. Avoid broad insecticides when hand picking, barriers, or targeted controls will work.
Fix soil that settles
Some settling is normal. In my beds, a fresh mix dropped 1 to 2 inches during the first month after several deep waterings.
Top up with a blend of topsoil and compost. Do not fill the lost space with pure compost, which may shrink again. If the bed settles more than 4 inches, check whether the cardboard, sod, or a hidden hollow below the frame collapsed.
Fix a soggy bed
First, check the soil mix. Fine clay topsoil and too much compost can hold water. Next, inspect the site after rain and see whether water enters from the surrounding lawn.
Do not add gravel to the bottom of a raised bed to “improve drainage.” This creates a perched water layer in many soils. It is better to correct the site, use a coarser soil mix, or move the bed.
Fix grass that returns
Pull the grass while the roots are small. Dig out runners and rhizomes instead of breaking them into pieces.
Add a fresh cardboard strip under the bed edge if possible. For a serious Bermuda grass problem, remove the soil near the edge, remove roots, and install a wider maintenance path. No barrier replaces regular edge control with a hoe, pruner, or string trimmer.
🔧 Quick Fix: If weeds emerge across the bed two weeks after planting, do not spray first. Pull them after rain, cover bare soil with mulch, and inspect for gaps in the cardboard below.
Pros and cons of placing beds over grass
Building over grass saves labor, but it does not remove every risk. The table below shows where the method earns its keep and where another approach may suit you better.
| Pros | Cons |
|---|---|
| Requires less digging | Persistent grass may return |
| Protects soil structure below | The bed can settle as grass and cardboard decay |
| Starts quickly | Soil and compost can cost more |
| Works on many lawns | Poor sites may still drain badly |
| Keeps roots above compacted ground | Taller beds need more soil and stronger walls |
| Easier for gardeners with limited mobility | Edges need mowing or trimming |
Choose the cardboard method when you want a fast vegetable bed over ordinary turf. Choose sod removal or tarp smothering when you have aggressive weeds, a shallow bed, or a long-term ornamental border.
For gardeners with back or knee limits, a 24- to 30-inch-tall bed may be worth the extra soil cost. For children, consider rounded edges, stable corners, and a bed height they can reach without climbing.
Compare cardboard, landscape fabric, and bare soil
These materials do not perform the same job. Cardboard blocks existing grass for a short period while it decomposes, while landscape fabric mainly blocks weeds at the soil surface and can create later maintenance problems.
| Base method | How it works | Best choice for |
|---|---|---|
| Cardboard | Blocks light and decomposes | Vegetable beds over lawn |
| Landscape fabric | Blocks some weeds but stays in place | Paths or ornamental gravel areas |
| Bare soil | Gives direct root contact | Dug beds with prepared soil |
| Tarp smothering | Blocks light for several weeks | Large future beds with time to wait |
| Concrete or pavers | Creates a firm, clean base | Accessible beds or poor drainage sites |
For most food gardens, cardboard over short grass gives the best balance of cost, effort, and soil health. For a permanent perennial bed, removing sod and preparing the soil may be cleaner.
A solid base such as pavers can help wheelchair access and stop grass from entering, but drainage and soil depth become more important. It also costs more and removes natural contact with earthworms and soil life.
Plan costs, labor, and bed life
The cost depends on the frame, soil source, height, and whether you do the labor yourself. Soil often costs more than the frame for a large, deep bed.
Typical cost range
Current pricing ranges from low-cost DIY materials to several hundred dollars for a large, tall bed. Reclaimed untreated boards may reduce the frame cost, while cedar, galvanized steel, and custom stone increase it.
A 4-by-8-foot bed at 12 inches deep needs about 1.2 cubic yards of mix. Buying bulk soil may lower the price per cubic yard, but delivery fees can change the total. Bagged soil makes sense when you need less than a cubic yard or cannot accept a truck delivery.
Budget for:
- Frame material and fasteners
- Soil, compost, and mulch
- Delivery or transport
- Drip irrigation or a soaker hose
- Trellis materials
- Replacement soil after settling
- Edge control tools
How long materials last
Untreated pine may rot in a few years, especially in wet climates. Cedar often lasts 8 to 15 years, though contact with wet soil, sprinkler water, and freeze-thaw cycles changes the result.
Galvanized steel beds can last for decades if the coating remains intact. Thin panels may bend, rust at cut edges, or heat soil near the wall in hot climates. Stone and brick can last the longest but need a firm base.
Seasonal care and maintenance
A raised bed needs less lawn care but still needs seasonal checks. Inspect the walls, soil level, mulch, irrigation, and grass edge at least once each season.
| Season | Main tasks |
|---|---|
| Spring | Check walls, top up soil, test irrigation, add compost, plant cool crops |
| Summer | Deep-water, mulch, tie plants, remove weeds, inspect pests |
| Fall | Remove diseased plants, add compost, plant garlic or cover crops where suitable |
| Winter | Drain hoses, protect exposed frames, avoid walking on frozen or wet soil |
| After heavy rain | Check erosion, pooling, wall movement, and exposed cardboard |
In cold USDA Zones 3 through 6, do not walk on frozen raised-bed soil. Freeze-thaw cycles can break down structure and compact wet soil in spring. In hot Zones 8 through 10, shade cloth and thicker mulch may prevent root stress.
Store hoses, trellis netting, and hand tools under cover. Empty liquid fertilizers and protect battery tools from freezing temperatures and damp storage.
Learn from mistakes I have seen in real beds
My first over-lawn bed looked fine on day one but had grass at the corners by midsummer. I had overlapped the center sheets but left narrow gaps near the frame. Since then, I extend cardboard past the edge and inspect every seam before adding soil.
Another mistake was using a very rich compost blend. Tomatoes grew huge leaves, but fruit came late and plants needed support sooner than expected. A moderate soil mix with a soil test gave better balance.
These are the most common avoidable errors:
- Building in deep shade.
- Making the bed wider than you can reach.
- Using fresh manure.
- Filling the bed with pure compost.
- Skipping a level base.
- Ignoring spreading grasses.
- Using plastic under the entire bed.
- Planting too closely.
- Watering only the surface.
- Forgetting a path for mowing and harvest.
A new bed should feel easy to use. If you must step over a fence, drag a hose across another bed, or reach too far for weeds, the design will become a chore. Convenience affects garden success as much as soil fertility.
When to hire help
Most homeowners can place a small raised bed on grass with hand tools. Hire help when the site has a steep slope, poor drainage, buried utilities, heavy stone, or a large amount of sod to remove.
A professional may also help with retaining walls, drainage swales, irrigation, or accessible garden design. Get local advice if runoff from an uphill yard enters the bed or if the soil may contain lead from old paint, traffic, or industrial use.
Do not build a tall structure against a foundation wall without checking drainage and access. Keep soil below siding and wood trim, and avoid blocking vents or inspection points.
For a simple 4-by-8-foot bed, two people can often complete site prep, assembly, and filling in one long day. Soil delivery and a garden cart reduce the hardest work. The job takes longer in wet clay, rocky ground, or hot weather.
Frequently asked questions
Q: Can I put a raised bed directly on grass?
A: Yes. Mow the grass short, cover it with overlapping plain cardboard, wet the sheets, and place the bed on top. Add at least 10 to 12 inches of soil for most vegetables. Remove sod first if the lawn contains Bermuda grass, quackgrass, nutgrass, or other spreading weeds.
Q: Should I remove grass under a raised garden bed?
A: Not always. Removing sod gives better control and lowers the bed height, but cardboard saves time and protects the soil below. Remove the sod when the bed is shallow, the site slopes, or the grass spreads by runners and rhizomes.
Q: How thick should cardboard be under a raised bed?
A: Use one thick layer or two thin layers. Overlap seams by 8 to 12 inches, and use about 18 inches of overlap for aggressive grass. Wet the cardboard before adding soil so it lies flat and starts to break down.
Q: Will grass grow through a raised garden bed?
A: It can. Grass returns through gaps in cardboard, weak seams, and the bed edges. Persistent species may spread through soil or under the frame. Pull new growth early, remove runners, and keep a narrow mulched path around the bed.
Q: Can I use landscape fabric under a vegetable raised bed?
A: You can, but it is usually not the best choice. Fabric may limit earthworms and root movement, and weeds can grow into it from above. Plain cardboard decomposes and supports a more natural connection between the bed and native soil.
Q: Can I put a raised bed on uneven grass?
A: You can correct small bumps with a shovel and rake. For a slope, level the site or build a terraced structure. Do not place a tall, loose bed on a steep slope without support, because wet soil creates strong downhill pressure.
Q: What is the best soil for a raised bed over grass?
A: Use roughly 50% screened topsoil, 30% finished compost, and 20% stable organic material such as aged pine bark fines or leaf mold. Adjust the mix for your crops. Avoid pure compost, fresh manure, and heavy clay topsoil.
Q: How deep should a raised bed be over grass?
A: Use 8 inches for shallow-rooted greens and herbs, 12 inches for most vegetables, and 18 inches or more for carrots, parsnips, potatoes, and larger root systems. A deeper bed also gives better control over poor native soil.
Q: Do I need to line the bottom of a raised bed?
A: No. The bed should usually remain open to the ground. A cardboard layer is enough to smother grass. Avoid plastic, carpet, and roofing materials because they can trap water or add unwanted chemicals.
Q: How much does it cost to build a raised bed over grass?
A: A small DIY bed can cost less than a large cedar or steel bed, but soil often makes up the biggest part of the budget. A 4-by-8-foot bed filled 12 inches deep needs about 1.2 cubic yards of mix, plus delivery or bag costs.
Q: When is the best time to put a raised bed on grass?
A: Build it when the soil is workable and not saturated. Spring and fall are both good in many climates. In hot Zones 8 through 10, avoid the hottest part of summer. In cold zones, finish before the ground freezes if you want to plant quickly.
Q: Can I grow tomatoes in a raised bed placed on grass?
A: Yes. Give tomatoes full sun, at least 12 inches of quality soil, steady water, and strong support. Space large indeterminate varieties 3 to 4 feet apart or grow compact varieties such as ‘Patio Choice’ when the bed is small.
Q: How do I stop weeds from entering from the lawn?
A: Make a 12- to 24-inch path around the bed using mulch, wood chips, pavers, or mowed grass. Keep the bed edge visible, trim runners, and do not let lawn clippings build up against the soil.
Final thoughts
Putting a raised bed on grass is a practical way to start growing without turning the whole yard into a construction site. The reliable sequence is simple: choose a sunny, well-drained spot, mow short, cover the grass with overlapping cardboard, build a level frame, and fill it with a balanced soil mix.
Spend the most care on the base and the soil. Those two choices prevent grass invasion, poor drainage, and weak plant growth. Start small, watch how the bed settles over the first four weeks, and adjust watering and feeding based on what your plants show you.
Meta description: Learn how to put raised beds on grass using cardboard, soil, and simple tools. Get step-by-step setup tips, costs, depth advice, drainage fixes, and weed control.
One Comment