How To Level A Raised Garden Bed: Easy Guide
A raised garden bed can look sturdy and still sit out of level. One corner may sink, the frame may twist, or water may collect on one side after rain. An uneven bed makes irrigation less even, stresses the frame, and can leave shallow soil over part of the root zone.
The good news is that leveling a raised garden bed does not need special building skills. You need a level, a shovel, a straight board, and a way to add or remove soil beneath the frame. The best method depends on the bed material, slope, soil type, and whether the bed is empty or already planted.

Quick answer: level the bed before filling it
The best way to level a raised garden bed is to empty it, mark a flat outline, remove soil from high spots, and check the frame with a long level. Do not build up one low corner with loose soil alone. Set the frame on firm, compact ground, use gravel or pavers where needed, then refill the bed in layers.

A small garden bed may take 30 to 60 minutes to level. A large bed on a slope may take several hours. A level bed does not need to sit perfectly flat across a steep yard, but the top edges should be even enough that water spreads well and the frame stays stable.
Why a level raised bed matters
A level raised garden bed keeps water, soil, and plant roots in a more even growing space. When the bed slopes, water runs toward the lower end. That area may stay wet while the high end dries out.
Uneven moisture can hurt plants such as tomatoes, peppers, cucumbers, lettuce, and carrots. It can also cause blossom-end rot in tomatoes and peppers when roots cycle between very dry and very wet soil. The problem is not always a lack of calcium. Uneven watering often plays a larger role.
A level frame also reduces stress on corners and fasteners. This matters with wood beds, galvanized steel beds, and composite kits. A twisted frame can pull screws loose, bow outward, or create gaps where soil escapes.
Level does not mean perfectly flat
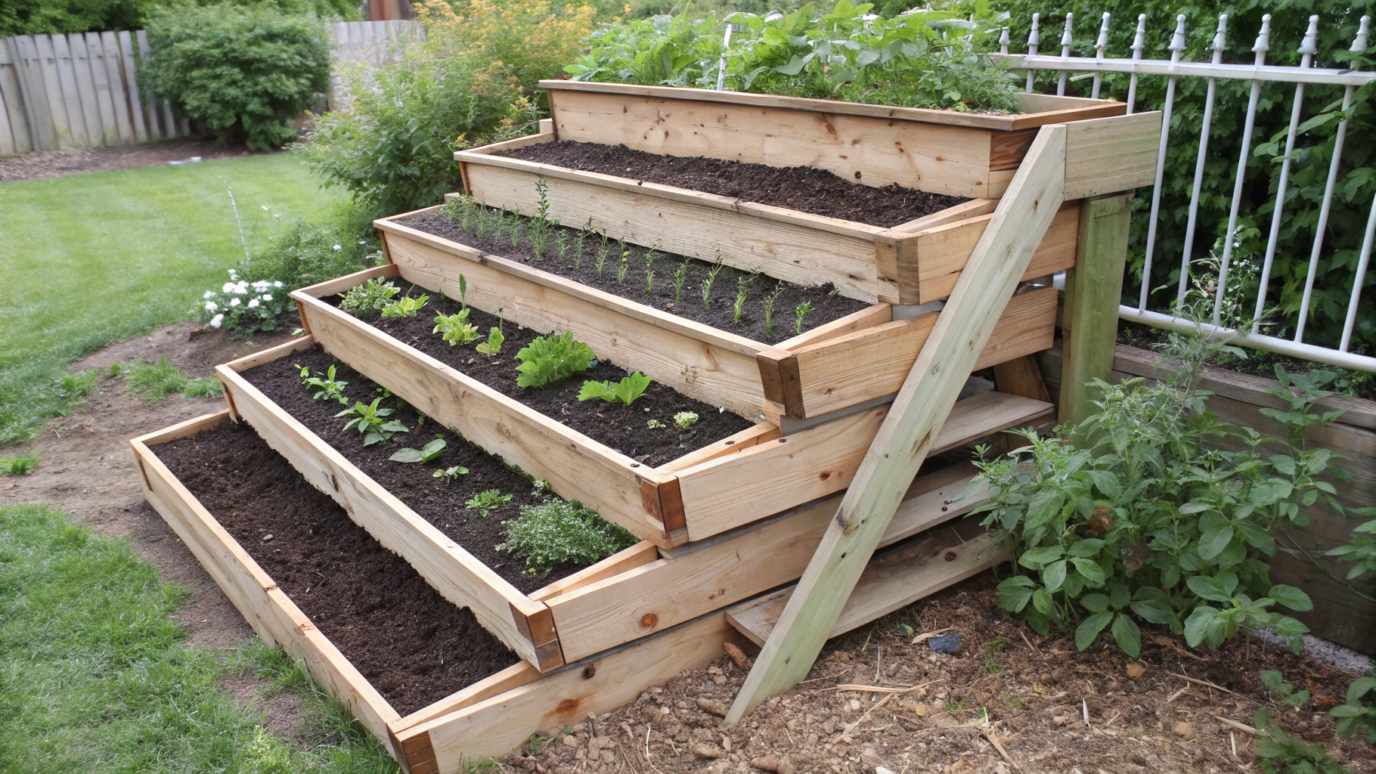
A raised bed can work on a gentle slope if the frame follows the land in a stepped design. However, the soil surface should remain close to level within each section.
A bed that drops 1 inch across 4 feet may work well. A bed that drops 4 inches across 4 feet needs more careful support. On a steep hill, several short beds often work better than one long bed.
Water and soil settle toward the low side
Loose soil moves over time. Rain, watering, frost, and earthworms shift fine particles toward the low end. Compost also shrinks as it breaks down.
This is why I level the base first and compact it before adding soil. If I try to correct a tilted bed with extra soil, the low side often sinks again within one season.
| Problem | What happens | Why leveling helps |
|---|---|---|
| Uneven watering | Water collects at the low end | Moisture spreads more evenly |
| Frame movement | Corners twist or separate | The base supports the full frame |
| Soil loss | Soil spills through gaps | A stable frame keeps joints tight |
A level base solves the cause instead of hiding the symptom with more soil.
Check the site before you begin
Choose a spot with at least six hours of direct sun for most vegetables. Fruiting crops such as tomatoes, eggplants, beans, cucumbers, and squash often produce better with eight or more hours.
Avoid placing the bed where roof water drains, tree roots crowd the soil, or a downspout floods the area. In USDA Zones 3 through 6, watch for frost heave. In Zones 7 through 10, check drainage after heavy winter or summer rain.
Test sunlight and drainage
Watch the site from morning to late afternoon. A spot that looks sunny at 9 a.m. may sit in shade by 2 p.m. from a fence, shed, or tree.
To test drainage, dig a hole about 12 inches wide and 12 inches deep. Fill it with water and let it drain. Fill it again and watch the water level. If water remains for many hours, improve drainage before setting the bed there.
Mark the bed outline
Place the empty frame on the ground. Use stakes and string to mark the outside edges. Measure the diagonals from corner to corner.
If both diagonals match, the frame sits square. If they differ by more than about 1 inch on a 4-foot bed, adjust the corners before you level the base.
💡 Pro Tip: Measure the frame’s inside and outside dimensions before digging. Many raised bed kits list nominal sizes that differ from their true dimensions.
Tools and materials you may need
Most raised garden beds need simple hand tools. A long level makes the work much easier because a short torpedo level can show one small area as flat while the whole bed still slopes.
For a 4-by-8-foot bed, I prefer a 4-foot level or a straight 2-by-4 with a level placed on top. A string level helps with long edges, but it can be less precise in wind.
| Tool or material | Use | Helpful amount |
|---|---|---|
| Shovel and garden rake | Remove high soil and spread base material | 1 each |
| 4-foot level and straight board | Check the frame and ground | 1 each |
| Gravel, pavers, or coarse sand | Support low areas and improve stability | As needed |
| Hand tamper or flat board | Compact the base | 1 |
| Stakes and string | Mark edges and height | 4–8 stakes |
| Work gloves and safety glasses | Protect hands and eyes | 1 pair each |
Wear gloves when handling galvanized steel, rough lumber, or broken pavers. Use safety glasses when cutting boards, driving stakes, or moving gravel.

How to level a raised garden bed step by step
The most reliable process is to work from the ground up. First make the site level, then square the frame, then fill the bed. Do not reverse those steps.
1. Empty the raised bed
If the bed already contains soil, remove it before doing major leveling work. Move good soil onto a tarp or into clean bins. Keep weeds, roots, and stones out as you work.
For a 4-by-8-foot bed that is 12 inches deep, you may move about 32 cubic feet of soil. That is close to 1.2 cubic yards, so use a wheelbarrow and plan for several trips.
If the bed contains established plants, dig them with a wide root ball and keep the roots damp. Transplant lettuce, kale, herbs, and young seedlings with little trouble. Mature tomatoes, peppers, and squash may suffer after a full bed rebuild.
2. Remove mulch and mark the high side
Pull mulch away from the frame. Place the level on the top edge of each side. Note which corners sit high and which sit low.
Do not assume the lawn or soil looks level by eye. A slope of only 2 inches can be hard to see, but it can change water flow across an 8-foot bed.
Use stakes to mark the four corners. Stretch string around the outside. Set the string at the height you want the bed to sit, then measure from the string to the ground at each corner.
3. Dig down from high areas
Remove soil from the high side instead of raising the low side with loose fill. Dig in small passes of 1 to 2 inches. Rake the base smooth after each pass.
This method creates a firm bearing surface. The bed rests on native soil rather than a thick mound that may settle.
For clay soil, use a mattock or garden fork to break the surface. Avoid working wet clay because it smears into a hard layer. Wait until the soil crumbles when squeezed.
4. Set the frame and check each side
Place the empty frame back on the prepared ground. Check the long sides, short sides, and both diagonals.
Put the level on a straight board that spans the width. Then repeat it along the length. Check at least four positions, not only one corner.
A wood frame may need the boards shifted slightly before you add support. A metal bed may need a paver under one leg or corner. Never force a rigid panel into place with heavy pressure, since the panel can bend or crack.
5. Support low corners with firm material
Use compacted gravel, crushed stone, pavers, or concrete blocks under low corners. Add material in thin layers and tamp each layer.
Do not use fresh compost, potting soil, wood chips, or loose topsoil as a structural base. Those materials decay or compress. The bed may look level on day one and lean by midsummer.
For a small 4-by-4-foot bed, one or two pavers may solve the problem. For a long bed, make a continuous compacted ledge under the low side. Point supports into the ground so they do not create a hollow pocket.
6. Square and stabilize the frame
Measure the diagonals again. If the measurements match, the frame is square. If not, push or pull the corners until they match.
For tall beds, add corner posts or internal braces. A 24-inch-high wood bed holds much more soil pressure than a 6-inch bed. Use exterior-rated screws, structural screws, or galvanized hardware.
Metal beds often need solid soil contact around the base. Fill small gaps with compacted soil after the frame sits level, but do not bury untreated wood unless it is designed for ground contact.
7. Compact the base
Walk around the frame and press the ground with a hand tamper. You can also use a flat board and a hammer to tamp small sections.
Compact the base when it is slightly damp, not soaked. Dry dust does not bind well, and wet soil can deform under weight.
Check the level once more after tamping. A low spot that appears now is easier to fix than one that appears after you add 1,200 pounds of wet soil.
8. Add landscape fabric or hardware cloth if needed
A raised bed does not always need a bottom liner. If the ground has good soil, direct contact lets earthworms enter and excess water drain.
Use 1/4-inch hardware cloth under the bed if voles, moles, or gophers damage roots. Overlap seams by at least 6 inches and pin the cloth down. Hardware cloth blocks pests but does not solve an uneven base.
Landscape fabric can help separate gravel from soil, but it should not replace a level foundation. Avoid plastic sheeting under most vegetable beds because it can trap water and reduce drainage.
9. Fill the bed in layers
Add soil in 3- to 4-inch layers. Lightly water each layer and rake it flat. Do not compact the soil hard, since vegetable roots need air spaces.
A common raised bed blend uses about 60% screened topsoil, 30% mature compost, and 10% aeration material such as pine bark fines. In wet clay areas, coarse compost and pine bark can improve structure. In dry climates, compost helps hold water.
Test the finished soil. Most vegetables grow well at pH 6.0 to 7.0. Blueberries need a much lower pH and usually perform better in a separate acidic container or bed.
10. Leave room for settling
Fill the bed to about 1 inch below the top edge. A very full bed spills during rain and makes mulch harder to keep in place.
After four to eight weeks, the soil may drop 1 to 3 inches as compost settles and air spaces close. Add more soil and compost only after you see where it settles.
| Bed situation | Base method | Extra support |
|---|---|---|
| Flat lawn or garden soil | Remove sod and level native soil | Usually none |
| Mild slope under 2 inches | Cut the high side and compact | Gravel under low spots |
| Steep slope over 2 inches | Build a stepped base | Pavers, blocks, or retaining support |
| Wet clay | Create a firm, raised ledge | Coarse gravel and good drainage |
| Pest-prone ground | Level soil, then add hardware cloth | Overlap seams and pin edges |
The steeper the site, the more important the foundation becomes. If the low side is more than half the bed height above ground, treat the project like a small retaining structure.
Leveling different types of raised beds
The bed material changes how you correct an uneven site. Wood allows small adjustments, while metal panels can crease if you twist them.
Wood raised beds
Wood beds are easy to level because you can shim a corner or trim a high spot. Cedar, redwood, and ground-contact pressure-treated lumber can last for years, but moisture at the base still causes rot.
Set wood on compacted mineral soil or pavers. Avoid placing untreated boards directly on constantly wet ground. The bottom board usually breaks down first, especially where mulch stays against it.
Galvanized steel beds
Steel beds are light and quick to install. Their thin walls can bow if the base is uneven or if the soil pushes against one unsupported section.
Level the ground before assembly when possible. Use pavers under legs or flanges, and check that each panel rests evenly. Do not hammer a bent steel panel flat against a rock.
Composite and plastic beds
Composite boards resist rot but may flex more than thick lumber. Plastic corner joints can crack when the bed twists.
Keep the base flat and support long sides. On a slope, use several short beds instead of one long plastic bed. This limits pressure at the joints.
Masonry and block beds
Concrete blocks and bricks need the most careful base work. Remove loose topsoil and create a compacted gravel footing.
Use a string line and level each block course. A small error at the first course becomes a large error at the top. Do not rely on soil inside the bed to hold a leaning wall upright.
Common leveling mistakes and simple fixes
Most failed leveling jobs come from shortcuts. The bed looks right at first, but the base moves after rain or filling.
| Mistake | Signs | Better fix |
|---|---|---|
| Using loose soil under one corner | Corner sinks after rain | Use compacted gravel or a paver |
| Leveling only one side | Water pools at one end | Check length, width, and diagonals |
| Filling before leveling | Soil must be removed again | Empty the bed first |
| Skipping compaction | Frame leans within weeks | Tamp thin layers |
| Building on wet clay | Base becomes hard and slick | Wait for proper soil moisture |
| Ignoring drainage | Plants stay wet near the low side | Redirect water or improve the base |
Mistake: adding soil to the low side
This is the most common error. Loose soil has air pockets, and water carries fine particles downward. The low side settles faster than the cut side.
If you must build up a low side, use compacted crushed stone or a properly built retaining edge. Add garden soil only after the structural base is stable.
Mistake: checking only the top edge
A frame can have a level top edge while the bottom has a large gap. That gap may allow soil to wash out or rodents to enter.
Check the bottom edge with a straight board. Fill small gaps with compacted mineral soil. For larger gaps, reset the frame rather than stuffing mulch underneath.
Mistake: using sand alone
Sand can help smooth a firm base, but a thick layer of loose sand shifts under weight. It also washes from gaps during heavy rain.
Use 1 inch or less of coarse sand over a compacted base. For larger corrections, use crushed stone or pavers.
⚠️ Warning: Never place a tall raised bed on a steep slope without checking soil pressure and drainage. A bed that holds 12 inches of wet soil can weigh several tons. Build stepped beds or ask a local landscape professional for help.

How to level a planted bed
A planted raised bed needs a gentler repair. Do not lift a full frame unless you are ready to disturb roots and remove heavy soil.
First, identify how much the bed has moved. If the slope is less than 1 inch and water still drains well, top-dress the surface with compost and adjust irrigation instead of rebuilding.
If one corner has sunk badly, remove plants from that section. Scoop soil into buckets or onto a tarp. Reset the frame, compact the base, and return the soil.
Protect roots during the repair
Keep removed soil shaded. Cover it with a damp tarp during hot weather. Do not let roots sit in water, but do not let them dry out.
Transplant cool-season crops such as lettuce, spinach, kale, and cilantro more easily than mature warm-season crops. Wait until evening to replant, then water deeply.
Add 1 to 2 inches of mulch after the repair. Shredded leaves, straw, or fine bark can reduce heat and moisture loss. Keep mulch 2 inches away from tomato, pepper, and cucumber stems to reduce rot.
Drainage, irrigation, and soil after leveling
Leveling the frame does not guarantee good drainage. Soil texture still controls how water moves through the bed.
Sandy soil drains quickly but may need more frequent watering. Clay soil holds water and may need more compost, pine bark, or a raised base. Do not add large amounts of fine sand to clay. The mix can become dense, much like concrete.
Drip irrigation works well in a level bed because emitters deliver water along an even line. Soaker hoses also work, but check them by hand. Some hoses release far more water near the faucet than at the far end.
| Soil or bed condition | Watering approach | What to watch |
|---|---|---|
| Sandy mix in hot weather | Short, frequent irrigation | Dry soil below the surface |
| Compost-rich loam | Deep watering as needed | Runoff after heavy watering |
| Clay-heavy mix | Slow watering with breaks | Standing water and root rot |
| Mulched bed | Water less often but deeply | Moisture 2–4 inches down |
Check moisture by pushing a finger 2 to 4 inches into the soil. For larger beds, use a soil moisture meter as a guide, not as the only test.
Seasonal timing for leveling work
The best time to level an empty bed is during the dormant season or before planting. In cold climates, late fall after harvest or early spring before the soil warms can work well.
Avoid heavy digging when the soil is saturated. In USDA Zones 3 through 6, wait until spring soil crumbles instead of smearing. In Zones 7 through 10, winter may offer a good work window, but avoid rebuilding during a stretch of heavy rain.
| Season | Best leveling work | Avoid |
|---|---|---|
| Late winter or early spring | Reset empty beds and improve drainage | Working frozen or soaked soil |
| Late spring | Minor adjustments and support | Disturbing mature roots |
| Summer | Small repairs and irrigation checks | Major excavation in heat |
| Fall | Empty, clean, and rebuild beds | Leaving loose soil on a steep slope |
A fall repair gives the base time to settle before spring planting. Cover exposed soil with mulch or a cover crop such as crimson clover, oats, or winter rye where suitable.
My experience with raised bed leveling
I have leveled beds on sandy coastal soil, heavy Midwestern clay, and rocky ground in a sloped backyard. The same lesson came up each time: the foundation matters more than the soil mix.
On one 4-by-8-foot cedar bed, I first added topsoil to the low end because it seemed fast. After a wet spring, that corner sank nearly 2 inches. I removed the soil, cut down the high side, and used compacted limestone screenings under the low rail. The bed stayed stable through two growing seasons.
A steel bed gave me a different problem. The frame looked level, but a small rock under one side pushed the panel outward. After I removed the rock and tamped the base, the sidewall straightened. The soil had not caused the bulge; the uneven foundation had.
I have also found that compost levels vary by region. A bag labeled “compost” may contain fine leaf compost, manure compost, or woody material. I mix it with screened topsoil and let the bed settle before planting carrots or other crops with straight roots.
How much leveling costs
A small DIY repair may cost less than $30 if you already own a shovel and level. Gravel, pavers, hardware cloth, and replacement soil can raise the cost.
A full 4-by-8-foot refill often costs more than the frame. Soil volume matters. At 12 inches deep, the bed needs about 32 cubic feet of mix. At 18 inches, it needs about 48 cubic feet.
| Project size | Typical DIY time | Main cost |
|---|---|---|
| 4-by-4-foot bed | 30–90 minutes | Gravel or pavers |
| 4-by-8-foot empty bed | 1–3 hours | Labor and replacement soil |
| Stepped bed on a slope | 1–2 days | Blocks, drainage, and soil |
| Planted bed repair | 2–6 hours | Temporary containers and soil |
Current pricing ranges from modest for a small repair to several hundred dollars for a large rebuild with delivered soil. Delivery fees often cost more than the gravel itself, so compare bulk and bagged material.
When to hire a professional
Hire help when the bed sits on a steep slope, near a foundation, beside a retaining wall, or over buried utility lines. Professional advice also makes sense when water flows toward your home.
A landscape contractor can build a stepped base, drainage swale, or small retaining wall. A structural engineer may be needed for tall masonry walls or beds that hold back a large bank of soil.
You can usually handle a low wood or steel bed yourself if the slope is mild and the frame weighs little. Stop if the ground shifts, the wall cracks, or water begins moving toward a building.

Pros and cons of leveling a raised garden bed
Leveling takes time at the start, but it prevents repeated repairs. The main trade-off is that a proper base may require more digging than simply adding soil.
| Pros | Cons |
|---|---|
| More even watering | Requires emptying the bed for major repairs |
| Less frame stress | Can involve heavy soil moving |
| Fewer soil washouts | Gravel and pavers add cost |
| Better root conditions | Steep slopes may need professional work |
| Easier irrigation setup | Soil may settle again after filling |
For most vegetable gardeners, the benefits outweigh the work. A stable bed makes later tasks such as watering, mulching, trellising, and harvesting easier.
Pro tips for a long-lasting level bed
Use a long level whenever possible. A 9-inch torpedo level works for corners, but it cannot show the full slope across an 8-foot side.
Keep the bed no taller than needed. A 6- to 12-inch bed works for lettuce, herbs, onions, beans, and many annual flowers. A 12- to 18-inch bed gives more root space for carrots, parsnips, tomatoes, and larger perennials.
Do not place heavy stone edging on soft ground without a compacted base. Stone settles unevenly and can push the bed out of square.
Use corner braces on wood beds wider than 4 feet. Soil pressure increases with bed height and width. Internal cross braces help long beds stay straight.
Use a simple level check each season
At the start and end of each growing season, place the level on each side. Look for gaps, leaning corners, bowing boards, and soil loss.
Repair small movement early. A 1/2-inch correction may take minutes. A 3-inch lean after years of settling may require removing the entire bed.
Match the bed to the slope
A long, narrow bed that follows a slope can be easier to manage than a square bed across it. On a hillside, run beds across the contour rather than straight downhill. This slows water and reduces erosion.
For very steep land, terrace the area with short beds. Each terrace should have stable support and a way for excess water to leave safely.
🌱 Beginner Note: If you are unsure whether the site is level, fill a clear hose with water and hold both ends at the corners. Water seeks the same height at both ends. This simple method helps measure elevation over long distances.

Raised bed leveling checklist
Use this checklist before planting:
- Choose a site with six to eight hours of sun.
- Check for roof runoff, tree roots, and poor drainage.
- Empty the bed if the frame has moved more than 1 inch.
- Mark the high and low sides.
- Cut down high soil first.
- Use compacted gravel or pavers under low areas.
- Check the top edges and the bottom edges.
- Measure both diagonals to confirm the frame is square.
- Add hardware cloth if rodents damage roots.
- Fill with soil in 3- to 4-inch layers.
- Leave 1 inch below the rim.
- Recheck the bed after four to eight weeks.
- Mulch after the soil settles.
FAQs about leveling a raised garden bed
Q: Should a raised garden bed be perfectly level?
A: The top should be close to level so water spreads evenly, but the whole garden does not need laboratory precision. A slight slope can help drainage. On steep ground, use several level terraces instead of forcing one long bed to sit flat.
Q: Can I level a raised bed with soil?
A: Use soil only for small gaps after the main base is firm. Do not support a low corner with loose garden soil, compost, or mulch. Those materials settle and wash away. Use compacted gravel, crushed stone, or a paver for structural support.
Q: Can I level a raised bed without removing the soil?
A: Yes, for a small correction under about 1 inch. Remove soil near the affected corner, lift the frame slightly, add firm support, and replace the soil. For a major tilt, emptying the bed is safer and gives a better result.
Q: What should I put under a raised garden bed?
A: Use firm native soil, compacted gravel, crushed stone, or stable pavers. Use 1/4-inch hardware cloth under the bed if you need protection from voles, moles, or gophers. Avoid plastic sheeting in most vegetable beds because it can block drainage.
Q: How do I level a raised bed on a slope?
A: Cut into the high side, then build a firm ledge under the low side. Use pavers, compacted stone, or a properly built retaining edge. For a steep slope, create several shorter terraces rather than one tall, unsupported wall.
Q: Why does my raised garden bed keep sinking?
A: Common causes include loose fill under the frame, wet clay, rotting wood, poor drainage, and compost shrinkage. Check whether the frame or the soil has sunk. If the frame moved, reset the base. If only the soil dropped, add a small amount of mature compost and topsoil.
Q: Should I use sand to level a garden bed?
A: A thin layer of coarse sand can smooth a firm surface, but sand should not support a thick raised section. It shifts and washes out. Use compacted crushed stone or pavers for larger height corrections.
Q: Does leveling improve raised bed drainage?
A: Leveling improves water distribution, but it does not fix compacted clay or a high water table by itself. Combine a level base with suitable soil, open drainage paths, and a bed location that does not collect runoff.
Q: How often should I re-level a raised garden bed?
A: Check it each spring and fall. A well-built bed may stay level for many years. Wood beds often need repairs sooner than galvanized steel beds because the bottom boards can rot. Extreme frost, heavy rain, and poor base material shorten the interval.
Q: Can I plant immediately after leveling?
A: Yes, if the frame is stable and the soil is moist but not wet. For the best results, let a newly filled bed settle for several days, then check the level again. Wait four to eight weeks before making a large soil adjustment unless plants need help sooner.
Q: What pH should a leveled raised bed have?
A: Most vegetables, herbs, and annual flowers prefer a soil pH between 6.0 and 7.0. Test before adding lime or sulfur. Blueberries, azaleas, and some ornamental plants need more acidic soil and may belong in a separate bed.
Q: Is it better to level a raised bed before winter?
A: Yes, if the soil is workable and not soaked. Fall leveling gives the base time to settle before spring planting. In cold USDA Zones 3 through 6, avoid digging frozen ground. In warm Zones 7 through 10, winter is often a useful repair season.
Final thoughts
A level raised garden bed starts with the ground, not the soil. Remove high spots, support low areas with firm material, square the frame, and check every side before you refill it.
Take your time with the base. Once the bed is stable, plants receive water more evenly, roots grow through a consistent soil depth, and the frame lasts longer. That extra hour of preparation can save many hours of repair during the growing season.
Meta description
Learn how to level a raised garden bed with simple tools, firm base materials, drainage tips, seasonal advice, common fixes, and step-by-step instructions for slopes and planted beds.