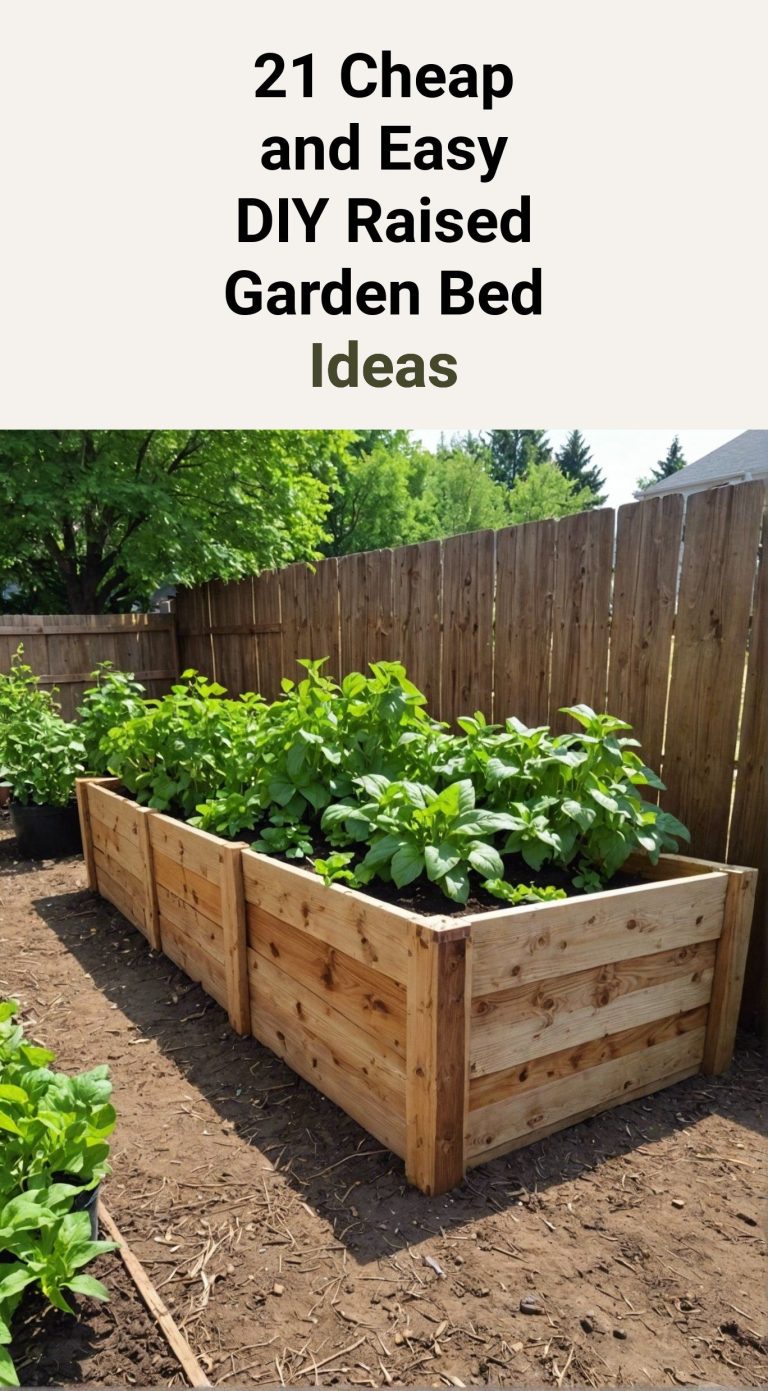
How To Build A 4×4 Raised Garden Bed: Easy DIY Guide
A 4×4 raised garden bed gives you a small, rich growing space without the hard work of digging poor soil. The finished bed measures about 4 feet by 4 feet, so you can reach the center from all sides. That makes it a good fit for backyards, patios, school gardens, and small urban lots.
I have built raised beds in sandy soil in USDA Zone 8 and in heavy clay in Zone 6. The same basic design worked in both places, but drainage, wood choice, and soil depth changed. A well-built 4×4 bed can last 7 to 15 years, depending on the lumber and weather.
This guide shows how to build a 4×4 raised garden bed from start to finish. You will learn how to choose safe wood, prepare the site, build strong corners, mix soil, add irrigation, and avoid the mistakes that cause beds to rot or bow.

Quick answer: How do you build a 4×4 raised garden bed?
To build a 4×4 raised garden bed, cut four boards to 4 feet, fasten them into a square, place the frame on level ground, and fill it with a mix of topsoil, compost, and aeration material. Use untreated cedar, redwood, or pressure-treated lumber rated for garden use. A 12-inch-tall bed usually needs about 16 cubic feet of soil.

A 4×4 bed works best when it receives at least six hours of direct sun. Place it near a water source, but do not set it where rainwater collects. A level site helps the frame stay square and keeps water from pooling on one side.
For most vegetables, build the bed 11 to 12 inches tall. Growers with poor soil, tree roots, mobility limits, or deep-rooted crops may prefer an 18- to 24-inch bed. Taller beds cost more and need more soil, but they reduce bending and improve root space.
Materials and tools for a 4×4 raised bed
You need only basic tools for this project. A drill, saw, tape measure, and level will handle most of the work. If you buy boards already cut to length, you can build the frame in less than two hours.

The table below lists a practical setup for a 12-inch bed. The exact amount may change if your boards have a different width or if you add a bottom, trellis, or internal brace.
| Item | Suggested amount | Notes |
|---|---|---|
| Untreated cedar or redwood boards | 4 boards, 2×12 inches, 4 feet long | Use rough or smooth boards in good condition |
| Exterior screws | 24 to 32 | Use 3-inch coated or stainless screws |
| Corner braces or stakes | 4 to 8 | Helpful for tall beds or loose soil |
| Compost | About 5.3 cubic feet | Use mature, screened compost |
| Topsoil | About 7.9 cubic feet | Choose clean soil without weed roots |
| Drill and driver bit | 1 each | Pre-drill near board ends |
| Level and tape measure | 1 each | Needed for a square, stable frame |
| Shovel and rake | 1 each | For site work and soil mixing |
For a 6-inch bed, you need about 8 cubic feet of soil. For a 12-inch bed, plan on 16 cubic feet. For an 18-inch bed, plan on 24 cubic feet. Buy 10 percent more than the calculation suggests because soil settles after watering.
Choosing lumber that will last
Cedar and redwood resist rot without chemical treatment. They cost more than pine, but they often last much longer in wet climates. In my garden, cedar boards stayed firm after eight wet seasons, while untreated pine began to soften near the soil line after three seasons.
Pressure-treated lumber is another option. Modern residential treated wood does not use the old chromated copper arsenate formula, which was phased out for most home uses. Still, choose lumber labeled for residential garden or ground-contact use, and follow the product label.
Avoid railroad ties, painted scrap wood, pallets with unknown markings, and boards treated with creosote or old industrial chemicals. If a board smells like oil or has a stain you cannot identify, do not use it around food crops.
Selecting screws and corner supports
Use exterior-rated screws with a corrosion-resistant coating. Stainless steel screws offer the longest life, especially in coastal areas, but they cost more. Standard drywall screws can snap or rust, so they are a poor choice for outdoor beds.
A 12-inch bed often holds together with screws alone. Add metal corner brackets or inside stakes if you build with 2×6 boards, use loose soil, or plan to stack two layers. Tall beds place more outward pressure on the corners.
💡 Pro Tip: Use a square-drive or star-drive exterior screw. Phillips screws strip more easily when you drive them into dense cedar.
Plan the site before you build
The best place for a raised bed has full sun, good air flow, and easy access to water. Most vegetables need six to eight hours of direct light. Leaf crops such as lettuce, spinach, and arugula can handle some afternoon shade, but tomatoes, peppers, cucumbers, squash, and melons need more sun.

Check the site at several times of day before you build. A spot that looks sunny at 9 a.m. may sit under a tree shadow by 2 p.m. Also look above the bed. Branches can drop leaves, roots can invade the soil, and bird activity can increase pest pressure.
Do not place the bed against a wooden fence unless you leave room to work. A gap of 18 to 24 inches lets you inspect the back wall, trim plants, and repair the frame. Leave wider paths if you use a wheelbarrow.
Measure the growing area
A “4×4” bed may not have an exact outside measurement of 48 inches. If you use four 2×12 boards and overlap the corners, the outside size may be about 49 1/2 by 49 1/2 inches. That small difference does not matter for growing, but it matters if you plan a grid of beds.
Mark the corners with stakes and string. Measure both diagonals. If the two diagonal measurements match, the layout is square. This simple check saves time later.
Decide whether to remove grass
Remove grass and perennial weeds before placing the frame. Sod can grow through the soil and compete with crops. Dig out the top 2 to 3 inches, then rake the ground smooth.
You can also use a sheet mulch method. Mow the grass short, cover it with overlapping cardboard, and place the bed on top. Use plain brown cardboard without glossy coating, tape, or colored ink. Add soil at least 12 inches deep so the roots have room above the old lawn.

If the site has aggressive weeds such as bindweed, quackgrass, or Bermuda grass, remove the sod and as many roots as possible. Cardboard alone may not stop these plants for long.
Build the raised bed frame step by step
Building the frame is simple, but careful measuring makes the difference between a solid bed and a crooked one. Work on a flat driveway, patio, or cleared patch of ground if possible. Keep the best face of each board facing outward.

1. Inspect and mark the boards
Check each board for deep cracks, soft spots, large knots, and severe warping. A slight bow can face upward or inward, but a twisted board may make the corners hard to join.
Mark the board ends so you know which pieces will overlap. If all four boards measure 4 feet, you can assemble a simple lap-style square. If you use 2×6 boards, cut each piece to 48 inches for an outside measurement near 4 feet when the boards meet end to end.
2. Pre-drill the screw holes
Set one board against the end of another board. Keep the top edges aligned. Drill two pilot holes through the outside board and into the end grain of the adjoining board.
Place the holes about 1 inch from the top and bottom edges. Pre-drilling reduces splitting, especially in cedar. Do not place screws too close to a board end.
3. Join the first two corners
Drive two 3-inch screws into the first corner. Keep pressure on the boards as you drive so the joint stays tight. Repeat the process at the other end of one board.
At this stage, the frame may look like an open U. Check that the top edges remain level and aligned. If one board rises, loosen the screws, reset the joint, and try again.
4. Complete the square
Attach the remaining board to form a square. Measure both diagonals from corner to corner. If one diagonal is longer, push the longer corner inward until both measurements match.
For a simple frame, two people make this task easier. One person holds the corner while the other drives the screws. Once the square looks right, add a second screw at each joint if you started with one.
5. Add corner stakes or brackets
Drive a 2×2 cedar stake inside each corner if the bed will sit on soft soil. The stake should extend about 12 inches below the frame and 2 to 3 inches above it. Screw the board to the stake from the inside.
For a bed taller than 12 inches, use two stakes per corner or install galvanized corner brackets. Add a center brace if the long sides bow outward. A 4-foot side usually does not need a brace at 12 inches tall, but it helps with 18- to 24-inch beds.
6. Set the frame in place
Carry the frame to the prepared site. Use a level across each side and corner. Remove soil under high spots rather than lifting low spots with loose soil.
Check the frame again after you water the ground. Soil can settle under one corner. A small change is easy to fix before filling the bed.
⚠️ Warning: Never stand inside an unfinished bed while forcing a corner apart. A board can spring back, and sharp screw tips may face inward.
Prepare the ground and improve drainage
A raised bed does not always need a bottom. If you place it on healthy soil, an open base lets earthworms, plant roots, and excess water move through the bed. A bottom makes sense on concrete, a rooftop, or a contaminated site, but it changes drainage and soil depth.
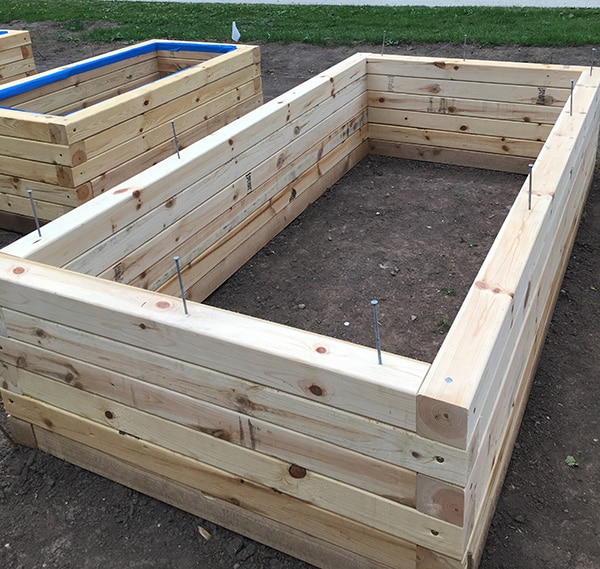
Before adding soil, loosen the ground below the bed to a depth of 6 to 8 inches. A garden fork works well. Do not turn the soil into a fine powder. Break compacted layers and remove large stones, roots, and perennial weeds.
If your native soil drains poorly, test it with a simple hole test. Dig a hole about 12 inches deep, fill it with water, and let it drain. Fill it again and watch how fast the water falls. Water that remains for many hours suggests clay, compaction, or a high water table.
Should you add gravel under a raised bed?
Usually, no. A gravel layer under soil does not create better drainage in most garden beds. It can form a perched water layer where fine soil meets coarse stone, and it reduces the depth available for roots.
Instead, improve drainage by loosening the native soil, choosing a higher site, and using a balanced soil mix. If the area stays wet after rain, build a shallow drainage swale or move the bed.
When to use a liner or bottom
Use a bottom only when the growing area needs a physical barrier. A bed on concrete can use hardware cloth, landscape fabric, or a raised planter base, but it needs drainage holes. A bed over contaminated urban soil may use a thick barrier that separates the soil layers.
Avoid lining a soil-based bed with plastic. Plastic can trap water and speed wood decay. If you need weed control, cardboard under the bed works better for most lawns.
Fill the bed with healthy soil
The right soil mix supports roots, drains after rain, and holds enough moisture for hot days. Do not fill a raised bed with pure bagged topsoil or pure compost. Pure compost can shrink, hold too much water, and release nutrients too quickly.

For most vegetables, use about 50 percent clean topsoil, 30 percent mature compost, and 20 percent aeration material such as fine pine bark or coarse coco coir. In a wet climate, increase the mineral soil and pine bark. In a dry climate, add more compost and organic matter.
The table below compares common fill options for a 12-inch bed. Soil prices vary by region, delivery distance, and whether you buy in bags or bulk.
| Soil mix | Approximate amount | Best use |
|---|---|---|
| 50% topsoil, 30% compost, 20% pine bark | 16 cubic feet | General vegetables and herbs |
| 60% topsoil, 30% compost, 10% coco coir | 16 cubic feet | Dry areas with frequent summer watering |
| 40% topsoil, 40% compost, 20% pine bark | 16 cubic feet | Beds with poor native soil and heavy feeders |
A cubic foot equals about 7.5 gallons. A 4×4 bed that is 12 inches deep holds 16 cubic feet before settling. After four weeks, the level may drop 2 to 4 inches as the compost breaks down and air spaces close.
Test the soil pH
Most vegetables grow well in soil with a pH of 6.0 to 7.0. Blueberries need a more acidic mix near pH 4.5 to 5.5, so they deserve a separate container or bed. Do not try to grow blueberries beside tomatoes and peppers in the same soil.
A home soil test can show pH, phosphorus, potassium, and organic matter. For more accurate results, use a lab test through your county extension service. Test again after one or two growing seasons rather than adding lime or sulfur without a reason.
Mix and settle the soil
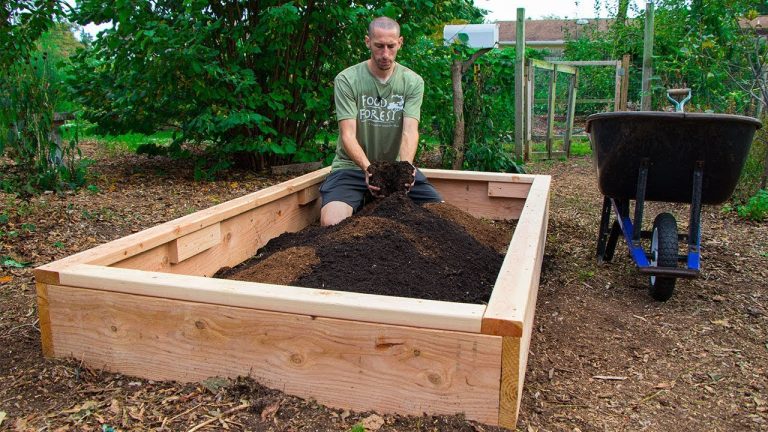
Add the soil in 3- to 4-inch layers. Spread each layer with a rake, then water it lightly. This helps reveal low areas and removes large air pockets.
Do not stomp hard on the soil. Walking in the bed compacts the mix and harms the loose structure that roots need. If you must reach the center, place a wide board across the frame and work from it.
🌱 Beginner Note: Fill the bed to within 1 inch of the top. Soil will settle, and mulch will add another layer. A full bed also keeps slugs and weeds from finding an easy path over the edge.
Plant a 4×4 bed with an efficient layout
A 4×4 garden bed gives you 16 square feet. Square-foot gardening divides the surface into 16 one-foot squares, but you do not need to follow that method exactly. Plant spacing depends on the crop, variety, climate, and whether you use trellises.

Place tall crops on the north side of the bed. This keeps tomatoes, pole beans, cucumbers, and trellised peas from shading shorter crops. In the Southern Hemisphere, place tall crops on the south side.
A 4×4 bed can grow one large tomato plant, four pepper plants, a row of carrots, several heads of lettuce, and herbs. It cannot support unlimited plants. Crowding increases humidity and can lead to powdery mildew, early blight, and poor air flow.
The table below gives a starting plan for common crops. Adjust it for cultivar size and your local season.
| Crop | Suggested spacing | Approximate plants in one 4×4 bed |
|---|---|---|
| Bush beans | 6 inches | 16 to 24 |
| Carrots | 3 inches | 100 or more, depending on rows |
| Leaf lettuce | 8 to 10 inches | 9 to 16 |
| Bell peppers | 18 inches | 4 |
| Cherry tomato | 24 to 30 inches | 1, with herbs below |
| Radishes | 3 inches | 100 or more |
| Basil | 10 to 12 inches | 4 to 6 |
Use trellises for pole beans, peas, cucumbers, and small melons. A strong trellis can sit on the north edge, but anchor it outside the frame if possible. Vining plants can pull a light bed out of square.
Good companion planting combinations
Companion planting works best when it improves space use, attracts pollinators, or confuses pests. It does not replace crop rotation, healthy soil, or insect checks.
Try tomatoes with basil and parsley. Pair carrots with onions or chives. Plant lettuce below taller crops during cool spring weather, then remove it when the tomato canopy closes.
Avoid placing large zucchini or pumpkin plants inside a 4×4 bed unless you plan to let the vines run outside. One zucchini can fill half the bed in a few weeks.
Water and mulch the new bed
Water the bed slowly after filling it. The first soaking settles the soil and shows whether water runs toward one corner. Add soil to low areas before planting.

New beds need more frequent watering than established beds. In warm USDA Zones 8 through 10, check moisture daily during the first week. In cooler Zones 4 through 6, every two to three days may be enough if rain falls.
Push your finger 2 inches into the soil. If it feels dry at that depth, water. Seedlings and shallow-rooted lettuce need more frequent checks than established tomatoes.
The table below offers a starting watering plan. Weather, soil, mulch, and plant size can change these numbers.
| Bed stage | Watering guide | What to check |
|---|---|---|
| First week | Light water daily or as needed | Keep seed beds evenly moist |
| Weeks 2 to 4 | Deep water 2 to 4 times weekly | Soil should dry slightly on top |
| Mature plants in mild weather | About 1 inch per week | Check after rain and wind |
| Hot, dry weather | Deep water every 1 to 2 days | Watch wilt and leaf curl |
Drip irrigation or a soaker hose gives better results than a sprinkler. A 1/2-inch soaker hose can run in a loop around the bed, but avoid tight bends that restrict flow. Add a timer with a pressure regulator if your water supply is strong.
Add the right mulch
Apply 1 to 2 inches of shredded leaves, straw, pine bark, or finished compost. Keep mulch 2 inches away from tomato stems and other plant crowns. Thick wet mulch touching stems can encourage rot and provide hiding places for slugs.
Straw works well around beans and cucumbers, but use clean straw rather than hay. Hay often contains grass seed. Shredded leaves improve soil over time but may mat if applied in a thick layer.
Fertilize based on the crop and soil test
Compost supplies slow nutrients, but heavy feeders may need more. Tomatoes, peppers, cucumbers, corn, squash, and broccoli use more nutrients than herbs, radishes, or carrots.

Start with a soil test. If the test shows adequate phosphorus and potassium, avoid fertilizer blends with high middle numbers. Too much phosphorus can harm waterways and interfere with micronutrient uptake.
A balanced organic fertilizer such as 4-4-4 can support many vegetables. Apply it according to the label and mix it into the top inch of soil. Fish emulsion gives a quick nitrogen boost, but it smells and needs repeat applications.
Do not fertilize dry, wilted plants. Water first, then feed after the plant recovers. Fertilizer salts can burn stressed roots.
A simple feeding schedule
Apply compost before planting each season. Side-dress leafy crops with a thin layer of compost after four weeks. For fruiting plants, use a complete fertilizer when flowers form if the soil test and plant growth show a need.
Do not feed carrots and other root crops with high nitrogen. Too much nitrogen creates large leaves and small roots. This was one of my early mistakes with carrots; the tops looked excellent, but the roots were thin and forked.
Protect the bed from pests and disease
Raised beds reduce some problems, but they do not make plants pest-proof. Aphids, flea beetles, cabbage worms, cutworms, slugs, squirrels, and rabbits can still find the bed.
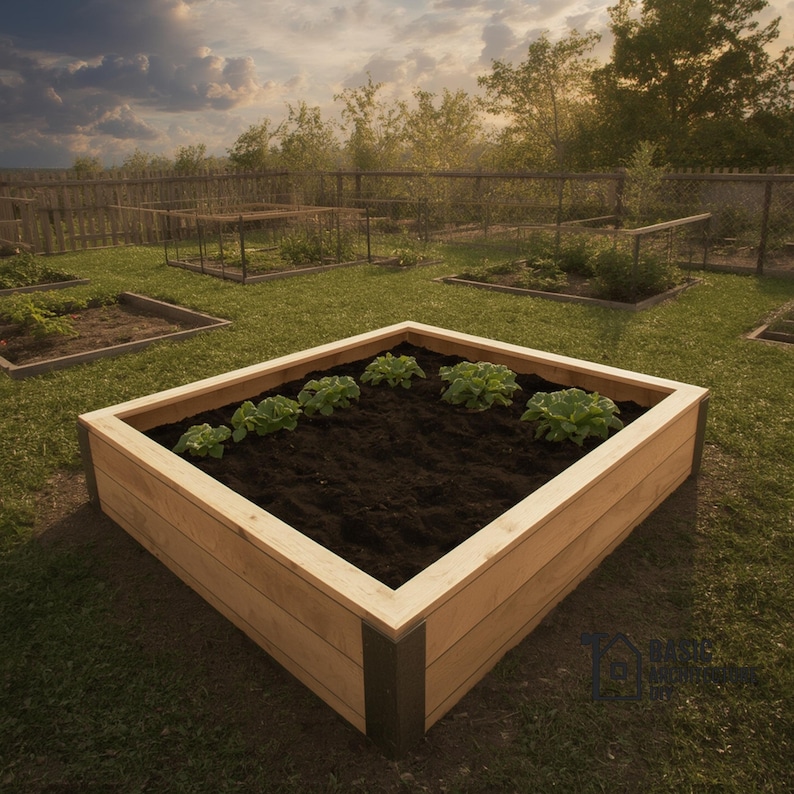
Inspect the underside of leaves once or twice a week. Look for holes, sticky honeydew, chewed edges, webbing, and clusters of eggs. Early action usually works better than a strong treatment later.
Use insect netting over cabbage, kale, and broccoli to block cabbage moths and flea beetles. A low fence can deter rabbits, but it must reach at least 24 inches high. Squirrels may require netting, motion sprinklers, or protected seedlings.
The table below links common signs with practical fixes. Always identify the pest before applying a product.
| Symptom | Likely cause | First fix |
|---|---|---|
| Small round holes in leafy greens | Flea beetles | Cover with insect netting |
| Ragged holes and slime trails | Slugs or snails | Remove hiding places and hand-pick |
| Wilted plant with cut stem | Cutworm | Add a paper or cardboard collar |
| Sticky leaves and curled new growth | Aphids | Spray with water and attract lady beetles |
| White powder on leaves | Powdery mildew | Improve air flow and water the soil |
| Dark spots on tomato leaves | Early blight or leaf spot | Remove damaged leaves and mulch soil |
Rotate crops when possible. Do not plant tomatoes, peppers, eggplants, and potatoes in the same part of the bed every season. These plants belong to the nightshade family and can share diseases.
Remove diseased leaves from the garden. Do not add heavily infected plant material to a cool home compost pile. Clean tomato cages and stakes with a household disinfectant between seasons if disease was severe.
Maintain the frame through every season
A raised bed needs little care, but a short inspection each season prevents expensive repairs. Check the corners, screw heads, soil level, and wood surface.

In spring, tighten loose screws and replace broken boards. Look for rot where wood touches wet soil. In summer, check for outward bowing after heavy watering. In fall, remove diseased plants and leave healthy roots to decompose in place.
In winter, avoid piling wet leaves against the outside walls. Snow itself usually does not hurt a 4×4 bed, but freeze-thaw cycles can shift an unlevel frame. In cold USDA Zones 3 through 5, inspect it after the ground thaws.
The table below gives a simple maintenance cycle.
| Timing | Task | Reason |
|---|---|---|
| Before planting | Check screws, corners, and level | Prevent movement before filling |
| Monthly in the growing season | Inspect wood and soil height | Catch rot and settling early |
| After heavy rain | Look for pooling and bowed sides | Correct drainage or support issues |
| End of season | Remove diseased debris and top up soil | Reduce pests and restore volume |
| Every 2 to 3 years | Soil test and refresh compost | Track fertility and pH |
Wood usually fails first near the bottom edge, especially in rainy regions. Cedar and redwood last longer, but no wood stays new forever. If a screwdriver sinks into the board or the corner moves when pushed, plan a repair.
Fix common 4×4 raised bed problems
Most raised bed problems come from poor drainage, weak corners, bad soil, or overcrowded plants. Each has a clear fix if you catch it early.

The bed is not square
Measure the diagonals. Push the longer diagonal inward until both measurements match. If the frame will not stay square, add inside corner stakes or metal brackets.
The sides bow outward
Too much soil pressure can push thin boards outward. Add a center brace across the bed or install stronger corner posts. For an 18-inch or taller bed, use thicker boards and braces before filling it.
Water pools in the bed
Check the ground below the frame. If the site is compacted clay, loosen it with a fork and improve the soil mix with compost and pine bark. Do not add a gravel layer and assume the issue is solved.
Soil settles too much
Fresh compost and loose soil settle after rain. Add more of the same soil mix instead of using pure compost. A drop of 2 to 4 inches during the first season is common.
Plants grow slowly
Check sunlight, watering, root space, and soil pH before adding fertilizer. Yellow leaves can come from low nitrogen, but they can also result from waterlogged roots. A soil test prevents guesswork.
🔧 Quick Fix: If the bed dries too fast, add 1 to 2 inches of compost and organic mulch. If it stays wet, reduce watering, clear blocked drainage, and inspect the soil below the frame.
Build alternatives for different needs
A standard wood frame is not the only way to make a 4×4 growing space. Your site, budget, mobility, and climate should guide the design.

Galvanized steel beds last a long time and resist rot. They warm faster in spring and can become hot in full sun, especially in USDA Zones 9 and 10. Choose a bed with rolled edges and avoid sharp exposed metal.
Composite boards resist decay and need little maintenance, but they cost more and may flex under heavy soil pressure. They work well for homeowners who want a clean look and do not want to stain or replace wood.
Grow bags and fabric beds cost less and weigh less. They suit renters and temporary gardens, but they dry faster and can degrade in strong sun. A 4×4 group of fabric pots does not hold one shared soil system, so water and nutrients vary by container.
The table below compares common designs.
| Bed type | Main benefit | Main limitation |
|---|---|---|
| Cedar wood | Natural look and easy DIY repair | Higher cost than pine |
| Pressure-treated wood | Long life at a lower price | Must follow product safety labels |
| Galvanized steel | Long service life and quick setup | Can heat and has sharp-edge concerns |
| Composite boards | Low rot risk and clean appearance | Higher cost and harder to modify |
| Fabric grow bags | Portable and renter-friendly | Dries faster and may wear out |
A ground-level garden may be a better choice if you have plenty of good soil and do not need extra height. A 4×4 bed is useful when you need control, access, or a clear boundary, but it is not automatically better than planting in the ground.
What a 4×4 raised bed costs and how long it takes
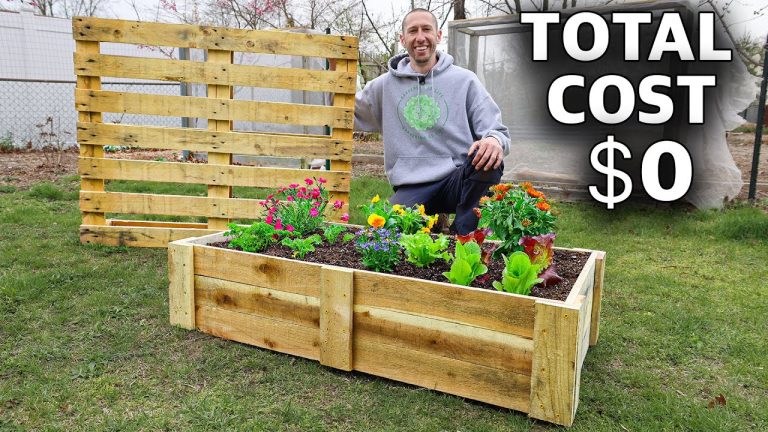
A basic 4×4 bed often costs between $100 and $250, depending on lumber, soil, delivery, irrigation, and tools. Cedar and delivered soil can push the total higher. Using reclaimed but safe lumber may lower the cost, but never trade safety for savings.
The frame itself may take one to two hours for a beginner. Site preparation can take another one to three hours if you remove sod or compacted soil. Filling the bed takes about 30 to 60 minutes when soil is already delivered nearby.
Soil often costs more than the wood. Bagged soil is easy to carry but expensive for 16 cubic feet. Bulk soil costs less per cubic foot but may require a delivery fee or a truck.
Is a 4×4 raised bed worth the money?
It is worth the cost for gardeners who have poor soil, limited space, drainage problems, or trouble bending. It also makes crop planning and weed control easier. The bed may pay for itself through several seasons of herbs, salad greens, beans, and tomatoes.
It may not be worth it if you already have deep, fertile soil and plenty of room. A simple in-ground row with compost can produce the same crops at a lower cost. Renters may prefer fabric containers that can move with them.
My experience building and using this bed
The most useful 4×4 bed I built used rough cedar boards, a 12-inch height, and a mix of local topsoil, screened compost, and pine bark. I placed it in full sun in Zone 7 and planted spring lettuce, carrots, basil, and one cherry tomato with a trellis on the north side.
The tomato shaded the lettuce by midsummer, so the lettuce bolted sooner than expected. The next season, I planted lettuce in the opposite corner and used a smaller tomato variety called ‘Sungold’ with a narrow cage. That change gave better air movement and more usable space.
I also tried filling another bed with almost all compost. It looked rich, but it dried unevenly and sank several inches. Carrots forked, and the bed needed frequent watering. A balanced mineral soil and compost mix performed much better after four weeks.
After two full seasons, the cedar remained solid. The first repair was not a broken corner. It was a loose screw caused by repeated wet-dry cycles. Replacing it took five minutes.
Common mistakes to avoid
A raised bed can fail before the first seed sprouts if the basic setup is rushed. These mistakes are easy to prevent.
- Using unsafe wood: Avoid creosote, old treated lumber, painted boards, and unknown pallets.
- Building on uneven ground: The frame will twist, water will collect, and corners will loosen.
- Filling with pure compost: Compost settles and may hold too much water.
- Adding gravel under normal soil beds: Gravel rarely fixes poor drainage.
- Overcrowding plants: Crowded leaves stay wet and invite disease.
- Ignoring the north side: Tall crops can shade half the bed.
- Skipping a soil test: Unneeded lime or fertilizer can create new problems.
- Using weak screws: Indoor screws rust or snap outdoors.
- Walking on the soil: Foot traffic compacts the root zone.
- Forgetting water access: Carrying watering cans across the yard becomes tiring fast.
When to hire a professional
Most 4×4 raised beds are simple DIY projects. Hire help if you need a tall retaining structure, a bed on a roof or balcony, drainage near a foundation, or a design that must support wheelchair access.
A tall bed filled with wet soil can weigh thousands of pounds. Confirm that a deck, roof, or balcony can carry the load before building there. A building professional or structural engineer can check the support system.
You may also need an electrician or irrigation professional if you plan buried lines, outdoor outlets, automated valves, or a large greenhouse system. Small drip kits are usually safe for homeowners, but follow local codes.
FAQs about building a 4×4 raised garden bed
Q: How much soil does a 4×4 raised bed need?
A 4×4 bed that is 12 inches deep holds 16 cubic feet of soil. Add about 10 percent extra because soil settles after watering. For an 18-inch bed, plan on 24 cubic feet.
Q: What is the best height for a raised garden bed?
A 12-inch height works for most vegetables and herbs. Choose 18 to 24 inches if you want easier access, need to cover tree roots, or plan to grow deep-rooted crops such as parsnips and long carrots.
Q: Can I put a raised bed on grass?
Yes. Remove the sod or cover short grass with overlapping plain cardboard before filling the bed. Use at least 12 inches of soil, and remove aggressive perennial weeds first.
Q: Should a raised garden bed have a bottom?
Most beds placed on soil should remain open at the bottom. Add a bottom only on concrete, a roof, a balcony, or contaminated ground, and include drainage holes.
Q: How many plants fit in a 4×4 raised bed?
It depends on spacing. You might grow 16 bush bean plants, four bell peppers, one cherry tomato, or dozens of carrots and radishes. Follow the spacing listed for the variety.
Q: Can I use pressure-treated wood for a vegetable garden?
Modern pressure-treated wood made for residential ground contact is commonly used for garden structures. Follow the label and local guidance. Do not use old lumber with unknown chemical treatment.
Q: How long does a cedar raised bed last?
Cedar often lasts 7 to 15 years, depending on board thickness, climate, soil moisture, and drainage. In wet regions, the lower edge may fail sooner than the rest of the frame.
Q: Why is my raised bed soil sinking?
Compost breaks down, air pockets close, and organic material settles. A 2- to 4-inch drop during the first season is normal. Top up with the same soil mix rather than pure compost.
Q: Can I grow tomatoes in a 4×4 raised bed?
Yes, but limit the bed to one large indeterminate tomato or two compact determinate plants. Add a sturdy cage or trellis, place the tomato on the north side, and provide at least six hours of sun.
Q: What should I plant first in a new raised bed?
Start with crops that match your season. Lettuce, spinach, peas, radishes, carrots, and herbs work well in cool spring weather. Tomatoes, peppers, beans, cucumbers, and basil prefer warmer soil.
Q: How often should I replace the soil?
You usually do not need to replace all the soil. Add compost each season, top up settled areas, and test the soil every two or three years. Replace soil only when it is contaminated, badly compacted, or affected by a persistent disease.
Q: Is a 4×4 bed large enough for a family?
One 4×4 bed can supply fresh herbs, salad greens, and some vegetables for one or two people. A family usually needs several beds or a larger in-ground garden for steady harvests through the season.
Final thoughts
A 4×4 raised garden bed succeeds when the frame is level, the soil drains well, and the planting plan matches the space. Use safe, rot-resistant materials, fill the bed with a balanced soil mix, and keep tall crops on the north side.
Start with a few reliable plants instead of filling every square on day one. Lettuce, basil, bush beans, radishes, peppers, and one compact tomato give beginners useful harvests without overwhelming the bed. With yearly compost, light mulch, and seasonal inspections, a small raised bed can stay productive for many growing seasons.