How To Build An Enclosed Garden: Easy DIY Guide
An enclosed garden gives plants a safer place to grow. A fence, gate, roof, or mesh wall can keep out deer, rabbits, chickens, pets, strong wind, and many insect pests. It can also make a small garden feel like a calm outdoor room.
I have built enclosed gardens in clay soil, sandy beds, and raised beds from USDA Zone 5 through Zone 9. The best designs were not the most costly ones. They had strong posts, easy access, good drainage, and enough space to work without stepping on the soil.
The right enclosure depends on your main problem. A 3-foot fence may stop rabbits, while deer need a fence closer to 8 feet high. A fine insect mesh can protect kale from cabbage moths, but it can also block bees from squash flowers. Start with the pest or hazard you need to stop, then build around that need.

Quick Answer: Build the Enclosure Around Your Main Garden Risk
To build an enclosed garden, choose a level site with at least 6 hours of sun, mark the garden size, install sturdy corner posts, attach a suitable fence or mesh, add a secure gate, and prepare the soil inside. Use 1/2-inch hardware cloth for rabbits and rodents, 1-inch poultry netting for larger pests, and a 7- to 8-foot deer fence where deer are common.

A small 8-by-12-foot enclosed garden works well for beginners. It gives you room for four raised beds, a central path, and a gate without creating too much upkeep.
Decide What Your Garden Must Keep Out
The first step is to identify the animal, insect, or weather problem. A fence designed for deer may still let mice pass through, and a roof designed for hail may reduce sunlight. One barrier rarely solves every problem.
Walk around your yard at dawn and again near sunset. Look for tracks, droppings, chewed stems, holes in leaves, and plants that disappear overnight. This simple check often saves money because you avoid building the wrong type of enclosure.
Match the Barrier to the Threat
Rabbits often chew young beans, lettuce, peas, and bark near ground level. Deer browse the tops of plants and may step over low fences. Raccoons test weak gates, while squirrels climb almost any rough surface.
The table below matches common garden threats with practical barriers. These dimensions work well in most home gardens, but local pressure can change the result.
| Garden threat | Barrier that usually works | Key detail |
|---|---|---|
| Rabbits and groundhogs | 1/2-inch hardware cloth, 24–36 inches high | Bury the bottom 6 inches or bend it outward |
| Deer | Woven wire or polypropylene deer fence, 7–8 feet high | Keep the fence tight and remove nearby launch points |
| Chickens and pets | 1-inch poultry netting or welded wire | Add a strong latch and a bottom skirt |
| Mice and voles | 1/4-inch hardware cloth | Use it under beds and along lower walls |
| Cabbage moths and whiteflies | Insect mesh, 0.8–1.2 mm openings | Seal edges before planting brassicas |
| Birds | Bird netting or a covered frame | Keep mesh tight to prevent tangles |
| Hail and heavy rain | polycarbonate panels or woven cover | Add ventilation on warm days |
A 2-inch chicken-wire mesh may stop a dog but will not stop rabbits or mice. Mesh size matters more than many new gardeners expect.
Think About Pollination
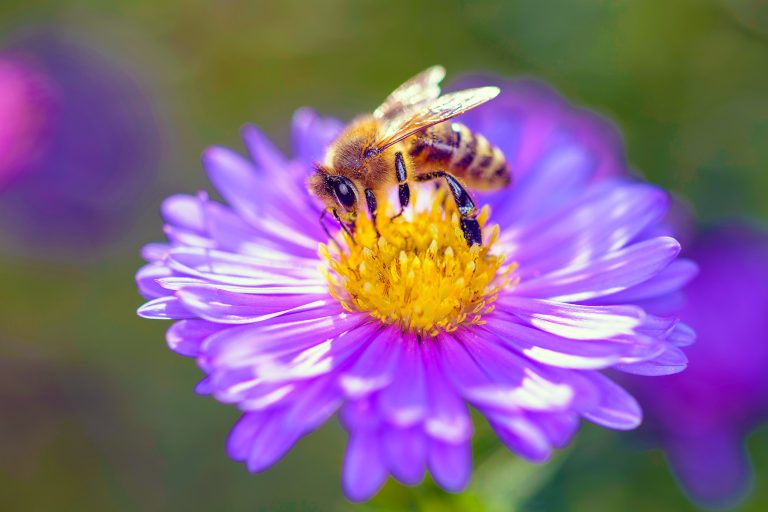
An enclosed garden can change how flowers receive pollen. Tomatoes and peppers usually pollinate well inside a mesh enclosure because wind and small insects can still reach them. Cucumbers, squash, melons, and pumpkins need insect visits or hand pollination.
If you cover cucurbits with insect mesh, open the cover when flowers appear, or hand-pollinate each morning. Use a small artist’s brush or transfer pollen from a male flower to a female flower with a tiny fruit behind it.
⚠️ Warning: Do not seal flowering squash, cucumbers, or melons under insect mesh and expect a full crop. Without bees or hand pollination, the plants may produce flowers but few fruits.
Pick the Best Site Before You Build
The best site has full sun, good drainage, nearby water, and enough room around the outside to repair the fence. Most vegetables need 6 to 8 hours of direct sun. Leafy greens can handle some afternoon shade, but tomatoes, peppers, beans, and cucumbers need stronger light.
Avoid a low spot where water stands after rain. Enclosed gardens often hold more humidity than open beds, so poor drainage can lead to root rot, fungal disease, and muddy paths.
Check Sun, Wind, and Water
Watch the site for one full day if possible. Mark where shade falls at 9 a.m., noon, and 3 p.m. A fence or wall can cast a long shadow, especially in spring and fall when the sun sits lower.
Place the garden close enough to a spigot that you will water without dragging a long hose through beds. I once built a garden 90 feet from the nearest tap. The garden grew well, but watering became such a chore that I later added a 1/2-inch drip line.
Test the Soil
Take soil samples from several spots inside the planned area. Mix them in a clean bucket and send a sample to your county extension service or a trusted soil lab. A pH between 6.0 and 7.0 suits most vegetables, although blueberries need a much more acidic soil.
Heavy clay can support a productive garden, but it needs compost and careful timing. Do not till wet clay. It forms hard clods that can remain for years. Sandy soil drains fast and benefits from compost, leaf mold, and mulch.
Plan the Layout
Leave at least 24 inches for a main path. A 30- to 36-inch path feels much better if you use a wheelbarrow or garden cart. Keep each bed narrow enough to reach the center without stepping on soil.
A 4-foot-wide bed works for most adults. If children or gardeners with limited reach will use the space, choose beds 2 to 3 feet wide.
| Garden size | Useful layout | Suitable for |
|---|---|---|
| 6 by 8 feet | Two narrow beds and one small path | Herbs, lettuce, radishes, and a few tomatoes |
| 8 by 12 feet | Four raised beds with a center path | A mixed beginner vegetable garden |
| 12 by 16 feet | Six beds, compost corner, and wider paths | Larger harvests and crop rotation |
| 16 by 24 feet | Multiple beds with trellises and work space | Families and serious food gardening |
A small enclosure is easier to weed, water, and repair. Build larger only when you know how much time you can give it each week.
Choose Materials That Fit Your Climate and Budget
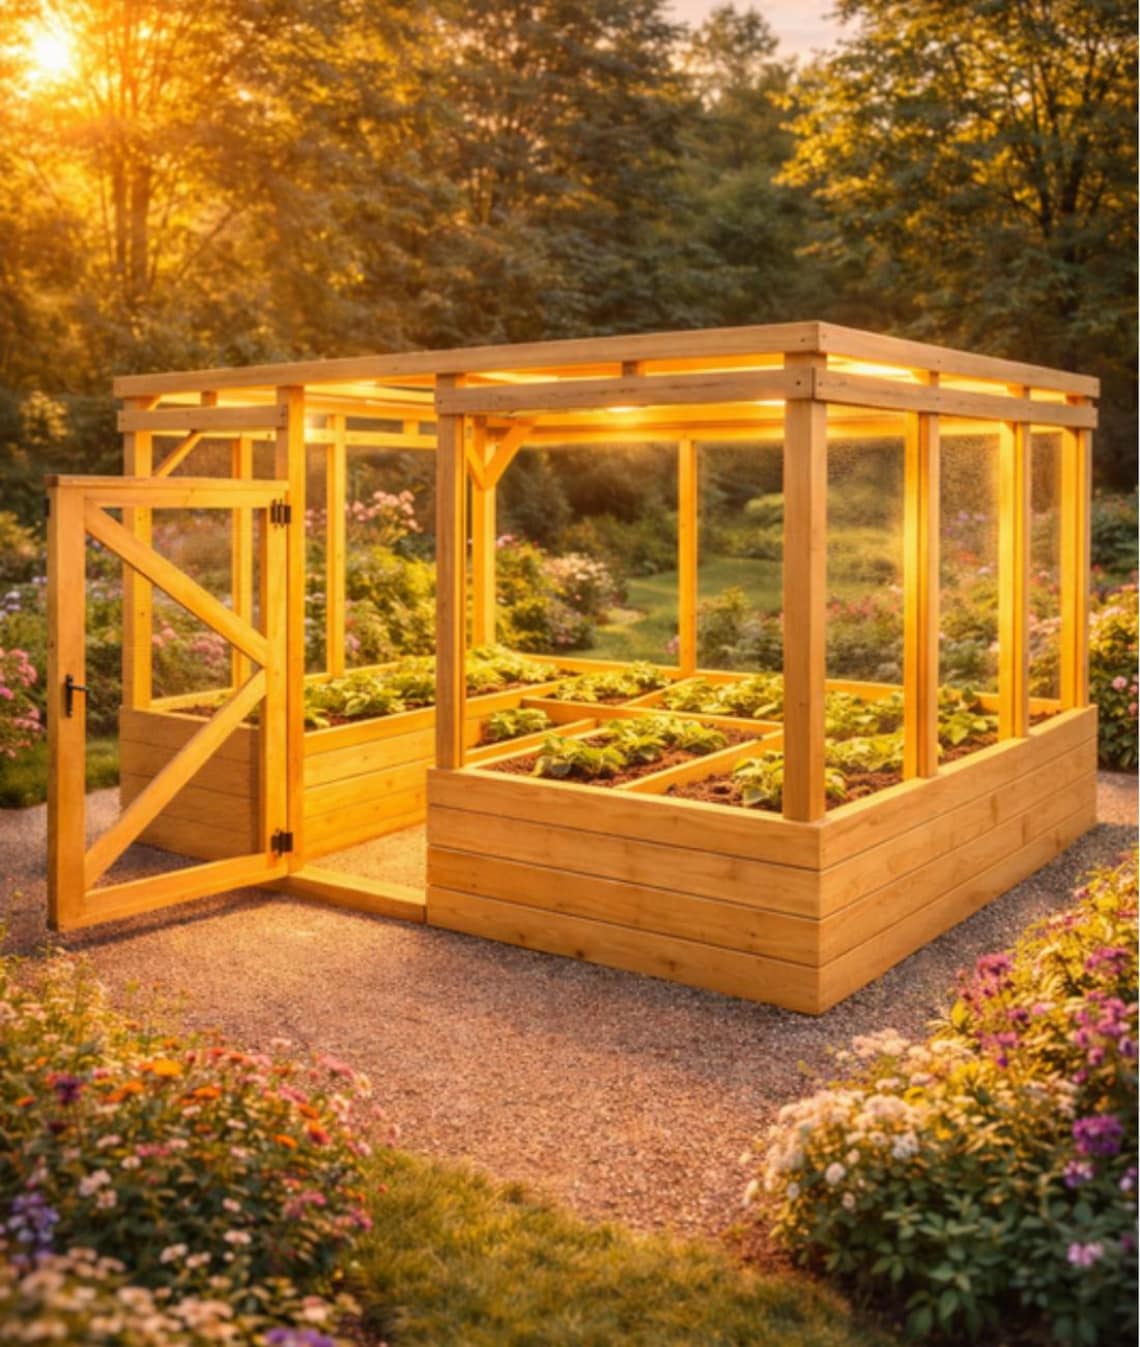
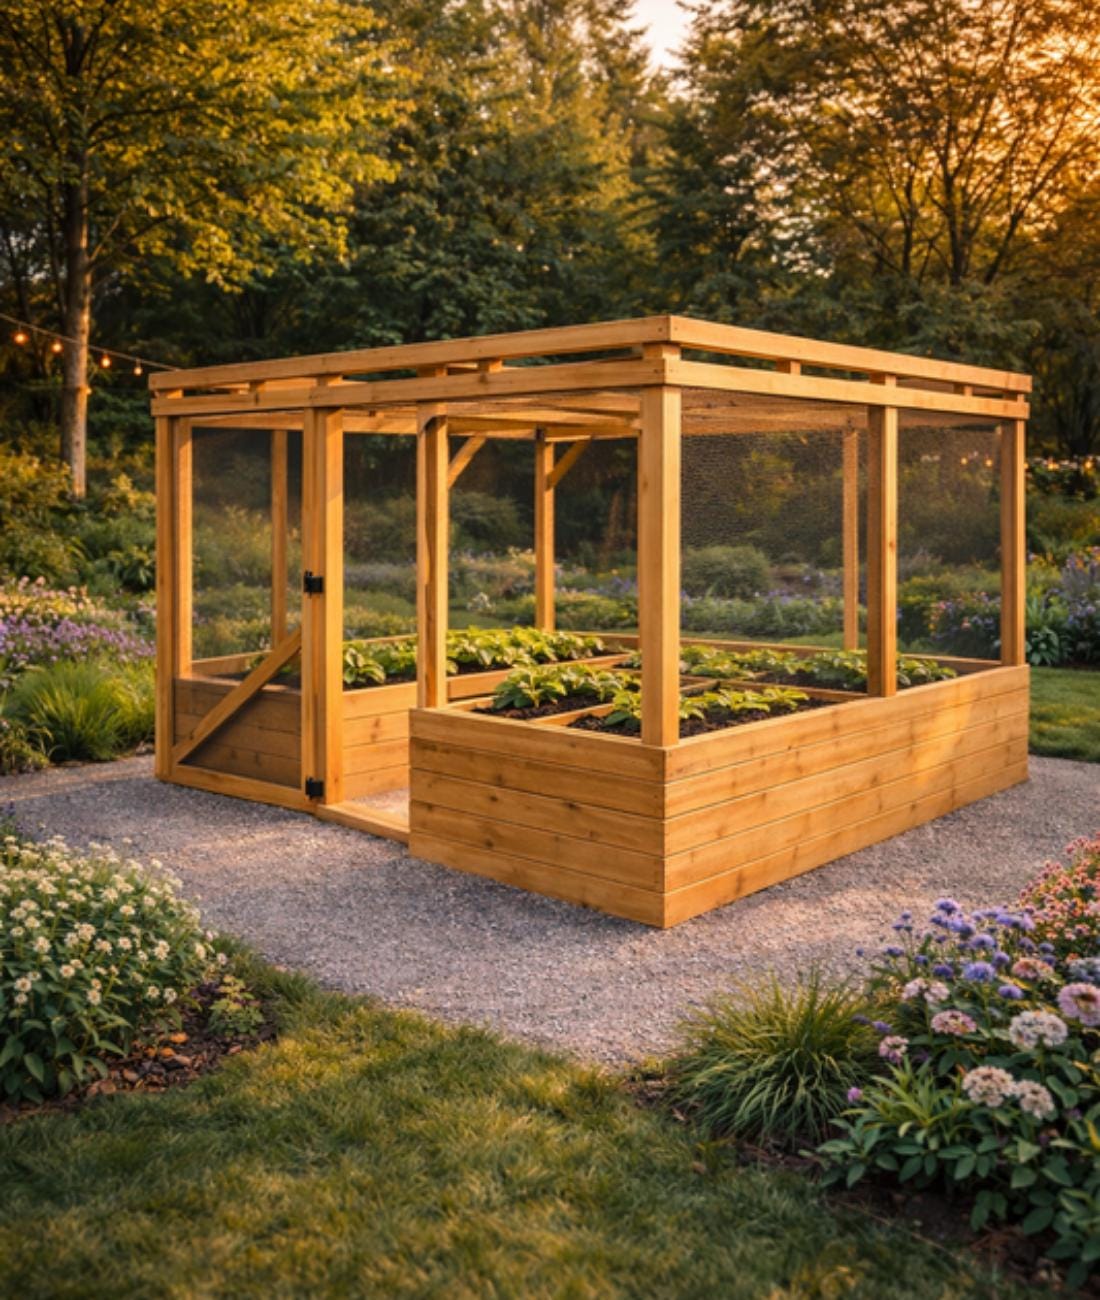
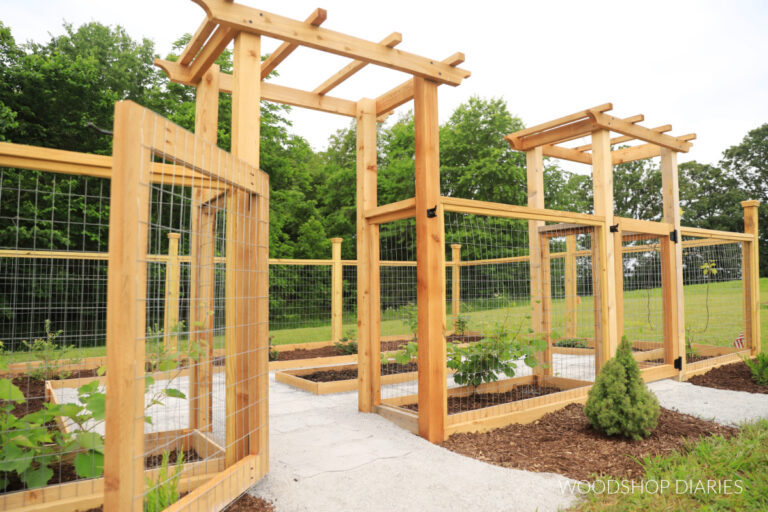
A durable enclosed garden needs four basic parts: posts, a barrier, a gate, and fasteners. The barrier may be wire, mesh, netting, wood, or a mix of materials.
Pressure-treated lumber rated for ground contact lasts longer than untreated wood. Cedar resists decay but costs more. Metal T-posts work well for simple wire fences, while wood posts give you a stronger frame for gates and roof panels.
Materials and Tools Checklist
Buy the materials before you dig. A missing bracket or short roll of mesh can stop the project halfway through. Measure the perimeter twice, then add at least 10 percent for overlaps and cuts.
| Material or tool | Suggested choice | Main use |
|---|---|---|
| Corner posts | 4-by-4-inch treated wood or heavy-duty steel posts | Hold the fence under tension |
| Line posts | 2-by-4-inch wood or steel T-posts | Support long fence runs |
| Lower barrier | 1/2-inch hardware cloth | Stops rabbits, rodents, and digging pests |
| Upper barrier | Welded wire, deer netting, or insect mesh | Matches the main garden threat |
| Gate frame | Treated lumber with diagonal brace | Prevents sagging |
| Fasteners | Fence staples, screws, washers, and zip ties | Secure wire and mesh |
| Tools | Tape measure, level, post-hole digger, drill, hammer, cutters | Layout and installation |
Use washers when attaching mesh to wood with screws. Staples alone can pull out during a hard wind or when an animal pushes against the fence.
Estimate Cost
Current pricing ranges from about $150 for a small rabbit-proof frame to $1,200 or more for a large deer-resistant garden with a roof and treated lumber. Local prices vary by wood, mesh type, gate size, and whether you rent tools.
A simple 8-by-12-foot enclosure may need 100 to 120 feet of wire, depending on height and overlaps. Add extra mesh for a buried skirt, the gate, and corners.
Compare Barrier Types
Each material solves a different problem. Hardware cloth costs more than chicken wire, but it lasts longer and has much smaller openings. Polypropylene deer netting is light and fast to install, though it can tear if branches fall on it.
| Barrier type | Strength | Main limitation |
|---|---|---|
| Hardware cloth | Excellent for rodents and rabbits | Costs more and takes time to cut |
| Welded wire | Strong, neat, and long lasting | Rigid rolls can be hard to shape |
| Chicken wire | Cheap and easy to handle | Does not stop small pests or strong animals |
| Deer netting | Light, tall, and affordable | Can sag, tear, or trap wildlife |
| Insect mesh | Blocks many flying pests | Reduces pollination and airflow |
| Wood fence boards | Private and wind resistant | Blocks light and needs more upkeep |
| Polycarbonate panels | Protect from hail and heavy rain | Costly and can overheat without vents |
For most mixed vegetable gardens, I prefer a lower strip of 1/2-inch hardware cloth with welded wire or deer netting above it. This layered design protects the base without making the whole structure expensive.
Build the Enclosed Garden Step by Step
Build the frame in a logical order: mark the site, prepare the ground, set posts, attach the barrier, install the gate, and finish the soil. Do not rush post alignment. A crooked frame makes every later step harder.
The steps below suit an 8-by-12-foot garden with 7-foot corner posts and a 3-foot gate. Adjust the measurements for your site and local rules.

1. Mark the Perimeter
Use stakes and string to mark the four corners. Measure both diagonals. If the diagonals match, the rectangle is square. A square frame makes mesh installation much easier.
Mark the gate before digging. A 36-inch gate gives comfortable access for most people and small carts. A 48-inch gate works better if you plan to move a wheelbarrow or raised bed materials through it.
2. Remove Weeds and Prepare the Ground
Cut grass and weeds close to the soil. Remove large roots, rocks, and construction debris. If perennial weeds such as bindweed, quackgrass, or nutsedge cover the site, deal with them before enclosing the garden.
You can smother a small area with cardboard and 4 to 6 inches of compost, but persistent weeds may grow through gaps. Do not lay landscape fabric under vegetable beds if you want deep roots and healthy soil life. Use it only under paths when needed.
3. Set the Corner Posts
Dig corner holes 24 to 36 inches deep, based on soil and frost conditions. In USDA Zones 3 through 6, local frost depth may require deeper footings for permanent structures. Check local building rules before setting posts in concrete.
Set each post plumb. Add gravel at the base if the hole holds water. For a light wire enclosure, packed soil may work, but concrete gives stronger support for tall fences and heavy gates.
4. Add Line Posts
Place line posts every 6 to 8 feet. Use closer spacing on a windy site or where deer pressure is high. Stretch string between corner posts to keep the line posts aligned.
Check each post with a level. Small errors add up along a long fence. A line that looks straight from one end may bow several inches in the middle.
5. Install the Bottom Barrier
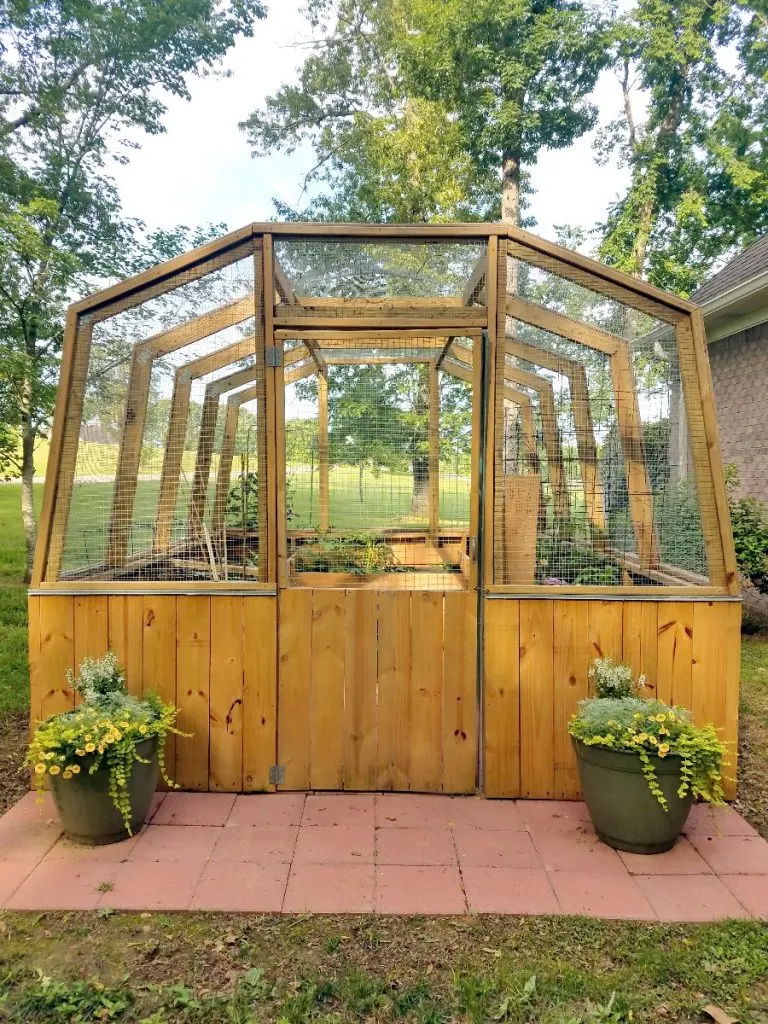
Attach 1/2-inch hardware cloth around the lower 24 to 36 inches. Extend it at least 6 inches below ground, or create an outward-facing apron 12 inches wide and pin it under soil or gravel.
An apron works well in rocky soil where digging is hard. Bend the wire at a right angle and lay it flat outside the fence. Burrowing animals hit the mesh when they try to dig at the base.
6. Attach the Upper Fence
Pull welded wire or deer netting tight from one corner to the next. Start at a corner and fasten the mesh every 8 to 12 inches. Keep the lower edge close to the ground.
Overlap wire by at least 6 inches at seams. For insect mesh, overlap by 12 inches and seal the edges with clips, hook-and-loop tape, or a sewn seam. A gap of only 1/4 inch can let cabbage moths enter.
7. Build and Hang the Gate
Make the gate slightly smaller than the opening. A diagonal brace should run from the lower hinge side toward the upper latch side. This design transfers weight back into the hinge side and reduces sag.
Use two strong hinges and a latch that closes automatically if possible. Raccoons can open simple hook latches. Add a spring, carabiner, or two-step latch if animals test the gate.
8. Add a Roof or Top Net
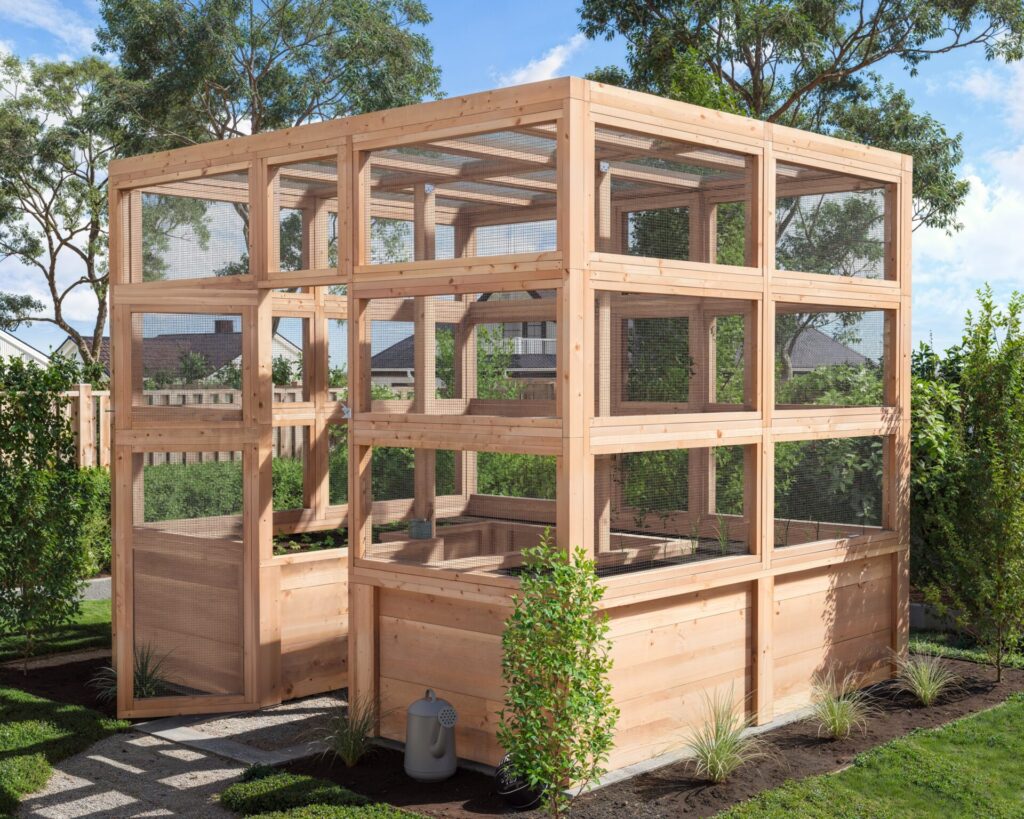
A roof is useful when birds, squirrels, hail, or deer are major problems. It also gives you a frame for shade cloth during hot weather. Use smooth supports so netting will not snag.
Leave ventilation gaps high on the sides if you add solid panels. Enclosed air can become much hotter than outside air. In my Zone 7 garden, a clear plastic roof raised midday temperatures by more than 15°F until I added roll-up side vents.
9. Prepare Beds and Paths
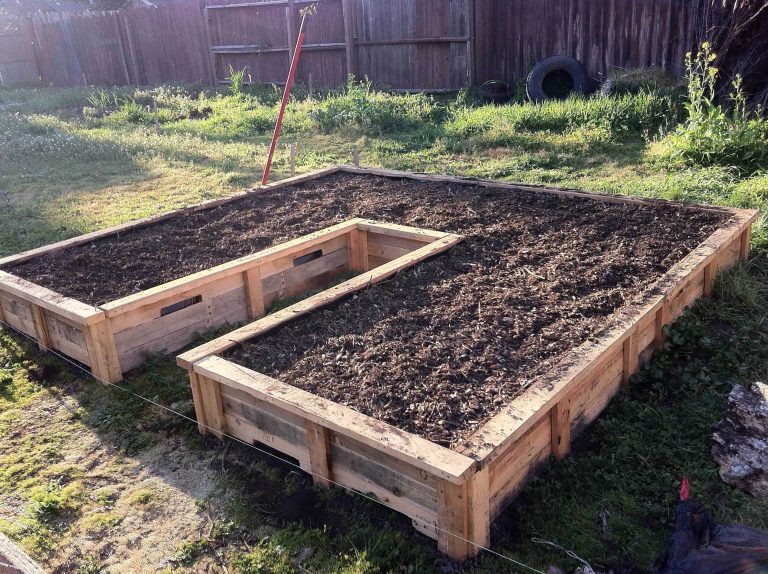
Build raised beds from untreated cedar, ground-contact treated lumber, stone, or metal. Avoid old railroad ties and salvaged wood treated with unknown chemicals. Fill beds with a mix of native soil, compost, and organic matter rather than pure compost.
A common blend is two parts topsoil to one part finished compost. Test the finished mix before adding lime, sulfur, or fertilizer. Too much compost can create high salts and excessive phosphorus.
10. Secure Every Gap
Walk around the finished garden at ground level. Look for gaps beneath the gate, open corners, loose seams, and places where mesh meets posts. Push on the fence to find weak spots.
Add a threshold board, buried wire, or paving stone under the gate. Trim sharp wire ends and cover them with caps or folded mesh. This protects hands, pets, children, and small wildlife.
Add Soil, Beds, and Plants in the Right Order
Build the enclosure before planting, but prepare the beds after the main structure stands. This prevents you from crushing new seedlings while carrying posts and rolls of mesh.
Use crop rotation inside the garden. Move tomatoes, peppers, and eggplants away from the same bed each year when possible. Rotate brassicas such as kale, broccoli, and cabbage to reduce disease buildup.

A Simple Planting Plan
Place tall crops on the north side so they do not shade shorter plants. Trellis cucumbers, peas, pole beans, and small melons. Keep sprawling pumpkins and winter squash near an edge where vines can run outside the main path.
Good enclosed garden crops include:
- ‘Sungold’ or ‘Celebrity’ tomatoes
- ‘California Wonder’ peppers
- ‘Provider’ bush beans
- ‘Blue Lake’ pole beans
- ‘Little Gem’ lettuce
- ‘Dwarf Blue Curled’ kale
- ‘Marketmore 76’ cucumbers
- Basil, parsley, chives, and thyme
- Strawberries in raised containers
Do not crowd plants because the enclosure already limits airflow. Space tomatoes 18 to 24 inches apart, depending on variety and pruning. Good airflow lowers the chance of powdery mildew, early blight, and leaf spot.
Add Mulch Carefully
Apply 2 to 3 inches of clean straw, shredded leaves, or leaf mold after the soil warms. Keep mulch 2 inches away from plant stems. Thick mulch touching stems can hold moisture and invite slugs, mice, and rot.
Wood chips suit paths more than annual vegetable beds because they break down slowly and can tie up nitrogen near the surface. Compost belongs in beds, while coarse chips work well outside the growing rows.
Water and Ventilate the Enclosure
Watering and airflow decide whether an enclosed garden thrives. A closed space can dry fast in full sun, yet stay damp after rain if the mesh blocks wind.
Drip irrigation works better than overhead watering for tomatoes, peppers, and squash. It keeps leaves dry and puts water near the roots. Soaker hoses can work in straight beds, but check that they wet the full bed width.

Watering Guide by Season
Check the soil with your finger or a simple moisture meter. Water when the top inch feels dry for shallow-rooted crops, but let the top 2 inches dry slightly for established tomatoes and peppers.
| Season or condition | Typical watering need | What to check |
|---|---|---|
| Cool spring | About 1 inch per week | Wet soil can slow roots |
| Hot summer | 1–2 inches per week | Water deeply in the morning |
| Heat above 90°F | More frequent checks | Add shade cloth if plants wilt at noon |
| Fruiting tomatoes and squash | Even moisture | Uneven water can cause cracking |
| Fall leafy greens | About 1 inch per week | Reduce water after cool rain |
| Covered winter beds | Light water only when dry | Avoid waterlogged roots |
These amounts include rainfall. Sandy soil may need smaller, more frequent applications, while clay soil needs slower watering with time to drain.
Manage Heat and Humidity
Open the gate or roll up side panels on hot days. Insect mesh reduces airflow, so inspect the inside each morning for condensation. Persistent wet leaves and damp soil signal a ventilation problem.
Shade cloth with a 30 percent rating works well for lettuce and herbs during hot summers. Tomatoes and peppers usually need full sun unless temperatures remain extreme.
💡 Pro Tip: Hang a small maximum-minimum thermometer inside the enclosure. It shows the real temperature near the plants, which can differ greatly from the weather report.
Maintain the Structure Through the Seasons
An enclosed garden needs a short inspection each week and a deeper check each season. Look at posts, hinges, fasteners, mesh tension, and the soil line. Repair small holes before animals find them.
Wash soil from tools before moving between beds. If one bed has a serious disease, clean pruners with 70 percent isopropyl alcohol between plants. Do not compost plants with severe blight, clubroot, or unknown viral symptoms.
Maintenance Schedule
A regular routine protects the structure and reduces pest pressure. The table below focuses on jobs that keep the enclosure working.
| Timing | Maintenance task | Why it matters |
|---|---|---|
| Weekly | Check the gate, lower edge, and mesh seams | Finds openings early |
| Weekly | Inspect leaves for chewing and disease | Stops small problems from spreading |
| Monthly | Tighten loose wire and clean hinges | Prevents sagging and gate failure |
| After storms | Check posts, roof panels, and tree limbs | Wind can tear mesh quickly |
| Late fall | Remove diseased plants and store loose covers | Reduces pests and rot |
| Winter | Brush snow from netting and inspect damage | Prevents collapse |
| Early spring | Wash beds, repair fasteners, and refresh compost | Starts the season clean |
Do not leave insect mesh rolled up while wet. Dry it fully before storage to prevent mildew.
Store Seasonal Covers
Label each cover by bed or crop. Fold insect mesh loosely instead of crushing it into a box. Keep netting in a sealed container so mice cannot chew it over winter.
Remove shade cloth before heavy snow. Store polycarbonate panels upright on a flat surface, protected from falling tools and direct heat.
Common Problems and Practical Fixes
Most enclosed garden failures come from small design errors. A weak gate, a gap at ground level, or a roof with no ventilation can cause more trouble than the fence itself.
The table below covers problems I have seen in home gardens. Start with the simplest fix before replacing the whole enclosure.
| Problem | Likely cause | Fix |
|---|---|---|
| Rabbits still enter | Gap under the gate or mesh too large | Add hardware cloth and a buried or surface apron |
| Deer push through | Loose netting or low fence | Tighten mesh and raise the barrier to 7–8 feet |
| Plants wilt inside | Heat buildup or dry soil | Add vents, shade cloth, and deeper watering |
| Cabbage worms appear | Mesh has holes or open seams | Patch holes and seal edges before moths arrive |
| Gate sags | No diagonal brace or weak hinges | Add a brace and heavier hinges |
| Mold spreads | Poor airflow and wet leaves | Increase ventilation and use drip irrigation |
| Mice chew seedlings | Large lower openings | Install 1/4-inch hardware cloth at the base |
| Birds become trapped | Loose overhead netting | Tighten netting and use visible support lines |
A garden enclosure is not a sealed laboratory. Pests may enter through soil, compost, nursery plants, tools, or an open gate. Keep checking the plants even when the structure looks secure.
🔧 Quick Fix: If a rabbit squeezes under the gate, place a 12-inch-wide strip of hardware cloth flat on the soil outside the opening. Pin it with landscape staples and cover the inner edge with mulch.
Pros and Cons of an Enclosed Garden
An enclosed garden offers strong protection, but it adds cost and work. The value depends on how much food you grow and how serious your pest pressure is.
I consider an enclosure worthwhile when deer destroy crops, rabbits return every night, or a gardener wants to grow clean brassicas without repeated sprays. It may not make sense for a balcony, a low-pest yard, or a short-term rental home.
| Pros | Cons |
|---|---|
| Protects crops from deer, rabbits, pets, and birds | Costs more than an open garden |
| Reduces some insect damage | Needs regular inspection and repairs |
| Keeps plants organized and easier to monitor | Can reduce airflow and pollination |
| Supports trellises, shade cloth, and covers | Gate design can fail if built too lightly |
| Makes crop protection more targeted | Snow, wind, and falling branches can damage it |
| May reduce pesticide use | Does not remove every pest or disease |
A simple fence with a good gate often gives more value than a costly roof. Add features in stages instead of building every possible layer at once.
My Experience Building Enclosed Gardens
My first enclosed garden used 1-inch chicken wire around a 10-by-14-foot plot. It looked neat, but rabbits walked through the large openings. I fixed it by adding 24 inches of 1/2-inch hardware cloth along the base, and the damage stopped within a week.
In another garden in USDA Zone 7, I used insect mesh over kale, broccoli, and cabbage. The mesh worked very well against cabbage moths for four weeks. Then one loose corner allowed moths inside, and I found green caterpillars on nearly every plant two days later.

A solid roof also taught me a lesson. Clear panels protected tomatoes from summer rain, but afternoon heat caused blossom drop on peppers. After adding open side vents and 30 percent shade cloth, fruit set improved over the next season.
The best result came from a mixed design: hardware cloth at the bottom, welded wire above, a wide braced gate, and removable insect mesh over brassicas. It was not the cheapest option, but repairs were simple and the structure lasted through strong wind and two snowy winters.
Improve the Design for Long-Term Use
Think about repairs before you finish the build. Use screws where you may need to remove panels, and use staples only where the material can stay in place. Keep a small repair kit with wire cutters, fence staples, washers, zip ties, and spare mesh.
Leave a clear strip outside the fence. A 12-inch maintenance path lets you cut grass, inspect the base, and repair wire without stepping into beds.
Design for Crop Rotation
Keep beds separate from the fence so you can reach plants on all sides. In a 12-by-16-foot enclosure, four or six beds allow you to rotate legumes, leafy crops, fruiting crops, and roots.
Beans and peas add some nitrogen through root bacteria, but they do not replace all fertilizer needs. Feed heavy crops with compost and a balanced fertilizer based on soil test results. A mild 5-5-5 organic fertilizer may suit many beds, but rates differ by product.
Build for Accessibility
A 36-inch path supports most wheelbarrows. Raise beds 18 to 24 inches if bending is difficult, but make sure the frame can hold wet soil. Add a small bench, tool hook, and water line inside the enclosure.
Keep the gate threshold low. A raised board can catch wheels and create a trip hazard. If you need a bottom seal for rabbits, use a sloped metal or rubber threshold instead.
Use Companion Planting With Good Airflow
Companion planting can add diversity, but it will not replace a sound barrier. Marigolds, dill, cilantro, and alyssum can attract pollinators and beneficial insects such as hoverflies and lacewings. Avoid planting thick masses that block air around tomatoes and cucumbers.
Plant flowers near, not inside, the main path when possible. Pollinators can enter through open gates and mesh gaps, while you still maintain clear access to crops.
Know When to Hire a Professional
Most small enclosed gardens are DIY projects. Hire help when the structure needs a concrete footing, a tall deer fence near a property line, electrical work, or a heavy roof that could fail under snow.
Check local rules before building a fence taller than 6 feet. Some towns regulate fence height, setbacks, drainage, and structures near property lines. Call utility-locating services before digging deep post holes.
A professional can also help on steep ground. A fence that follows a slope may leave gaps under the lower edge. Terracing the site or stepping the fence in sections often works better than forcing a straight line.
Frequently Asked Questions
Q: How tall should an enclosed garden fence be?
A: Use 24 to 36 inches for rabbits when the base is secured. Use 7 to 8 feet for deer. A shorter deer fence may work if you angle the top outward or use two offset fences, but a tall, tight barrier gives more reliable results.
Q: What is the cheapest way to enclose a garden?
A: Use strong corner posts, poultry netting for larger animals, and a lower strip of hardware cloth only where rabbits or rodents are active. Do not use chicken wire alone if small pests are your main problem.
Q: Can I build an enclosed garden on grass?
A: Yes, but remove or smother the grass before planting. Digging out sod works fast for a small site. For a larger site, lay overlapping cardboard and add 4 to 6 inches of compost, then wait several weeks before planting.
Q: Should an enclosed garden have a roof?
A: Add a roof when birds, squirrels, hail, or deer cause major losses. Skip a solid roof if you need maximum light and airflow. Removable netting often gives better value for most vegetable gardens.
Q: How do I keep rabbits from digging under the fence?
A: Bury 6 inches of hardware cloth, or lay a 12-inch apron outward along the ground. Secure it with landscape staples and cover it with soil, gravel, or mulch.
Q: Does insect netting stop pollination?
A: It can. Fine mesh blocks many bees and other pollinators. Remove the cover when crops flower, grow self-pollinating crops, or hand-pollinate cucumbers, squash, melons, and pumpkins.
Q: How often should I inspect an enclosed garden?
A: Check it once a week and after every strong storm. Look first at the gate, bottom edge, seams, roof, and places where mesh meets posts. Early repairs take minutes instead of hours.
Q: How long does an enclosed garden last?
A: A wood-and-wire enclosure can last 10 years or more with sound posts and regular repairs. Hardware cloth may last 15 to 20 years, while lightweight plastic netting may need replacement after 3 to 8 years, depending on sun and weather.
Q: What should I plant first in a new enclosed garden?
A: Start with crops that match your season and light. Lettuce, radishes, kale, herbs, beans, and compact tomatoes give quick feedback. Avoid planting every bed at once until you understand watering, heat, and pest movement inside the enclosure.
Q: How do I stop an enclosed garden from overheating?
A: Open gates or vents, use 30 percent shade cloth during extreme heat, water deeply in the morning, and avoid solid plastic walls without airflow. A thermometer inside the garden helps you see the true temperature.
Q: Is an enclosed garden worth the cost?
A: It is worth the cost when animals destroy enough produce to justify the materials and labor. For low pest pressure, a short rabbit fence, row cover, or individual plant cage may be a cheaper choice.
Final Thoughts
A good enclosed garden starts with observation, not lumber. Find out what eats your plants, how high it can climb, where it digs, and how the sun moves across the site. Then build a simple barrier that solves that exact problem.
Use strong posts, a secure gate, fine mesh where needed, and enough room to work. Add irrigation, shade, roof panels, or insect covers only when your garden shows that you need them. With careful planning, an enclosed garden can protect crops, reduce stress, and give you more reliable harvests for many seasons.
Meta description: Learn how to build an enclosed garden with the right fence, mesh, gate, soil, watering system, and pest protection for vegetables, herbs, and fruit.