How To Build A Raised Garden Bed With Seating: Easy DIY
A raised garden bed with seating gives you two useful features in one small build. You get deep, rich soil for vegetables, herbs, flowers, or berries. You also get a firm place to sit while you sow seeds, pull weeds, harvest lettuce, or enjoy a cup of coffee.
I have built raised beds from cedar, treated lumber, and recycled composite boards in gardens from humid North Carolina to dry parts of Colorado. The design works in many climates, but small details matter. A seat that feels fine for five minutes may feel hard after half an hour. A bed that looks level in spring may shift after a wet winter. Good planning prevents both problems.
This guide shows how to build a raised garden bed with seating from start to finish. You will learn how to choose safe materials, size the bed, build a strong frame, add a comfortable bench, fill the bed, and care for it through the seasons.

Quick answer: Build the bed and bench as one strong frame
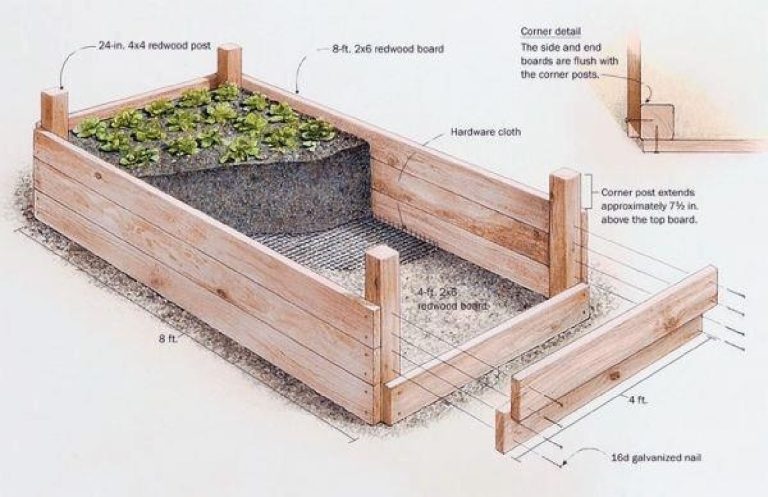
The best way to build a raised garden bed with seating is to make a sturdy planting box first, then attach a wide bench board to the outside wall. Use rot-resistant cedar or pressure-treated lumber rated for garden use, set the bed on level ground, and keep the soil depth at 12 to 18 inches. A 4-by-8-foot bed with a 12-inch-wide seat works well for most home gardens.

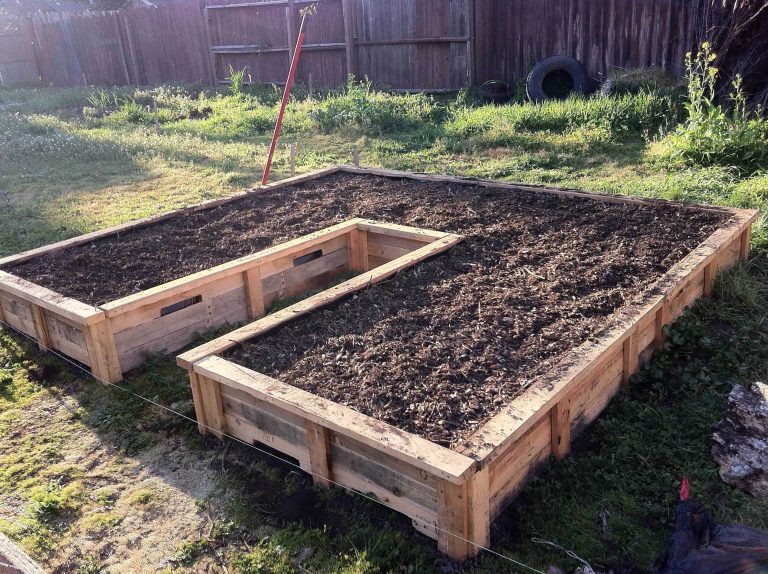
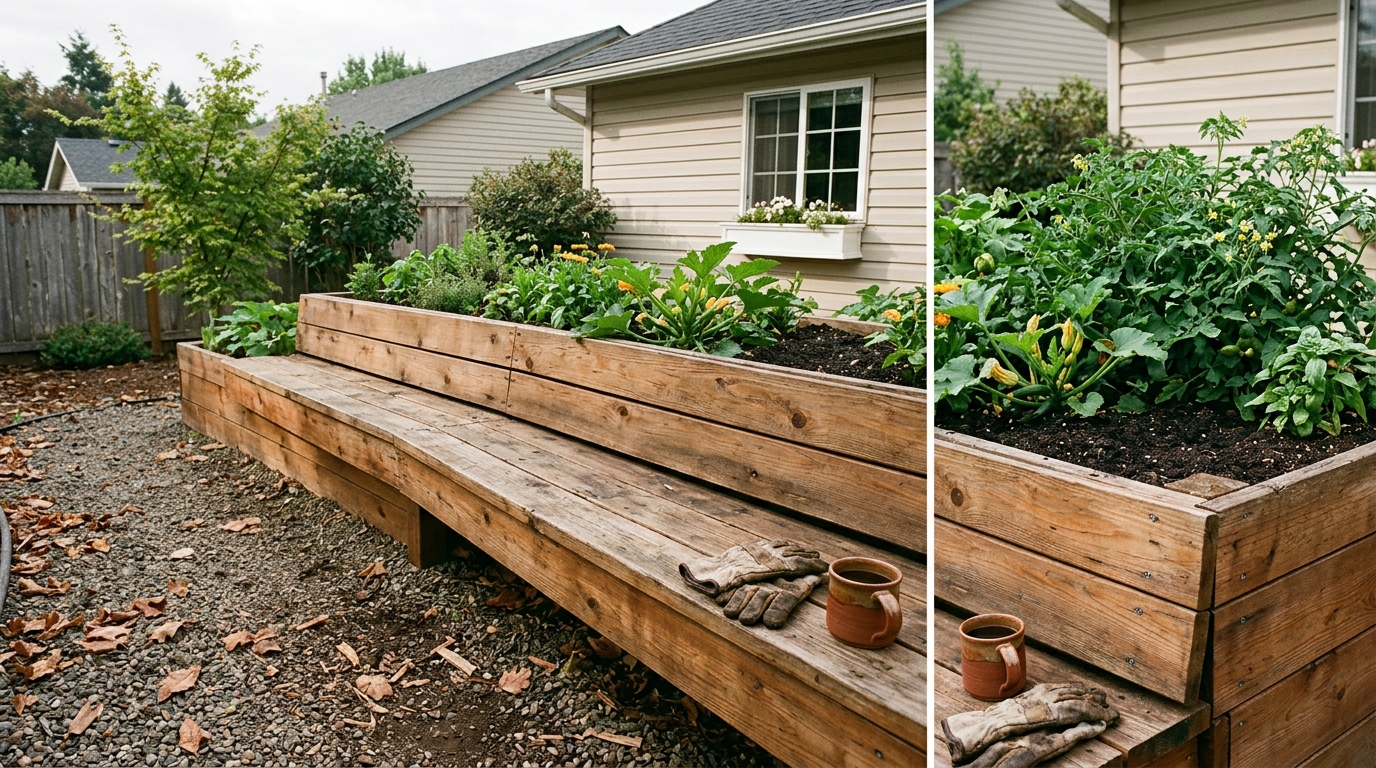
A simple design uses two long side walls, two end walls, internal braces, and one or two bench boards. The bench can sit on top of the bed wall or attach to the outer side with cleats. The second style gives you more planting space and feels more like a real seat.
For most gardeners, a 4-by-8-foot bed is large enough to grow a useful mix of crops. It also leaves room for a 12-inch bench along one long side. If you have limited space, use a 3-by-6-foot bed with seating on one end.
Plan the size, site, and layout
Choose the site before you buy lumber. A raised bed is hard to move once it holds soil, and wet soil can add more than 1,000 pounds to a large bed.
Pick the right amount of sunlight
Place the bed where it gets at least six hours of direct sun. Eight to ten hours suits tomatoes, peppers, cucumbers, squash, and eggplant. Leafy crops such as lettuce, kale, spinach, and arugula can manage with four to six hours, especially in hot USDA Zones 8 through 10.
Watch the site for a full day if you can. A wall, fence, tree, or shed may cast a longer shadow than you expect. In my own yard, a bed that looked sunny in April lost nearly three hours of afternoon sun by July because a nearby maple had leafed out.

Leave room to walk and work
Keep at least 24 inches of clear space around the bed. Thirty-six inches feels much better if you use a wheelbarrow, garden cart, or kneeling pad. If two raised beds sit side by side, leave 36 to 48 inches between them.
Do not place the bench where it blocks the main path. A seat on the north side of a bed often works well because it avoids shading the plants. In hot regions, a seat on the east side can offer comfortable morning shade.
Use a comfortable bench size
A garden seat should be wide enough to support you without forcing you to balance. Use these starting measurements:
- Seat height: 17 to 20 inches
- Seat depth: 10 to 16 inches
- Seat board thickness: 1 to 2 inches
- Space behind the seat: At least 24 inches for leg movement
- Bench overhang: 1 to 2 inches past the support
A 12-inch-wide seat suits most adults. A 16-inch seat feels more relaxed but takes more space from paths and planting areas.
Check the slope
A slight slope can make a bed look crooked and cause soil to spill from one corner. Set a long level on a straight board to check the site. For a small slope, remove soil from the high side. For a larger slope, build a stepped base rather than forcing the frame to sit at an angle.
| Bed size | Best use | Suggested seat |
|---|---|---|
| 3 × 6 feet | Small yards, herbs, greens | 12-inch seat on one end |
| 4 × 8 feet | Mixed vegetables and flowers | 12-inch seat on one long side |
| 4 × 10 feet | Large crop mix or shared garden | 12- to 16-inch seat on one long side |
| 2 × 4 feet | Balcony or patio garden | 10- to 12-inch seat on one end |
A 4-by-8-foot bed gives the best balance of space, reach, and cost for many households. Avoid beds wider than 4 feet unless you can reach the center from both sides.
Choose safe and durable materials
The main difference between a bed that lasts three seasons and one that lasts ten is often the material and drainage detail. Cedar, redwood, and composite boards resist decay well. Pressure-treated lumber costs less, but you must choose modern lumber labeled for residential garden use.

Lumber options
Use boards that are straight and free from large knots. Common sizes include 2-by-6, 2-by-8, and 2-by-10 boards. A 2-by-8 board is about 7¼ inches wide after milling, so two stacked courses create a wall about 14½ inches high.
Cedar is easy to cut and resists rot. It costs more than pine, but it usually needs less maintenance. Redwood performs well in wet climates but may cost more and can be harder to find outside the West Coast.
Pressure-treated lumber can work when it carries a current residential-use rating. Avoid old reclaimed lumber if you cannot identify its treatment. Never use railroad ties, creosote-treated boards, painted scrap wood, or wood with an oily smell around food crops.
Fasteners and hardware
Use exterior-rated screws, not indoor drywall screws. Galvanized or ceramic-coated screws resist rust. Stainless steel screws last the longest, especially in coastal areas, but they cost more.
For a bench, use structural screws or carriage bolts at load points. A seat may support one adult, two children, or a person leaning hard on one edge. Build for more weight than you expect.
Weed barrier and base materials
You can place a raised bed over grass, soil, gravel, or concrete. Each surface needs a different base.
- Over soil: Remove sod, loosen the top 4 to 6 inches, and add cardboard if weeds are a concern.
- Over grass: Mow short, lay overlapping cardboard, and cover it with soil.
- Over gravel: Add a landscape fabric layer only if the gravel contains weeds. Keep drainage open.
- Over concrete: Use a deeper bed, protect drainage holes, and choose crops with shallow roots.
Do not use plastic sheeting under a bed on soil. It traps water and can create a sour, airless root zone. Cardboard breaks down and blocks grass for a time, while landscape fabric lasts longer but may interfere with roots if you use it under the whole bed.
| Material | Expected life in average conditions | Best feature |
|---|---|---|
| Cedar | 8–15 years | Good rot resistance and easy workability |
| Redwood | 10–20 years | Long life in wet climates |
| Pressure-treated garden lumber | 10–20 years | Lower cost and strong structure |
| Composite boards | 15–25 years | Low rot risk and low upkeep |
| Untreated pine | 3–7 years | Low starting cost |
Climate changes these numbers. Wood lasts longer in dry western climates and often fails sooner in wet USDA Zones 6 through 9. The first parts to rot are usually the bottom edges, inside corners, and areas where soil stays against the wood.
Tools and materials checklist
Gather all parts before you cut. A missing screw or short board can stop the build halfway through, and wet weather may warp loose lumber while it sits outside.

Materials for a 4-by-8-foot bed
This list assumes a bed about 14 to 16 inches tall with one 8-foot bench along the long side.
- Four 8-foot 2-by-8 boards for long walls
- Four 4-foot 2-by-8 boards for end walls
- One 8-foot 2-by-12 board for the seat
- Four 4-by-4 posts, each 24 to 30 inches long
- Eight to twelve 2-by-4 braces or cleats
- Exterior structural screws, 3½ inches long
- Exterior screws, 2½ inches long
- Galvanized or stainless carriage bolts, optional
- Landscape fabric or plain cardboard
- Soil, compost, and mulch
- Gravel, optional, for a patio or compacted base
- Exterior wood finish, optional
A 2-by-12 board measures about 11¼ inches wide. That makes it a practical seat without needing two boards. If you use a 2-by-6 board for the seat, add a second board or use a wider support system.
Tools for the build
You can build this project with basic tools:
- Tape measure
- Pencil and speed square
- Circular saw or miter saw
- Drill and driver bits
- Level
- Clamps
- Shovel and rake
- Rubber mallet
- Safety glasses
- Hearing protection
- Work gloves
- Dust mask for cutting treated lumber
| Tool or supply | Why you need it | Useful note |
|---|---|---|
| Circular saw | Cuts boards to length | Use a sharp, general-purpose blade |
| Drill/driver | Bores pilot holes and drives screws | An 18- or 20-volt model has enough power |
| Long level | Checks the frame and bench | A 24- to 48-inch level works well |
| Clamps | Holds corners during assembly | Two medium bar clamps save time |
| Speed square | Marks straight cuts | Also helps align corners |
| Safety gear | Protects eyes, ears, hands, and lungs | Wear eye protection during every cut |
A sharp blade makes cleaner cuts and reduces tear-out. I use a 40-tooth carbide blade for cedar and a 24-tooth framing blade for rough pressure-treated lumber. Let the saw do the work; pushing too fast can burn the cut and reduce control.
Prepare the ground before assembly
Ground preparation takes less time than rebuilding a leaning bed. Clear the site, level the base, and make sure water can drain away from the frame.

Remove grass and perennial weeds
Mow the grass as short as possible. Cut the sod into strips and lift it with a flat shovel. You can reuse clean sod in another area, but do not place living grass upside down inside the bed unless you cover it well.
Remove bindweed, quackgrass, Bermuda grass, and other spreading weeds with care. These plants can grow through small gaps and return from tiny root pieces. In areas with heavy weed pressure, use overlapping cardboard beneath the bed and inspect the edges during the first season.
Level and firm the base
Set the first course of boards in place without fastening them. Check the corners with a square and use a level across each side. Remove high spots and fill low spots with compacted soil or crushed gravel.
Do not bury untreated wood below grade. If you need to raise one side, use gravel or pavers under the frame rather than packing wet soil against the boards.
Plan for drainage
A raised bed does not need a gravel layer if it sits on open soil. Water can move down through the soil below. A gravel layer inside the bed often creates a perched water table, where water sits above the sharp change from fine soil to coarse stone.
On concrete or compacted patio surfaces, drill drainage holes in the bottom or leave open gaps between base boards. Use a bed depth of at least 18 inches for tomatoes, carrots, beets, and other deeper-rooted crops.
🌱 Beginner Note: Raised beds improve control, but they do not fix poor watering. A bed in full sun can dry much faster than the ground around it. Plan a hose route or drip line before you fill it.
Build the raised garden bed frame
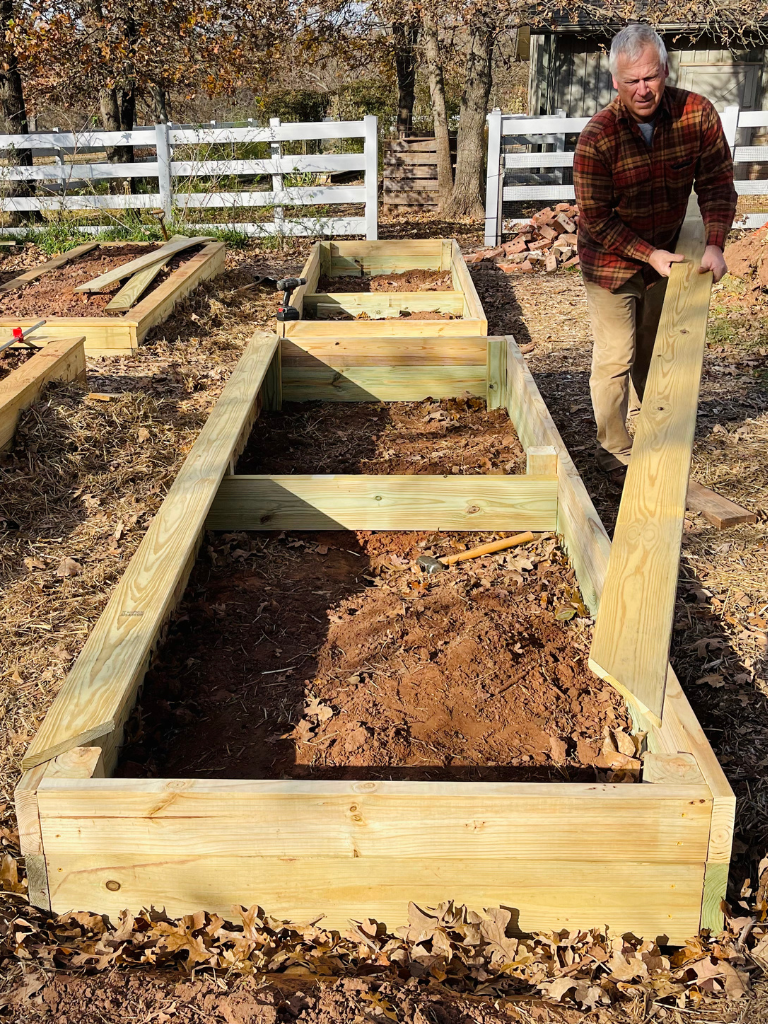
Build the frame on the ground or in place, depending on its size. A 4-by-8-foot bed is easier to assemble in sections and then square on the prepared site.
1. Cut and mark every board
Cut the long boards to 8 feet and the end boards to 4 feet. If you use two courses of 2-by-8 boards, cut both courses before you begin assembly.
Mark the inside and outside faces with a pencil. This small step helps prevent a board from being installed backward or flipped out of alignment.
2. Assemble the first course
Stand two long boards and two end boards on their edges. Butt the end boards against the long boards or place the long boards outside the end boards. Both layouts work, but the outside dimensions will differ.
Drill two pilot holes at each corner. Drive two 3½-inch exterior screws through the long board and into the end board. Check the corner with a square before tightening the screws.
3. Add the second course
Place the second row of boards on top of the first. Stagger the corners if possible. A staggered joint gives the wall more strength and reduces one long crack line.
Attach the second course with screws every 16 to 24 inches. Use a clamp to hold bowed boards tight before you drive the screw.
4. Add internal braces
A 4-by-8-foot bed can push outward when filled with wet soil. Add a cross brace at the center of each long wall. Use a 2-by-4 board across the bed or a pair of short cleats inside the corners.
For beds taller than 18 inches, add braces every 3 to 4 feet. Without them, the long walls may bow after heavy rain.
5. Square the frame
Measure both diagonals from corner to corner. If the numbers match, the frame is square. If they differ, push one corner until both diagonal measurements match.
This step matters more than it looks. A square frame makes the bench fit better and keeps irrigation lines, row covers, and trellises straight.
| Bed height | Root space | Good crop choices |
|---|---|---|
| 8–10 inches | Shallow roots | Lettuce, radish, herbs, strawberries |
| 12–16 inches | Most vegetables | Beans, kale, peppers, onions, bush tomatoes |
| 18–24 inches | Deep roots and easier access | Carrots, parsnips, tomatoes, blueberries in suitable soil |
Most gardeners do not need a 24-inch bed unless they want less bending or must garden over concrete. A 12- to 16-inch bed uses less soil and still supports a wide range of crops.
Attach a safe, comfortable bench
The bench should connect to the bed without placing all the load on thin wall boards. Use solid posts, cleats, or both.

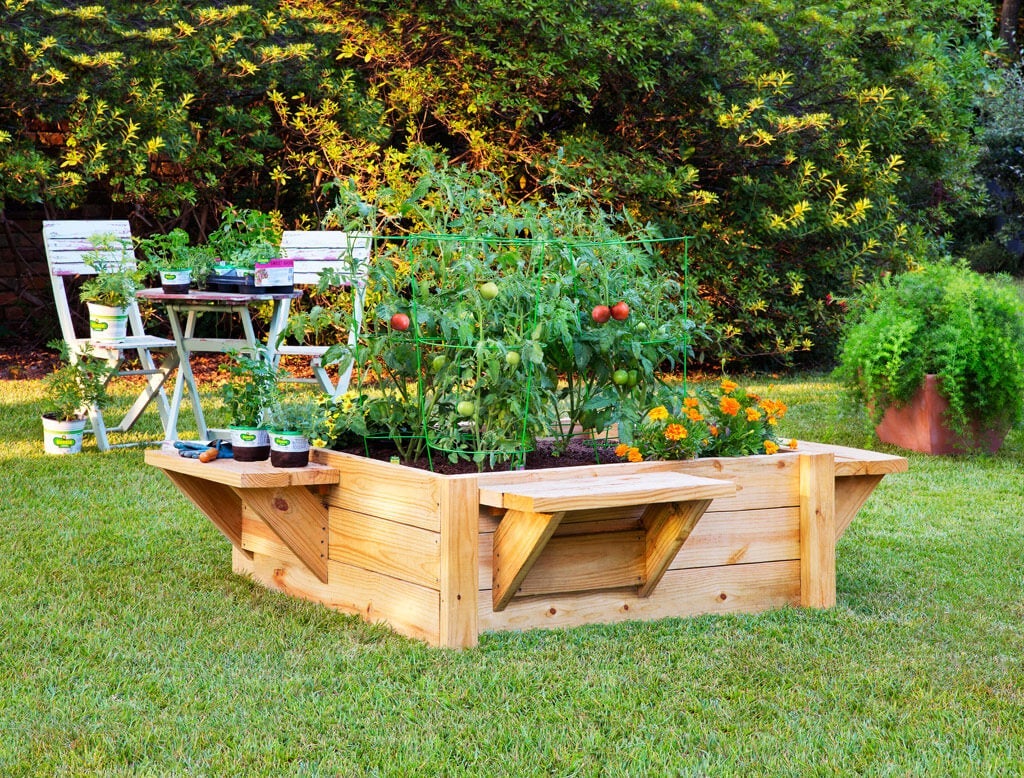
Option 1: Top-mounted bench
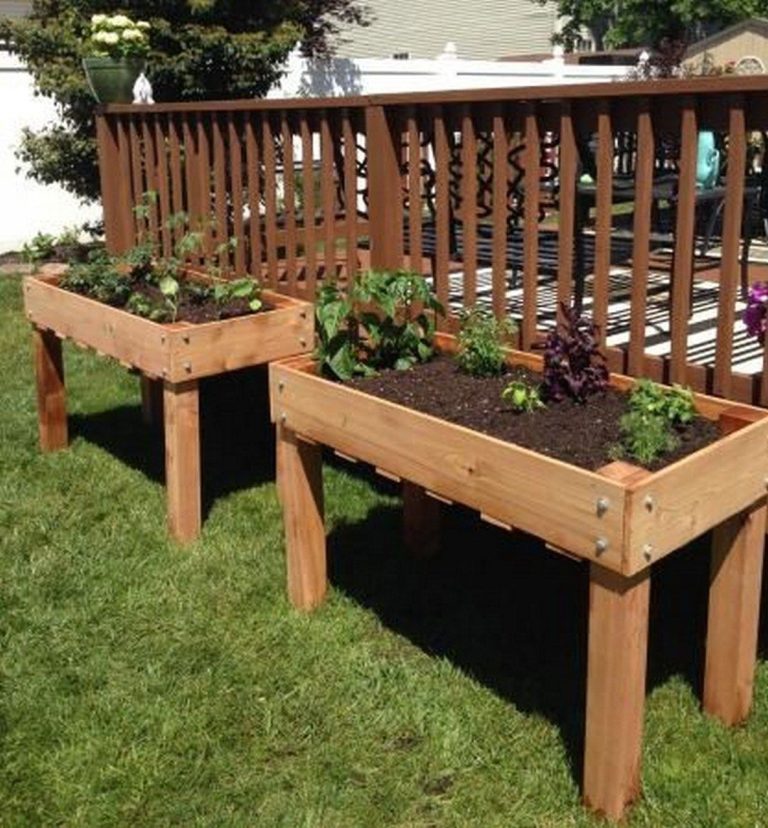
A top-mounted bench rests on the bed wall. This design is simple, but it reduces the planting width and may make the seat too high if the bed wall already stands 16 inches tall.
To build it, place the seat board on the outside half of the wall. Attach it to the wall with screws from below or with small blocks beneath the seat. Keep at least 10 inches of clear sitting depth.
This style works well for a low herb bed or a bed designed for children. It may not suit tall gardeners because a 20-inch bed plus a 2-inch seat becomes too high.
Option 2: Side-mounted bench
A side-mounted bench gives the most usable planting area. Attach short 2-by-4 cleats to the outside wall, then rest the seat on those cleats. Add vertical posts beneath the seat at least every 4 feet.
For an 8-foot bench, use three supports: one near each end and one in the center. Set the posts on compacted gravel or pavers so they do not sit in wet soil. Secure each post to the bed frame with structural screws.
Option 3: Fold-down seat
A fold-down seat saves space near a narrow path. Use a piano hinge or heavy outdoor hinges and a support chain. This design needs careful hardware and regular checks.
I would not use a fold-down seat for a public garden, a child’s play area, or anyone who needs strong support. It can loosen over time, and a failed hinge can cause a fall.
Round the edges and test the load
Sand sharp corners with 80-grit paper, then finish with 120-grit paper. Round the top edge of the seat slightly so it does not cut into the back of your legs.
Before adding soil, sit on the bench and shift your weight. Ask another adult to sit beside you if that is how you plan to use it. If the seat moves, add a center post, a second cleat, or carriage bolts.
⚠️ Warning: Do not treat the bench as a handrail. A garden seat needs strong vertical support, but it may not resist a sideways fall. Add a separate grab rail if someone with limited balance will use the bed.
Fill the bed with healthy soil
Good soil makes the bed productive. Do not fill it with plain topsoil, pure compost, or garden soil from an unknown source.

Use a simple soil blend
For most vegetable beds, use:
- 60% screened topsoil
- 30% finished compost
- 10% aged bark fines, leaf mold, or coconut coir
In heavy clay, increase the compost and add coarse organic matter over time. Do not add large amounts of sand to clay soil. The mix can become dense, much like concrete.
In dry climates such as parts of USDA Zones 5 through 8, compost and leaf mold help hold moisture. In wet climates such as parts of Zones 7 through 9, use a looser blend and avoid overwatering.
Calculate the soil volume
Multiply length by width by depth in feet. A 4-by-8-foot bed filled to 14 inches needs about 37 cubic feet of soil, or roughly 1.37 cubic yards.
Leave 1 to 2 inches below the top edge. This keeps soil from washing over the bench during heavy rain. Soil will settle after the first watering, so top it up after two to four weeks.
| Bed size and depth | Approximate soil volume | Compost at 30% |
|---|---|---|
| 3 × 6 × 12 inches | 18 cubic feet | 5.4 cubic feet |
| 4 × 8 × 14 inches | 37.3 cubic feet | 11.2 cubic feet |
| 4 × 8 × 18 inches | 48 cubic feet | 14.4 cubic feet |
| 4 × 10 × 16 inches | 53.3 cubic feet | 16 cubic feet |
Buy a little extra soil if the bags are sold by volume. Soil settles, and a small mound often shrinks to the correct level after watering.
Test the soil pH
Most vegetables grow well in soil with a pH between 6.0 and 7.0. Blueberries need a much more acidic range, about 4.5 to 5.5, so grow them in a separate bed or large container.
A soil test can also show phosphorus, potassium, calcium, and magnesium levels. Avoid adding lime or strong fertilizer based on guesswork. Excess nutrients can harm plants and wash into nearby streams.
Finish with mulch
Add 1 to 2 inches of shredded leaves, clean straw, pine straw, or fine bark. Keep mulch away from plant stems by about 2 inches. Mulch slows evaporation, limits weeds, and protects the soil from hard rain.
Do not use fresh wood chips inside the root zone. They can tie up nitrogen as they break down. Aged chips work well on paths around the bed.
Plant the bed for easy care
A seat changes how you use the bed, so plant for reach and comfort. Keep tall crops away from the seat if they will brush your shoulders or block your view.

Place crops by height
Put tall plants on the north side of the bed. This reduces shade on shorter crops. Tomatoes, trellised cucumbers, pole beans, and sunflowers can reach 6 to 10 feet, so give them strong supports.
Use the center for medium crops such as peppers, kale, bush beans, Swiss chard, and basil. Plant lettuce, radishes, carrots, onions, thyme, and strawberries near the seat where you can reach them without leaning across taller plants.
Match plants to the season
A raised bed warms earlier in spring than nearby ground. That helps cool-season crops, but it can also cause early flowering in spinach and cilantro. In warm Zones 8 through 10, use shade cloth or plant leafy crops in the cooler fall season.
A simple rotation might look like this:
- Early spring: Peas, radishes, lettuce, spinach, kale
- Late spring: Bush beans, basil, peppers, tomatoes
- Summer: Cucumbers, eggplant, Swiss chard, herbs
- Fall: Carrots, beets, broccoli, cilantro, Asian greens
- Winter in mild zones: Garlic, onions, parsley, hardy greens
Add flowers and pollinator plants
Marigolds, calendula, nasturtiums, borage, and alyssum bring pollinators and beneficial insects. Plant flowers near, but not inside, the main path of your hands and tools.
Be aware that borage can spread by seed. Mint should stay in a separate pot because its roots can take over a bed. Lavender prefers drier soil than tomatoes and cucumbers, so it may perform better in a nearby container.
Use companion planting with restraint
Companion planting can improve diversity, but it does not replace good soil, crop spacing, or pest control. Basil near tomatoes can be useful for kitchen access, while onions and carrots can share space because their roots occupy different zones.
Do not crowd plants just because a chart says they are companions. Air flow matters more. Dense foliage raises humidity and can increase powdery mildew, downy mildew, and fungal leaf spots.
Water, fertilize, and maintain the bed
Raised beds need steady care, especially during the first month. The soil drains well, but the exposed sides also lose moisture faster than ground-level soil.

Water deeply and check the soil
Water when the top 1 to 2 inches feel dry. Push a finger into the soil near a plant rather than judging by the surface alone. In hot weather, leafy crops may need water every day, while established herbs may need water every two or three days.
A drip line or soaker hose works better than a sprinkler. It wets the root zone and keeps leaves dry. Run the system in the morning when possible.
| Season or weather | Typical watering pattern | What to check |
|---|---|---|
| Cool spring | 1–2 times per week | Soil stays damp, not wet |
| Warm summer | 3–5 times per week | Top 1–2 inches dry between waterings |
| Heat above 90°F | Daily checks, sometimes daily water | Wilting at dawn means root stress |
| Wet weather | Little or no added water | Watch for standing water |
| Fall | Reduce as growth slows | Keep seedlings evenly moist |
These are starting points, not fixed rules. Sandy soil dries faster than loam, and a bed in full afternoon sun loses more water than one with morning sun.
Feed according to the crop
Mix finished compost into the top inch or two each spring. For heavy feeders such as tomatoes, peppers, cucumbers, and squash, use a balanced organic fertilizer such as 5-5-5 according to the label.
Leafy greens need nitrogen, but too much nitrogen can produce soft growth and attract aphids. Root crops prefer moderate fertility. Do not add high-phosphorus fertilizer unless a soil test shows a need.
Check the structure each season
Inspect the bed in early spring and after heavy storms. Look for:
- Loose screws
- Bowed side walls
- Cracked boards
- Rot at the bottom edge
- Wobbly bench supports
- Soil spilling through joints
- Standing water after rain
Tighten screws before the bed becomes unstable. Replace a soft board rather than covering it with paint or sealant.
Protect the wood
A penetrating exterior oil can slow weathering on cedar and redwood. Choose a product labeled for garden structures and follow its food-crop safety directions. Many gardeners leave cedar unfinished and allow it to turn silver-gray.
Do not coat the inside of the bed with unknown stains or sealers. If you use a finish, apply it to the outside, seat, and exposed top edges. Keep fresh coatings away from soil until fully cured.
| Maintenance task | When to do it | Why it matters |
|---|---|---|
| Tighten hardware | Spring and after storms | Stops movement and loose joints |
| Add settled soil | After 2–4 weeks and each spring | Keeps roots at the right depth |
| Refresh mulch | Spring and midseason | Reduces weeds and water loss |
| Inspect the bench | Monthly during use | Finds weak supports early |
| Replace rotten boards | As soon as soft spots appear | Prevents wall failure |
The bench usually needs more inspection than the planting box. Rain, sun, and repeated body weight stress the same joints again and again.
Common problems and practical fixes
Most raised bed problems come from poor drainage, weak bracing, wrong soil, or crowded plants. These issues often appear within the first growing season.

| Problem | Likely cause | Practical fix |
|---|---|---|
| Wall bows outward | Long wall lacks braces | Add cross braces or replace weak boards |
| Soil stays soggy | Bed sits on concrete or has blocked drainage | Open drainage holes and reduce watering |
| Plants wilt each afternoon | Shallow roots, heat, or dry soil | Add mulch and water deeply in the morning |
| Seat feels loose | Cleats or posts are too small | Add a center post and structural screws |
| Weeds return through bed | Perennial roots under the frame | Remove roots and use overlapping cardboard |
| Leaves turn pale | Low nitrogen, root stress, or poor pH | Test soil before adding fertilizer |
| White leaf coating | Powdery mildew | Improve air flow and avoid wetting leaves |
A raised bed cannot solve every plant problem. A tomato with blossom-end rot may have uneven water uptake, not a lack of calcium. A pepper with curled leaves may suffer from heat, aphids, or herbicide drift.
🔧 Quick Fix: If the bench rocks, do not add more screws at random. Sit on it while someone watches the movement. The gap will show whether the problem is a loose cleat, a low post, or a bowed wall.
Pros and cons of a raised bed with seating
A seating bed improves access, but it also costs more and takes more room than a basic planting box.
| Pros | Cons | Best response |
|---|---|---|
| Easier weeding and harvesting | Uses more lumber and hardware | Build one seat first |
| Adds a place to rest | Bench can shade nearby plants | Place it on the north side |
| Defines the garden space | Heavy soil makes the bed hard to move | Choose the site carefully |
| Warms early in spring | Dries faster in hot weather | Use mulch and drip irrigation |
| Helps gardeners with limited mobility | Seat joints need inspection | Use posts, not thin brackets alone |
This design suits gardeners who want a working seat, not just decoration. If you only need a place to kneel, a separate garden stool may cost less and offer more flexibility.
How long the bed lasts and what fails first
A well-built raised bed with seating can last 8 to 15 years with cedar and longer with composite boards. Pressure-treated garden lumber may last 10 to 20 years, depending on moisture, soil contact, and the quality of the cut ends.

The seat often fails before the planting walls. It receives direct rain and repeated weight. The next weak points are screw holes, end grain, and the lower edge of the wall where wet soil stays in contact.
Use a wider seat board only if you support it well. A 2-by-12 board can sag if it spans too far without a center post. If you want a 16-inch-deep seat, use two boards with a support cleat beneath the joint.
Composite boards resist rot but can flex more than wood. They need close support spacing and special screws. Metal beds last a long time but can heat the soil and become uncomfortable to touch in full sun.
Seasonal care and winter preparation
A raised garden bed with seating can stay outdoors all year, but winter care varies by climate. Freeze-thaw cycles can shift posts and open corner joints.
Spring
Inspect the frame before planting. Tighten hardware, add soil, refresh mulch, and clean the bench. In cold Zones 3 through 5, wait until the soil can be worked without forming sticky clumps.
Install trellises before tomatoes and cucumbers grow large. Early support prevents root damage from pushing stakes into an established root zone.
Summer
Check moisture often. The wood side walls can become hot in direct sun, especially on south-facing beds. Mulch helps, but leave a small gap around plant stems to reduce rot.
Harvest often. Beans, zucchini, cucumbers, basil, and lettuce become tough or bitter when left too long. Prune tomato suckers only if that matches the variety and your support plan.
Fall
Remove diseased leaves and spent plants. Do not compost plants with severe blight, clubroot, or an active pest infestation unless your compost reaches a reliably hot temperature.
Plant garlic, onions, spinach, kale, or cover crops such as crimson clover where your climate allows. Cover crops protect soil and add organic matter when cut down in spring.
Winter
In cold zones, remove standing water from seat joints and store loose cushions indoors. Do not cover the whole bed with airtight plastic. Use row cover, frost cloth, or a low tunnel if you need plant protection.
If the bed sits on frozen ground, avoid major repairs until a thaw. Frozen soil can hold the frame in a shifted position and hide the true level.
Cost, time, and lower-cost alternatives
A basic 4-by-8-foot raised bed with seating often takes one full day to build. A careful beginner may need a weekend, especially if the site needs leveling or the lumber requires several cuts.
Current pricing ranges from about $180 to $500 for a wood bed with a bench. Cedar, stainless fasteners, delivered soil, and custom details raise the total. Using pressure-treated garden lumber, standard screws, and bulk soil can lower the cost.
| Build choice | Typical cost range | Best for |
|---|---|---|
| Pressure-treated wood bed and simple seat | $180–$300 | Budget builds |
| Cedar bed with supported bench | $300–$500 | Long life and natural appearance |
| Composite or metal bed with seat | $450–$900+ | Low wood upkeep |
| Separate stool beside a basic bed | $120–$280 | Flexible, lower-cost access |
A separate bench is the best alternative when you may change the garden layout. A garden kneeler-seat is cheaper and stores easily, but it does not provide a stable place for two people.
If the bed is for wheelchair access, use a wider path, a higher bed wall, and a seat that does not block the approach. A 30- to 36-inch-wide accessible path works better than a narrow stepping route.
When to hire a professional
Most gardeners can build a small bed with common tools. Hire a professional or experienced carpenter when the bed will retain a large amount of soil, sit on a steep slope, attach to a deck, or support someone who needs a transfer seat.
Get help if you need a bed more than 24 inches tall, a long retaining wall, built-in rails, electrical lighting, or a concrete foundation. Soil pressure increases with height, and a failed wall can damage a fence, patio, or home.
A professional can also help with drainage on clay sites and with accessible garden design. The cost may prevent a bigger problem later.
Mistakes that shorten the life of the project
Avoid these common errors:
- Making the bed too wide. You should reach the center without stepping into the soil.
- Using indoor screws. They rust quickly and leave weak joints.
- Skipping internal bracing. Wet soil pushes hard on long walls.
- Putting a bench on thin brackets. Use cleats, posts, or structural bolts.
- Filling with pure compost. It shrinks, dries, and may hold too much water.
- Using plastic under the whole bed. It blocks drainage and harms soil life.
- Ignoring the wood end grain. Cut ends absorb moisture and rot first.
- Planting tall crops beside the seat. They block access and may brush against users.
- Overfertilizing new soil. Compost may already contain enough nutrients.
- Leaving diseased debris in the bed. Some pests and pathogens survive in plant residue.
A little extra time spent on leveling, bracing, and bench support pays off each time you sit down. These are the parts that are hard to fix after the bed is full.
FAQs about raised garden beds with seating
Q: How high should a raised garden bed with a bench be?
A: Make the planting wall 12 to 18 inches high for most vegetables. Keep the seat about 17 to 20 inches above the ground. If the bed wall itself supports the seat, check the final height before adding soil and mulch.
Q: What is the best wood for a raised garden bed with seating?
A: Cedar is a strong all-around choice because it resists rot and cuts easily. Redwood lasts well in wet climates. Modern pressure-treated lumber labeled for residential garden use can also work at a lower cost.
Q: Can I build a raised bed with seating on concrete?
A: Yes. Build the bed at least 18 inches deep, provide open drainage holes or gaps, and use a soil mix that drains well. Avoid placing the bed where water collects against a wall or foundation.
Q: How deep should soil be in a raised garden bed?
A: Use 12 to 16 inches for lettuce, herbs, beans, peppers, onions, and many flowers. Use 18 to 24 inches for carrots, parsnips, tomatoes, and beds placed over concrete.
Q: Does a raised bed with seating need a bottom?
A: No, not when it sits on healthy soil with good drainage. A bottom can block drainage and make the bed heavier. Add a bottom only for a container-style bed on a patio, and include drainage holes.
Q: How do I make the bench safe?
A: Support an 8-foot bench at both ends and in the center. Use structural screws or bolts, keep the seat level, round sharp edges, and test it with the weight it will carry. Do not use it as a handrail.
Q: How much does it cost to build one?
A: A simple wood design often costs about $180 to $500, including lumber, hardware, and soil. Cedar, custom seating, delivered soil, and composite materials can push the price higher.
Q: Can I use old pallets or reclaimed wood?
A: Avoid unknown pallets and painted or oily boards. Use reclaimed wood only when you know its history and treatment. Do not use railroad ties or creosote-treated lumber near edible crops.
Q: Why is my raised bed drying out so fast?
A: Raised beds drain and warm faster than ground soil. Full sun, sandy soil, wind, and dark wall materials increase water loss. Add mulch, use drip irrigation, and check moisture below the surface.
Q: How often should I replace the soil?
A: You usually do not need to replace healthy bed soil. Add 1 to 2 inches of finished compost each spring, top up after settling, and rotate crop families to reduce disease pressure.
Final thoughts
A raised garden bed with seating is worth building when you want a garden that feels easy to use, not just productive. The strongest design combines a level base, rot-resistant materials, internal braces, a supported seat, and a soil mix that drains well.
Start with one 4-by-8-foot bed if you are unsure. Keep the seat on the north side, place low crops near it, and add a drip line before the plants fill the space. After one full season, you will know whether you want a second bed, a wider seat, a trellis, or a different crop plan.
The best garden seat is the one you use often. Build it strong, keep it dry, and plant the bed so every harvest is within easy reach.
Meta description: Learn how to build a raised garden bed with seating using safe materials, strong supports, healthy soil, simple tools, and practical planting tips.