How To Make A Raised Bed Greenhouse: Easy DIY Guide
A raised bed greenhouse gives you the warmth of a greenhouse and the neat growing space of a raised bed. It can protect tomatoes from cold nights, help lettuce grow in early spring, and keep herbs productive when wind, rain, or pests cause trouble. You do not need a large yard or a costly kit. With basic lumber, hoops, greenhouse plastic, and a few hand tools, you can build one in a weekend.
I have built small covered beds in cool, wet gardens in USDA Zones 5 and 6, and I have helped adapt them for hot Zone 8 sites. The design works well, but small details matter. Poor airflow can cause mildew. Thin plastic can tear in one storm. A bed that sits in shade may stay cold even with a cover.
This guide shows how to make a raised bed greenhouse from start to finish. You will learn how to choose the site, build the bed, fit the hoops, secure the cover, control heat, water plants, and care for the structure through all four seasons.

The Simple Answer: Build the Bed First, Then Add Hoops and a Cover
The best way to make a raised bed greenhouse is to build a sturdy raised bed, attach flexible hoops to its sides, and cover the hoops with greenhouse plastic or insect netting. Use untreated cedar or pressure-treated lumber rated for garden use, place the bed in full sun, and leave room for ventilation. A small 4-by-8-foot structure often costs about $100 to $250, depending on the wood and cover.

A good raised bed greenhouse has five parts:
- A level, well-drained site.
- A strong raised bed frame.
- Hoops made from PVC, conduit, or flexible water pipe.
- A cover that lets in light but holds heat.
- Vents, clips, or roll-up sides for airflow.
The structure works by trapping solar heat during the day. Soil and water store some of that heat and release it after sunset. The cover also blocks wind, which helps plants lose less heat and water.
What You Need Before You Start
Gather all parts before cutting wood or bending hoops. A clear plan saves time and helps you avoid a cover that is too short or a frame that cannot handle snow.

Tools and Materials
The list below fits a basic 4-by-8-foot raised bed greenhouse. Adjust the amount if you build a different size.
| Item | Suggested choice | Typical amount |
|---|---|---|
| Bed boards | 2-inch-thick cedar or garden-safe lumber | Two 8-foot and two 4-foot boards |
| Corner supports | Cedar posts or 2-by-2-inch stakes | 4 to 6 |
| Hoops | 1/2-inch PVC, EMT conduit, or PEX | 3 to 5 hoops |
| Cover | 6-mil greenhouse plastic or woven fabric | About 12 by 20 feet |
| Fasteners | Exterior screws, washers, clamps, or wiggle wire | As needed |
| Soil mix | Topsoil, compost, and aeration material | About 1 cubic yard |
Choose 6-mil greenhouse film if you want a low-cost cover that lasts more than one season. Clear construction plastic may work for a short test, but it often becomes brittle after sun exposure. For a permanent structure, UV-treated greenhouse film is a better choice.
You will also need a drill, tape measure, level, saw, shovel, mallet, utility knife, staple gun, and wire cutters. Wear safety glasses when cutting conduit or drilling. Gloves help prevent cuts from sharp plastic edges and metal burrs.
Choosing Lumber for the Bed
Cedar resists rot and is easy to work with. It costs more than pine, but a well-built cedar frame can last 8 to 15 years in many climates. Douglas fir may last 5 to 10 years when kept off wet soil and sealed on the outside.
Modern pressure-treated lumber is generally made for outdoor use, but avoid old boards of unknown age. Never use railroad ties or wood treated with creosote. If you grow organic vegetables, choose untreated cedar, larch, or a lumber product clearly labeled for garden beds.
A bed 12 to 18 inches deep gives roots more room and holds heat well. A 12-inch bed works for lettuce, radishes, basil, and many annual crops. A 16- to 18-inch bed suits tomatoes, peppers, cucumbers, and carrots.
💡 Pro Tip: Keep the bed no wider than 4 feet if you can reach from both sides. A 3-foot bed is even easier to weed and harvest, especially when the greenhouse cover stays on for weeks.
Pick the Right Location
The best location for a raised bed greenhouse gets at least six hours of direct sun, has good drainage, and sits near a water source. Morning sun matters more than late afternoon sun because it dries leaves and warms the structure after cool nights.

Avoid low spots where rain collects. Wet soil under a covered bed drains slowly and may cause root rot. Stay away from large trees as well. Tree roots can enter the bed, branches can damage the cover, and shade will reduce plant growth.
In USDA Zones 3 through 6, place the long side of the greenhouse from east to west if winter light is limited. This can give the south side more direct sun. In hot Zones 8 through 10, some afternoon shade may help prevent heat stress. A site with morning sun and light afternoon shade can work well for lettuce and spinach.
Leave at least 3 feet around the bed. You need space to roll up the cover, repair plastic, carry soil, and walk with a wheelbarrow. If snow is common, choose a spot where you can brush snow away without stepping on the bed.
Check Drainage Before Building
Dig a small hole 12 inches deep and fill it with water. Let it drain, then fill it again. If the second filling takes more than 24 hours to drain, the site may need a raised gravel base or a different location.
Do not place the bed on concrete unless you plan to use a bottom. A bed on concrete dries faster and can overheat, but it also limits root growth. If you build on a patio, use a 16- to 24-inch-deep bed and add drainage holes.
Build the Raised Bed Frame
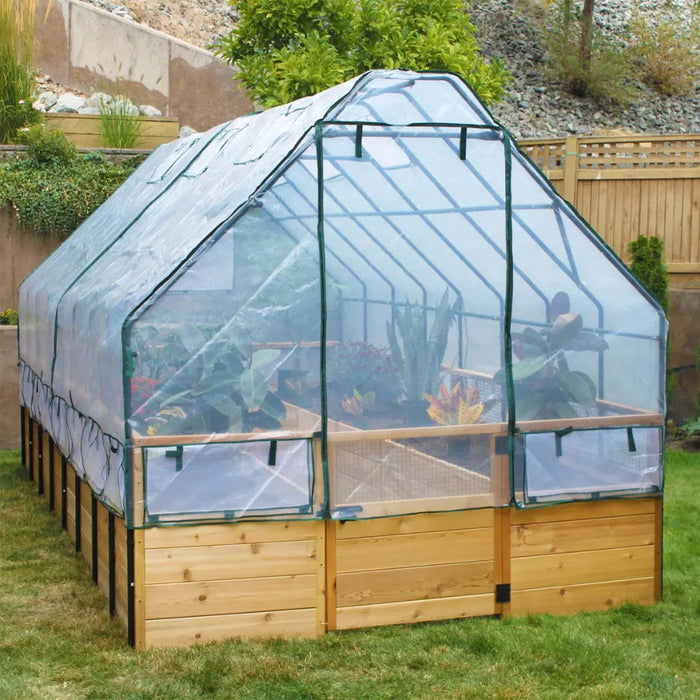
Build the bed before installing the greenhouse parts. A square frame can twist in the wind, so use corner supports and at least one center support on long beds.
Step 1: Mark and Level the Site
Mark a 4-by-8-foot rectangle with stakes and string. Check both diagonals. If both diagonal measurements match, the layout is square.
Remove grass and large roots. You can dig down 2 to 4 inches, but you do not need to remove all the soil. Level high spots with a rake. A level bed makes hoop placement easier and stops water from running to one side.
If rodents are common, place 1/2-inch galvanized hardware cloth under the bed. Extend it 6 inches beyond each edge and fold the extra upward against the inside of the frame. Secure it with screws and washers.
Step 2: Assemble the Boards
Place the long boards and short boards into position. Drill pilot holes before driving exterior screws. Use at least two screws at each corner, with one screw near the top and one near the bottom.
For a 16-inch-high bed, stack two 8-inch boards. Stagger the joints so they do not line up. Add a vertical post at each corner and another post at the center of each long side.
A 4-by-8-foot bed holds about 32 cubic feet of soil at 12 inches deep. That equals about 1.2 cubic yards. At 18 inches deep, it holds about 48 cubic feet, or nearly 1.8 cubic yards.
Step 3: Add Hoop Anchors
Hoops need firm anchors. The easiest method uses short lengths of 1-inch PVC or metal conduit attached to the inside of the bed. Place one anchor on each side for every hoop.
For a 4-by-8-foot bed, install three hoops at about 2 feet, 4 feet, and 6 feet from one end. Use four or five hoops if you expect snow, strong wind, or a wide cover. More hoops reduce flapping and spread the weight of rain.
If you use PVC, screw the anchor pieces to the bed. If you use EMT conduit, install metal straps or specialized hoop brackets. Keep each pair at the same distance from the ends so the hoops sit straight.
Install the Hoops
The best hoop material depends on your weather and budget. PVC is cheap and simple to bend. EMT conduit is stronger and handles wind better. PEX bends easily but may sag under heavy plastic or snow.

PVC Hoops
Use 1/2-inch or 3/4-inch UV-resistant PVC for small beds. Slide each hoop into its anchors, then bend it over the bed. PVC works well for frost protection and light summer shade cloth.
PVC can crack after repeated freezing and sun exposure. It also may collapse under wet snow. If you use it in a snowy region, remove the cover before a major storm or choose metal conduit.
EMT Conduit Hoops
Half-inch EMT conduit makes a strong hoop when bent with a conduit bender. It costs more and takes more work, but it resists wind better than thin PVC.
Smooth sharp conduit ends with a file. Cover the ends with rubber caps or short pieces of old garden hose. This protects the plastic film from punctures.
Hoop Spacing and Height
Space hoops 18 to 30 inches apart. A 4-by-8-foot bed usually needs three or four hoops. Set the first and last hoop 6 to 12 inches from the ends.
For low crops, a 24-inch center height may be enough. For tomatoes and peppers, aim for 36 to 48 inches. Tall plants need a taller frame or a different greenhouse design. A hoop house only 30 inches high becomes hard to manage once plants fill the bed.
| Hoop material | Strength | Best use |
|---|---|---|
| 1/2-inch PVC | Low to medium | Frost cover and small beds |
| 3/4-inch PVC | Medium | Wider beds and light wind |
| PEX tubing | Medium | Flexible seasonal covers |
| 1/2-inch EMT conduit | High | Windy sites and repeated use |
| 3/4-inch EMT conduit | Very high | Snow-prone or larger frames |
PVC is the easiest choice for a first project. EMT conduit is the better long-term choice when high wind or snow is a regular problem.
Add a Ridge Support
A ridge support runs along the top center of the hoops. It keeps the hoops aligned and reduces side-to-side movement.

Use a straight length of PVC, conduit, or wood. Attach it to each hoop with clips, zip ties, or metal straps. Do not use thin string as the main support. String can sag and allows the frame to shift.
A ridge support also helps rain run off instead of pooling in the middle. Pooled water can stretch plastic, bend hoops, and pull the bed frame out of square.
For a 4-by-8-foot bed, one center ridge is enough. For a bed wider than 4 feet, add side rails or build a stronger frame. Wide covers catch more wind and need more support.
Fit and Secure the Greenhouse Cover
The cover is the part that controls warmth, airflow, light, and moisture. Use greenhouse film for heat, floating row cover for frost protection, and insect mesh when pests are the main concern.

Measure the Cover
Measure the distance from one side of the bed, over the hoops, and down the other side. Add at least 2 feet on each side for fastening. Add 2 to 3 feet at each end so you can close the corners.
For a 4-by-8-foot bed with hoops about 3 feet high, a cover about 12 feet wide and 18 to 20 feet long usually works. Measure your frame because hoop height changes the needed width.
Avoid cutting the cover too close. A few extra feet make it easier to repair, roll up, and secure. You can fold extra material under the bed edge.
Secure the Long Sides
The most durable method uses a base rail and wiggle wire. The rail can be wood or a metal greenhouse channel. Attach it to the outside of the bed, then lock the film into the channel.
For a low-cost setup, clamp the plastic to the bed with spring clamps or greenhouse clips. Add a strip of old garden hose over the edge before clamping. This spreads pressure and reduces tears.
Do not rely on staples alone. Staples can make small holes that grow in wind. If you must staple plastic, staple it to a wood batten rather than directly to the film.
Close the Ends
Gather the plastic at each end like a curtain. Roll it around a short stick or dowel and fasten it to the bed. This makes a simple door that can open for watering and ventilation.
You can also cut a door into one end and add a zipper. Zipper doors are convenient, but they can fail when dirt enters the teeth. A roll-up flap is easier to repair.
| Cover type | Main benefit | Main limit |
|---|---|---|
| 6-mil greenhouse film | Holds heat and sheds rain | Needs ventilation on sunny days |
| Frost cloth | Protects plants from light frost | Does not block heavy rain |
| Insect mesh | Stops many moths and beetles | Adds little heat |
| Shade cloth | Reduces heat and sun stress | Cannot protect from cold |
| Clear polycarbonate panels | Strong and long lasting | Costs more and needs a rigid frame |
Use plastic when cold protection matters. Use insect mesh when cabbage worms, flea beetles, or cucumber beetles are the main problem. In hot summer weather, shade cloth may protect plants better than clear film.
Prepare the Soil and Planting Mix
A raised bed greenhouse needs soil that drains well but still holds water. A simple mix uses about 60% quality topsoil, 30% finished compost, and 10% aeration material such as leaf mold, pine fines, or coarse perlite.

Do not fill the bed with pure compost. Compost settles quickly and may hold too much water. It can also release excess nutrients, especially phosphorus, which may harm waterways when it washes out.
Test the soil before planting. Most vegetables grow well at pH 6.0 to 7.0. Lettuce, spinach, carrots, tomatoes, peppers, and basil all tolerate a slightly acidic to neutral mix.
Mix compost into the top 6 inches each season rather than turning deeply around plant roots. Add 1 to 2 inches of compost in spring. A light mulch layer of straw or shredded leaves helps reduce evaporation.
Match Crops to Bed Height
A low tunnel suits cool crops and short plants. A taller raised bed greenhouse works for heat-loving crops, but tomatoes and cucumbers can quickly touch the cover.
Good crops include:
- Lettuce, spinach, arugula, and mizuna.
- Radishes, carrots, beets, and turnips.
- Kale, Swiss chard, and bok choy.
- Bush beans and compact cucumbers.
- Peppers, basil, and dwarf tomatoes.
- Strawberries in a deep bed with good drainage.
Indeterminate tomatoes such as ‘Sun Gold’ or ‘Cherokee Purple’ usually outgrow a small hoop cover. Choose determinate varieties or cherry tomatoes if you want to grow tomatoes under a low tunnel.
Plant at the Right Time
A raised bed greenhouse can extend the season by several weeks, but it does not replace sunlight or stop every freeze. The cover may raise night temperatures by 2 to 8°F, while a sealed structure on a sunny day can become 20°F or more warmer than outside air.
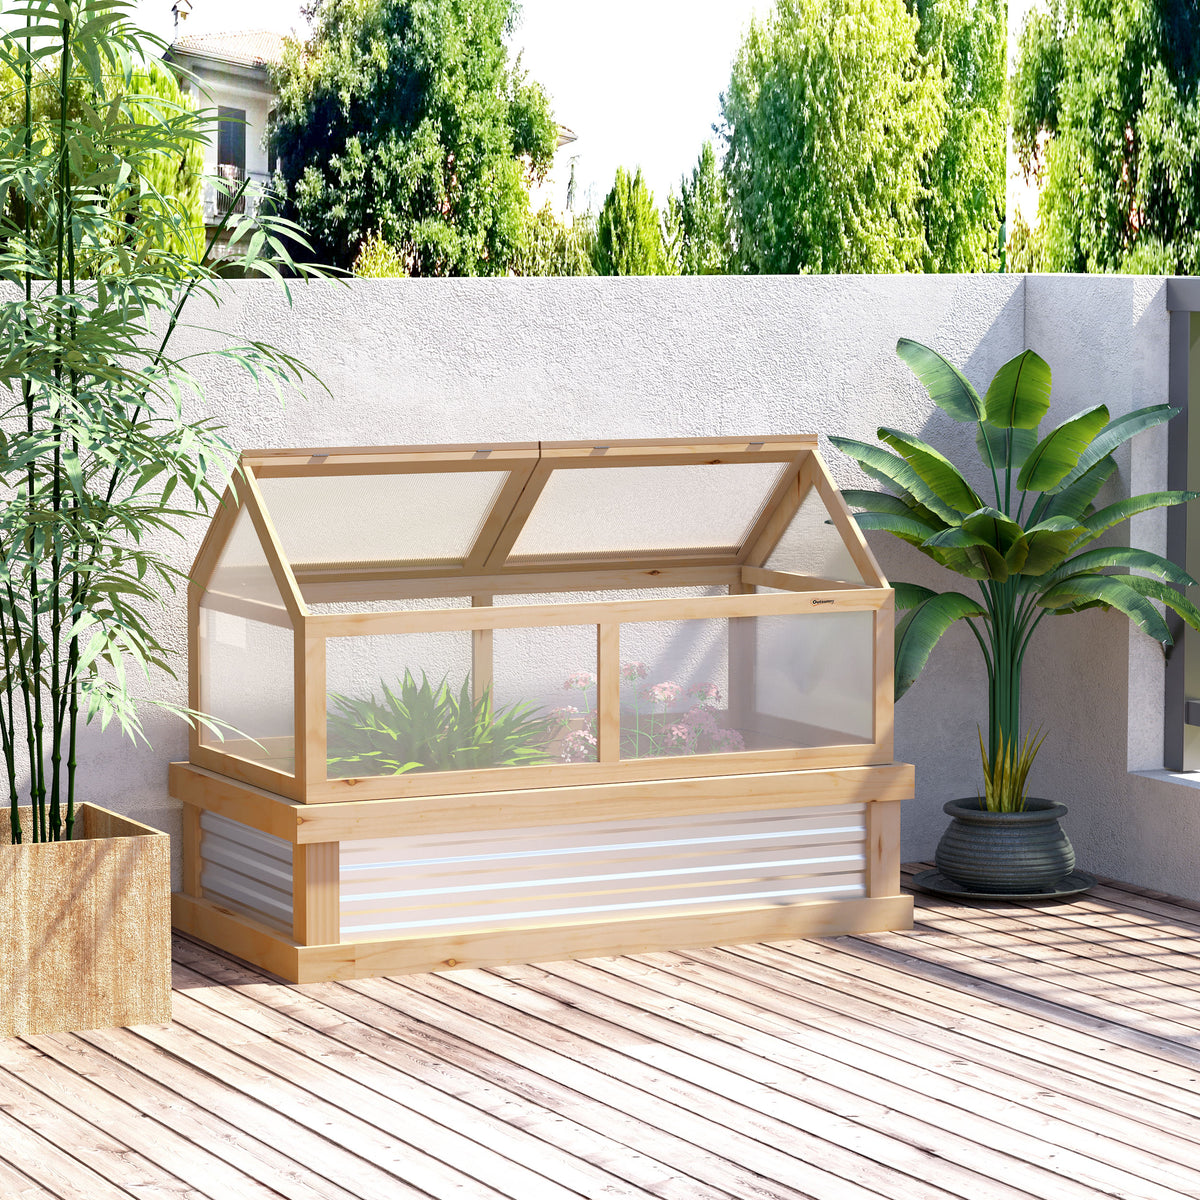
In Zones 3 and 4, use the greenhouse for hardy greens, seedlings, and cold-tolerant roots. In Zones 5 and 6, it can start spring crops three to six weeks early. In Zones 7 and 8, it may support winter lettuce, cilantro, and kale, but summer heat can become the main challenge.
Harden seedlings before planting. Set young plants outside for a few hours each day over seven to ten days. A greenhouse cover protects plants from cold, but it does not remove transplant shock.
| Season | Crops to grow | Cover approach |
|---|---|---|
| Early spring | Spinach, lettuce, peas, radish | Clear film or frost cloth |
| Late spring | Basil, peppers, cucumbers | Open sides on warm days |
| Summer | Beans, compact tomatoes, basil | Shade cloth or insect mesh |
| Early fall | Kale, chard, carrots, bok choy | Clear film at night |
| Winter | Spinach, mâche, parsley | Double cover in cold zones |
The same structure may need three different covers in one year. I often use clear film in spring, insect mesh in summer, and clear film again in fall.
Control Temperature and Airflow
Ventilation matters as much as warmth. Open the ends or roll up the sides when the inside temperature reaches about 75 to 80°F for cool crops. Warm-season crops may tolerate 85°F, but temperatures above 90°F can reduce tomato pollination and cause lettuce to bolt.

Use a maximum-minimum thermometer at plant height. Do not judge the temperature by how the air feels when you stand outside. A covered bed can heat rapidly after sunrise.
Open the cover early on bright days. Close it before sunset when frost threatens. In a small bed, this may take only two minutes, but missing one hot afternoon can wilt lettuce or scorch pepper leaves.
Add a water-filled jug or dark container to store heat. One gallon of water weighs about 8 pounds and releases heat slowly at night. Keep containers covered or clean to avoid algae and mosquito breeding.
⚠️ Warning: Never seal a raised bed greenhouse for several days without checking it. High heat and trapped moisture can cause blossom drop, powdery mildew, damping-off, and leaf scorch.
Improve Pollination
Tomatoes and peppers need pollination, but a closed tunnel can limit bee access. Tap tomato flower clusters gently in late morning when the air is dry. For cucumbers, grow parthenocarpic varieties that can set fruit without pollination, such as ‘Diva’ or ‘Socrates’.
Leave one end open during bloom when weather allows. Bees and other pollinators can enter, and airflow improves. Avoid spraying insecticides inside the structure while flowers are open.
Water Plants the Right Way
Plants under cover often need less water from rain but more careful watering from you. Check the soil with a finger or moisture meter before watering. The top inch may feel dry while the root zone remains wet.

Water slowly at the soil line in the morning. A drip line or soaker hose reduces leaf moisture and lowers the risk of fungal disease. Hand watering works well in a small bed, but aim the stream away from stems.
Tomatoes, cucumbers, and peppers need steady moisture when flowering and fruiting. Uneven watering can cause tomato blossom-end rot, cracked fruit, and bitter cucumbers. Consistent moisture also helps lettuce stay tender.
| Crop group | Water when | Common risk |
|---|---|---|
| Lettuce and spinach | Top 1 inch feels dry | Wilting and bolting |
| Tomatoes and peppers | Top 2 inches feels dry | Cracking and blossom drop |
| Cucumbers and beans | Top 1 to 2 inches feels dry | Bitter or misshapen fruit |
| Carrots and beets | Top 2 inches feels dry | Forked or split roots |
| Seedlings | Surface begins to dry | Damping-off or weak roots |
The exact schedule varies with soil, weather, and plant size. In a hot Zone 8 bed, you may water daily. In a cool Zone 5 spring, twice a week may be enough.
Manage Fertilizer and Plant Nutrition
Start with a soil test rather than guessing. A balanced organic fertilizer such as 4-4-4 can support mixed vegetables, but heavy feeders may need extra nitrogen early and more potassium during fruiting.

Side-dress tomatoes and peppers with compost when they begin to flower. Use a small amount of fertilizer around the drip line, not against the stem. Water after feeding to move nutrients into the root zone.
Avoid high-nitrogen fertilizer on tomatoes once they have plenty of leaves. Too much nitrogen can create a jungle of foliage with few flowers. Basil and leafy greens can use more nitrogen, but they still need balanced nutrition.
Do not add lime unless a soil test shows low pH. Lime raises pH, but it does not act as a general plant tonic. In beds where you grow blueberries, use a separate acidic bed because blueberries prefer a pH near 4.5 to 5.5.
Prevent Common Problems
Most raised bed greenhouse problems come from too much heat, too much moisture, weak materials, or poor spacing. Watch the plants every day during the first month.

| Symptom | Likely cause | Practical fix |
|---|---|---|
| White powder on leaves | Powdery mildew from poor airflow | Ventilate, space plants, remove badly affected leaves |
| Seedlings collapse at soil line | Damping-off from wet soil | Reduce watering and improve airflow |
| Leaves curl and feel dry | Heat or low water | Open cover and water deeply |
| Yellow lower leaves | Wet roots or low nitrogen | Check drainage and soil test |
| Flowers drop without fruit | Heat above 90°F or poor pollination | Ventilate and hand-pollinate |
| Tiny holes in leaves | Flea beetles or flea larvae | Use insect mesh and remove weeds |
Inspect the undersides of leaves for aphids, whiteflies, spider mites, and thrips. Look for chewed edges and green caterpillar droppings on kale and cabbage. Handpick pests when possible, then use insecticidal soap or horticultural oil according to the label.
Do not spray insecticidal soap in full sun or high heat. It can burn leaves. Spray in the evening, test one leaf first, and keep pollinators away from wet plants.
Rotate Crops
Do not grow tomatoes, peppers, eggplants, and potatoes in the same soil year after year. These crops belong to the nightshade family and can share diseases such as early blight and verticillium wilt.
Move plant families around the bed when possible. Follow nightshades with lettuce, beans, carrots, or herbs. Remove diseased plant debris at the end of the season and avoid adding infected leaves to a home compost pile.
🌱 Beginner Note: Crop rotation does not need to be perfect in a small bed. Even moving tomatoes from one end to the other and adding fresh compost helps reduce disease pressure over time.
What Worked and What Failed in My Beds
My first raised bed greenhouse used thin PVC and ordinary clear plastic. It protected lettuce from light frost, but the plastic tore at the corners after a windy week. The bed also overheated because I opened it too late in the morning.

The next version used 1/2-inch EMT hoops, 6-mil greenhouse film, and spring clamps over folded garden hose. That frame survived two windy seasons in Zone 6. The clamps still needed adjustment, but the film did not tear.
I also tried growing full-size cucumbers in a 30-inch-high tunnel. The vines touched the cover, held moisture against the leaves, and developed powdery mildew. Compact cucumbers on a small trellis worked much better.
In another bed, I planted basil beside tomatoes and left the end open during bloom. The tomatoes set fruit well, but the basil attracted aphids later in summer. Companion planting can help, but it does not replace inspection.
Pros and Cons of a Raised Bed Greenhouse
A raised bed greenhouse offers strong season extension in a small space, but it has limits. It works best when you want a simple structure for seedlings, greens, herbs, or compact crops.
| Pros | Cons |
|---|---|
| Extends spring and fall growing seasons | Needs daily temperature checks |
| Protects plants from wind, rain, and some pests | Can overheat in minutes |
| Improves drainage and soil control | Cover may tear in strong wind |
| Costs less than a full greenhouse | Limited height for large crops |
| Fits small yards and patios | Requires hand pollination at times |
| Easy to repair with common tools | Snow can bend weak hoops |
The main benefit is control. You decide which soil goes into the bed, when rain reaches the plants, and when cold air enters. The main drawback is that the structure demands attention, especially during spring sun and summer heat.
Maintain the Structure Through the Seasons
A simple maintenance routine can add years to the frame and cover. Check the bed after strong wind, heavy rain, and snow.
Spring
Inspect screws, hoop anchors, clips, and the ridge support. Replace brittle plastic before planting. Wash the cover with mild soap and water if algae or dust blocks light.
Add compost and check the soil pH. Flush drip lines and look for leaks. Set a thermometer inside before adding seedlings.
Summer
Use insect mesh or shade cloth when clear film causes excess heat. Roll the cover up during warm nights if pests and rain are not a concern. Trim plants before they touch the plastic.
Check clamps each week. Heat can soften some plastics and cause clips to slip. Remove weeds inside and around the bed because they shelter aphids, mites, and slugs.
Fall
Clean plant debris and remove any diseased leaves. Wash the cover before storing it. Repair small holes with greenhouse repair tape while the plastic is clean and dry.
Plant cool crops such as kale, spinach, parsley, and winter lettuce. Add a second layer of frost cloth if your zone has hard freezes.
Winter
In snowy regions, remove heavy snow from the cover with a soft broom. Do not push hard against the plastic. If the frame is not built for snow, remove the cover before a major storm.
Store loose covers in a dry, dark place. Fold them loosely rather than stuffing them into a tight bag. Rodents may chew stored plastic, so use a sealed container when possible.
| Maintenance task | How often | Why it matters |
|---|---|---|
| Check clips and anchors | Weekly in windy weather | Stops cover loss |
| Inspect plastic for tears | Every 2 to 4 weeks | Prevents small tears from spreading |
| Clean the cover | Twice per season | Keeps light levels high |
| Check soil moisture | Daily in hot weather | Prevents stress and root problems |
| Remove diseased leaves | As needed | Limits disease spread |
| Inspect hoops after storms | After strong wind or snow | Finds damage early |
A small repair takes minutes when you catch it early. A loose cover can become a shredded cover overnight.
Compare DIY, a Cold Frame, and a Full Greenhouse
A raised bed greenhouse is not the only way to protect plants. The best option depends on crop height, available space, budget, and how often you want to manage the structure.
| Structure | Best for | Main limitation |
|---|---|---|
| Raised bed greenhouse | Small beds, greens, herbs, seedlings | Low height and daily venting |
| Cold frame | Seedlings and very short crops | Little growing space |
| Full greenhouse | Tall crops and year-round growing | Higher cost and more upkeep |
| Row cover over a bed | Simple frost protection | Less rain and pest control |
| Shade house | Hot weather and tender plants | Does not hold winter heat |
A cold frame costs less and can protect seedlings, but it has less growing space. A full greenhouse gives you room to walk and grow tall tomatoes, but it needs a stronger base, more ventilation, and often more money.
For many home gardeners, a raised bed greenhouse is the best first step. It teaches you how heat, moisture, airflow, and plant timing work without the cost of a large structure.
Cost, Time, and Expected Lifespan
A basic DIY raised bed greenhouse often costs $100 to $250. Cedar, metal conduit, greenhouse film, and strong hardware can push the price above $300. Current pricing ranges from about $25 for a small cover to more than $100 for UV-treated film and hardware kits.
Plan on four to eight hours for a first build. A simple PVC frame may take three hours. A cedar bed with EMT hoops, a ridge rail, roll-up sides, and a fitted cover may take a full day.
The bed frame often lasts longer than the cover. Cedar may last 8 to 15 years. EMT hoops can last 10 years or more. UV-treated greenhouse film may last three to five years, while low-cost plastic may last one season.
Replacing the cover is usually the first major repair. Hoop anchors and corner joints come next. If the frame rocks when you push it, repair the structure before installing new plastic.
Safety and Practical Limits
A raised bed greenhouse is safe when you use sound materials and manage heat. Secure the frame before covering it. A loose structure can lift in high wind and damage plants, windows, or people.
Keep tools and sharp wire ends away from children. File cut conduit ends and cap them. Do not burn plastic scraps. Dispose of damaged film through a local recycling program if one accepts agricultural plastic.
Never use a fuel-burning heater inside a small plastic-covered bed. Carbon monoxide can build up, and heat sources can melt plastic or start a fire. If you need frost protection, use approved electric heating equipment with outdoor-rated cords and ground-fault protection.
Do not walk on wet soil inside the bed. It compresses the root zone and reduces air spaces. Place stepping boards outside the bed so you can work without leaning on the soil.
Steps to Build the Greenhouse in One Weekend
Use this order to avoid redoing work:
- Choose a sunny, level site with good drainage.
- Mark a 4-by-8-foot bed and check the diagonals.
- Remove grass and install hardware cloth if rodents are a problem.
- Assemble the raised bed with exterior screws.
- Add corner posts and center supports.
- Fill the bed with a balanced soil and compost mix.
- Install hoop anchors at equal distances.
- Bend and install the hoops.
- Attach a ridge support along the top.
- Drape the cover over the frame.
- Secure the long sides with clips, battens, or wiggle wire.
- Create roll-up ends for ventilation.
- Add a thermometer and drip line.
- Plant crops suited to the height and season.
- Check the structure every day during the first week.
Do not plant before testing the cover. Open and close the ends several times. Make sure you can reach every plant and secure the cover quickly before a storm.
Frequently Asked Questions
Q: How high should a raised bed greenhouse be?
A: Make the center at least 30 inches high for lettuce, spinach, and herbs. Use 36 to 48 inches for peppers, bush beans, and compact tomatoes. Taller plants need a walk-in greenhouse or a taller hoop frame.
Q: Can I use regular clear plastic?
A: You can use regular plastic for a short trial, but it often tears or becomes brittle after sun exposure. UV-treated 6-mil greenhouse film lasts longer and usually gives better value over several seasons.
Q: Does a raised bed greenhouse need a floor?
A: No. Most raised bed greenhouses use the garden soil as the floor. A floor is useful only when the bed sits on concrete, a patio, or another hard surface.
Q: How many hoops do I need for a 4-by-8-foot bed?
A: Use three hoops for light frost protection and four or five for windy areas or snow. Space them about 18 to 30 inches apart. Add a ridge support for better stability.
Q: Can tomatoes grow in a raised bed greenhouse?
A: Yes, but choose compact or determinate varieties. ‘Patio Choice Yellow,’ ‘Roma,’ and ‘Celebrity’ are more practical than large indeterminate vines in a low tunnel. Ventilate well during flowering.
Q: Why is my raised bed greenhouse too hot?
A: The cover traps solar heat, especially when the ends stay closed. Open the sides or ends early in the day, use shade cloth in summer, and install a thermometer at plant height.
Q: How do I keep wind from blowing off the cover?
A: Use a cover with extra material on each side, secure it with a base rail or many strong clips, and add a ridge support. Burying loose plastic edges can help, but do not rely on soil alone in strong wind.
Q: Can I leave the greenhouse cover on all winter?
A: You can in mild climates if the frame can handle wind and snow. In snowy areas, remove the cover before heavy storms unless the hoops and anchors were designed for the load.
Q: What soil is best for a raised bed greenhouse?
A: Use about 60% quality topsoil, 30% finished compost, and 10% coarse material such as pine fines or perlite. Aim for a pH between 6.0 and 7.0 for most vegetables.
Q: How often should I water plants under cover?
A: Check the soil each day in hot weather and every few days in cool weather. Water when the top 1 to 2 inches feels dry. The right schedule depends on crop size, soil, temperature, and humidity.
Q: Can I grow plants in a raised bed greenhouse all year?
A: You can grow some hardy crops through winter in mild climates. Spinach, kale, mâche, parsley, and scallions handle cool conditions. Growth slows in winter because there is less light, even when the air stays warmer.
Q: Is a raised bed greenhouse worth the money?
A: It is worth the cost for gardeners who want early greens, late fall harvests, seedling protection, or fewer pest problems in a small space. It may not suit you if you cannot check the cover often or if you want to grow tall crops.
Final Thoughts
A raised bed greenhouse is a practical middle ground between outdoor gardening and a full greenhouse. Start with a sturdy 4-by-8-foot bed, use strong hoops, choose a UV-treated cover, and plan for ventilation from the first day.
Build for your climate, not just for appearance. Use metal hoops in windy or snowy areas, shade cloth in hot zones, and insect mesh when pests cause more trouble than cold. With daily checks and a few simple repairs, the structure can extend your growing season for many years.
Meta description: Learn how to make a raised bed greenhouse with simple tools, low-cost materials, strong hoops, greenhouse plastic, soil tips, ventilation, crop choices, and seasonal care.