How To Build A Durable Raised Garden Bed: A Lasting Guide
A durable raised garden bed gives you better control over soil, drainage, weeds, and plant spacing. It also makes gardening easier on your back. But a bed that lasts more than one or two seasons needs more than four boards screwed together. The wood, fasteners, site, drainage, soil mix, and yearly care all matter.
I have built raised beds in wet coastal gardens, dry areas with hard clay, and cold sites in USDA Zones 4 and 5. The strongest design has always followed the same rule: keep the bed low, drain it well, brace long sides, and use materials that can handle constant contact with damp soil.

Quick answer: build the frame for the climate
To build a durable raised garden bed, choose rot-resistant lumber, use 2½- to 3-inch exterior screws, brace any side longer than 4 feet, and set the bed on level, well-drained ground. A 4-by-8-foot bed, 12 to 18 inches deep, works well for most vegetables. Fill it with quality topsoil, compost, and aeration material rather than garden soil alone.
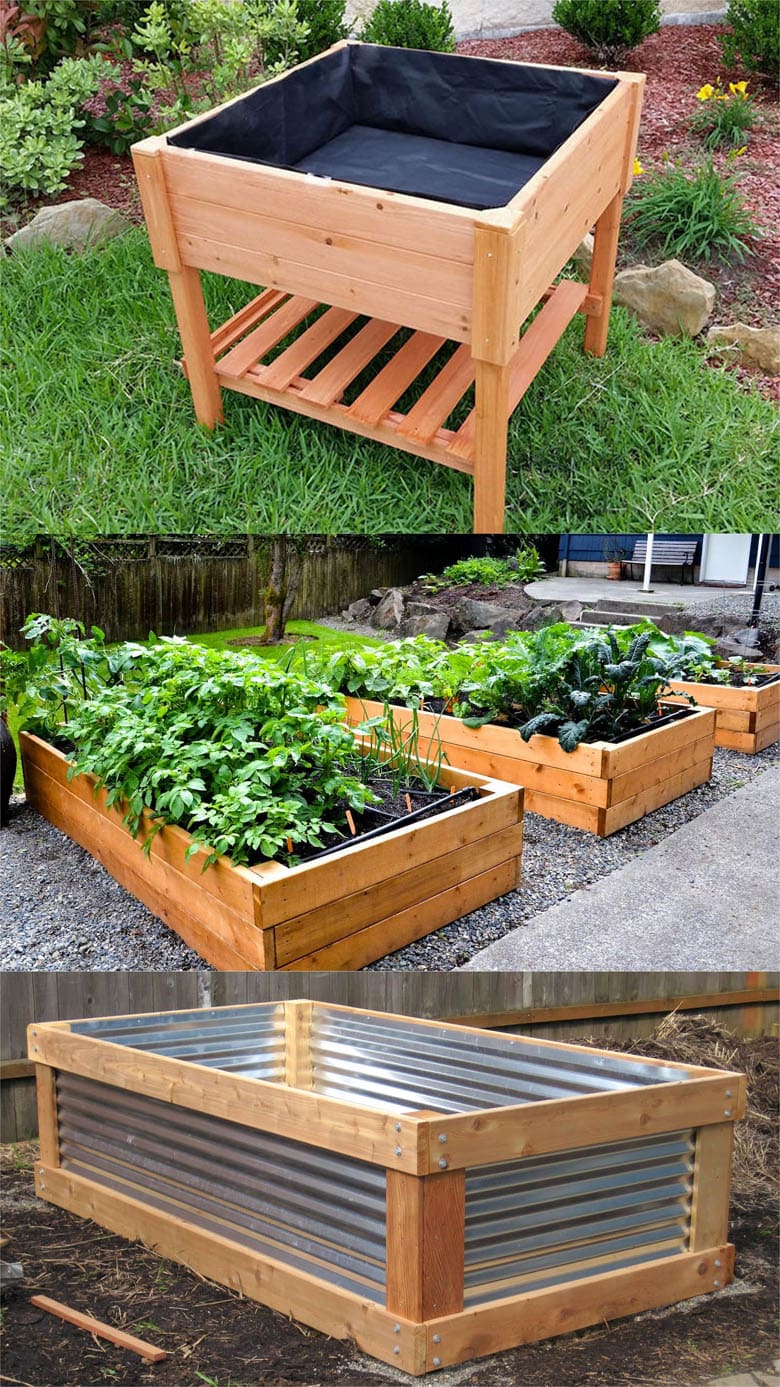
A simple untreated cedar bed can last 8 to 15 years in many climates. Black locust, white oak, and recycled plastic lumber may last longer. Standard untreated pine costs less, but it often needs replacement after 4 to 7 years, especially in wet regions or where the wood stays in contact with the ground.
Decide what your raised bed must handle
A raised bed is a contained growing area made from boards, blocks, metal panels, stone, or another rigid material. The walls hold a mix of soil above the native ground. This gives you control over soil depth, texture, fertility, and drainage.
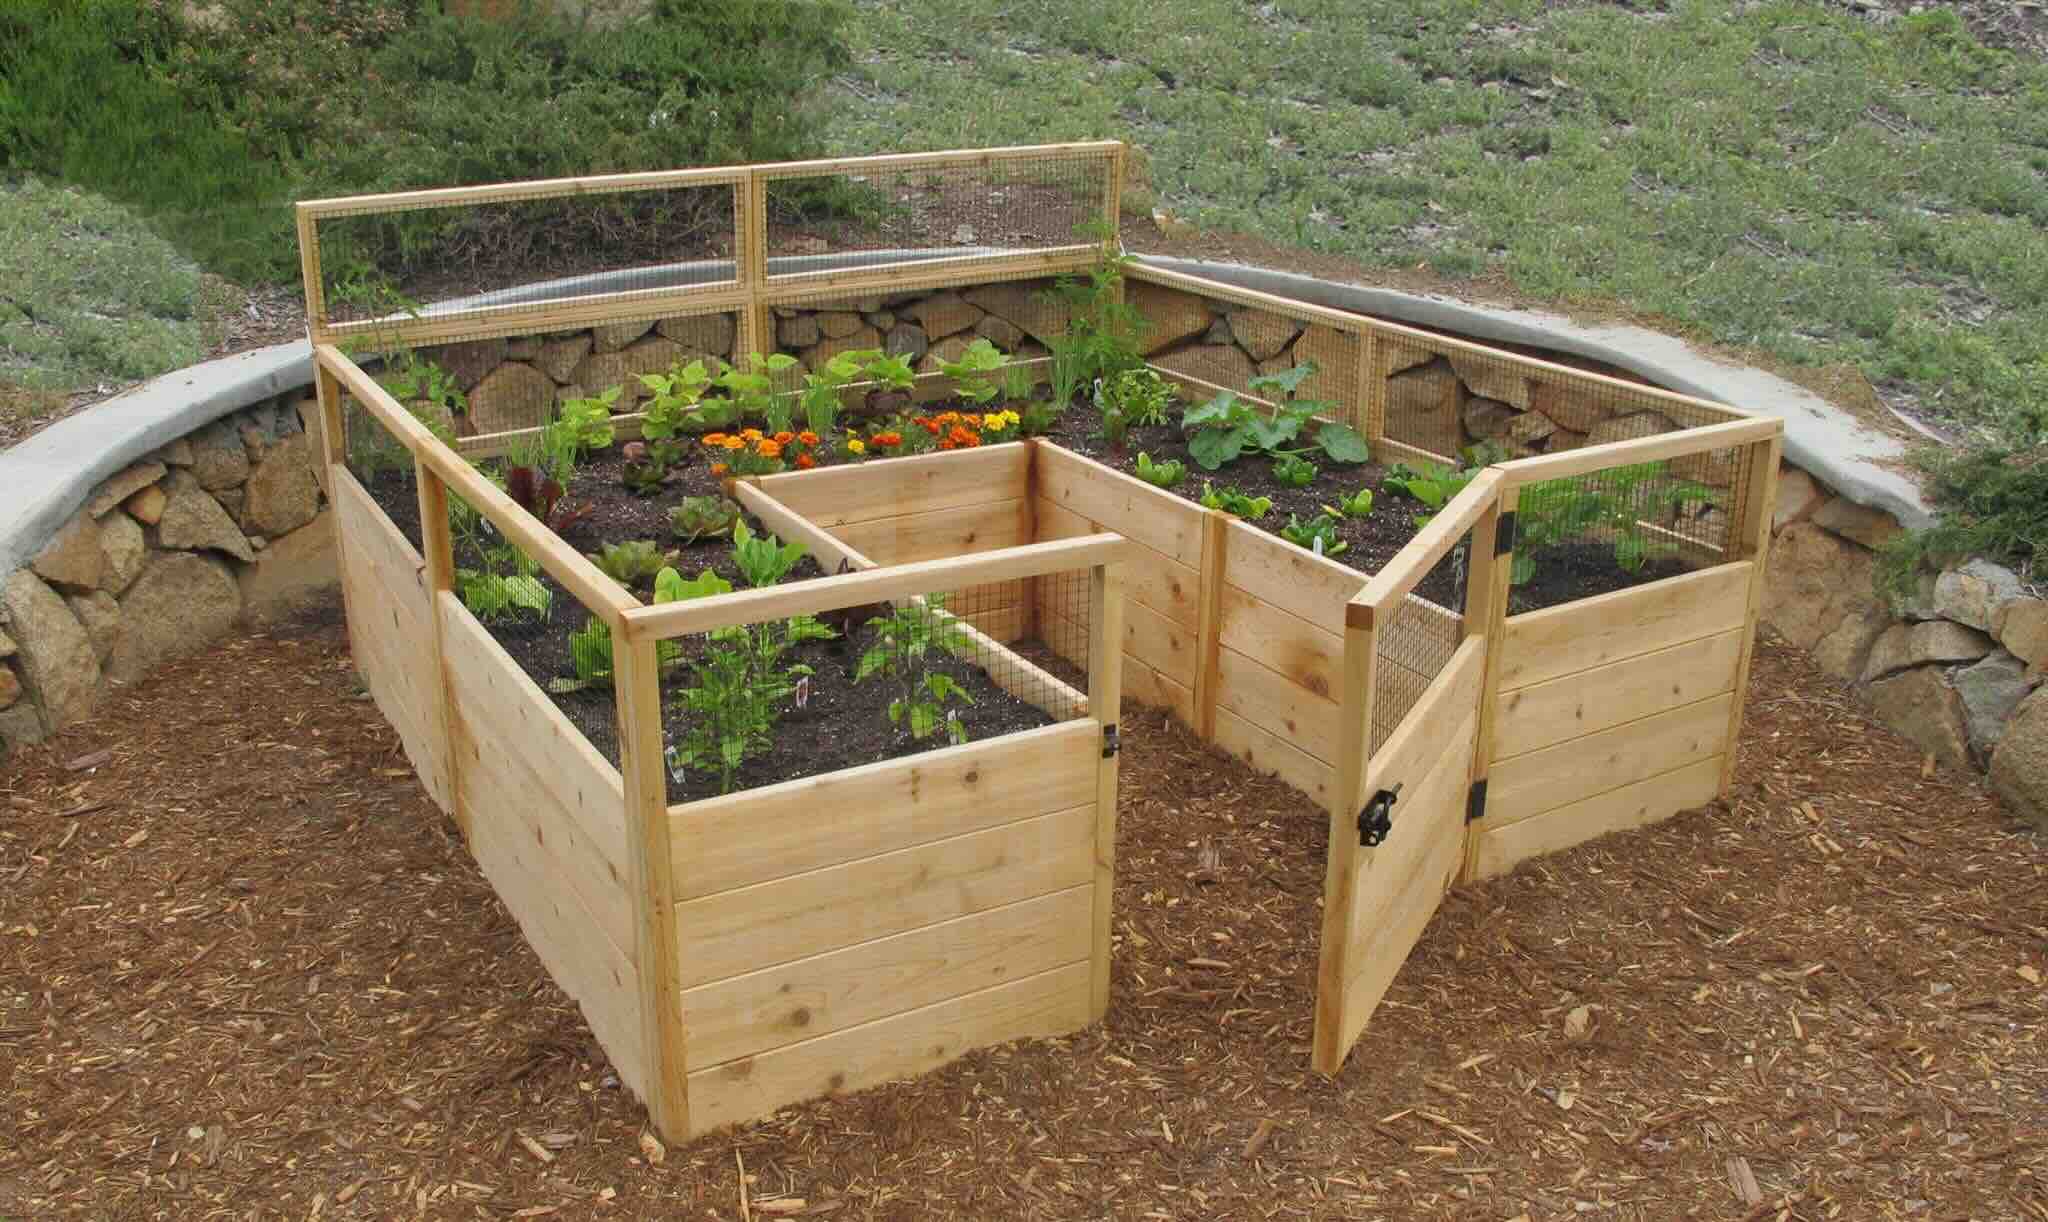
Before you buy lumber, think about your site and your plants. A bed for lettuce has different needs from one for carrots, tomatoes, or perennial herbs. A bed in Arizona must handle intense sun and fast drying. A bed in Oregon or Georgia must cope with rain, rot, and slugs.
Choose the right size
Keep the bed no wider than 4 feet if you can reach both sides. This lets you weed and harvest without stepping on the soil. If the bed touches a wall or fence, limit the width to about 2 feet.
A 4-by-8-foot bed gives you 32 square feet of growing space. It fits common lumber lengths and provides enough room for crop rotation. A 3-by-6-foot bed works better in a small yard, balcony garden, or narrow side passage.
The ideal height depends on your needs:
- 6 to 8 inches: herbs, lettuce, radishes, and shallow-rooted flowers
- 12 inches: most vegetables and annual flowers
- 18 to 24 inches: carrots, parsnips, potatoes, accessible gardening, and poor native soil
- 30 inches or more: easier access for people who garden from a chair, but higher cost and greater wall pressure
Plan for root depth and reach
Many vegetables need more root space than new gardeners expect. Tomatoes, cucumbers, peppers, and eggplants grow well in 12 to 18 inches of soil. Carrots and parsnips need loose soil at least 12 inches deep, while potatoes benefit from 18 inches or more.
Do not make the bed so tall that you cannot reach the center. An 18-inch bed that is 4 feet wide is still easy to tend. A 30-inch bed that is 6 feet wide will force you to lean, stretch, or step into the soil.
💡 Pro Tip: Mark the bed outline with a hose or flour before building. Walk around it with a full watering can. If you cannot reach the center with ease, make the bed narrower.
Pick materials that resist rot and movement
The most durable raised garden bed material depends on your budget, climate, and planting plan. Wood looks natural and is easy to cut. Metal lasts well but can heat up in strong sun. Stone and concrete blocks last for decades but need more work to place and level.
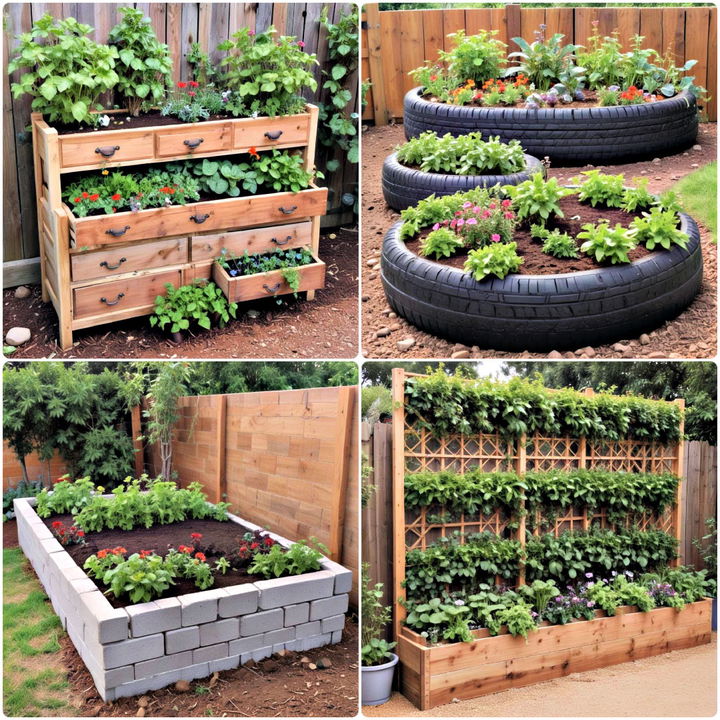
Lumber choices
Cedar is the most common premium choice for raised beds. Western red cedar performs well in many parts of the United States, while northern white cedar suits colder regions. Cedar resists rot without needing a coating that could leach into the soil.
Redwood also lasts well, but good grades can cost more. Black locust has excellent decay resistance and can last for decades, though it is heavy and harder to find. White oak performs better than soft pine, but it can split if you drive screws too close to the ends.
Avoid painted, stained, or treated scrap wood unless you know exactly what it contains. Older wood may contain lead paint or preservatives that you do not want near edible crops.
Recycled plastic and composite boards
Recycled plastic lumber will not rot, and it does not need sealing. It works well in wet climates and near irrigation lines. However, long boards may bow in hot weather, and some products cost more than cedar.
Composite decking can work, but check the product instructions first. Some boards have a hollow profile or a smooth surface that makes fastening difficult. Composite boards also expand and contract with temperature changes.
Metal, block, and stone
Corrugated metal beds with wood or steel frames can last for many years. Choose panels made for outdoor use and cover sharp edges. In hot climates, add a wood or plastic liner on the inside if the metal becomes too hot for roots.
Concrete blocks and retaining-wall blocks make strong beds. They work well for permanent layouts and can create small planting pockets for thyme, alyssum, or other shallow-rooted plants. Stone is durable but often requires more labor than wood.
This table compares common materials for a home vegetable garden.
| Material | Typical life and main issue | Best fit |
|---|---|---|
| Cedar or redwood | About 8–15 years; higher cost | Most home gardeners |
| Untreated pine | About 4–7 years; rots sooner in wet soil | Low-cost starter beds |
| Black locust or oak | 15–30 years or more; heavy and costly | Long-term builds |
| Recycled plastic | 20 years or more; may bow in heat | Wet climates and low maintenance |
| Metal panels | 15–30 years; can heat soil | Modern designs and dry sites |
| Concrete block or stone | Several decades; hard to move | Permanent gardens |
Material life changes with rain, snow, soil contact, and airflow. A cedar bed raised slightly above wet ground can outlast the same cedar placed in standing water.
Gather the tools and hardware
The frame fails first at weak joints, split boards, and loose fasteners. Good hardware matters as much as good lumber. Use exterior-rated structural screws, not drywall screws. Drywall screws snap under pressure and rust quickly outdoors.
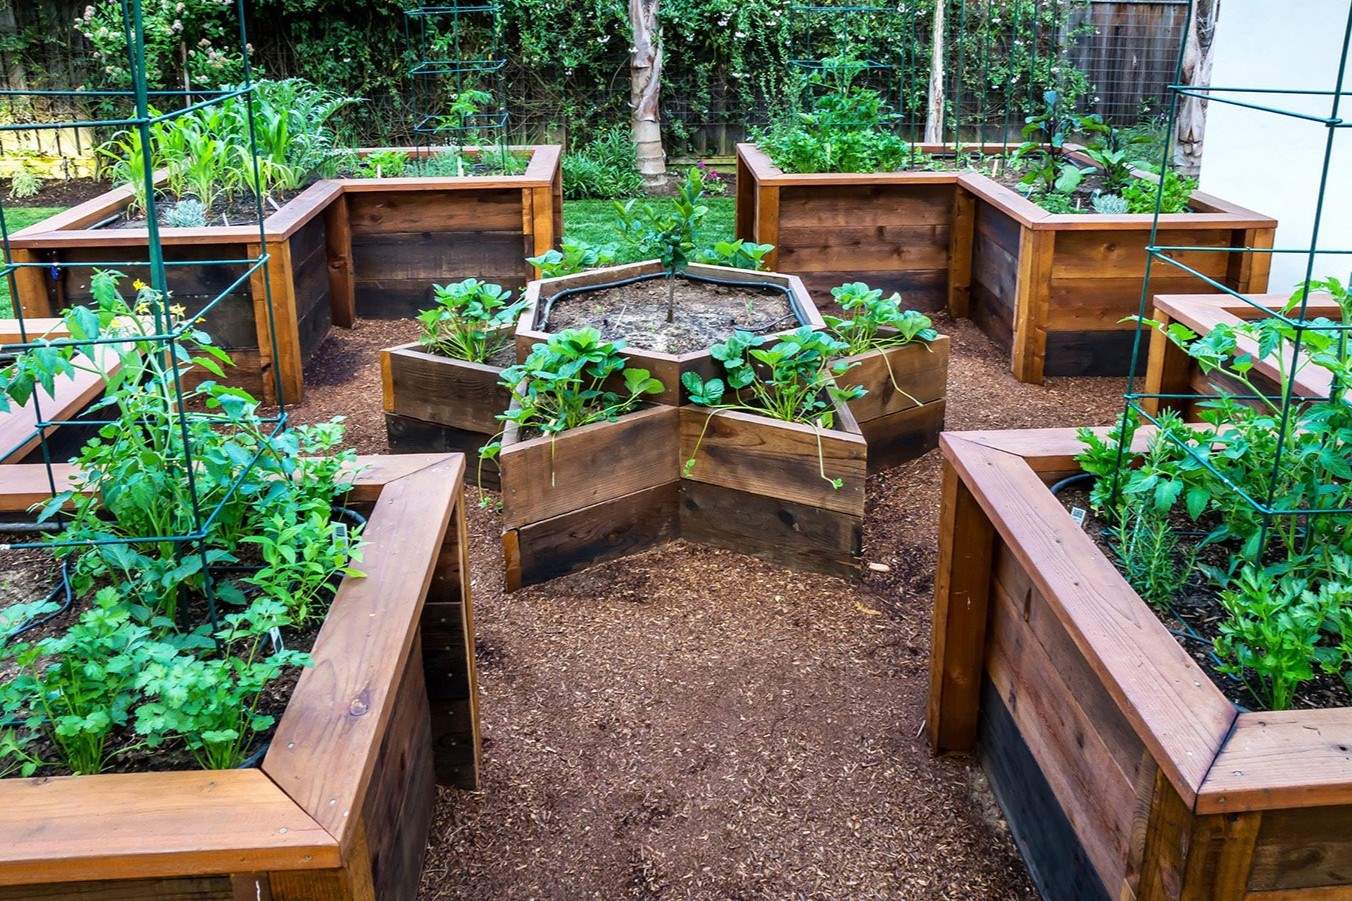
A 4-by-8-foot bed made from two courses of 2-by-8 boards needs four long boards and four short boards. If you use 2-by-6 lumber, the bed will be about 11 inches high after the boards are joined. Lumber dimensions are smaller than their names, so a 2-by-8 is usually about 1½ by 7¼ inches.
| Item | Suggested amount for a 4-by-8-foot bed | Why you need it |
|---|---|---|
| Cedar or other durable boards | 8 boards, 8 feet long | Two courses for an 11- to 14-inch frame |
| Exterior structural screws | 32–48 | Four to six screws at each corner |
| Corner posts or stakes | 4–8 | Hold corners and reduce movement |
| Galvanized angle brackets | 4–8 | Add strength to long sides |
| Weed-free cardboard | Enough for the footprint | Smothers grass without plastic |
| Level and tape measure | 1 each | Keeps the frame square and even |
| Drill, driver bit, and drill bit | 1 set | Drilling prevents split ends |
| Shovel, rake, and wheelbarrow | 1 each | Site prep and soil mixing |
For a bed taller than 18 inches, add internal cross braces. A long wall filled with wet soil can bow outward with surprising force.
Use the right screws
Choose hot-dipped galvanized or stainless steel screws made for outdoor construction. Stainless steel performs best near salt air, but galvanized screws cost less and work well in most inland gardens.
Use screws long enough to pass through one board and enter the adjoining board by at least 1½ inches. For common 1½-inch-thick lumber, 2½- or 3-inch screws work well.
Avoid toxic or unsuitable liners
Do not line the inside of a food-growing bed with roofing felt, old carpet, vinyl, or unknown plastic. These materials may break down or release unwanted compounds. A thin layer of untreated cardboard under the bed is usually enough to suppress grass.
You can use hardware cloth under a bed if voles, moles, or gophers cause trouble. Choose ½-inch galvanized hardware cloth and extend it under the full footprint. Bend the edges upward inside the frame to block digging pests.
Prepare a level, well-drained site
The best way to make a raised bed last is to prepare the ground before the frame goes in. A bed that sits on a slope twists over time. A bed that sits in a low, wet spot rots from the bottom up.

Choose a location with at least 6 to 8 hours of direct sun for tomatoes, peppers, squash, beans, and most fruiting crops. Leafy greens can tolerate less sun, especially in hot USDA Zones 8 through 10.
Keep the bed away from large trees. Tree roots steal water and nutrients, while tree shade can reduce yields. Black walnut deserves special care because its roots and leaves can release juglone, a compound that harms some plants, including tomatoes and peppers.
Clear and measure the area
Remove grass, weeds, rocks, and thick roots. Mark a rectangle with stakes and string. Measure the diagonals from corner to corner. If both diagonals match, the outline is square.
For grass, you have two choices. Remove the sod for a clean start, or lay overlapping sheets of plain cardboard under the bed. Remove tape and glossy labels first. Cover every gap by at least 6 inches.
Level the frame, not just the soil
Set the boards in place and check them with a 2-foot level. Dig down on the high side rather than building up one corner with loose soil. Loose fill settles and leaves the frame twisted.
A slight slope inside the bed is not a major problem, but a twisted frame puts stress on every joint. Take time here. A level base is one of the cheapest ways to improve durability.
🌱 Beginner Note: Do not place a raised bed on a concrete patio unless you plan for drainage. Use a bottom with drainage holes, a liner that does not block water, and a lighter soil mix. A standard soil-filled bed can weigh several thousand pounds.
Build the raised bed step by step
A durable raised garden bed does not need complex joinery. It needs square corners, sound fasteners, strong long sides, and room for the soil to drain.

1. Cut and inspect the boards
Cut boards to length if needed. Inspect each one for deep cracks, soft spots, bark pockets, or severe warping. A small knot is fine. A split that runs through a corner is not.
For a 4-by-8-foot bed, use 8-foot boards for the long sides. Cut four boards to about 45 inches for the short sides if you want the finished outside width close to 4 feet. The exact cut depends on your board thickness and how you place the corners.
2. Dry-fit the first course
Place the boards in position without screws. Check the outside dimensions and measure both diagonals. Adjust the boards until the corners are square.
If the bed sits on soil, hold each corner in place with a temporary stake. This makes the frame easier to align while you drill.
3. Drill pilot holes
Drill pilot holes before driving screws near board ends. The pilot hole should be slightly smaller than the screw shaft. This reduces splitting, especially in cedar and dry oak.
Place at least four screws at each corner for a 2-by-8 board. Keep the screws about ¾ inch from the board edges and stagger them so they do not collide.
4. Fasten the corners
Join the first long board to the short board. Check the corner again, then drive the screws. Repeat around the frame.
Do not overdrive the screws. The screw head should sit flush with the wood, not deep enough to crush the surface. Crushed wood holds water and weakens the joint.
5. Add the second course
If you want a taller bed, stack a second course of boards. Stagger the corner joints so the upper joints do not sit directly above the lower joints. This spreads stress across the frame.
Fasten the upper course to the lower course with screws every 18 to 24 inches. Use corner posts on the inside or outside if the bed is 18 inches high or more.
6. Install braces on long sides
A 4-foot side usually needs little support. An 8-foot side benefits from one center brace, especially when the bed is 18 inches deep. Use a short piece of treated-free outdoor lumber, cedar, or a galvanized metal brace.
You can also drive a sturdy stake against the outside center of the long wall. An internal brace looks cleaner and stays protected from mower wheels and foot traffic.
7. Add pest protection
If you have voles or gophers, place galvanized hardware cloth under the bed before filling it. Secure the mesh to the inside of the frame with heavy staples or screws and washers. Overlap seams by at least 6 inches.
For slugs, hardware cloth will not help. Use clear boards, hand picking, reduced mulch near seedlings, and habitat control. Avoid relying on salt, which damages soil and nearby plants.
8. Fill the bed in layers
Do not fill a deep bed with only bagged potting soil. It costs too much and may settle sharply. Do not use only native clay or topsoil either. It can compact and drain poorly.
A reliable mix for most vegetables is:
- 50% screened topsoil
- 30% finished compost
- 20% aeration material, such as aged pine fines or coarse coconut coir
For a 12-inch bed, you can use about 60% topsoil and 40% compost if the compost is mature and not too rich. Avoid fresh manure. It can burn roots and may contain weed seeds or pathogens.
Add soil in 3- to 4-inch layers. Water each layer lightly and mix it with a garden fork. Do not walk inside the bed. Foot traffic removes air from the soil and creates dense areas that roots cannot use.
9. Finish with mulch
Apply 1 to 2 inches of shredded leaves, straw, or finished compost after planting. Keep mulch 2 inches away from tomato stems, pepper stems, and other soft plant crowns.
Mulch reduces evaporation and soil splash. Soil splash spreads diseases such as early blight and septoria leaf spot from the soil onto tomato foliage.
Choose soil that stays loose and fertile
Raised beds drain better than many garden plots, but they can also dry out faster. Soil structure must hold moisture while leaving air spaces for roots.
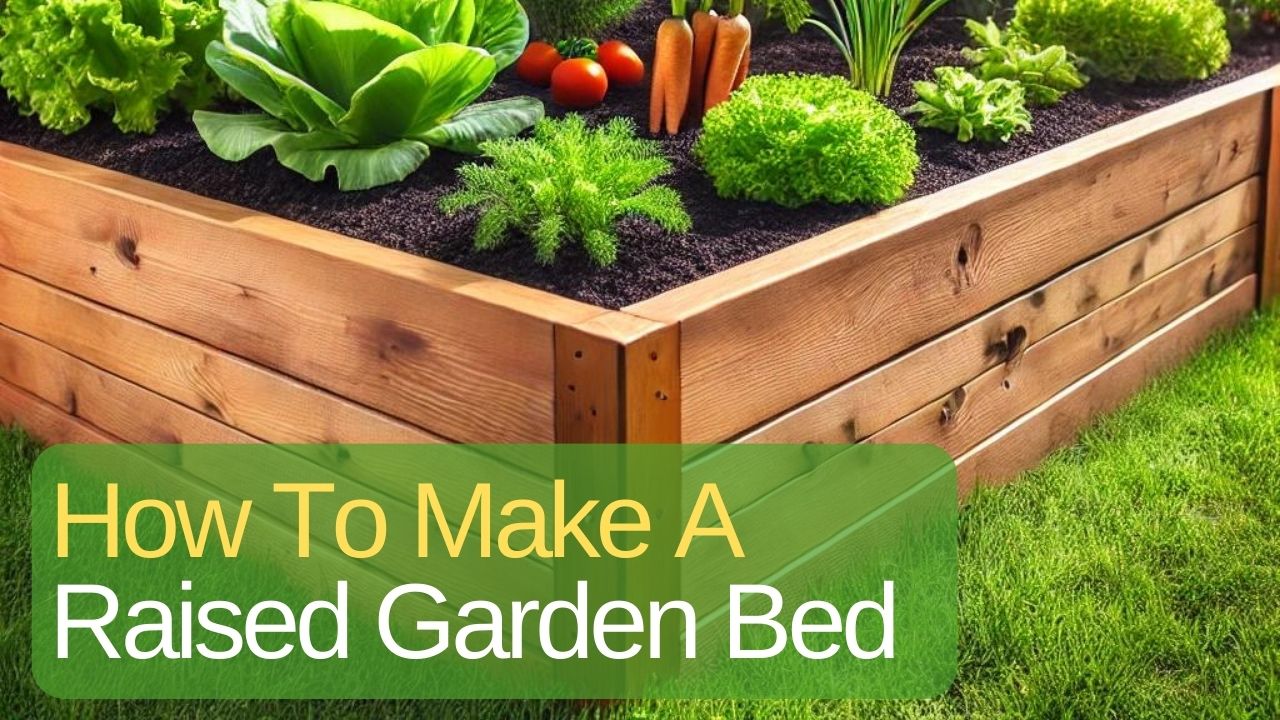
A good raised bed mix should crumble in your hand, drain after heavy rain, and hold together when watered. If water sits on the surface for more than a few minutes, the mix may contain too much clay or fine compost.
Test the soil after the bed settles for a few weeks. Most vegetables prefer a pH between 6.0 and 7.0. Blueberries need much more acidic soil, around pH 4.5 to 5.5, so they usually deserve a separate container or dedicated bed.
Match amendments to a soil test
Do not add lime, sulfur, bone meal, or large amounts of fertilizer based on guesswork. A soil test tells you the pH, phosphorus, potassium, and organic matter level.
Compost improves structure, but it is not a complete fertilizer in a predictable ratio. A balanced organic fertilizer such as 4-4-4 can help hungry crops, but the right amount depends on the label and soil test.
Avoid a compost-heavy mix
Fresh or unfinished compost may heat up, shrink, or tie up nitrogen. Compost made from biosolids may also contain salts or contaminants, depending on the source. Buy compost from a supplier that provides testing information when possible.
I once filled a new bed with a dark, rich compost blend that looked perfect. After four weeks, the soil had dropped nearly 3 inches, and seedlings showed pale leaves. The mix had settled and held too much water. I added screened topsoil and pine fines, and the bed performed much better the next season.
Plant and water with the bed’s design in mind
A raised bed works best when you plant by height, root depth, and water need. Put tall crops on the north side so they do not shade shorter plants. In the Southern Hemisphere, use the south side.

Plant tomatoes, peppers, eggplants, cucumbers, and squash where they can receive full sun. Lettuce, spinach, cilantro, and parsley tolerate some afternoon shade. In USDA Zones 8 through 10, afternoon shade can prevent lettuce and cilantro from bolting too soon.
Use drip irrigation or a soaker hose under mulch. Hand watering with a spray wand works for small beds, but it can splash soil onto leaves and create dry spots near the edges.
| Crop group | Sun and spacing need | Watering approach |
|---|---|---|
| Tomatoes and peppers | Full sun; allow 18–24 inches per plant | Deep watering when top 1–2 inches dry |
| Lettuce and spinach | Full sun to part shade; close spacing | Light, steady moisture |
| Carrots and radishes | Full sun; loose soil | Keep the top inch moist during germination |
| Beans and cucumbers | Full sun; trellis saves space | Water deeply during flowering |
| Herbs such as thyme and rosemary | Full sun; fast drainage | Let the surface dry between watering |
Water slowly until moisture reaches 6 to 8 inches deep. In sandy mixes, you may need water more often. In heavy mixes or cool spring weather, watering once or twice each week may be enough.
Check moisture with your finger or a soil probe. Do not follow a fixed schedule during heat waves, cool rain, or early spring. Weather changes the bed’s needs.
Protect the structure through every season
Durability comes from small checks done before problems grow. Inspect the bed in spring, after heavy rain, and before winter in cold regions.
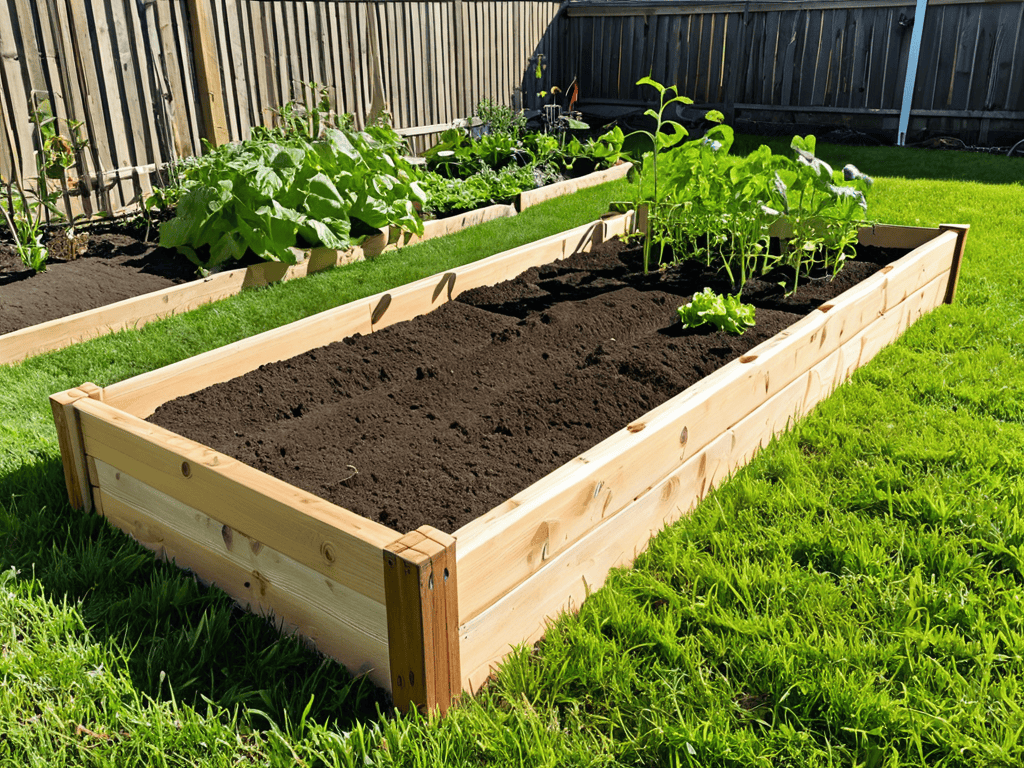
Look for loose screws, split corners, bowed sidewalls, soil erosion, and wood that stays dark and soft. Pay special attention to the bottom edge of the boards. That is where wet mulch and poor drainage cause the most damage.
| Season | Raised bed maintenance task | Reason |
|---|---|---|
| Early spring | Tighten screws, check level, top up settled soil | Repairs are easier before planting |
| Late spring | Inspect irrigation and mulch depth | Prevents dry roots and wet stems |
| Summer | Check for bowing, rot, and pest entry | Heavy wet soil stresses the walls |
| Fall | Remove diseased plant debris and repair joints | Reduces disease and winter damage |
| Winter | Keep drainage paths open; avoid piling snow against wood | Limits long-term moisture exposure |
Do not seal cedar with an unknown wood product if you grow food. If you want to protect the outside, use a product labeled for garden use and follow the cure time. Some gardeners leave cedar unfinished because it ages naturally and remains easy to inspect.
⚠️ Warning: Never burn old treated lumber from a raised bed. Ash can concentrate chemicals and should not go into a vegetable garden or compost pile.
Fix common raised bed problems
Most raised bed problems have clear signs. The key is to correct the cause rather than add more fertilizer or water.

| Problem or symptom | Likely cause | Practical fix |
|---|---|---|
| Wall bows outward | Long side lacks a brace | Add an internal cross brace or exterior stake |
| Soil stays wet | Poor drainage or fine, dense mix | Add aeration material and check the site slope |
| Soil drops several inches | Compost settled or decomposed | Top up with screened topsoil and mature compost |
| Wood turns soft at the base | Standing water or mulch against the wall | Improve drainage and pull mulch away |
| Plants wilt in damp soil | Root damage or poor oxygen supply | Reduce watering and improve soil structure |
| Voles tunnel under plants | Open base on native soil | Install ½-inch galvanized hardware cloth |
| Tomato leaves get brown spots | Soil splash and wet foliage | Mulch, water at soil level, improve airflow |
A bowed wall can often be repaired without emptying the bed. Remove soil from the inside near the affected section, install a brace, and refill the soil in layers. If the wood is soft enough to crumble, replace the board rather than reinforce it.
Repair loose corners
Remove any loose screw and inspect the wood. If the hole is stripped, shift the new screw at least ½ inch away or insert a hardwood dowel and redrill the pilot hole.
For a cracked corner, add a galvanized angle bracket on the inside. If the crack reaches the bottom edge, replace the board. A bracket may hold for a season, but it will not restore rotten wood.
Repair settled soil
Top up the bed in spring with a mix of about two parts topsoil to one part finished compost. Avoid adding a thick layer of pure compost. It can create a sharp change in texture between the old and new soil.
If the bed settles every year by more than 2 inches, inspect the original mix. Large amounts of leaf mold, wood chips, or fresh compost may still be decomposing.
🔧 Quick Fix: If water runs off the bed instead of soaking in, roughen the top 2 inches with a hand fork. Then add a thin layer of mature compost and mulch. Do not flood the bed to force water into compacted soil.
Raised beds versus other garden styles
A raised bed is not right for every yard. It costs more than planting directly in the ground, and it may need more irrigation in hot weather.

In-ground beds use native soil and can support deep-rooted crops without extra construction. They work well where the soil drains freely and is not contaminated. Mounded rows offer some of the benefits of raised beds with less lumber.
Containers suit patios and renters, but they dry out faster and have less space for roots. Grow bags cost less and provide good drainage, though they can become unstable and need frequent watering.
| Garden style | Main advantage | Main limitation |
|---|---|---|
| Raised wood bed | Strong soil control and easy access | Costs more and eventually needs repair |
| In-ground garden | Low cost and large root zone | Native soil may drain poorly or contain weeds |
| Fabric grow bag | Portable and inexpensive | Dries fast and may last only a few seasons |
| Plastic container | Works on patios and balconies | Limited soil volume and heat near roots |
| Stone or block bed | Very long life | Heavy, permanent, and harder to change |
For a rental property, grow bags or modular plastic beds may make more sense. For a forever garden, stone, block, or black locust may justify the higher first cost.
Estimate the time and cost
A basic 4-by-8-foot cedar bed usually takes one to three hours to build once the site is ready. Add more time if you remove sod, install gopher mesh, mix soil by hand, or build a trellis.
Current pricing ranges from roughly $80 to $200 for a simple untreated pine or cedar frame, excluding soil. A durable cedar bed with hardware cloth, braces, and purchased soil may cost $250 to $500. Metal, stone, and plastic lumber can cost more.
Soil often becomes the largest expense. A 4-by-8-foot bed that is 12 inches deep needs about 32 cubic feet of material, or nearly 1.2 cubic yards. An 18-inch bed needs about 48 cubic feet, or nearly 1.8 cubic yards.
Use this formula:
Length in feet × width in feet × depth in feet = cubic feet
Divide cubic feet by 27 to estimate cubic yards. Add about 10% for settling, especially when the mix contains compost.
Know when to hire help
Most gardeners can build a low bed with common tools. Hire a professional or experienced carpenter when the bed will retain a large amount of soil, sit against a foundation, or exceed about 24 inches in height.
Get help if the site has a steep slope, buried utility lines, drainage problems, or contaminated soil. A tall retaining-style bed can push against walls and shift if the base is not designed well.
Call an electrician before digging near outdoor wiring. Call the utility locating service before driving long stakes into unknown ground. A five-minute check can prevent a serious injury.
Personal lessons from long-term beds
My first raised bed was made from inexpensive pine. I used no center brace and filled it with a compost-heavy mix. By the end of the second wet winter, one long side had bowed, the corner screws had loosened, and the soil had fallen by nearly 4 inches.
The repair taught me three things. First, long walls need support even when the wood looks thick. Second, compost is useful but should not make up most of the soil volume. Third, a bed needs a small air gap or clean drainage path around its outside walls.
The cedar bed I built after that has held its shape for more than two growing seasons with very little work. I added a center brace, used galvanized structural screws, and kept mulch away from the wood. In a damp Zone 6 garden, those small changes mattered more than any decorative finish.
I also learned not to make every bed 18 inches high. That height is helpful for carrots and access, but it uses much more soil. For lettuce, basil, onions, and annual flowers, a 10- to 12-inch frame is enough.
Mistakes that shorten a bed’s life
Avoid these common errors when you build a raised garden bed:
- Using drywall screws: They snap and rust outdoors.
- Skipping pilot holes: Cedar and oak split near the ends.
- Building on a slope: The frame twists and joints pull apart.
- Making the bed too wide: You compact soil when reaching the center.
- Using fresh manure: It can burn roots and carry pathogens.
- Filling with pure compost: The mix settles and may hold too much water.
- Leaving long walls unbraced: Wet soil can bow the sides.
- Placing mulch against wood: Constant damp contact speeds rot.
- Ignoring pests below the bed: Voles can reach roots from underneath.
- Watering by the calendar: Soil and weather change the real need.
The most expensive mistake is usually building in the wrong place. A bed with poor sunlight or constant standing water will disappoint even if the frame lasts for decades.
FAQs about durable raised garden beds
Q: What is the longest-lasting wood for a raised garden bed?
A: Black locust, durable white oak, and some grades of redwood can last for many years. Cedar offers the best balance of availability, workability, and decay resistance for most home gardeners. Life still depends on drainage, climate, and soil contact.
Q: Is pressure-treated wood safe for vegetable gardens?
A: Modern residential treated lumber uses preservatives that differ from older arsenic-based products, but many gardeners still prefer cedar, redwood, or recycled plastic for food beds. Do not use old treated lumber of unknown age or type. Keep treated wood away from direct contact with edible roots when in doubt.
Q: Should a raised garden bed have a bottom?
A: Usually, no. An open-bottom bed drains better and lets earthworms and plant roots move into the native soil. Add a bottom only for a patio, balcony, contaminated ground, or serious pest problem. Any bottom must have large, open drainage holes.
Q: How deep should a raised bed be for tomatoes?
A: Use at least 12 inches of good soil, with 18 inches preferred for strong root growth and steady moisture. Tomatoes also need full sun, rich but well-drained soil, and support such as a cage or trellis.
Q: Can I put a raised bed on grass?
A: Yes. Remove the sod or cover the grass with overlapping plain cardboard. Add a thick soil layer above it. Perennial weeds such as bindweed and quackgrass may still grow through, so remove aggressive roots before building.
Q: Do I need landscape fabric under a raised bed?
A: No, not in most gardens. Landscape fabric can block earthworms and slow drainage. Cardboard works better for smothering grass. Use ½-inch hardware cloth instead when your main concern is voles or gophers.
Q: How often should I replace the soil?
A: You usually do not need to replace healthy raised bed soil. Each spring, add 1 to 2 inches of finished compost and mix only the top few inches. Replace soil when it contains disease-contaminated material, persistent herbicide residue, or severe salt buildup.
Q: How long does a cedar raised bed last?
A: A cedar bed often lasts 8 to 15 years, though dry climates may extend its life and wet climates may shorten it. Thick boards, good airflow, raised edges, and strong joints improve longevity. Inspect the lower edges each year.
Q: Can I use garden soil in a raised bed?
A: Use garden soil only as part of the mix. Pure native soil can become heavy and compacted inside a raised frame. Blend screened topsoil with mature compost and an aeration material suited to your climate.
Q: What is better for a raised bed: screws or nails?
A: Exterior structural screws are easier to remove and hold well during seasonal movement. Galvanized ring-shank nails can also work, but they make repairs harder. Avoid drywall screws because they are brittle and not made for outdoor use.
Q: Why is my raised bed soil sinking?
A: Soil sinks when compost, leaves, wood chips, or other organic materials decompose. Some settling is normal during the first season. Add screened topsoil and mature compost rather than filling the gap with fresh organic matter.
Q: How do I stop a raised bed from bowing?
A: Add a center brace to any long side, especially when the bed is 18 inches deep or more. Use corner posts and strong screws. If the wood has begun to rot, replace the board before adding support.
Q: Can I grow blueberries in a raised bed?
A: Yes, but blueberries need acidic soil with a pH near 4.5 to 5.5. Use a separate bed or large container filled with an acid-loving plant mix. Do not mix lime or alkaline compost into that bed.
Q: What should I plant in a new raised bed?
A: Start with forgiving crops such as lettuce, bush beans, radishes, kale, basil, and Swiss chard. Add tomatoes, peppers, carrots, and cucumbers once you understand the bed’s drainage and watering pattern. Marigolds and alyssum can attract pollinators, but they do not replace pest control.
Final recommendation
Build the smallest bed that fits your space, then make its frame stronger than it looks necessary. Use cedar or another durable material, brace long sides, keep the bottom open, and fill the bed with a balanced soil mix. Good drainage will protect the wood, while steady mulch and seasonal inspections will protect the soil.
For most home gardens, a 4-by-8-foot bed that is 12 to 18 inches deep offers the best mix of cost, access, and growing space. If you live in a wet climate, focus on drainage and rot resistance. If you garden in a hot, dry zone, focus on mulch, irrigation, and soil that holds moisture without becoming dense.
A durable raised garden bed is not just a box. It is a small growing system. Build the structure well, feed the soil each season, and it can produce vegetables, herbs, flowers, and pollinator plants for many years.
Meta description: Learn how to build a durable raised garden bed with strong materials, proper braces, safe soil, drainage, pest protection, maintenance tips, costs, and step-by-step instructions.