How To Layout A Raised Bed Garden: Easy Design Guide
A raised bed garden turns a patch of soil into a clear, productive growing space. You control the soil, drainage, plant spacing, and walking paths instead of fighting poor ground conditions. A good layout also makes watering, weeding, crop rotation, and harvest much easier.
The main goal is simple: give each plant enough sun, root room, air flow, and access. Most raised beds fail because they look neat on paper but are too wide to reach, too close to a fence, or placed where trees and buildings cast shade. I have learned that a few minutes with a tape measure can save hours of digging and moving soil later.
This guide explains how to layout a raised bed garden for vegetables, herbs, flowers, and small fruits. It covers bed size, orientation, paths, sunlight, spacing, irrigation, soil depth, accessibility, seasonal use, and common mistakes. The advice works for small yards, suburban lots, patios, and larger gardens across USDA hardiness zones.

Quick answer: plan the garden before building the beds
The best way to layout a raised bed garden is to choose a sunny, level site, orient long beds north to south, leave at least 18 to 24 inches between beds, and keep each bed no wider than 4 feet when you can reach both sides. Place tall crops on the north side, use paths for access, and leave room for water lines, wheelbarrows, and future expansion.
A productive raised bed garden needs at least 6 hours of direct sun for most vegetables. Fruiting crops such as tomatoes, peppers, cucumbers, squash, and eggplants often perform better with 8 or more hours.
Start with one or two beds if this is your first season. A smaller layout is easier to water and maintain. You can add more beds after you learn how much time, compost, and water your site needs.
Choose the right location first
The best garden layout starts with the site, not the lumber. Walk around your yard at different times of day and watch how sunlight moves across the ground. A spot that looks sunny at 10 a.m. may sit in shade by 3 p.m.

Choose a site with these traits:
- Six to eight hours of direct sun
- Good air movement
- Easy access to a water source
- A level or gently sloped surface
- No standing water after rain
- Distance from large tree roots
- Enough room for paths and tools
Avoid placing beds under walnut trees when possible. Black walnut roots and fallen leaves can release juglone, a natural compound that harms some plants. Tree roots also compete for water and nutrients. In my garden, beds near mature maples dried out much faster than beds only 20 feet away.
Check the sun during the growing season
Sunlight changes with the seasons. In early spring, a fence may cast a long shadow. By midsummer, the same fence may cause little trouble. Use a phone compass app, a simple sun map, or mark shadows with stakes.
For most vegetable gardens, the long side of each bed should run north to south. This lets sunlight reach both sides of rows as the sun moves across the sky. An east-to-west bed can still work, but tall plants may shade shorter crops for much of the day.
Watch for water and drainage problems
Raised beds improve drainage, but they do not fix a site that stays wet. If water pools in the area after a storm, solve the drainage issue first. You may need a shallow swale, a French drain, or a different location.
Do not place beds where roof runoff lands. One heavy storm can wash out seeds, compact soil, and flood plant roots. Keep beds several feet away from downspouts unless you install a safe rain garden or controlled drainage system.
Measure the site before you draw it
Measure the usable space, then subtract room for paths. Mark the corners with stakes and string. Walk the planned routes with a wheelbarrow.
I prefer drawing the garden on graph paper with one square equal to 1 foot. A free garden planning app can also help, but paper makes it easy to test several layouts. Include fences, sheds, trees, gates, hose bibs, and power outlets.
Select bed dimensions that make work easy
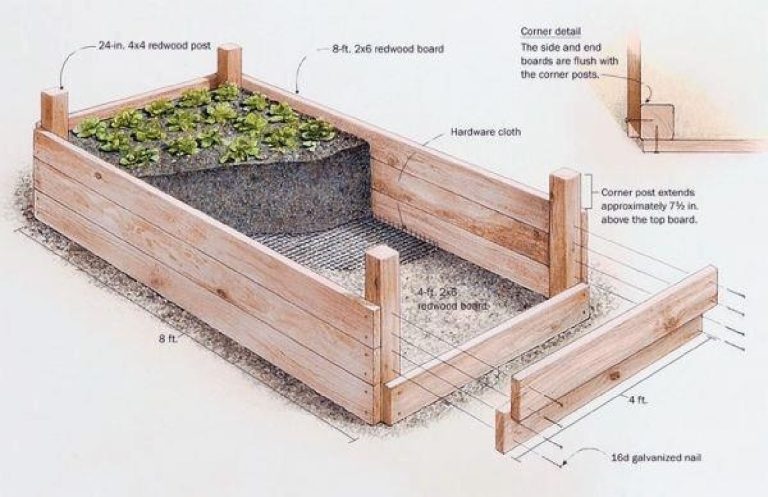
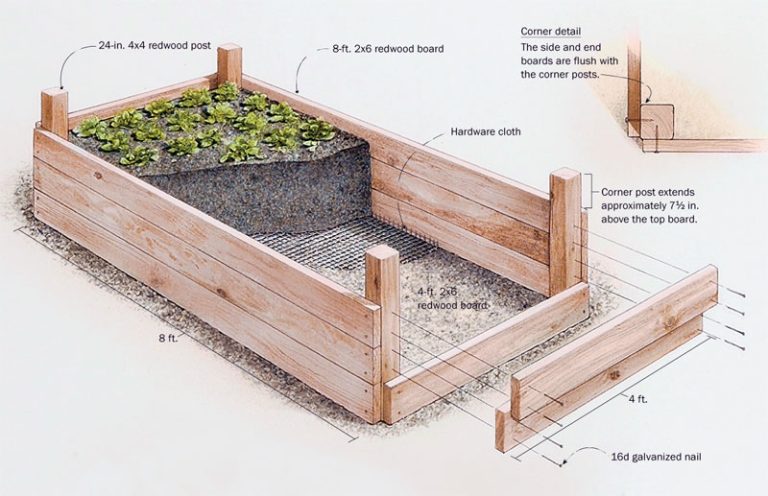
A raised bed should fit your reach and your tools. The standard width for a bed that you can reach from both sides is 4 feet. A bed against a wall or fence should be no more than 2 feet wide.
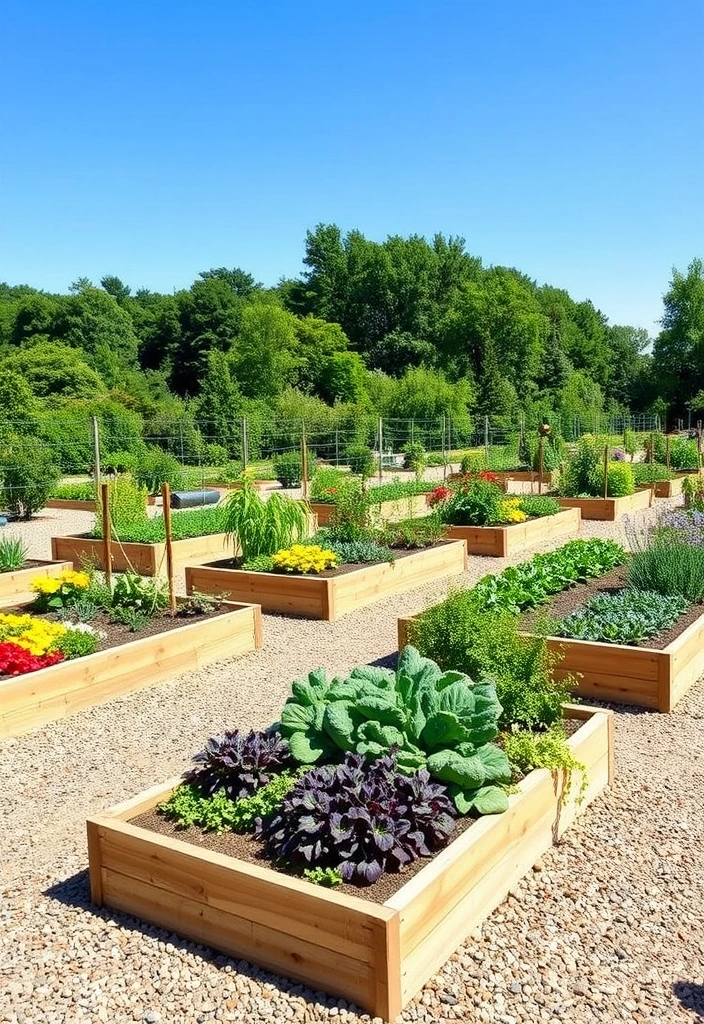
Most gardeners do not need beds wider than 4 feet. You should never need to step into the growing soil. Walking on it crushes air pockets and creates hard, wet zones around plant roots.
Bed length depends on the site. Four-foot, 6-foot, and 8-foot beds are easy to build and cover. A 4-by-8-foot bed gives you 32 square feet of growing space while keeping the layout simple.
| Bed location | Practical width | Useful length |
|---|---|---|
| Open bed, reachable from both sides | 3 to 4 feet | 4 to 12 feet |
| Bed beside a fence or wall | 18 to 24 inches | 4 to 12 feet |
| Accessible bed for seated gardening | 2 to 3 feet | 4 to 8 feet |
| Narrow herb or flower bed | 18 to 30 inches | 4 to 10 feet |
A narrower bed often works better than a larger one. You may lose a few square feet, but you gain easier planting, weeding, and harvest.
Plan bed height around soil and mobility
A bed 6 to 12 inches tall works for most vegetables when the soil below drains well. A 12- to 18-inch bed gives roots more loose soil and reduces bending. Beds 24 inches tall or higher can help gardeners who use a chair or have back pain, but they need stronger walls and more soil.
For carrots, parsnips, daikon radishes, and long-rooted crops, aim for at least 12 inches of loose soil. Potatoes grow well in 12 to 18 inches, especially when you add soil or compost as stems grow.
A tall bed costs more to fill. It also dries out faster in hot climates. In USDA zones 8 through 10, I use drip irrigation and a 2- to 3-inch mulch layer on taller beds.
Keep corners and edges safe
Square corners use space well, but they can become trip hazards. Round or beveled corners help in busy yards. Sand rough wood edges and use exterior screws that do not protrude.
Do not use old railroad ties or treated wood of unknown age. Modern pressure-treated lumber made for residential use is generally accepted for garden beds, but avoid salvaged wood that may contain creosote, paint, or industrial chemicals.
Design paths, access, and work zones
A garden layout works only if you can move through it. Paths should fit your feet, hose, kneeler, cart, and wheelbarrow. A beautiful garden with narrow paths quickly becomes frustrating.

Use 18 to 24 inches for footpaths. Increase the width to 30 or 36 inches if you want a wheelbarrow to pass. Main paths near the gate or compost bin should be 36 to 48 inches wide.
Leave at least 12 inches between a raised bed and a fence so you can inspect the back wall. If you need to reach both sides of a fence-side bed, leave 24 inches or more.
| Path use | Minimum width | More comfortable width |
|---|---|---|
| One person walking | 18 inches | 24 inches |
| Kneeling and hand weeding | 24 inches | 30 inches |
| Wheelbarrow access | 30 inches | 36 to 48 inches |
| Two people or garden cart | 36 inches | 48 inches |
The main path should connect the entrance, water source, compost area, tool storage, and each bed. Avoid making people walk around the entire garden to reach one bed.
Choose path materials
Grass paths feel cool and soft, but they need mowing and edging. Wood chips create a low-cost surface and improve soil over time as they break down. Gravel drains well but can move into lawns and become difficult for small wheels.
Landscape fabric under wood chips can reduce weeds for a short time, but it often makes later changes harder. I prefer a thick layer of arborist chips, usually 4 to 6 inches deep, with cardboard below it when starting over turf.
Do not use fresh wood chips inside the beds. They can tie up nitrogen as they decompose. Aged compost, leaf mold, and finished organic matter belong in the growing soil.
Make room for a garden cart
A 4-foot bed may look small, but a loaded cart needs space to turn. Test the layout with a real wheelbarrow before adding soil. This small step often reveals that a corner is too tight.
Place compost bins near the garden but not where they shade crops. Keep hoses on the outer edge of paths. A hose reel near the entrance reduces dragging and prevents plants from being crushed.
💡 Pro Tip: Lay cardboard on the planned paths and walk them for a week. If you keep stepping outside the cardboard, widen the path before building the beds.
Arrange crops by height and sunlight
Tall plants should usually go on the north side of the garden. This reduces shade on lettuce, carrots, radishes, onions, and other low crops. Trellises count as tall structures, even when the crop itself starts small.
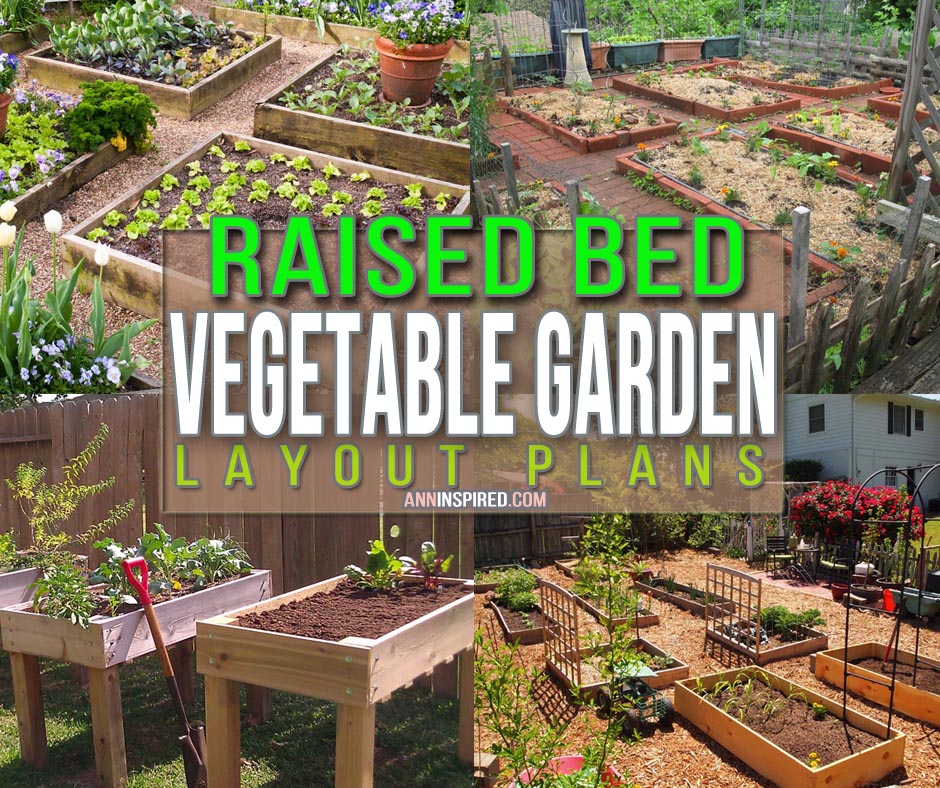
Place tomatoes, pole beans, cucumbers, peas, corn, and sunflowers where they will not block short plants. In a north-to-south layout, tall crops can go along the north end of each bed. In an east-to-west bed, place tall crops on the north edge.
The height of a crop changes during the season. A young tomato does not shade anything in May, but an indeterminate variety such as ‘Sun Gold’ can reach 8 feet by midsummer.
| Crop group | Typical height | Layout position |
|---|---|---|
| Lettuce, radish, carrot, spinach | 4 to 18 inches | South or open edge |
| Bush bean, pepper, basil, chard | 12 to 30 inches | Middle or south side |
| Tomato, cucumber, pole bean, corn | 4 to 10 feet | North side or trellis |
Use trellises to save space, but anchor them well. A cucumber trellis loaded with vines becomes heavy and catches wind. Set posts at least 12 inches into the soil or attach the frame to the bed structure.
Avoid crowding crops
Plant spacing depends on the mature size of the plant, not the size of the seedling. A pepper transplant may be 6 inches tall but need 18 inches of space. A zucchini plant can spread 3 to 5 feet.
Square-foot gardening can help beginners plan space. You might grow one tomato, four lettuce plants, nine onions, or sixteen radishes in a square foot. Still, use the final size of each variety as the deciding factor.
Crowded plants compete for light and air. This can increase fungal diseases such as powdery mildew, early blight, and downy mildew. Good spacing also makes it easier to find tomato hornworms, cabbage worms, aphids, and squash bugs.
Group crops by water needs
Place crops with similar water needs together. Lettuce, spinach, celery, and radishes prefer steady moisture. Rosemary, thyme, sage, and many Mediterranean herbs prefer drier soil.
This grouping makes drip irrigation more efficient. It also prevents you from overwatering herbs while trying to keep lettuce crisp. In hot climates, group thirsty crops where afternoon shade or a shade cloth can protect them.
Pick the best raised bed layout for your space
There is no single perfect raised bed garden design. The best arrangement depends on yard shape, sun, mobility, soil, climate, and how much time you have for care.

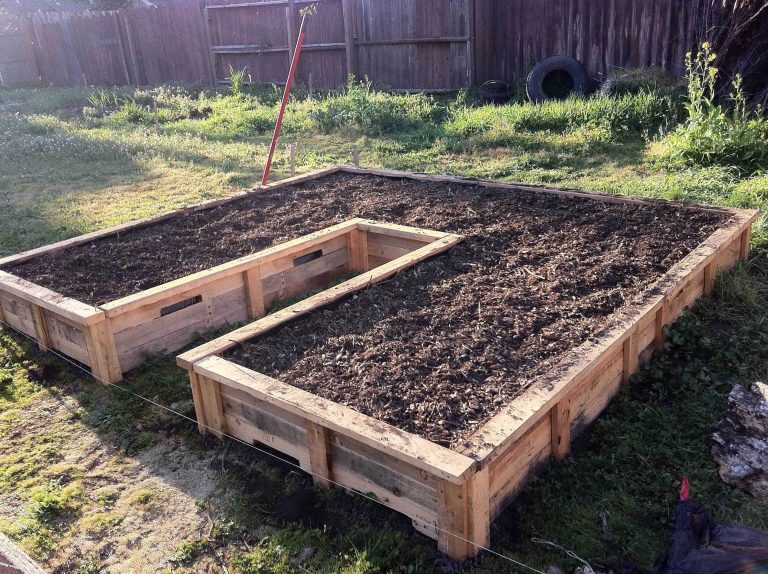
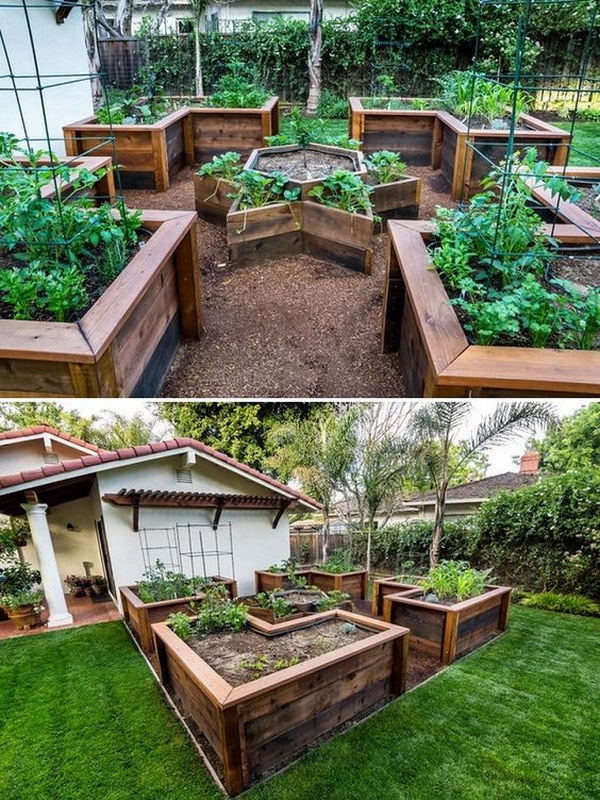
A simple grid works well for most home gardens. L-shaped and U-shaped layouts can improve access in a wide area, but they may create narrow inside corners. Keyhole gardens save walking space in dry regions, while tiered beds suit slopes.
Four-bed grid layout
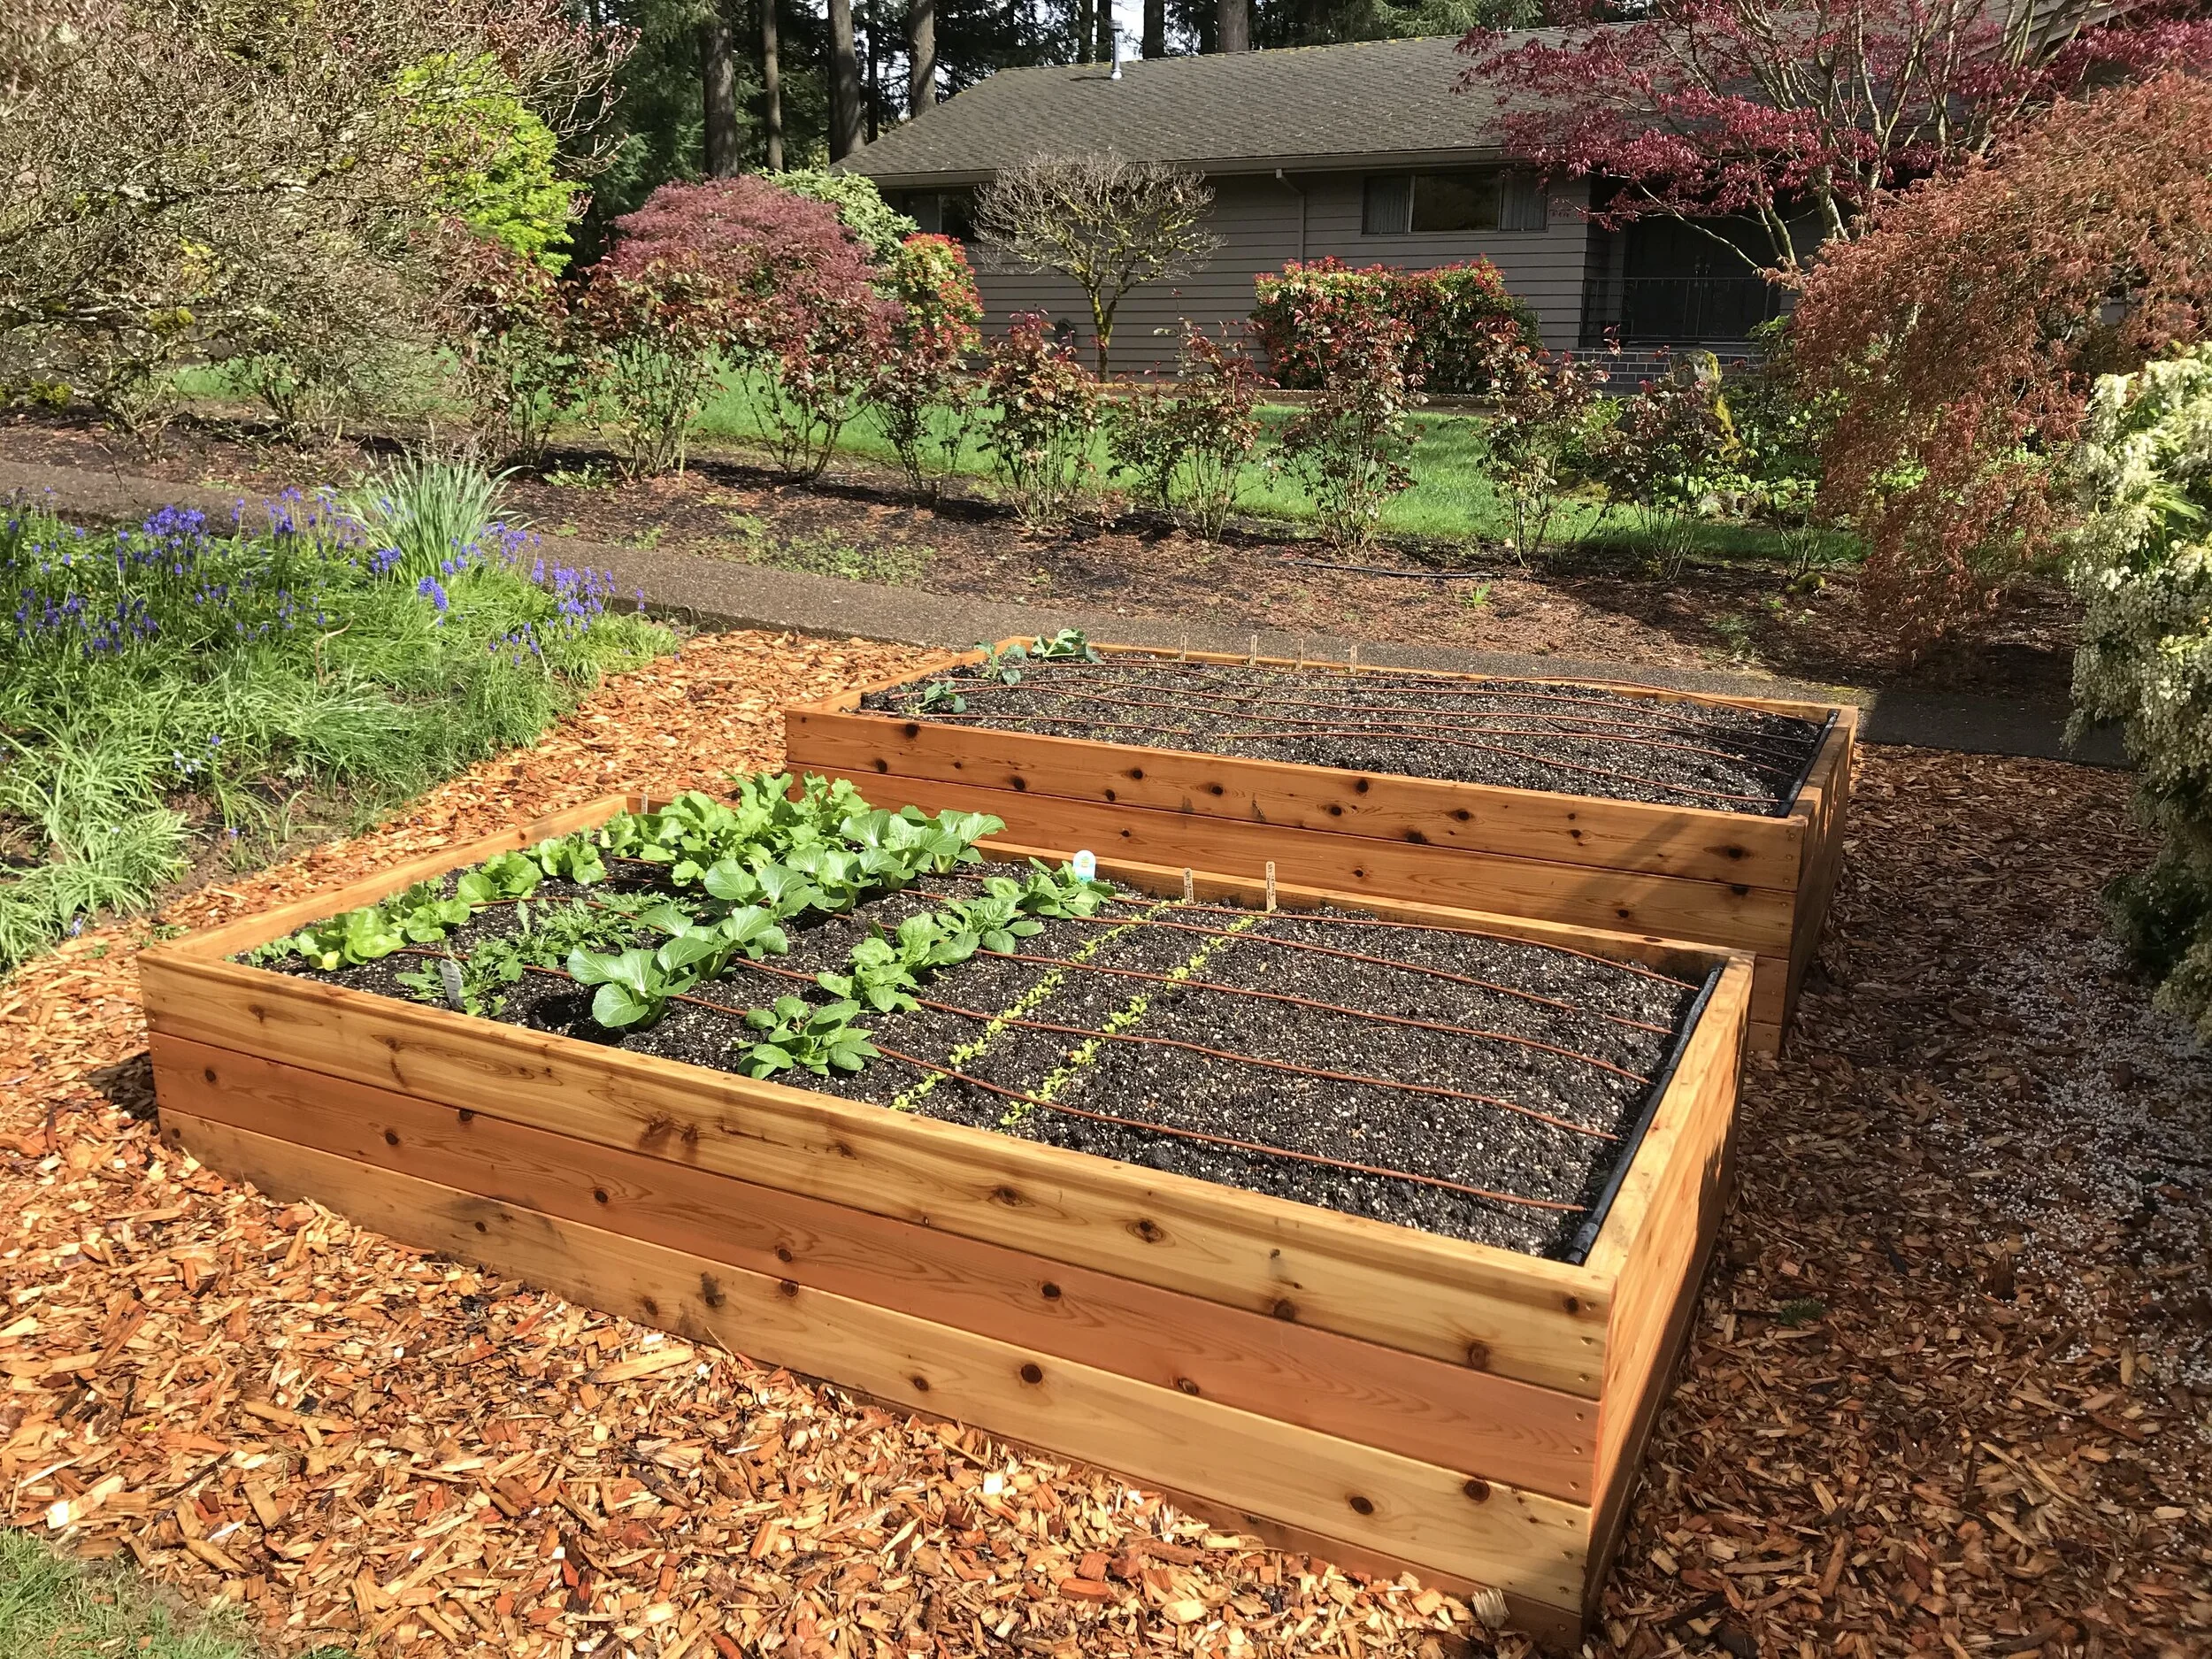
A four-bed grid uses four 4-by-8-foot beds with paths between them. This gives 128 square feet of growing space and creates a clear space for crop rotation.
You can place tomatoes and peppers in one bed, beans and cucumbers in another, roots in a third, and leafy crops in a fourth. Add flowers such as calendula, alyssum, and nasturtium along the edges to attract pollinators.
This layout suits medium yards and beginners who want a clear plan. It also makes row covers and low tunnels easier to install.
U-shaped layout
A U-shaped garden places beds around a central path. It gives excellent access from the inside and outside. Keep the arms no more than 4 feet wide.
This design works well near a patio or kitchen door. It can become difficult to reach if the inside path is less than 3 feet wide. Leave enough turning room for a cart.
L-shaped layout
An L-shaped layout fits corners and leaves an open center for a tree, seating area, or compost bin. It works well along two fences or the side of a house.
Watch the inside corner. If the beds meet tightly, you may create a spot that is hard to reach. A small gap or wider corner path can solve the problem.
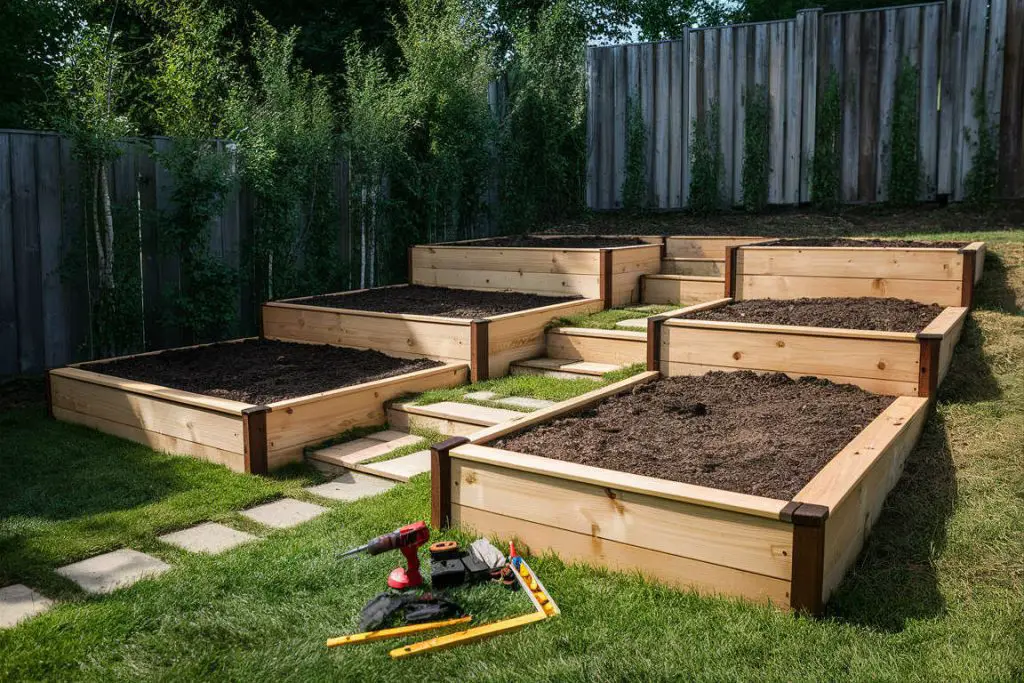
Tiered layout for slopes
A sloped yard needs terraced beds rather than one bed that follows the slope. Build each bed level and step the beds down the hill. Use strong walls and plan for water movement.
Never rely on thin boards to hold back a tall bank of wet soil. A retaining wall over about 3 to 4 feet may need engineering, drainage stone, and local approval. Small garden terraces are often a DIY job, but large retaining walls are not.
Plan the soil depth and bed fill
Raised beds need more than a frame. They need a stable, fertile growing mix with good drainage and enough organic matter. The soil should hold water but still allow air to reach roots.

A practical raised bed mix contains topsoil, finished compost, and an aerating material. Many gardeners use a rough blend of 60 percent topsoil, 30 percent compost, and 10 percent pine fines or coarse material. The exact mix varies by climate and source.
Do not fill a bed with pure compost. Compost shrinks, dries quickly, and may contain too many soluble salts. In one new bed, I used an overly rich compost blend and saw lush tomato leaves but fewer fruits until I stopped adding nitrogen.
| Bed depth | Suitable crops | Approximate soil volume for a 4-by-8-foot bed |
|---|---|---|
| 6 inches | Lettuce, herbs, radish, onion | 16 cubic feet |
| 12 inches | Most vegetables and flowers | 32 cubic feet |
| 18 inches | Carrot, potato, tomato, deep-rooted crops | 48 cubic feet |
These volumes assume the bed is filled to the top. Soil settles after watering, so buy about 10 percent extra. One cubic yard equals 27 cubic feet.
Test soil before adding fertilizer
Send a soil sample to a local laboratory before using fertilizer. A basic test should show pH, phosphorus, potassium, calcium, magnesium, and organic matter.
Most vegetables grow well at pH 6.0 to 7.0. Blueberries need a much more acidic range, often around pH 4.5 to 5.5, so they may need a separate container or dedicated bed. Do not add lime unless a soil test shows that you need it.
A balanced fertilizer such as 5-5-5 may suit a new bed with low fertility. Avoid routine high-nitrogen feeding when plants already have dark green leaves and weak fruit production.
Decide whether to remove grass
For a new garden over lawn, mow the grass short, cover it with overlapping cardboard, and add soil above it. Remove persistent weeds such as bermudagrass, quackgrass, and bindweed when possible. These plants can grow through gaps and invade beds.
If the bed is only 6 inches tall, remove sod or use several layers of cardboard. If the bed is 12 inches or taller, the cardboard method usually works well, but water the layers before adding soil.
Build a planting map before you plant
A planting map prevents empty spaces and overcrowding. Draw each bed as a rectangle and divide it into sections based on mature plant size.

Mark permanent crops first. Tomatoes, asparagus, strawberries, rosemary, and perennial flowers may remain in place for several seasons. Then add short-season crops such as lettuce, peas, radishes, and spinach.
Use succession planting to keep beds productive. After spring peas finish, plant bush beans or fall carrots. After garlic comes out in early summer, add cucumbers, basil, or a cover crop such as buckwheat.
Use companion planting with realistic goals
Companion planting can help with space, pollination, and pest monitoring, but it does not replace crop rotation or pest control. Basil near tomatoes may attract pollinators, while alyssum can support hoverflies and other beneficial insects.
Good pairings include:
- Carrots with onions or leeks
- Tomatoes with basil and marigold
- Cucumbers with dill and nasturtium
- Lettuce with radishes
- Beans with summer savory
- Cabbage with dill and calendula
Avoid planting the same crop family in the same bed year after year. Tomatoes, peppers, and eggplants all belong to the nightshade family. Rotate them with beans, lettuce, carrots, or onions to reduce the buildup of pests and diseases.
Leave space for flowers and pollinators
Flowers make a vegetable garden more useful and more attractive. Add a narrow border of calendula, borage, alyssum, zinnia, or native flowers. Choose plants that bloom at different times.
Pollinators need food, water, and shelter. Avoid broad-spectrum insecticides when possible. Hand-pick pests, use row covers, and identify the insect before treating.
🌱 Beginner Note: You do not need to grow every crop in one year. Start with vegetables your household eats often. A bed of lettuce, herbs, beans, and tomatoes may give more value than a crowded bed of unfamiliar crops.
Install irrigation before filling the beds
Watering becomes much easier when you plan irrigation before the soil goes in. A hose can work for one small bed, but several beds benefit from drip lines or soaker hoses.

Drip irrigation sends water slowly to the root zone. It reduces wet foliage, which can lower disease risk on tomatoes and cucumbers. Use a filter and pressure regulator when connecting drip tubing to a household faucet.
Lay main lines along the paths, then run drip tape or 1/2-inch tubing through each bed. Secure lines with garden staples. Keep emitters near plant roots but not pressed against stems.
| Garden size | Practical watering method | Maintenance need |
|---|---|---|
| One small bed | Hand watering wand | Check soil often |
| Two to four beds | Soaker hoses or drip lines | Flush lines each season |
| Large garden | Filtered drip system with timer | Check filters, emitters, and leaks |
Water deeply enough to wet the full root zone. A light sprinkle may make the surface look damp while the soil below stays dry. Push a finger 2 inches into the soil or use a moisture meter to check.
Most beds need about 1 inch of water per week from rain and irrigation, but sandy soil, hot weather, wind, and tall plants can raise that need. In a hot summer in USDA zone 7, my tomato beds needed water every two to three days, while mulched beds needed it less often.
Use a maintenance-friendly layout
A garden layout should reduce future work. Place crops, tools, compost, mulch, and water so daily tasks take minutes instead of an hour.

Keep a small tool station near the entrance. A hand trowel, pruner, gloves, labels, and harvest basket should not live in a shed 100 feet away. Store sharp tools with blades covered and keep fertilizers in a dry, locked area.
Install edging between paths and beds. Without edging, wood chips and soil slowly mix. Metal edging, stone, brick, or a clean strip of compacted soil can hold the boundary.
Plan for mulch
Apply 2 to 3 inches of straw, shredded leaves, or finished compost around plants. Keep mulch 2 to 3 inches away from plant stems. Thick mulch against stems can encourage rot and shelter slugs or voles.
Mulch reduces evaporation, soil splash, weeds, and temperature swings. It also makes the garden look finished. In cool spring soil, wait until the ground warms before adding a thick layer around heat-loving crops such as tomatoes and peppers.
Plan for covers and supports
Leave room for hoops, insect netting, frost cloth, and shade cloth. A bed that touches a fence may not allow a cover to sit properly.
Use hoops made from PVC, metal conduit, or flexible greenhouse tubing. Secure covers at the sides so wind cannot lift them. In my zone 6 garden, a simple frost cloth setup extends lettuce and spinach by several weeks in fall.
Think about crop rotation
Crop rotation means moving plant families to different beds each season. It helps reduce soilborne diseases and pest cycles. A three- or four-bed system makes rotation easy.
A basic rotation might look like this:
- Bed one: tomatoes, peppers, and eggplants
- Bed two: beans and peas
- Bed three: carrots, beets, and onions
- Bed four: lettuce, spinach, and cabbage family crops
Rotate the groups each year. This does not stop every problem, but it lowers disease pressure and balances nutrient use.
Common raised bed layout mistakes and fixes
Most layout problems come from poor access, weak sun, or unrealistic plant spacing. Fixing these issues early costs less than rebuilding later.
| Problem | Why it happens | Better solution |
|---|---|---|
| Bed is too wide | Design focused on soil volume | Limit open beds to 4 feet |
| Plants stay weak | Trees or buildings block sun | Move beds or prune carefully |
| Path becomes muddy | No drainage or mulch | Add wood chips and improve grade |
| Soil dries too fast | Bed is tall or mix is sandy | Add compost, mulch, and drip irrigation |
| Trellis falls over | Wind and vine weight were ignored | Anchor posts deep and brace the frame |
| Bed walls rot early | Untreated or wet wood | Use durable lumber and keep soil below the top edge |
A common mistake is placing beds in a low corner because the area looks unused. Low spots often collect cold air, runoff, and pests. A slightly higher part of the yard usually gives better drainage and earlier spring growth.
Another mistake is making paths just wide enough to walk through. The path must also fit the tools you will use. If you plan to spread compost with a wheelbarrow, test that route before construction.
⚠️ Warning: Do not fill a raised bed against house siding or untreated fence boards. Leave a gap for airflow and keep damp soil away from structures. Moisture can cause rot and attract termites in some regions.
Build the layout step by step
Once you have measured the site, use this order. It keeps expensive mistakes from happening.

Step 1: Mark the sunniest area
Use stakes and string to outline the full garden. Mark north with a compass. Note shade from buildings, trees, fences, and tall crops.
Step 2: Mark the main path
Run a 36- to 48-inch path from the entrance to the water source and compost area. This path is the backbone of the garden.
Step 3: Add the beds
Place beds so each growing area is reachable from a path. Keep open beds 3 to 4 feet wide. Make fence-side beds 18 to 24 inches wide.
Step 4: Test movement
Push a wheelbarrow through every route. Kneel beside each bed. Reach the center without stepping into the soil. Change the layout if any task feels awkward.
Step 5: Add water lines
Plan the hose, faucet, timer, filter, and drip tubing. Keep lines away from sharp corners and high-traffic spots.
Step 6: Build or install the frames
Level the frames from side to side. A slight slope along the length is acceptable, but standing water should never collect inside the bed.
Step 7: Prepare the ground
Remove large weeds and roots. Mow grass short. Lay overlapping cardboard if needed. Add hardware cloth below the bed if voles, moles, or gophers are a serious problem.
Step 8: Fill with soil
Add the soil mix in layers. Water each layer to settle air pockets. Leave about 1 to 2 inches below the top edge so soil and mulch do not wash out.
Step 9: Install supports
Add trellises, hoops, stakes, and irrigation before planting. It is easier to work in an empty bed.
Step 10: Add paths and mulch
Cover paths with wood chips, straw, gravel, or another suitable material. Mulch the beds after planting, leaving space around stems.
Step 11: Plant by height and family
Put tall crops on the north side. Group plants with similar water needs. Use the final plant size to set spacing.
Step 12: Label the beds
Write the crop, variety, planting date, and expected harvest date on weatherproof labels. This makes crop rotation much easier next year.
Consider costs, lifespan, and materials
A raised bed garden can cost very little if you use local soil and recycled, safe materials. It can also become expensive when you add tall frames, imported soil, irrigation, trellises, and protective covers.
Current pricing ranges from a modest DIY setup using untreated cedar or pine to a premium system with metal beds and automated irrigation. Soil often costs more than the frame, especially for beds 18 inches or taller.
Cedar may last 8 to 15 years, depending on climate and soil contact. Untreated pine may last 3 to 7 years in damp regions but longer in dry areas. Galvanized steel can last 20 years or more when the coating remains intact.
Plastic lumber resists rot but can become brittle or warp in strong sun. Masonry lasts a long time but costs more and is harder to change. Choose a material that matches your budget and the permanence of the site.
A raised bed is worth the money when your native soil is compacted, contaminated, rocky, poorly drained, or difficult to work. It may not be worth it if your ground is already fertile and level. In that case, an in-ground garden with compost may produce the same crops at lower cost.
Personal lessons from laying out raised beds
I once placed three beds too close to a fence because I wanted to maximize growing space. The garden looked efficient, but I could not reach the back corners. Weeds grew there, irrigation lines kinked, and harvest became a chore.
The next season, I removed one bed and widened the paths. I lost about 24 square feet of growing space but saved time every week. The remaining beds produced more because I could weed, water, and support plants properly.
I have also learned that orientation is not a rule that overrides every site. In a narrow side yard, an east-to-west layout may be the only practical choice. Good access and enough sunlight matter more than forcing a perfect compass pattern.
In USDA zone 5, I use low tunnels to protect early greens. In zone 9, I give more attention to afternoon shade and irrigation. The same bed plan can work in both places, but the seasonal details change.
When to hire help
Most small raised beds are suitable for DIY construction. Hire a professional or experienced contractor when the project involves major grading, retaining walls, drainage near a foundation, electrical work, or suspected soil contamination.
Ask for help if a wall will hold back more than 3 to 4 feet of soil, especially on a slope. Wet soil creates strong pressure. A failed retaining wall can damage property and injure someone.
Test questionable soil before gardening. Soil near old buildings, painted structures, roads, or industrial areas may contain lead or other contaminants. Use certified soil testing and follow local guidance.
A landscaper can also help when you need a full irrigation system, deer fencing, or accessibility features. Good planning still matters, even when someone else does the physical work.
FAQs about raised bed garden layout
Q: How far apart should raised garden beds be?
A: Leave 18 to 24 inches for footpaths. Use 30 to 36 inches for a wheelbarrow, and 36 to 48 inches for a main path. Wider paths work better for gardeners who use carts, kneelers, or mobility aids.
Q: Should raised beds run north to south or east to west?
A: North-to-south usually gives the most even light because the sun can reach both sides. East-to-west can work in a narrow site. Place tall crops on the north side in either layout.
Q: How wide should a raised bed be?
A: Make an open bed no wider than 4 feet if you can reach both sides. A bed against a wall or fence should be 18 to 24 inches wide. Never design a bed that requires you to step into the soil.
Q: How deep should a raised garden bed be?
A: Six inches suits shallow crops such as lettuce and radishes. Use 12 inches for most vegetables. Choose 18 inches for crops such as carrots, potatoes, tomatoes, and plants grown above poor native soil.
Q: Can I place a raised bed on grass?
A: Yes. Mow the grass short, cover it with overlapping cardboard, and build the bed above it. Remove invasive grasses such as bermudagrass when possible. Water the cardboard before adding soil.
Q: Do raised beds need a bottom?
A: Most beds do not need a bottom when placed on soil. A bottom can block drainage and limit root growth. Use hardware cloth under the bed only when rodents or burrowing pests are a problem.
Q: What should I put between raised beds?
A: Wood chips, straw, gravel, brick, grass, or compacted soil can work. Wood chips are a good low-cost choice for most yards. Keep grass paths mowed and edged so they do not invade the beds.
Q: Should I line a raised bed with plastic?
A: Avoid lining the bottom with plastic because it can trap water. A thin barrier on the inside wall may protect wood, but good drainage matters more. Do not use plastic that may leach unknown chemicals into the soil.
Q: How do I layout raised beds in a small backyard?
A: Start with one or two beds no wider than 4 feet. Keep a 24- to 36-inch path around them. Use trellises for peas, cucumbers, and pole beans. Grow herbs and salad greens in narrow beds near the kitchen.
Q: Where should tall plants go in a raised bed?
A: Put tall plants and trellises on the north side. This reduces shade on low crops. In a small bed, place tall plants on the north edge and keep the south edge open for lettuce, carrots, and herbs.
Q: How much soil does a 4-by-8-foot raised bed need?
A: A 6-inch bed needs about 16 cubic feet. A 12-inch bed needs about 32 cubic feet. An 18-inch bed needs about 48 cubic feet. Add roughly 10 percent extra because the soil settles.
Q: Are raised beds worth it?
A: They are worth it when your native soil drains poorly, stays compacted, contains rocks, or may be contaminated. They cost more than an in-ground garden and need regular irrigation. Use in-ground beds if your existing soil is fertile and easy to work.
Q: How long do raised garden beds last?
A: Untreated pine may last 3 to 7 years, cedar often lasts 8 to 15 years, and galvanized steel can last 20 years or more. Moist climates shorten wood life. Rot usually starts where boards touch wet soil.
Final layout recommendations
A successful raised bed garden is easy to reach, easy to water, and placed where plants receive enough light. Start with a measured site plan, use 3- to 4-foot-wide beds, leave generous paths, and place tall crops on the north side.
Build fewer beds than you think you need. Fill them with balanced soil, add compost based on a soil test, and install irrigation before planting. Keep room for trellises, covers, mulch, and a wheelbarrow.
The best layout is not the one with the most soil. It is the one you will enjoy tending after a hot day, a heavy rain, or a long week at work. If every bed is reachable and every path has a purpose, your garden will stay productive for many seasons.
Meta description: Learn how to layout a raised bed garden with practical bed sizes, paths, sunlight, soil depth, irrigation, crop spacing, costs, and beginner-friendly design tips.