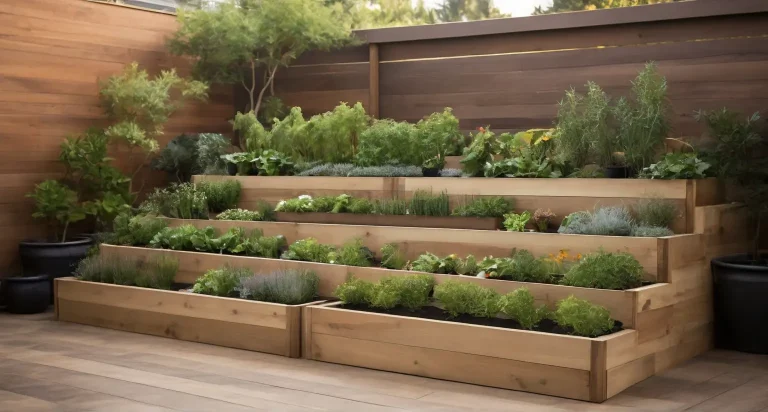
How To Build A Raised Garden Bed For Tomatoes: Easy Guide
Tomatoes love warm soil, full sun, steady water, and rich soil that drains well. A raised garden bed can provide all four. It also gives you more control over soil quality, drainage, spacing, and support than a ground-level garden.
I have grown tomatoes in raised beds in humid Zone 7, dry Zone 8, and short-season Zone 5 gardens. The bed itself was never the hard part. The real gains came from choosing a sunny site, building a strong frame, filling it with the right soil, and planning support before the plants grew large. A poor soil mix or weak trellis can spoil an otherwise good bed.
This guide shows how to build a raised garden bed for tomatoes from start to finish. You will learn the best size, materials, soil mix, spacing, watering plan, support options, seasonal timing, common mistakes, and ways to keep the bed productive for years.

Quick answer: the simplest way to build a tomato bed
The best way to build a raised garden bed for tomatoes is to choose a site with 8 or more hours of sun, build a 12- to 18-inch-deep frame, fill it with a loose soil-and-compost mix, and add a strong trellis before planting. Use untreated cedar or another rot-resistant wood, leave room for air flow, and water slowly at the soil line.

A 4-by-8-foot bed works well for most homes. It holds about 1.5 cubic yards of soil when 12 inches deep and can grow four to eight tomato plants, depending on variety and pruning.
Tomatoes are heavy feeders. They also develop deep roots when the soil stays moist but not wet. A raised bed helps, but it does not remove the need for good soil, mulch, support, and regular care.
Plan the bed before you cut wood
The best raised bed starts with a good location. Pick the sunniest part of your yard, not the easiest place to build. Tomatoes need at least six hours of direct sun, but eight to ten hours gives better growth and fruit in most climates.

Keep the bed away from large trees. Tree roots steal water and nutrients, while tree shade can delay ripening. Avoid low spots where rain collects. A site with gentle drainage works well.
Think about access, too. I prefer a bed no wider than 4 feet. That lets me reach the center from either side without stepping on the soil. A bed against a wall should be no more than 2 to 3 feet wide.
Choose the right shape and size
A 4-by-8-foot raised bed gives a lot of growing room without becoming hard to reach. A 4-by-4-foot bed is easier for a small yard, balcony garden, or first project. Longer beds need more support in the middle to stop the boards from bowing.
The bed length does not matter as much as its width and depth. Keep the layout simple. Straight sides make it easier to install trellises, drip lines, row covers, and mulch.
| Bed size | Approximate tomato capacity | Best use |
|---|---|---|
| 2 by 4 feet | 2–3 plants | Small yard or patio |
| 4 by 4 feet | 4 plants | beginner garden |
| 4 by 8 feet | 6–8 plants | Family vegetable garden |
These plant counts assume medium or determinate tomatoes. Large indeterminate varieties may need more space and stronger support.
Decide how deep the bed should be
A 12-inch bed works for tomatoes if the soil below drains well and is not compacted. An 18-inch bed gives roots more room and works better over clay, gravel, pavement, or poor urban soil.
You do not need a 3-foot-deep bed for tomatoes. That adds cost and soil weight without a clear benefit in most gardens. If you build higher than 18 inches, add strong corner posts and cross braces.
Check local rules and buried lines
Before digging, call your local utility marking service. Even a shallow bed may require stakes, edging, or anchors. Mark irrigation lines and low-voltage landscape wires before you drive posts into the ground.
Some cities and homeowner associations limit front-yard structures. Check local rules if the bed will sit near a sidewalk, property line, or drainage area.
Tools and materials for a tomato raised bed
You can build a basic bed with common tools. A circular saw makes clean cuts, but a handsaw also works for a small bed. Use a drill with an exterior-rated bit and corrosion-resistant screws.

Choose materials that will not leach harmful chemicals into the soil. Modern pressure-treated lumber made for residential use is generally accepted for vegetable beds, but many gardeners still prefer untreated cedar, redwood, cypress, or composite boards.
| Item | Suggested choice | Quantity for a 4-by-8-foot bed |
|---|---|---|
| Side boards | Untreated 2-by-6 or 2-by-8 cedar | 6 boards, 8 feet long |
| Corner posts | 4-by-4 cedar or treated post | 4 pieces, 18–24 inches |
| Screws | Exterior structural screws | 24–40 |
| Soil | Topsoil, compost, and aeration material | About 1.5 cubic yards |
| Mulch | Straw, shredded leaves, or leaf mold | 2–3 inches |
| Support | Tomato trellis, cages, or stakes | 1 system |
Two-by-6 boards are about 5.5 inches wide. Two stacked courses make a bed close to 11 inches tall. Two-by-8 boards give about 14.5 inches with two courses.
Use structural screws, not drywall screws. Drywall screws snap easily and rust outdoors. Avoid nails if you may need to repair or change the bed later.
A level, tape measure, square, pencil, shovel, rake, wheelbarrow, and work gloves will also help. Wear eye protection when cutting lumber and drilling.
Build the frame step by step
Build the bed on level ground whenever possible. A small slope is fine, but a steep slope causes soil to wash out and puts stress on the joints.

1. Mark the footprint
Measure the full outside dimensions of the bed. For a 4-by-8-foot design, mark a rectangle with stakes and string. Measure both diagonals. They should match if the corners form a true rectangle.
Remove grass and weeds from inside the outline. You can leave the soil in place, but cut the sod short and turn the top few inches with a fork.
2. Cut and pre-drill the boards
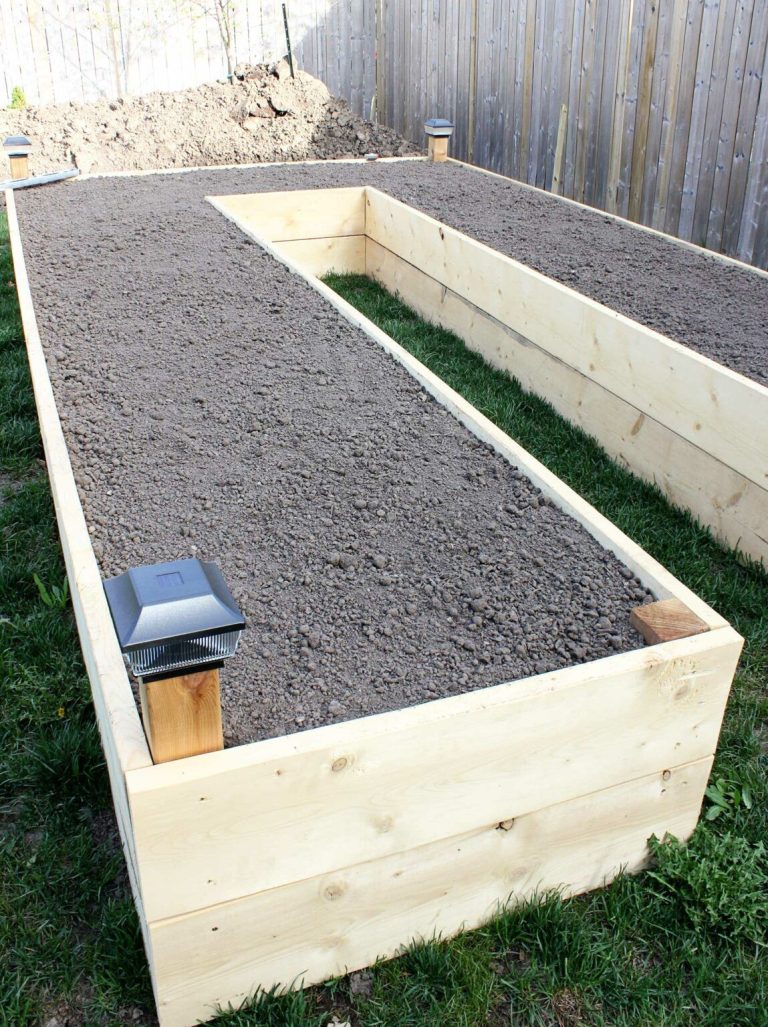
Cut the boards to the planned length. For a simple butt-joint bed, use two 8-foot boards for the long sides and four 4-foot boards for the short sides.
Pre-drill near the ends to reduce splitting. Cedar can crack if you drive a large screw too close to the edge. Keep each screw at least 1 inch from the board end.
3. Assemble the first course
Stand the boards on edge and hold each corner square. Drive two or three screws through the short board into the end grain of the long board.
A helper makes this step easier. If you work alone, clamp the boards or place a heavy block against one side while you drill.
4. Add a second course
Stack the second layer on top of the first. Stagger the joints when possible. This adds strength and reduces long weak seams.
Attach the upper boards to the lower boards with screws every 18 to 24 inches. Add corner posts inside the bed if the boards feel loose.
5. Add center support on long beds
An 8-foot bed may bow outward after you fill it. Add a 4-by-4 post at the center of each long side. Connect the posts with a galvanized threaded rod or a short cross brace above the soil line.
This small step prevents a common failure. In one of my early 4-by-10 beds, the sides pushed out nearly an inch after heavy rain. A center brace fixed the problem.
6. Check the frame
Use a level along every side. Check the corners again. A frame that leans may still hold soil, but water will collect at one end.
Do not line the bottom with plastic. Plastic blocks drainage and can create a wet root zone. Use cardboard only to smother grass or newspaper as a short-term weed barrier.
🌱 Beginner Note: A raised bed does not need a floor. Its value comes from containing improved soil above the native ground. A bottom is useful only when the bed sits on concrete, asphalt, or another hard surface.
Fill the bed with healthy tomato soil
Tomatoes grow best in soil that drains well but holds water. Aim for a crumbly loam with a pH between 6.0 and 6.8. Soil that stays soggy can cause root loss, while very sandy soil dries too fast.

Do not fill the bed with compost alone. Pure compost can settle, dry out, or hold too many soluble salts. It also lacks the mineral balance that roots need.
A simple mix for a new bed is:
- 50% screened topsoil or quality garden soil
- 30% finished compost
- 20% aged pine bark fines, leaf mold, or coarse organic matter
For a bed over native soil, you can use 60% topsoil, 30% compost, and 10% aeration material. If the soil below is heavy clay, use more bark fines or leaf mold, but do not add large amounts of sand. Sand mixed into clay can form a dense, brick-like soil.
Calculate how much soil you need
Use this formula:
Length in feet × width in feet × depth in feet = cubic feet
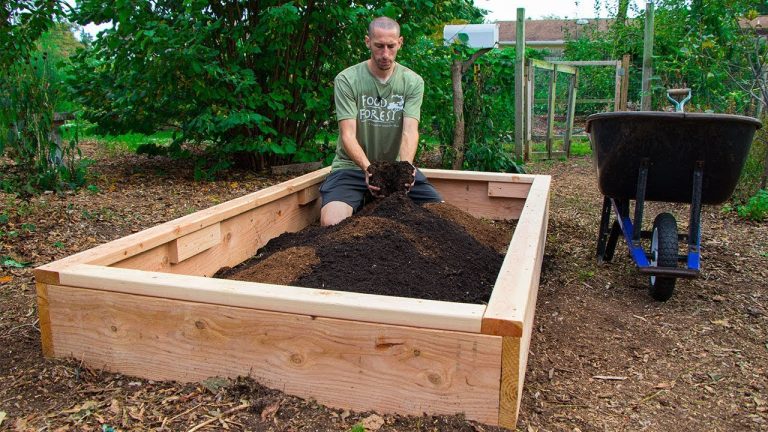
A 4-by-8-foot bed that is 1 foot deep needs 32 cubic feet of soil. One cubic yard equals 27 cubic feet, so the bed needs about 1.2 cubic yards. Add 10% to 15% for settling.
| Bed size and depth | Soil volume before settling | Soil to order |
|---|---|---|
| 4 × 4 × 1 foot | 16 cubic feet | About 0.7 cubic yard |
| 4 × 8 × 1 foot | 32 cubic feet | About 1.3 cubic yards |
| 4 × 8 × 1.5 feet | 48 cubic feet | About 2 cubic yards |
Bulk soil often costs less than bags, but delivery fees vary. Bagged soil works for small beds, though moving many bags can cost more and create more plastic waste.
Test the soil before adding fertilizer
A basic soil test can show pH, phosphorus, potassium, calcium, and organic matter. Test after mixing the bed, not from one small scoop of compost.
Tomatoes need nitrogen for leaves, phosphorus for roots and flowers, and potassium for fruit quality. More fertilizer is not always better. High nitrogen can produce huge plants with few tomatoes.
If the test shows low fertility, mix in a vegetable fertilizer at the label rate. A balanced product such as 5-5-5 can work. Once fruit sets, a lower-nitrogen blend may help, but avoid chasing fertilizer numbers without a soil test.
Use compost with care
Finished compost should smell earthy and look dark and crumbly. Avoid compost that smells sour, contains many weed seeds, or came from unknown waste.
I once used a load of immature compost in a new bed. The tomatoes grew slowly for almost four weeks, and the soil became hot and sour after watering. Mixing in fresh topsoil and waiting two weeks helped, but mature compost would have prevented the issue.
⚠️ Warning: Do not use fresh manure in a tomato bed. It can burn roots, add excess salts, and carry pathogens. Use well-aged manure or finished compost instead.
Install tomato support before planting
Tomato support is part of the bed design, not an afterthought. Indeterminate tomatoes keep growing until frost and can reach 6 to 10 feet. Determinate tomatoes stop at a set height but still become heavy with fruit.

Install cages, stakes, or a trellis while the bed is empty. Pushing a stake beside a mature plant can cut roots and damage the stem.
Compare the main support systems
The best support depends on variety, climate, and how often you can prune. A small wire cage may work for a determinate Roma tomato but fail under a vigorous Cherokee Purple or Sungold.
| Support system | Best for | Main limitation |
|---|---|---|
| Heavy tomato cage | Determinate and compact plants | Needs wide, strong wire |
| Single stake | Pruned indeterminate plants | Requires tying every week |
| Florida weave | Several plants in a row | Needs end posts and regular ties |
| String trellis | Indeterminate vines | Needs a strong top bar |
| Cattle panel arch | Large beds and many vines | Takes more space and setup |
Use cages made from thick galvanized wire with openings wide enough to reach through. Small cone cages often bend under fruit weight and restrict air flow.
For an indeterminate tomato, a trellis at least 6 feet tall works better than a 3-foot stake. In a warm Zone 8 garden, I prefer an 8-foot trellis because vines grow fast and the season lasts longer.
Set up a Florida weave
The Florida weave works well for a row of tomatoes. Drive sturdy posts at both ends and every 4 to 5 feet. Run soft twine along one side of the plants, wrap it around each stem, and return along the other side.
Add another strand every 8 to 12 inches as the plants grow. Use tomato clips or soft cloth, not wire or thin string that cuts into stems.
Support plants in containers or small beds
For a 2-by-4-foot bed, use one cage per plant or a wall-mounted trellis. Keep the support at least 12 inches away from walls that reflect intense heat in hot climates.
Do not crowd tall plants against a fence. Poor air flow raises the risk of early blight, Septoria leaf spot, and fungal leaf problems.
Plant tomatoes with enough room
Spacing controls air flow, root competition, and disease risk. The right distance depends on the variety and support system.

Determinate tomatoes usually need 18 to 24 inches of space. Indeterminate plants need 24 to 36 inches, especially in humid areas. If you use single-stem pruning, you can space them closer, but close spacing requires more work.
Plant tomatoes after the last spring frost when the soil reaches about 60°F. Cold soil slows roots and can cause purple leaves. Use a soil thermometer if your spring weather changes quickly.
Harden off transplants
Harden off means slowly adapting indoor-grown plants to outdoor sun and wind. Set them outside in bright shade for two to three hours on the first day. Increase time and sun over seven to ten days.
Do not move tender plants straight from a warm room into full afternoon sun. Leaves can bleach, scorch, or collapse from wind stress.
Plant deeply
Tomatoes can form roots along buried stems. Remove the lower leaves and plant the root ball with one-third to one-half of the stem below the soil line. Leave the top cluster of leaves above ground.
This deep planting method gives the plant a larger root system. It works well with standard tomatoes, cherry tomatoes, heirlooms, and grafted plants, but keep the graft union above the soil on grafted plants.
Water each transplant slowly after planting. Add a cage or tie the stem to a stake at once.
Water and mulch the raised bed correctly
Raised beds often drain faster than ground soil. Tomatoes need steady moisture, especially during flowering and fruit growth. Letting the bed swing from dry to soaked can cause blossom-end rot and fruit cracking.

Water deeply when the top 1 to 2 inches of soil feels dry. In hot weather, a mature tomato may need 1 to 2 inches of water per week from rain and irrigation. Sandy beds may need more frequent watering than heavy loam.
Drip irrigation or a soaker hose works better than a sprinkler. Wet leaves stay damp longer and can spread fungal disease.
| Weather and plant stage | Typical watering pattern |
|---|---|
| Cool spring, young plants | Deep water 1–2 times per week |
| Warm weather, flowering plants | Deep water 2–3 times per week |
| Hot weather, fruiting plants | Check daily; water as needed |
| Heavy rain week | Pause irrigation and check soil depth |
These are starting points, not fixed rules. A windy 95°F day in Arizona may dry a bed in hours, while a cloudy week in Oregon may require little extra water.
Apply 2 to 3 inches of straw, shredded leaves, or leaf mold around plants. Keep mulch 2 inches away from each stem. Mulch holds soil moisture, reduces weeds, and prevents soil from splashing onto lower leaves.
🔧 Quick Fix: If a tomato bed dries too fast, add organic mulch first. Then check for leaks, exposed soil, and roots filling the bed. Do not solve every dry-bed problem by watering shallowly every day.
Feed tomatoes through the season
Good soil reduces the need for frequent feeding, but tomatoes still benefit from timely nutrients. Feed based on plant growth and soil test results rather than a calendar alone.

At planting, mix compost into the top 6 inches of soil. If the soil test calls for fertilizer, apply a slow-release vegetable blend at the label rate. Avoid placing concentrated fertilizer directly against roots.
When the first fruit is about the size of a marble, side-dress with compost or a low-nitrogen vegetable fertilizer. Side-dressing means placing the nutrient beside the plant, not in the planting hole.
Watch the leaves. Pale lower leaves may show nitrogen shortage, but yellow leaves can also come from overwatering, root damage, or poor drainage. Dark green leaves with few flowers often point to too much nitrogen.
Do not add calcium products automatically for blossom-end rot. That problem usually comes from uneven water uptake, not a simple lack of calcium in the soil.
Choose good tomato varieties for your bed
Variety choice matters as much as bed design. Determinate tomatoes suit small beds because they stop growing at a set size. Indeterminate tomatoes produce over a longer season but need tall support.

Good choices for small raised beds
Compact varieties include ‘Patio Choice Yellow,’ ‘Tiny Tim,’ ‘Roma,’ ‘Celebrity,’ and ‘Mountain Spring.’ Cherry types such as ‘Sungold’ are vigorous but can grow tall, so do not assume small fruit means a small plant.
For short seasons in USDA Zones 3 through 5, select early varieties such as ‘Early Girl,’ ‘Stupice,’ or ‘Siletz.’ In hot Zones 8 through 10, provide afternoon shade during extreme heat and choose varieties known to set fruit in warmth.
Match varieties to the bed
A 4-by-4-foot bed can hold four compact determinate plants. A 4-by-8-foot bed can hold six medium plants with cages or four large indeterminate plants on a trellis.
Avoid planting only one variety if you want a long harvest. A mix of cherry, slicing, paste, and early tomatoes spreads risk and gives you fruit for different uses.
Common raised-bed tomato problems and fixes
Most tomato problems begin with stress. Uneven water, poor air flow, cold soil, excess nitrogen, and weak support cause more trouble than a lack of special products.

| Symptom | Likely cause | Practical fix |
|---|---|---|
| Leaves wilt in wet soil | Root stress or poor drainage | Check roots, reduce water, improve soil |
| Black spot on fruit bottom | Uneven water uptake | Mulch and keep moisture steady |
| Brown lower leaf spots | Early blight or Septoria | Remove damaged leaves and improve air flow |
| Flowers drop without fruit | Heat, cold, or stress | Shade during heat and keep water steady |
| Tall plants with few flowers | Too much nitrogen or low light | Stop high-nitrogen feed and add sun |
| Cracked fruit | Fast water changes | Water evenly and harvest ripe fruit soon |
Signs of blossom-end rot include a dark, sunken patch on the bottom of green or ripening fruit. Remove damaged fruit, mulch the bed, and keep watering consistent.
Fungal diseases spread quickly when leaves stay wet. Remove lower leaves that touch the soil, space plants farther apart, and clean up fallen leaves at the end of the season. Do not compost diseased plant material unless your compost pile gets hot enough to destroy pathogens.
Tomato hornworms can strip a plant in one night. Look for missing leaves and dark droppings. Hand-pick the caterpillars at dusk and place them in soapy water. If you see white cocoons on a hornworm, leave it alone because parasitic wasps are helping control the pest.
Aphids cluster on new growth. A firm spray of water often controls a small group. Lady beetles, lacewings, hoverflies, and other beneficial insects can reduce aphids without broad insecticides.
Maintain the bed during the growing season
A raised bed needs a small amount of regular care. A short weekly check prevents most major problems.
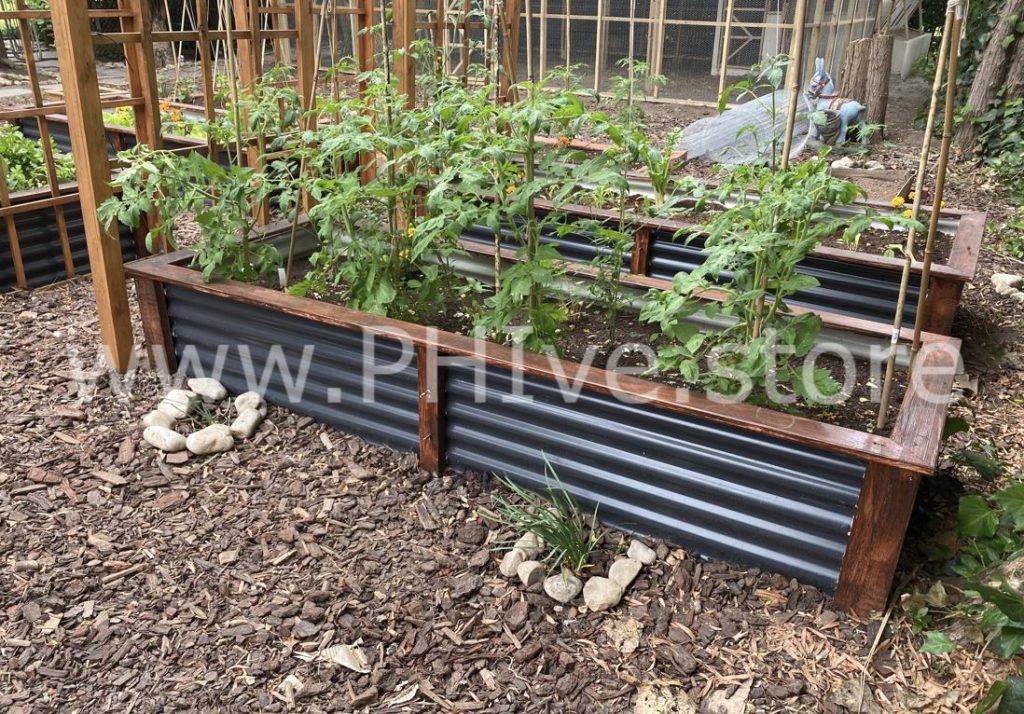
Weekly tomato bed checklist
- Check soil moisture 2 inches below the surface.
- Tie new growth to the support.
- Look under leaves for aphids, caterpillars, and eggs.
- Remove yellow leaves touching the soil.
- Check that mulch stays 2 inches from stems.
- Look for leaning boards, loose screws, or bowed sides.
Prune with a clean tool when needed. For indeterminate tomatoes, remove small suckers only if you want a more open plant. A sucker is a shoot that grows between the main stem and a leaf branch.
Do not strip every leaf. Leaves make the sugars that fill the fruit. Remove diseased leaves first, then thin only enough growth to improve air flow.
Determinate tomatoes need less pruning. Heavy pruning can reduce the total harvest because the plant sets most of its fruit within a short period.
Replace soil and compost over time
Do not dump the entire bed each year. Add 1 to 2 inches of finished compost each spring and mix it lightly into the top layer. Deep digging can damage soil structure and expose weed seeds.
Rotate tomatoes, peppers, eggplants, and potatoes when possible. These crops belong to the nightshade family and can share diseases. A three-year rotation is useful, but small beds may not allow it.
If rotation is impossible, remove all old plant debris, add fresh compost, and avoid planting tomatoes in the exact same spot. Grafting and disease-resistant varieties can also help.
Inspect the frame each year
Wood often fails first at ground contact and inside corners. Look for soft areas, dark rot, split boards, and screws that no longer hold.
Cedar beds may last 8 to 15 years, depending on climate and soil contact. Untreated pine may last 3 to 7 years. Composite boards can last longer but cost more and may become brittle or warp in extreme heat.
You can extend wood life by keeping soil below the top edge, avoiding constant wet mulch against the boards, and repairing loose joints early.
Seasonal care for a tomato raised bed
The best timing depends on your USDA hardiness zone and local frost dates. Hardiness zones describe winter cold, but they do not replace local frost records or soil temperature.

| Season | Main bed tasks |
|---|---|
| Late winter | Order soil, check seed starts, inspect frame |
| Spring | Build bed, add compost, install support, plant after frost |
| Summer | Water deeply, tie vines, mulch, harvest often |
| Fall | Remove plants, clean supports, add compost, cover soil |
In Zones 5 and colder, start tomato seeds indoors six to eight weeks before the last frost. In Zones 7 through 10, you may plant earlier, but cold nights can still slow growth.
In hot climates, fruit set may drop when nights stay above 75°F. Use shade cloth during severe afternoon heat, but keep morning sun. In cool climates, black plastic mulch can warm the soil, though it may increase heat stress later.
After frost kills the plants, remove vines and roots. Do not leave diseased foliage in the bed. Add compost, cover crops, or a layer of leaves to protect the soil during winter.
What did not work in my early tomato beds
My first raised bed was too wide. At 5 feet, I could not reach the middle without stepping into the soil. That compacted the root zone and made weeding awkward. I rebuilt later beds at 4 feet wide, and the difference was immediate.
I also used flimsy tomato cages. They looked fine in May but folded under indeterminate vines by July. Heavy cages or a fixed trellis cost more at the start but saved time and prevented broken stems.
Another mistake was filling a bed with dark compost from an unknown source. The plants grew unevenly, and weeds appeared for months. Now I buy screened soil and certified compost or use compost from a pile I know well.
In a humid Zone 7 garden, close spacing caused early blight by midseason. Wider spacing, drip irrigation, and removal of lower leaves gave much cleaner plants the next year.
Raised beds versus containers and in-ground rows
A raised bed is not the only way to grow tomatoes. Containers suit renters and patios, while in-ground rows cost less if you already have good soil.

Raised bed or container?
Containers offer control and mobility. They also dry out fast and need more frequent feeding. A single tomato needs a container of at least 10 gallons, with 15 to 25 gallons better for an indeterminate variety.
Raised beds hold moisture more steadily and allow several plants to share irrigation. They need more startup soil and cannot be moved easily.
Raised bed or in-ground garden?
In-ground planting costs less and supports natural soil life. It works well when the soil drains, receives sun, and has a pH near 6.0 to 6.8.
A raised bed makes more sense when your native soil is compacted clay, contaminated, rocky, poorly drained, or hard to work. It also helps gardeners with limited mobility when built at a comfortable height.
| Growing method | Main advantage | Main drawback |
|---|---|---|
| Raised bed | Control over soil and drainage | Higher setup cost |
| Large container | Works on patios and can move | Dries and warms quickly |
| In-ground row | Low cost and large planting area | Soil may need years of improvement |
Choose the method that fits your space and time. A raised bed is useful, but it is not automatically better in every yard.
Cost, labor, and long-term value
A small DIY raised bed may cost $100 to $250 for lumber, screws, soil, compost, and support. A 4-by-8-foot bed often costs $250 to $600, depending on wood, soil delivery, trellis type, and local prices.
Bulk soil lowers the price per cubic foot. Cedar and redwood raise the upfront cost but often last longer than untreated pine. A cattle-panel trellis costs more than a few stakes but can serve for many seasons.
The value comes from more than tomato yield. A raised bed can improve access, reduce digging, make soil easier to manage, and let you grow salad greens or herbs in the same space during cooler months.
If you only want two tomato plants, two large containers may cost less. If you want a long-term vegetable garden, a raised bed becomes more useful over several seasons.
Safety and construction mistakes to avoid
Wear gloves, safety glasses, and hearing protection when cutting or drilling. Keep children and pets away from saws, screws, treated lumber, and fresh fertilizer.
Do not use old railroad ties, creosote-treated wood, painted scrap lumber, or boards with unknown chemical treatment. Avoid reusing lumber from industrial sites.
Common building mistakes include:
- Making the bed too wide to reach.
- Using weak screws or thin boards.
- Skipping center braces on long beds.
- Filling the bed with compost alone.
- Blocking drainage with plastic.
- Adding fertilizer without a soil test.
- Installing support after roots fill the bed.
- Planting too many vigorous tomatoes in a small space.
A strong frame cannot fix a dark site. Sunlight remains the most important part of tomato production.
FAQs about building tomato raised beds
Q: How deep should a raised bed be for tomatoes?
A: Build at least 12 inches deep over healthy, loose ground. Use 18 inches when the native soil is compacted, rocky, poorly drained, or covered by hard pavement.
Q: How many tomato plants fit in a 4-by-8-foot raised bed?
A: Plant six to eight compact or determinate tomatoes, or four to six large indeterminate tomatoes. Use wider spacing in humid climates.
Q: Can I use regular garden soil in a raised bed?
A: You can use some garden soil, but do not fill the bed with heavy clay or dense topsoil alone. Mix it with compost and organic material so roots can drain and breathe.
Q: Should I put landscape fabric under a tomato raised bed?
A: No, not over healthy ground. Landscape fabric can restrict root growth and drainage. Remove grass, loosen the soil, and use cardboard only when you need to smother turf.
Q: Is pressure-treated wood safe for a vegetable bed?
A: Modern residential pressure-treated lumber is widely used for garden beds, but some gardeners prefer untreated cedar or composite materials. Never use old lumber with unknown treatment or creosote.
Q: What is the best soil mix for raised-bed tomatoes?
A: Use about 50% quality topsoil, 30% finished compost, and 20% aged bark fines, leaf mold, or similar organic material. Adjust the mix after a soil test.
Q: Why are my raised-bed tomato leaves turning yellow?
A: Yellow leaves may come from old age, too much water, poor drainage, nitrogen shortage, root damage, or disease. Check soil moisture and the lower leaves before adding fertilizer.
Q: Can I grow tomatoes in the same raised bed every year?
A: You can, but rotation reduces disease risk. Rotate tomatoes and other nightshades when possible, remove plant debris, add fresh compost, and use resistant varieties.
Q: Do tomatoes need a trellis in a raised bed?
A: Most indeterminate tomatoes do. Determinate varieties can use strong cages, but even compact plants benefit from support because fruit-laden branches can break.
Q: When should I build a raised bed for tomatoes?
A: Build it several weeks before your local planting date. This gives the soil time to settle and lets you install irrigation and support before transplanting.
Q: How long does a wooden raised bed last?
A: Untreated pine may last 3 to 7 years, while cedar often lasts 8 to 15 years. Wet climates and constant soil contact shorten wood life.
Q: Can I build a raised bed on concrete?
A: Yes, but make it at least 18 inches deep and provide drainage holes or a fully open base. Use a lightweight soil mix and choose a strong frame that will not shift.
Final recommendation
Build the bed around the tomato plants, not just around the lumber. Give them full sun, 12 to 18 inches of fertile soil, steady moisture, enough room, and support that can carry mature vines. A 4-by-8-foot cedar bed with a strong trellis is a practical choice for many home gardens, but a smaller bed or large container may suit a smaller space better.
Start with one well-made bed instead of several weak ones. Add compost each season, inspect the frame, rotate crops when you can, and keep notes on varieties and weather. After one full season, you will know what your yard needs, and the next tomato harvest will usually be easier, healthier, and more generous.
Meta description: Learn how to build a raised garden bed for tomatoes with easy steps, soil ratios, sizes, tools, support systems, spacing, watering, costs, and common fixes.