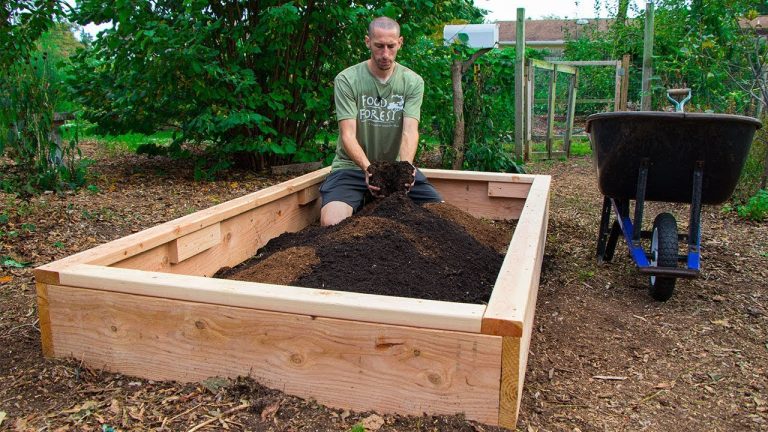
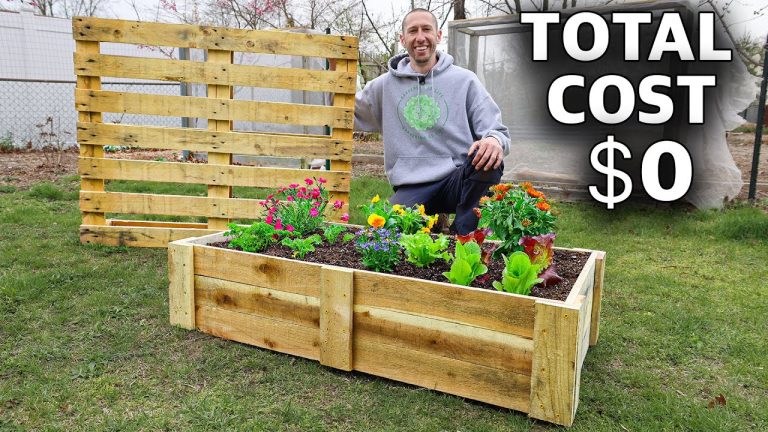
How To Build A Raised Garden Bed Off The Ground: Easy Guide
A raised garden bed off the ground makes growing easier, cleaner, and more accessible. It can sit on legs, a strong frame, or a raised platform. This design helps gardeners avoid poor soil, wet ground, weeds, and back strain. It also works well on patios, decks, balconies, gravel, concrete, and small yards.
I have built raised beds in clay soil in USDA Zone 6 and on paved patios in warmer Zone 9 areas. The biggest lesson is simple: the frame matters, but drainage matters even more. A beautiful bed can still fail if it holds water, tips in the wind, or uses weak lumber.

Quick answer: how to build a raised garden bed off the ground
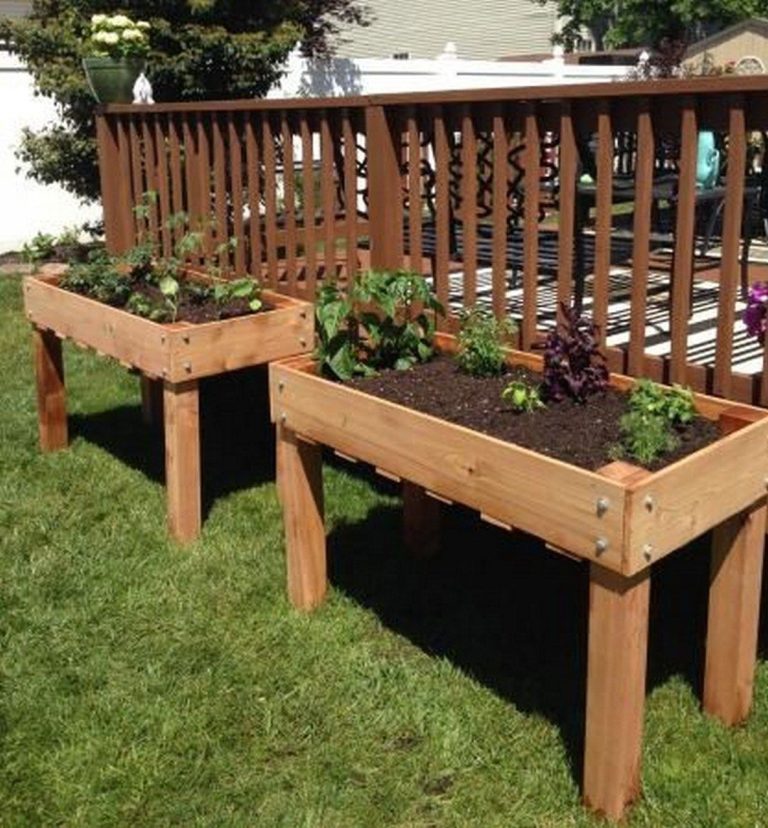
To build a raised garden bed off the ground, make a strong box from untreated lumber, attach it to sturdy legs or a support frame, add drainage holes, and fill it with light, fertile soil. Keep the bed 24 to 32 inches high for comfortable access. Use 2-by-6 or 2-by-8 boards, exterior screws, corner braces, and a soil mix with compost, topsoil, and coarse material for drainage.
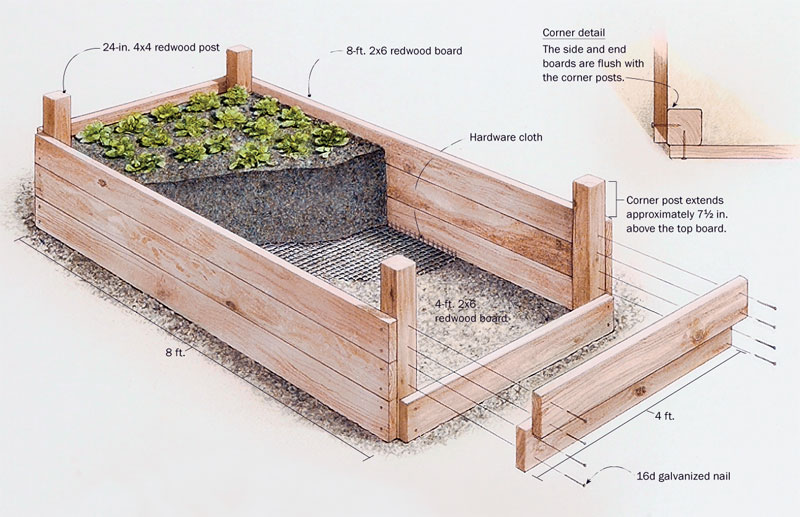
The bed must support a heavy load. Wet soil can weigh more than 50 pounds per cubic foot. A 2-by-4-foot bed that is 24 inches deep may hold more than 1,000 pounds of soil and water.
Why build a garden bed above the ground?
An elevated garden bed gives you more control than a bed placed directly on soil. You choose the soil, height, drainage, and location. The bed also creates a clear barrier between crops and lawn grass.

Main benefits of an elevated bed
A raised bed off the ground can help with:
- Poor clay or sandy soil
- Small yards and rented homes
- Concrete patios and balconies
- Limited mobility or back pain
- Fewer weeds
- Better drainage
- Earlier spring planting
- Easier pest checks
- Cleaner harvests
- More control over soil pH
The height also keeps many crops away from wet ground. This helps reduce some soil-borne problems, such as root rot caused by long periods of saturated soil. It does not stop every pest, though. Slugs, aphids, cabbage worms, and squirrels can still reach the plants.
What an elevated bed cannot fix
An off-ground bed will not solve poor sunlight. Most vegetables need at least six hours of direct sun each day. Tomatoes, peppers, cucumbers, squash, and eggplants often perform better with eight hours.
It also will not remove the need for watering. Elevated beds dry out faster than beds set on the earth. This matters most in hot, dry areas such as USDA Zones 8 through 10.
Choose the right design before you buy materials
The best design depends on your space, plants, height, and budget. A shallow planter works for herbs and lettuce. A deep, strong bed works better for carrots, tomatoes, peppers, and root crops.

Table: elevated garden bed designs
| Design | Best use | Main limit |
|---|---|---|
| Legged planter box | Patios, decks, and easy access | Needs strong legs and frequent watering |
| Trough bed | Long rows of herbs and vegetables | Can become very heavy |
| Raised platform bed | Large gardens and uneven ground | Costs more and needs careful leveling |
| Waist-high bed | Gardeners with back or knee pain | Uses more soil and support material |
| Tiered bed | Small spaces and mixed crops | Upper tiers may shade lower plants |
A legged planter is the simplest choice for most home gardeners. A platform bed makes more sense when you want a larger growing area but need to keep it above muddy or compacted ground.
Pick a useful height
A bed 18 to 24 inches high offers a good balance of comfort, cost, and stability. A height of 30 to 32 inches works well for wheelchair access or seated gardening, but it needs stronger legs and more bracing.
Beds below 12 inches are lighter and cheaper. However, they offer less space for roots and may still force you to bend. For lettuce, basil, radishes, and strawberries, 12 to 18 inches can work well.
Pick the right width
Keep the bed no more than 4 feet wide if you can reach it from both sides. Use a width of 2 to 3 feet if you can reach only one side.
A bed that is too wide causes a common problem: you step into it to reach the center. That compacts the soil and damages roots. I prefer a 2-by-4-foot bed for balconies and a 3-by-6-foot bed for a small yard.
Tools and materials for an off-ground garden bed
Good materials prevent most early failures. Use lumber that can handle outdoor moisture, fasteners that resist rust, and supports that can carry the full soil load.

Table: tools and materials checklist
| Item | Suggested choice | Why it matters |
|---|---|---|
| Side boards | Untreated cedar, redwood, or hemlock | Holds soil without adding unwanted chemicals |
| Legs | 4-by-4 posts or doubled 2-by-4 boards | Carries the weight of wet soil |
| Screws | Exterior-rated 3-inch and 1½-inch screws | Resists rust and splits |
| Corner braces | Galvanized steel or heavy wood blocks | Stops the box from twisting |
| Drill | Cordless drill with a pilot bit | Speeds assembly and reduces cracks |
| Saw | Circular saw or handsaw | Cuts boards to length |
| Drainage bit | ½-inch to 1-inch bit | Makes water escape holes |
| Level | 2-foot or 4-foot level | Prevents standing water on one side |
| Safety gear | Eye protection, gloves, hearing protection | Protects during cutting and drilling |
Cedar costs more than pine, but it often lasts longer in damp conditions. Untreated pine may last three to seven years, depending on rain, soil contact, and airflow. Cedar may last eight to fifteen years when the bed stays off wet ground.
Should you use pressure-treated wood?
Modern pressure-treated wood is widely used for outdoor structures. Still, some gardeners prefer untreated cedar, redwood, cypress, or composite boards for food beds.
Avoid old salvaged lumber if you do not know its history. Do not use boards that may contain creosote, lead paint, or older arsenic-based treatments. Never burn treated scraps.
Use food-safe finishes with care
You do not need to seal cedar. If you want to protect another type of wood, use a product labeled for exterior garden use and follow its full curing time.
Do not coat the inside with unknown paint, roofing tar, or used motor oil. These products can leach unwanted compounds into soil. A removable pond-liner style barrier can protect the wood, but it must not block drainage.
Plan the site, sunlight, and support
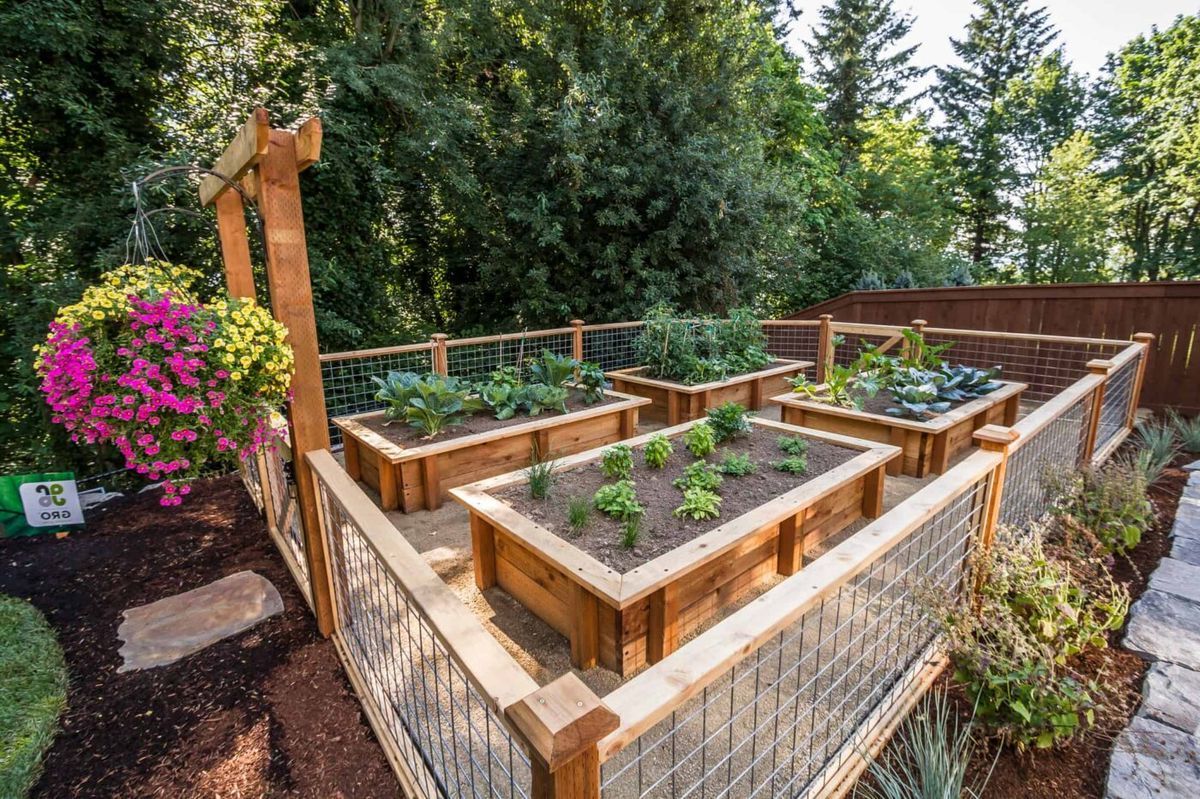
The site should be level, bright, and easy to reach. A raised bed that sits in a dark corner will produce weak plants no matter how rich the soil is.
Check the sunlight
Watch the site from morning to late afternoon before you build. Leafy greens such as spinach, lettuce, and arugula can manage with four to six hours of sun. Fruiting plants need more.
Place tomatoes, peppers, cucumbers, and bush beans where they receive six to eight hours of direct sunlight. In hot Zone 9 and Zone 10 gardens, some afternoon shade can prevent lettuce from bolting and peppers from scorching.
Check the surface
Set the bed on a firm surface. Concrete, pavers, gravel, compacted soil, and a strong deck can work. Avoid soft mulch, loose sand, or a steep slope unless you build a base first.
A sloped site creates uneven moisture. The low end can stay wet while the high end dries out. Use a level across the support frame before you add soil.
Check wind and access
Tall beds catch wind. This matters on balconies, rooftops, and exposed yards. A narrow bed may tip if it has tall tomato cages and light soil.
Leave at least 24 inches of walking space around the bed. Leave 36 inches if you use a wheelchair, walker, or garden cart.
⚠️ Warning: Do not place a large soil-filled planter on a balcony or roof without checking the structure. A structural engineer or building manager can confirm the safe load.
How to build a raised garden bed off the ground
The following steps build a sturdy 2-by-4-foot bed that stands about 24 inches high. Adjust the length and width as needed, but keep the same support principles.
Step 1: Cut the boards
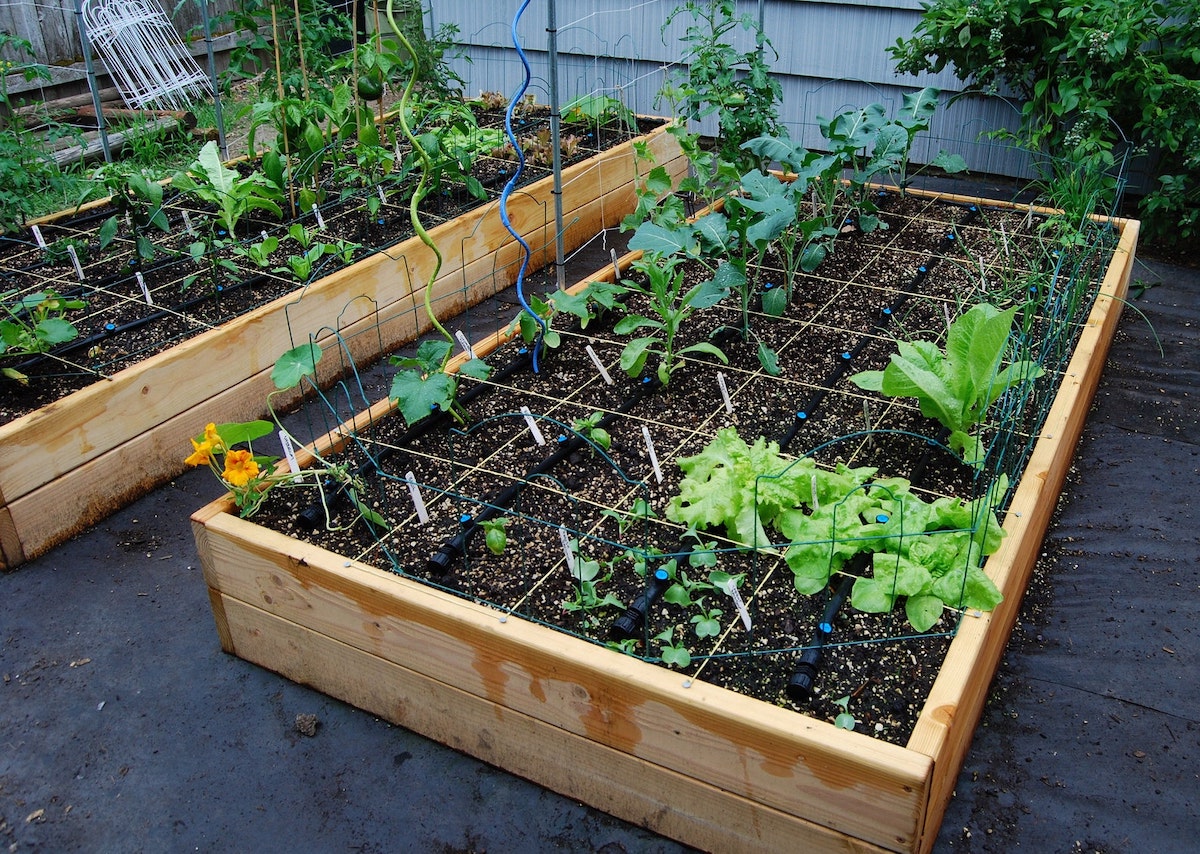
Cut two long boards to 48 inches and two end boards to 24 inches. For a 24-inch-tall box, stack three 2-by-8 boards or use taller side boards.
If you use 2-by-6 boards, stack four layers for a bed close to 22 inches tall. Remember that the real board size is smaller than the label. A “2-by-6” board usually measures about 1½ by 5½ inches.
Wear eye protection when cutting. Support long boards on sawhorses so they do not pinch the saw blade.
Step 2: Build the planter box
Lay the first layer of boards on a flat surface. Position the long boards between or outside the end boards, based on the final size you want.
Drill pilot holes, then drive two exterior screws into each corner. Add the next layers and stagger the joints. Staggered joints make the box stronger and reduce a long weak seam.
Check each corner with a square. A box that starts crooked will remain crooked.
Step 3: Add corner posts or internal supports
Place a vertical 4-by-4 post inside each corner. The post should reach from the bottom of the box to the top edge.
Fasten each board layer to the post. This creates a strong connection and reduces outward pressure. For a bed longer than 4 feet, add a center support or cross brace on each long side.
Step 4: Build the legs
Cut four 4-by-4 legs to the desired height. For a bed that stands 24 inches above the ground, the legs may be 24 to 28 inches long, depending on how the box rests on them.
Attach the legs to the outside corners with four 3-inch exterior screws per side. Use bolts or carriage bolts for a large bed. Screws alone may pull out under a very heavy load.
For a 3-by-6-foot bed, add two center legs on each long side. Long boxes need support in the middle, not only at the corners.
Step 5: Add a bottom frame
A bottom frame supports the drainage floor. Use two or three crosspieces made from 2-by-4 lumber.
Place the crosspieces across the short width of the bed. Space them 12 to 16 inches apart. Screw them into the side supports and legs.
This step matters more than many builders expect. Without a bottom frame, the floor can bow after several watering cycles.
Step 6: Install the bed floor
Use exterior plywood that is at least ¾ inch thick, or use closely spaced deck boards. Plywood gives even support, while deck boards allow more airflow.
Drill many ½-inch to 1-inch drainage holes through the floor. Space them about 6 to 8 inches apart. Add extra holes near the edges because water often collects there.
Cover the floor with landscape fabric or a breathable geotextile fabric. Secure it with staples, but do not use plastic sheeting as the main liner.
Step 7: Add a lower shelf if needed
A lower shelf can hold pots, hand tools, or bags of compost. Keep it open or use slats so rain does not collect.
Do not store wet soil bags on a shelf that was not designed for heavy weight. A bag of moist potting mix can weigh more than it seems.
Step 8: Sand sharp edges
Sand the top edges and corners. This protects hands, gloves, clothing, and children.
Use a medium-grit paper first, then a finer grit on areas that people touch. I also round the outer top corners with a rasp.
Step 9: Test the structure
Before adding soil, push the bed from each side. It should not rock, twist, or shift.
Add a few buckets of water to test drainage. Water should leave through the bottom within minutes. If water pools, add more holes before filling the bed.
Step 10: Place the finished bed
Move the empty bed into its final position. Once filled, it may become too heavy to move safely.
Set it on pavers, gravel, or a firm base. Check the level again. A slight slope can help drainage, but a steep tilt causes dry and wet zones.
Step 11: Fill it with the right soil
Use a loose mix rather than plain garden soil. A simple mix contains:
- 50 percent quality topsoil
- 30 percent finished compost
- 20 percent coarse material, such as pine bark fines or aged leaf mold
For a legged bed, avoid heavy clay soil. It can compact and place too much strain on the frame. Commercial raised-bed soil works well but costs more.
Step 12: Water and settle the soil
Fill the bed in layers. Lightly water each layer to settle air gaps. Do not pack the soil down with your feet.
After watering, the soil may sink by 2 to 4 inches. Add more mix before planting. Leave about 1 inch of space below the rim so mulch and water do not spill over.
Step 13: Plant for the bed size
Use compact crops in a small elevated bed. Good choices include:
- Leaf lettuce
- Spinach
- Kale
- Swiss chard
- Radishes
- Carrots
- Bush beans
- Basil
- Parsley
- Chives
- Strawberries
- Patio tomatoes
- Dwarf peppers
Avoid large pumpkins, sprawling winter squash, and full-size melons unless the vines can grow over the edge. A single zucchini can take over a 2-by-4-foot bed.

Step 14: Add mulch
Apply 1 to 2 inches of shredded leaves, straw, or fine bark after planting. Keep mulch a few inches away from tomato stems and other soft stems.
Mulch slows water loss and reduces soil splash. In a raised bed, it also helps keep the surface from heating too fast.
Choose soil depth and soil mix by crop
Root depth affects both plant health and bed weight. Deep crops need more soil, while many leafy crops can grow in a shallower mix.

Table: soil depth for common crops
| Crop | Useful soil depth | Notes |
|---|---|---|
| Lettuce and spinach | 6–8 inches | Sow often for a steady harvest |
| Radish | 8–10 inches | Loose soil prevents forked roots |
| Carrot | 12–18 inches | Choose short varieties in small beds |
| Bush bean | 12 inches | Needs steady moisture |
| Pepper | 12–18 inches | Warm soil helps early growth |
| Tomato | 18–24 inches | Add a cage or stake before roots spread |
| Strawberry | 8–12 inches | Keep crowns at soil level |
| Blueberry | 18–24 inches | Needs acidic soil near pH 4.5–5.5 |
Most vegetables prefer soil near pH 6.0 to 7.0. Blueberries are an exception and need a much lower pH. Do not place blueberries in the same mix as tomatoes and lettuce.
Use compost, not fresh manure
Finished compost improves structure and adds slow nutrients. Fresh manure can burn roots and may contain weed seeds or pathogens.
If you use manure compost, follow the product label and allow it to finish curing. Many gardeners add a thin layer of compost each spring rather than replacing all the soil.
Do not fill the bottom with gravel
A gravel layer does not improve drainage in a raised planter with a small base. It can create a perched water zone above the gravel. Use a well-draining soil mix and open drainage holes instead.
Water and feed an elevated bed
Raised beds above ground often need more water than in-ground beds. Wind, sun, and airflow dry the sides and top faster.
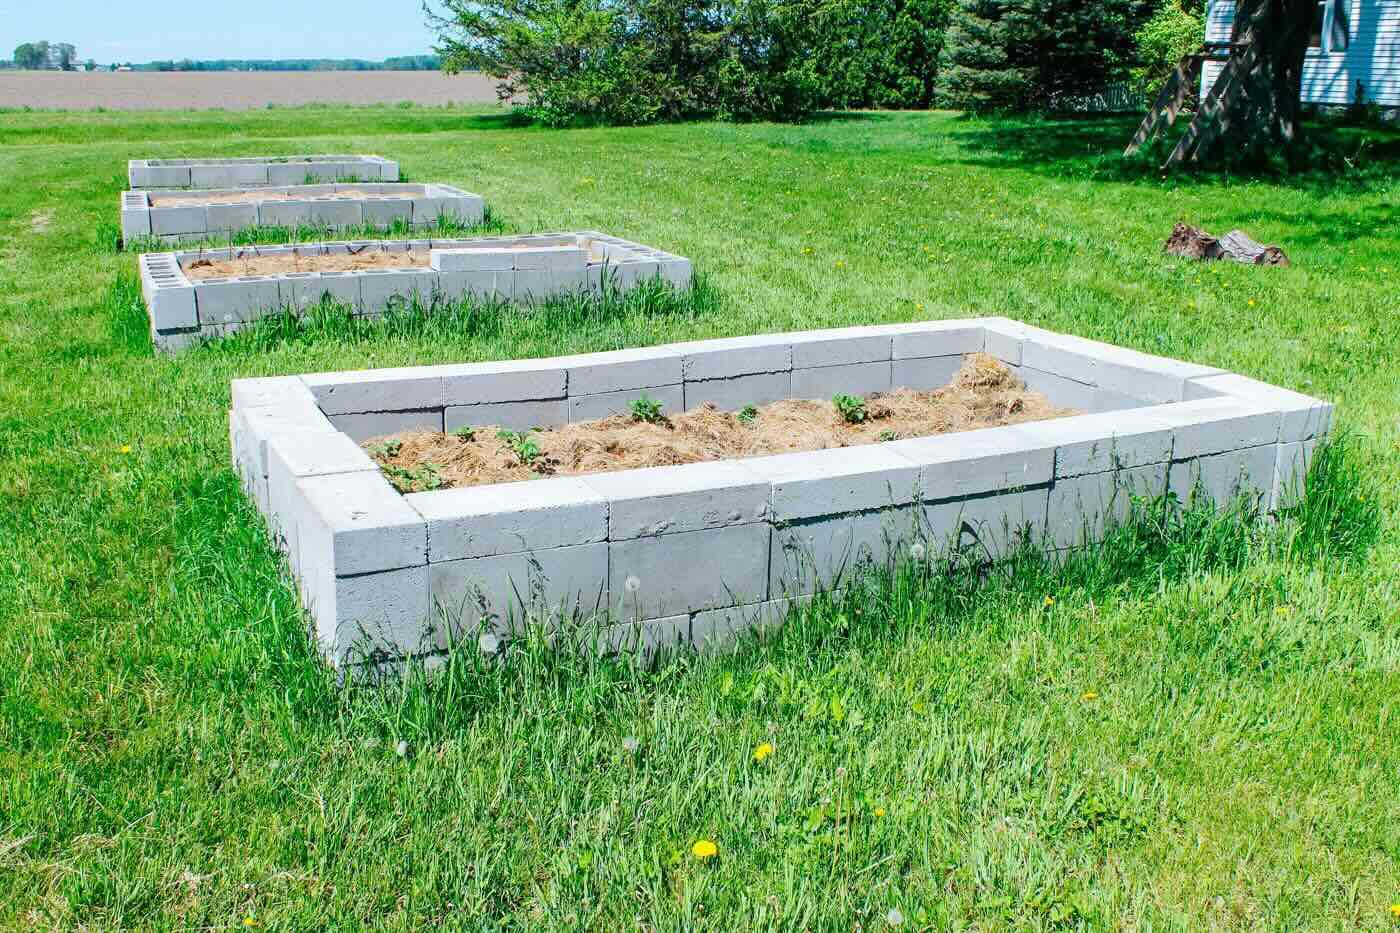
Table: watering guide by season
| Season or condition | Typical schedule | What to check |
|---|---|---|
| Cool spring | Every 2–4 days | Soil moisture 2 inches down |
| Warm summer | Daily or every other day | Wilting, dry edges, hot soil |
| Heat above 90°F | Daily, sometimes twice daily | Morning and late-day moisture |
| Cool fall | Every 3–5 days | Rain and slower plant growth |
| Heavy rain | Pause watering | Drainage and root health |
These are starting points, not fixed rules. A bed with tomatoes in full sun dries much faster than one with lettuce in partial shade.
Water slowly at the soil line. A soaker hose or drip line works well. I use a timer with adjustable run time, but I still check the soil by hand because timers cannot see rain, wind, or plant size.
Fertilize based on plant need
Compost may supply enough nutrients for leafy greens during the first crop. Fruiting crops often need more food as they grow.
A balanced fertilizer such as 5-5-5 can help new beds. The three numbers show nitrogen, phosphorus, and potassium. Avoid heavy nitrogen feeding once tomatoes and peppers begin flowering, since excess nitrogen can create large leaves with fewer fruits.
Watch for nutrient problems
Pale older leaves may point to low nitrogen, but yellow leaves can also come from overwatering or poor roots. Purple leaves may result from cool soil or phosphorus stress, though true phosphorus deficiency is less common in garden soil than many labels suggest.
Use a soil test before adding lime, sulfur, or strong fertilizer. A test gives better guidance than guessing from leaf color.
💡 Pro Tip: Put a simple moisture meter aside and use your finger first. Push it 2 inches into the soil. If the mix feels dry at that depth, water deeply until a little drains from the bottom.
Common mistakes and practical fixes
Most raised-bed failures come from weak support, poor drainage, or a bad crop choice. The good news is that many problems can be fixed without rebuilding the whole bed.
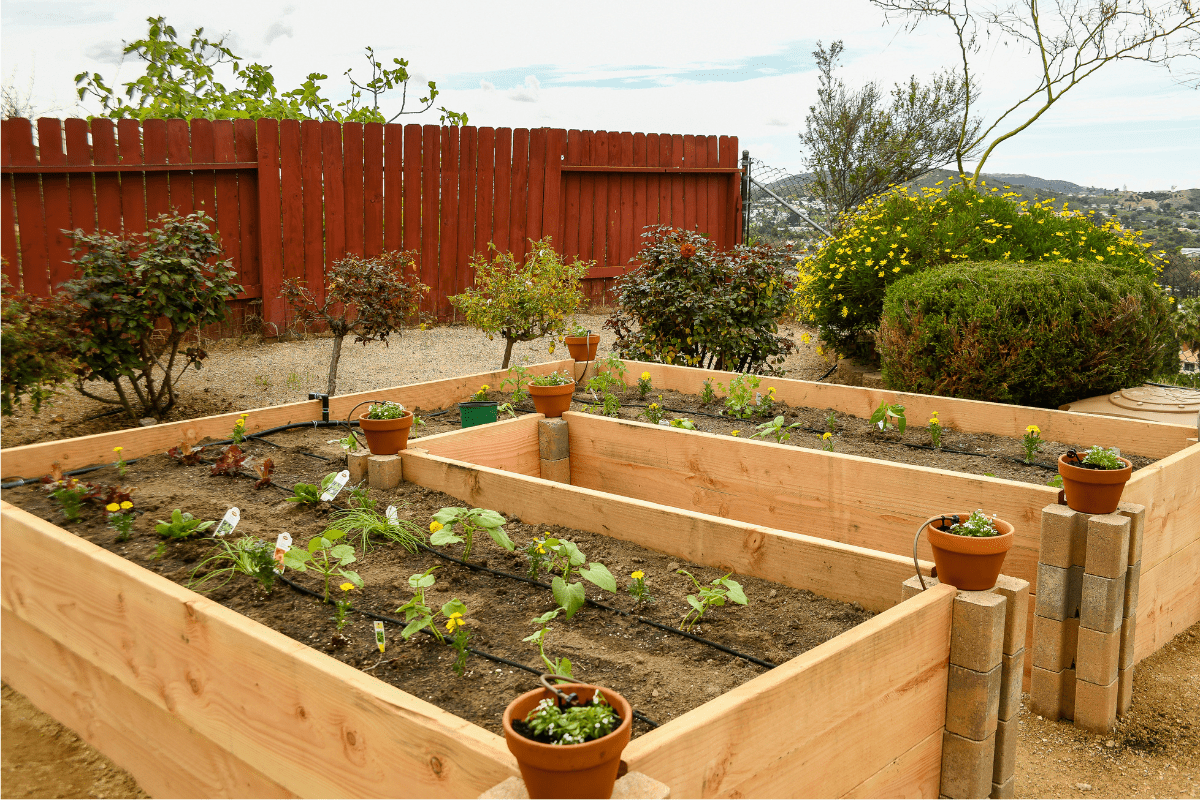
Table: common problems and solutions
| Problem | Likely cause | Fix |
|---|---|---|
| Bed rocks or leans | Uneven base or weak legs | Re-level the site and add braces |
| Soil spills out | No fabric or gaps in boards | Add inner fabric and close gaps |
| Water stays too long | Few drainage holes or heavy soil | Drill holes and mix in bark fines |
| Plants wilt each afternoon | Small bed dries fast | Add mulch and drip irrigation |
| Wood bows outward | Long unsupported side | Add a center post or brace |
| Roots rot | Constantly wet soil | Improve drainage and reduce watering |
| Soil sinks quickly | Air gaps or unfinished compost | Add settled, finished mix |
| Crops stay small | Poor light or low nutrients | Move the bed or test the soil |
A bowed wall is a structural warning. Do not wait until the boards split. Empty some soil, add a brace, and rebuild the weak section.
Why is my raised bed drying out so fast?
Elevated beds lose water through the drainage floor, side gaps, and exposed soil surface. Dark wood can also heat the root zone.
Add 1 to 2 inches of mulch, use a drip line, and group plants by water need. In Zone 9, light-colored shade cloth during the hottest afternoon hours can protect lettuce and cilantro.
Why is the soil sinking?
Fresh soil contains air pockets. Organic matter also breaks down over time. Most beds settle after the first month and again after winter rain.
Top up with compost and raised-bed mix. Do not fill the gap with pure compost, since it can shrink again and may hold too much water.
Why are tomato leaves yellow?
Yellow leaves may signal overwatering, root damage, nitrogen shortage, or normal aging of lower leaves. Check the soil moisture, inspect the drainage holes, and look for pests such as aphids or whiteflies.
Tomatoes also need steady warmth. Cold nights below 55°F can slow growth and cause pale leaves even when the soil is fertile.
Maintain the bed through the seasons
A raised garden bed lasts longer when you inspect it twice a year. Spring and fall checks catch loose screws, rot, blocked holes, and soil loss before they become expensive problems.

Table: seasonal maintenance schedule
| Time | Main tasks | Reason |
|---|---|---|
| Early spring | Check screws, braces, and drainage | Winter movement can loosen the frame |
| Late spring | Add compost and mulch | Restores soil and limits weeds |
| Mid-summer | Inspect for dry wood and pests | Heat speeds water loss and wear |
| Early fall | Remove diseased plants | Reduces disease carryover |
| Late fall | Clean tools and empty dead roots | Helps prevent pests and rot |
| Winter | Cover or store removable parts | Protects wood and fabric |
Do not leave diseased tomato vines in the bed. Remove them and discard them according to local rules. Do not add heavily diseased plant material to a cool home compost pile.
How long does an elevated garden bed last?
The frame may last three to seven years with untreated pine, eight to fifteen years with cedar, and longer with quality composite or stone. The floor often fails before the side boards because it stays damp and carries the soil load.
Inspect the floor each spring. Push gently on it with a blunt tool. Soft, sagging, or cracked areas need repair before the bed is planted.
How to protect the bed in winter
Leave healthy roots in place to protect soil structure, but remove tender annual crops and diseased debris. Cover the soil with leaves, straw, or compost.
If the bed sits on a balcony, secure it against wind. Do not wrap the entire planter in airtight plastic. Trapped moisture can speed rot.
Pros and cons of building above-ground
An elevated bed solves real problems, but it also costs more and needs more care than a bed on the ground.

Table: pros and cons
| Pros | Cons |
|---|---|
| Easier access for planting and harvest | Costs more to build |
| Works on concrete and poor soil | Needs more frequent watering |
| Strong control over soil quality | Requires a sturdy frame |
| Fewer weeds from lawns and paths | Holds a heavy load |
| Warms early in spring | Can overheat in hot climates |
| Cleaner crops and less mud | Floor and legs may rot first |
| Good for limited mobility | Not ideal for large sprawling crops |
For a small patio, the benefits often outweigh the cost. For a large vegetable garden with good soil, an in-ground or low raised bed may offer more growing space for less money.
Personal lessons from building elevated beds
My first elevated bed used 2-by-4 side boards and four narrow legs. It looked fine when empty. After I filled it, the long sides bowed outward by nearly an inch.
I fixed it by adding center legs and a cross brace. Since then, I add a support every 3 to 4 feet on long beds. That small step costs little and prevents a major repair.
I also learned not to use a dense mix of garden soil and compost in a legged planter. The bed drained slowly after heavy rain, and the basil roots stayed wet. A mix with pine bark fines performed better over two growing seasons.
In a Zone 6 garden, the elevated bed warmed faster in April, so I planted lettuce and radishes early. In Zone 9, the same design needed mulch, shade cloth, and more water to keep the root zone from overheating.
Improve the design for accessibility and safety
A raised garden bed can support seated gardening, but the details matter. Smooth edges, a firm path, and safe reach distance make the bed much easier to use.
Comfortable dimensions
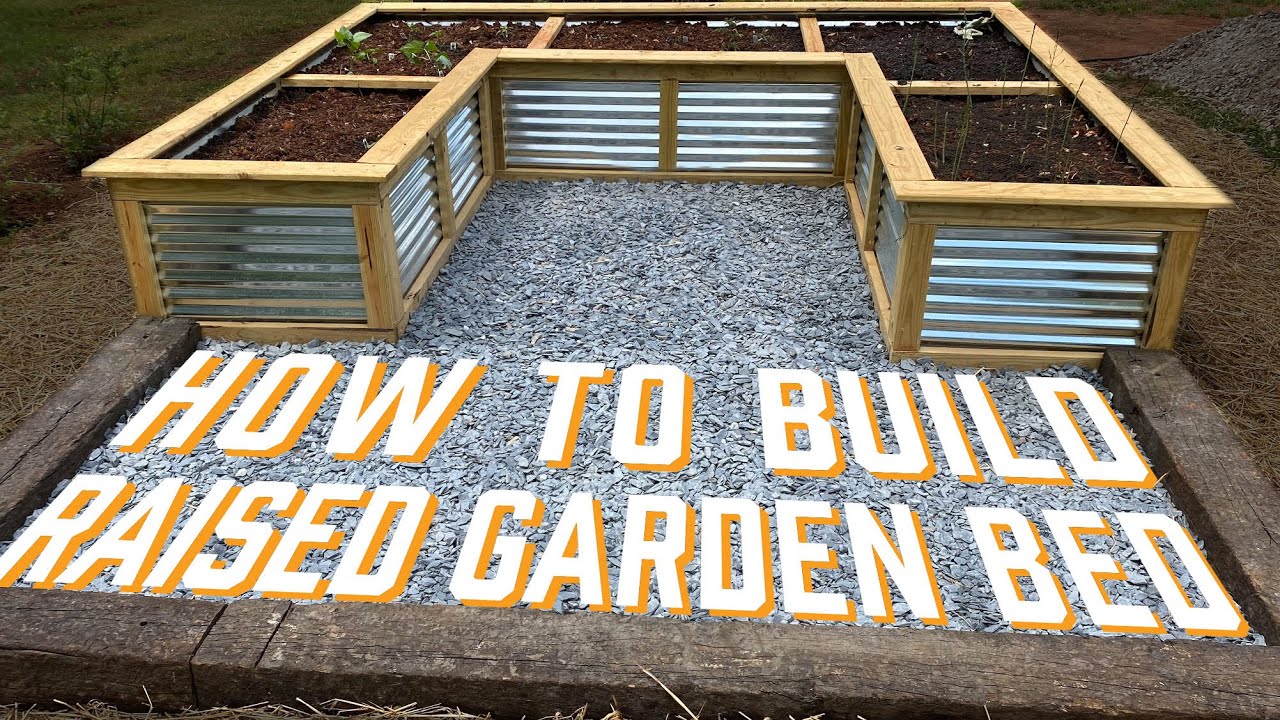
For many gardeners, a 24- to 32-inch height reduces bending. A 2-foot reach from the edge works well for most tasks. If you garden from a wheelchair, leave knee clearance under part of the bed.
Use a 3-foot-wide path at the front if you need to turn a chair or cart. Keep tools on a shelf within reach so you do not need to lift heavy items.
Safe fasteners and edges
Use galvanized or stainless exterior fasteners. Rusted screws can stain wood and fail under stress.
Sand all corners. Cover exposed bolt ends with caps or trim. Check for loose boards before children or pets use the area.
Keep chemicals away from food beds
Do not place the bed where lawn herbicides or insecticides may drift. Avoid areas near treated decks or freshly sealed concrete until the product label allows contact.
Use row cover, insect netting, hand picking, and crop rotation as the first pest controls. Invite pollinators with flowers such as calendula, alyssum, borage, and nasturtium, but do not crowd the vegetable roots.
Alternatives to a raised bed on legs
A legged planter is not the only way to grow above poor ground. Your best alternative may depend on cost, space, or the crop you want to grow.
Ground-level raised beds
A bed 8 to 12 inches above the soil costs less and holds less weight. It works well when you have a yard but poor clay or compacted soil.
You can place cardboard under the bed to suppress grass. Over time, earthworms and roots connect the bed soil with the ground below.
Fabric grow bags
Fabric bags are light, cheap, and easy to move. They work well for potatoes, tomatoes, peppers, and herbs.
They dry even faster than wooden planters. Use a saucer only when needed, and empty standing water after irrigation.
Stock tanks
Galvanized stock tanks offer strong walls and a long life. Drill drainage holes and cover sharp edges. Metal heats in full sun, so use mulch and monitor soil temperature in hot regions.
Masonry or block beds
Concrete blocks and stone can make durable beds. They are heavy and more permanent, but they resist rot. Use a level base and avoid unstable stacked walls.
Who should build an elevated garden bed?
An off-ground bed suits gardeners who need easy access, have poor soil, or grow on hard surfaces. It also helps renters who want a removable garden.
It works well for
- Apartment and balcony gardeners
- Older adults
- Gardeners with knee or back pain
- People using wheelchairs or walkers
- Small-space vegetable growers
- Homes with contaminated or compacted soil
- Gardeners who want tight control of soil pH
Choose another design if
Avoid a large legged bed if you cannot move heavy materials safely or if the surface cannot support the load. A ground-level raised bed may be safer and cheaper.
You may also prefer containers if you move often. A few 10-gallon fabric pots can grow tomatoes and peppers without the cost of a permanent frame.
FAQs about raised garden beds off the ground
Q: Can I put a raised garden bed on concrete?
A: Yes. Use a bottom with many drainage holes, set the bed level, and protect the concrete from constant standing water. A tray or paver base can help keep water from staining the surface.
Q: How high should a raised garden bed be off the ground?
A: Use 18 to 24 inches for general comfort. Choose 30 to 32 inches for seated gardening or wheelchair access. Taller beds need stronger legs, braces, and a wider base.
Q: Does an elevated garden bed need a bottom?
A: Yes, if it stands on legs or a platform. The bottom holds the soil. Use ¾-inch exterior plywood or strong deck boards, plus many drainage holes and support crosspieces.
Q: What is the best wood for a raised garden bed?
A: Untreated cedar, redwood, cypress, and durable hemlock work well. Cedar offers a useful balance of life, weight, and cost. Avoid unknown reclaimed wood.
Q: Can I use regular garden soil in an elevated bed?
A: You can, but heavy garden soil often drains poorly and adds more weight. Mix topsoil with finished compost and coarse organic material, such as pine bark fines.
Q: How often should I water a raised bed off the ground?
A: Check the soil every day during hot weather and water when the top 2 inches feel dry. Many beds need water every day in summer, especially in Zones 8 through 10.
Q: Can I grow tomatoes in an elevated raised bed?
A: Yes. Give tomatoes 18 to 24 inches of soil, strong support, full sun, and steady water. Compact types such as ‘Patio Choice Yellow’ or ‘Tiny Tim’ suit small beds.
Q: Why does my raised bed lean?
A: The base may be uneven, the legs may be too narrow, or the soil load may be shifting the frame. Empty part of the bed, level the base, and add diagonal braces or wider feet.
Q: Should I line a raised garden bed?
A: Line the inside walls with breathable fabric if you want to protect the wood. Do not seal the bottom with plastic. Water must drain freely.
Q: Can I leave an elevated bed outside all winter?
A: Yes, if the frame and floor are built for outdoor use. Remove diseased plants, repair loose parts, protect the bed from wind, and cover the soil with mulch.
Q: How much does it cost to build one?
A: Current pricing ranges from about $75 to $350 for a small DIY bed, depending on wood, soil, hardware, and tools. Cedar, deep soil, wheels, and accessibility features raise the cost.
Q: Is a raised bed off the ground worth the money?
A: It is worth the cost for gardeners who need access, have poor soil, or grow on concrete. It may not be worth it if you have fertile ground, plenty of space, and no need for extra height.
Final thoughts
The best way to build a raised garden bed off the ground is to treat it like a small outdoor structure, not just a wooden box. Build a level base, use strong legs, support the floor, drill generous drainage holes, and choose a light soil mix.
Start with a 2-by-4-foot bed if you are new to elevated gardening. Grow lettuce, herbs, radishes, bush beans, peppers, and compact tomatoes. After one season, you will know how much water, height, and space your garden needs. Then you can build a larger bed with confidence.
Meta description: Learn how to build a raised garden bed off the ground with strong materials, proper drainage, soil depth, planting tips, maintenance advice, and practical DIY steps.