How To Make A Seed Bed: Easy Gardening Guide
A good seed bed gives tiny plants the loose soil, air, water, and light they need to grow strong. It can be a small patch in the ground, a raised bed, or a shallow tray for starting seeds indoors. The basic method is simple: clear the site, improve the soil, make a fine surface, sow seeds at the right depth, and keep the bed evenly moist.
I have made seed beds in heavy clay in Ohio, sandy soil in North Carolina, and cool spring beds in USDA Zone 5. The same lesson comes up each time: small seeds fail more often from rough soil, deep planting, crusted surfaces, or uneven moisture than from poor seed quality. A well-made seed bed prevents most of these problems before they start.

Quick Answer: How Do You Make a Seed Bed?
To make a seed bed, choose a sunny site, remove weeds and stones, loosen the soil 6 to 8 inches deep, and mix in 1 to 2 inches of finished compost. Rake the surface until it feels fine and level, water it, sow seeds at the depth listed on the packet, and cover them lightly. Keep the top inch of soil damp until seedlings emerge.

A seed bed works best when the soil drains well but holds enough moisture for germination. Most vegetables need at least 6 hours of direct sun, while lettuce, spinach, and some herbs can handle light afternoon shade.
The best time to prepare a seed bed depends on your crop and local weather. Cool-season crops such as peas, kale, and spinach may go into the garden 2 to 6 weeks before the last spring frost. Warm-season crops such as beans, cucumbers, and squash need warmer soil and should wait until frost danger has passed.
What a Seed Bed Is and Why It Matters
A seed bed is a prepared growing area where seeds germinate and young plants develop roots. It may be a garden row, raised bed, nursery bed, cold frame, or container. Unlike ordinary soil, a proper seed bed has a fine surface, low weed pressure, good drainage, and steady moisture.

Seeds need four basic conditions: moisture, oxygen, warmth, and contact with soil. If the soil is packed, roots cannot spread well. If the surface dries out, tiny roots die. If the soil stays wet, seeds may rot before they sprout.
The top layer matters most. A seed rarely needs deep, rich soil at first. It needs a soft surface with small soil particles around it. Large clods leave air gaps, while a hard crust blocks seedlings from reaching daylight.
A seed bed also gives you better control. You can mark rows, space plants, remove weeds early, and protect seedlings from slugs, birds, wind, and heavy rain. This control saves seed and reduces thinning work later.
Seed Bed Versus Ordinary Garden Soil
Ordinary garden soil may support mature plants but still fail for seeds. It can contain weed roots, stones, hard clods, or a crusted surface. A seed bed needs more care because seedlings have small roots and little stored energy.
You do not need to replace all your soil. In most gardens, loosening the existing soil and adding a modest amount of compost works well. Too much compost can create soft, rich soil that dries unevenly or holds excess water.
In-Ground, Raised, or Container Seed Beds
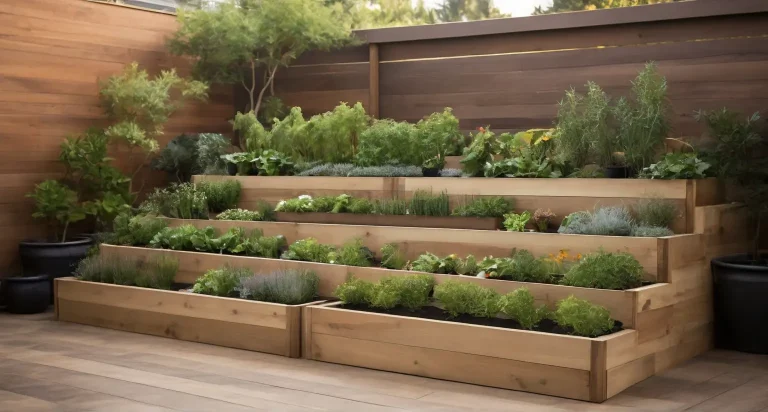
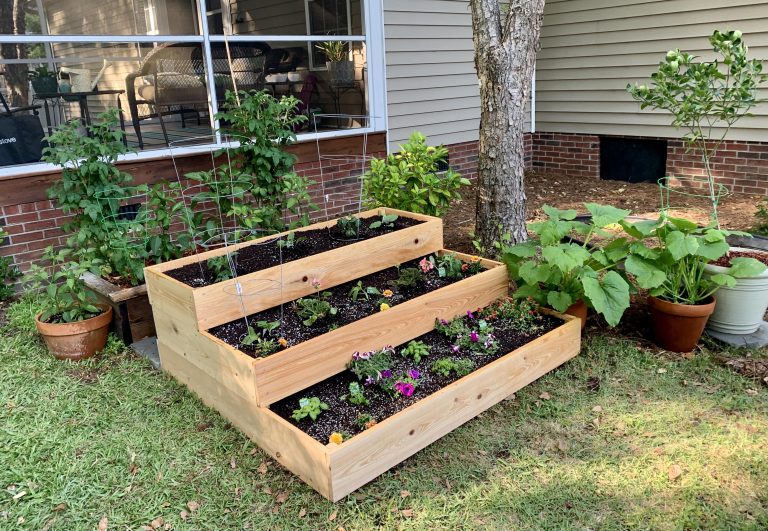
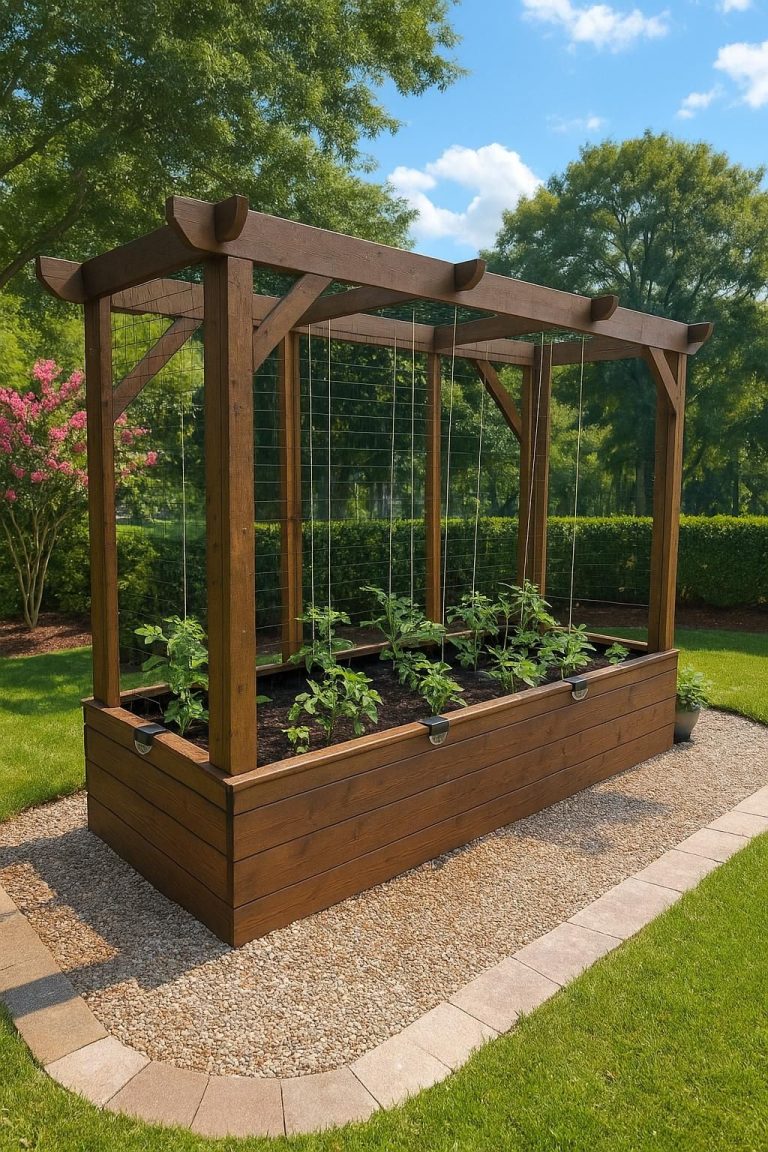
An in-ground bed costs the least and works well for larger crops such as carrots, beets, onions, lettuce, and beans. A raised bed warms sooner in spring and gives you more control over soil texture. A shallow tray or container works best when you need close control of moisture, light, and temperature.
| Seed bed type | Best use | Main limitation |
|---|---|---|
| In-ground bed | Large crops and long rows | May contain weeds or poor soil |
| Raised bed | Wet, compacted, or heavy soil | Costs more to build and fill |
| Tray or container | Indoor starts and small spaces | Needs close watering and transplant care |
In-ground beds suit most home gardeners. Raised beds help when drainage or soil compaction causes trouble. Containers save space but dry out quickly, especially in a sunny window or on a windy deck.
Choose the Right Site Before You Dig
The best seed bed site has sunlight, good drainage, easy water access, and protection from strong wind. Pick a place you can visit every day. A bed that is hard to reach often dries out or becomes overrun with weeds.

Watch the site after rain. If water sits there for more than a day, improve drainage or choose another spot. Seeds need moisture, but they also need oxygen around their roots.
Avoid areas beneath large trees. Tree roots compete for water, and dense shade slows germination. Walnut trees can also release juglone, a natural chemical that may harm some plants, so place sensitive crops away from black walnut roots and leaf litter.
Light Needs by Crop
Most vegetables need full sun, which means 6 or more hours of direct light. Leaf crops can tolerate less sun, but growth may slow and plants may become thin.
| Crop group | Light target | Useful examples |
|---|---|---|
| Full sun crops | 8 or more hours | Tomatoes, peppers, beans, corn |
| Moderate sun crops | 6 to 8 hours | Carrots, beets, onions, broccoli |
| Light shade crops | 4 to 6 hours | Lettuce, spinach, cilantro, arugula |
Morning sun is often better than harsh late-day sun in hot climates such as USDA Zones 8 through 10. In cool Zones 3 through 6, extra sun helps warm the soil and speed early growth.
Check Soil Texture and Drainage
Grab a handful of damp soil and squeeze it. Sandy soil falls apart at once. Clay soil forms a sticky ball. Loam makes a loose ball that breaks apart with a light touch.
Sandy soil drains fast but may need compost to hold moisture. Clay soil holds water but needs organic matter and careful timing. Never work wet clay, since digging it can create hard chunks that last all season.
Tools and Materials You Need
You can build a small seed bed with basic hand tools. A garden fork, hoe, rake, hand trowel, and watering wand cover most jobs. For a large area, a broadfork or tiller can save time, but neither tool replaces good soil judgment.

Use finished compost, not fresh manure. Finished compost smells earthy and contains no hot, fresh plant scraps. Fresh manure may burn roots, add weed seeds, or carry pathogens.
| Tool or material | Purpose | Amount or detail |
|---|---|---|
| Garden fork or broadfork | Loosen compacted soil | Work 6 to 8 inches deep |
| Finished compost | Improve soil structure | Add 1 to 2 inches |
| Bow rake | Level and refine the surface | Use the back for a smooth finish |
| Hand trowel | Make small holes and furrows | Keep one nearby for spot work |
| Fine-rose watering wand | Water without washing seed away | Use low pressure |
| Row marker or string | Keep rows straight | Helpful for small seeds |
A metal rake with stiff teeth breaks clods well, but use the back of the rake to finish the surface. A strong jet from a hose can uncover seeds, so use a gentle rose or mist setting.
You may also need floating row cover, insect netting, labels, and a soil thermometer. A soil test is useful when plants repeatedly fail or pH seems far from normal.
Prepare the Soil Step by Step
Prepare the bed when the soil is moist but not wet. If soil sticks to your boots or tools, wait a day or two. Good timing prevents compaction and saves effort.

1. Mark the Bed
Use stakes and string to outline the area. Keep the bed narrow enough that you can reach the center without stepping on the soil. A width of 3 to 4 feet works well for most raised or in-ground beds.
A narrow bed makes weeding and thinning easier. It also protects the soil from foot traffic. For a long bed, add paths every 10 to 15 feet so you do not need to walk across the planting area.
2. Remove Weeds and Debris
Pull weeds before they form seed. Remove grass crowns, thick roots, stones, sticks, and old crop debris. Perennial weeds such as quackgrass, bindweed, and nutsedge need extra care because small root pieces may regrow.
Do not simply turn mature weeds into the soil. Some weeds can survive shallow burial. Put diseased plant material in the trash unless your compost pile reaches a reliable high heat.
3. Loosen the Soil
Use a garden fork to loosen the soil 6 to 8 inches deep. Push the fork in, rock it back, and lift slightly. Avoid turning every layer upside down, since deep digging can disturb soil life and bring weed seeds to the surface.
For a broad bed, a broadfork loosens soil with less damage to structure. A tiller can help with a badly compacted new bed, but repeated tilling may break soil into dust and create a hard layer below the worked zone.
4. Add Compost
Spread 1 to 2 inches of finished compost over the bed. Mix it into the top 4 to 6 inches, or leave some near the surface after loosening. Compost improves clay soil structure and helps sandy soil hold water.
Do not add a thick layer of compost every season without a soil test. Too much compost may raise phosphorus levels and create nutrient imbalance. A mature seed bed often needs only a thin annual layer.
5. Test and Adjust Soil pH
Most vegetables grow well in soil with a pH from 6.0 to 7.0. Blueberries prefer a much lower pH, around 4.5 to 5.5, so they need a separate acidic bed. Potatoes tolerate slightly acidic soil, often around pH 5.0 to 6.0.
A home test can show the rough range, but a lab test gives better advice. Add lime only when a soil test calls for it. Garden lime acts slowly, while sulfur also takes time and depends on soil type.
6. Make the Surface Fine and Level
Rake out clods until the top inch looks even and crumbly. The surface should feel like a fine cake mix, not powder. Press it lightly with the back of the rake or a flat board.
Do not pack the bed hard. Seeds need firm contact, but roots need air. A light surface firming gives seeds a stable place without sealing the soil.
7. Water Before Planting
Water the bed slowly before sowing. This settles loose soil and reduces the need to spray after seeds go in. Wait until excess water drains away.
Pre-watering works especially well for tiny seeds such as carrots, lettuce, basil, and onions. It also helps you spot low areas where water pools.
Sow Seeds at the Correct Depth and Spacing
Plant seeds at a depth listed on the packet, since seed size controls how much soil cover a seed can push through. A common rule is to cover a seed with soil two to three times as deep as its width. Some seeds, such as lettuce and many herbs, need light and should sit on the surface or under a very thin dusting of soil.

Make shallow furrows with a stick, hoe corner, or ruler. Space rows based on the mature plant, not the tiny seedling. Crowding can lead to weak stems, poor airflow, and diseases such as damping off.
Direct Sowing Depth Guide
The following ranges give a starting point, but the seed packet should always take priority. Soil texture also changes the result. Seeds planted in heavy clay often need less cover than seeds planted in loose sandy soil.
| Seed type | Usual depth | Examples |
|---|---|---|
| Very small | Surface to 1/8 inch | Lettuce, basil, celery |
| Small | 1/8 to 1/4 inch | Carrot, onion, kale |
| Medium | 1/2 to 1 inch | Pea, bean, beet |
| Large | 1 to 2 inches | Corn, squash, pumpkin |
After sowing, cover seeds with fine soil or screened compost. Avoid chunky mulch over tiny seeds. A thick layer can block seedlings or keep the surface too wet.
Mark Rows and Label Varieties
Place labels at the end of every row. Write the crop, variety, planting date, and seed source. This small habit helps when different lettuce types or tomato starts look alike.
Use labels that tolerate rain. A pencil on a plastic marker often lasts longer than a fading felt pen. Keep a garden notebook or phone photo of the bed, too.
Thin Seedlings Early
Thinning means removing extra seedlings so the remaining plants have enough space. Thin when seedlings have one or two sets of true leaves, not just the first smooth seed leaves.
Use scissors for delicate plants. Pulling can disturb nearby roots. Carrots, beets, radishes, lettuce, and spinach often need thinning, even when you sow carefully.
💡 Pro Tip: Sow radishes or lettuce in a narrow band rather than one seed at a time. Thin the row in stages and harvest the small greens as baby leaves.
Keep a New Seed Bed Moist and Safe
Water is the most important task after sowing. Keep the top layer evenly damp until most seedlings emerge. Do not let the surface swing from soaked to dry.

Water gently in the morning when possible. Morning watering gives leaves and soil time to dry, which lowers disease risk. In hot, windy weather, a second light watering may be needed.
Watering by Soil Type and Weather
Your watering plan should follow the soil and the forecast. A sandy bed may need water each day during hot weather, while clay may need water less often but more slowly.
| Condition | Watering approach | What to watch |
|---|---|---|
| Cool, cloudy spring | Light water as needed | Avoid wet, cold soil |
| Hot, dry weather | Check soil daily | Surface may dry in hours |
| Sandy soil | Small, frequent watering | Moisture drains quickly |
| Clay soil | Slow, less frequent watering | Do not create puddles |
Touch the soil with your finger. If the top 1/2 inch feels dry, water small seeds. Once plants have deeper roots, allow the top inch to dry slightly between watering.
Protect Seeds From Pests
Slugs, birds, cutworms, flea beetles, and ants can damage a new bed. Remove hiding places, keep weeds down, and use insect netting when needed. Do not assume every hole means a disease.
For cutworms, place a small paper or cardboard collar around young stems. For slugs, reduce damp debris and inspect the bed at night. Beer traps may catch some slugs, but they do not solve a large infestation alone.
Floating row cover protects seedlings from flea beetles, cabbage moths, and light frost. Secure the edges so wind cannot lift it. Remove or open the cover when plants flower if pollinators need access.
⚠️ Warning: Do not use broad insecticide sprays on a seed bed without checking the label. Many products harm bees, lady beetles, and other helpful insects. Identify the pest first.
Prevent Damping Off
Damping off is a group of fungal and water-mold problems that kill young seedlings at the soil line. Signs include thin brown stems, collapsed seedlings, and patches of dead plants.
Reduce the risk with clean tools, fresh seed-starting mix, good airflow, and careful watering. In outdoor beds, avoid dense sowing and improve drainage. Do not reuse soil from a tray that held diseased seedlings.
Manage Weeds Before They Take Over
The best time to control weeds is before they become large. Weeds compete with seedlings for light, water, and nutrients. They also shelter aphids, thrips, and other pests.

Use a stale seed bed method when weeds are a major problem. Prepare and water the bed one to two weeks before planting. Let weed seeds sprout, then scrape the surface lightly with a hoe without digging deep.
A sharp stirrup hoe works well between rows once seedlings are easy to see. Hand pull weeds close to young plants. Mulch paths, but wait until crop seedlings are established before adding mulch near the row.
Stale Seed Bed Method
The stale seed bed method works best for carrots, lettuce, onions, and other slow-growing crops. It reduces the first flush of weeds without using herbicide.
- Prepare the soil as if you will plant.
- Water the bed lightly.
- Wait 7 to 14 days.
- Scrape emerging weeds at the surface.
- Sow your crop with minimal soil disturbance.
This method will not stop every weed. It works because many weed seeds germinate near the surface after watering. Deep digging afterward can bring up another wave.
Fertilize Only When the Soil Needs It
Most seeds do not need fertilizer at planting. The seed contains enough food for early growth. Once true leaves form, plants may need nutrients if the soil test or plant color shows a shortage.

A balanced fertilizer such as 5-5-5 may help in poor soil, but more is not always better. Excess nitrogen can produce soft, leafy growth and delay roots, flowers, and fruit. Root crops may fork or grow lush tops in overly rich soil.
A soil test is the best guide. Follow the label rate and keep fertilizer away from direct contact with seeds. Water after applying granular fertilizer.
| Plant stage | Nutrient focus | Practical action |
|---|---|---|
| Germination | Little or none | Use prepared soil |
| Early seedlings | Gentle, balanced nutrition | Feed only if growth is pale or weak |
| Leaf growth | Nitrogen in modest amounts | Use compost or a light feed |
| Flower and fruit stage | Phosphorus and potassium balance | Follow soil test and crop needs |
Some crops need special care. Legumes such as peas and beans work with nitrogen-fixing bacteria, so heavy nitrogen can reduce their benefit. Tomatoes and peppers need steady nutrition but also need good calcium movement through consistent watering.
Common Seed Bed Problems and Fixes
Most seed bed problems have a clear cause. Look at moisture, depth, temperature, soil texture, and pests before changing several things at once.

Seeds Do Not Germinate
Seeds may fail because they are old, planted too deep, too dry, too cold, or exposed to rotting conditions. Check the packet germination range. Peppers, tomatoes, and eggplant need warm soil, while spinach and peas dislike high heat.
Dig gently in one spot to inspect the seed. A dry, hard seed points to poor moisture. A soft or rotten seed points to excess water or poor drainage.
Seedlings Are Tall and Weak
Tall, thin seedlings usually need more light. This often happens indoors near a weak window. Place a grow light 2 to 4 inches above seedlings, following the light maker’s instructions, and run it for about 14 to 16 hours each day.
Outdoor seedlings may stretch in shade or crowding. Thin them and improve light exposure. Do not add fertilizer to fix a light problem.
The Soil Forms a Hard Crust
Hard crusts develop after heavy rain, overhead watering, or high clay content. A crust blocks small seedlings, especially carrots and lettuce.
Break the crust gently with a hand rake after seedlings emerge. Add a thin layer of fine compost before the next sowing and use a gentle watering wand or drip line.
Seedlings Turn Yellow
Yellow leaves may come from excess water, poor drainage, low nitrogen, cold roots, or root damage. Check the soil before feeding. Wet, cold soil can make plants look hungry even when nutrients are present.
Improve drainage and wait for warmer conditions. If only older leaves turn pale and growth stays slow, a soil test may show a nutrient need.
| Problem sign | Likely cause | First fix |
|---|---|---|
| No sprouts after the expected time | Cold soil, dry surface, old seed | Check moisture and temperature |
| Stems collapse at soil line | Damping off | Improve air flow and reduce water |
| Leaves have tiny holes | Flea beetles or slugs | Use netting and inspect at night |
| Surface becomes hard | Heavy rain or clay | Loosen lightly and water gently |
| Seedlings grow thin | Low light or crowding | Thin plants and increase light |
Solve one cause at a time. Changing soil, water, fertilizer, and light all at once makes it hard to know what worked.
My Experience Making Seed Beds in Different Climates
In my Zone 5 garden, I prepare beds for peas, spinach, and radishes as soon as the soil can be worked in early spring. I use a thin compost layer and cover the rows with fleece on cold nights. The biggest problem is not frost; it is working wet clay too soon.

In a warm Zone 8 garden, I found that timing mattered more than extra fertilizer. Lettuce and cilantro germinated well in early fall but struggled when planted as summer heat rose. Shade cloth and morning watering helped, yet moving the sowing date gave better results.
I once added too much compost to a carrot bed. The tops looked strong, but the roots forked and split. The next season, I used a lighter compost layer and a deeper, stone-free bed. The carrots grew straighter with less effort.
For tiny seeds, I now pre-water the bed and mix seed with a little dry sand before sowing. This spreads seed more evenly. I still thin the row, but I remove fewer crowded plants.
Pros and Cons of Making a Dedicated Seed Bed
A dedicated seed bed gives you control, but it also adds work. The value depends on how many plants you grow and how poor your native soil is.

| Pros | Cons |
|---|---|
| Improves germination and early root growth | Takes time to prepare |
| Makes rows and spacing easier to manage | Needs regular moisture checks |
| Reduces weeds and soil crusting | May need compost or soil testing |
| Helps protect young plants | Can still fail in poor weather |
| Works for many crops and varieties | Requires thinning and later care |
A seed bed is worth the effort for small seeds, expensive seed packets, difficult soil, and crops that need a long season. It may not be worth building a special bed for large seeds such as beans, corn, or squash when direct sowing already works well.
Seasonal Timing for Seed Bed Preparation
Timing controls soil temperature, moisture, and germination speed. Use the last frost date as a guide, but watch your soil and weather rather than following a calendar alone.
| Season | Main seed bed tasks | Suitable crops |
|---|---|---|
| Late winter to early spring | Prepare cool soil when workable | Peas, spinach, radishes |
| Mid to late spring | Plant after frost and warm soil | Beans, cucumbers, corn |
| Summer | Shade and water new sowings | Basil, carrots, chard |
| Late summer to fall | Sow cool crops and cover soil | Kale, lettuce, turnips |
| Late fall | Remove debris and add compost | Future spring beds |
In USDA Zones 3 through 5, cold soil can delay warm-season crops for weeks. In Zones 8 through 10, heat may be the main issue, so fall often becomes the best season for lettuce, peas, and brassicas.
Soil Temperature Guide
Soil temperature gives a better clue than air temperature for many seeds. Use a soil thermometer in the morning for a more reliable reading.
| Crop | Approximate minimum soil temperature | Better germination range |
|---|---|---|
| Peas and spinach | 40°F | 45 to 60°F |
| Lettuce and carrots | 40°F | 50 to 70°F |
| Beans and cucumbers | 60°F | 70 to 85°F |
| Tomatoes and peppers | 60°F | 75 to 85°F |
| Corn and squash | 60°F | 70 to 90°F |
These are general ranges, not strict rules. Germination slows near the minimum and can fail when soil stays cold and wet.
Mistakes That Reduce Germination
The most common mistake is planting into soil that looks ready but is still too wet. Soil may crumble on top while remaining sticky below. Wait until a squeezed handful breaks apart instead of forming a shiny ball.
Another mistake is covering every seed with the same amount of soil. Tiny lettuce seeds may need light, while beans need deeper cover. Read each packet and adjust for your soil texture.
Avoid walking on the bed. One step can compress a wide area, especially in clay. Set paths before planting so you do not need to reach across the row.
Do not use fresh manure, unfinished compost, or thick wood mulch over a new seed row. These materials can add heat, harbor pests, block seedlings, or tie up nitrogen as they break down.
🌱 Beginner Note: Start with one small bed, perhaps 3 feet by 6 feet. A manageable bed teaches you more than a large bed that becomes hard to weed and water.
How Long a Seed Bed Takes and What It Costs
A small seed bed can take 1 to 3 hours to prepare by hand. A new bed with grass, roots, and compacted soil may take a full day. The work becomes faster after the first season because the soil structure improves.
Current material costs vary by region, compost source, and bed size. A small in-ground bed may cost very little if you already own tools. Raised beds cost more because lumber, soil, hardware, and delivery add up.
| Project size | Typical time | Main cost |
|---|---|---|
| 3-by-6-foot in-ground bed | 1 to 3 hours | Compost and seed |
| 4-by-8-foot raised bed | 3 to 6 hours | Frame and soil mix |
| Large nursery-style bed | 1 day or more | Compost, tools, covers |
Hand tools can last many seasons if you clean soil from them, dry metal parts, and store them under cover. A wooden handle may crack first, while a cheap rake head may bend. Replace damaged tools before they injure your hands or leave the soil poorly prepared.
Pro Tips for Better Seed Bed Results
A few small habits improve results more than expensive gear. Focus on soil texture, timing, moisture, and observation.
- Use a board to make a flat planting line, but do not press the whole bed hard.
- Cover newly sown rows with floating row cover in windy or cold weather.
- Sow a few extra seeds, then thin instead of expecting every seed to grow.
- Keep seed packets in a cool, dry place and check their age before planting.
- Use drip tape or a soaker hose for larger beds once seedlings emerge.
- Rotate crop families to reduce disease buildup.
- Keep brassicas away from old cabbage and broccoli debris.
- Grow flowers such as calendula, alyssum, and dill near the bed to support pollinators and beneficial insects.
Companion planting can help create habitat, but it will not replace proper spacing or pest control. Marigolds may attract helpful insects, yet they cannot protect a crowded tomato bed from every pest.
🔧 Quick Fix: If rain washes out a row, do not rake the whole bed. Refill the shallow furrow with fine soil, reseed the missing section, and cover it with a thin layer of compost or vermiculite.
When to Use a Nursery Bed Instead
A nursery bed makes sense when you need to grow many young plants before transplanting them. It works well for onions, leeks, cabbage, kale, perennial flowers, and some herbs.
A nursery bed should have loose soil, reliable water, and protection from harsh sun or wind. Transplant seedlings when they have several true leaves and a compact root system. Harden them off first by placing them outdoors for a few hours each day over 7 to 10 days.
Direct sowing is better for crops that dislike root disturbance. Carrots, parsnips, beets, and many tap-rooted plants can grow poorly when transplanted. Beans, peas, corn, cucumbers, and squash also usually prefer direct sowing.
When to Hire Help
Most home gardeners can make a seed bed without professional help. Consider advice from a soil laboratory, extension office, or experienced gardener when drainage stays poor, soil tests show serious contamination, or plants fail across several seasons.
Do not plant food crops in soil that may contain lead, petroleum, or unknown construction debris until it has been tested. Raised beds with clean soil may offer a safer alternative, but the source of the fill still matters.
A professional may also help with grading, drainage, large-scale irrigation, or removing invasive perennial weeds. For a small garden, local university extension services often provide more useful soil advice than a general landscaping company.
Frequently Asked Questions
Q: What is the best soil for a seed bed?
A: Loose, crumbly loam with good drainage works best. Aim for soil that holds together lightly when damp but breaks apart with gentle pressure. Most vegetables prefer a pH near 6.0 to 7.0. Add finished compost in a moderate layer, but avoid using fresh manure or large amounts of compost without a soil test.
Q: How deep should I prepare a seed bed?
A: Loosen the soil about 6 to 8 inches deep. Most seeds only need a fine surface layer, but young roots need loose soil below the seed. Root crops such as carrots and parsnips benefit from deeper, stone-free soil.
Q: Should I water the seed bed before planting?
A: Yes. Pre-water the bed, let excess water drain, then sow the seeds. This settles the soil and reduces the chance of washing tiny seeds out of place after planting.
Q: Can I make a seed bed in clay soil?
A: Yes, but work clay only when it is moist and crumbly, not wet. Add finished compost, use a garden fork or broadfork, and avoid repeated tilling. Raised beds can help if clay stays waterlogged.
Q: How often should I water newly planted seeds?
A: Check the surface every day. Keep the top layer damp but not flooded until seedlings emerge. Sandy soil and hot weather may need daily or twice-daily checks, while cool clay soil may need much less water.
Q: Should I fertilize seeds when I plant them?
A: Usually not. Most seeds contain enough stored food for early growth. Fertilize only when a soil test or clear plant symptoms show a need, and keep granular fertilizer away from direct seed contact.
Q: Why did my seedlings die after emerging?
A: Common causes include damping off, dry soil, excess water, cutworms, slugs, cold soil, and poor light. Look at the stem and soil line. A pinched, brown stem suggests damping off, while a cleanly cut stem points more toward cutworms.
Q: Can I use potting soil in an outdoor seed bed?
A: You can use a small amount of quality seed-starting mix in a shallow furrow, but potting soil is costly for large beds and may dry quickly. Screened garden soil mixed with finished compost usually works better outdoors.
Q: Is a raised bed better than an in-ground seed bed?
A: A raised bed is better for wet, compacted, or contaminated soil. An in-ground bed is cheaper and works well when native soil drains and has reasonable texture. The main difference is control, not automatic plant quality.
Q: How long does it take seeds to sprout?
A: Fast crops such as radishes may sprout in 3 to 7 days. Lettuce and beans often take 5 to 10 days. Peppers, parsley, and some flowers may take 10 to 21 days, especially when soil is cool.
Q: Should I cover a new seed bed?
A: Use floating row cover for frost, wind, birds, and some insects. Secure it well and monitor heat and moisture underneath. Remove it when plants need pollination or when temperatures rise too high.
Q: What should I grow in my first seed bed?
A: Try radishes, lettuce, bush beans, peas, spinach, or calendula. These crops give clear results and teach spacing, moisture control, thinning, and harvest timing. Avoid starting with crops that need very warm soil or a long indoor season.
Final Thoughts
The best seed bed is not the most expensive one. It is a clean, level, well-drained space with fine soil, correct planting depth, steady moisture, and enough light. Start small, observe the bed each day, and change one thing at a time when a problem appears.
After a few seasons, the work becomes easier. Soil gains structure, weeds become more manageable, and you learn the planting windows for your own USDA zone. A well-made seed bed turns a packet of seeds into a reliable start for vegetables, herbs, flowers, and pollinator plants.
Meta description: Learn how to make a seed bed with simple tools, soil preparation steps, planting depths, watering tips, seasonal timing, pest control, and common fixes.