How To Replace Raised Beds: Easy Garden Guide
Replacing a raised bed is often easier than trying to save a frame that has bowed, rotted, or leached soil into the path. The job also gives you a chance to fix poor drainage, refresh tired soil, and choose a safer material. I have rebuilt beds in wet Pacific Northwest gardens, dry Zone 6 yards, and hot Zone 9 plots. The best results came from treating the project as both a carpentry job and a soil job.

Quick answer: how to replace a raised bed
To replace a raised bed, remove the old frame, save healthy soil, inspect the site, level the base, install a durable new frame, and refill it with a balanced soil mix. Replace the soil only when it has severe compaction, chemical contamination, disease, or heavy pest problems. Most home gardeners can replace one 4-by-8-foot bed in one day for about $100 to $500, depending on the material.

The best time to replace a raised garden bed is late winter, early spring, or fall after harvest. Work when the soil is moist but not wet. If the bed holds perennial herbs, strawberries, asparagus, or pollinator plants, move them before you take the frame apart.
A raised bed usually needs replacement for one of three reasons:
- The frame has rotted or split.
- The bed has settled and no longer drains well.
- The soil has become contaminated, compacted, or full of roots and weeds.
You do not always need to discard all the soil. In many cases, the old soil is still useful. You can move it to a tarp, remove roots and debris, mix in fresh compost, and return it to the new frame.
Signs your raised bed needs replacement
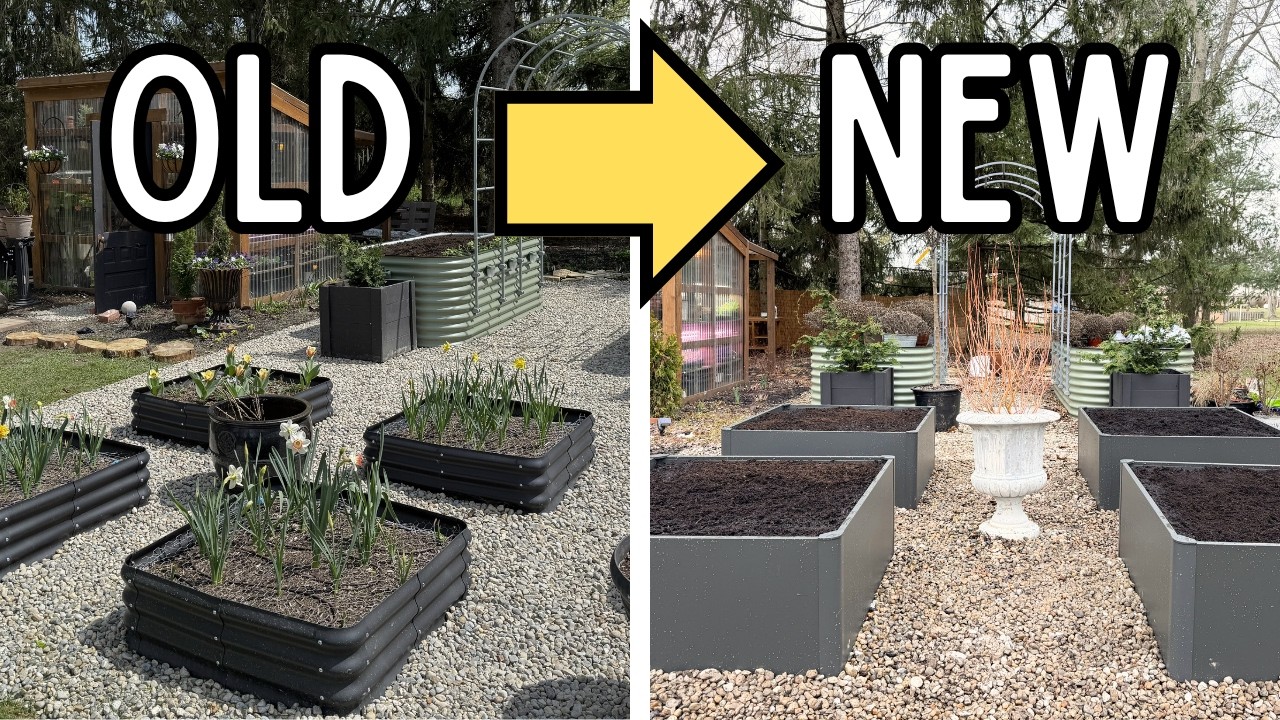
A raised bed needs replacement when the structure no longer holds soil safely or the growing conditions have become hard to manage. A small crack may need only a brace. A frame that leans, bulges, or sheds soft wood usually needs a full rebuild.
Structural warning signs
Check the frame at the start and end of each growing season. Push gently against each wall. If it moves more than an inch, the soil pressure has likely weakened the joints or side boards.
Look for:
- Soft wood that crumbles under a screwdriver
- Boards that bow outward
- Nails or screws that no longer grip
- Corners that pull apart
- Broken caps or sharp edges
- A frame that has sunk on one side
- Water pooling inside the bed
- Soil spilling into nearby paths
Wood rot often starts at the bottom edge, where the board stays damp against soil. Cedar can last 8 to 15 years in many climates. Pine may last only 3 to 7 years, especially in USDA Zones 7 through 10 or in wet areas.
Soil and plant warning signs
The frame may look fine while the soil needs attention. Compacted soil drains slowly and leaves roots short of air. Poor soil may also cause plants to stay small even when you water and fertilize them.
| Symptom | Likely cause | First action |
|---|---|---|
| Water remains for more than 24 hours | Compaction or blocked base | Remove soil and inspect the site |
| Plants stay small after feeding | Low organic matter or poor pH | Test soil before adding fertilizer |
| Repeated wilt in damp soil | Root disease or poor drainage | Improve drainage and remove sick plants |
| White crust on the surface | Salt buildup from water or fertilizer | Replace part of the soil and flush |
| Many roots from nearby trees | Tree invasion | Add a root barrier or move the bed |
| Strong chemical smell or strange plant damage | Possible contamination | Stop growing food until tested |
Soil testing matters more than guessing. A basic test can show pH, phosphorus, potassium, and organic matter. Most vegetables grow well at pH 6.0 to 7.0. Blueberries need a much lower pH, near 4.5 to 5.5, so they should not share a standard vegetable bed.

When you can repair instead
You can often repair a raised bed when the damage affects only one board or one corner. A rotten board should not be covered with new wood. Remove the bad section, inspect the soil side, and replace the whole board if the rot extends behind the surface.
A repair makes sense when:
- The frame is less than five years old.
- The corner posts remain solid.
- The bed is level.
- Less than one-third of the boards show damage.
- The repair will cost less than half of a new frame.
A full replacement makes more sense when several boards fail at once. It also makes sense when the bed has poor access, a weak base, or a size that no longer suits your garden.
⚠️ Warning: Do not burn old pressure-treated lumber, painted wood, railroad ties, or unknown scraps. Smoke and ash can carry harmful compounds. Keep questionable wood away from compost and food-growing areas.
Plan the new bed before removing the old one
Good planning prevents most raised-bed replacement problems. Measure the space, decide how high the new bed should be, and choose where the soil will go while you work.

Choose the right size
A raised bed should usually be no more than 4 feet wide if you can reach it from both sides. A bed against a wall should be 2 to 3 feet wide. This keeps you from stepping into the soil and compacting the root zone.
Length matters less than width, but long beds need stronger joints. A 12-foot bed may need a center brace or an internal support. Without one, the side walls may bow after heavy rain.
Common sizes include:
- 2 by 8 feet for a narrow side yard
- 3 by 6 feet for a small patio garden
- 4 by 8 feet for vegetables
- 4 by 12 feet for a larger family plot
- 3 by 3 feet for herbs or flowers
Set the height for your needs
A 6- to 8-inch bed works well on good native soil. An 11- to 12-inch bed gives roots more room and makes weed control easier. A 24-inch bed can help gardeners with back or knee pain, but it costs more and needs more soil.
Tall beds also create more pressure on the walls. Use thicker boards, corner posts, and cross braces. A 2-inch-thick board performs much better than a thin 1-inch board at 24 inches high.
Pick a safe location
Most vegetables need at least six hours of direct sun. Tomatoes, peppers, cucumbers, squash, basil, and eggplant often perform better with eight or more hours. Leafy greens such as kale, lettuce, and spinach can manage with four to six hours, especially in hot USDA Zones 8 through 10.
Avoid low spots where storm water collects. Stay away from walnut trees when possible because black walnut roots release juglone, which can affect tomatoes and other sensitive plants. Also check for utility lines before driving stakes or digging.

Gather tools and materials
The tools depend on the bed size and the material you choose. A shovel and rake handle most soil work. A drill with a driver bit makes frame assembly much faster than a hammer.

| Tool or material | Suggested amount for a 4-by-8-foot bed | Use |
|---|---|---|
| Shovel, garden fork, and rake | 1 each | Move and level soil |
| Tape measure and level | 1 each | Set size and grade |
| Drill and exterior screws | 1 set | Assemble the frame |
| Tarp or wheelbarrow | 1 | Hold old soil |
| Boards or panels | 4 to 8 pieces | Build the walls |
| Corner posts or brackets | 4 to 8 | Strengthen corners |
| Compost | 8 to 16 cubic feet | Improve soil structure |
| Safety glasses and gloves | 1 set | Protect eyes and hands |
Choose exterior-rated screws with a corrosion-resistant coating. Stainless steel screws last longer near salty coastal air, but they cost more. Galvanized structural screws work well for most home gardens.
Use a level often. A bed does not need to sit perfectly level on a slope, but it should sit flat across each wall. On a steep slope, step the bed into the hill rather than forcing one wall to hold back a large wedge of soil.

Choose a replacement material
The material controls the bed’s lifespan, cost, heat, and safety. There is no single right choice for every garden. Cedar suits many food gardens, while galvanized steel works well when you want a long service life and quick assembly.

| Material | Typical life and cost | Main strengths and limits |
|---|---|---|
| Cedar | 8–15 years; medium cost | Safe, attractive, easy to cut; can rot at ground contact |
| Redwood | 10–20 years; high cost | Long life and good rot resistance; often expensive |
| Untreated pine | 3–7 years; low cost | Easy to find and cheap; short life in wet climates |
| Galvanized steel | 20+ years; medium to high cost | Long life and simple care; heats in hot sun |
| Composite boards | 15–25 years; high cost | Rot resistant and low maintenance; can flex |
| Concrete blocks | 20+ years; medium cost | Stable and modular; hard to move and may dry soil |
For most vegetable gardeners, untreated cedar is a practical middle ground. It does not last forever, but it is easy to repair and does not become dangerously hot in the way dark metal can during a heat wave.
Galvanized steel is useful in small spaces and wet climates. It resists rot, but the walls can warm the soil in full sun. Mulch, afternoon shade, and regular watering help. In USDA Zones 9 and 10, I prefer light-colored steel or a bed that gets some afternoon shade.
Concrete block beds can work well for herbs, flowers, and permanent vegetables. Watch the openings in hollow blocks. They dry out quickly, but they make good spots for thyme, oregano, chives, and small pollinator plants.
🌱 Beginner Note: Avoid old railroad ties, painted boards, and lumber with an unknown treatment history. If you cannot identify the wood, do not use it for a food garden.
Remove the old raised bed
Remove the frame in sections instead of pulling the whole structure apart at once. This protects nearby plants and makes it easier to save good soil.

1. Harvest and mark useful plants
Pick ripe crops before you begin. Mark perennial plants with labels. Strawberries, chives, sage, lavender, rhubarb, and asparagus may survive the move if you handle their roots with care.
Move plants to temporary pots or a spare garden row. Wrap exposed roots in damp burlap or place them in moist soil. Try to replant within the same day.
2. Remove mulch and surface debris
Rake away straw, leaves, plastic, and large weeds. Put clean plant debris in the compost pile. Do not compost plants with active tomato blight, cucumber wilt, clubroot, or severe insect infestations.
Remove tomato cages, trellises, drip lines, and irrigation stakes. Take photos of the old layout before you disconnect anything. Those photos can help you rebuild a better watering system.
3. Separate healthy soil from poor soil
Use a spade or garden fork to lift soil into a tarp. Keep the top 6 to 8 inches separate from soil that smells sour, contains many roots, or has visible mold.
Healthy soil usually smells earthy and has a crumbly texture. It should hold together lightly when squeezed, then break apart with a small tap. Soil that forms hard gray clods may need more than compost.
Do not reuse soil if you suspect lead, arsenic, petroleum, or another pollutant. This can happen near old buildings, painted structures, roads, or treated utility poles. Send a sample to a certified lab before growing food.
4. Take apart the frame safely
Remove screws with a drill or driver. If a screw head strips, cut it with an oscillating tool or pry the board away from the post. Wear gloves and eye protection because old boards often hide nails.
Do not stand inside a tall, unstable bed while pulling on a wall. A side can collapse inward or outward without warning. Work from the outside and remove one board at a time.
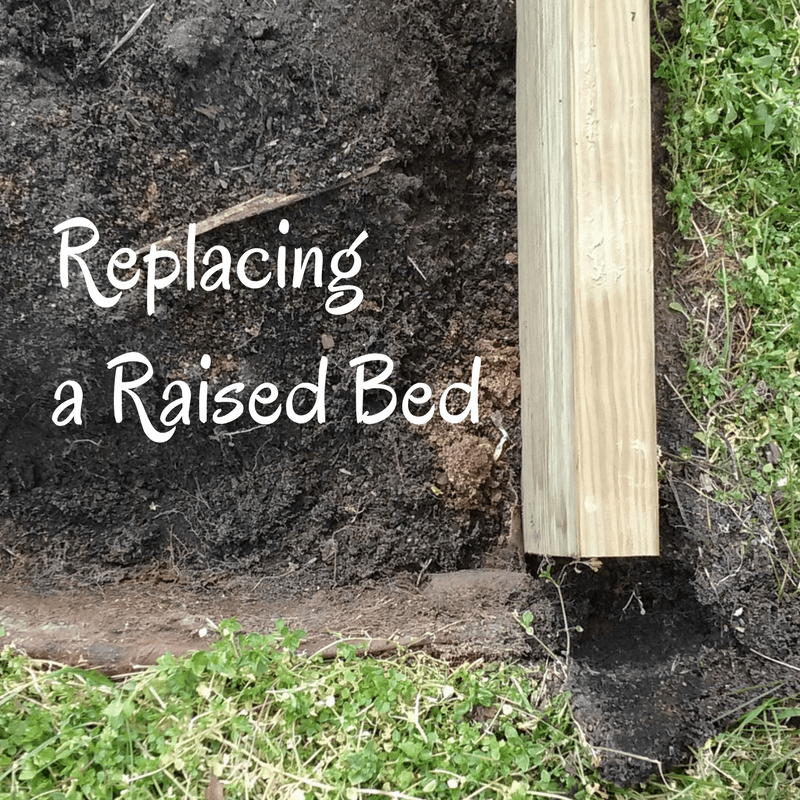
5. Inspect the base
Once the old frame is gone, look for:
- Buried wood or roots
- Ant nests
- Standing water
- Landscape fabric that has blocked drainage
- Plastic sheeting that has trapped water
- Weeds with spreading rhizomes
- Compacted soil under the bed
Earthworms are a good sign, but large tree roots are a problem. If roots have filled the bed, install a proper root barrier or move the bed farther from the tree. Do not rely on a thin sheet of weed fabric to stop mature roots.
Prepare and level the site
The new bed needs a firm, well-drained base. Leveling the site now is much easier than correcting a leaning frame after you fill it.

1. Mark the footprint
Place stakes at the corners and stretch string between them. Measure the diagonals. A 4-by-8-foot rectangle should have equal diagonal measurements. If the diagonals differ, the frame will sit crooked.
Leave at least 18 to 24 inches between beds. A 30-inch path feels more comfortable when you use a wheelbarrow or need to kneel. In wet areas, use wood chips, gravel, or stepping stones to reduce mud.
2. Remove sod and perennial weeds
Cut the grass low, then remove the sod if the bed is shallow. For a tall bed with a bottom open to soil, you can lay several sheets of plain cardboard under the frame. Overlap the sheets by 6 to 8 inches.
Cardboard suppresses grass for a season or two as it breaks down. It does not stop bindweed, horsetail, or aggressive bamboo. Dig out those roots or use a strong physical barrier.
Avoid landscape fabric under a vegetable bed. It can slow drainage, trap roots, and make later soil renewal harder. It works better beneath paths than beneath living soil.
3. Correct the grade
Remove soil from high spots and use it to fill low spots. Check the base with a long level or a straight board. Aim for a firm surface that does not rock under your foot.
On a slope, cut a shallow terrace. Do not simply place a tall box on the downhill side and fill it. The lower wall must resist the weight of wet soil, which can exceed 100 pounds per cubic foot.
4. Improve drainage only when needed
Most raised beds do not need a gravel layer at the bottom. Gravel beneath fine soil can create a perched water table instead of improving drainage. The best fix is usually to correct compacted native soil and avoid overfilling the bed.
If the site stays wet, use a perforated drain pipe outside the bed or move the bed to higher ground. A raised bed cannot solve a flooded site by itself.

Build and install the new frame
Build the frame on level ground when possible, then move it into position. For a large or tall bed, assemble each wall in place.

1. Cut the boards
For a 4-by-8-foot bed, you can use two 8-foot boards for the long sides and four 4-foot boards for the short sides. The exact cut depends on whether the short boards sit inside or outside the long boards.
Use a circular saw with a sharp 40-tooth blade for clean cuts. Keep both hands on the tool and support the board near the cut. A dull blade can tear cedar and cause kickback.
2. Add corner support
Use 4-by-4 posts at the corners for a tall bed. For an 8- to 12-inch bed, 2-by-2 or 2-by-4 corner stakes often work. Drive or bury the posts 6 to 12 inches into firm soil.
Fasten each board with at least two screws at each corner. Stagger the screws so they do not split the post. Pre-drill near board ends, especially with dry cedar.
3. Add cross braces to long beds
A 4-by-8-foot bed usually needs no center brace if the walls are thick and well fastened. A bed taller than 12 inches or longer than 8 feet benefits from a cross tie.
Run a galvanized threaded rod, treated 2-by-4, or purpose-made bed brace across the width. Place it near the upper third of the wall. This keeps the sides from spreading when the soil becomes wet.
4. Protect the inside only when needed
You can line the inside of a wood bed with untreated cardboard, but do not add plastic sheeting unless you have a specific reason. Plastic can hold moisture against wood and reduce drainage.
A breathable pond liner or heavy landscape fabric may help protect a metal bed from sharp soil contact, but it is not required in every design. Keep the bottom open so earthworms and soil organisms can move in.
5. Check the frame before filling
Measure the inside width and length. Check each corner with a square. Push on the walls and inspect every screw.
This is the last easy moment to fix a mistake. Once the soil is in place, even a small correction can take hours.
🔧 Quick Fix: If a cedar board splits near a screw, remove the screw, drill a pilot hole 1/8 inch smaller than the screw shaft, and refasten it at least 1 inch from the split. Replace the board if the split reaches a corner or runs along most of its length.

Decide whether to replace the soil
You should replace all the soil only when testing or clear damage shows that it is unsafe or unfit for plants. Healthy old soil can reduce cost and preserve useful fungi, worms, and organic matter.
Keep the soil when it is healthy
Reuse the soil if it:
- Has an earthy smell
- Drains within a few hours
- Has no chemical history
- Contains no major disease problem
- Breaks apart rather than forming hard clods
- Has a reasonable pH and nutrient level
For a typical vegetable bed, mix the saved soil with 25% to 35% finished compost by volume. If the soil feels heavy and sticky, add compost and coarse organic matter over time. Do not dump large amounts of sand into clay soil; it can create a dense, concrete-like mix.
Replace some soil for common problems
Partial replacement works for many beds. Remove the top 6 to 12 inches if weeds, salt, or poor texture cause trouble. Blend new soil with the remaining lower layer instead of creating a sharp boundary.
A good refill mix often contains:
- 50% screened topsoil
- 30% finished compost
- 20% aged bark fines, leaf mold, or quality garden soil
The exact mix depends on the source. Bagged “raised bed soil” varies widely. Check the label for compost, topsoil, and organic matter. Avoid mixes made mostly of fresh wood chips, which can tie up nitrogen as they break down.
Replace all soil after contamination
Use new soil if a lab finds lead or other heavy metals. Do not solve contamination with compost alone. You may need to cap the area with clean soil, install a barrier, or relocate the bed.
If the old bed had a serious soil disease, remove infected plants and roots. Do not move that soil to another vegetable bed. Diseases such as clubroot can remain in soil for years.
Fill the bed with the right soil mix
The soil should hold water while allowing air to reach roots. A dark color alone does not prove quality. Good soil has a loose texture, a mild smell, and enough mineral material to stay stable after watering.
Calculate the soil volume
Use this formula:
Length in feet × width in feet × depth in feet = cubic feet
A 4-by-8-foot bed filled 12 inches deep needs:
4 × 8 × 1 = 32 cubic feet
That equals about 1.2 cubic yards. Add 10% to 15% because soil settles. For a 24-inch bed, the same footprint needs about 64 cubic feet.
Do not fill a tall bed with logs or large branches unless you intentionally use a hugelkultur design. Fresh wood can settle unevenly and reduce nitrogen. If you use a small amount of woody material, place it low and allow for settling.
Mix the soil before planting
Blend amendments on a tarp or in the bed with a garden fork. Avoid tilling wet soil. Wet mixing destroys soil pores and creates clumps that can stay hard for months.
For most vegetables, skip routine lime and fertilizer until a soil test shows a need. Compost adds slow nutrients, but it may not supply enough nitrogen for heavy feeders such as corn, tomatoes, squash, and cabbage.
Use a balanced organic fertilizer based on the soil test. A product near 5-5-5 can suit a general bed, while a nitrogen-rich product may help leafy crops. Follow the label. More fertilizer does not mean more harvest.
| Bed size and depth | Soil needed before settling | Compost at 25% |
|---|---|---|
| 3 by 6 feet, 12 inches | 18 cubic feet | 4.5 cubic feet |
| 4 by 8 feet, 12 inches | 32 cubic feet | 8 cubic feet |
| 4 by 8 feet, 18 inches | 48 cubic feet | 12 cubic feet |
| 4 by 8 feet, 24 inches | 64 cubic feet | 16 cubic feet |
These amounts are estimates. Soil sold by the bag may settle more than screened bulk soil. Buy a little extra rather than stopping with a bed that sits several inches low.
Water and settle the soil
Fill the bed in 4- to 6-inch layers. Water each layer lightly. This removes air pockets without turning the mix into mud.
Let the bed settle for several days if possible. Top it off, then add 1 to 2 inches of shredded leaves, straw, or finished compost. Keep mulch away from plant stems to reduce rot and slug shelter.
Reconnect irrigation and plant safely
A new frame is only part of the job. Watering, crop rotation, and access determine whether the replacement works well.
Install irrigation before planting
A simple drip system saves water and keeps leaves dry. Lay drip lines 8 to 12 inches apart for closely spaced vegetables. Use emitters with a flow rate that matches the line and water pressure.
Soaker hoses work in small beds, but they can clog and distribute water unevenly. Test the bed by running the system for 15 minutes. Dig down 3 to 4 inches and check whether the soil is evenly moist.
Mulch reduces evaporation. Straw suits vegetables, while shredded bark works well around perennial herbs and flowers. Keep mulch 2 inches away from stems.
Rotate crops after a disease problem
Do not plant tomatoes, peppers, eggplant, and potatoes in the same bed year after year if the bed had blight or soil disease. These crops all belong to the nightshade family and share several pests and diseases.
Rotate by plant family:
- Nightshades: tomatoes, peppers, eggplant, potatoes
- Legumes: beans and peas
- Brassicas: kale, cabbage, broccoli, radishes
- Cucurbits: cucumbers, squash, melons
- Apiaceae: carrots, parsley, celery
A three-year rotation helps, but small beds make that hard. You can also rotate by season and replace part of the soil after a serious disease.
Choose plants for the rebuilt bed
Plant based on sun, season, and soil depth. Carrots need loose soil at least 12 inches deep. Bush beans need less depth but need warm soil. Lettuce and spinach prefer cool weather and may bolt in hot summer weather.
For a pollinator-friendly bed, add calendula, alyssum, borage, nasturtium, or native flowers around the vegetable area. Avoid spraying broad-spectrum insecticides when bees and butterflies are active.
Common replacement mistakes
Most failed bed replacements result from poor drainage, weak construction, or the wrong soil mix. These errors often appear weeks after the project, when correction is harder.
Using thin boards for a tall bed
A 1-inch board may look strong when empty. Wet soil pushes outward with surprising force. Use thicker lumber, corner posts, and braces for beds taller than 12 inches.
Filling with pure compost
Pure compost settles fast and can hold too much water. It may also release high levels of soluble nutrients. Mix compost with mineral soil or a reliable raised-bed blend.
Adding gravel under the soil
Gravel does not solve compacted native soil. Improve the base, install drainage outside the bed, or move the bed instead.
Sealing food-bed wood with unknown chemicals
Some wood sealers contain compounds you may not want near edible crops. If you seal cedar, choose a product clearly labeled for garden beds or food-contact areas and follow the cure time.
Building too wide
A 5- or 6-foot bed saves frame material but forces you to step into the soil. Compaction harms carrots, onions, and shallow-rooted greens. Keep the width within reach.
Forgetting soil settling
A full bed often drops 2 to 5 inches after watering and rain. Leave extra soil on hand. Top up with compost in spring rather than piling fresh soil against plant stems.
Leaving old diseased material in place
A few infected roots can restart a disease cycle. Remove old tomato roots, brassica roots, and weeds with seed heads. Clean tools with soap and water before moving to another bed.
Pros and cons of replacing a raised bed
Replacing a raised bed can improve the garden for years, but the work has tradeoffs. The main benefit is control over structure and soil. The main cost is time, materials, and the need to manage a large volume of soil.
| Pros | Cons |
|---|---|
| Improves drainage and access | Requires lifting and soil handling |
| Lets you correct poor soil | New lumber and soil can cost hundreds |
| Reduces contact with contaminated ground | Temporary plant disruption |
| Creates a stronger frame | Tall beds need extra bracing |
| Makes irrigation easier to install | Soil may settle after the rebuild |
| Can extend bed life for 10 to 20 years | Some materials heat up or crack |
Replacement is usually worth the money when the bed grows food, has unsafe wood, or causes regular back strain. Repair remains sensible when damage is small and the soil performs well.
Cost, time, and lifespan
Current pricing ranges from about $100 for a basic untreated pine rebuild to more than $800 for a tall cedar or composite bed with purchased soil and irrigation. Local lumber prices, soil delivery, and bed height cause large changes.
| Project type | Typical DIY cost | Time for one bed |
|---|---|---|
| Repair one or two boards | $30–$150 | 2–4 hours |
| Replace with pine | $100–$250 | 4–8 hours |
| Replace with cedar | $250–$600 | 5–10 hours |
| Galvanized steel kit | $200–$700 | 2–6 hours |
| Tall bed with new soil | $500–$1,000+ | 1–2 days |
These figures exclude major grading, tree-root removal, delivery fees, and professional labor. Soil often costs more than the frame. A 4-by-8-foot bed that is 12 inches deep needs about 1.2 cubic yards, which can be difficult to move by hand.
A cedar frame may last 8 to 15 years. Galvanized steel and concrete can last much longer, but hardware, coating, and ground contact still matter. Composite boards can last 15 to 25 years, though some types flex under pressure.
Seasonal timing and follow-up care
The best replacement window depends on your climate and crops. A bed that stays empty during the cool season offers the easiest access.
| Season or zone | Best replacement window | Main task |
|---|---|---|
| USDA Zones 3–5 | Late spring after thaw or early fall | Avoid frozen or saturated ground |
| USDA Zones 6–7 | Early spring or fall | Finish before heat or heavy rain |
| USDA Zones 8–10 | Fall, winter, or early spring | Avoid peak summer heat |
| Wet coastal climates | Dry weather in spring or fall | Protect open soil from rain |
| Hot dry climates | Cool season | Install irrigation before planting |
In cold Zones 3 through 5, do not work wet soil after snowmelt. Wait until a handful of soil crumbles instead of forming a shiny ball. In warm Zones 8 through 10, fall replacement often works best because vegetables can go in soon after the frame is ready.
After four weeks, check for wall movement, soil settling, and blocked drip emitters. After the first heavy rain, inspect the downhill side. Water may expose a low corner or wash soil through a gap.
A simple maintenance schedule
A replacement bed needs little care if you inspect it twice a year. Look at the frame in spring before planting and in fall after harvest.
| Timing | Maintenance task |
|---|---|
| Early spring | Check screws, corners, soil level, and irrigation |
| After heavy rain | Look for leaning walls and washed soil |
| Midseason | Check mulch depth and dry spots |
| After harvest | Remove diseased plants and crop debris |
| Every 2–3 years | Test soil and add compost as needed |
| Every 5–10 years | Inspect wood contact points and braces |
Do not add compost by habit if the bed is already high in phosphorus. Soil tests prevent nutrient buildup. Add 1 inch of compost when needed, then mix only the top few inches to protect soil structure.
Storage and winter care
You do not need to store a permanent raised bed. Remove loose trellises, cages, hoses, and drip fittings before freezing weather. Drain irrigation lines and store plastic parts out of direct sun.
If you use a removable fabric bed, empty it after the growing season. Brush off soil, let the fabric dry, and store it in a dry shed. Folded wet fabric can grow mold and weaken at the seams.
My experience replacing raised beds
In my own garden, the frame often failed before the soil did. One 4-by-8-foot cedar bed looked fine from the outside, but the bottom board had turned soft behind the mulch. When I removed it, I found a dense mat of tomato roots and a blocked strip of plastic under the bed.
I saved about two-thirds of the soil. I screened out roots, mixed in finished compost, and added new soil only where the old mix had become compacted. The new bed drained faster after rain, but it also dried faster in July because I had improved the base and removed the plastic.
That result taught me to check both sides of the problem. Better drainage can expose a watering need. A new frame does not replace mulch, drip irrigation, or good crop planning.
I also tested a galvanized steel bed in a sunny Zone 8 garden. It assembled quickly and stayed straight through two wet winters. In the hottest part of summer, the south wall became warm enough to dry nearby basil and lettuce. A 2-inch mulch layer and afternoon shade reduced the problem.
The most durable choice is not always the most comfortable choice. Cedar feels forgiving and easy to modify. Steel lasts longer, but it needs more attention to heat and sharp edges.
When to hire a professional
Most one-bed replacements suit a careful DIY gardener. Hire help when the site has major drainage problems, steep slopes, contaminated soil, large tree roots, or a retaining wall.
A professional may be needed when:
- The bed is more than 24 inches tall.
- The downhill wall holds back a large amount of soil.
- Water flows toward the bed from a roof or driveway.
- You suspect lead, arsenic, fuel, or pesticide contamination.
- The project requires digging near utilities.
- Heavy soil must be moved over a long distance.
- You need a retaining wall, drain, or terrace.
A landscaper can also help if back or knee pain makes soil handling unsafe. Ask for a written plan that states the lumber type, soil source, drainage method, and disposal plan.
Do not let a contractor fill a food bed with “topsoil” without asking what it contains. Request a clean soil source and, when possible, a soil test.
FAQs about replacing raised beds
Q: Do I need to replace all the soil when I replace a raised bed?
A: No. Keep healthy soil if it drains well, smells earthy, and has no contamination or major disease problem. Remove roots and debris, then mix in about 25% to 35% finished compost. Replace all soil after a confirmed chemical contaminant or severe soil disease.
Q: How often should a raised bed be replaced?
A: Replace the frame when it becomes unsafe or no longer holds soil. Untreated pine may last 3 to 7 years. Cedar often lasts 8 to 15 years. Galvanized steel, concrete, and quality composite beds can last 15 to 25 years or more with sound installation.
Q: What is the best wood for replacing a vegetable raised bed?
A: Cedar is a strong all-around choice because it resists rot and is easy to cut. Redwood lasts longer but costs more in many areas. Avoid unknown recycled wood, railroad ties, painted boards, and old pressure-treated lumber.
Q: Can I put a raised bed on grass?
A: Yes, but cut the grass short and remove sod when the bed is shallow. Plain cardboard can suppress grass beneath an open-bottom bed. Remove aggressive weeds such as bindweed, horsetail, and bamboo by the roots before building.
Q: Should I line my raised bed with plastic?
A: Usually no. Plastic can trap moisture against wood and slow drainage. Keep the bottom open. Use a breathable liner only for a specific need, such as separating a metal wall from soil or creating a container with a designed drainage system.
Q: How deep should a replacement raised bed be?
A: Six to 8 inches suits many leafy greens and herbs. Twelve inches works well for most vegetables. Use 18 to 24 inches for deep-rooted crops, easier access, or poor native soil. Tall beds need thicker walls and stronger braces.
Q: Why is my new raised bed settling so much?
A: Fresh compost, loose soil, and woody materials settle as air leaves and organic matter breaks down. Fill in layers, water each layer, and keep extra soil available. A bed may drop 2 to 5 inches during its first season.
Q: Can I use old raised-bed soil in a compost pile?
A: You can add healthy soil in small amounts, but do not add soil from a bed with clubroot, severe wilt, or suspected contamination. Diseased soil can spread problems through the compost and return to future beds.
Q: Is galvanized steel safe for vegetable gardens?
A: Quality galvanized steel is widely used for garden beds and is generally suitable when intact. Use care with sharp edges, monitor soil temperature in hot climates, and avoid burning or cutting coated metal without proper protection.
Q: What should I plant first after replacing a raised bed?
A: Choose a crop that matches the season and soil depth. Lettuce, radishes, beans, kale, herbs, and bush cucumbers are forgiving choices. Wait on demanding crops such as corn or large indeterminate tomatoes until the soil settles and irrigation works evenly.
Q: How do I stop tree roots from entering a raised bed?
A: Move the bed away from the tree when possible. If relocation is not practical, install a strong vertical root barrier around the outside perimeter. A thin layer of landscape fabric rarely stops mature roots.
Q: Can I replace a raised bed without removing the plants?
A: Only when the plants grow in a separate inner container or the damage is minor. For a full frame replacement, move plants first. Protect roots with damp soil and replant the same day when possible.
Final thoughts
The best way to replace a raised bed is to solve the reason the old one failed, not just copy its shape. Build on firm ground, use safe materials, keep the width within reach, and refill the bed with soil that drains well but still holds moisture.
For most gardeners, a cedar frame with an open bottom, quality soil, compost, mulch, and drip irrigation offers the easiest balance. Choose galvanized steel or concrete when long life matters more than low heat and easy changes. Replace only the soil that truly needs replacing, then inspect the new bed after rain, frost, and the first full growing season.
A sound frame can last for many years. Good soil care will make those years far more productive.
Meta description: Learn how to replace a raised bed, from removing old wood and saving soil to choosing materials, building a durable frame, fixing drainage, and calculating costs.