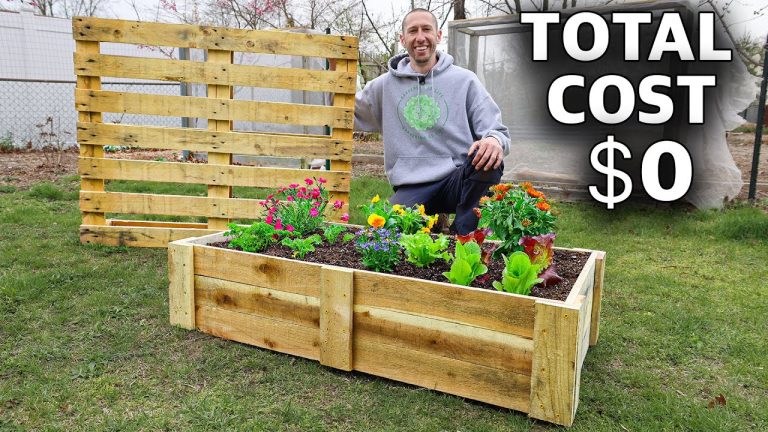
How To Turn A Raised Garden Bed Into A Greenhouse: DIY Guide
A raised garden bed can become a simple greenhouse with a few hoops, a clear cover, and good airflow. This small upgrade can protect lettuce from frost, help tomato seedlings start early, and extend the harvest season without the cost of a full greenhouse. I have built low tunnels over cedar beds, metal beds, and old timber frames in both wet spring weather and hot summer zones.
The key is to treat the bed like a tiny climate system. The cover must stay secure, the plants need light, and hot air must escape. A sealed bed may feel warm in the morning but can become dangerously hot by noon. With the right design, you can create a useful growing space for seedlings, herbs, leafy greens, peppers, and many cool-season crops.
Quick answer: turn the bed into a low greenhouse
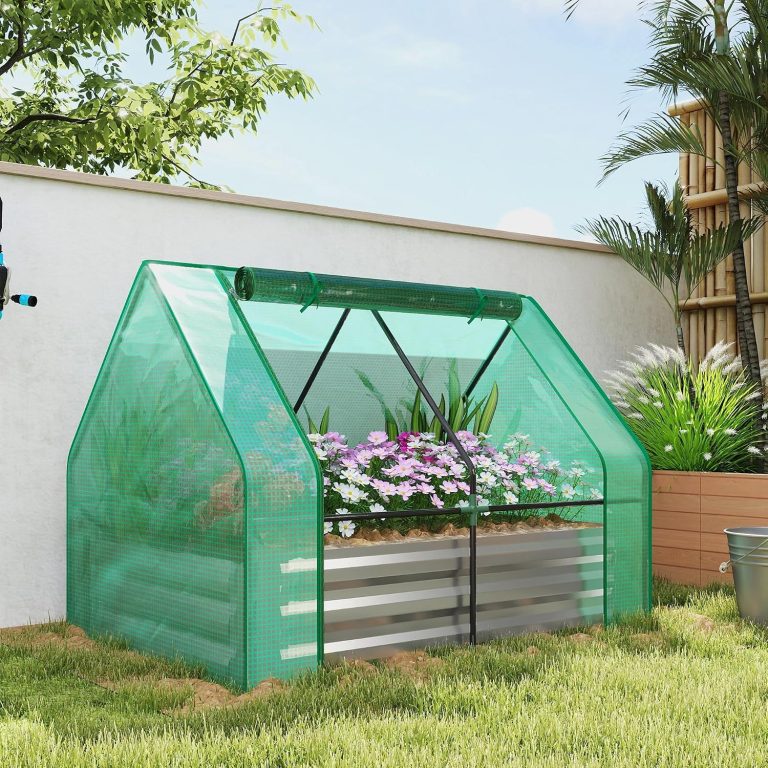
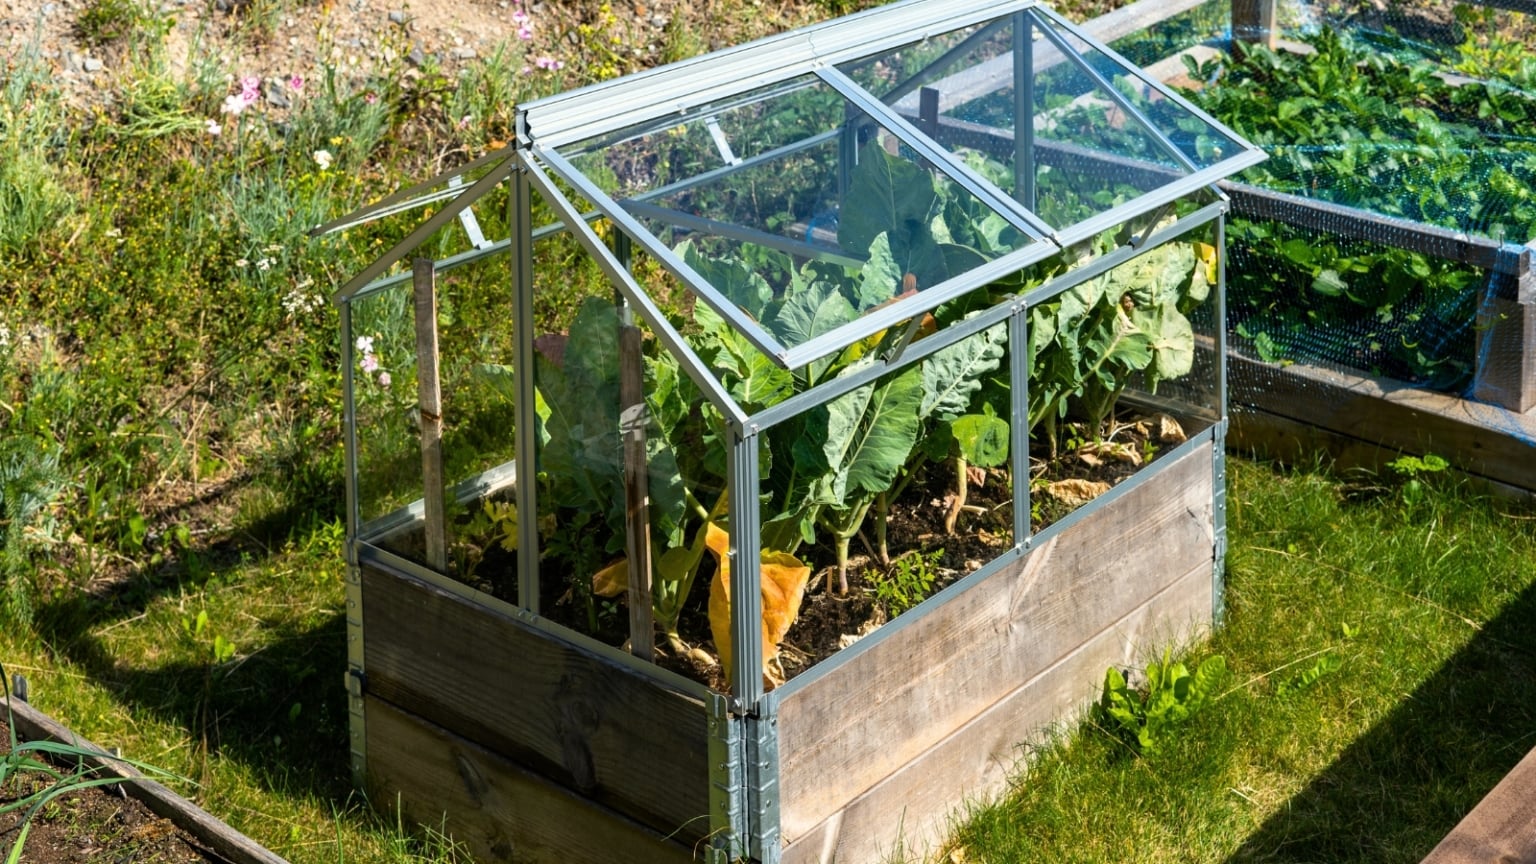
The best way to turn a raised garden bed into a greenhouse is to build a hoop frame over the bed and cover it with greenhouse plastic or insect mesh. Use PVC, electrical conduit, or metal hoops. Anchor the frame well, leave room for plant growth, and add roll-up sides or vents for airflow. A small thermometer helps prevent heat stress and frost damage.

A simple raised-bed greenhouse usually takes two to four hours to build. A small 4-by-8-foot setup may cost $50 to $180, depending on the frame and cover. You can spend less with garden hoops and row cover, or more with rigid panels, automatic vents, and a stronger frame.
This project works well for USDA Zones 3 through 8, where frost protection and season extension matter most. Gardeners in Zones 9 and 10 may use the structure mainly for winter growing, rain protection, or pest control. In hot climates, a clear cover can create too much heat unless you add shade cloth and wide vents.
What you need before you start
You do not need a full greenhouse kit. Most raised-bed greenhouses use a few basic parts that are easy to cut, bend, and repair. Measure the bed first, then choose a frame that leaves at least 12 inches of space above the tallest mature plant.

Choose the right frame material
PVC pipe is light, cheap, and easy to bend. It works well for temporary beds and mild weather. However, thin PVC can crack in cold weather and may collapse under wet snow.
Electrical metallic tubing, often called EMT conduit, makes a stronger frame. A ½-inch or ¾-inch conduit bender can create clean arches. Metal hoops handle wind better than PVC, but they take more time to shape.
Fiberglass garden hoops are another good choice. They bend easily and do not rust. I like them for beds that I cover and uncover often. They are less suitable for heavy snow or areas with strong winter winds.
A wood frame works best when you want a box-style greenhouse. You can attach clear polycarbonate panels to a simple rectangle. This design lasts longer, but it costs more and limits access from the sides.
Select the cover
The cover controls the temperature, light, moisture, and lifespan of the greenhouse. Clear greenhouse film gives the most heat and light. Frost cloth provides less heat but allows better air movement. Insect mesh keeps pests out without trapping as much heat.
Use greenhouse-grade polyethylene rather than thin drop cloth when possible. Thin plastic tears at corners and becomes brittle in sunlight. UV-treated film often lasts three to five seasons, while low-cost plastic may last one season.
| Cover type | Best use | Main limitation |
|---|---|---|
| Clear greenhouse film | Frost protection and early crops | Overheats quickly without vents |
| Frost cloth or row cover | Light frost and cool nights | Adds less heat than plastic |
| Insect mesh | Pest control and summer airflow | Does not stop hard frost |
| Twin-wall polycarbonate | Long-term greenhouse panels | Higher cost and harder to cut |
| Shade cloth | Hot climates and summer use | Reduces light and warmth |
Clear film works best when your goal is heat. Row cover works best when you need mild frost protection. Many gardeners use both: cloth close to the plants and plastic over the hoops.
Gather the basic tools
You will need a tape measure, marker, drill, outdoor screws, clamps, and a sharp utility knife. Add a conduit bender if you use EMT. A staple gun can attach plastic to wood, but battens and screws hold better in wind.
Wear safety glasses when cutting pipe or conduit. Gloves protect your hands from sharp metal edges and plastic cuts. If you use a power drill, choose a low-speed setting when driving screws into cedar or soft pine.

Materials for a 4-by-8-foot bed
The table below lists a practical setup for a standard 4-by-8-foot raised bed. Adjust the number of hoops if your area gets strong wind or snow.
| Material | Typical amount | Purpose |
|---|---|---|
| ½-inch PVC or EMT conduit | 4 to 5 pieces, 10 feet long | Makes the hoop frame |
| Greenhouse film | About 12 by 16 feet | Covers the frame with extra edge material |
| Hoop clips or spring clamps | 10 to 20 | Holds film to hoops |
| Ground staples or landscape pins | 6 to 10 | Secures the cover near the soil |
| Wood strips and screws | 2 long strips, optional | Creates a stronger film edge |
| Door zipper or hook-and-loop tape | 1 set, optional | Makes access easier |
Buy extra clips. They are small, easy to lose, and very useful when the wind rises. Leave enough film to reach the ground on both sides, with at least 12 inches of extra material for anchoring.
Prepare the raised bed and planting area
A greenhouse frame cannot fix poor soil or bad drainage. Prepare the bed before you cover it. Remove weeds, check the boards, and make sure water can drain freely after heavy rain.

Check the bed structure
Inspect every corner for movement and rot. Tighten loose screws and replace cracked boards. A hoop attached to a weak bed can pull the whole side apart during a strong gust.
The bed should sit on level ground. A slight slope is fine for drainage, but a sharp slope makes the cover hard to secure. If water collects near the bed, improve drainage before adding plastic.
Wood beds made from untreated cedar, redwood, or naturally rot-resistant boards work well. Avoid old painted or pressure-treated boards of unknown age if you plan to grow food. Galvanized steel beds also make strong anchor points, but metal sides can heat up in full sun.
Improve the soil before covering it
Mix finished compost into the top 6 to 8 inches of soil. Do not fill the bed with fresh manure. It can burn roots and release excess ammonia in a warm, enclosed space.
Most vegetables grow well at a pH between 6.0 and 7.0. Leafy greens tolerate slightly lower pH, while beans and many herbs prefer soil near neutral. A basic soil test can show pH, phosphorus, potassium, and organic matter.
Avoid adding a large dose of nitrogen before building the greenhouse. Warm conditions can push leafy growth while roots remain weak. For a general vegetable bed, a balanced organic fertilizer close to 4-4-4 works better than a strong lawn fertilizer.

Decide what will grow inside
A low greenhouse suits plants that match the season. In late winter and early spring, use it for spinach, kale, lettuce, radish, scallions, and cool-season herbs such as cilantro and parsley.
As the weather warms, you can grow cucumber, basil, pepper, and compact tomato varieties. Determinate tomatoes such as ‘Patio Choice Yellow’ or ‘Roma’ fit better than large indeterminate vines. A hoop house over a 12-inch-deep bed may not provide enough height for vigorous tomatoes.
Avoid planting large pumpkins, corn, full-size melons, or sprawling squash inside a small bed greenhouse. Their leaves quickly block light and press against the cover.
Build the hoop frame
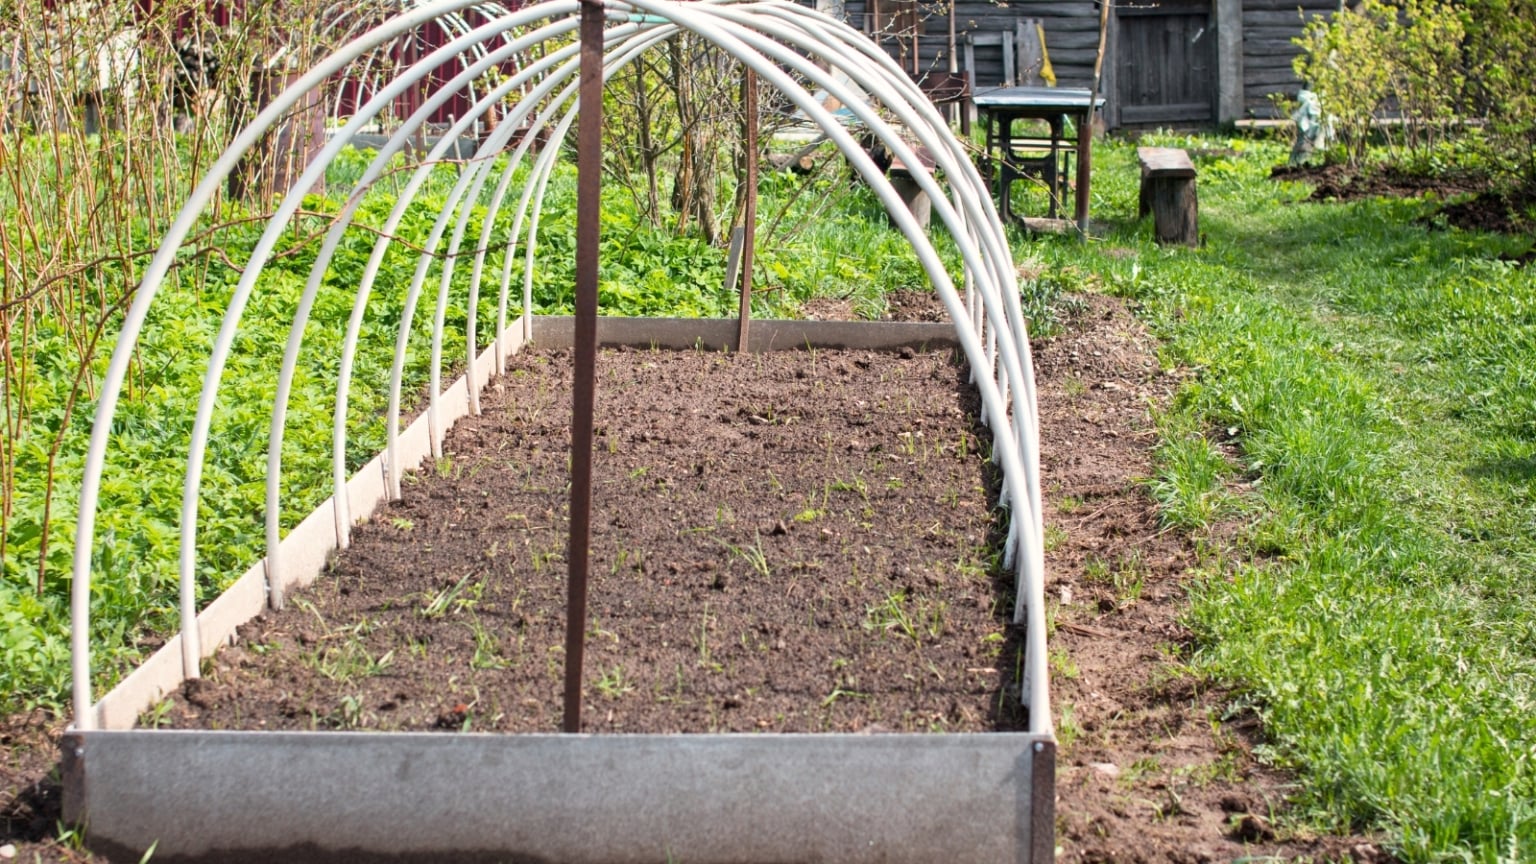
Build the frame before you install the cover. A strong frame keeps plastic off the plants and gives you enough room to work. The highest point should sit at least 18 inches above the mature crop, and 24 to 36 inches is better.

Mark the hoop positions
For a 4-by-8-foot bed, place hoops across the 4-foot width. Set the first and last hoop about 6 inches from the ends. Place the middle hoops 24 to 30 inches apart.
Mark the same points on both long sides of the bed. The marks must line up or the arches will twist. Use a tape measure instead of estimating by eye.
If you live in a windy area, use five hoops rather than three. Coastal gardens, open plains, and exposed hilltops need more support than sheltered urban yards.
Install PVC or conduit hoops
For PVC, push each end 6 to 10 inches into the soil inside the bed or into short sections of pipe fixed to the bed wall. Sleeves attached to the outside of the bed make removal easier.
For EMT, bend each piece into a smooth arch. Avoid sharp bends because they create weak points and can cut the cover. Insert the ends into metal or PVC sleeves, or fasten them to the bed with conduit straps.
The frame should flex slightly but should not wobble. Add a ridge pole along the top if the hoops move from side to side. A second side rail at shoulder height adds even more strength.
Add a ridge pole and side rails
A ridge pole runs from one end of the bed to the other along the top of the hoops. It keeps the arches aligned and stops the plastic from sagging into low spots.
Attach the ridge pole with hoop clips, zip ties, or small screws with washers. If you use zip ties, choose UV-resistant black ties. White indoor ties often break after months in sunlight.
Side rails improve wind resistance. They also give you a place to roll the cover up. For a 4-by-8-foot bed, place a rail about 12 to 18 inches above the soil on each long side.
Add the greenhouse cover
The cover is the part that creates the greenhouse effect. Sunlight passes through the clear material, warms the soil and plants, and traps some of that heat inside. The cover also slows wind and reduces moisture loss.

Install the film on a calm day
Choose a dry day with little wind. Plastic behaves like a sail, and one sudden gust can bend hoops or drag the cover across the garden.
Drape the film over the frame with equal amounts on both sides. Leave extra material at each end. Do not stretch it so tightly that it tears when the frame moves.
Attach the film at the ridge first, then work down both sides. Use spring clamps or purpose-made greenhouse clips. Smooth wrinkles, but do not force every crease flat.
Secure the edges
The most reliable method uses wood battens. Wrap the film around a narrow wood strip, then screw the strip to the bed frame. This spreads pressure across the plastic and makes the edge less likely to tear.
You can also bury the edges in soil. Dig a shallow trench, place the plastic inside, and cover it with soil. This holds well but makes daily opening and closing less convenient.
Landscape staples work for temporary covers. Place them every 12 to 18 inches and use a folded section of film at each point. A staple through a single thin layer can create a tear.
Create an easy door
A simple door can be a rolled-up end panel. Gather the plastic at one end, roll it upward, and secure it with clips or a strap. This costs nothing, but it can become annoying if you open the greenhouse several times a day.
A zipper door kit gives faster access. You can also cut a vertical opening and attach hook-and-loop tape. Reinforce the cut edge with greenhouse repair tape first.
Leave one end partly open on mild days. Plants need airflow for healthy stems and pollination. Tomatoes, peppers, and cucumbers also need insects or hand pollination unless you grow parthenocarpic cucumber varieties.

Use a cover that fits the season
The right cover changes during the year. Clear film helps in March, but it may damage lettuce in May if you live in the southern United States. Frost cloth or insect mesh often works better after the last hard frost.
| Season | Main cover | Venting plan |
|---|---|---|
| Late winter | Clear film plus inner frost cloth | Open ends on sunny days |
| Spring | Clear film or light row cover | Roll up both sides above 70°F |
| Summer | Insect mesh or shade cloth | Keep sides open most days |
| Fall | Clear film | Close before evening frost |
| Winter | Clear film with inner cloth | Close at night, inspect snow load |
These are starting points, not fixed rules. A sunny bed in Georgia may need ventilation in February, while a bed in Minnesota may stay closed during the same month.
Control temperature, humidity, and water
A raised-bed greenhouse works when you manage the air, not when you simply seal the plants under plastic. Temperature can rise 30°F or more above the outdoor air on a bright day.
Vent before the plants wilt
Open the sides when the inside temperature reaches about 75°F for lettuce and other cool-season crops. Warm-season plants such as peppers and tomatoes can handle more heat, but temperatures above 90°F may reduce flower set.
Use a small maximum-minimum thermometer at plant height. Do not place it against the plastic, where it will read hotter than the leaves. Check it at noon for the first week.
Automatic vent openers can help on a larger box greenhouse. They use a heat-sensitive cylinder to open a vent as the temperature rises. They cost more than hand clips but help when you are away from home.
💡 Pro Tip: Put a dark, water-filled container inside the greenhouse in spring. It stores heat during the day and releases some warmth at night. Use a capped container, not an open bucket, to reduce humidity and mosquito breeding.
Prevent excess humidity
Condensation on the inside of the film is normal. Constant dripping is not. High humidity encourages fungal problems such as gray mold, powdery mildew, and damping-off in seedlings.
Water the soil in the morning. Keep leaves dry when possible. Space plants so air can move between them, and remove yellow leaves quickly.
Do not place the greenhouse in a low, damp corner. Morning sun and moving air help dry the cover and soil. In humid Zones 7 through 10, side ventilation matters more than adding extra heat.
Water with care
Covered beds lose less water than open beds. Check the soil with your finger before watering. If the top inch feels dry but the soil below remains moist, wait another day.
Seedlings need even moisture. Mature tomatoes and peppers prefer a deep soak followed by partial drying. Overwatering in a covered bed can cause root rot, fungus gnats, and weak growth.
A short soaker hose works well under plastic. Place it before you install the cover. Drip irrigation also reduces wet leaves, but check emitters often because roots can grow over them.
Plant the greenhouse bed safely
A protected bed still needs proper spacing, nutrition, and pest checks. Warm air can speed growth, but it can also speed pest reproduction.

Start seeds inside the bed
Direct sowing works for lettuce, radish, spinach, carrots, and peas. Press the seed into moist soil at the depth shown on the packet. Thin seedlings early so they do not compete for light.
For tomatoes, peppers, and eggplant, start seeds indoors under a grow light and move them into the raised-bed greenhouse after hardening off. Hardening off means slowly exposing young plants to outdoor conditions over seven to ten days.
Do not move tender seedlings from a warm indoor room into a cold greenhouse at night. Even under plastic, the bed may reach outdoor temperatures after sunset.
Give plants enough space
Crowded plants create a wall of wet leaves. Follow the wider spacing range on the seed packet when humidity is high.
As a rough guide, space leaf lettuce 8 to 10 inches apart, bush beans 6 inches apart, peppers 18 inches apart, and compact tomatoes 18 to 24 inches apart. Trellised cucumbers need vertical room and strong support.
Companion planting can help use space, but it does not replace airflow. Basil may grow well near tomatoes, and dill can attract some beneficial insects, but do not pack every open space with plants.
Watch for pests
Common greenhouse pests include aphids, whiteflies, spider mites, fungus gnats, and slugs. Inspect the undersides of leaves twice a week. A small problem is much easier to control than an outbreak in a warm enclosure.
Remove aphids with a firm water spray. Use yellow sticky cards for adult whiteflies and fungus gnats. Insecticidal soap can help, but spray in the evening and follow the label.
Avoid broad-spectrum insecticides when possible. They may harm bees, hoverflies, lady beetles, and other pollinators that help the garden.
🌱 Beginner Note: Start with lettuce, spinach, radish, and herbs. These crops forgive small temperature mistakes. Save cucumbers and tomatoes for your second season, when you understand how fast the bed heats up.
Common problems and practical fixes
Most raised-bed greenhouse problems come from weak anchoring, poor ventilation, or the wrong cover. The table below matches common symptoms with likely causes and fixes.
| Problem or symptom | Likely cause | Practical fix |
|---|---|---|
| Plants wilt at noon | Heat buildup or dry roots | Open both ends and check soil moisture |
| Film blows loose | Weak clips or poor edge anchoring | Add battens, clamps, and ground staples |
| Leaves turn pale | Low light, cold roots, or nutrient shortage | Check light, soil temperature, and test soil |
| White powder appears on leaves | Powdery mildew | Improve airflow and remove affected leaves |
| Seedlings collapse at soil level | Damping-off from wet soil | Reduce watering and improve air movement |
| Flowers fall without fruit | Excess heat or poor pollination | Vent earlier and hand-pollinate if needed |
| Plastic drips all night | High humidity and poor ventilation | Open vents in the morning and space plants |
A problem often has more than one cause. For example, wilted tomato leaves may mean dry soil, root damage, or high heat. Feel the soil before adding water.

🔧 Quick Fix: If the bed overheats while you are away, remove one long side of the film and replace it with insect mesh. You may lose a few degrees of warmth, but you gain airflow and prevent repeated heat spikes.
Maintain the small greenhouse through the year
A raised-bed greenhouse needs regular checks, but the work is light. A few minutes each week can prevent a torn cover or dead crop.

Weekly maintenance
Check the frame for movement after strong wind. Look for loose clips, torn film, and bent hoops. Touch the plastic where it meets the frame; sharp edges can cause small cuts that grow quickly.
Inspect plants under the leaves. Remove fallen leaves, ripe fruit, and diseased plant parts. Keep weeds out because they compete for water and can shelter pests.
Read the thermometer at midday. Also check the soil moisture in two places, since one side of the bed may dry faster than the other.
Monthly maintenance
Wash heavy dust from the cover with clean water and a soft sponge. Dirt reduces light. Avoid harsh cleaners, which can damage UV-treated film and leave residues near edible crops.
Check screws and wood battens. Cedar can shrink and swell, and screw holes may loosen. Replace cracked clamps before winter wind arrives.
Review the crop plan. Rotate plant families when possible. After tomatoes, plant lettuce or peas rather than another tomato, pepper, or eggplant crop. Rotation helps reduce soil-borne disease buildup.
| Task | How often | Why it matters |
|---|---|---|
| Check clips and anchors | Weekly and after storms | Stops wind damage |
| Check temperature | Daily during warm weather | Prevents heat stress |
| Inspect leaves and stems | Twice each week | Finds pests early |
| Clean the cover | Monthly or when dusty | Keeps light levels high |
| Inspect wood and hoops | Monthly | Finds weak points before winter |
| Replace damaged film | As needed | Stops tears from spreading |
Small repairs cost less than replacing a full cover. Keep greenhouse repair tape, spare clamps, and a few extra screws in a dry box.
Use the greenhouse in each season
The same structure can serve different purposes throughout the year. Change the cover and crop plan instead of treating it as a permanent sealed box.
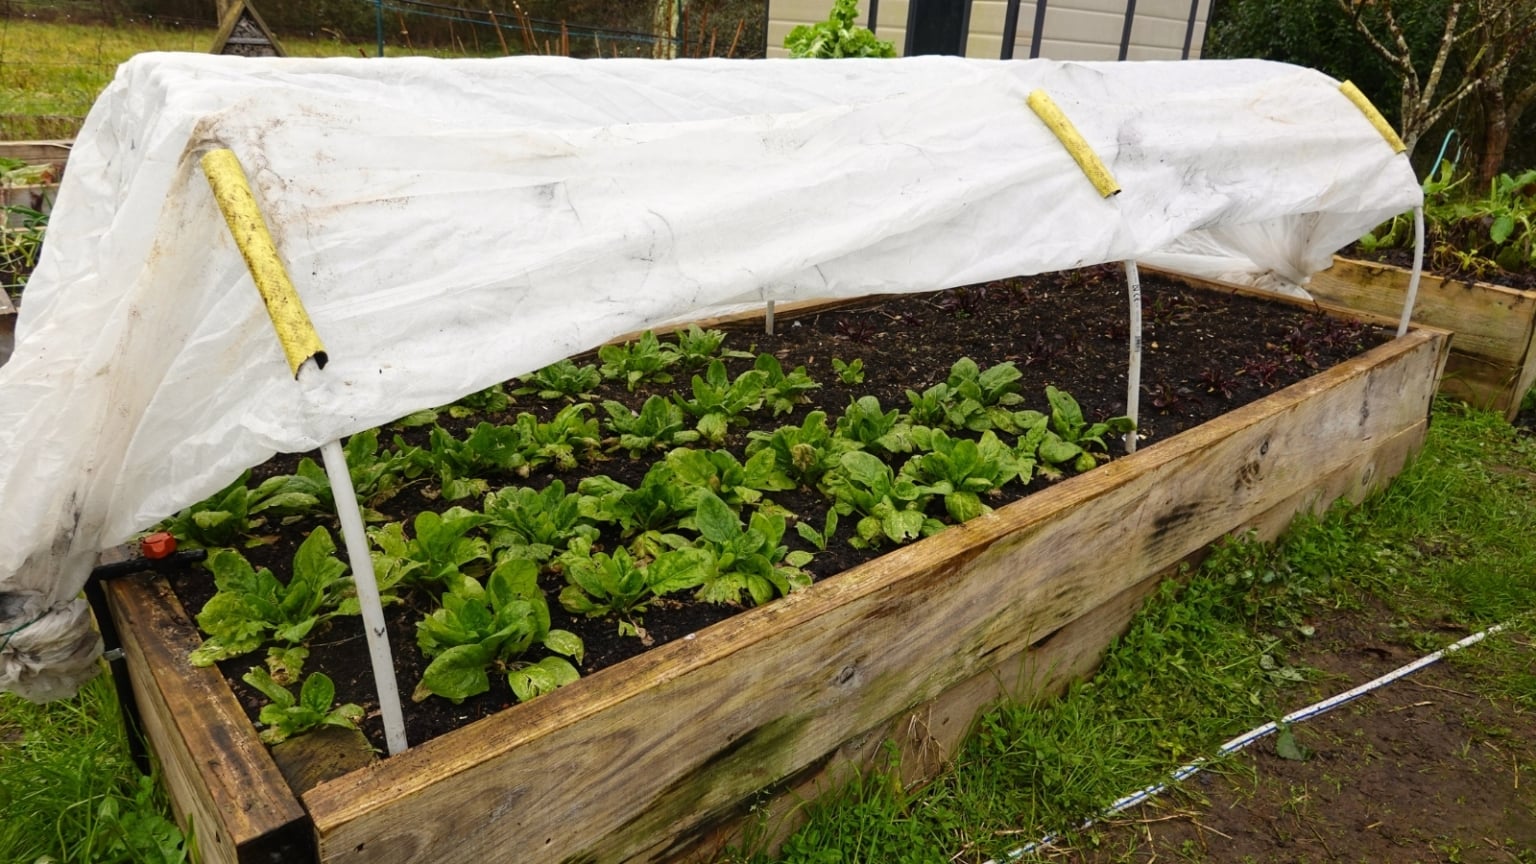
Spring
Spring is the easiest time to use a raised-bed greenhouse. Sow spinach, lettuce, mustard greens, kale, radish, carrots, and peas. In colder zones, clear film can give you two to six weeks of earlier growth.
Vent on sunny days. Cool-season crops still suffer when the air rises above 80°F for long periods. Harvest outer leaves instead of pulling the whole plant, and many greens will regrow.
Start hardening off warm-season seedlings when night temperatures begin to stay above 50°F. Tomatoes, peppers, and basil need warmer roots than lettuce.
Summer
In summer, the structure may work better as a screened tunnel than a greenhouse. Remove clear film and use insect mesh or 30 to 50 percent shade cloth.
In Zones 3 through 6, clear film may still help heat-loving plants during cool nights. In Zones 8 through 10, full sun under plastic can damage leaves and stop tomato flowers from setting fruit.
Keep at least one side open most of the time. Water early, harvest often, and watch for spider mites during dry weather.
Fall
Fall is an excellent season for lettuce, arugula, spinach, Asian greens, cilantro, parsley, and baby carrots. Sow crops six to eight weeks before your average first frost, then close the cover as nights cool.
Use clear film over sturdy plants and add frost cloth during hard freezes. Do not let plastic rest on wet leaves because frozen contact can cause damage.
Winter
A low greenhouse does not make plants immune to deep freezes. In Zones 3 and 4, it may protect hardy greens but will not keep tomatoes alive without extra heat.
Remove heavy snow from the cover with a soft broom. Push upward from inside only if the frame can handle the load. Do not scrape plastic with a shovel or sharp tool.
Never use an indoor propane heater in a small plastic greenhouse. Carbon monoxide, fire, and moisture create serious risks. If you add electric heat, use outdoor-rated equipment with ground-fault protection and keep cords dry.
⚠️ Warning: Never seal a gas heater inside a small raised-bed greenhouse. The fire and carbon monoxide risks outweigh the extra warmth. Use passive protection, safe electric equipment, or move tender plants indoors.
Compare greenhouse styles and alternatives
A hoop cover is not the only way to protect a raised bed. The best design depends on your climate, budget, crop height, and willingness to open vents each day.
Low tunnel versus cold frame
A low tunnel uses hoops and flexible cover. It gives more planting space and costs less, but it needs stronger anchoring in wind.
A cold frame uses a rigid box with a sloped lid. It holds heat well and works beautifully for seedlings, lettuce, and herbs. It has less floor space and can become very hot under a glass or polycarbonate lid.
Flexible film versus polycarbonate
Flexible film is affordable and easy to replace. It also folds for storage. Its weak points are tearing, wind damage, and a shorter lifespan.
Twin-wall polycarbonate lasts longer and insulates better. It resists impact and looks neat, but it costs more and needs a stronger frame. It makes sense for a permanent garden structure, not always for a seasonal bed.
| Design | Approximate cost | Best for |
|---|---|---|
| Hoops with row cover | $25–$75 | Light frost and beginners |
| Hoops with greenhouse film | $50–$180 | Season extension and vegetables |
| Wooden cold frame lid | $75–$250 | Seedlings and compact crops |
| Polycarbonate bed cover | $150–$400 | Long-term use and windy sites |
| Full walk-in greenhouse | $300 and up | Tall crops and larger harvests |
Current pricing varies by region, material quality, and shipping. Reusing hoops or salvaged windows can lower the cost, but inspect used materials for lead paint, broken glass, and chemical residue.
Estimate cost, time, and lifespan
A small raised-bed greenhouse is usually a good value when you already own the bed. The cost rises when you need rigid panels, custom doors, automatic vents, or a heavy foundation.
A basic PVC and row-cover setup may take one hour. A conduit frame with ridge rails and a secured film cover often takes three to five hours. A polycarbonate box may take a full weekend, especially if you need to build a new timber frame.
The frame can last five to ten years when protected from rust and heavy snow. Greenhouse film commonly lasts two to five seasons. Clips may last several years, while cheap plastic staples and zip ties often fail first.
| Project level | Time needed | Typical cost |
|---|---|---|
| Simple row-cover tunnel | 1–2 hours | $25–$75 |
| Film-covered hoop house | 3–5 hours | $50–$180 |
| Rigid cold frame | 4–8 hours | $75–$250 |
| Polycarbonate cover | 1–2 days | $150–$400 |
The lowest-cost option is not always the cheapest over time. Replacing thin plastic every season can cost more than buying UV-treated film once.
Learn from common building mistakes
The most common mistake is building the frame first and thinking about access later. If you cannot reach the middle of the bed, weeds and pests will win.
Mistake: using thin household plastic
Painter’s plastic may seem cheap, but sunlight makes it brittle. It also tears around clips and corners. Use greenhouse film when you expect the cover to remain outdoors for more than a few weeks.
Mistake: sealing both ends
A sealed tunnel can reach temperatures that kill lettuce, seedlings, and young tomato plants. Open one or both ends before the sun is high.
Mistake: placing hoops too far apart
Wide hoop spacing lets the film sag. Rain collects in the low spots, and wind pulls harder on the cover. Keep hoops about 24 to 30 inches apart for a small bed.
Mistake: letting plastic touch leaves
Leaves against wet plastic stay damp and cold at night. The contact can cause frost injury and fungal disease. Use taller hoops or prune plants so the cover remains clear.
Mistake: ignoring snow and wind
A hoop tunnel may handle rain but fail under wet snow. Remove snow early, add a ridge pole, and take the cover off if a severe storm is forecast and the bed contains no plants that need protection.
Use personal experience to refine the design
I first built a raised-bed greenhouse with three thin PVC hoops and ordinary clear plastic. It worked for lettuce in April, but the middle sagged after rain, and the plastic tore where the clips pinched it. The next version used five hoops, a ridge pole, and wood battens along the edges.
That design held up much better through two growing seasons in a windy Zone 6 garden. The unexpected issue was heat. On a sunny May morning, the inside temperature passed 95°F before I finished breakfast. After that, I installed a simple roll-up side and placed the thermometer at leaf height.
The best result came from using the structure in stages. I used clear film for early greens, insect mesh for summer cucumbers, and clear film again for fall spinach. This gave me more useful growing time than leaving plastic on all year.
I also learned that the bed’s location mattered as much as the frame. A site with six to eight hours of sun, morning light, and shelter from the strongest west wind performed better than a fully exposed spot. Good placement reduces repairs and makes temperature control easier.
Know when to hire help
Most gardeners can build a small hoop cover without professional help. Hire a contractor or experienced carpenter when you plan to attach heavy glass, build a permanent structure, install electrical heat, or create a walk-in greenhouse.
Get help if the site has poor drainage, unstable soil, or a large snow load. A stronger foundation may cost more at the start but prevents structural failure.
You should also ask for help with electrical work. Outdoor outlets, heaters, fans, and extension cords require weather-safe installation and ground-fault protection. Water and electricity should never share a wet, cluttered space.
Frequently asked questions
Can I turn any raised garden bed into a greenhouse?
Most beds can support a small hoop cover if the boards are solid and the site drains well. The bed should be wide enough for hoops and tall enough to hold the cover above the plants. Replace rotten boards before attaching a frame.
What is the best cover for a raised-bed greenhouse?
Clear UV-treated greenhouse film is best for heat and frost protection. Row cover is better for mild frost and airflow. Insect mesh is best for summer pest control. Many gardeners switch covers as the season changes.
How warm does a raised-bed greenhouse get?
On a sunny day, the air may rise 20°F to 40°F above outdoor temperatures. The exact change depends on sunlight, wind, cover type, bed location, and ventilation. Use a thermometer instead of guessing.
Can I grow tomatoes in a raised-bed greenhouse?
Yes, but choose compact or determinate tomatoes unless the frame is tall. Provide strong support, vent early, and avoid crowding. High heat can cause tomato flowers to drop, especially when temperatures stay above 90°F.
How do I keep a small greenhouse from overheating?
Open the ends and roll up the sides before the inside reaches about 75°F for cool crops. Use shade cloth or insect mesh in hot weather. A thermometer at plant height gives the most useful reading.
Will a greenhouse protect plants from frost?
A plastic cover can protect plants from light frost, especially when the soil is warm. It may not protect against a long, hard freeze. Add inner frost cloth, water containers for heat storage, or move tender plants indoors.
Can I use regular plastic sheeting?
You can use regular plastic for a short project, but it often tears and becomes brittle in sunlight. Greenhouse film lasts longer because it includes UV protection. Avoid plastic that touches sharp hoop edges.
How long does greenhouse plastic last?
Quality UV-treated film often lasts two to five seasons. Wind, sun, snow, hail, and rubbing against the frame shorten its life. Store clean, dry film in a dark place if you remove it between seasons.
Do I need a fan?
A fan helps in a larger or tightly enclosed greenhouse, but most low tunnels work with roll-up sides and open ends. If you use a fan, choose an outdoor-rated model and protect all electrical connections from water.
Can I leave the greenhouse up all winter?
You can leave it up if the frame and cover can handle local weather. Remove heavy snow and inspect it after storms. In areas with major snow or high wind, taking the film down may protect the frame.
Should I water plants less under plastic?
Usually, yes. Covered soil loses less water through evaporation. Check the soil before watering, and use deep, less frequent watering for mature crops. Seedlings still need steady moisture.
What can I grow in a raised-bed greenhouse in winter?
In mild climates, grow spinach, kale, mâche, parsley, cilantro, lettuce, scallions, and hardy Asian greens. In cold Zones 3 and 4, growth may stop during the darkest weeks, even when plants survive.
Is a raised-bed greenhouse worth the money?
It is worth the cost for gardeners who want earlier spring crops, later fall harvests, frost protection, or fewer insect problems. It may not be worthwhile if you cannot open it daily or if your main crops need tall, permanent space.
Final thoughts
Turning a raised garden bed into a greenhouse is one of the simplest ways to gain extra growing weeks. Start with a strong frame, a suitable cover, secure edges, and a plan for ventilation. A thermometer, spare clips, and a roll-up side solve many problems before they become serious.
Begin with cool-season crops and a low-cost hoop design. After one season, you will know how fast your bed heats up, where wind enters, and which cover suits your climate. Then you can upgrade to conduit hoops, automatic vents, shade cloth, or polycarbonate panels if your garden needs them.
The goal is not to build a perfect greenhouse. It is to create a useful, manageable shelter that helps your plants grow when the outdoor weather is not ready.
Meta description: Learn how to turn a raised garden bed into a greenhouse with simple hoops, greenhouse film, ventilation, planting tips, costs, seasonal care, and frost protection advice.