How To Build A Raised Vegetable Garden Bed: Easy Guide
A raised vegetable garden bed gives you more control over soil, water, weeds, and plant spacing than a flat garden. You can build one in a weekend with basic tools, even if your yard has hard clay, poor drainage, tree roots, or no usable soil at all. A well-built bed also reduces bending and warms faster in spring.
I have built raised beds in sandy soil in USDA Zone 8, heavy clay in Zone 6, and cold spring sites in Zone 4. The same mistakes appear in every region: beds are made too narrow, filled with poor soil, or built without a plan for watering. This guide shows how to build a raised vegetable garden bed that lasts, drains well, and supports healthy crops for many seasons.
Quick answer: how to build a raised vegetable garden bed
To build a raised vegetable garden bed, choose a sunny, level site, assemble untreated rot-resistant boards, anchor the frame, and fill it with a balanced soil mix. A 4-by-8-foot bed that is 12 inches tall works well for most vegetables. Use about 1 cubic yard of soil, leave 18 to 24 inches between beds, and add compost each season.
Plan the garden bed before you buy materials
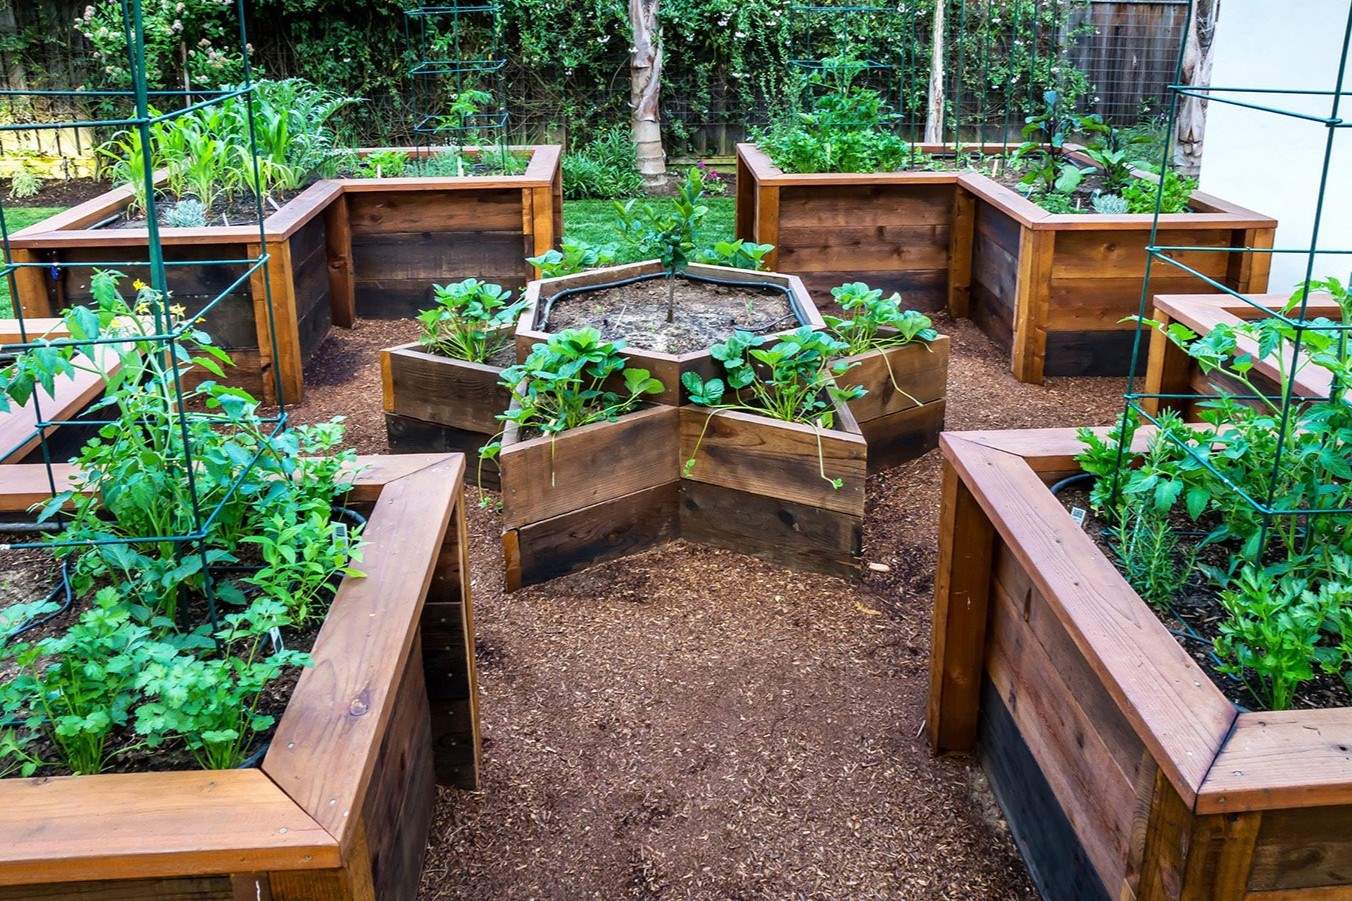
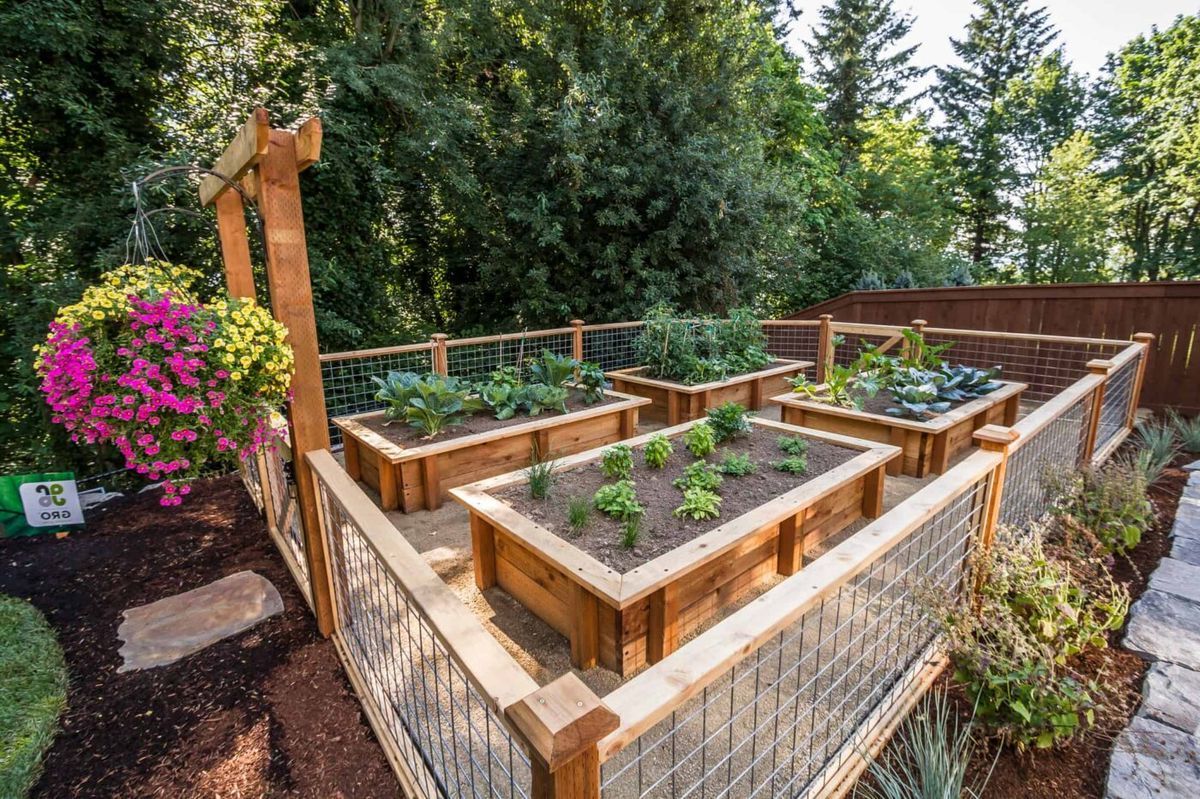
The best raised bed starts with a simple plan. Decide what you will grow, how much space you have, and how you will reach the bed with a hose, wheelbarrow, or garden cart. A rushed layout often leads to beds that look good but are hard to water or weed.
Pick the right location
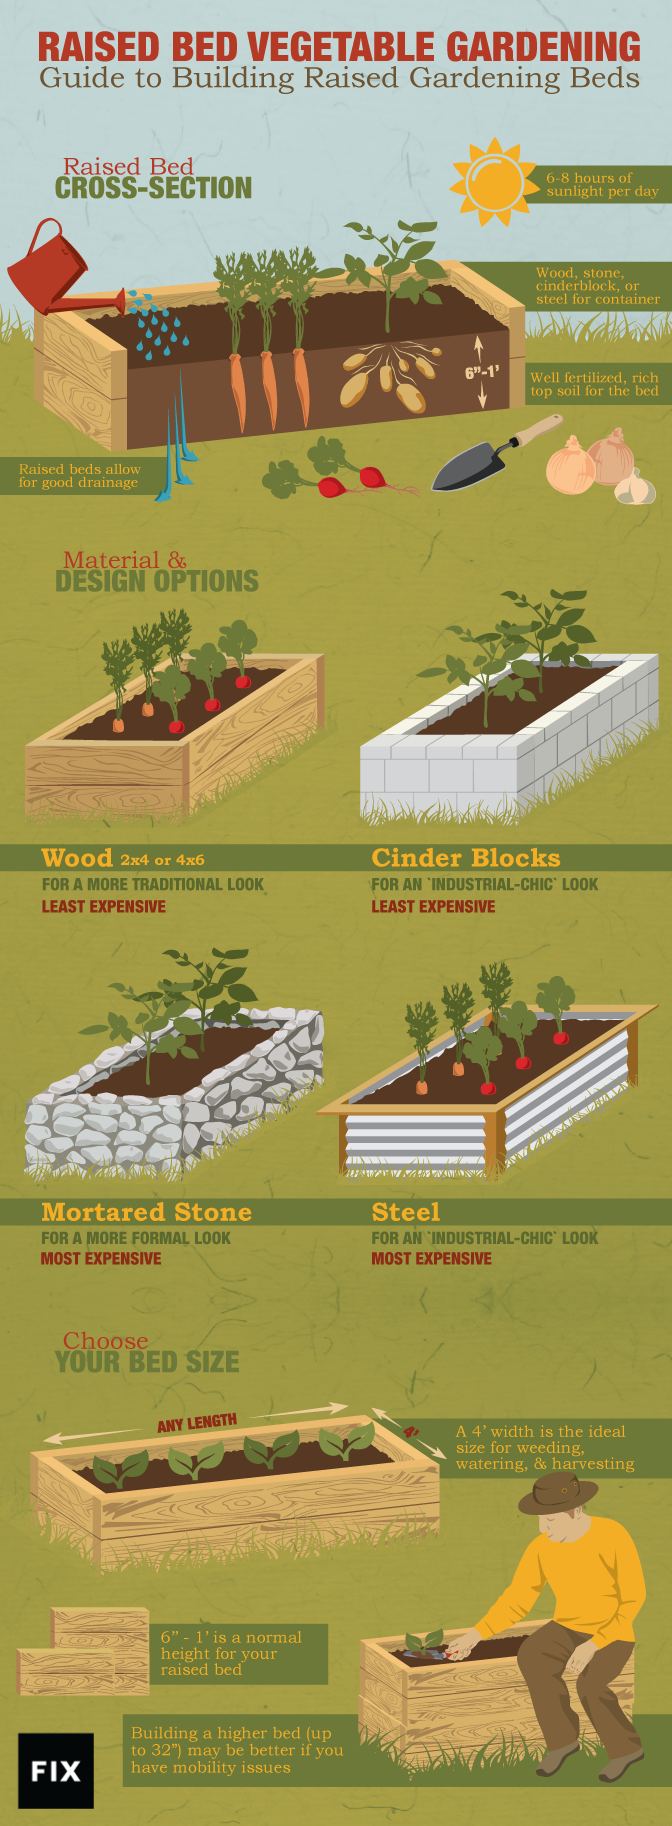
Most vegetables need at least six to eight hours of direct sun each day. Fruiting crops such as tomatoes, peppers, cucumbers, squash, and eggplants prefer closer to eight hours. Leaf crops such as lettuce, kale, arugula, and spinach can handle some afternoon shade.
Watch the site for a full day before you build. A spot that looks sunny at 10 a.m. may sit under a tree by 2 p.m. Avoid low areas where rain collects. Also stay clear of black walnut trees, whose roots and fallen leaves can release juglone, a compound that harms some plants.
Place the bed near a water source, but not directly under a roof drip line. Roof runoff can carry concentrated salts and contaminants into the soil. Keep beds away from large tree roots, too. Roots can invade the bed and steal moisture within one growing season.
Choose a useful bed size
A raised bed should be narrow enough to reach the center without stepping on the soil. For most adults, 4 feet wide is the practical limit. A 3-foot-wide bed works better for children, wheelchair users, or gardeners who can reach from one side only.
Length depends on your space. An 8-foot bed uses standard lumber well, but a 6-foot or 4-foot bed is easier to move and square. I often use two 4-by-4-foot beds instead of one 4-by-8-foot bed because paths stay open and crop rotation becomes simpler.
| Bed feature | Practical recommendation | Why it matters |
|---|---|---|
| Width | 3 to 4 feet | Keeps the center within reach |
| Length | 4 to 8 feet | Fits common lumber and garden spaces |
| Height | 10 to 12 inches | Holds most vegetable roots |
| Path width | 18 to 24 inches | Allows walking and hose access |
| Tall accessible bed | 24 to 32 inches | Reduces bending and improves access |
A 12-inch bed gives enough depth for lettuce, beans, carrots, beets, onions, and most herbs. Tomatoes and other deep-rooted crops do well in 18 inches or more, especially where the native soil drains poorly.

Check sunlight, slope, and drainage
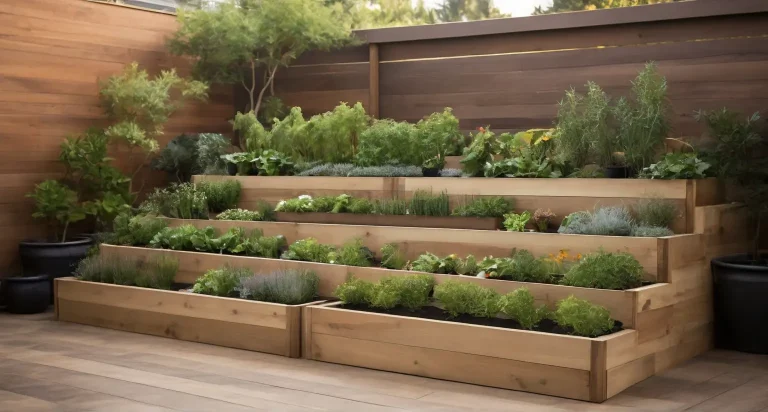
A slight slope is manageable, but a steep slope needs terracing or a retaining wall design. Do not simply stack boards on a sharp slope and expect the soil to stay in place. The lower side may bow or wash out after heavy rain.
Use a 4-foot level or a straight board with a smaller level on top. Remove high spots and fill low spots with compacted soil. You do not need a perfect foundation, but the bottom board should sit firmly along its full length.
If the site stays wet for days after rain, solve drainage before filling the bed. A raised frame cannot fix a waterlogged location by itself. You may need a French drain, a gravel swale, or a different garden site.
Gather safe, durable materials and tools
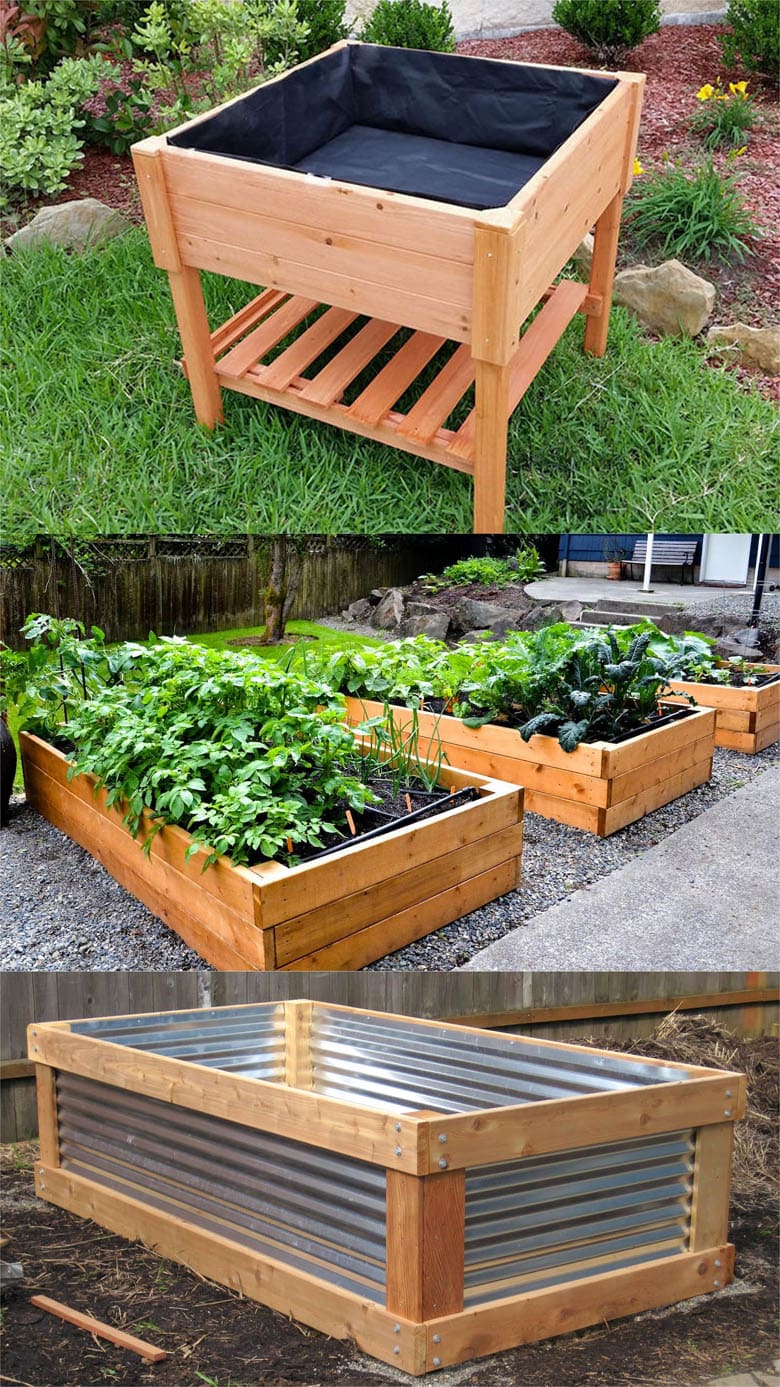
The best materials for a raised vegetable bed are untreated lumber, galvanized metal, stone, or food-safe recycled plastic. Avoid old railroad ties, painted boards, unknown salvaged wood, and lumber treated with chemicals that are not approved for garden use.

Wood choices for raised beds
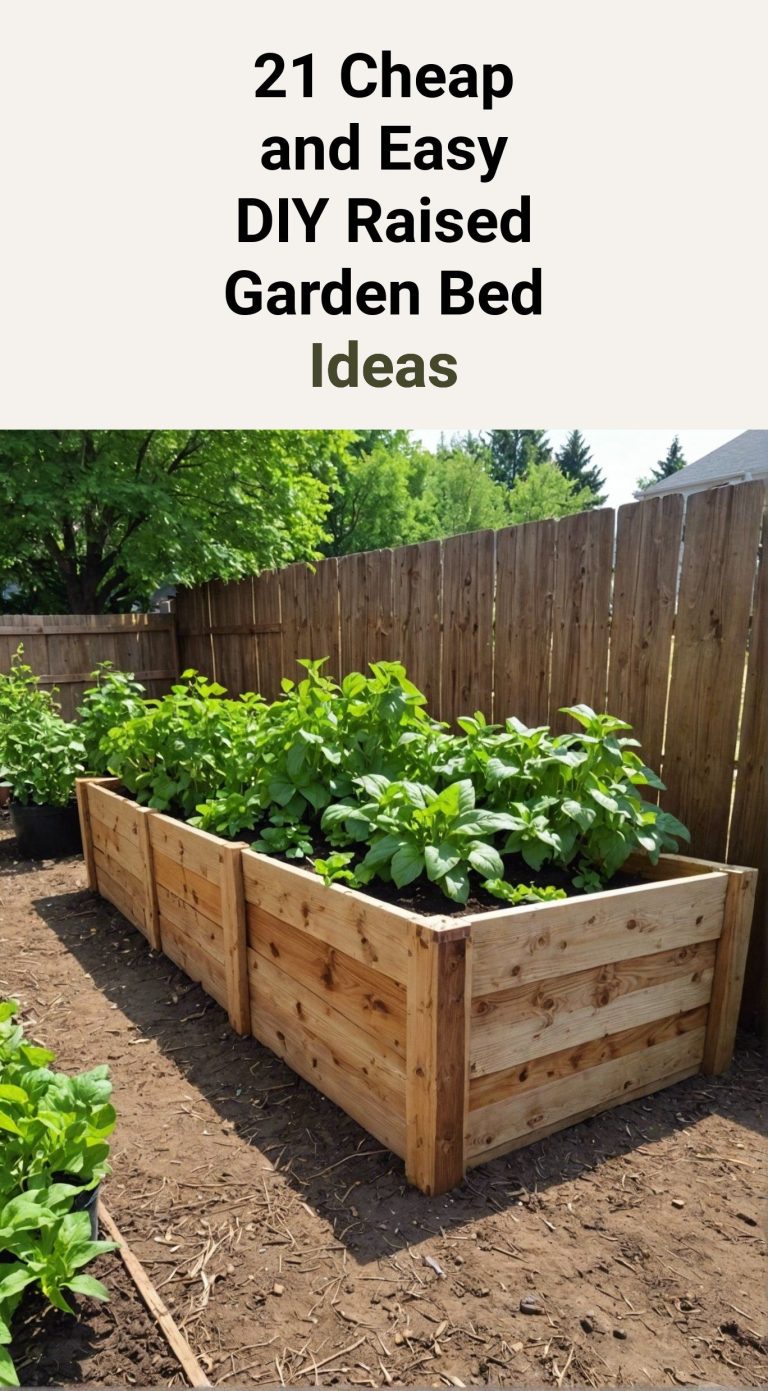
Untreated cedar, redwood, and cypress resist decay better than pine. Cedar is the common choice because it lasts well and is widely available. In my Zone 6 beds, 2-inch-thick cedar boards stayed solid for about eight years, while untreated pine began to soften near the ground after three to four seasons.
Modern pressure-treated lumber made for residential use is regulated and is generally considered suitable for raised beds in the United States. Still, many gardeners prefer untreated wood for peace of mind. If you use treated boards, select current residential lumber and follow the label. Never use old industrial timbers or creosote-treated railroad ties.
Metal beds last longer in many climates, but they can heat quickly in hot areas. Galvanized steel works well when the bed has enough soil volume and regular moisture. In USDA Zones 8 through 10, place metal beds where afternoon shade is possible, or use a thicker mulch layer.
Tools and supplies checklist
You do not need a power saw if the store cuts lumber to size. A drill makes assembly faster, but a screwdriver and patience can work for a small bed. Use exterior-rated screws rather than indoor drywall screws, which rust and snap.
| Material or tool | Suggested size or type | Main use |
|---|---|---|
| Bed boards | Cedar or other rot-resistant 2-by-6 or 2-by-8 boards | Forms the frame |
| Screws | 3-inch exterior structural screws | Joins corners |
| Corner stakes | 2-by-2 or 2-by-4 lumber | Adds strength |
| Drill | Cordless drill with driver bit | Pre-drills and drives screws |
| Level | 2- or 4-foot level | Checks the frame |
| Tape measure | 12 to 25 feet | Measures cuts and layout |
| Soil calculator | Volume estimate in cubic feet | Prevents underbuying soil |
| Wheelbarrow | One-wheel or two-wheel model | Moves soil and compost |
| Safety gear | Gloves, eye protection, closed shoes | Protects hands and eyes |
A cordless drill such as a DeWalt 20V MAX or Ryobi ONE+ is more than enough for a small bed. You do not need a high-torque impact driver, and it can overdrive screws into soft cedar. A standard drill with a clutch gives better control.
Calculate the soil volume
Measure the inside length, inside width, and soil depth in feet. Multiply those three numbers to find cubic feet.
For a 4-by-8-foot bed filled to 12 inches:
- 4 feet × 8 feet × 1 foot = 32 cubic feet
- 32 cubic feet ÷ 27 = about 1.19 cubic yards
Buy about 1.25 cubic yards to allow for settling. Bagged soil often comes in 1.5- or 2-cubic-foot bags, so this bed may need 16 to 22 bags depending on the fill level. Bulk soil costs less when you build more than one bed.
💡 Pro Tip: Fill the bed to within 2 inches of the top, then water it slowly. The soil may settle by 2 to 4 inches during the first month. Keep a few extra bags of compost or soil mix nearby for topping off.
Build the raised bed frame step by step
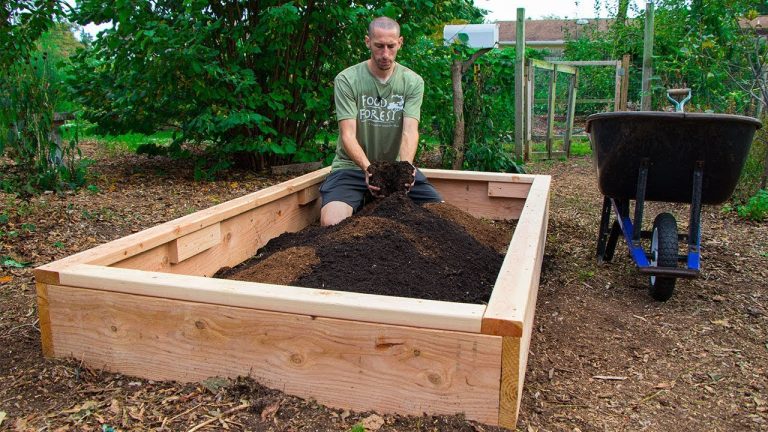
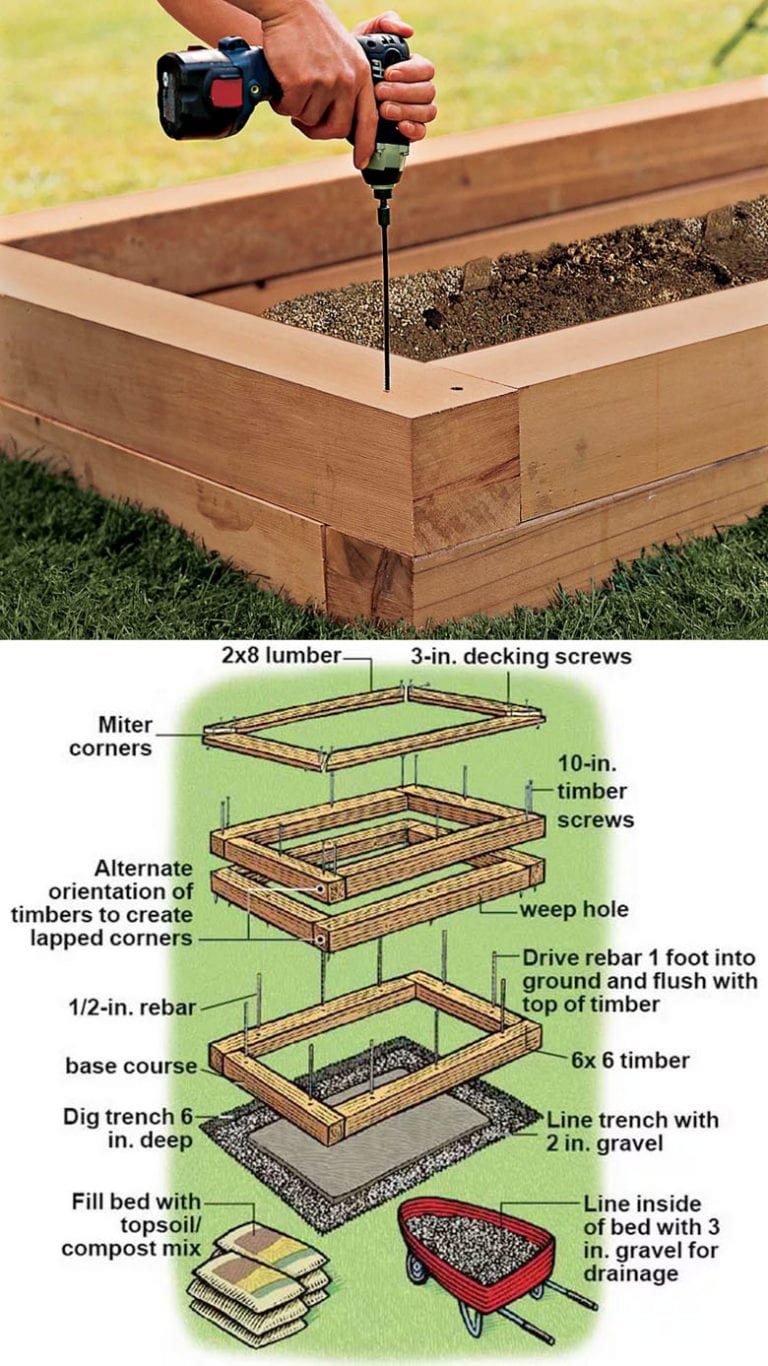
A strong frame needs square corners, firm joints, and enough support to resist wet soil. Soil is heavy. A 4-by-8-foot bed filled 12 inches deep can hold more than 2,000 pounds of soil when wet.

Step 1: Mark the bed footprint
Mark the outside corners with stakes, flags, or flour. Measure both diagonals. If the diagonals match, the layout is square. For a rectangular bed, this small check prevents frustrating gaps when you join the boards.
Remove grass and large weeds from inside the footprint. You can build over lawn, but cutting the grass short and covering it with cardboard works better than leaving tall turf under the bed.
Step 2: Prepare the ground
Level the high points with a spade or garden rake. Do not place a raised bed on loose mulch, deep compost, or freshly tilled soil. The frame may settle unevenly after rain.
For lawn, use overlapping sheets of plain brown cardboard. Remove plastic tape and glossy coatings. Wet the cardboard before adding soil so it stays in place and begins to break down.
If you have persistent perennial weeds such as bindweed, quackgrass, or Bermuda grass, remove as much root as possible. Cardboard alone may not stop aggressive rhizomes. In one bed I built over Bermuda grass, runners reached the surface through gaps at the edge after six weeks.
Step 3: Cut and dry-fit the boards
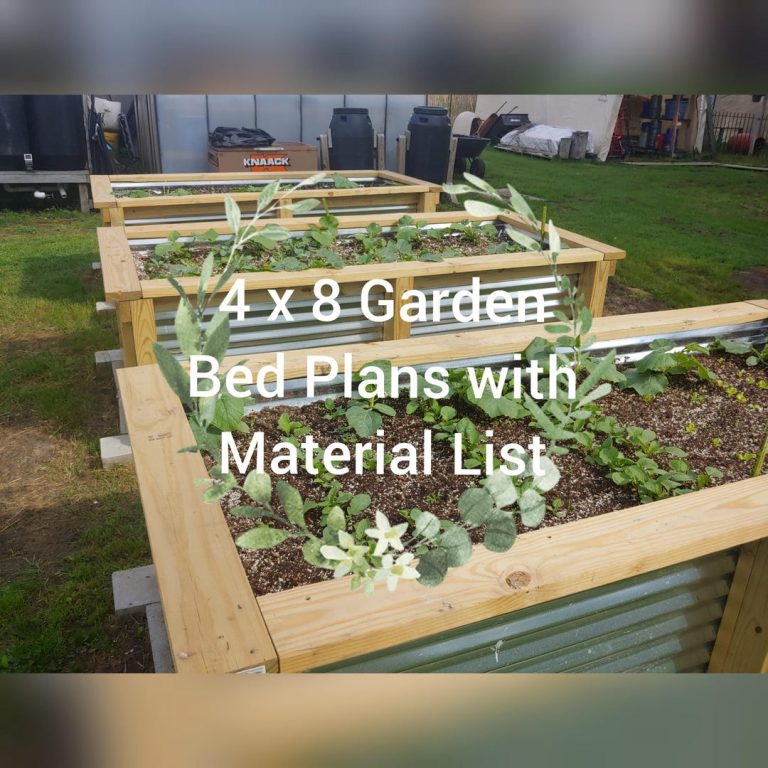
For one 4-by-8-foot bed, use two 8-foot boards for the long sides and four 4-foot boards for the ends if you want a two-layer frame. A single layer of 2-by-8 boards creates a bed close to 7 1/4 inches tall, not 8 inches.
Dry-fit the boards before driving screws. Place the ends so the corners overlap in a consistent pattern. Check the length, width, and diagonals once more.
Step 4: Join the corners
Pre-drill holes near the ends of the boards. This reduces splitting, especially in cedar. Use at least two 3-inch exterior screws per corner for a single-layer bed.
For a bed taller than 12 inches, use corner posts or internal braces. Tall frames create more outward pressure. Add a 2-by-2 or 4-by-4 post at each corner and fasten the boards to the post.
Step 5: Add a second course if needed
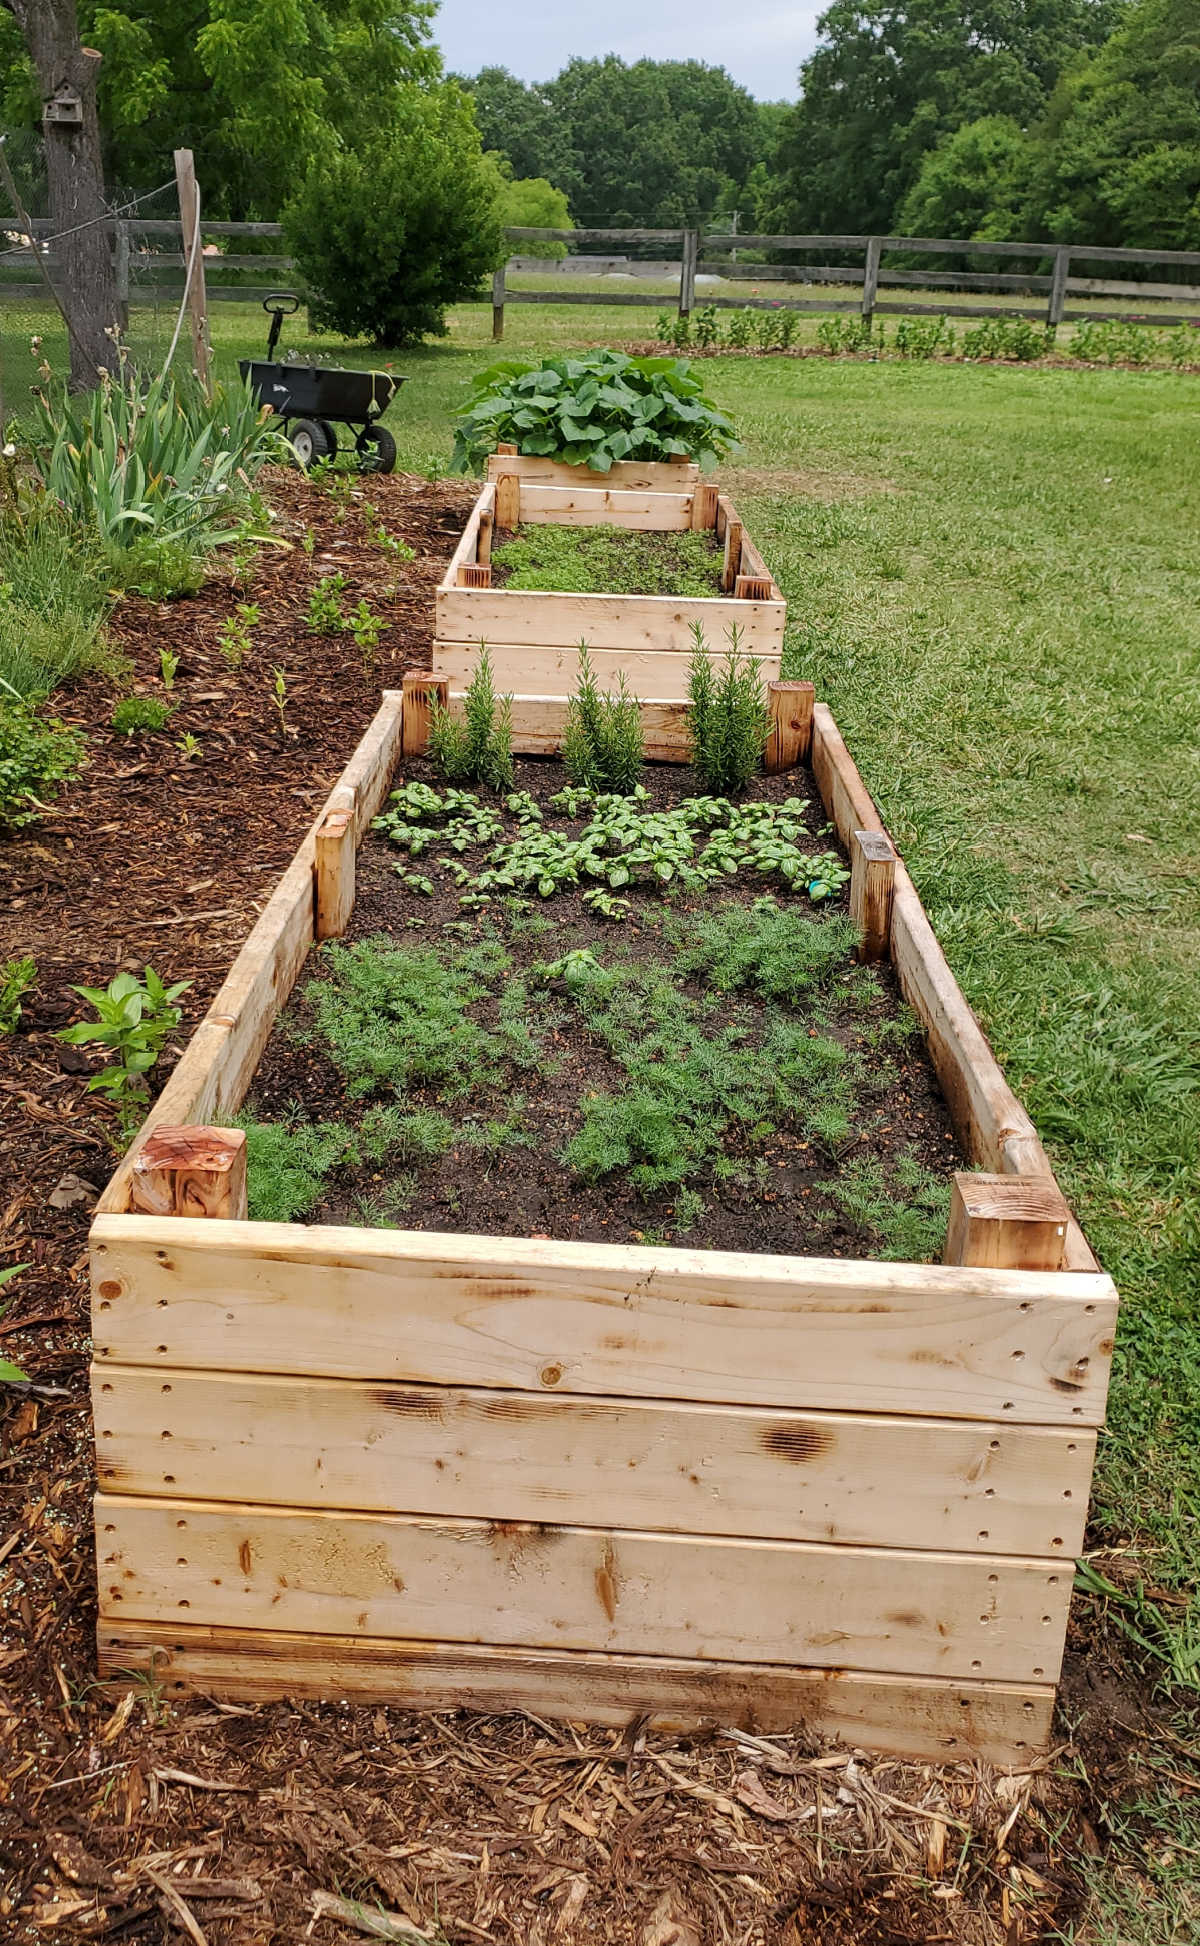
If you want an 18- or 24-inch bed, stack a second course of boards. Stagger the joints so the upper boards do not line up with the lower corners. Connect the courses with screws every 16 to 24 inches.
For beds longer than 8 feet, add a center brace across the width. Attach it to the side boards with structural screws or metal brackets. Without a brace, long sides can bow outward after the first heavy watering.
Step 6: Set the frame and check it
Place the completed frame on the prepared ground. Press down on each corner and check for rocking. Add or remove soil under the low side until the frame sits firm.
Check the level from front to back and side to side. A bed does not need to be perfectly level for plants, but a level top keeps water and soil evenly distributed.
Step 7: Anchor the bed
Drive stakes outside the corners or inside the frame where they will not interfere with roots. Screw the frame to the stakes. This step matters most for beds taller than 12 inches or in areas with freeze-thaw cycles.
In northern climates such as USDA Zones 3 through 5, frost can shift a frame several inches. Anchors and a compacted base reduce movement. The frame may still shift slightly, but it will not separate as easily.
⚠️ Warning: Do not use thin interior screws, nails, or decorative hardware as the main fasteners. Wet soil creates constant pressure, and weak fasteners can fail when the frame is hardest to repair.

Fill the bed with healthy soil
The best soil for a raised vegetable bed holds moisture but drains excess water. A common mix uses about 60% screened topsoil, 30% finished compost, and 10% aeration material such as pine bark fines or coarse vermiculite.

Use the right soil blend
Avoid filling the whole bed with pure compost. Compost shrinks, dries quickly, and may contain high levels of soluble salts. It is a soil amendment, not a complete replacement for mineral soil.
Bagged raised-bed mix is convenient for one small bed. For several beds, buy bulk soil from a local supplier and ask for a product made for vegetables. Ask whether the topsoil contains construction fill, herbicide residue, or excessive sand.
| Soil component | Typical share | Function |
|---|---|---|
| Screened topsoil | 50% to 60% | Adds mineral structure and weight |
| Finished compost | 25% to 35% | Adds organic matter and nutrients |
| Pine bark fines | 10% to 20% | Improves drainage and air space |
| Coarse vermiculite | Up to 10% | Holds moisture in dry climates |
The exact mix can vary by climate. In wet USDA Zones 5 and 6, use more bark fines and less compost. In dry Zones 8 and 9, add organic matter and mulch to slow water loss.
Test soil pH and nutrients
Most vegetables grow well in soil with a pH of 6.0 to 7.0. Blueberries are an exception and need acidic soil, usually around pH 4.5 to 5.5, so they deserve a separate container or bed.
A basic soil test can show pH, phosphorus, potassium, calcium, and magnesium. Test after mixing the bed and again after a season or two. Do not add lime, sulfur, or fertilizer based on guesswork.
For a new bed with good compost, you may not need fertilizer right away. If the soil test shows low nutrients, use a balanced organic fertilizer such as 4-4-4 according to the label. Too much nitrogen produces large leaves but weak fruit set and more pest pressure.
Add the soil in layers
Put the soil mix into the bed in 4- to 6-inch layers. Water each layer lightly to settle air pockets. Do not compact it by walking inside the bed.
Stop when the soil sits 1 to 2 inches below the top edge. That space keeps mulch and soil from washing over the boards. After four weeks, add more mix if the surface drops.
Decide whether to use a bottom liner
Most raised beds should remain open to the native soil. An open bottom lets earthworms enter, improves drainage, and gives deep-rooted plants more room.
Use hardware cloth under the bed if voles, moles, or gophers cause serious problems. Choose galvanized 1/2-inch hardware cloth, extend it up the inside edges, and secure it before adding soil. Avoid landscape fabric under vegetable beds because it can block roots and reduce soil life.
For a bed on concrete or a balcony, use a liner with drainage holes. That setup becomes a large container, so it needs more frequent watering and a lighter soil mix.
🌱 Beginner Note: Do not add a gravel layer under a bed to “improve drainage.” Water does not drain faster through a sharp soil-to-gravel boundary. Fix wet soil with a better site, an open bottom, or a true drainage system.

Plant the bed for strong growth and easy harvests
A raised bed works best when you use intensive spacing without crowding plants. The goal is to cover the soil with leaves while leaving enough airflow around crops.
Match vegetables to root depth
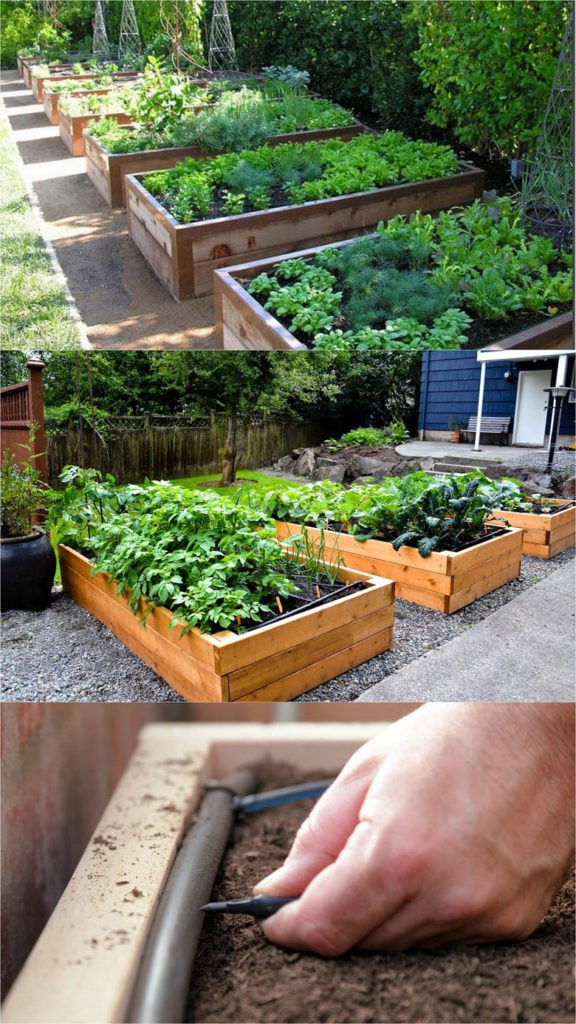
Shallow-rooted crops include lettuce, spinach, radishes, scallions, and many herbs. They need about 6 to 8 inches of soil. Carrots, parsnips, tomatoes, and large peppers need deeper soil.
A 12-inch bed can grow most vegetables if roots can enter the native soil below. If the bottom is blocked by concrete, choose dwarf tomatoes, bush beans, salad greens, radishes, and herbs rather than long carrots or full-size indeterminate tomatoes.
Use a simple planting plan
Place tall crops on the north side of the bed so they do not shade shorter crops. Put tomatoes, trellised cucumbers, peas, and pole beans along the north or west edge. Grow lettuce, basil, carrots, and bush beans toward the front.
Square-foot spacing can work well, but follow the mature size of each plant. One tomato plant may need 2 to 4 square feet, while you can plant 16 radishes in the same area.
Good beginner crops include:
- Bush beans
- Leaf lettuce
- Kale
- Swiss chard
- Radishes
- Carrots
- Basil
- Parsley
- Strawberries in a dedicated bed
Do not place mint directly in the raised bed. It spreads through runners and can take over within a season. Grow mint in a separate pot.
Add trellises before planting
Install tomato cages, pea netting, or cucumber trellises before roots fill the soil. Pushing stakes into a planted bed can cut roots and disturb young plants.
Use sturdy supports for indeterminate tomatoes such as ‘Cherokee Purple’ or ‘Sun Gold.’ Lightweight cages often bend under the weight of mature vines. A cattle panel or strong welded-wire panel makes a durable cucumber and pea trellis.
Water, mulch, and fertilize the bed
Raised beds drain faster than in-ground gardens, especially in hot weather. Water deeply enough to moisten the full root zone, then allow the top inch of soil to dry before watering again for most established crops.

Choose a watering method
A hand wand works well for one small bed. Use a soft spray and water at the soil line. Avoid blasting leaves, which can spread fungal diseases such as early blight and powdery mildew.
Drip irrigation or a soaker hose saves time in larger beds. Lay the line before planting, secure it with landscape staples, and cover it with 1 to 2 inches of straw or shredded leaves. Check the flow at the far end because pressure can drop on long runs.
| Weather and crop stage | Typical watering need | What to check |
|---|---|---|
| Newly seeded bed | Light water once or twice daily | Keep the top layer damp |
| Young seedlings | About 1 inch per week | Soil should not stay soggy |
| Fruiting crops in heat | 1 to 2 inches per week | Check soil 2 inches deep |
| Cool, rainy week | Little or no added water | Test moisture before watering |
| Container-style bed | More frequent watering | Drainage holes must stay open |
These are starting points, not fixed rules. Sandy mixes may need water more often than clay-rich mixes. Mulch, wind, plant size, and local rainfall also change the schedule.

Mulch the soil surface
Apply 1 to 3 inches of clean straw, shredded leaves, compost, or untreated grass clippings. Mulch reduces weeds, slows evaporation, and protects soil from heavy rain.
Keep mulch 2 to 3 inches away from tomato stems and other plant crowns. Wet mulch against stems can encourage rot and provide cover for slugs.
Fertilize based on plant needs
Leafy crops may respond to a light nitrogen feeding. Fruiting crops need balanced nutrition, but too much nitrogen can delay flowers. A side dressing of compost in midseason often supplies enough food for beans, greens, and herbs.
For tomatoes and peppers, use a fertilizer labeled for vegetables and follow the application rate. Fish emulsion can help young plants, but it smells strong and may attract pets or wildlife. Slow-release granular fertilizer gives steadier results and needs fewer applications.
Protect the bed from pests and disease
Raised beds do not stop pests. They make problems easier to spot because crops grow in a smaller area. Walk through the bed every few days and inspect the underside of leaves.
Common problems and practical fixes
| Symptom | Likely cause | Fix |
|---|---|---|
| Seedlings disappear overnight | Slugs, cutworms, or birds | Use collars, handpick slugs, add netting |
| Yellow lower leaves | Overwatering or nitrogen shortage | Check soil moisture and test soil |
| Holes in kale leaves | Cabbage worms or flea beetles | Use row cover and handpick pests |
| Tomato leaves show dark spots | Early blight or leaf wetness | Improve airflow and water at soil level |
| Carrots fork or split | Rocks, compact soil, uneven water | Sift soil and keep moisture steady |
| Plants wilt in wet soil | Poor drainage or root disease | Reduce watering and improve drainage |
Floating row cover protects cabbage, broccoli, kale, carrots, and turnips from many moths and flies. Remove it when plants flower if pollinators need access. Handpick tomato hornworms in the evening; they are large but often hard to see during the day.
Do not spray broad-spectrum insecticide when bees are active. Even organic products such as neem oil and pyrethrin can harm beneficial insects if used carelessly. Identify the pest first, then treat only when damage justifies it.
Prevent disease with spacing and rotation
Give tomatoes and cucumbers enough space for air movement. Remove lower leaves that touch the soil, but do not strip a plant bare. Clean tomato pruners with rubbing alcohol when moving between diseased and healthy plants.
Rotate plant families when possible. Do not grow tomatoes, peppers, eggplants, and potatoes in the same bed year after year. They all belong to the nightshade family and can share soil-borne diseases.
A simple three-year rotation helps:
- Year one: tomatoes and peppers
- Year two: beans and peas
- Year three: lettuce, carrots, onions, and herbs
Crop rotation matters more in small beds where the same plants occupy the same soil each year.
Maintain the bed through every season
A raised bed needs less work than a traditional garden, but it is not maintenance-free. The frame, soil, irrigation, and plants all need regular checks.
Spring maintenance
Inspect the boards before planting. Look for soft corners, loose screws, bowed sides, and gaps under the frame. Replace damaged wood before the bed becomes full of roots.
Top off settled soil with compost and a small amount of raised-bed mix. Do not till deeply. Tilling destroys fungal networks and brings weed seeds to the surface.
Install trellises, irrigation, and pest barriers before planting. Spring is also the best time to test soil pH and nutrients if you did not test in fall.
Summer maintenance
Check moisture by pushing a finger 2 inches into the soil. If it feels dry at that depth, water slowly at the base of the plants. During heat waves in Zones 7 through 10, morning watering reduces stress and evaporation.
Harvest often. Pick beans while pods are slim, harvest zucchini when it is small, and cut lettuce outer leaves instead of pulling the whole plant. Frequent harvest can keep plants producing longer.
Fall and winter care
Remove diseased plants and dispose of them according to local guidance. Do not compost plants with severe blight, clubroot, or unknown disease. Healthy roots and stems can go into a hot compost pile.
Cover bare soil with compost, shredded leaves, or straw. This protects soil from erosion and feeds microbes over winter. In cold Zones 3 through 5, avoid leaving heavy snow piled against a weak wooden wall.
| Season | Main task | Timing |
|---|---|---|
| Early spring | Inspect frame and amend soil | Before planting |
| Late spring | Install trellises and drip lines | Before plants grow large |
| Summer | Water, mulch, harvest, scout pests | Weekly or more in heat |
| Early fall | Remove diseased plants and replant greens | After summer crops finish |
| Late fall | Add compost and protective mulch | Before the ground freezes |
| Winter | Check frame and plan rotation | During dry weather |
A light layer of compost each fall usually works better than large doses of fertilizer. It improves soil structure without causing a sharp nutrient surge.
Know what breaks first
Wood corners and fasteners usually fail before the soil does. Water collects at the bottom of the boards, so the lower edge often rots first. Thin pine boards may warp, split, or bow after several wet seasons.
Replace a board when it feels soft under a screwdriver or shows a long split near a fastener. Do not wait for a full collapse. Remove soil from one side, replace the board, and refill it in layers.
A well-built cedar bed can last 8 to 15 years, sometimes longer in a dry climate. Untreated pine may last 3 to 7 years. Metal beds can last 20 years or more, but their coating, seams, and fasteners affect service life.
🔧 Quick Fix: If a bed wall bows outward, empty soil from the damaged section before adding more screws. Driving screws into a loaded wall may hold for a short time but can split the board and make the repair harder.
Compare raised beds with other garden options
A raised bed is useful, but it is not right for every yard. The main advantage is control. The main drawback is the cost of lumber and soil.
| Garden type | Main advantage | Main limitation |
|---|---|---|
| Raised wooden bed | Easy access and soil control | Wood eventually decays |
| In-ground garden | Low cost and large root area | More weeds and poor soil may remain |
| Metal raised bed | Long service life | Can heat soil in hot climates |
| Fabric grow bag | Low cost and portable | Dries out quickly |
| Container garden | Works on patios and balconies | Limited soil volume and water storage |
In-ground beds make sense when native soil drains well and you have enough space. Fabric grow bags work well for renters or short-term gardens, but they need more frequent watering. Metal beds suit gardeners who want a long service life and a clean modern look.
The best choice for a beginner is often a single 4-by-8-foot wooden bed. It is large enough to grow a useful amount of food but small enough to manage without expensive irrigation.
Pros and cons of raised vegetable beds
Raised beds solve several common garden problems, but they also create new responsibilities. Weigh both sides before you buy lumber and soil.
| Pros | Cons |
|---|---|
| Warms earlier in spring | Costs more than in-ground planting |
| Improves control of soil quality | Soil dries faster in hot weather |
| Reduces bending and compaction | Frames need repairs over time |
| Gives cleaner paths and layout | Requires purchased soil in poor sites |
| Helps manage drainage | Can attract rodents if poorly protected |
| Makes crop rotation simple | Needs regular watering and topping off |
Raised beds are worth the money when your native soil is rocky, contaminated, compacted, or poorly drained. They are less attractive if you have deep, fertile loam and plenty of open space. In that case, wide in-ground rows may produce more food for less cost.
Estimate the cost and build time
A basic 4-by-8-foot bed usually takes two to four hours to build if the lumber is already cut. Soil filling may take another hour or two, depending on access. A tall bed, stone wall, or difficult slope can take a full weekend.
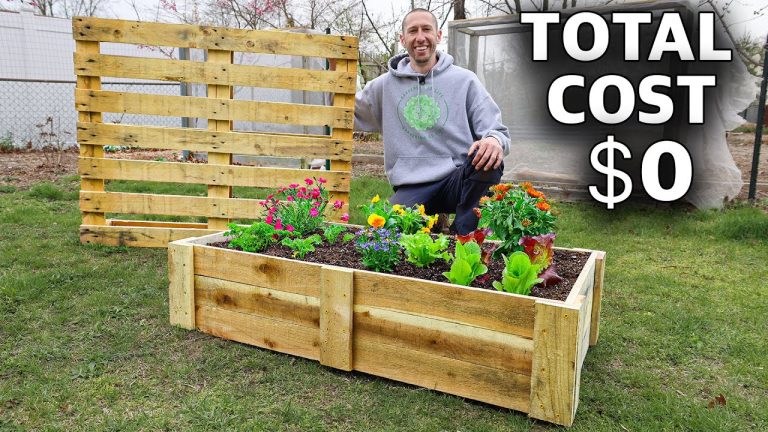
Current pricing ranges from about $80 to $250 for a simple wood bed with soil, depending on lumber, compost, delivery fees, and local supply. Cedar and bulk soil raise the cost. A metal kit may cost more at first but can last longer.
| Build choice | Approximate cost range | Typical time |
|---|---|---|
| Pine or basic lumber bed | $80–$150 | 2–4 hours |
| Cedar bed with bulk soil | $150–$300 | 3–5 hours |
| Metal raised-bed kit | $150–$500 | 1–3 hours |
| Tall accessible bed | $250–$700 | 1–2 days |
| Multiple beds with irrigation | $400–$1,000+ | 1–2 weekends |
Prices vary by region and bed size. Soil delivery can cost more than the soil itself if the supplier has a minimum order or a long travel distance.
Follow a simple first-year growing plan
Do not fill your first bed with ten demanding crops. Start with a few reliable plants and learn how the site behaves. Lettuce, bush beans, kale, radishes, basil, and chard give quick feedback.
Spring planting
In cool USDA Zones 3 through 6, plant peas, radishes, lettuce, spinach, and onions as soon as the soil can be worked. Use row cover if frost threatens. Wait for warm soil before planting tomatoes, peppers, cucumbers, and basil.
In Zones 7 through 10, cool-season crops may start in late winter. Heat arrives quickly, so sow small amounts every two weeks rather than planting the entire bed at once.
Summer planting
Plant tomatoes and peppers after the last frost date, when nighttime temperatures stay above about 50°F. Cucumbers, squash, and beans grow fast in warm soil, but they need steady moisture.
Mulch as soon as seedlings are established. Watch for blossom-end rot on tomatoes and peppers. It often relates to uneven water uptake rather than a simple lack of calcium.
Fall planting
After summer crops finish, plant kale, lettuce, arugula, radishes, carrots, and garlic based on your local frost date. In Zones 8 through 10, fall can be the main growing season for greens.
Use frost cloth during cold nights. A raised bed may cool faster than the ground on clear nights, so protect tender crops even when nearby in-ground plants look fine.
Avoid the most common raised-bed mistakes
Most failures come from a few preventable choices. Fixing them early saves money and plant stress.
- Making the bed too wide: You should never step into the soil to reach the center.
- Using fresh manure: Fresh manure can burn roots and may contain pathogens. Use finished compost instead.
- Filling with pure compost: It settles and drains poorly over time.
- Skipping a soil test: Lime and fertilizer can harm plants when added without a need.
- Building under trees: Roots compete for water and may enter through the open bottom.
- Ignoring water access: Carrying watering cans across the yard becomes tiring fast.
- Planting too close: Crowded leaves stay wet and invite disease.
- Using weak fasteners: Wet soil can push apart poorly joined corners.
- Leaving bare soil: Bare soil crusts, dries, and grows more weeds.
- Growing the same crop family in one bed: Repeated crops increase disease pressure.
One mistake I made was placing a 4-by-8-foot bed beside a fence without checking afternoon shade. The bed received full morning sun but lost nearly three hours of light in summer. Lettuce did fine, but tomatoes produced fewer ripe fruits. A simple sun check would have prevented that result.
Know when to hire help
Most gardeners can build a low bed themselves. Hire a professional or experienced carpenter when the bed is part of a retaining wall, sits on a steep slope, or must support a tall accessible design.
Get help if the site has buried utility lines, drainage problems, large roots, or contaminated soil. Call the appropriate utility locating service before digging posts or drainage trenches. For a bed over 24 inches tall, make sure the design includes proper bracing.
A landscape contractor can also help with bulk soil delivery, grading, stone walls, and irrigation. You may save money by building the frame yourself and hiring help only for excavation or soil placement.
Frequently asked questions
Q: How deep should a raised vegetable garden bed be?
A: Build the bed at least 10 to 12 inches deep for most vegetables. Use 18 to 24 inches for tomatoes, carrots, parsnips, potatoes, or beds placed on concrete. An open-bottom bed lets roots grow into the native soil below.
Q: Should I put cardboard under a raised garden bed?
A: Cardboard works well over short grass and annual weeds. Overlap plain brown sheets, wet them, and remove tape. Cardboard may not stop bindweed, Bermuda grass, or other aggressive perennial weeds.
Q: Can I build a raised bed directly on grass?
A: Yes, but cut the grass short first and cover it with overlapping cardboard. Remove perennial weeds when possible. The grass will die under the blocked light, but deep roots may survive and grow into the bed.
Q: What is the best wood for a raised garden bed?
A: Cedar, redwood, and cypress resist rot better than untreated pine. Cedar offers a good balance of cost, availability, and lifespan. Avoid railroad ties, creosote wood, painted boards, and unknown reclaimed lumber.
Q: How much soil do I need for a 4-by-8-foot raised bed?
A: A 4-by-8-foot bed filled 12 inches deep needs 32 cubic feet, or about 1.2 cubic yards, of soil. Buy about 1.25 cubic yards because the mix settles after watering.
Q: Should a raised bed have a bottom?
A: Most garden beds should have no bottom. An open base improves drainage and lets roots, worms, and soil organisms move freely. Add 1/2-inch hardware cloth under the bed only when rodents are a serious problem.
Q: How often should I water raised vegetable beds?
A: Check the soil 2 inches below the surface. Water when it feels dry, usually once or twice a week in mild weather and more often during hot, dry periods. Seedlings need lighter and more frequent watering than established plants.
Q: Can I use pressure-treated lumber for a vegetable garden bed?
A: Current residential pressure-treated lumber is regulated for consumer use, but many gardeners still choose untreated cedar. Never use old industrial-treated wood or creosote railroad ties. Follow the product label and local guidance.
Q: How long does a wooden raised garden bed last?
A: Cedar often lasts 8 to 15 years, while untreated pine may last 3 to 7 years. Drainage, climate, board thickness, and soil contact affect lifespan. The corners and lower boards usually fail first.
Q: What vegetables grow best in raised beds?
A: Lettuce, kale, carrots, radishes, beans, onions, herbs, tomatoes, peppers, and cucumbers all grow well. Choose crops that match your bed depth, sunlight, season, and USDA hardiness zone.
Q: How do I stop a raised bed from drying out?
A: Add 1 to 3 inches of mulch, use drip irrigation, water deeply, and include compost in the soil mix. Metal beds and beds in hot USDA Zones 8 through 10 may need extra mulch or afternoon shade.
Q: Do raised beds need crop rotation?
A: Rotation helps reduce soil-borne diseases and nutrient imbalance. Move tomatoes, peppers, eggplants, and potatoes to a different bed every two or three years when possible. Follow them with beans, greens, roots, or herbs.
Build one bed, then improve it
A 4-by-8-foot raised bed is a strong starting point because it gives enough room for useful harvests without becoming a major project. Build it level, use safe materials, fill it with balanced soil, and plan your water source before planting.
The bed will change as you learn. After one season, you may add drip irrigation, a trellis, row cover, or a second bed. Start with sound construction and healthy soil, then let your plants show you what the garden needs.
Meta description: Learn how to build a raised vegetable garden bed with safe materials, soil calculations, step-by-step instructions, watering tips, crop plans, costs, and maintenance advice.