Raised Garden Beds From Recycled Materials: Easy DIY
Raised garden beds make it easier to grow vegetables in poor soil, small yards, patios, and rented spaces. You can build one from old fence boards, shipping pallets, bricks, concrete blocks, metal roofing, logs, or other safe materials that might otherwise go to waste. The key is to choose clean materials, build a sturdy frame, and fill it with healthy soil.
I have built raised beds in sandy soil in USDA Zone 8 and heavy clay in Zone 6. recycled materials can work very well, but not every old board or pallet belongs near food crops. A little care at the start prevents rot, chemical exposure, leaning walls, and wasted soil later.
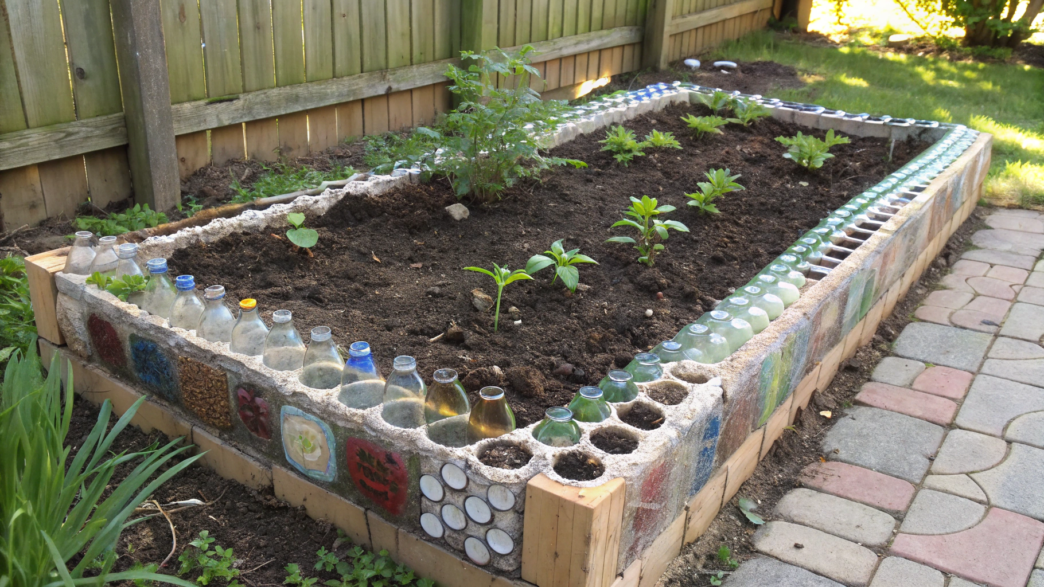
Quick Answer: How to Make a Raised Garden Bed From Recycled Materials
To make a recycled raised garden bed, choose untreated and clean materials, form a level frame, secure the corners, add a weed barrier if needed, and fill the bed with a mix of topsoil, compost, and coarse organic matter. Keep the bed 6 to 12 inches tall for most crops and 18 to 24 inches tall for deep roots or easy access. Avoid painted, oily, pressure-treated, or unknown wood.

A simple 4-by-8-foot bed needs about 1.5 cubic yards of soil at 12 inches deep. Place it where plants will receive at least six hours of direct sun. Keep the bed narrow enough to reach the center without stepping on the soil.

Why Recycled Raised Beds Are Worth Building
Recycled raised beds cost less, reduce waste, and let you improve poor ground without digging out a whole planting area. They also warm faster in spring, drain better than compacted clay, and give you control over soil pH, compost, and fertilizer.

A raised bed does not need to be tall to work. A 6-inch frame helps define a garden and slows grass from spreading. A 12-inch bed gives roots more loose soil and makes watering easier. A 24-inch bed can reduce bending, but it needs more material and soil.
In my garden, a 12-inch bed made a clear difference in clay soil. Carrots grew straighter, lettuce drained better after heavy rain, and spring soil warmed several days sooner than the ground beside the bed. The raised bed did not remove the need for mulch or pest control, but it made both tasks easier.
Benefits of Using Reclaimed Materials
The most useful benefit is flexibility. You can match the material to your space instead of buying a complete kit. Old bricks work well in a formal yard, while logs suit a woodland garden. Broken concrete blocks can form a sturdy bed on a slope.
Reclaimed materials also give a bed character. Weathered wood, stone, and old metal can look better than a new plastic frame when used with care. However, free material is not always a bargain if it contains lead paint, chemical residue, or hidden rot.
Limits You Should Know
Recycled beds often need more inspection than new lumber beds. Old wood may split when you drive screws into it. Pallets may have broken slats. Bricks can settle if the ground is not level. Thin metal can develop sharp edges and become very hot in full sun.
A recycled frame may also last less time than a cedar or composite bed. That is acceptable if you plan for repairs. Replace one weak board instead of rebuilding the whole bed.
Choose Safe Recycled Materials
The safest recycled garden bed materials are clean bricks, untreated lumber, natural logs, stone, concrete blocks, and food-safe containers. The material should be stable, free of chemical stains, and strong enough to hold wet soil after heavy rain.

Wood often causes the most questions. Modern lumber treated with alkaline copper quaternary, or ACQ, is generally sold for garden use, but many gardeners still prefer untreated wood for vegetable beds. Avoid old railroad ties, creosote-treated timbers, utility poles, and wood with a strong chemical smell.
| Recycled material | Good use | Main concern |
|---|---|---|
| Untreated boards | Simple 6–12 inch beds | Rot and splitting |
| Clean bricks or stone | Long-lasting low beds | Settling and uneven walls |
| Concrete blocks | Tall, modular beds | Alkaline dust and heavy weight |
| Natural logs | Rustic beds | Insects and fast decay |
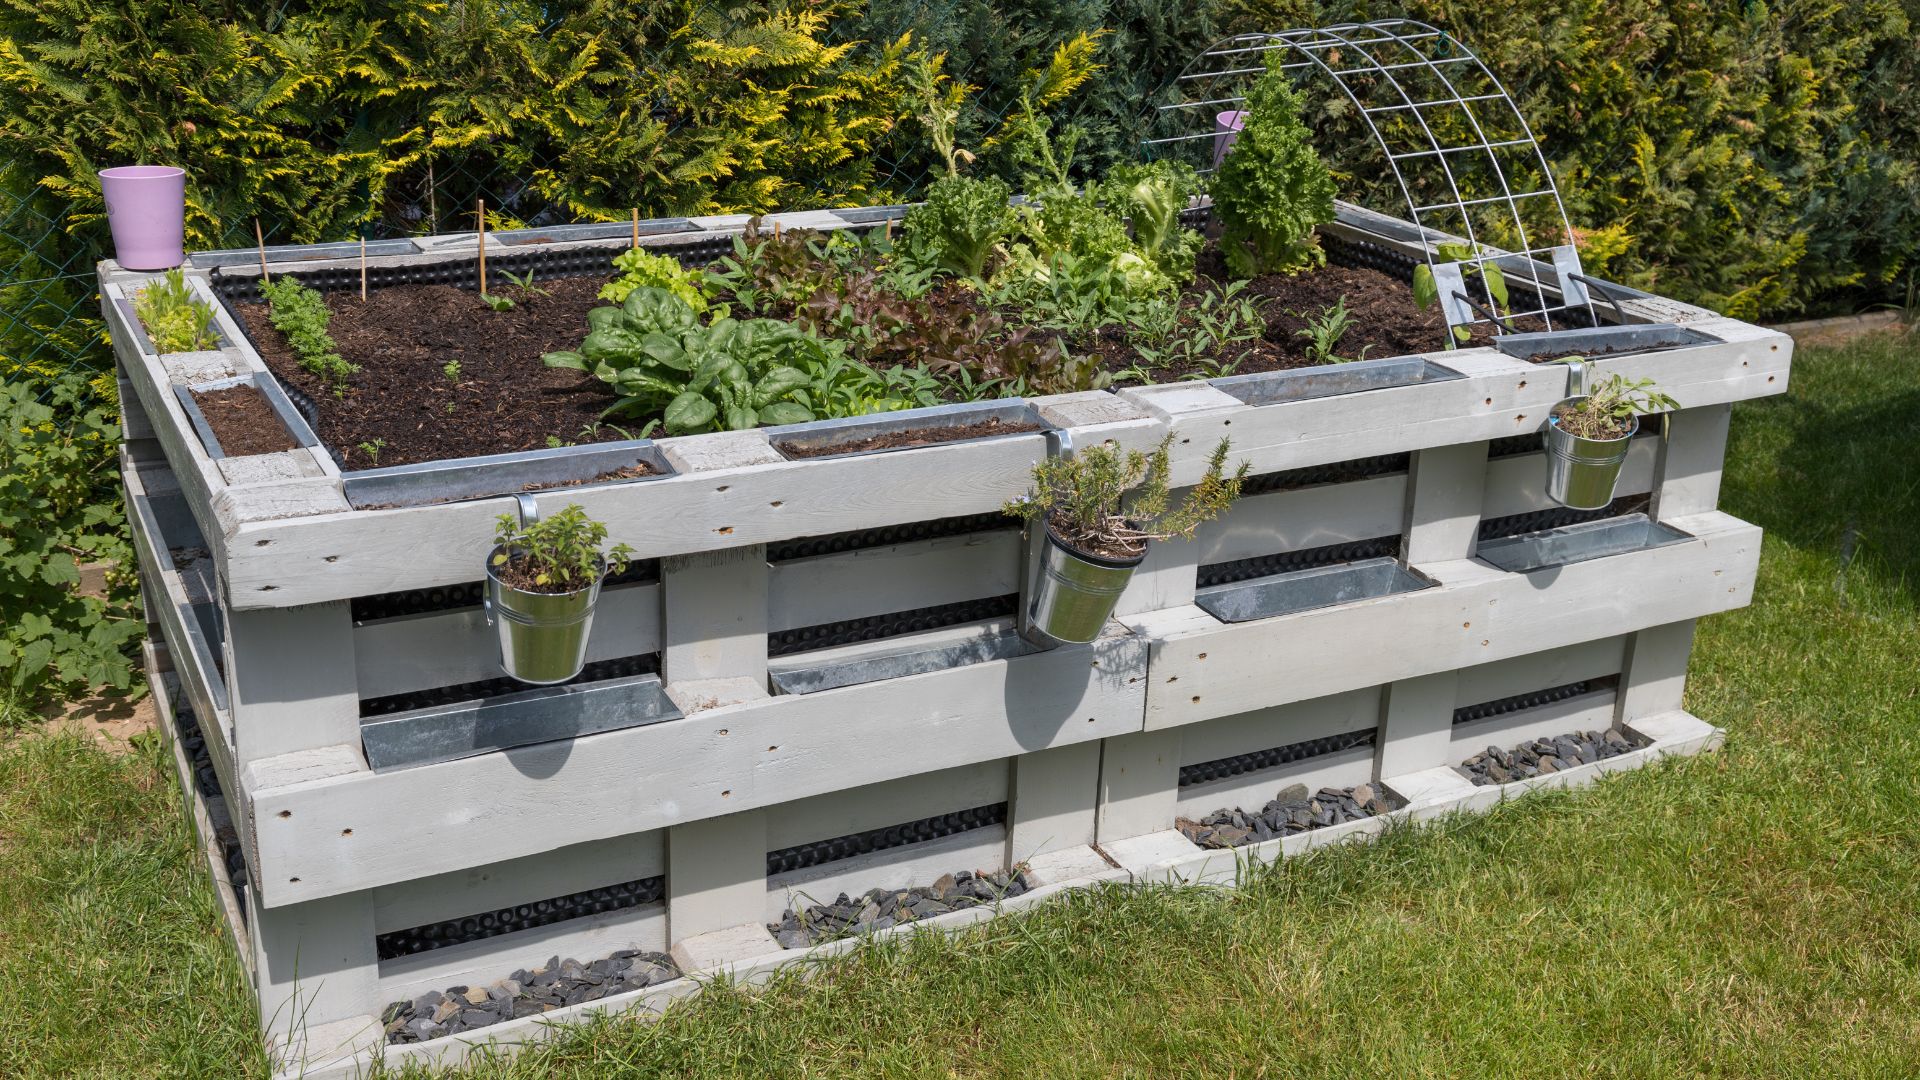
| Pallets marked HT | Short-term frames | Unknown past use |
| Corrugated metal | Modern tall beds | Sharp edges and heat |
Clean bricks and stone offer the longest life with little care. Untreated boards are easier for beginners, while pallets and logs need more careful screening.
How to Read Pallet Marks
Use only pallets marked HT, which means heat treated. Heat treatment lowers the risk of pests without adding a chemical preservative. Avoid pallets marked MB, which means methyl bromide fumigation.
Do not use a pallet if the stamp is missing or hard to read. Skip pallets that smell like fuel, paint, solvents, pesticides, or animal waste. A pallet used to move food may still have spills from a previous load.
Pallet wood is often thin and rough. It can work for a low bed, but it may not last more than two or three growing seasons when it touches wet soil.
Wood to Avoid
Do not use old railroad ties or landscape timbers with a tar-like smell. These may contain creosote, which can harm soil organisms and is not suitable for food gardens. Avoid boards with peeling paint, especially older paint that may contain lead.
Also reject wood with black soft spots, a sour smell, or deep insect tunnels. Surface weathering is fine. Wood that crumbles under a screwdriver is not strong enough for a bed wall.
⚠️ Warning: Never burn, chip, or cut painted or chemically treated wood for garden use. Dust and smoke can spread harmful residues through your yard.
Materials That Need a Liner
A liner is useful when the recycled frame contains small gaps or rough surfaces. Use plain cardboard beneath a bed placed on grass. Use landscape fabric only when you need to separate soil from a gravel surface or invasive roots.
Do not line a healthy soil bed with plastic unless you have a specific reason. Plastic can slow drainage and trap water near roots. If you use metal, place a thin layer of cardboard or untreated wood between the soil and sharp seams.
Plan the Bed Size and Location
The best raised bed location receives six to eight hours of sun, drains after rain, and sits close to a water source. Leave enough space around the bed for a wheelbarrow, hose, mower, and your own knees.

A 4-by-8-foot bed is popular because it provides a lot of growing space without becoming hard to reach. You can reach about 2 feet from each side. If the bed touches a wall or fence, keep it no wider than 2 to 3 feet.
| Bed size | Soil needed at 12 inches deep | Suitable crops |
|---|---|---|
| 2 × 4 feet | About 0.3 cubic yard | Herbs, lettuce, radishes |
| 4 × 4 feet | About 0.6 cubic yard | Greens, beans, peppers |
| 4 × 8 feet | About 1.5 cubic yards | Mixed vegetable garden |
| 3 × 6 feet | About 0.7 cubic yard | Roots and compact crops |
Order soil by volume, not by the number of bags alone. Bagged soil costs more for large beds, but it can make sense when access is tight or you need a small container bed.
Pick the Right Sun
Tomatoes, peppers, cucumbers, squash, beans, and eggplant need full sun. Full sun means at least six hours of direct light, with eight hours often better in mild climates. Leafy greens such as spinach, kale, and lettuce can manage four to six hours, especially in hot USDA Zones 8 through 10.
Watch the site for one full day before building. A place that looks sunny at 9 a.m. may sit under a tree by noon. Nearby trees also compete for water and send roots into the bed.
Check Drainage
Avoid the lowest part of the yard unless you plan to build a drainage system. A raised bed still floods if groundwater rises into it. Dig a small test hole about 12 inches deep, fill it with water, and watch how fast the water drops.
If water remains after several hours, improve the site before building. You may need a shallow swale, a gravel path, or a different location.
Level the Ground
A level base keeps walls from leaning and reduces stress on corners. Remove grass and large roots, then rake the area flat. You do not need to make the ground perfect, but the frame should not rock.
On a slope, do not simply pile soil against the downhill side. Use a stepped design with short walls, or build a stronger retaining structure. A tall wall holding back soil may need professional design.
Tools and Materials Checklist
You need basic hand tools for most recycled raised beds. A drill, level, tape measure, and shovel will handle nearly all simple designs.

| Item | Why you need it | Recycled option |
|---|---|---|
| Tape measure | Set a square layout | String and marked stick |
| Level | Check the frame | Clear hose water level |
| Drill and screws | Join wood | Bolts or corner stakes |
| Shovel and rake | Clear and level soil | Hand trowel for small beds |
| Work gloves | Protect hands | Thick leather gloves |
| Soil and compost | Fill the bed | Homemade screened compost |
| Cardboard | Block grass | Plain paper bags without ink |
Use exterior-rated screws rather than drywall screws. Drywall screws snap under outdoor stress. For thick boards, use 3-inch galvanized or coated deck screws.
A handsaw can cut old boards, but inspect for nails before cutting. A pry bar helps separate pallets. Keep a metal bucket nearby for rusty nails and broken screws.
Build the Raised Bed Step by Step
The best way to build a recycled raised garden bed is to work in a clear order: inspect the material, prepare the site, build the frame, secure the walls, and fill it in layers. Do not rush the leveling step. A frame that starts crooked becomes harder to fix once it holds heavy soil.

1. Sort and Clean the Recycled Material
Lay out every board, brick, log, or block before you begin. Remove nails, staples, plastic wrap, labels, and loose dirt. Use a stiff brush to clean dry soil from wood.
Do not pressure-wash questionable wood. Water can spread residues into cracks and soil. For clean, untreated wood, let the boards dry fully before assembly.
Set aside pieces with deep rot or major splits. You can cut a sound section from a long board, but do not rely on weak pieces for corners.
2. Measure and Mark the Site
Mark the bed with stakes and string. Check both diagonal measurements in a rectangular bed. If the diagonals match, the corners are square.
For a 4-by-8-foot bed, mark an outer rectangle at least 48 by 96 inches. If you use thick logs or blocks, measure the inside space too. The plants need the interior dimensions, not just the outside size.
3. Remove Grass or Cover It
For the cleanest result, remove sod from under the bed. Shake the soil from the roots and use the sod elsewhere. If you leave grass in place, it may grow through the bed within weeks.
A simpler method is to lay overlapping cardboard over short grass. Use two or three layers, overlap seams by at least 6 inches, and wet the cardboard before adding soil. Avoid glossy paper, tape, and cardboard with heavy colored ink.
🌱 Beginner Note: Cardboard works best over thin grass and soft soil. It will not stop deep perennial weeds such as bindweed, quackgrass, or nutsedge for long.
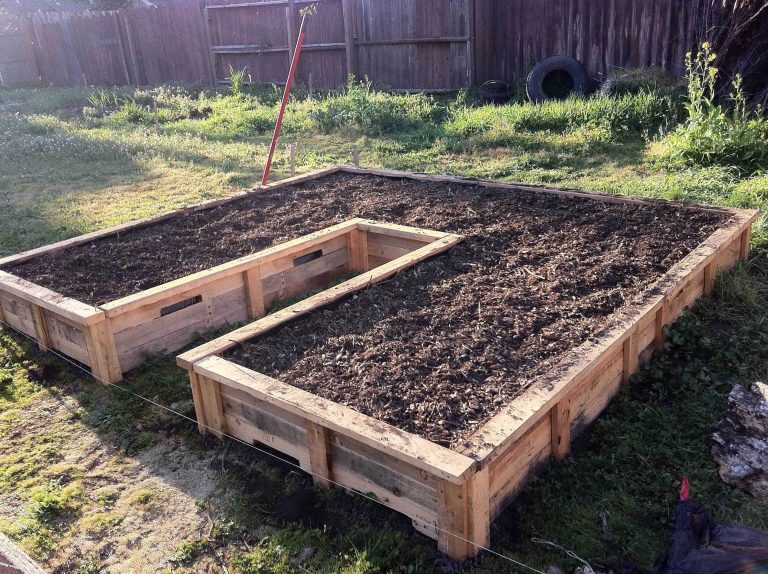
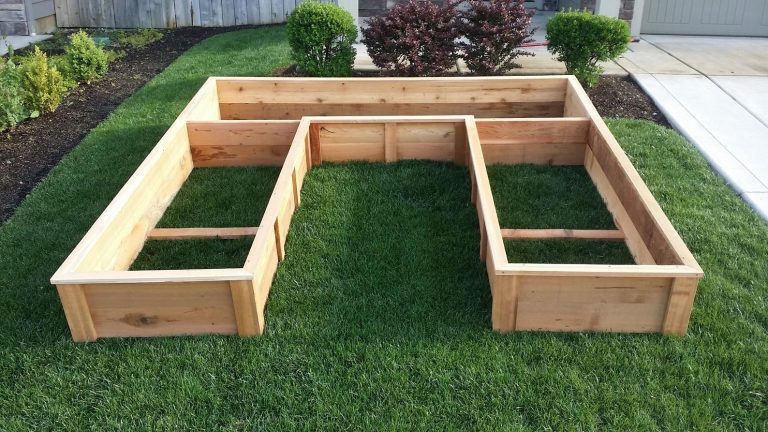
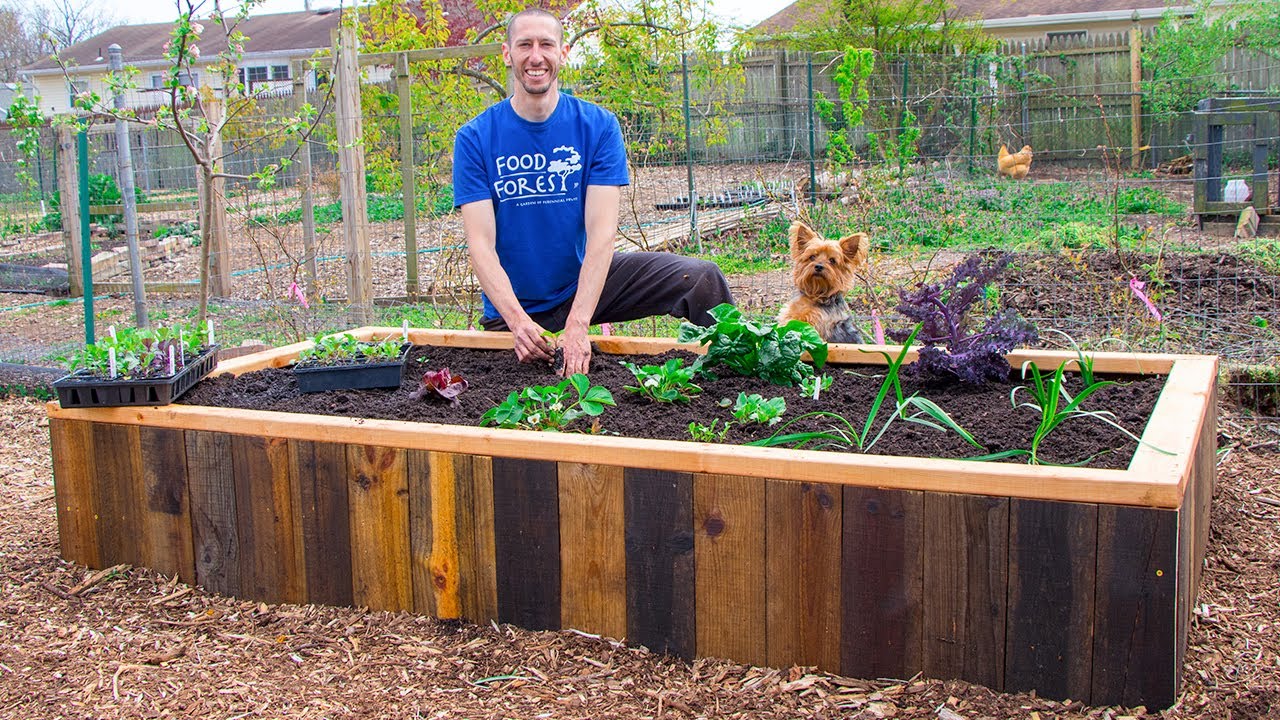
4. Assemble a Wooden Frame
Place the boards on their edges along the marked lines. Join each corner with two or three exterior screws. Pre-drill holes near board ends to reduce splitting.
For a bed taller than 12 inches, add support stakes on the outside. Drive stakes into the ground every 3 to 4 feet. You can use straight branches, scrap lumber, or metal garden stakes.
The boards may not match perfectly. That is fine if the inside wall is stable and the frame does not move when you push it.
5. Build With Bricks or Blocks
Set the first row on compact, level ground. Use a mallet to settle each brick. Leave small gaps between bricks if drainage matters, but keep the gaps narrow enough to hold soil.
For concrete blocks, place the open holes facing upward. You can fill those holes with soil and grow shallow-rooted herbs such as thyme, chives, or alyssum. Stagger the joints in each row, like a brick wall, for greater strength.
Do not build a tall freestanding wall from loose blocks without a stable base. Soil is heavy, especially when wet. A 2-by-8-foot bed filled 18 inches deep can hold several thousand pounds of material.
6. Add Corner Bracing
Corner bracing prevents the walls from spreading. Use scrap wood blocks inside the corners, metal angle brackets, or long screws that pass through both boards.
For an 8-foot side, add a center brace if the boards bow outward. A brace can run across the bed, but place it low enough that it does not interfere with roots or a garden cover.
7. Smooth Sharp Edges
Sand rough wood edges, bend sharp metal inward, and cover exposed screws. If you use corrugated roofing, install edge trim or attach split garden hose over the top edge.
This small step matters. I once built a bed from old metal panels and left one cut edge unprotected. The bed worked well, but it tore a glove and would have caused a serious cut without gloves.
8. Add a Barrier Only When Needed
If the bed sits on grass, cardboard is usually enough. If it sits on concrete, use a layer of sticks, coarse compost, or drainage material only if the container has an open bottom and water can escape.
Do not place gravel at the bottom of a bed on soil. The common “drainage layer” idea can create a perched water table, where water stays above the gravel instead of draining faster. Good soil structure and a clear site work better.
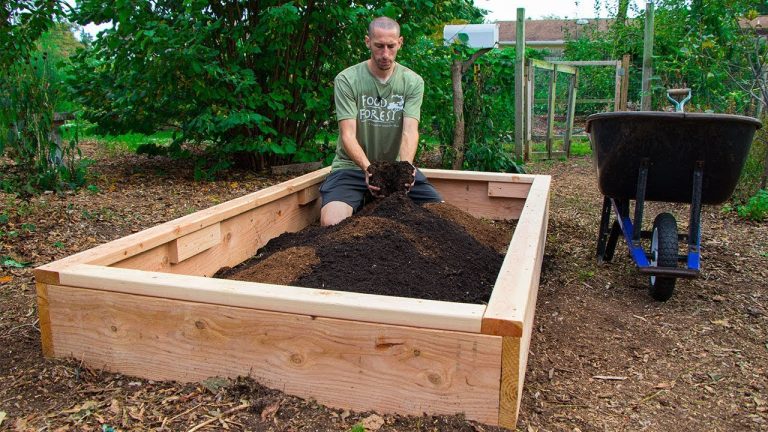
9. Fill With a Balanced Soil Mix
A reliable raised bed mix contains topsoil, compost, and an aeration material such as aged bark fines or leaf mold. For most vegetables, use about 60% quality topsoil and 40% compost and organic matter.
| Bed ingredient | Suggested share | Purpose |
|---|---|---|
| Screened topsoil | 50–60% | Holds roots and minerals |
| Finished compost | 25–35% | Adds organic matter and slow nutrients |
| Leaf mold or aged bark | 10–20% | Improves air and water balance |
Avoid filling the whole bed with compost. Pure compost can shrink, dry quickly, hold too much water, or release excess nutrients. It may also contain weed seeds or salts if it was not finished well.
For a 4-by-8-foot bed at 12 inches deep, mix about 0.9 cubic yard of topsoil with 0.5 to 0.6 cubic yard of compost and leaf mold. Mix lightly with a garden fork rather than turning the entire bed into a loose pile.
10. Water and Settle the Soil
Water the bed slowly after filling it. The soil will settle several inches, especially if the compost is coarse or dry. Add more soil after a few days, then top it with 2 inches of shredded leaves, straw, or untreated grass clippings.
Do not pile mulch against plant stems. Leave a small gap around tomatoes, peppers, beans, and herbs to reduce stem rot and slug cover.
11. Test the Soil Before Heavy Feeding
Most vegetables grow well at a soil pH between 6.0 and 7.0. A soil test can show pH, phosphorus, potassium, and organic matter. Test again after one or two seasons if you add large amounts of compost.
Do not add lime without a test. Lime raises pH, while sulfur lowers it. Too much of either can make nutrients harder for plants to use.
12. Plant by Root Depth and Season
Put tall crops on the north side so they do not shade shorter plants. Plant lettuce, spinach, radishes, and carrots in spring or fall. Set out tomatoes, peppers, basil, cucumbers, and eggplant after the last frost.
| Crop | Useful bed depth | Sun and spacing note |
|---|---|---|
| Lettuce | 6–8 inches | 4–8 inches apart |
| Radish | 6–8 inches | Full sun to light shade |
| Carrot | 12 inches | Loose soil; thin seedlings |
| Tomato | 18 inches | Full sun; use a cage |
| Pepper | 12–18 inches | Warm soil and steady water |
| Bush bean | 8–12 inches | Add support if needed |
A raised bed gives you more root space, but it does not change a plant’s need for sun. Tomatoes in a shaded bed will still grow tall and produce little fruit.
Recycled Bed Materials Compared
Different materials suit different gardens. Wood is easy to cut and repair, while masonry lasts longer but takes more effort to move. Metal gives a clean look but needs edge protection and careful heat management.

| Material | Life in a garden bed | Best fit |
|---|---|---|
| Untreated pine | 3–7 years | Low-cost beginner beds |
| Cedar or locust scraps | 8–15 years | Long-term wood beds |
| Bricks or stone | 20+ years | Permanent low beds |
| Concrete blocks | 15–30 years | Modular beds and slopes |
| Natural logs | 2–6 years | Rustic, temporary beds |
| Corrugated metal | 10–20 years | Tall beds with protected edges |
Lifespan varies with rain, soil contact, freeze-thaw cycles, and wood species. In wet USDA Zones 5 and 6, pine can rot faster than it does in a dry Zone 7 climate. Cedar lasts longer, but reclaimed cedar is not always easy to find.
Concrete blocks may remain strong for decades, but the bed can be difficult to move. Bricks also need a firm base, or frost heave may shift the wall each winter.
Pros and Cons of Recycled Raised Beds
Recycled beds offer clear advantages, but they also require more screening and repair than a new raised bed kit. The right choice depends on your budget, time, and access to safe materials.

| Pros | Cons |
|---|---|
| Lower material cost | Materials may be uneven |
| Keeps waste out of landfills | Unknown chemical history is a risk |
| Fits many garden styles | Some pieces need repair |
| Easy to customize | Lifespan can be shorter |
| Uses local, available materials | Heavy blocks are hard to move |
| Can improve poor soil fast | Filling the bed still costs money |
The biggest hidden cost is soil. A free frame still needs quality soil, compost, mulch, seeds, tools, and water. Start with one small bed if your budget is tight.
Common Problems and Simple Fixes
Most raised bed problems come from poor drainage, weak corners, unsafe material, or soil that settles too much. Fix the frame and soil before blaming the plants.

| Problem | Likely cause | Fix |
|---|---|---|
| Wall bows outward | No center brace | Add a cross brace or stake |
| Soil sinks quickly | Fresh compost or loose fill | Top up with soil and mulch |
| Water pools | Poor site or compacted base | Move, level, or improve drainage |
| Plants wilt daily | Bed dries too fast | Add mulch and deep-water |
| Leaves turn yellow | Wet roots or nutrient issue | Check moisture and soil test |
| Grass grows through bed | Thin barrier or open seams | Add cardboard and remove roots |
| Wood crumbles | Rot or insect damage | Replace the weak board |
When Soil Stays Too Wet
Wet soil often comes from a low site, fine clay, or too much compost. Check moisture 2 inches below the surface before watering. If it feels wet and plants wilt, the roots may lack oxygen.
Avoid adding more sand to clay soil in a small bed. Sand can combine with clay and form a hard, cement-like mix. Use finished compost, leaf mold, and coarse organic matter over time.
When Soil Dries Too Fast
Tall beds, metal walls, sandy soil, and hot wind can dry a bed quickly. Apply 2 to 3 inches of shredded leaves, straw, or untreated bark. Water slowly at the soil surface so the water reaches the root zone.
A soaker hose or drip line works well. I prefer a simple 1/2-inch drip line with 6- or 12-inch emitter spacing for mixed vegetables. Check the soil by hand before changing the schedule.
When Wood Rot Starts
Rot usually begins where wood touches wet soil. Remove the soft section with a screwdriver. If the frame remains strong, attach a new board to the outside and add a stake.
Do not seal food garden wood with unknown paint or deck treatment. If you use a sealant, choose one labeled for exterior garden use and follow the product directions. A sacrificial inner board can also keep the main frame away from wet soil.
Care Through the Seasons
Raised beds need care all year, even when no crops grow. The main jobs are moisture control, mulch management, crop rotation, and frame checks.

| Season | Main raised bed tasks |
|---|---|
| Spring | Add compost, test soil, inspect corners, plant cool crops |
| Summer | Mulch, water deeply, tie crops, check pests |
| Fall | Remove diseased plants, plant garlic or cover crops |
| Winter | Check drainage, cover bare soil, repair loose boards |
In spring, avoid working wet soil. If soil sticks to your boots or shovel, wait. Walking on wet soil removes air spaces and creates compaction.
In summer, inspect the bed at least twice a week during heat. Tomatoes and cucumbers may need water every one or two days in a hot Zone 8 summer, while established herbs may need less.
In fall, remove tomato vines, squash vines, and diseased leaves. Do not compost plants with severe blight, powdery mildew, or insect infestations unless your compost pile reaches sustained high heat.
In winter, leave healthy roots in place when possible. Roots feed soil life as they break down. Cover bare beds with leaves, straw, or a winter cover crop such as crimson clover, oats, or winter rye.
Personal Lessons From Building Recycled Beds
My first recycled bed used old pine boards from a dismantled shed. The boards looked solid, but one corner split when I drove in a screw. I rebuilt that corner with an inside brace and pre-drilled every hole after that.
Another bed used natural logs. It looked attractive, but the logs settled and softened faster than expected. After two wet seasons in a Zone 6 garden, mushrooms grew on the shaded side and the top edge dropped several inches. I would use logs again for a short-term herb bed, but not for a permanent vegetable bed.
The most successful recycled bed used clean bricks on a compacted base. It stayed level through winter, held heat well in spring, and needed almost no repair. The tradeoff was labor. Moving and setting the bricks took longer than assembling a wood frame.
I also learned not to overfill a bed with rich compost. A tomato bed with too much compost produced large leaves but fewer fruits. A soil test showed high phosphorus. The next season, I used more topsoil, less compost, and a light organic fertilizer with a balanced NPK ratio.
How Much a Recycled Raised Bed Costs
A recycled raised bed can cost almost nothing if you already have safe materials, but most projects still need soil and hardware. Current pricing ranges from about $30 for a small pallet or scrap-wood bed to several hundred dollars for a large masonry bed filled with purchased soil.
| Project size | Typical material cost | Main expense |
|---|---|---|
| 2 × 4 feet, 6 inches tall | $20–$75 | Screws and soil |
| 4 × 4 feet, 12 inches tall | $50–$150 | Soil and compost |
| 4 × 8 feet, 12 inches tall | $100–$300 | Soil, supports, mulch |
| Masonry bed | $150–$600+ | Blocks, base, delivery |
Free soil from a construction site is not automatically safe. It may contain weed seeds, rubble, road salt, or contaminants. Use a soil test if the source is unknown.
You can reduce cost by building a smaller bed first, making your own leaf mold, collecting finished compost, and using a free local mulch source. Do not save money by using unsafe lumber.
Improve the Bed With Simple Additions
A recycled frame becomes more useful when you add support, shade, water control, and pest protection. These upgrades do not need to happen on the first day.
Add a Trellis
Use old cattle panels, fence sections, bamboo poles, or sturdy branches for cucumbers, peas, pole beans, and small melons. Anchor the trellis outside the bed so it does not steal root space.
Place a trellis on the north side. In the Southern Hemisphere, place it on the side that causes the least shade based on your local sun path.
Install Drip Irrigation
A drip line applies water near the roots and keeps leaves dry. Dry leaves can reduce some fungal disease issues, though good spacing and airflow still matter.
Use a filter and pressure regulator if you connect the system to a hose. Flush the line at the start of the season. Store removable parts indoors before hard freezes.
Use a Low Tunnel
Flexible hoops made from old wire, electrical conduit, or PVC can support frost cloth or insect netting. Do not let plastic touch plant leaves during a freeze. It can transfer cold damage.
For cabbage, kale, broccoli, and cauliflower, insect netting can block cabbage moths. Remove covers when plants flower if pollinators need access, or hand-pollinate crops such as squash.
Add Crop Rotation
Do not grow tomatoes, peppers, eggplant, or potatoes in the same soil year after year if you can avoid it. These crops belong to the nightshade family and can share diseases such as early blight and bacterial wilt.
Rotate plant families:
- Year one: tomatoes and peppers
- Year two: beans and peas
- Year three: lettuce, carrots, and beets
- Year four: cucumbers and squash
Small gardens cannot always follow a perfect four-year rotation. Even moving crops to another bed or adding fresh compost can help.
Safety Tips for DIY Garden Beds
Wear gloves, eye protection, long pants, and sturdy shoes when cutting, prying, or drilling recycled materials. Old boards often hide nails, staples, and splinters.

Use a dust mask when sanding dry wood or cutting masonry. Do not cut concrete blocks indoors. Keep children and pets away while you sort old materials.
Check utility lines before driving stakes into the ground. Call the local utility marking service when required. A short stake can still damage a shallow cable or irrigation line.
Avoid burning leftover treated wood. Dispose of it according to local rules. Keep sharp metal, broken glass, and rusty nails out of any area where children may play.
Mistakes to Avoid
The most common mistake is building the frame before deciding what will grow inside it. A bed designed for lettuce does not need the depth required for carrots or tomatoes.
Avoid these errors:
- Using unknown pallets near food crops.
- Making the bed too wide to reach.
- Filling the bed with pure compost.
- Skipping corner braces on long beds.
- Placing the bed in shade.
- Adding gravel under a bed without a drainage reason.
- Forgetting to mulch the soil surface.
- Leaving diseased plant debris in the bed.
- Using drywall screws outdoors.
- Building on a slope without a stable base.
A good raised bed should feel solid before you add soil. Push each wall from the outside. If it shifts, brace it now. Soil pressure will only make the movement worse.
When to Choose a New Bed Instead
Recycled materials are not right for every gardener. Buy new lumber or a raised bed kit if you need exact dimensions, a long warranty, or a uniform look. New cedar, black locust, recycled plastic lumber, and galvanized steel can offer longer service with less sorting.
Choose a different design if you rent and need a movable garden. Fabric grow bags, half barrels, and large food-safe containers work well for patios and balconies. Use containers with drainage holes and avoid placing heavy beds on a balcony without checking its load rating.
If you have contaminated soil, a raised bed with a sealed bottom may be safer than a simple frame. In that case, use food-safe materials and a reliable soil source. Contact a local extension service for testing advice.
Frequently Asked Questions
Q: What is the safest recycled wood for a raised garden bed?
A: Clean, untreated wood is the simplest choice. Cedar, locust, oak, and untreated pine can work. Avoid railroad ties, creosote-treated timbers, painted boards, and wood with an unknown chemical history.
Q: Can I use pallets to build a vegetable garden bed?
A: Use pallets only when they are marked HT and have no stains, odors, or visible damage. Do not use pallets marked MB or pallets with no readable treatment mark. Pallet beds often last only a few seasons.
Q: How deep should a recycled raised bed be?
A: Use 6 to 8 inches for lettuce and herbs, 12 inches for most vegetables, and 18 to 24 inches for tomatoes, peppers, carrots, and other deep-rooted crops. Deeper beds also suit gardeners who want less bending.
Q: Do raised beds need a bottom?
A: Most beds placed on healthy soil do not need a bottom. An open base lets roots, earthworms, and water move naturally. Add a bottom only for a container placed on concrete, a contaminated site, or a location with severe invasive roots.
Q: Should I put rocks in the bottom of my raised bed?
A: No, not as a general drainage layer. Rocks can reduce the usable soil depth and create a wet layer above them. Improve the site, use a suitable soil mix, and make sure water can drain away.
Q: How much compost should I add to a raised bed?
A: Use about 25% to 35% finished compost in the initial soil mix. Add roughly 1 inch of compost to the surface each year, then mix it lightly into the top few inches. Test soil before adding more if plants grow poorly.
Q: How long do recycled raised beds last?
A: Untreated pine may last three to seven years, while cedar or locust can last eight to fifteen years. Bricks and concrete blocks may last decades. Moisture, climate, wood quality, and contact with soil change the lifespan.
Q: Can I paint or seal a recycled wood garden bed?
A: Avoid unknown paints and sealers around food crops. If you use a product, choose one clearly labeled for exterior garden use and follow its curing instructions. Do not coat wood that has a chemical odor or old peeling paint.
Q: What should I grow in my first raised bed?
A: Start with crops that grow quickly and forgive small errors. Leaf lettuce, bush beans, radishes, kale, Swiss chard, basil, and bush cucumbers are good choices. Add tomatoes after you learn how fast the bed dries.
Q: Why is my raised bed soil sinking?
A: Fresh compost, loose soil, and decaying roots cause normal settling. Add more topsoil and finished compost after two to four weeks. If the bed sinks sharply on one side, inspect the frame and the ground below it.
Q: Can raised beds help with clay soil?
A: Yes. A raised bed gives roots loose soil above compacted clay. Keep the bottom open when possible, and avoid mixing large amounts of sand into clay. Compost and organic matter improve the soil over time.
Q: Do raised beds need fertilizer?
A: Sometimes. A soil test should guide fertilizer use. If needed, apply a balanced organic fertilizer according to the label rather than guessing. Too much nitrogen can produce leaves at the expense of flowers and fruit.
Q: How often should I water a recycled raised bed?
A: Check the soil 2 inches down. Water when that layer feels dry, then soak the bed deeply. In hot, windy weather, a tall bed may need water every day or two. Mulch can reduce water loss by a large amount.
Q: Can I build a raised bed on a slope?
A: Yes, but use stepped sections or a properly supported retaining design. Do not stack loose blocks high on a slope without a firm base. A tall wall under soil pressure may require professional help.
Q: Are concrete blocks safe for vegetable beds?
A: Clean concrete blocks are commonly used for garden beds. They may raise soil pH slightly near the blocks, but this rarely causes a major issue in a well-mixed bed. Test soil if you grow acid-loving crops such as blueberries, which are better in separate containers.
Final Thoughts
The best recycled raised garden bed is safe, stable, easy to reach, and matched to your soil and crops. Start with clean materials, build on level ground, use a balanced soil mix, and plan for repairs. A small 2-by-4-foot bed can teach you more than a large project that becomes hard to water or maintain.
My practical choice for most beginners is a 12-inch frame made from clean untreated boards, old bricks, or sound concrete blocks. Add compost each spring, mulch through summer, rotate plant families, and replace weak parts before they fail. With those habits, recycled materials can support productive vegetables, herbs, flowers, and pollinator plants for many growing seasons.
Meta description: Learn how to make raised garden beds from recycled materials using safe wood, pallets, bricks, blocks, logs, and metal. Includes tools, soil mix, steps, costs, safety tips, and maintenance.