How To Make A Raised Garden Bed Cheap: Budget DIY Guide
A raised garden bed can cost less than a few bags of premium potting soil if you use simple materials, build a practical size, and avoid features you do not need. The cheapest beds often use untreated lumber, reclaimed boards, logs, straw bales, concrete blocks, or corrugated metal panels. The key is to choose safe materials, fill the bed with affordable soil, and match the design to your plants, climate, and budget.
I have built raised beds in sandy soil in North Carolina, heavy clay in Ohio, and cold beds in USDA Zone 5. The frame was rarely the hardest part. Filling it was. A small bed may cost $30 to $75, while a larger 4-by-8-foot bed often costs $70 to $180, depending on the material and soil mix.
Quick Answer: Build a Small Bed With Low-Cost Materials
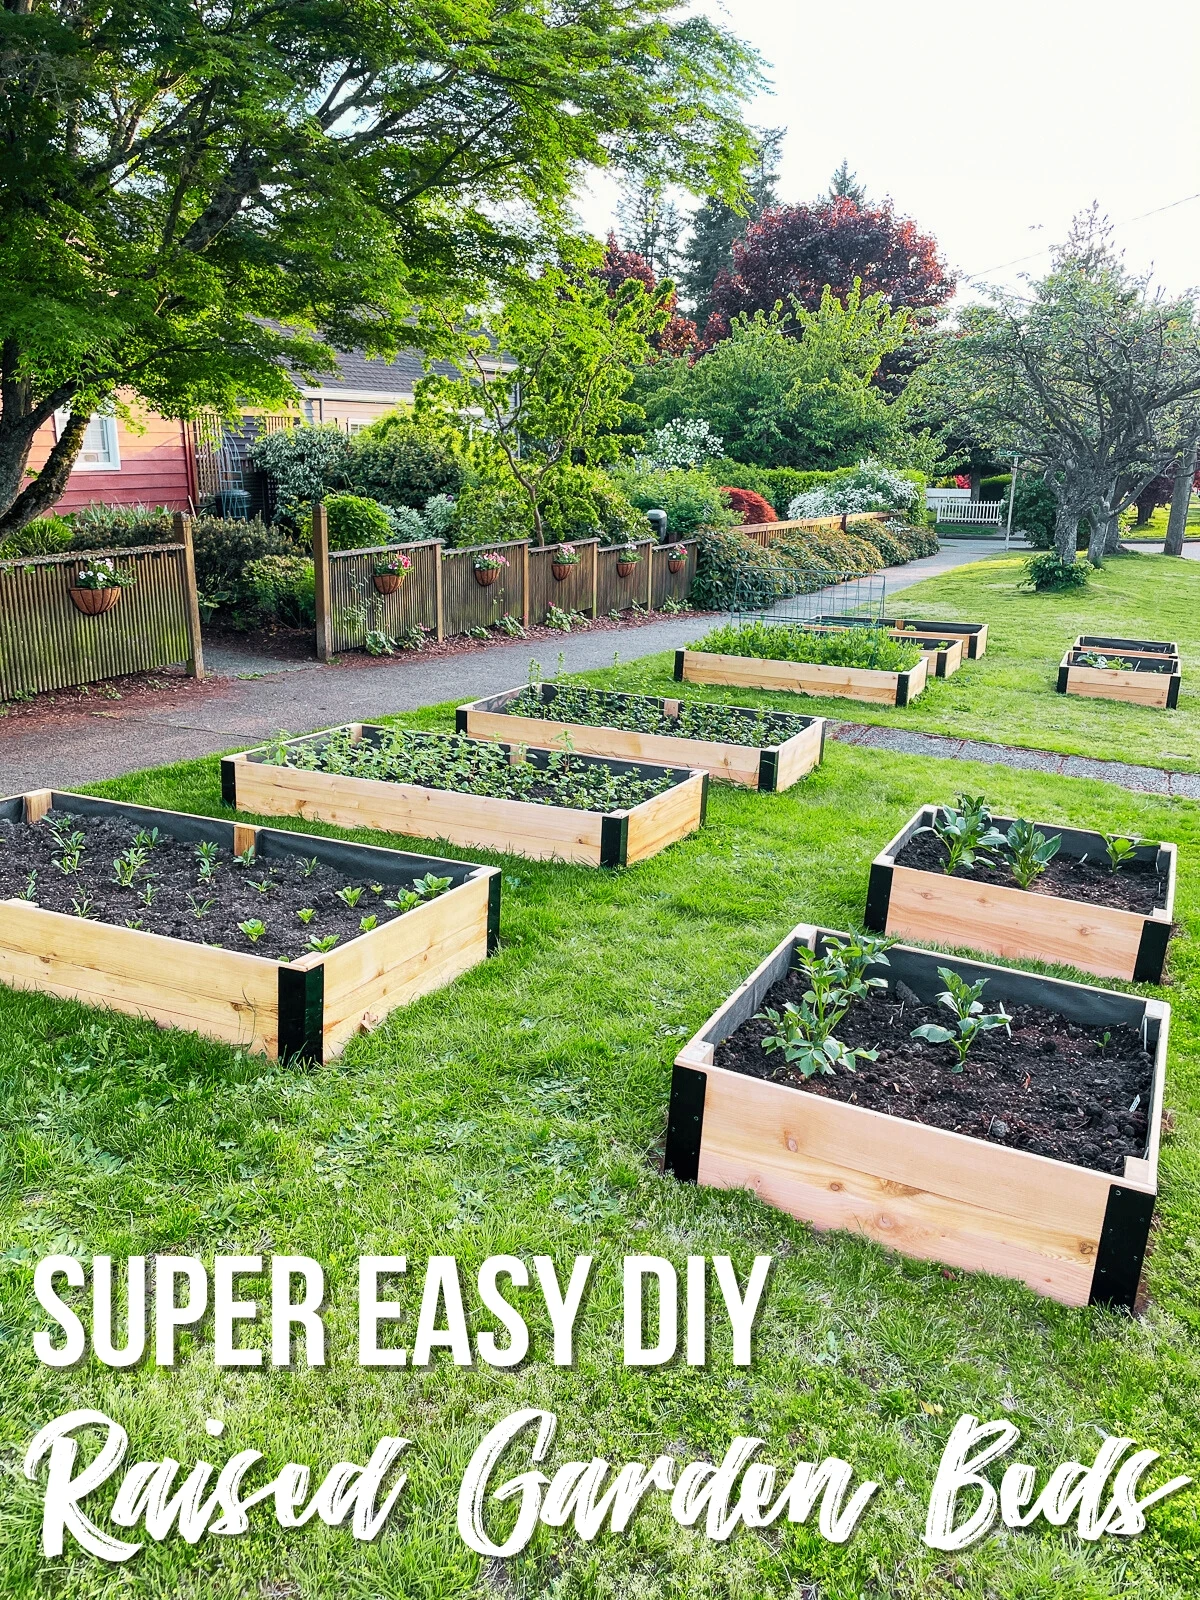
The cheapest reliable raised garden bed uses two 2-by-6-inch untreated boards, cut into 4-foot lengths, with simple exterior screws. Place the frame on level ground, loosen the soil below it, and fill it with about 8 inches of compost-rich soil. For a 4-by-4-foot bed, expect to spend about $35 to $80. Use cedar or metal if you need a longer-lasting bed.

A 4-by-4-foot bed is the best starting size for most beginners. It gives you 16 square feet of growing space, fits in small yards, and lets you reach the center from both sides. A 4-by-8-foot bed holds more crops but needs more soil and may tempt you to step inside, which can compact the soil.
You do not need a bottom, landscape fabric, expensive corner brackets, or a special raised-bed soil blend. Those items can help in some gardens, but they are not required for a simple bed on open ground.
Choose the Cheapest Safe Bed Material
The best low-cost material depends on what you already have. Untreated pine is often the lowest-cost new lumber, while free logs, bricks, blocks, and reclaimed boards can lower the price even more. Avoid wood that may contain chemical preservatives or paint flakes.
Untreated Lumber
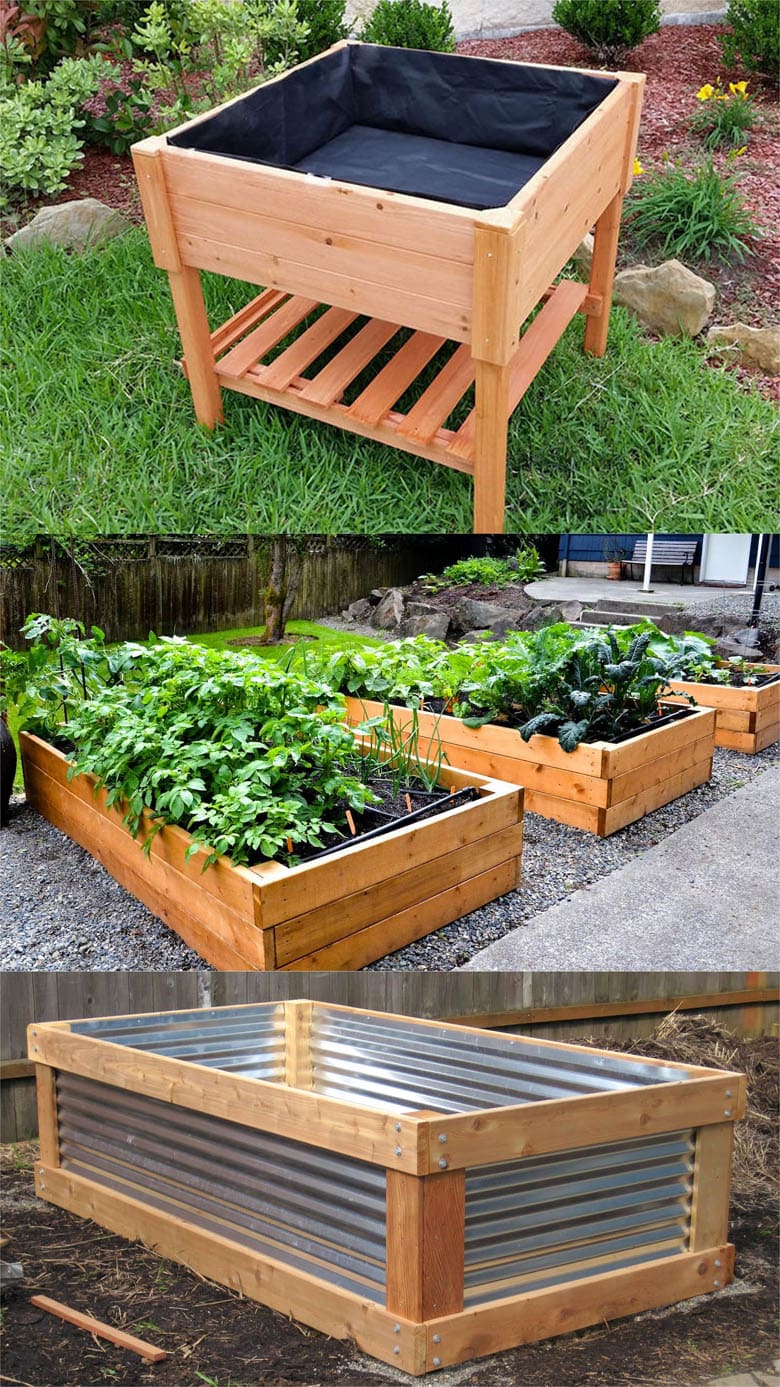
Untreated pine, fir, spruce, and hemlock work well for a cheap raised garden bed. A 2-by-6 board is about 1 1/2 inches thick and 5 1/2 inches wide, so two stacked boards make a bed close to 11 inches tall.
Pine may last three to seven years in a wet climate. In dry parts of USDA Zones 7 to 10, it can last longer. In rainy areas, keep the boards off standing water and allow air to move around the outside.
Use untreated wood when you want the lowest cost and do not mind rebuilding the frame later. For food gardens, I prefer plain, unfinished boards with no unknown stains, oils, or coatings.
Reclaimed Wood
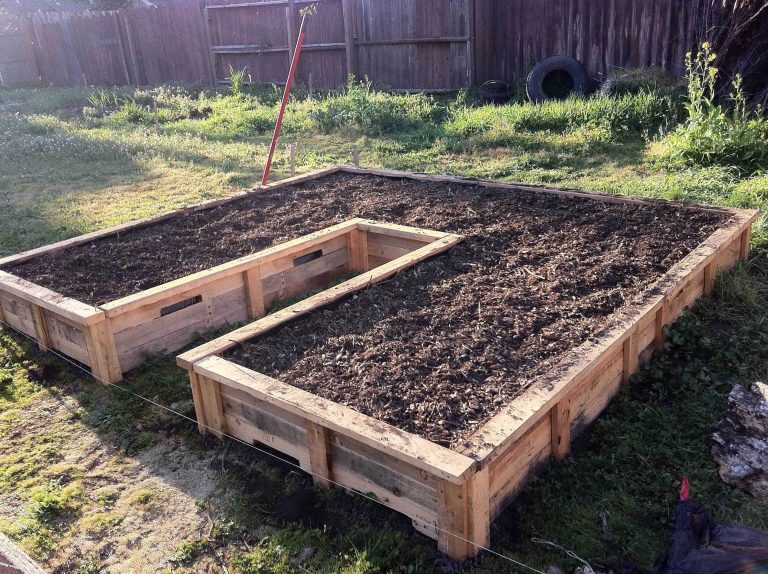
Old fence boards, shipping pallets, and barn boards can make a nearly free garden bed. The risk is that you may not know what touched the wood before you found it.
Do not use boards with a strong chemical smell, oily stains, black mold, peeling paint, or an unknown treatment label. Avoid old railroad ties and landscaping timbers treated with creosote. Also skip very old painted wood because some paint may contain lead.
Pallets marked “HT” were heat-treated. Pallets marked “MB” were treated with methyl bromide and should not enter a vegetable garden. When in doubt, use the wood for flowers rather than edible crops, or choose new untreated boards.
Logs, Branches, and Stones
Logs can form a natural raised bed with no cutting or hardware. Cedar, oak, maple, and other untreated hardwoods last longer than soft pine. Place thick logs on the ground, stack smaller branches behind them, and fill the center with soil.
Stones and bricks work well on slopes and do not rot. They take more time to level, though. Gaps can also let grass and weeds grow into the bed.
Straw bales can serve as short-term bed walls for one or two seasons. They break down quickly, so they work best for temporary beds or fall gardens rather than a permanent vegetable plot.
| Material | Typical life and cost |
|---|---|
| Untreated pine | 3–7 years; low cost |
| Cedar or redwood | 8–15 years; higher cost |
| Reclaimed boards | Varies; free to low cost |
| Logs or branches | 2–8 years; free if available |
| Concrete blocks or brick | 20+ years; low to medium cost |
| Corrugated metal | 10–30 years; medium cost |
The cheapest option is not always the lowest long-term cost. Free logs may save money but take more work, while concrete blocks cost more at first and may last for decades.
Concrete Blocks
Concrete blocks make sturdy raised beds without cutting lumber. Set them on firm, level ground, place boards or stones over the gaps if needed, and fill the center with soil.
The holes in standard blocks can hold herbs or small flowers. Try thyme, oregano, chives, sedum, or alyssum. I avoid growing large carrots in narrow block holes because the soil dries out fast and roots have little room.
Blocks are a good choice if you want a bed that will not rot. They can become hot in full sun, especially in USDA Zones 8 and warmer. Mulch the soil and check moisture often during July and August.
Gather Basic Tools and Materials
You can build a simple raised bed with common hand tools. A drill with a driver bit makes the job faster, but a screwdriver and a little patience will also work.

Buy or gather the frame materials first. Then calculate the soil volume before you visit a garden center. Soil often costs more than the wood, so this step helps prevent waste.
| Item | Amount for a 4-by-4-foot bed | Low-cost choice |
|---|---|---|
| Side boards | Four 4-foot boards | Untreated 2-by-6 lumber |
| Screws | 12–16 | 3-inch exterior screws |
| Leveling tool | 1 | Hand level or straight board |
| Drill or screwdriver | 1 | Cordless drill if available |
| Measuring tape | 1 | Any reliable tape |
| Compost and soil | About 16 cubic feet at 8 inches deep | Bulk soil plus compost |
| Mulch | 1–2 bags or local material | Shredded leaves or straw |
A 4-by-4-foot bed that is 8 inches deep needs about 10.7 cubic feet of soil. If you build it 12 inches deep, it needs 16 cubic feet. Bags often list volume in cubic feet, while bulk soil is sold by the cubic yard.
You may also need a handsaw, work gloves, a shovel, a wheelbarrow, and a rake. Safety glasses protect your eyes from wood chips and screw fragments.
💡 Pro Tip: Use 3-inch exterior screws, not drywall screws. Drywall screws snap more easily and rust fast outdoors. Galvanized deck screws cost a little more but hold the frame together much longer.
Plan the Bed Size Before You Cut
A cheap raised bed should fit your body and your garden, not just the available lumber. Keep the bed no wider than 4 feet if you can reach it from both sides. If you can reach only one side, make it 2 feet wide.
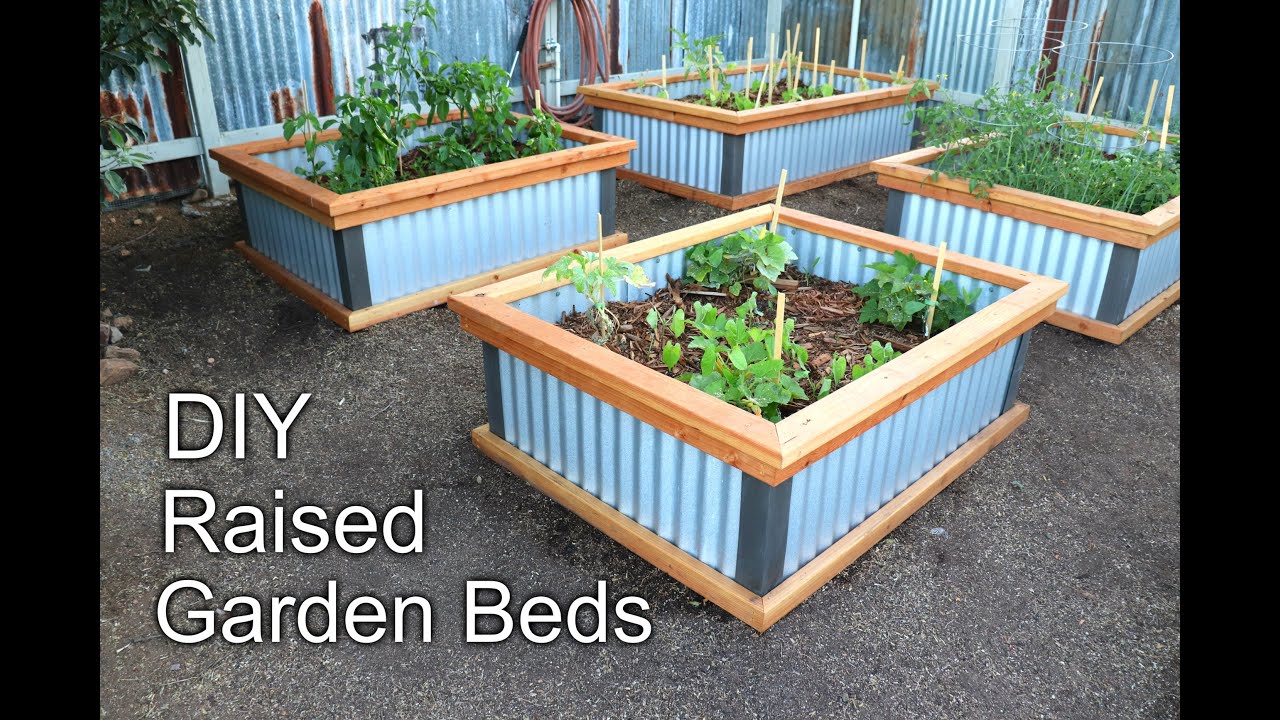
Place the bed where it gets at least six hours of direct sun for tomatoes, peppers, cucumbers, beans, and squash. Leaf lettuce, spinach, parsley, and some herbs can grow with four to five hours, especially in hot climates.
Leave at least 18 to 24 inches between beds. A 30-inch path feels much better if you use a wheelbarrow. Grass paths cost less than gravel, but they need mowing and can spread into the bed.
Calculate Soil Volume
Use this formula:
Length in feet × width in feet × depth in feet = cubic feet of soil
For example:
- A 4-by-4-foot bed, 8 inches deep: 4 × 4 × 0.67 = about 10.7 cubic feet
- A 4-by-8-foot bed, 8 inches deep: 4 × 8 × 0.67 = about 21.4 cubic feet
- A 2-by-8-foot bed, 12 inches deep: 2 × 8 × 1 = 16 cubic feet
Soil settles after you fill the bed. Add about 10 percent extra, or plan to top it off with compost next season.
Use More Than One Bed for Better Access
Two 2-by-4-foot beds may cost slightly more than one 4-by-4-foot bed, but they create better paths and make crop rotation easier. They also let you separate plants with different water needs.
A single 4-by-8-foot bed is efficient for bulk crops such as potatoes, onions, carrots, and bush beans. Two smaller beds work better for a mixed garden with tomatoes, salad greens, herbs, and flowers for pollinators.
Build the Raised Bed Step by Step
Build the frame on level ground, but do not rush the leveling step. A frame that looks straight on uneven ground can twist when you add several hundred pounds of wet soil.

1. Pick and Prepare the Site
Mark the bed with stakes, string, a garden hose, or flour. Check the site at different times of day so you know how much sun it receives.
Remove tall grass and large weeds. You do not need to strip every root from the soil. Mow the area short, dig out thick perennial weeds such as Bermuda grass or bindweed, and loosen the top 4 to 6 inches of native soil.
If the site has standing water after rain, do not simply build a deeper bed. Improve drainage first, move the bed, or raise it to at least 18 inches. Wet roots can cause root rot, damping-off, and poor growth.

2. Level the Ground
Set one board on the ground and place a level on top. Dig down high spots rather than filling low spots with loose soil. Loose fill settles and may leave one corner unsupported.
A small slope is fine for a garden bed, but a severe slope needs a terraced design. On a slope, anchor the lower side with blocks, thick logs, or posts driven into the ground.

3. Cut or Position the Boards
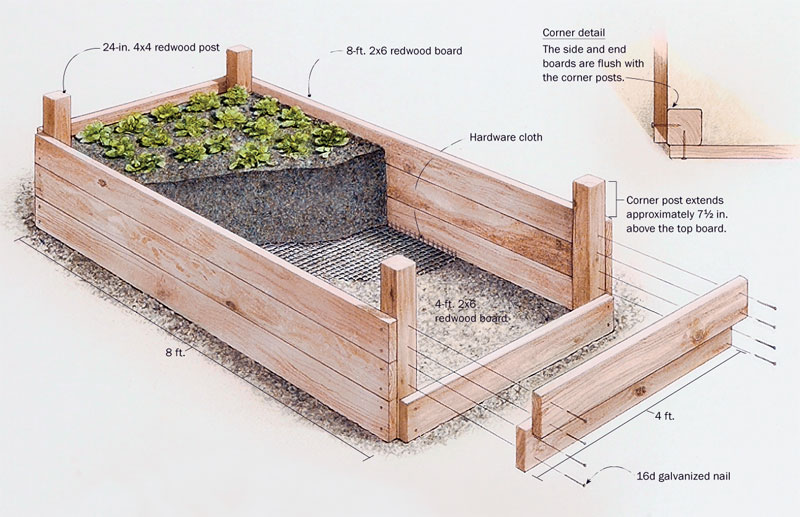
For a 4-by-4-foot bed, use four boards that are each 4 feet long. If you stack two boards to make an 11-inch wall, you need eight boards.
Place the boards so the ends form a square. Check both diagonal measurements. When both diagonals match, the frame is square.
4. Fasten the Corners
Drive two or three exterior screws into each corner. Pre-drill near the ends of the boards to reduce splitting, especially with dry pine.
For a taller bed, add a vertical brace at each corner. Add another brace at the middle of an 8-foot side. Long boards can bow outward when wet soil presses against them.
5. Add a Bottom Only When Needed
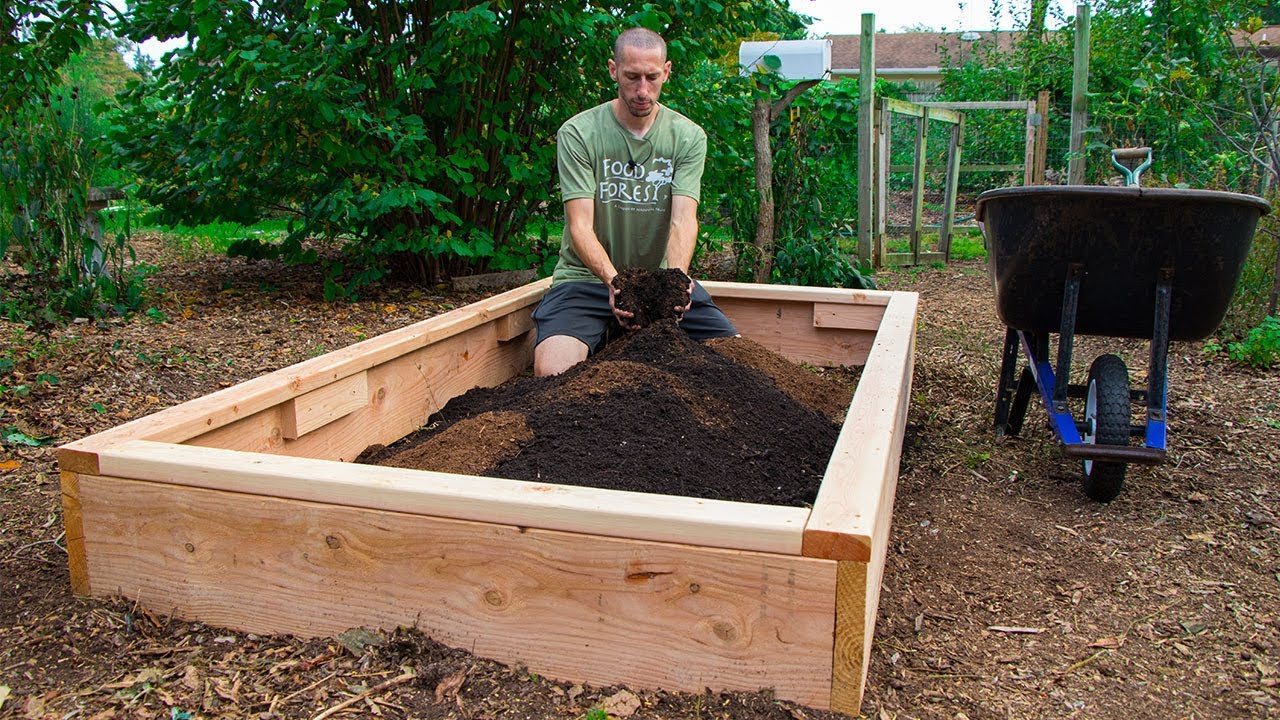
Most raised beds on soil should remain open at the bottom. Open bottoms let earthworms move in, allow excess water to drain, and give deep-rooted plants more space.
Use a bottom only for a bed on concrete, a balcony, a rooftop, or contaminated ground. A bottomed bed needs drainage holes and a strong frame because wet soil is very heavy.
Landscape fabric does not stop all weeds forever. It can also block beneficial soil life. If you need a barrier over contaminated soil, use a thick layer of clean soil above a suitable barrier and grow shallow-rooted crops with care.

6. Fill the Bed in Layers
Add coarse organic matter only in a very deep bed. For an 8-to-12-inch bed, fill it with a stable soil mix rather than large logs or fresh wood.
A simple mix is:
- 60 percent screened topsoil
- 30 percent finished compost
- 10 percent aged leaf mold, composted manure, or pine fines
Mix the ingredients before placing them in the bed when possible. Fresh manure and fresh wood chips can burn roots, tie up nitrogen, or release excess salts.

7. Water and Settle the Soil
Water the bed slowly after filling it. Stop when water begins to drain from the bottom, then wait several minutes and water again.
Let the bed settle for a day or two before planting if you can. Add more soil if the level falls below the frame. Finish with 1 to 2 inches of mulch, leaving a few inches of space around plant stems.
Use Cheap Soil Without Creating a Poor Bed
The lowest soil price is not always the best value. Some cheap topsoil contains clay clods, stones, weed seeds, or very little organic matter. Ask for a screened garden mix when buying in bulk.

For most vegetables, aim for loose soil with good drainage and enough organic matter to hold moisture. A soil pH between 6.0 and 7.0 suits tomatoes, peppers, beans, lettuce, carrots, and most herbs.
Do not fill a raised bed with pure compost. Compost shrinks as it breaks down and may hold too much water or release too many nutrients. A blend of mineral soil and finished compost gives roots better structure.
Compare Bagged and Bulk Soil
Bagged soil is easy to carry and useful for one small bed. Bulk soil costs less per cubic foot when you fill several beds, but delivery fees can erase the savings.
| Soil source | Best use | Main drawback |
|---|---|---|
| Bagged garden soil | One small bed | High cost per cubic foot |
| Bulk topsoil plus compost | Several beds | Delivery and storage |
| Homemade compost blend | Lowest cost over time | Takes months to mature |
| Native soil plus compost | Bed over healthy ground | May contain clay or weed seeds |
| Aged manure blend | Heavy-feeding crops | May have salt or weed seeds |
For a single 4-by-4-foot bed, compare the total price of bags with the delivery charge for bulk soil. In many areas, bags win for one bed, while bulk soil wins for two or more.
Make Your Own Compost
Compost can reduce the cost of raised-bed soil over time. Use leaves, untreated grass clippings, vegetable scraps, coffee grounds, and plant waste. Keep the pile moist like a wrung-out sponge and turn it when it becomes compact.
Finished compost smells earthy and has no clear food scraps left. If the pile is still hot, sour, or full of recognizable material, let it mature longer.
Avoid using compost made from unknown lawn clippings if the grass may have received herbicides. Some persistent herbicides can pass through manure or compost and damage tomatoes, beans, peas, and peppers.
Reduce the Cost Without Cutting Safety
You can save money by reducing the size, using local materials, and growing crops that return a lot of food. Do not save money by using unsafe wood or skipping drainage.

Here are practical ways to lower the total cost:
- Start with one 4-by-4-foot bed.
- Use native soil mixed with finished compost.
- Make your own leaf mold.
- Collect leaves from your own yard.
- Use untreated logs for a rustic bed.
- Buy lumber during seasonal sales.
- Share a bulk soil delivery with a neighbor.
- Grow from seed rather than buying large plants.
| Budget choice | Approximate cost for 4-by-4 feet | Trade-off |
|---|---|---|
| Free logs and homemade compost | $0–$30 | Shorter life and more labor |
| Untreated pine and bagged soil | $50–$100 | Frame may rot in a few years |
| Concrete blocks and bulk soil | $70–$150 | Heavy and less easy to move |
| Cedar and purchased soil | $120–$220 | Longer life and higher cost |
| Metal kit and premium soil | $180–$350 | Fast setup but costly |
Prices vary by region, lumber size, delivery fees, and soil quality. Current pricing ranges from very low for reclaimed materials to several hundred dollars for a ready-made kit.
The largest savings usually come from using less soil, not cheaper screws. A smaller bed with a strong mix will grow more useful food than a large bed filled with poor soil.
Pick the Right Plants for a Cheap Bed
A raised bed becomes more cost-effective when you grow crops that are expensive at the store or produce for a long season. Cut-and-come-again greens, herbs, tomatoes, peppers, and pole beans can repay the cost over one or two seasons.
Good Crops for a Small Bed
Use the sunniest section for plants that need heat. Place tall tomatoes or trellised cucumbers on the north side so they do not shade lettuce and carrots.
Good choices include:
- ‘Sungold’ or ‘Celebrity’ tomatoes
- ‘California Wonder’ peppers
- Bush beans
- Leaf lettuce
- Kale
- Swiss chard
- Basil
- Parsley
- Chives
- Radishes
- Carrots
- Strawberries
Perennial herbs such as thyme, oregano, and chives can return each year. Put mint in a separate container because it can spread through a bed.
Match Crops to Root Depth
An 8-inch bed suits lettuce, radishes, bush beans, onions, strawberries, and many herbs. Carrots need loose soil at least 10 to 12 inches deep, while tomatoes grow better when roots can explore deeper soil.
Large crops need more room than seed packets suggest. A determinate tomato may need 2 square feet, while an indeterminate variety may need 3 to 4 square feet plus a cage or trellis.
Add Flowers for Pollinators
Flowers can improve the garden without adding much cost. Grow calendula, nasturtium, borage, sweet alyssum, or dwarf sunflowers near vegetables.
Pollinators such as bees visit flowers, while beneficial insects may help limit aphids and caterpillars. Do not treat every insect as a pest. Identify the insect before using soap, oil, or other sprays.
Maintain the Bed for a Longer Life
A cheap bed lasts longer when you keep soil and water away from the outside of the frame. Good maintenance can add several seasons to untreated lumber.
Water Deeply, Not Constantly
Raised beds drain faster than ground soil, especially beds filled with compost and fine topsoil. Water when the top 1 to 2 inches feel dry, then soak the root zone.
Tomatoes, cucumbers, and peppers may need water every day during a hot spell in USDA Zones 8 and 9. In cool spring weather, once or twice a week may be enough. Soil type, wind, mulch, and plant size all change the schedule.
Drip irrigation or a soaker hose saves time. Place it under mulch and run it in the morning. Avoid wetting tomato leaves late in the day because long periods of leaf moisture can encourage fungal disease.
Feed Based on Plant Need
Compost provides slow nutrients, but heavy feeders may need extra fertilizer. Before adding fertilizer, use a soil test if the bed has a history of overfeeding.
A balanced fertilizer such as 5-5-5 can support mixed vegetables. Too much nitrogen creates large leaves and few tomatoes or peppers. Root crops prefer moderate nitrogen and loose soil rather than a heavy dose of manure.
Add 1 inch of finished compost each spring. Mix it into only the top few inches to protect soil structure and earthworms.
Protect the Wood
Keep weeds and mulch from touching the outside of the frame. Constant damp contact speeds rot. Leave a narrow gap between the bed wall and wet mulch.
Inspect the corners each spring. Tighten loose screws, replace split boards, and add a brace if the wall bows. Do not wait until the soil spills out.
🌱 Beginner Note: You do not need to stain or seal untreated lumber for a food bed. Some finishes contain chemicals that can move into soil. If you use a coating, choose one clearly labeled for garden or food-growing use and follow the label.
Fix Common Raised-Bed Problems
Most cheap raised-bed problems come from poor drainage, weak corners, bad soil, or plants that do not match the site. The good news is that these problems usually have simple fixes.
| Problem or sign | Likely cause | Low-cost fix |
|---|---|---|
| Wall bows outward | Long side lacks support | Add a center brace |
| Soil stays wet | Poor drainage or heavy clay | Mix in compost and check site |
| Plants wilt each day | Bed dries too fast | Add mulch and use drip irrigation |
| Yellow lower leaves | Overwatering or low nitrogen | Check moisture before feeding |
| Stunted tomatoes | Poor roots or cold soil | Wait for warm soil and avoid compaction |
| Chewed leaves | Caterpillars, beetles, or slugs | Hand-pick and use row cover |
| Bed sinks after rain | Soil settled or compost broke down | Add compost and soil each spring |
The main difference between a healthy and unhealthy raised bed is often the soil below the frame. If water cannot drain into the ground, a high wall will not solve the problem.
Stop Soil From Washing Out
Heavy rain can wash soil from low spots or open corners. Add a strip of cardboard on the outside of the bed for temporary erosion control, or set the frame more deeply into the soil.
Mulch reduces splash and slows runoff. Shredded leaves work well, but thick layers of fresh grass can mat and smell. Straw is useful if it is clean and free of persistent herbicides.
Handle Pests Without Expensive Products
Use insect netting or lightweight row cover to protect young cabbage, kale, and broccoli from cabbage moths and flea beetles. A simple hoop made from flexible irrigation tubing can hold the cover above the plants.
Hand-pick tomato hornworms, squash bugs, and Japanese beetles. Remove diseased leaves and throw them in the trash if your compost pile does not get hot enough to kill pathogens.
For slugs, water in the morning, remove hiding boards, and keep weeds down. Diatomaceous earth loses its effect when wet and can harm helpful insects, so it is not my first choice.
🔧 Quick Fix: If a raised-bed corner opens, empty soil from that corner, clamp the boards together, and drive new exterior screws through a scrap block on the inside. The block acts like a small brace and often saves the whole frame.
Compare Raised Beds With Cheaper Alternatives
A raised bed is not always the right answer. In good soil, an in-ground garden costs less and can support deeper roots. Containers work better on patios, while grow bags offer a low-cost option for renters.
In-Ground Gardening
An in-ground bed needs no frame and uses less imported soil. You can improve a poor plot with compost, leaves, and a broadfork or garden fork.
This option works well where the native soil drains properly and is not contaminated. It is less useful in compacted clay, rocky fill, or areas with tree roots.
Grow Bags
Fabric grow bags cost little and need no construction. A 10-gallon bag can grow one tomato, pepper, or eggplant. They dry faster than raised beds, though, and the fabric may break down after several seasons.
Grow bags suit balconies, rental homes, and small patios. They also let you move warm-season crops into better sun.
Straw Bale Beds
Straw bales create a raised growing surface with no wood. They need conditioning with water and fertilizer before planting. Fresh bales can heat up, settle, and release nitrogen as they decompose.
This method works for a short-term garden but costs more labor than a small pine frame. Make sure the bales contain straw, not hay, if you want fewer weed seeds.
| Garden type | Upfront cost | Best for |
|---|---|---|
| In-ground plot | Very low | Healthy native soil |
| Raised wood bed | Low to medium | Better drainage and access |
| Concrete-block bed | Low to medium | Long life and stable walls |
| Grow bags | Low | Patios and renters |
| Straw bale bed | Low to medium | Temporary gardens |
A raised bed earns its cost when it solves a real problem: poor soil, flooding, limited mobility, or a need for clean growing space. If your ground is already loose and fertile, skip the frame and invest in compost and seeds.
Use a Seasonal Care Plan
Raised beds warm earlier in spring but also cool and dry faster than ground soil. The best planting time depends on your USDA zone, crop, and local frost date.
| Season | Main tasks | Low-cost protection |
|---|---|---|
| Early spring | Add compost, repair boards, plant cool crops | Row cover or old sheet |
| Late spring | Plant tomatoes, peppers, beans after frost | Mulch and simple stakes |
| Summer | Water deeply, harvest often, watch pests | Soaker hose and shade cloth |
| Fall | Remove diseased plants, plant greens or garlic | Leaf mulch |
| Winter | Check drainage and frame damage | Cover bare soil with leaves |
In USDA Zones 3 to 5, you may plant peas, spinach, and lettuce several weeks before tomatoes. In Zones 8 to 10, summer heat may stop lettuce and cilantro, so use the bed for peppers, eggplant, okra, sweet potatoes, and heat-tolerant herbs.
Do not leave bare soil all winter if erosion is a concern. Plant a cover crop such as crimson clover or winter rye, or add chopped leaves as mulch. Pull diseased plant material rather than burying it in the bed.
Avoid These Money-Wasting Mistakes
The most common mistake is building a large bed before testing a small one. A 4-by-4-foot bed teaches you how fast your soil dries, how much sun you receive, and how much time you have for care.
Avoid these errors:
- Building in deep shade
- Making the bed wider than you can reach
- Using fresh manure
- Filling the bed with pure compost
- Using treated or painted mystery wood
- Skipping corner braces on long beds
- Adding gravel under a bed with open soil
- Planting too many large crops
- Forgetting a path for mowing or watering
- Watering lightly every day
A thin layer of gravel does not improve drainage in a raised bed on soil. It can create a perched water zone where water moves slowly from fine soil into coarse stone. Improve the soil and site instead.
Do not line the bottom with plastic unless the bed sits on a hard surface. Plastic can trap water, overheat roots, and shorten the life of the soil.
My Low-Cost Raised-Bed Setup
My most useful budget bed was a 4-by-4-foot frame made from untreated pine in a Zone 7 garden. I used two stacked 2-by-6 boards, 3-inch deck screws, native sandy loam, homemade leaf compost, and shredded leaves for mulch.
The full bed cost about $60 at the time, with the soil taking more money than the wood. I planted two ‘Sungold’ tomatoes at the back, basil between them, lettuce along the front edge, and bush beans on one side.
The first version failed in one way: I used too much compost. The soil settled nearly 2 inches after heavy rain, and the bed dried faster than expected. I topped it up with screened topsoil and added leaf mulch. Four weeks later, the lettuce looked better and watering took less time.
After two seasons, the pine showed darkening near the ground but remained solid. The screws stayed tight. If I rebuilt it for a permanent garden, I would use thicker cedar or concrete blocks, but the pine frame was a good low-cost test.
Know When to Hire Help
Most small raised beds are simple do-it-yourself projects. You may need help if the site has contaminated soil, major drainage problems, a steep slope, or a retaining wall that holds back soil.
Call a professional before building near underground utilities, buried electrical lines, septic systems, or unstable slopes. A tall bed over 18 to 24 inches can exert strong pressure on its walls, especially when wet.
Older homes and urban lots may contain lead in soil or paint chips. A soil test can reveal lead, arsenic, pH, and nutrient levels. If contamination is present, use a properly designed barrier and clean soil, and follow local health guidance.
Frequently Asked Questions
Q: What is the cheapest way to make a raised garden bed?
A: Use free untreated logs, reclaimed safe boards, or untreated pine. Build a 4-by-4-foot frame, leave the bottom open, and fill it with native soil mixed with finished compost. This usually costs less than a large raised-bed kit or premium bagged soil.
Q: How much does it cost to build a 4-by-4 raised bed?
A: A basic 4-by-4-foot bed often costs $35 to $100. Free materials can lower the cost below $30, while cedar, metal, purchased soil, and delivery can push the total above $150.
Q: What is the best wood for a cheap raised garden bed?
A: Untreated pine is usually the cheapest new wood. Cedar lasts longer and resists rot, but it costs more. Never use railroad ties, creosote-treated wood, or unknown painted boards for food crops.
Q: Does a raised garden bed need a bottom?
A: No, not when it sits on healthy soil. An open bottom improves drainage and lets roots, worms, and soil microbes move between the bed and ground. Add a bottom only on concrete, balconies, rooftops, or contaminated surfaces.
Q: How deep should a cheap raised bed be?
A: Make it at least 8 inches deep for lettuce, herbs, beans, radishes, and many flowers. Use 10 to 12 inches for carrots and most mixed vegetables. Deep-rooted tomatoes grow better when they can root into the native soil below.
Q: Can I use regular topsoil in a raised bed?
A: Yes, but improve it with finished compost. Pure topsoil may drain poorly or contain clay and stones. A practical mix is about 60 percent screened topsoil, 30 percent compost, and 10 percent aged organic matter.
Q: Can I use pallets to build a vegetable bed?
A: Use only clean pallets marked “HT” for heat-treated. Do not use pallets marked “MB,” or boards with oil, chemical stains, or unknown paint. New untreated lumber is safer when the pallet history is unclear.
Q: How long does an untreated pine raised bed last?
A: Untreated pine often lasts three to seven years. Wet climates may shorten its life, while dry climates may extend it. Keep mulch and standing water away from the outside walls to slow rot.
Q: How do I keep a raised bed from drying out?
A: Add 1 to 2 inches of mulch, mix compost into the soil, and water deeply. A soaker hose under mulch works well. Check moisture with your finger rather than watering on a fixed schedule.
Q: Can I put cardboard under a raised bed?
A: You can use plain brown cardboard as a temporary weed barrier over grass. Remove tape, labels, and glossy coatings. Cardboard breaks down, so it should not replace good weed removal where Bermuda grass or bindweed is present.
Q: Are concrete blocks safe for a vegetable garden?
A: Standard modern concrete blocks are generally suitable for garden walls. Avoid blocks with unknown chemical coatings or heavy contamination. The holes can hold herbs, but they dry quickly and need frequent watering in hot weather.
Q: What should I plant first in a new raised bed?
A: Start with easy crops that match the season. Try lettuce, radishes, bush beans, basil, chives, kale, or Swiss chard. Add tomatoes and peppers after the last frost when soil and night air are warm.
Final Recommendation
The cheapest raised garden bed is a small, open-bottom bed made from safe materials and filled with a simple soil mix. Start with a 4-by-4-foot frame, use untreated pine or free logs, and spend your budget on good compost, mulch, and seeds instead of decorative hardware.
Build one bed, grow it for a full season, and watch what happens. You will learn more from how the soil settles, how fast it dries, and which plants thrive in your USDA zone than from any expensive garden kit. Once the first bed works, add another only if your time, water, and budget support it.
Meta description: Learn how to make a raised garden bed cheap with safe materials, low-cost soil, simple tools, building steps, budget estimates, maintenance tips, and plant ideas.