Hydroponic Tubing and Fittings Guide
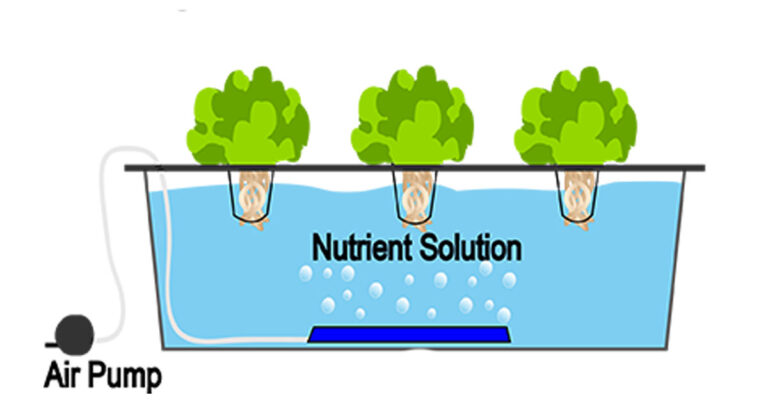
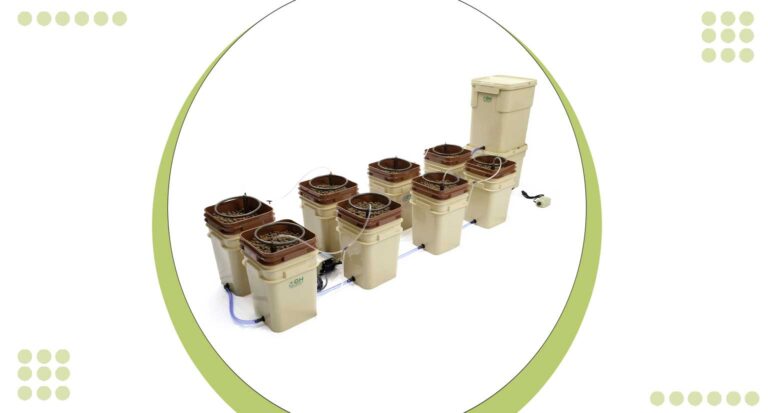
Hydroponic Tubing and Fittings are integral parts of a hydroponic system that enable the transport of nutrient-rich water solution directly to the plant’s roots.
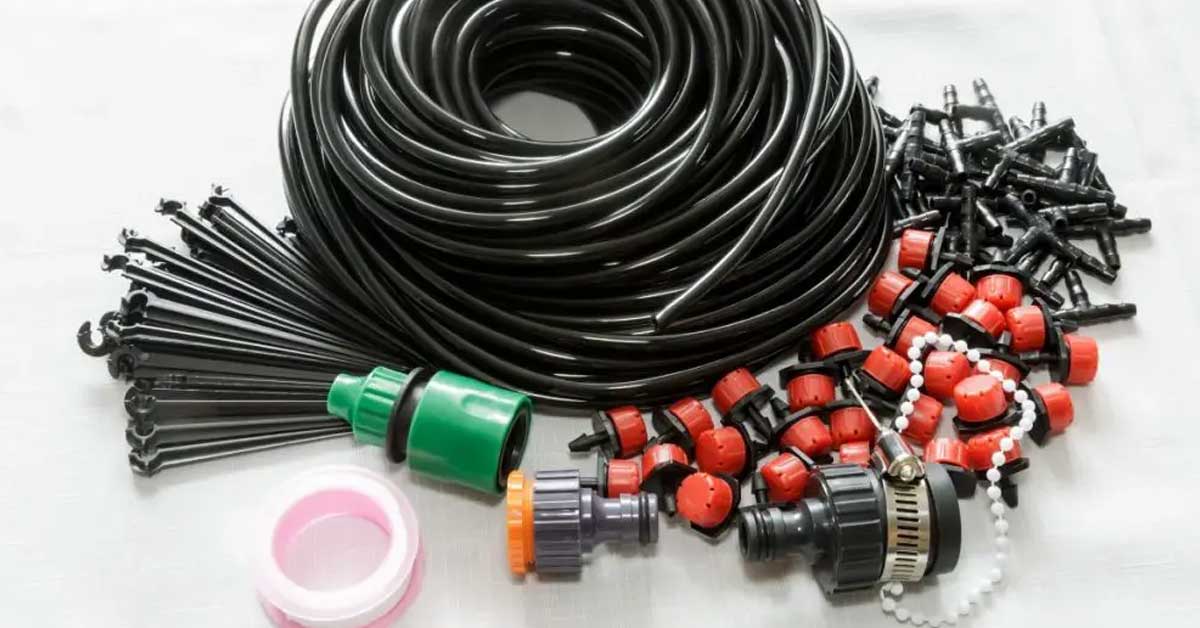
Hydroponic Tubing, typically made of PVC or vinyl, creates a network of channels guiding the nutrient solution, while Fittings ensure secure connections, prevent leaks, and assist in managing the flow.
Utilizing these elements in your home garden can significantly optimize water and nutrient usage, enhance plant growth rate, and maximize yield.
Moreover, the hydroponic system’s closed-loop nature contributes to water conservation, making it an eco-friendly gardening solution.
There exists a wide array of tubing and fittings available for hydroponic gardening, each designed to cater to specific needs and system configurations.
Types
Vinyl Tubing:
Vinyl tubing is generally easier to work with and more resistant to UV light,
Vinyl Tubing is highly preferred for hydroponic systems due to its flexibility and high UV resistance.
This type of tubing comes in various sizes and lengths, allowing you to tailor it to your specific needs. Being transparent, it lets you visually monitor the flow of nutrient solution, ensuring it is unobstructed. Its non-toxic nature ensures no harmful chemicals leach into the solution, maintaining the purity of the nutrients.
With its easy installation and maintenance, vinyl tubing proves to be not only a practical but also a cost-effective option for your hydroponic systems.
However, it’s important to replace it periodically as it can become brittle over time due to constant exposure to nutrient solution and UV light.
Polyethylene Tubing:
Polyethylene Tubing is more robust and can withstand higher water pressures.
Polyethylene tubing offers a more robust solution for hydroponic systems.
This type of tubing is known for its ability to withstand higher water pressures, making it suitable for systems with a greater distance between the nutrient reservoir and the plants.
Also, Polyethylene tubing is resistant to punctures and cracks, leading to less likelihood of leaks and subsequent nutrient loss.
This tubing, however, is opaque, preventing the visual monitoring of nutrient solution flow. Despite this, its high durability compensates for this minor drawback, making it a viable option for larger, more complex hydroponic systems. Like the vinyl tubing,
It is also necessary to replace Polyethylene tubing periodically to ensure the efficient functioning of your hydroponic system.
As for fittings, there are several types to choose from, each serving a unique purpose.
Some of the most commonly used are Elbow Fittings (used to create sharp turns without restricting flow), Straight Connectors (used to connect two lengths of tubing), and T Connectors (used to split one line into two).
Other specialized fittings include End Caps (used to stop water flow at the end of a line), and Grommets (used to create leak-proof holes in hydroponic reservoirs).
Installation steps:
- Plan Your Setup: Start by designing a layout for your hydroponic system. Determine where your reservoir will be located and where your plants will be placed. This step is crucial to decide the length of tubing required and the type of fittings needed.
- Select the Type of Tubing and Fittings: Choose between vinyl or polyethylene tubing depending on your system requirements. Also, select the appropriate fittings such as elbow fittings, straight connectors, T connectors, end caps, and grommets based on your system design.
- Cut the Tubing: Measure and cut the tubing according to the lengths identified in your layout. Ensure you have some extra tubing to account for minor adjustments.
- Connect the Tubing and Fittings: Attach your fittings to the cut pieces of tubing. Make sure all connections are secure to prevent leaks.
- Install the Tubing: Connect one end of the tubing to your nutrient reservoir. Route the tubing according to your layout, making sure it reaches all of your plants.
- Test Your System: Fill the reservoir with a nutrient solution and run the system. Check for leaks or blockages and adjust the tubing and fittings as needed.
Usage and Benefits:
- Efficient Nutrient Delivery: Hydroponic tubing ensures a direct, uninterrupted flow of nutrient-rich solution to the plants’ roots. This targeted delivery system facilitates optimal nutrient uptake, promoting faster growth and higher yields.
- Water Conservation: As part of a closed-loop system, the tubing and fittings help recycle and reuse the nutrient solution, significantly reducing water usage compared to traditional soil-based gardening. This feature underscores the eco-friendliness of hydroponic systems.
- Cost-effective: Hydroponic tubing and fittings are not only affordable but also durable. Their ease of installation and low maintenance requirements make them a cost-effective choice for home gardeners.
- Flexibility and Customization: The variety of tubing and fittings available allows for customization of your system based on plant requirements, available space, and personal preferences.
- Improved Plant Health: The efficient delivery of nutrients and water directly to the plant roots reduces the risk of soil-borne diseases and pests. This benefit leads to healthier plants and better-quality produce.
Troubleshooting Tips for Common Issues:
- Leaks: If you notice a leak in the system, inspect the tubing and fittings for cracks or loose connections. Replace any damaged tubing, and make sure all fittings are securely attached. Remember, it’s best to replace tubing periodically to prevent these issues.
- Blockages: If the nutrient solution isn’t flowing smoothly, there might be a blockage. Check the tubing for any visible obstructions and clear them out. If the blockage isn’t visible, you may need to flush the system with clean water to remove any buildup.
- Insufficient Water Flow: If the plants aren’t receiving enough water, ensure the tubing is of a sufficient diameter to provide an adequate flow rate. Also, verify the tubing isn’t kinked or bent in a way that could restrict flow.
- Fittings Not Holding: If the fittings aren’t securely holding the tubing, ensure you’re using the correct size fitting for your tubing. If the problem persists, consider using a different type of fitting or adding clamps for extra security.
- Algae Growth: If you’re using transparent tubing and notice algae growth, consider switching to opaque tubing. Algae thrive in sunlight, and opaque tubing can help prevent this issue.
Recommended Accessories:
- Drip Emitters: These devices help control the rate of nutrient solution delivery. By installing drip emitters, you can ensure each plant gets the precise amount of nutrients it needs.
- Tubing Stakes and Clamps: These play crucial roles in securing the tubing to your system layout. It keeps tubing in place, preventing unnecessary movement and possible leaks.
- Digital pH and EC Meters: These can be used to measure the pH and Electrical Conductivity (EC) levels in your nutrient solution, ensuring your plants are growing in the optimal conditions.
- Water Pumps and Air Stones: These devices help circulate the nutrient solution and oxygenate your reservoir, respectively. Both are vital for the health of your plant’s root system.
- Nutrient Solution Chillers: These work to keep your nutrient solution at the ideal temperature, as extreme temperatures can harm your plant’s roots and hinder nutrient uptake.
- Tubing Cutters: A good tubing cutter can help ensure clean, straight cuts, reducing the chance of leaks at the fittings.
These accessories, while not strictly necessary, can significantly improve the efficiency and ease of maintaining your hydroponic garden. Each offers unique enhancements that can make your gardening experience more productive and enjoyable.

